To associate VPC and CCN under different accounts, the VPC account should initiate an association request. The association is established when the CCN account accepts the request.
The workflow is illustrated below:
Submitting Association Request (VPC Side)
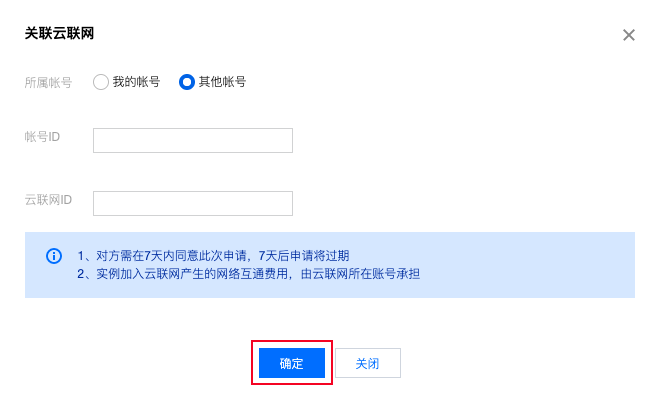
2. Click the ID of the target VPC to enter the details page and click Associate Now.
3. In the pop-up window, enter the peer account ID and peer CCN ID and click OK.
Note:
You need to enter the root account ID for Account ID.
Accepting the Application via the CCN Account
1. Log in to the CCN console and click the ID of the CCN instance with a pending association request. 2. On the Associated Instances page, locate the VPC to be associated, and click Agree to add the VPC to the CCN instance.
(Optional) Checking Route Table
After the association request is accepted and the association succeeds, you need to view the route table to check whether the IP range of this instance conflicts with that of an existing CCN instance, to prevent a routing failure.
For more information about related operations, see Checking Route Table. (Optional) Setting a Bandwidth for Cross-Region Interconnection
Was this page helpful?