This document helps you quickly understand and integrate the Media Processing Service (MPS). The main steps to use the MPS are as follows:
Prerequisites
Sign-up and Login
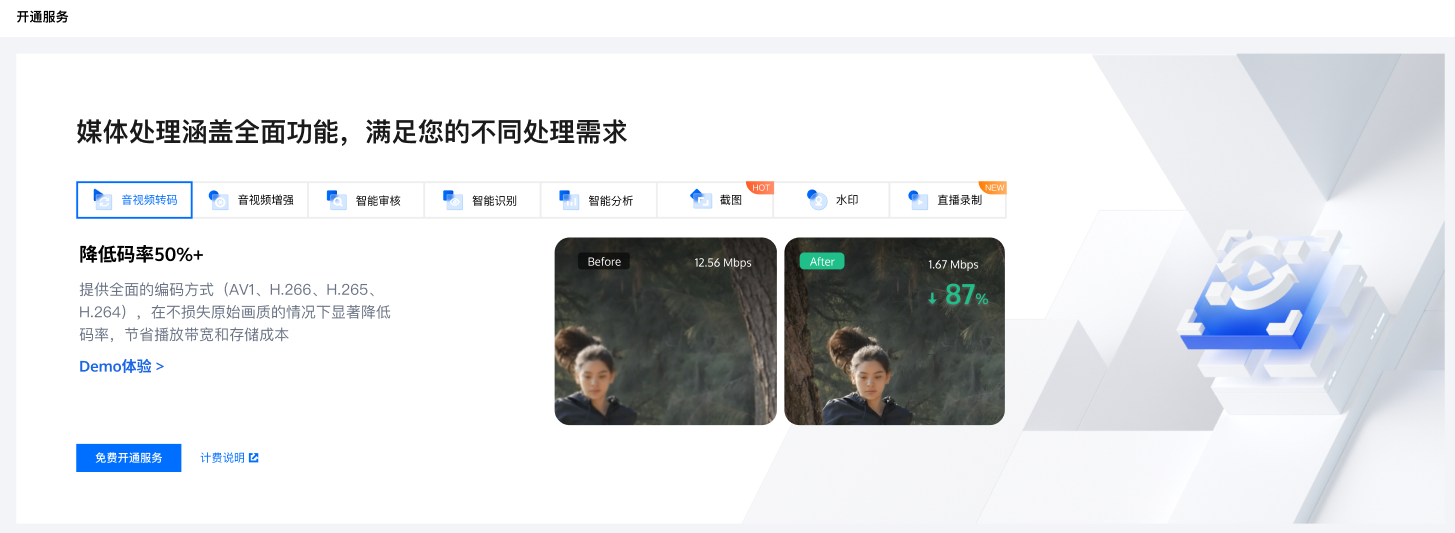
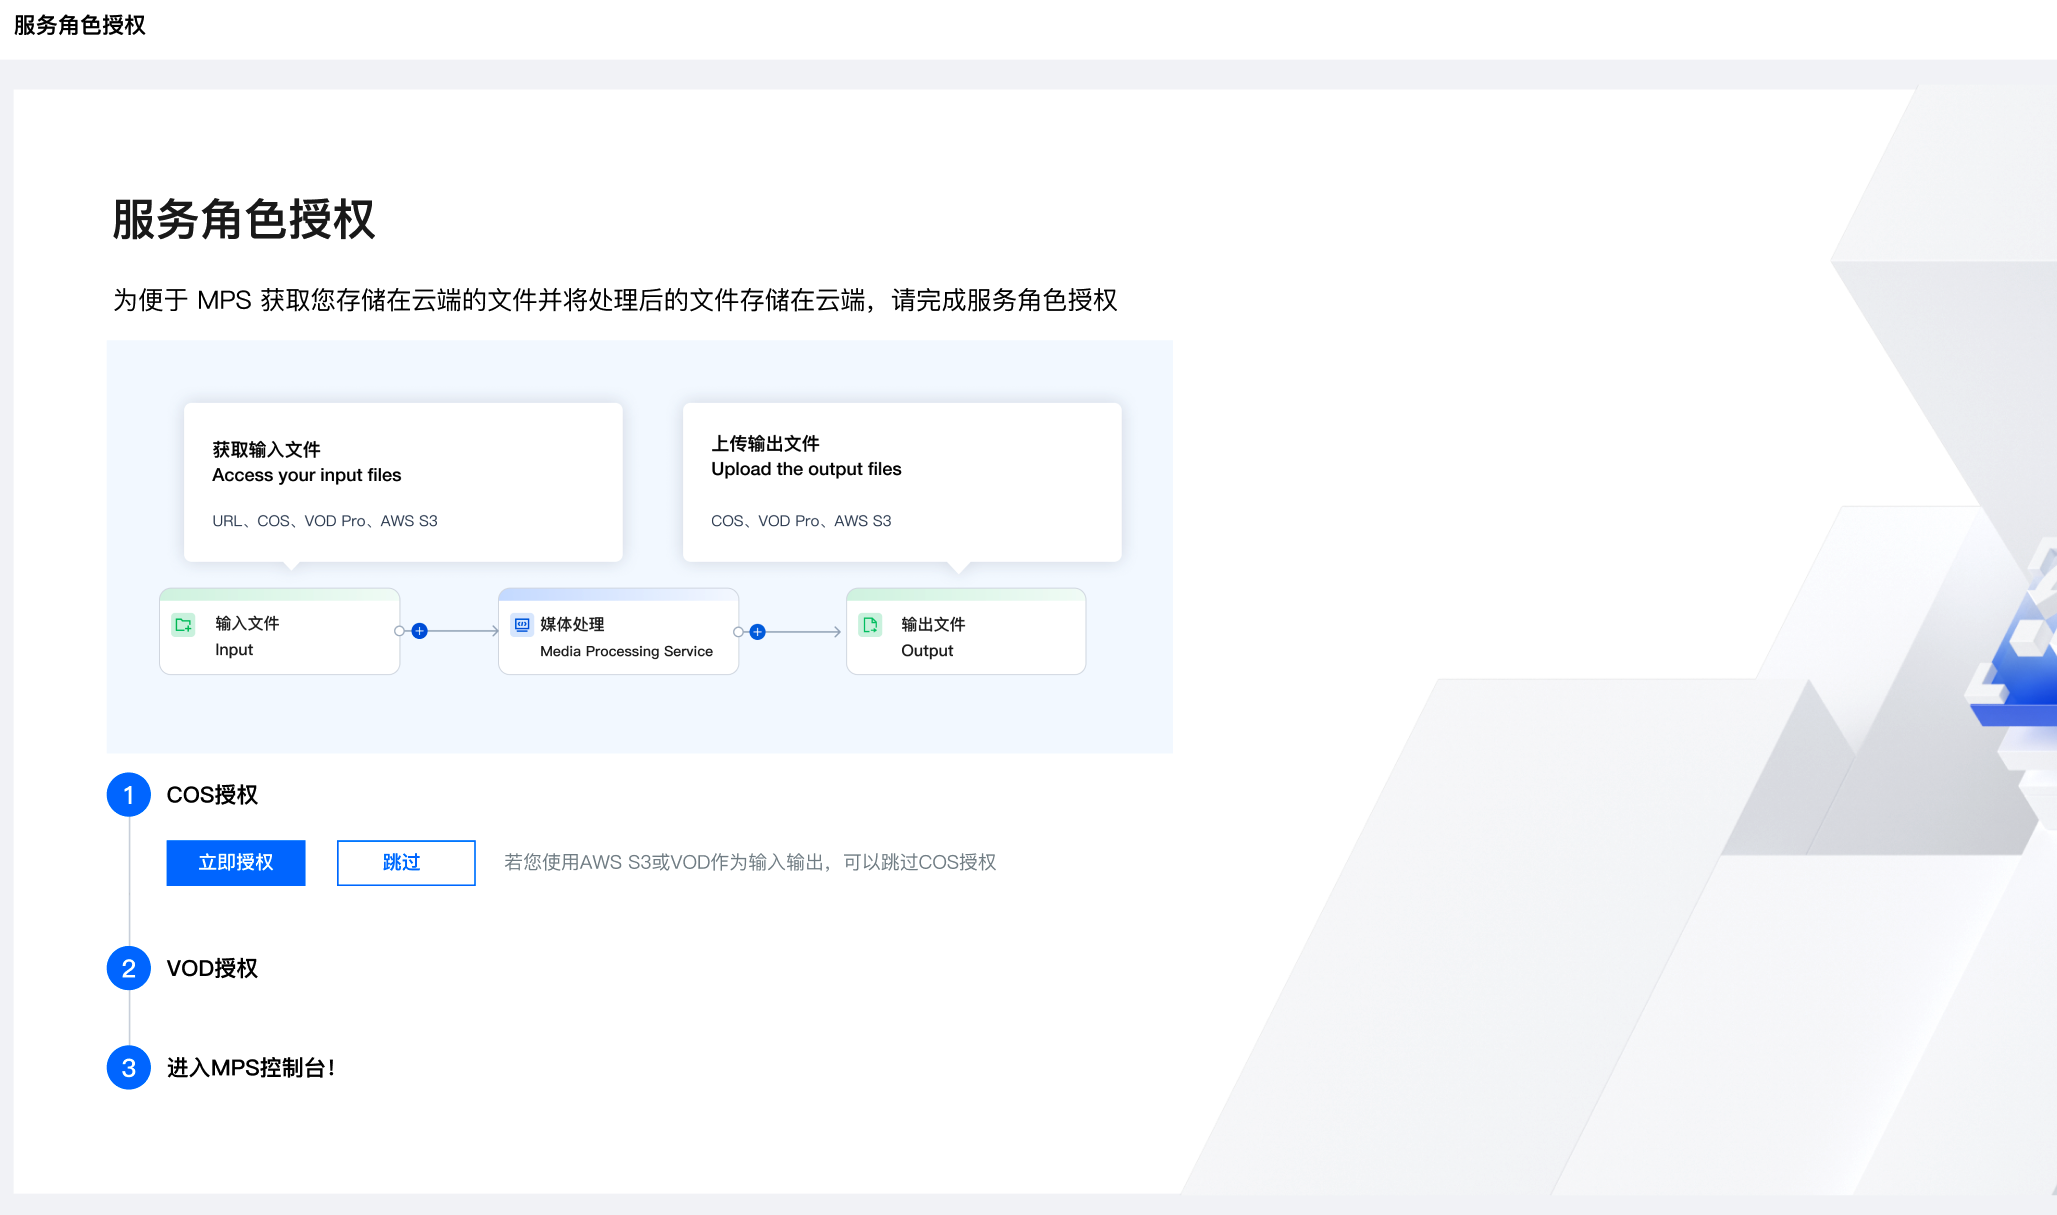
2. Log in to the Tencent Cloud website, and select Cloud Products > Video Services > MPS to enter the MPS console and activate the service for free. COS Authorization
If you wish to use COS, you must complete COS authorization, create a service role, and allow MPS to perform read and write operations such as downloading, transcoding, and uploading on files in your COS bucket.
To use a URL as the input source, you need to authorize COS as the output source.
Note
If you do not complete the authorization, you will not be able to perform COS-related operations in the MPS console, or enable the Event Notification feature. Operation Steps
MPS can process your VOD files or live streams.
VOD file processing: Audio and video transcoding, enhancement, intelligent identification & analysis, quality inspection and other processing tasks can be performed on files uploaded to Tencent COS buckets. Currently only transcoding is available for files in AWS S3 buckets.
Live stream processing: Real-time recording, intelligent identification & analysis, quality inspection and other processing tasks can be performed on live streams.
VOD File Processing
Step 1: Initiate a Task
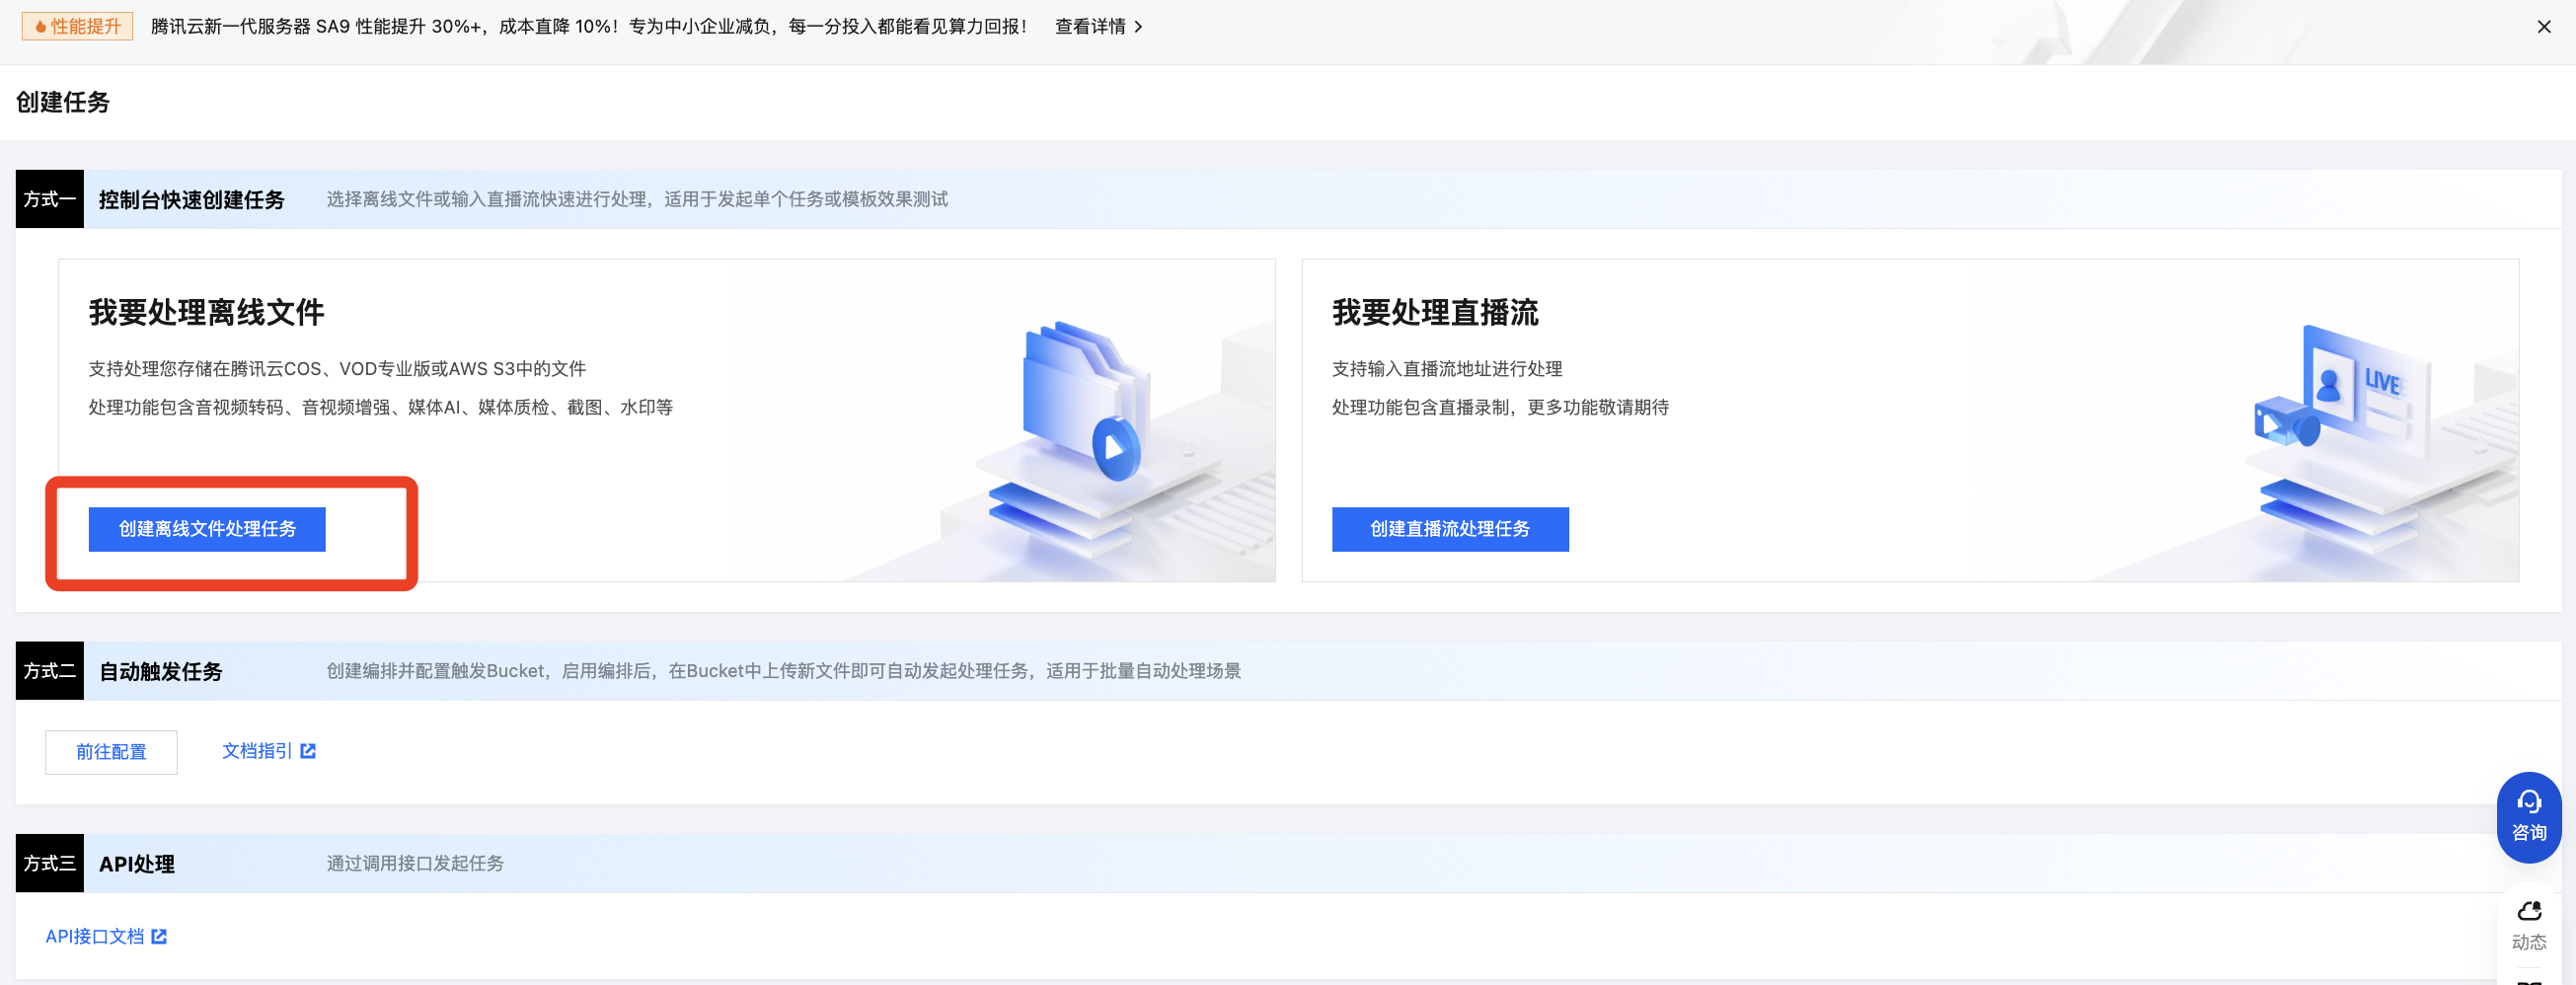
Currently, you can initiate a VOD file processing task by three methods:
Quickly creating a task in the console: Manually select files in the console and initiate a processing task.
Automatically triggering a task: After files are uploaded to COS/AWS S3 buckets, a processing task will be automatically initiated, with no need to manually create a task in the console.
Initiating a task via an API: A task is initiated by calling the API. It is applicable to batch processing of uploaded files.
Method 1: Quickly Creating a Task in the Console
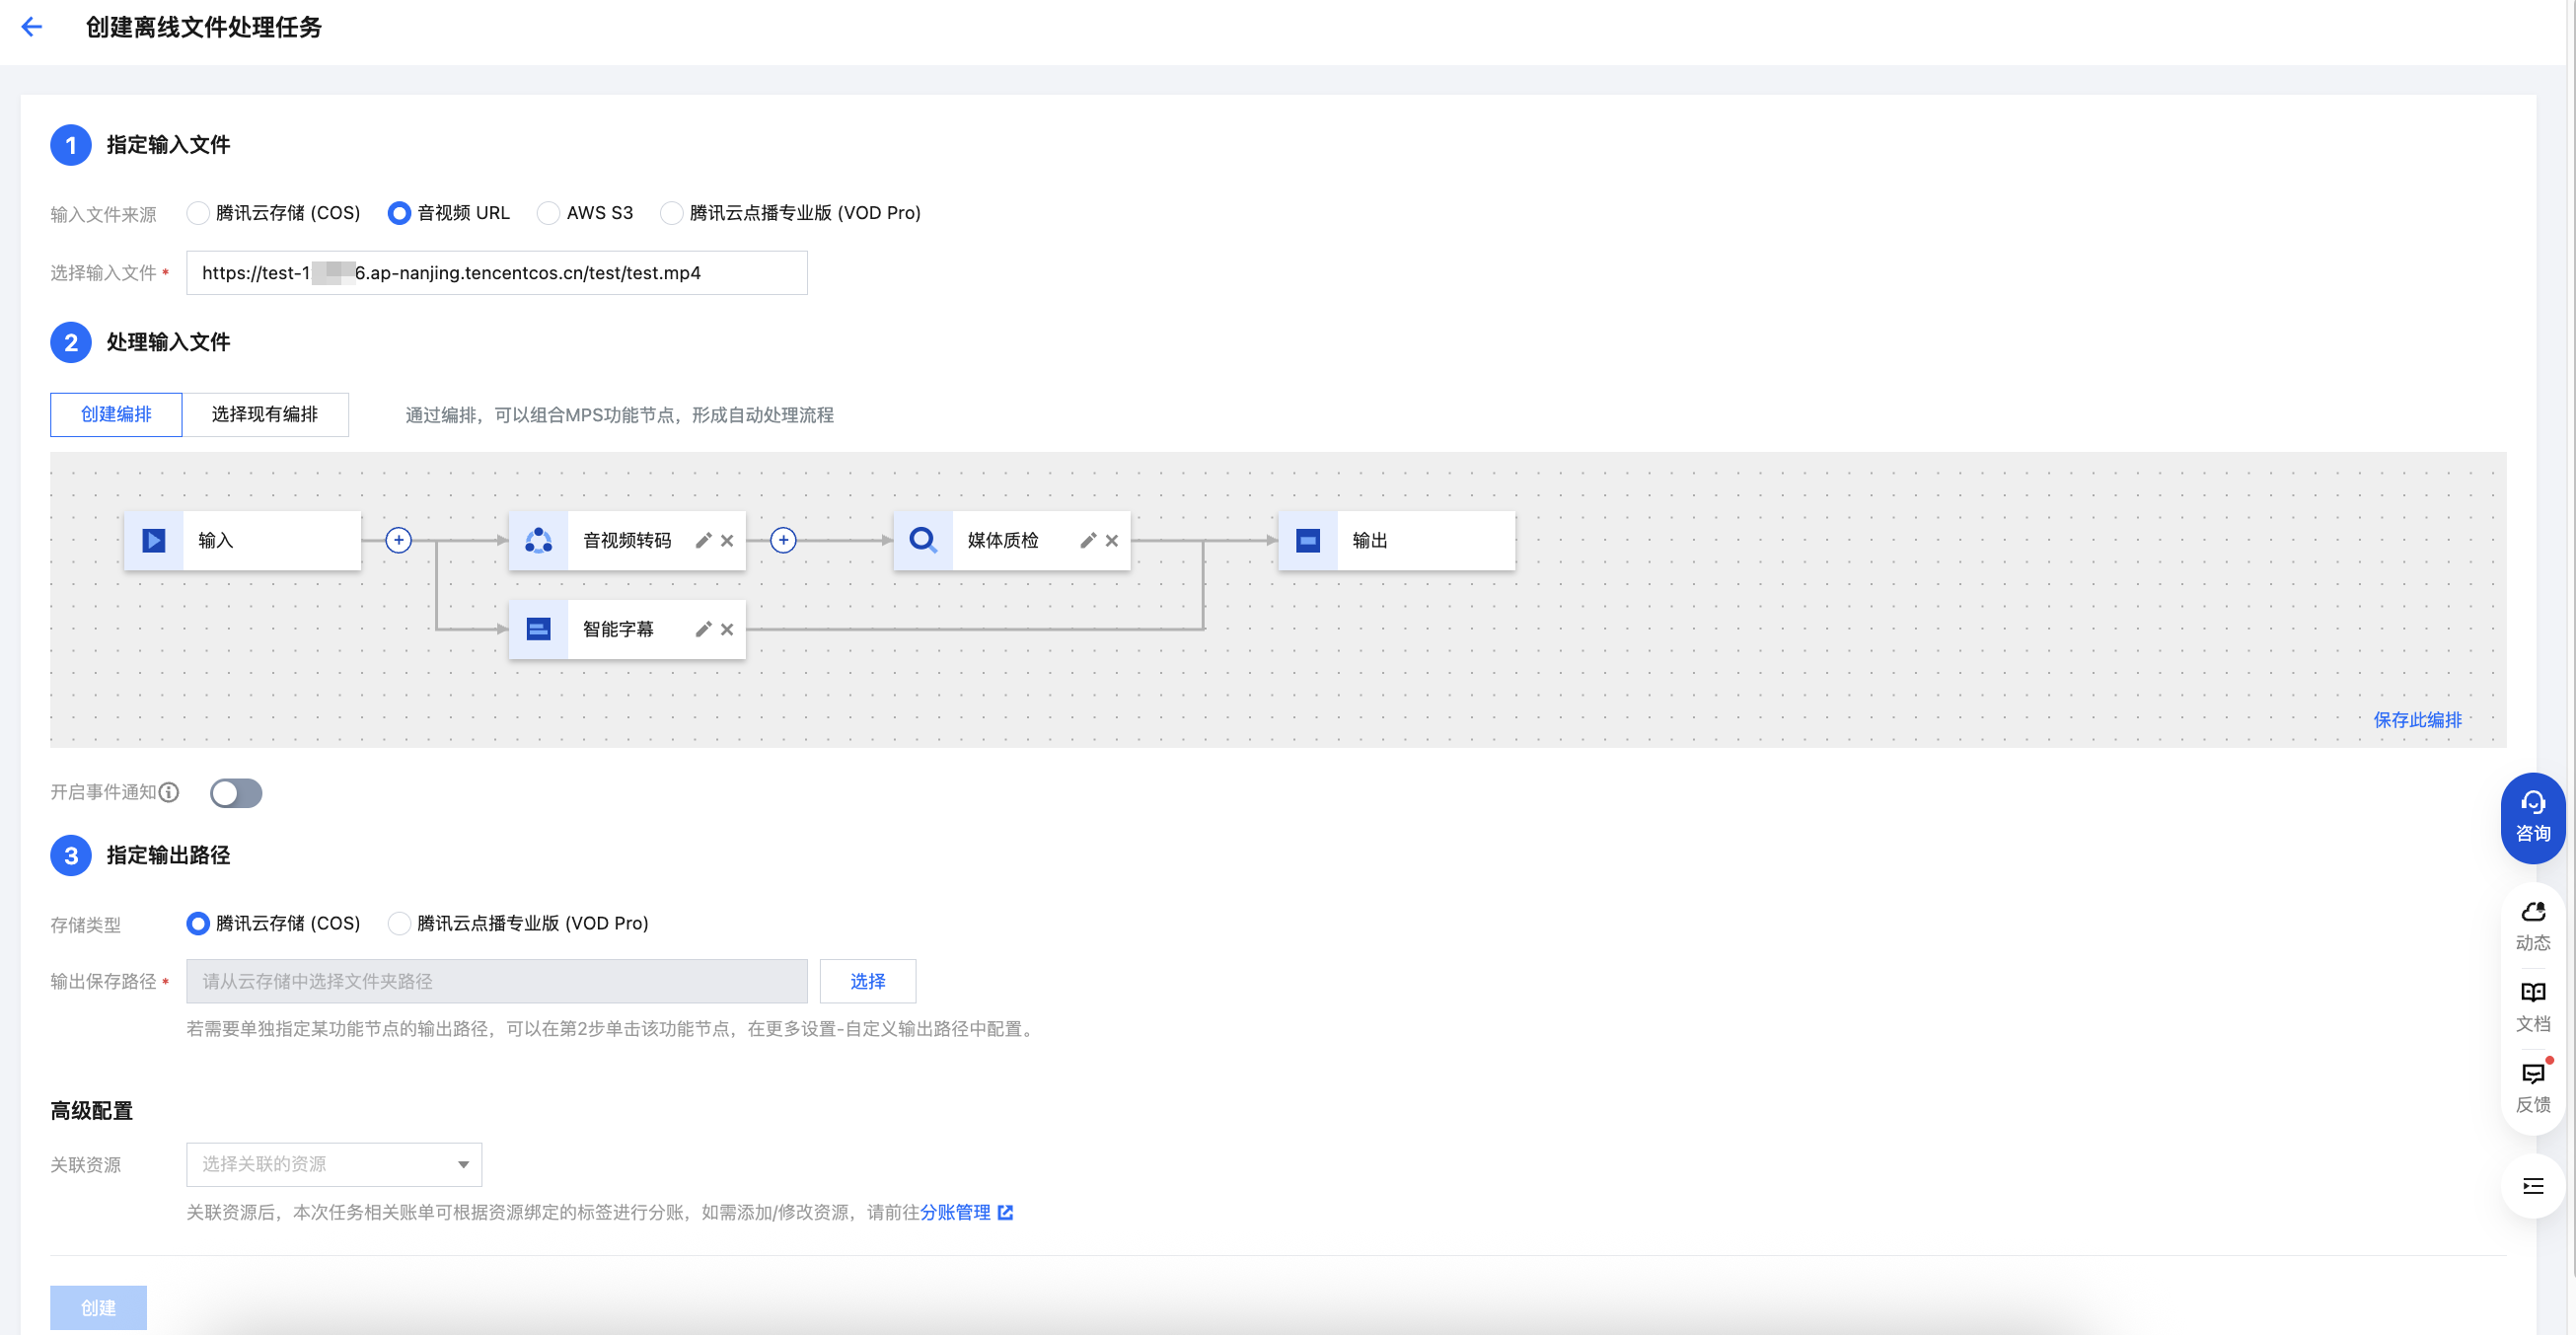
Fill in the following information on the Quickly Create VOD File Processing Task page:
1. Specify an input file
You can choose an audio or video file from a COS or AWS S3 bucket, or provide a file download URL.
Note:
If you choose AWS S3 as the input, you do not need to complete COS authorization, but shall refer to the Using Amazon S3 Buckets with MPS document, to create an AWS sub-account, S3 input and output buckets, SQS, etc. 2. Scheme Processing Workflow
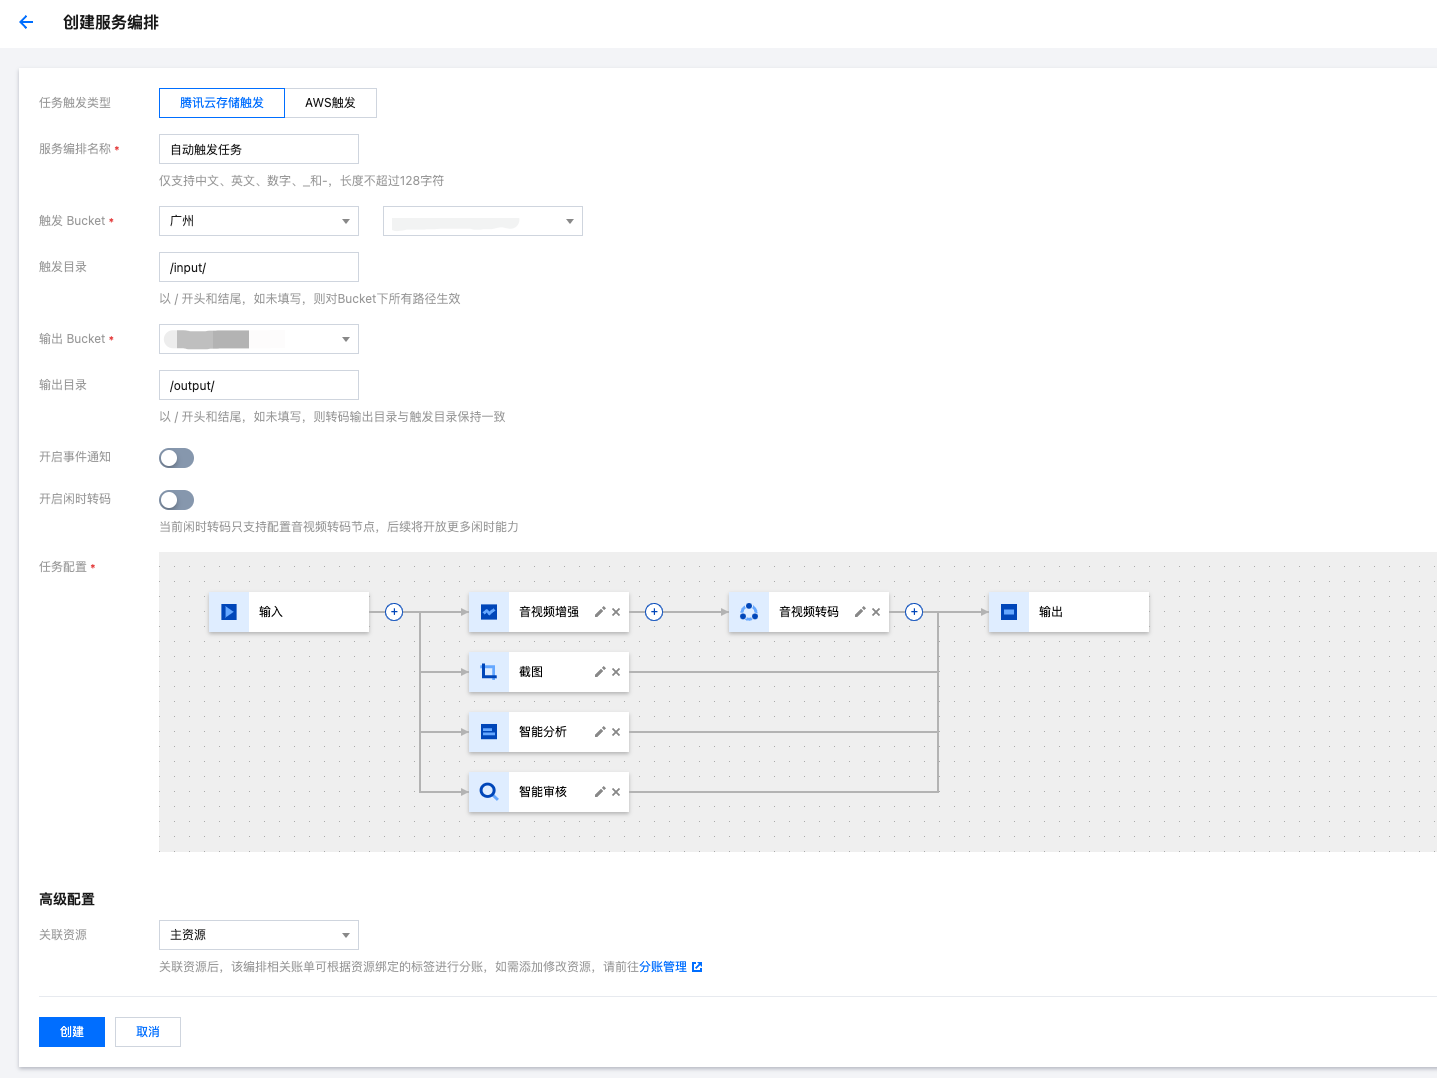
With a scheme, you can combine various features to form an automatic processing workflow. For example, by combining the enhancement and transcoding features, you can first enhance the image quality of the input file and then perform transcoding to reduce the bitrate.
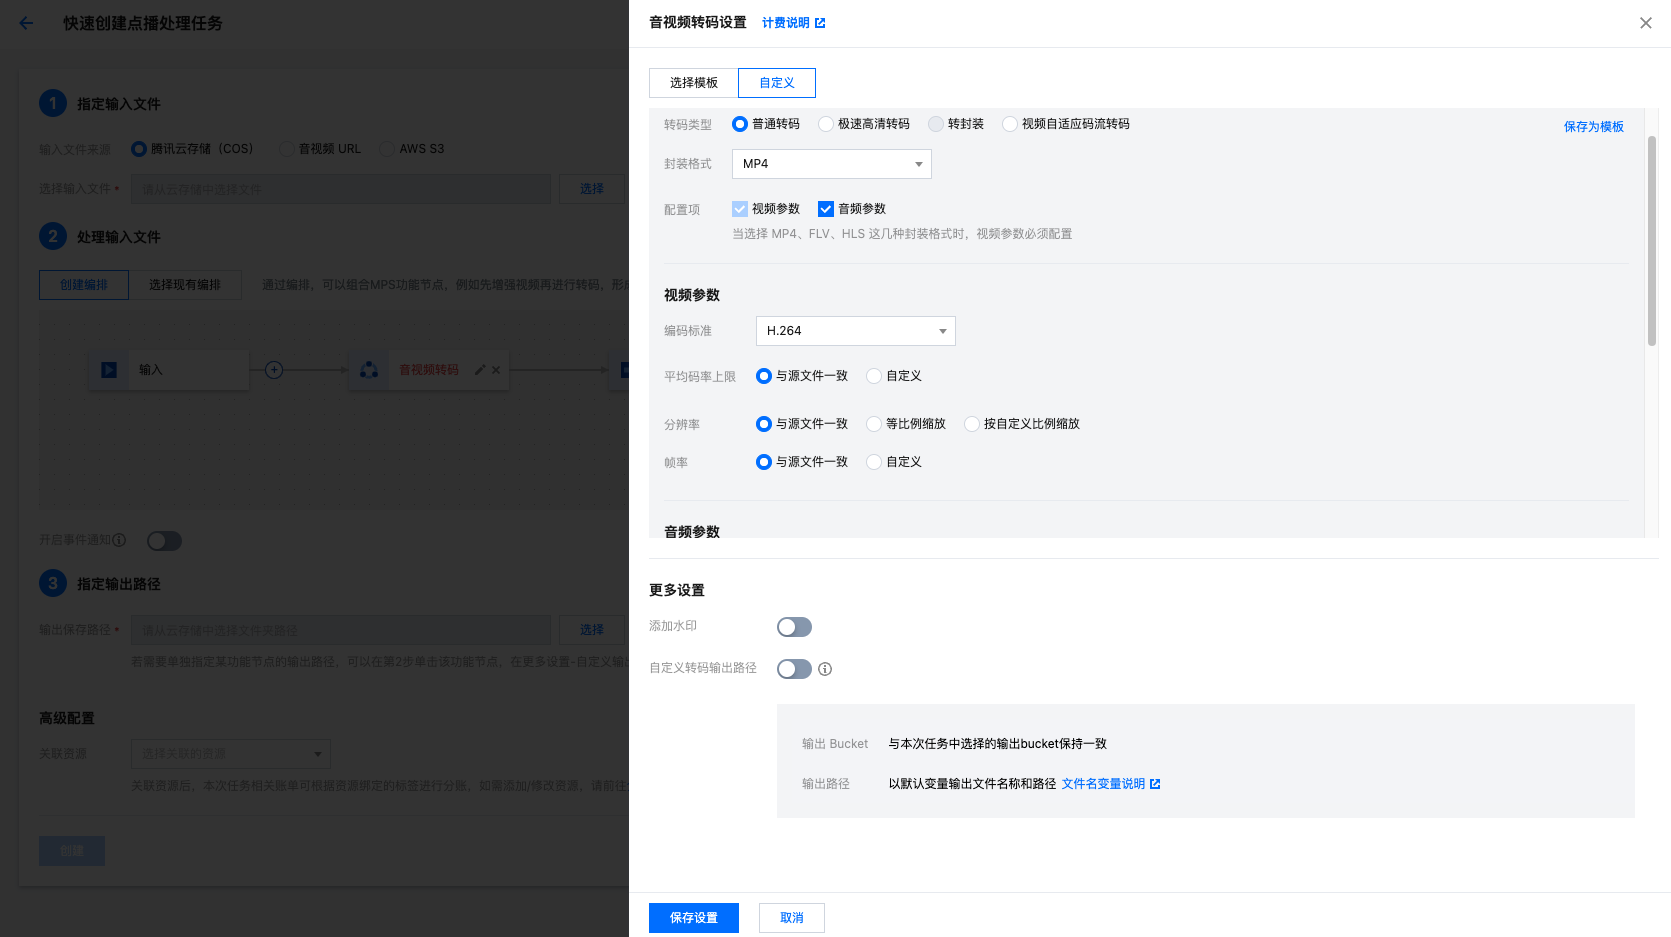
Click Add Feature Node, to edit the parameters in the opened drawer floating layer. You can create templates to save parameters for the convenience of reuse.
Select a template: Use template parameters preset in the system or saved previously.
Custom: Custom parameters.
3. Specify the output path
Specify the default save path for the processed output file.
If you need to set a separate output path for a certain feature node in the scheme, e.g., when you add three features, namely transcoding, enhancement, and screencapturing in the scheme, and you expect the output files of screencapturing to be saved in different paths, you can click on the screencapturing node in Step 2, and configure it in More Settings > Custom Screencapturing Output Path. You can also adjust the naming method of the output files for different features. For details, see the description of Filename Variable. Method 2: Automatically Triggering a Task
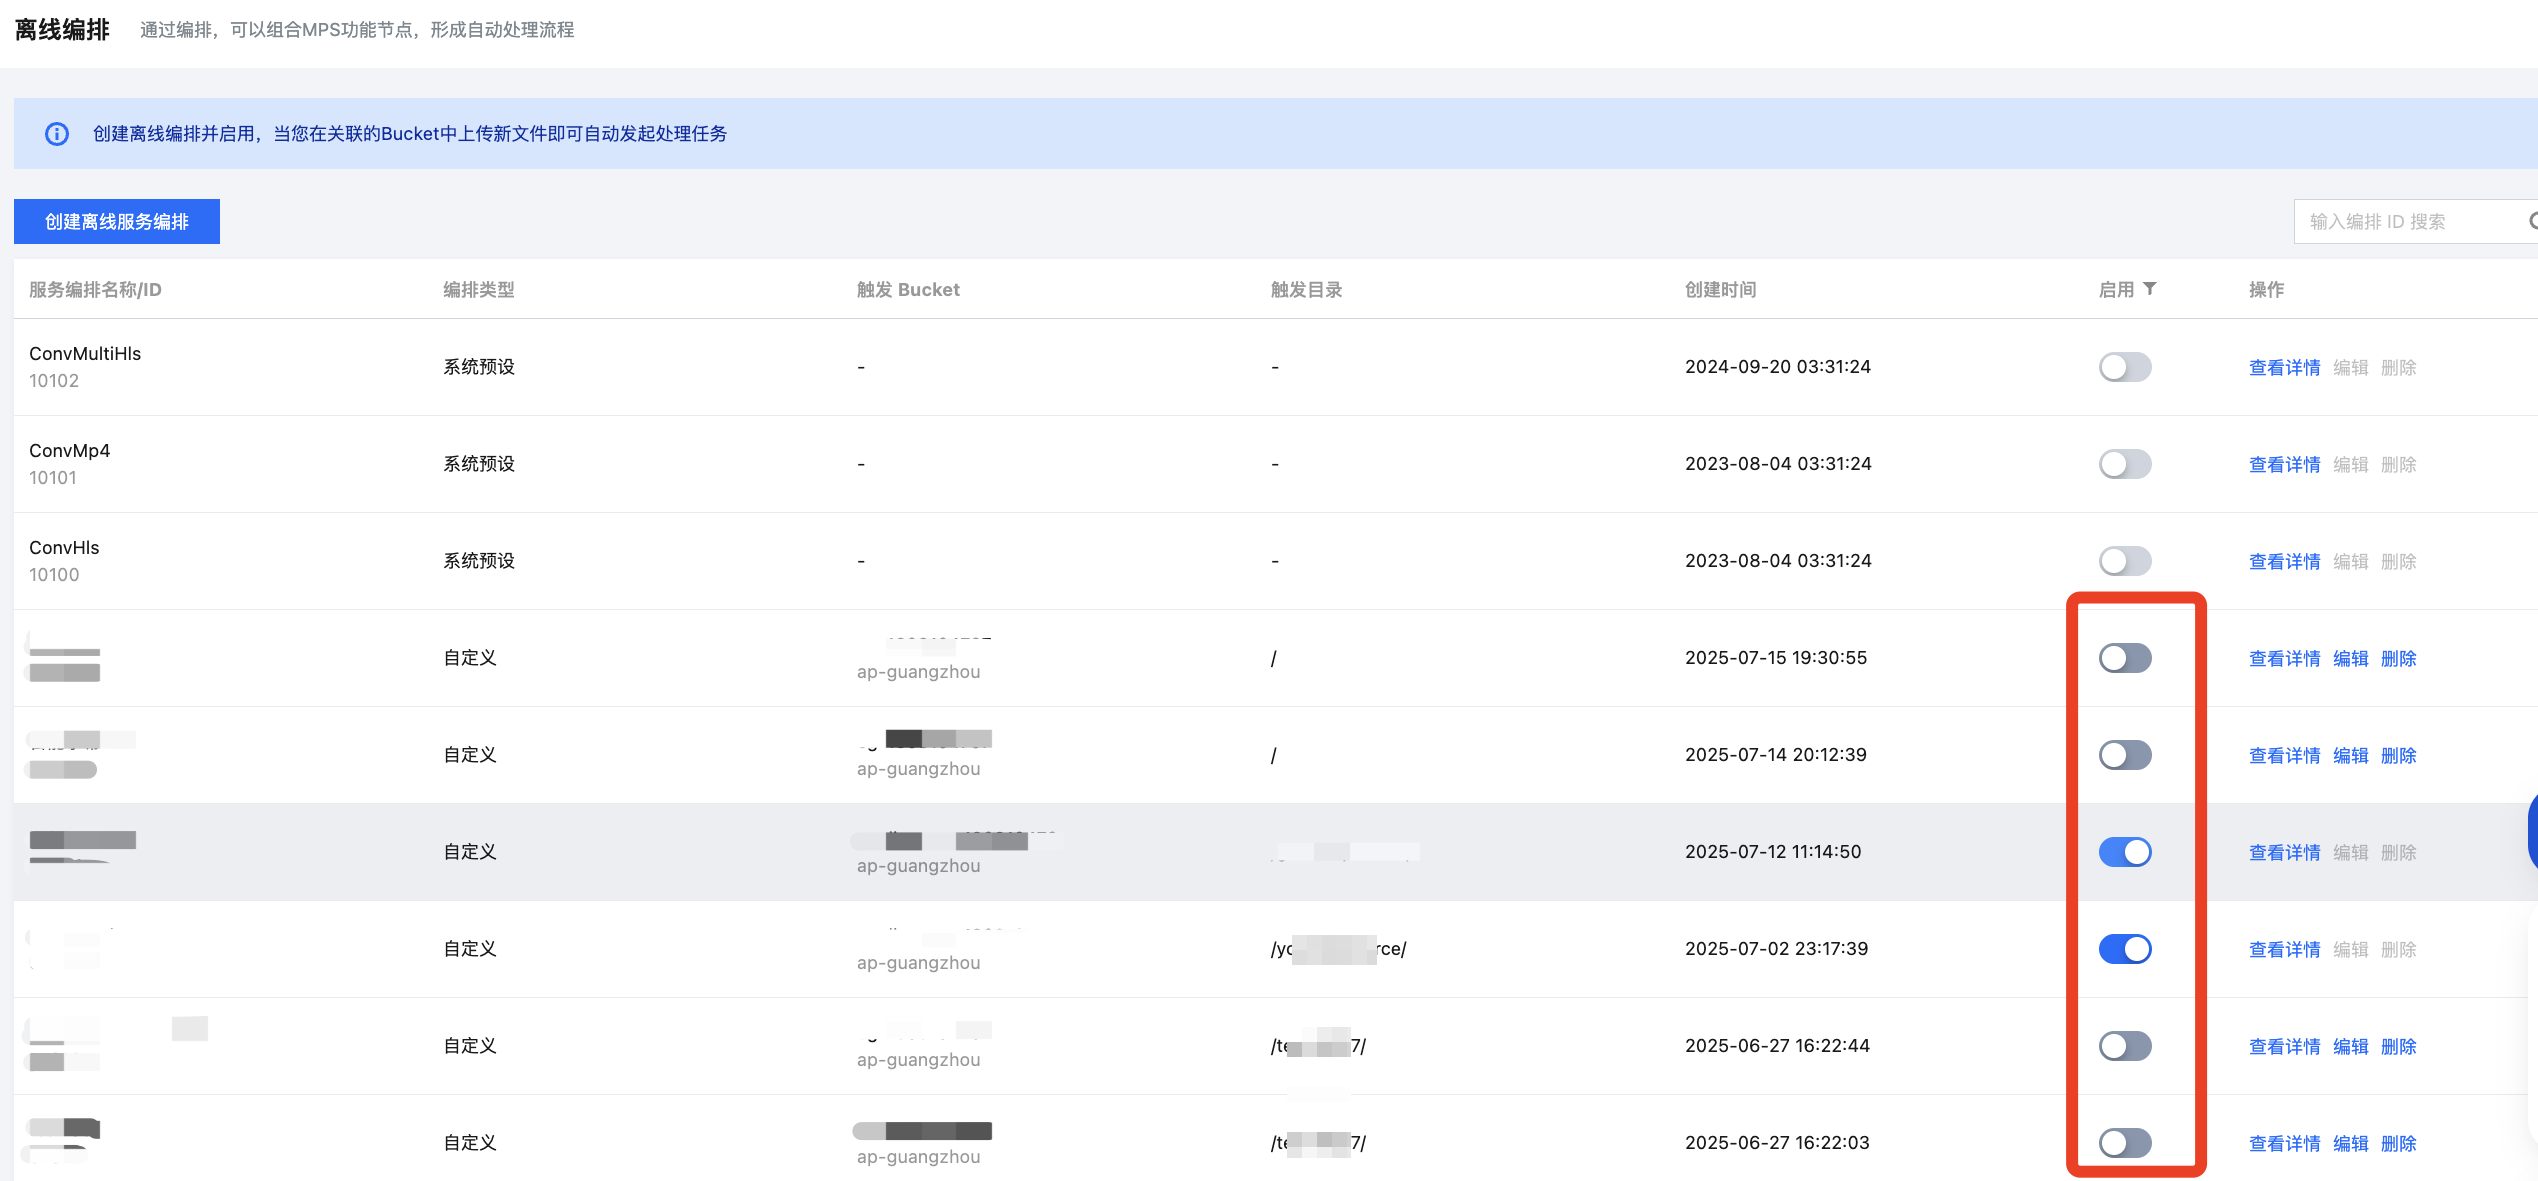
3. By default, auto-trigger is not enabled for the scheme. Go back to the Scheme Management > VOD Scheme page and click Enable to enable the auto-trigger feature.
4. Upload a video file that needs processing to the trigger bucket configured in the scheme. The newly uploaded video will then be automatically processed according to the tasks configured in the scheme, with no need to manually create a task in the console.
Note
After auto-trigger is enabled for the scheme, it will only take effect in video files newly uploaded to the trigger bucket. Files previously stored in the trigger bucket will not be processed automatically.
Method 3: Initiating a task via an API
Media Quality Inspection: Supports video file format diagnosis, video image content detection (shaking, blur, low light, overexposure, black edge, white edge, black screen, white screen, image glitch, noise, mosaic, QR code, etc.), and no-reference scoring.
Step 2: Manage Tasks
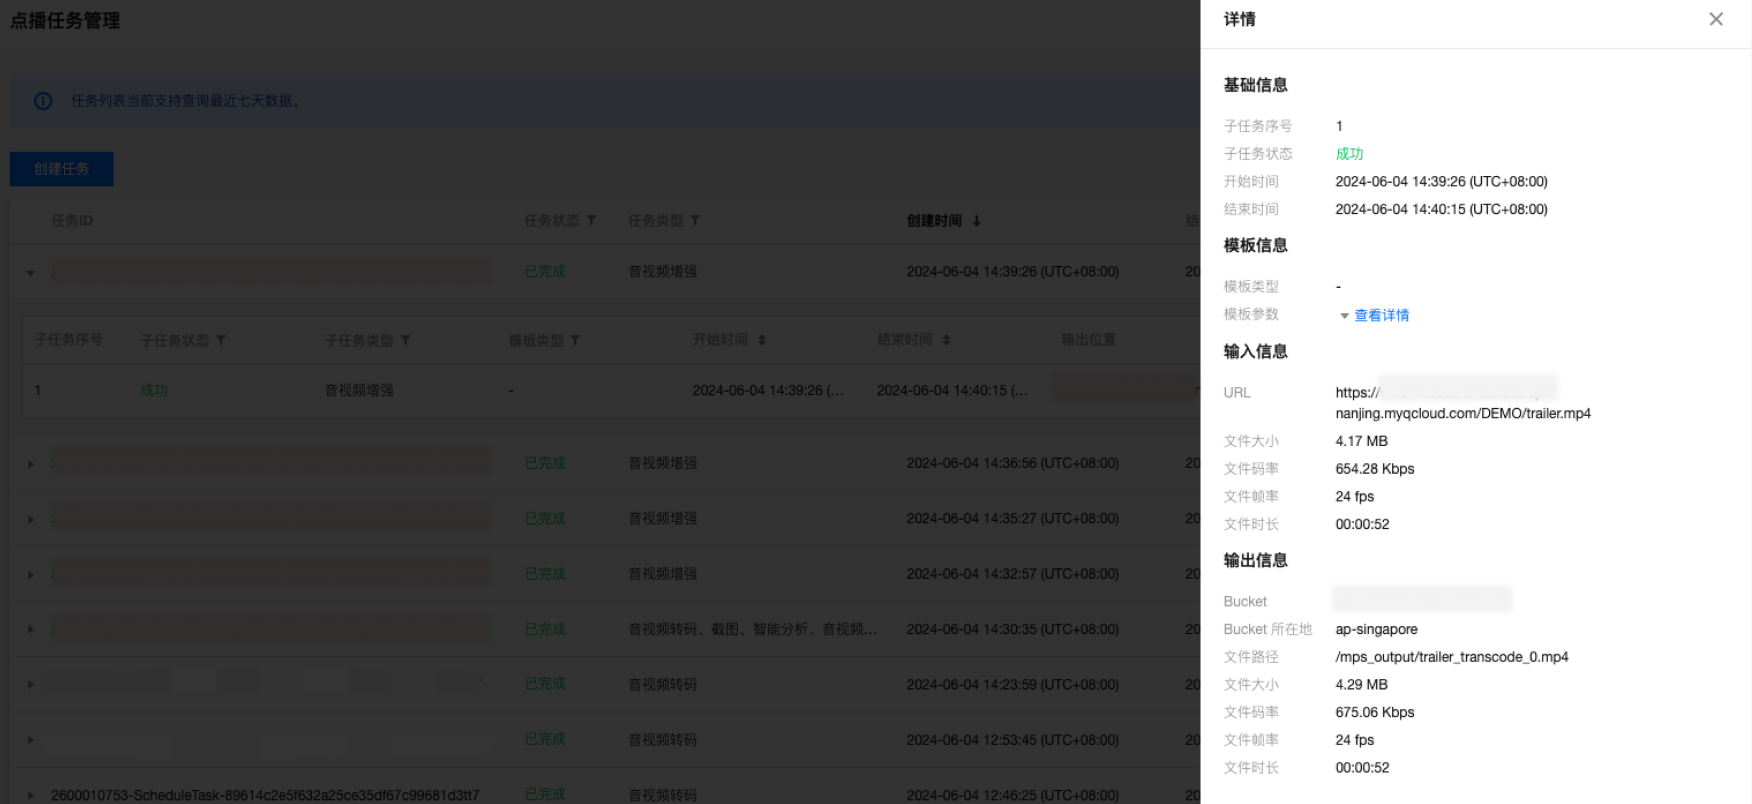
1. By entering the VOD Task Management page, you can see a list of all tasks you have initiated. 2. You can filter tasks to be processed by task status, Task ID, etc. You can also click View details to view subtask information, click the Restart button to restart tasks queuing up, play the source video, and perform other operations.
3. By expanding the subtask list, you can view subtask information, play/view subtask files, download subtask output files, view subtask details, and perform other operations.
Live Stream Processing
Step 1: Initiate a Task
Currently, you can initiate a live stream processing task by two methods:
Quickly creating a task in the console: Manually configure and initiate a processing task in the console.
Initiating a task via an API: A task is initiated by calling an API.
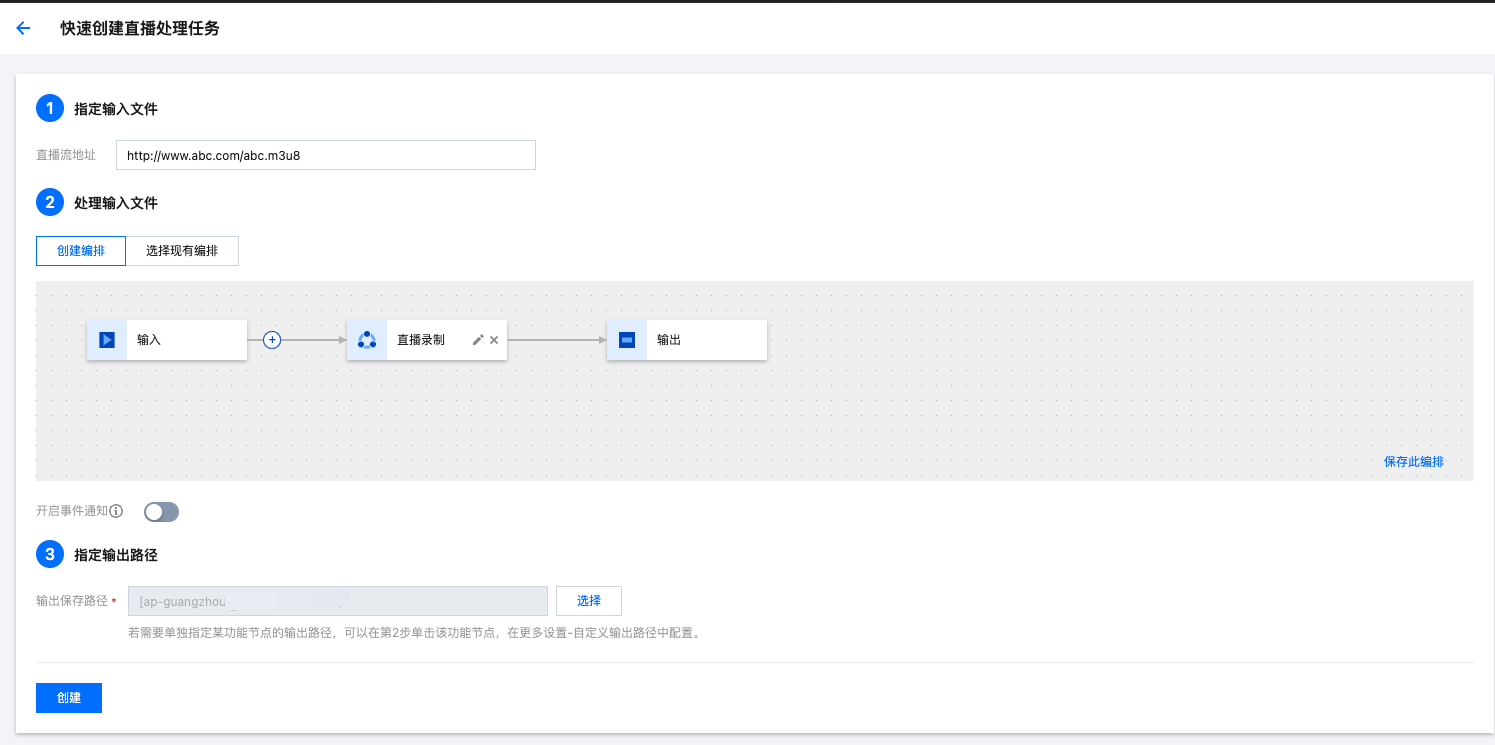
Method 1: Quickly Creating a Task in the Console
Follow the page instructions to configure the live stream address, scheme, and output save path. Currently, the console supports real-time recording of live streams. For detailed template configurations, refer to Live Stream Recording Template. Note:
When creating a live stream recording task, ensure that the live stream address is correctly entered. If the live stream fails to be pulled the first time, the pulling operation will be retried three times. If the operation still fails, a message of failure will be returned for the recording task.
Method 2: Initiating a Task via an API
Initiate a single live stream processing task via the API ProcessLiveStream. It supports the following features: Smart Moderation: Supports recognition of pornographic content in images and sounds, and detection of sensitive information.
Intelligent Identification: Supports recognition of faces, objects, text, and speech. Speech recognition also supports intelligent translation and real-time subtitle conversion. It includes features such as game tagging.
Intelligent Analysis: Supports real-time news segmentation and other features.
Quality Inspection: Supports live stream format diagnosis, video image content detection (shaking, blur, low light, overexposure, black and white edges, black and white screens, image glitch, noise, mosaic, QR code, etc.), no-reference scoring, and other features.
Live Stream Recording.
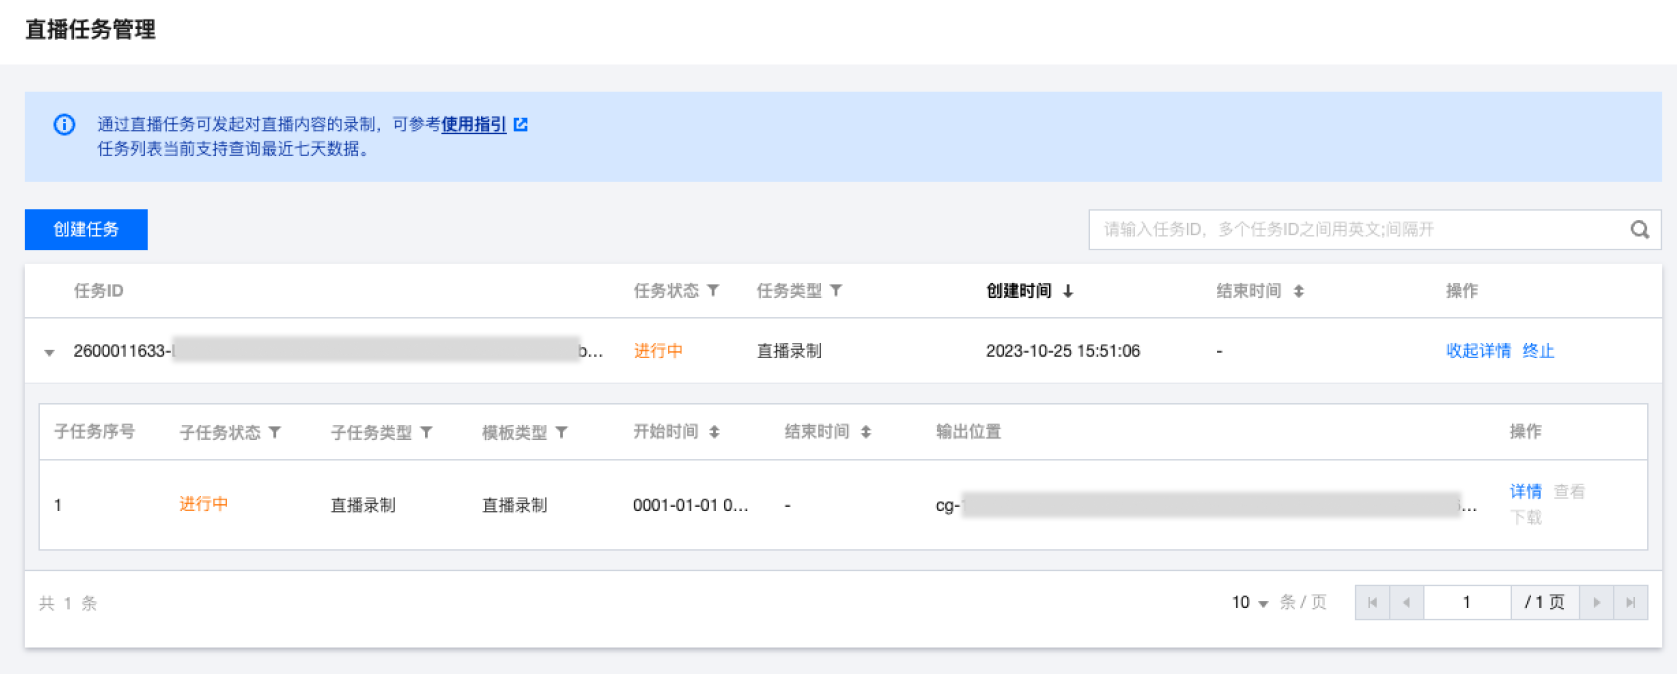
Step 2: Manage Tasks
Go to the Live Stream Task Management page, where you can see a list of all the live stream processing tasks you have initiated. You can view task details, terminate tasks, and perform other operations.
Was this page helpful?