To respect the copyright of emoji designs, the Chat Demo/TUIKit project does not include cutouts of large emoji elements. Please replace them with your own designs or other emoji packs for which you hold the copyright before officially launching for commercial use. The default smiley face emoji pack shown below is copyrighted by Tencent RTC and is available for licensed use for a fee. If you need to obtain a license, please contact us.
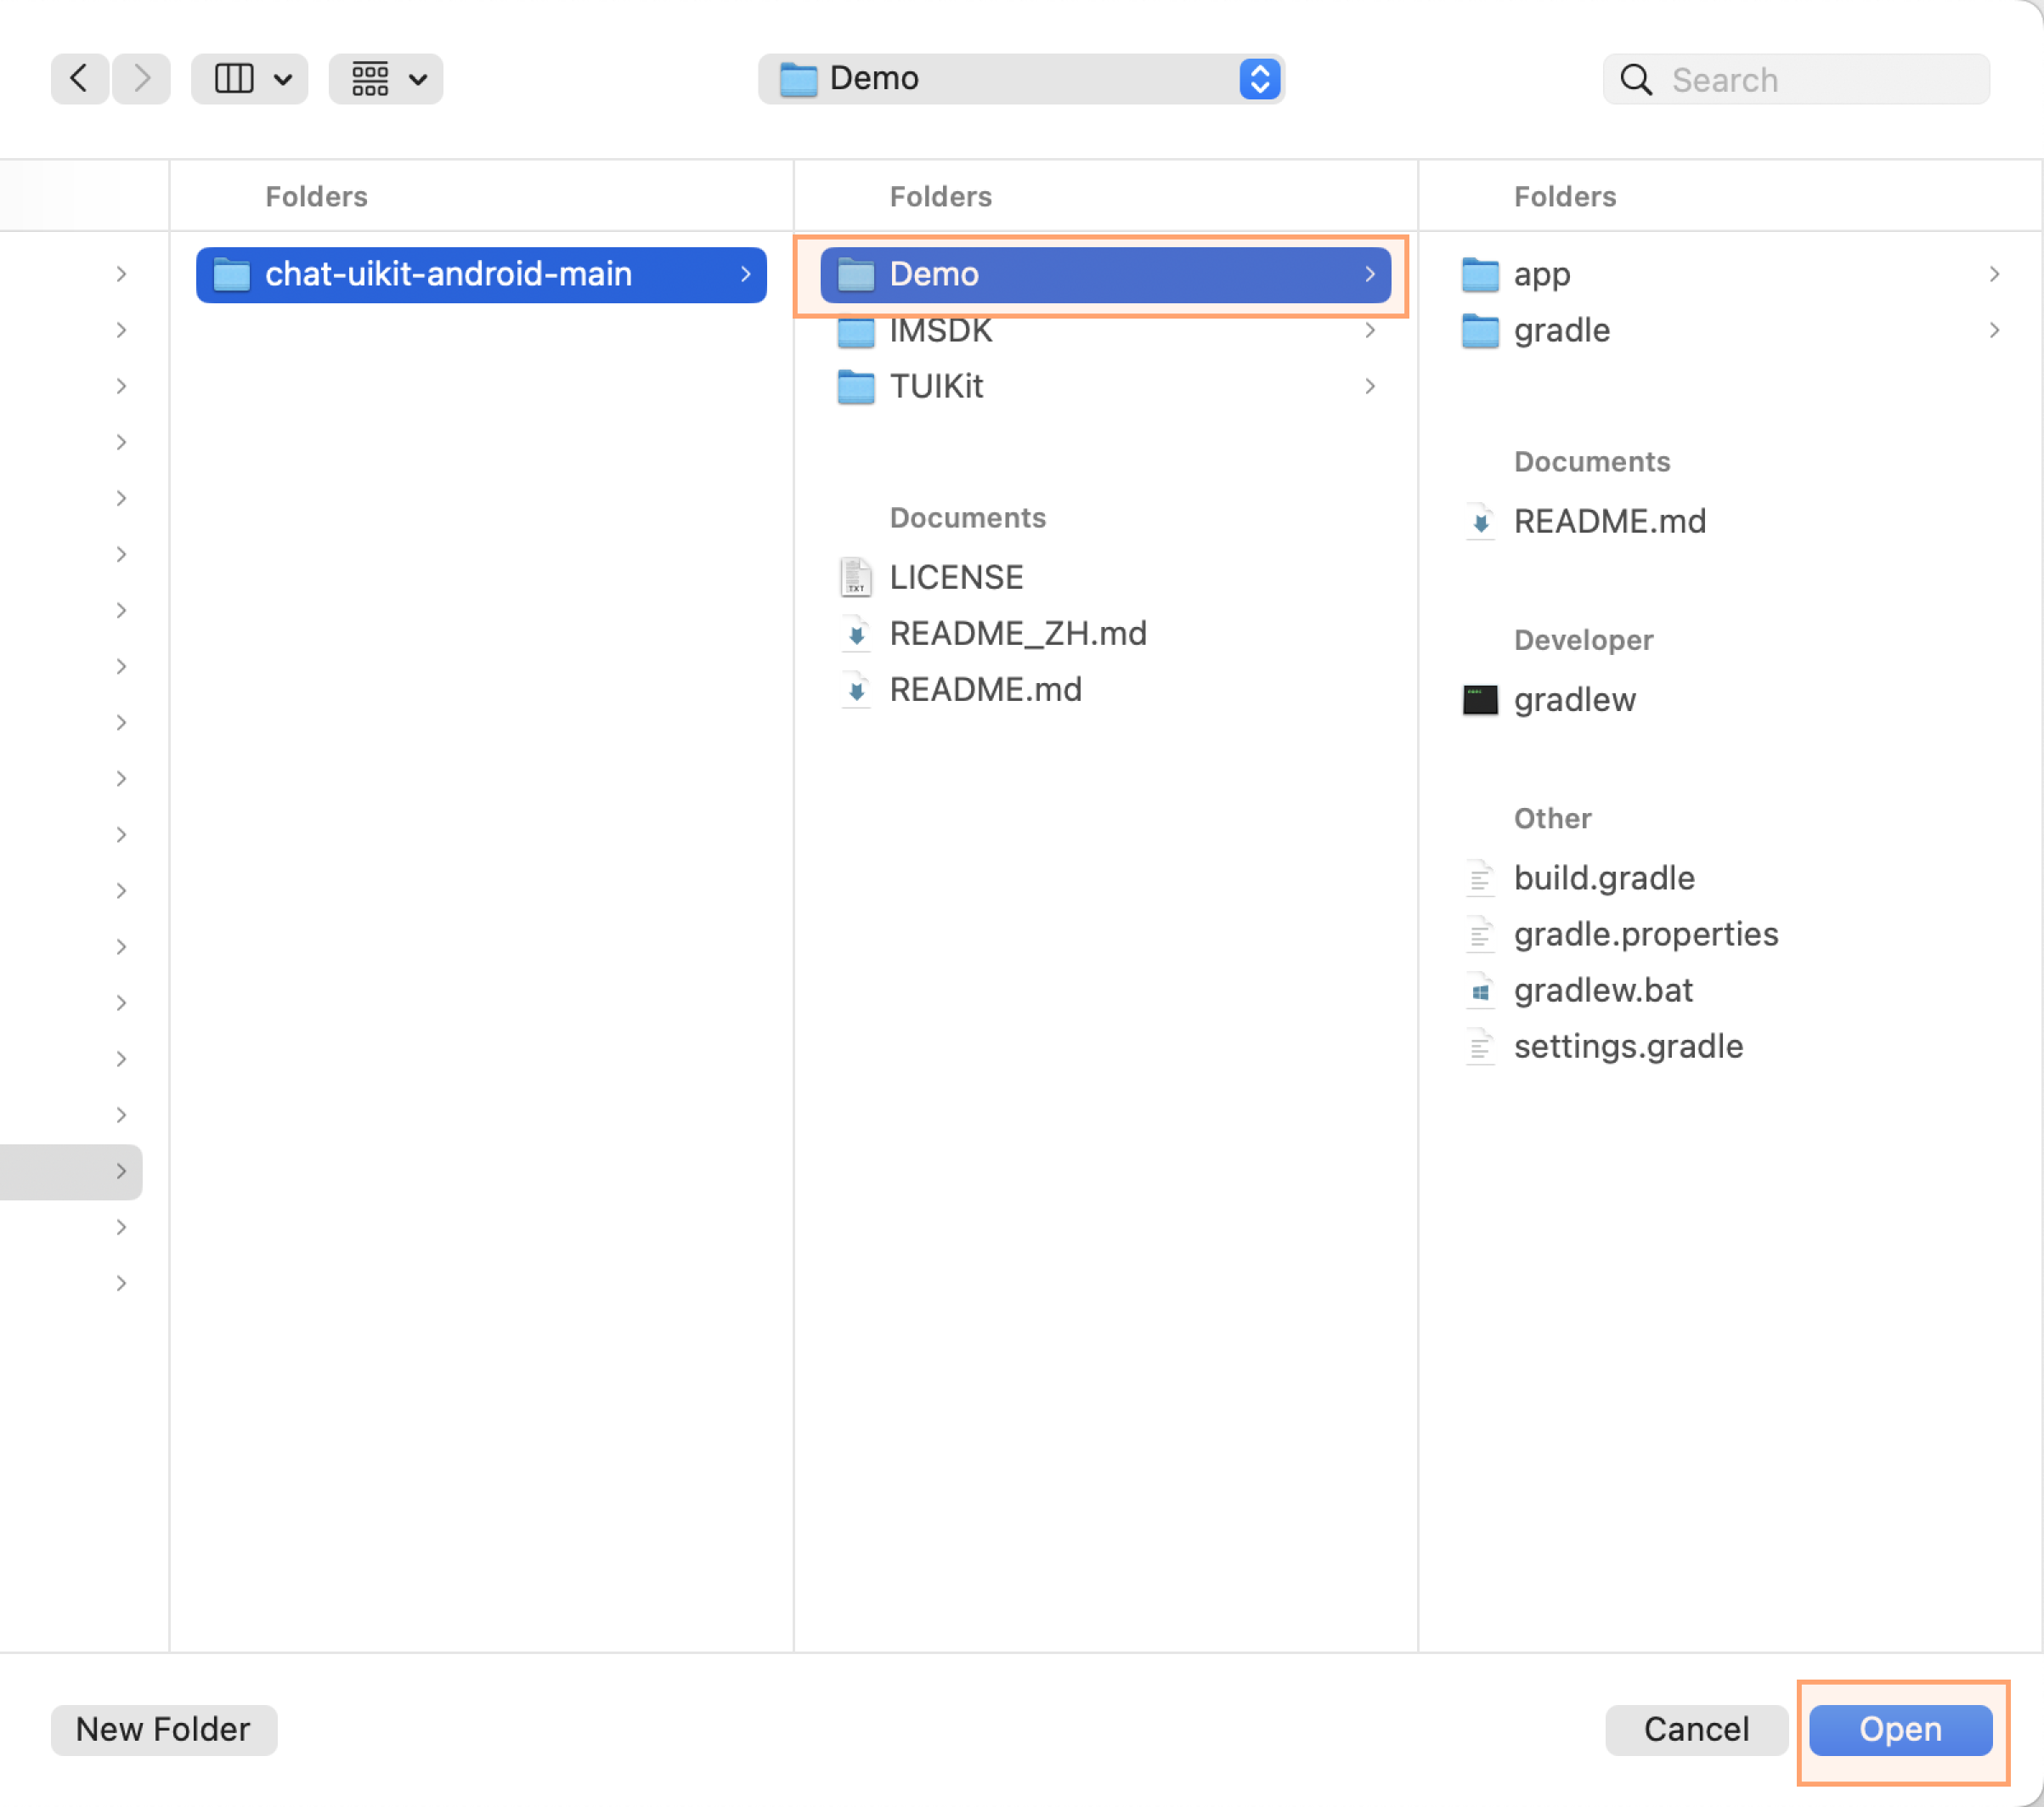
2. Open the Chat project through Android Studio:
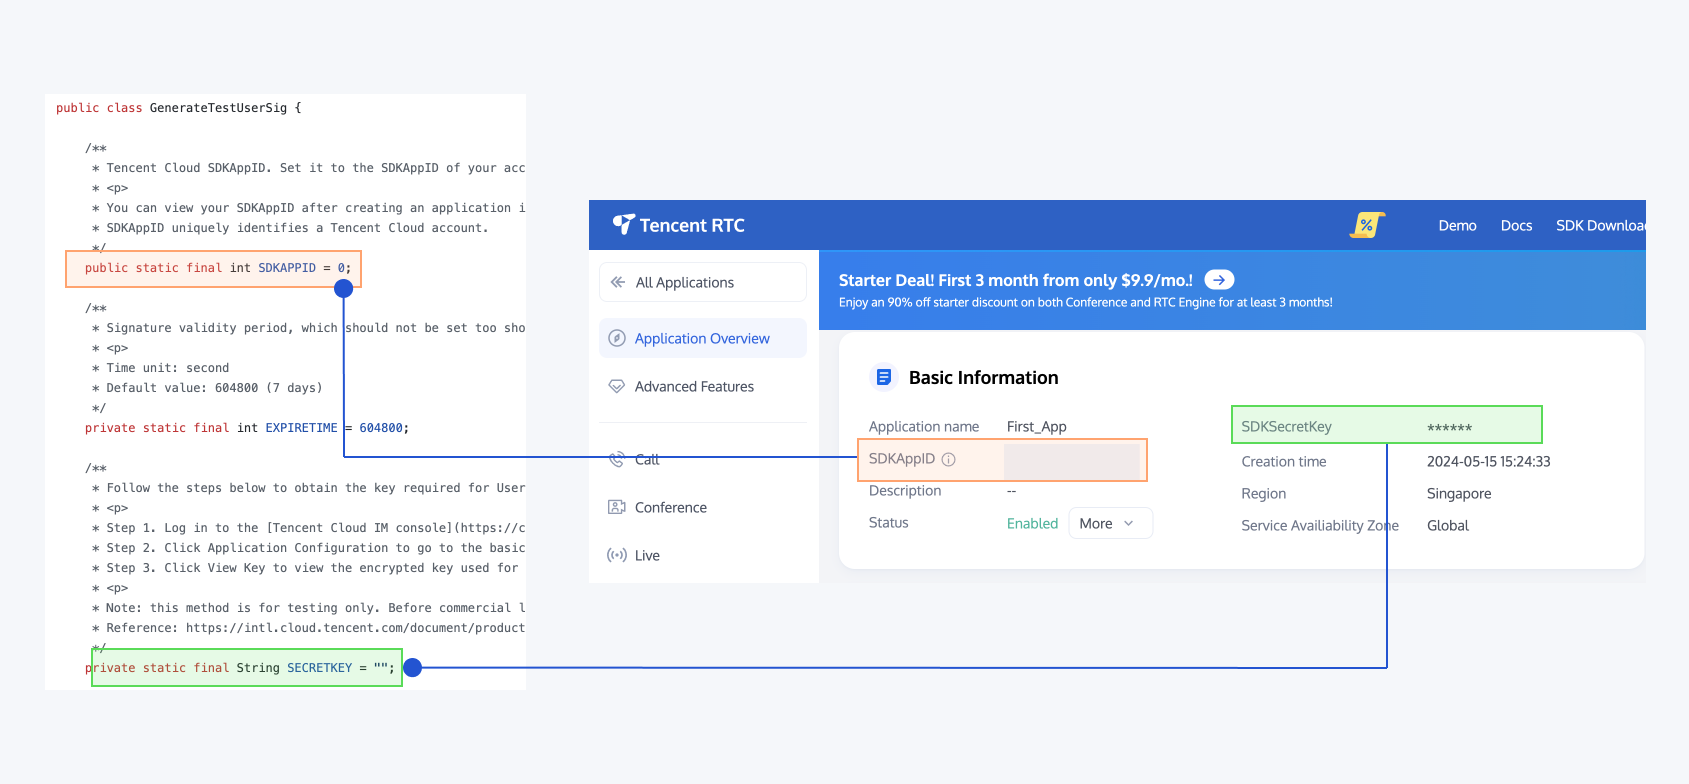
3. Find the GenerateTestUserSig.java file. The path is:Android/Demo/app/src/main/java/com/tencent/qcloud/tim/demo/signature/GenerateTestUserSig.java
4. Set the relevant parameters:
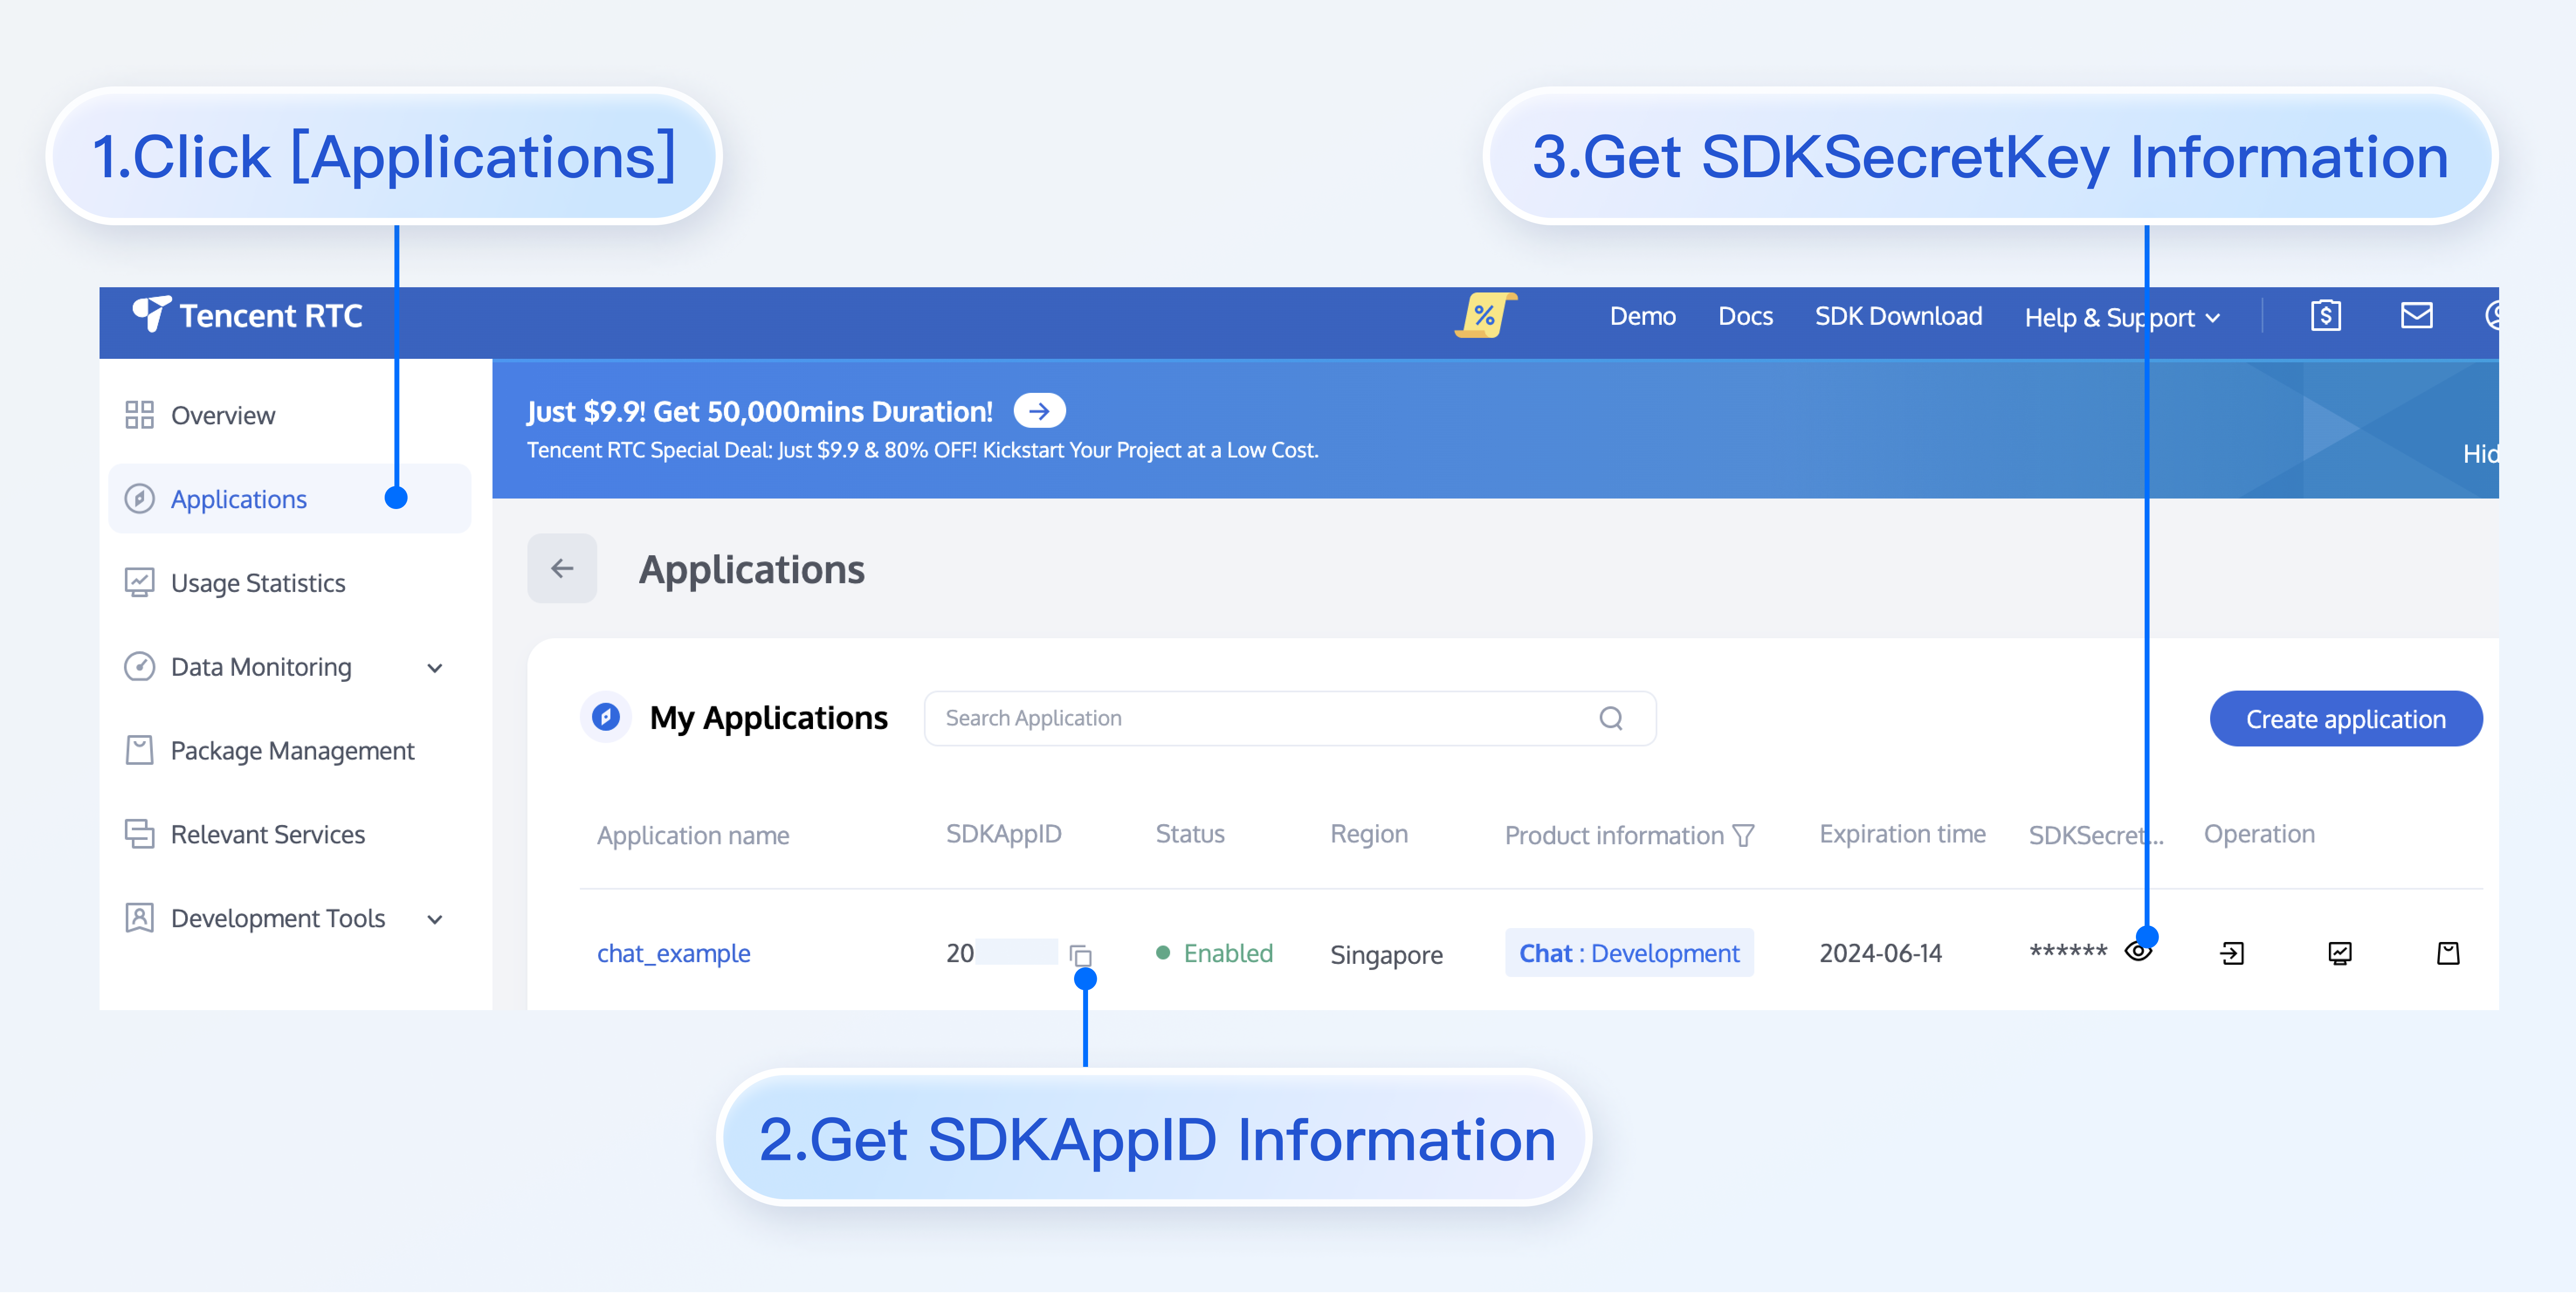
SDKAPPID: set it to the SDKAppID obtained above.
SECRETKEY: set it to the SDKSecretKey obtained above.
Warning:
In this document, the method to obtain UserSig is to configure a SECRETKEY in the client code. In this method, the SECRETKEY is vulnerable to decompilation and reverse engineering. Once your SECRETKEY is disclosed, attackers can steal your Tencent Cloud traffic. Therefore, this method is only suitable for locally running a demo project and feature debugging.
The correct UserSig distribution method is to integrate the calculation code of UserSig into your server and provide an app-oriented API. When UserSig is needed, your app can send a request to the business server to obtain a dynamic UserSig. For more information, see How to Generate UserSig on the Server.
To respect the copyright of emoji design, the downloaded demo project does not contain sliced images of major emoji elements. You can use your local emoji packs to configure code. Unauthorized use of the emoji pack in the Chat demo may infringe on the design copyright.
4. Compile and Run the Demo
Import the demo project with Android Studio, and then compile and run it. For more information, see the file README.md in the corresponding directory of the demo project cloned above.
Environment requirements
Android Studio-Chipmunk
Gradle-6.7.1
Android Gradle Plugin Version-4.2.0
kotlin-gradle-plugin-1.5.31
Note:
The demo is integrated with the audio/video call feature by default. However, the TRTC SDK on which the audio/video call feature relies currently does not support simulators. Please use real devices for demo running or debugging.
Experience basic features
Create User Account
If you have successfully run the Demo by following the above steps, you can start experiencing the basic features.
First, you need to create a user account. There are many ways to do this, for example, by registering through log in to Demo on the client side or creating some in the console. You can choose any method that suits you.
Client Registration
Simply log in to the Demo with several different accounts.
Create in Console
The steps are as follows:
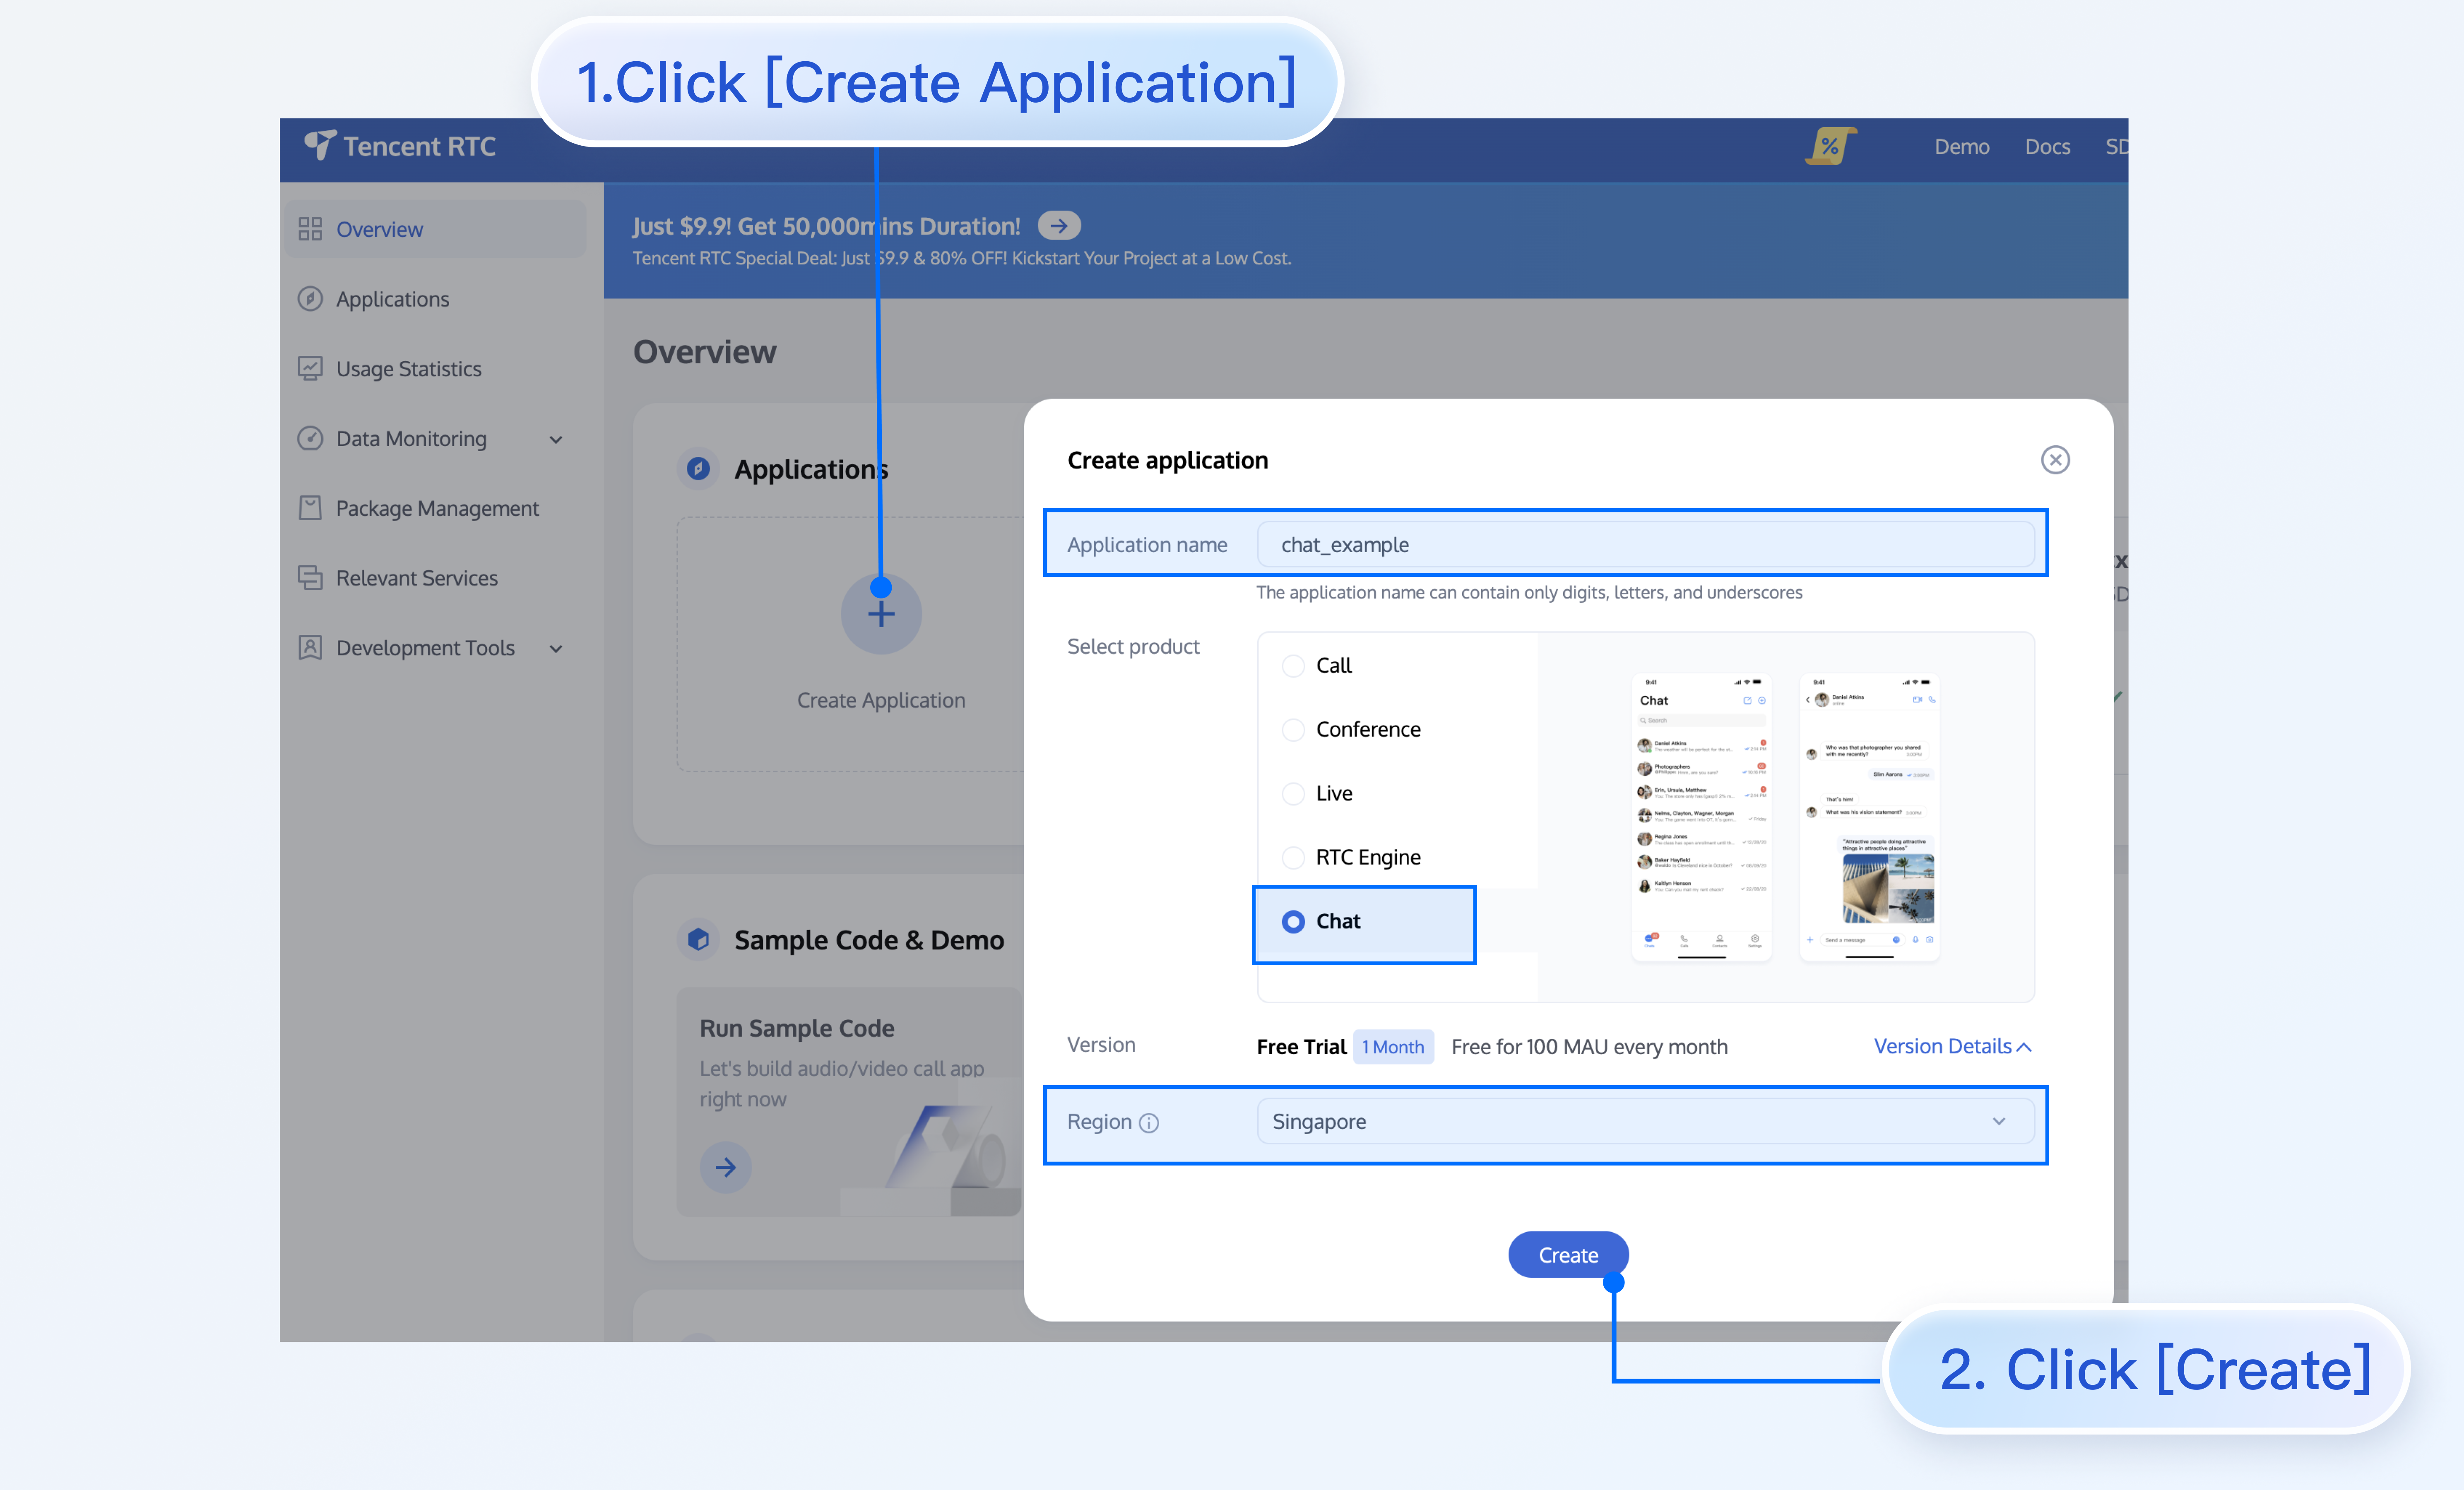
1. Click to enter the application you created above, and you will see the Chat product entry on the left sidebar, click to enter.
2. After entering the Chat Product subpage, click on Users to go to the User Management Page.
3. Click Create account, a pop-up will appear for you to fill in the account creation information. If you are just a regular member, we recommend you choose the General type. Although Nickname is not mandatory, we still suggest you set it. If it's inconvenient to display userID on the interface, you can identify different users through Nickname.
The details are as follows:
Note:
Sending messages involves at least two users, so at this step, you need to create at least 2 accounts. Please note down the userID of these 2 accounts for subsequent steps.
Add to Contacts
After switching to the Contacts interface:
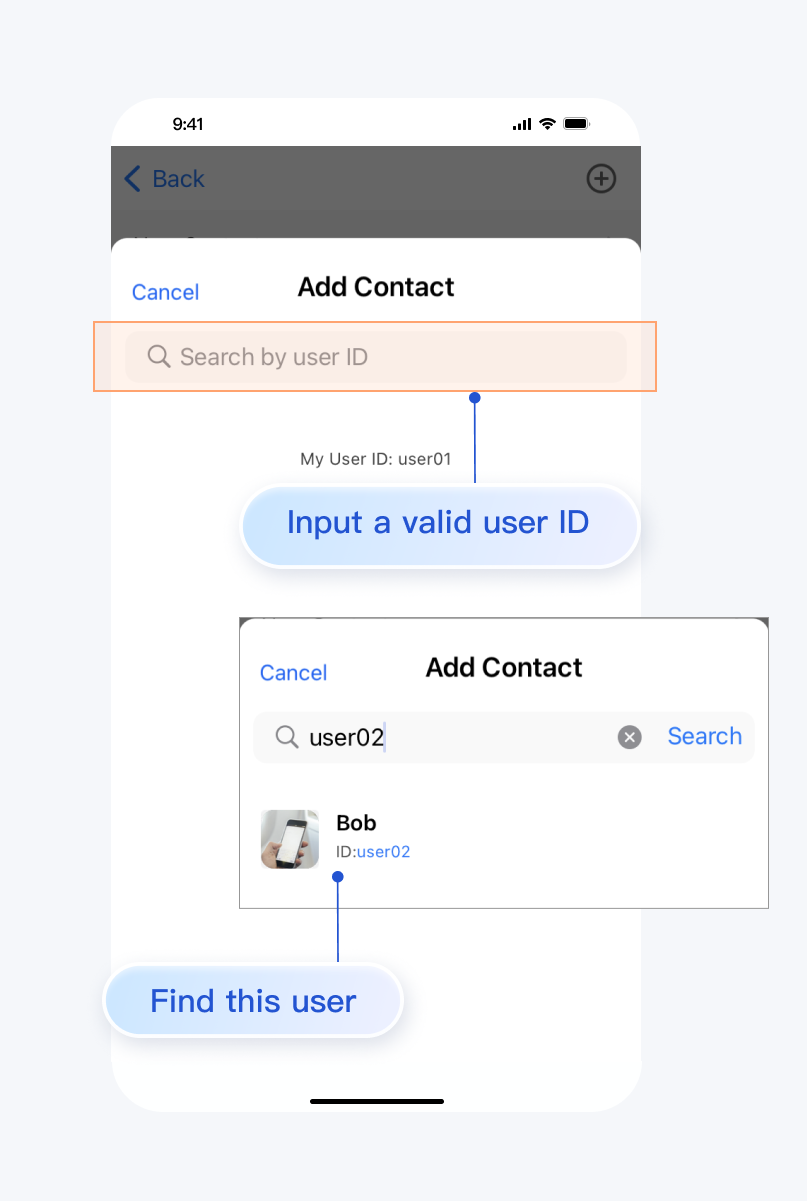
1. Click the + button in the top right corner of the interface, and in the submenu, select Add to Contacts.
2. Enter a valid userID and search for the user. If you have already created an account in the console, you can go to the console Account Management page to get a valid userID. Page path: Applications > Your App > Chat > Users > Account Management.
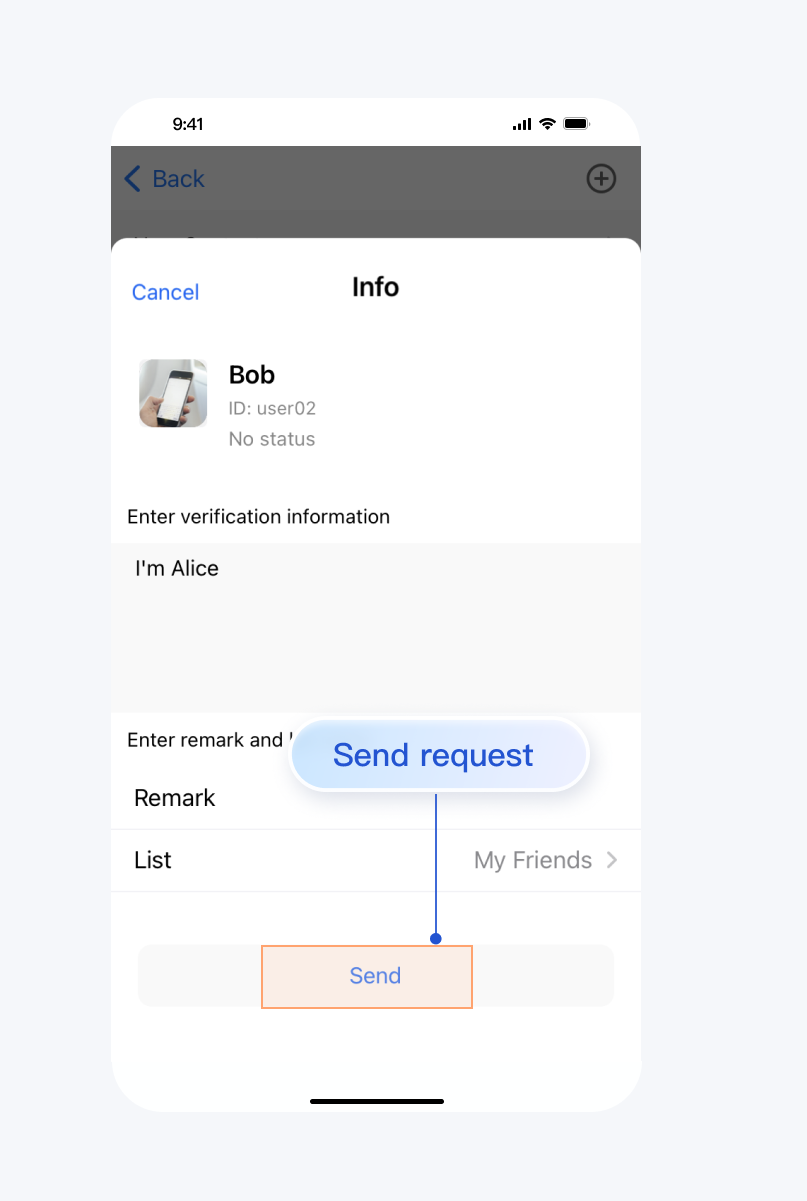
3. Add user as contact.
The steps are shown below:
Click [Add to Contacts]
Search user
Send contact request
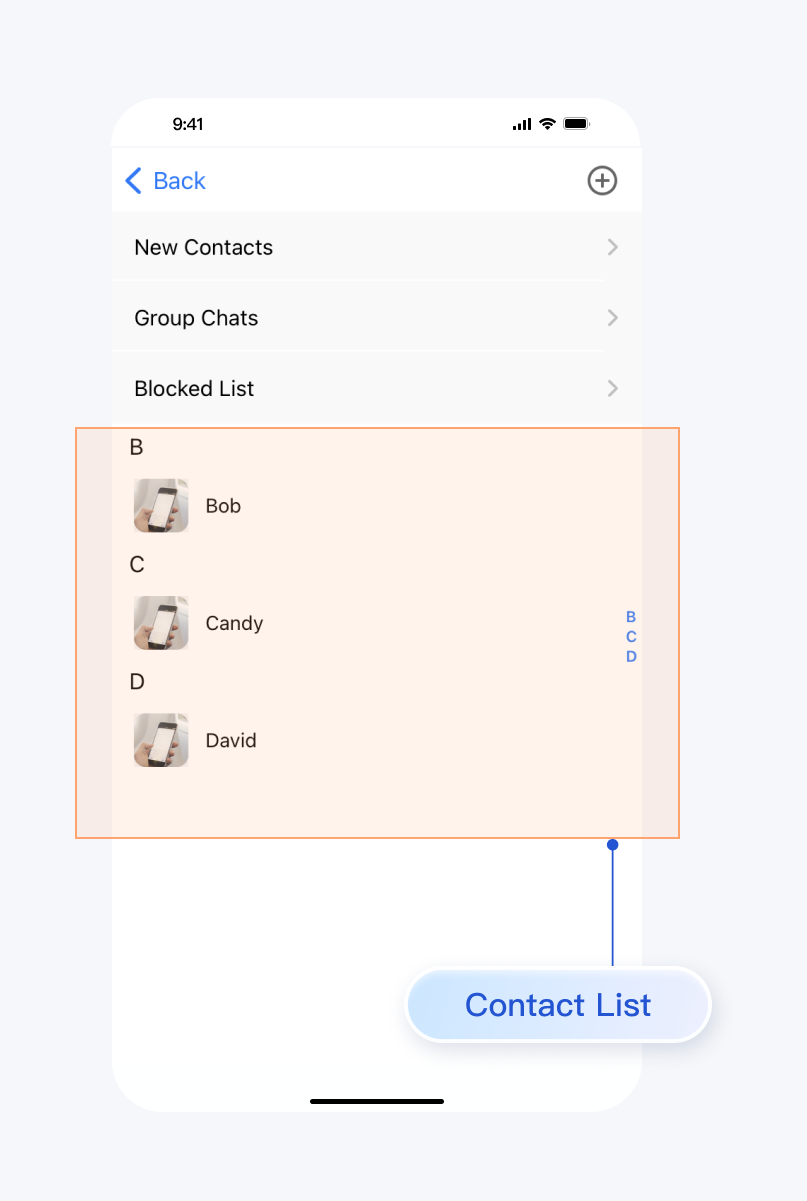
After successfully adding, the user will appear in the contact list:
Sending Messages
Select a user, click Message to enter the message interface:
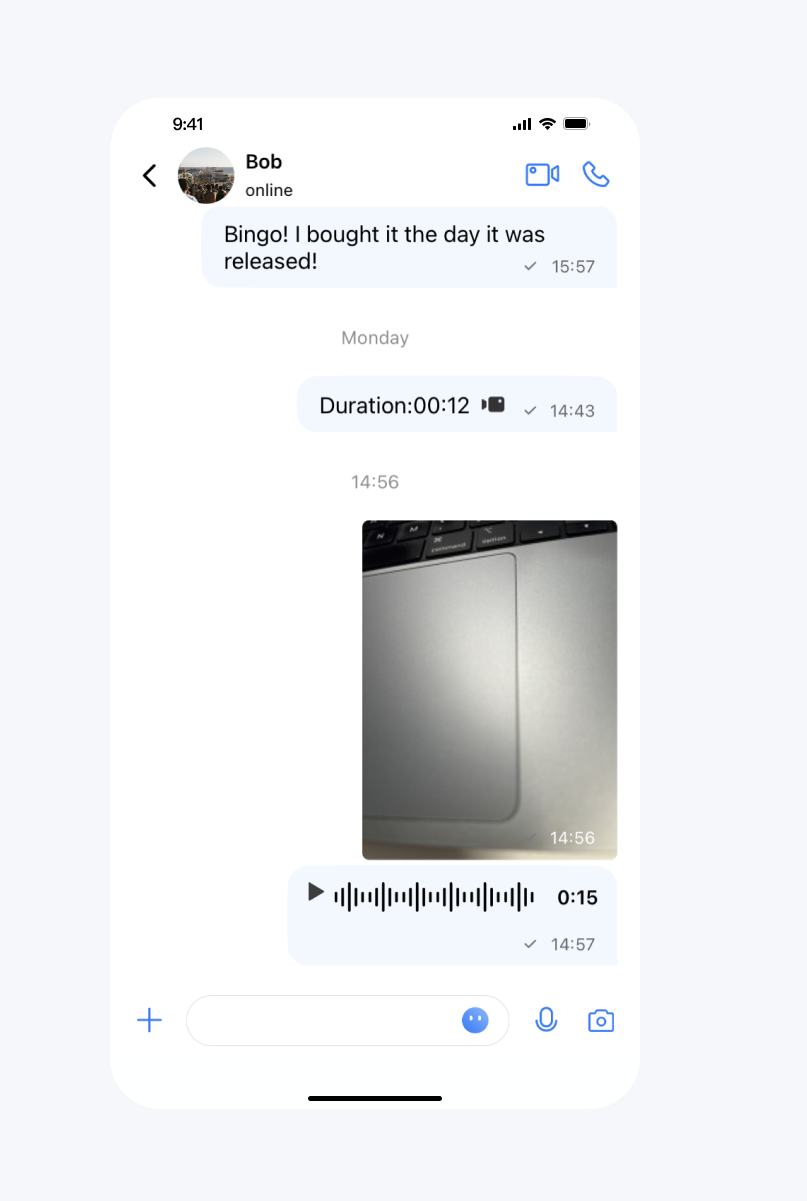
Next, you can send messages, voice, images, and make audio/video calls with the user in the message interface:


 Yes
Yes
 No
No
Was this page helpful?