Before integrating the TIMPush component, you need to apply for an APNs Push Certificate from Apple and then upload the Push Certificate to the IM console. After that, you can proceed with the quick access steps.
There are currently two mainstream types of certificates for Apple Manufacturer Configuration: p12 certificates and p8 certificates. Each type of certificate has its advantages and drawbacks, and you can choose one according to your needs.
Certificate Type:
p12 Certificate: A p12 certificate is a binary file containing both a public key and a private key, used for certificate-based authentication. It bundles the public key certificate and the private key into one file, with extensions .p12 or .pfx.
p8 Certificate: A p8 certificate is an Auth Key, used for token-based authentication. It is a text file containing a private key, with an extension of .p8.
Validity and Management:
p12 Certificate: A p12 certificate typically has a one-year validity period, after which it needs to be regenerated and deployed. Each application requires a separate P12 certificate to handle push notifications.
p8 Certificate: A p8 certificate does not have an expiration date, so you don't have to worry about the certificate expiring. Moreover, using a P8 certificate can simplify certificate management, as you can use a single p8 certificate to provide push notification services for multiple applications.
Security:
p12 Certificate: A p12 certificate uses certificate-based authentication and requires the private key to be stored on the server. This could increase security risks, as the private key could be accessed by unauthorized users.
p8 Certificate: A p8 certificate uses token-based authentication, which means your server periodically generates a JSON Web Token (JWT) to establish a connection with APNs. This method is more secure, as it doesn't require storing a private key on the server.
Dynamic Island:
p12 Certificate: Not supported.
p8 Certificate: Supports Dynamic Island push notifications.
Method 1:Using a p12 certificate (traditional push certificate)
Step 1: Apply for an APNs certificate
Enable remote push for the app
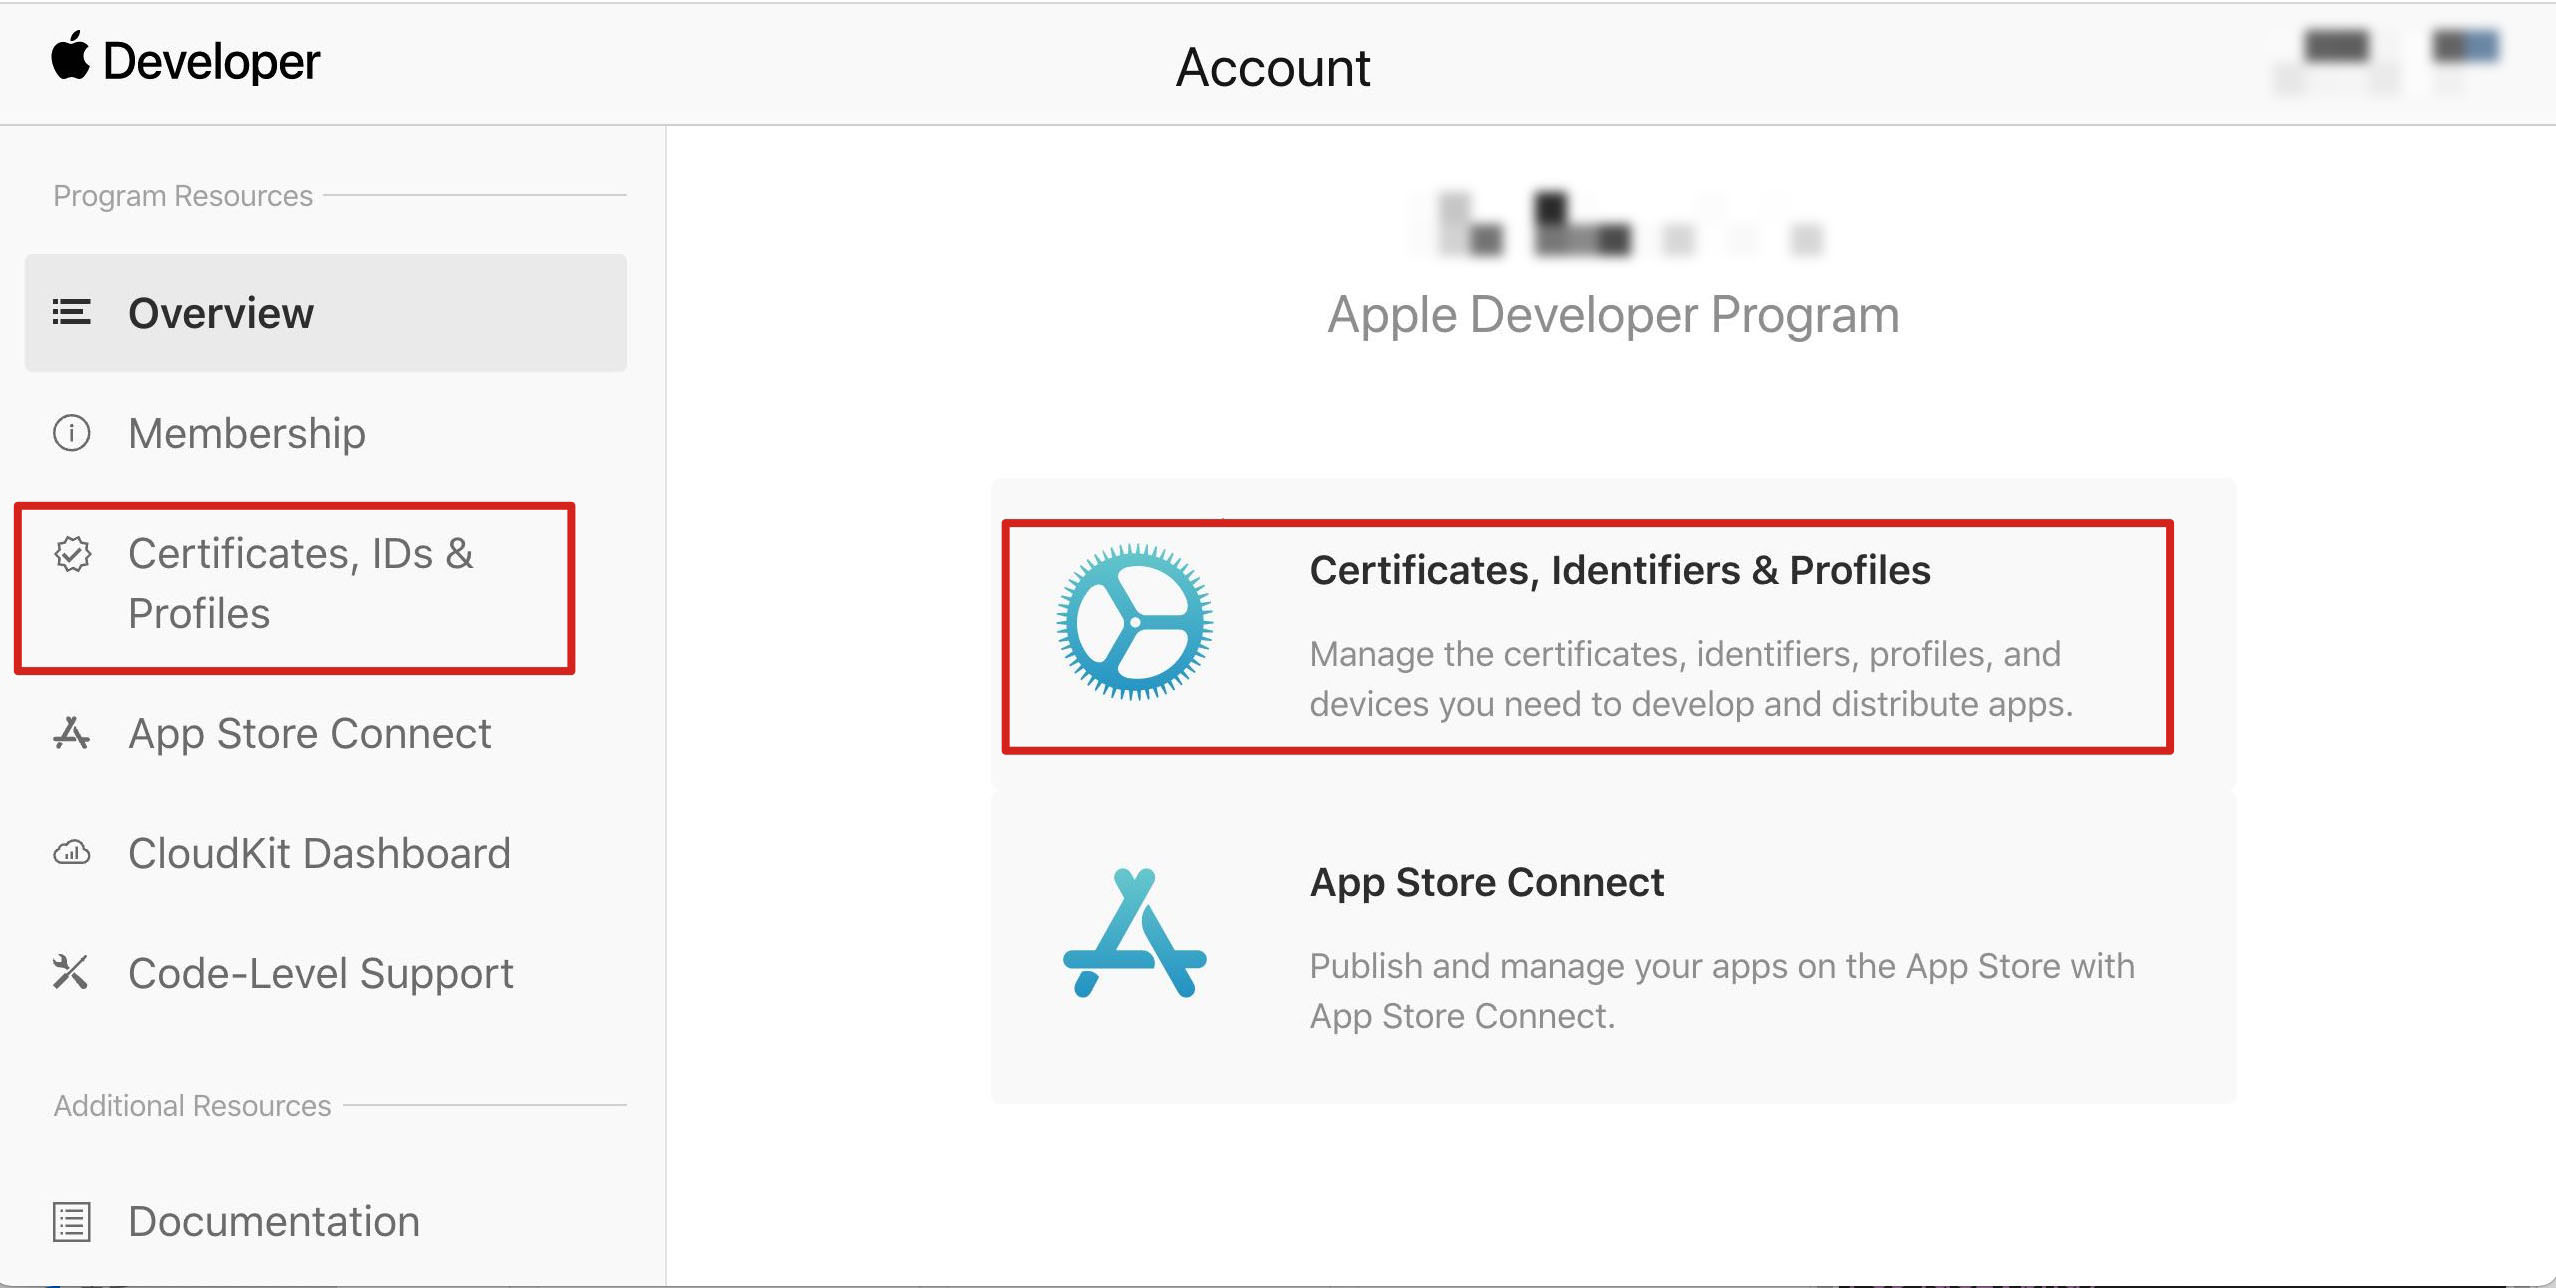
1. log in to Apple Developer Center website, click Certificates, Identifiers & Profiles or the sidebar's Certificates, IDs & Profiles, enter the Certificates, IDS & Profiles page.
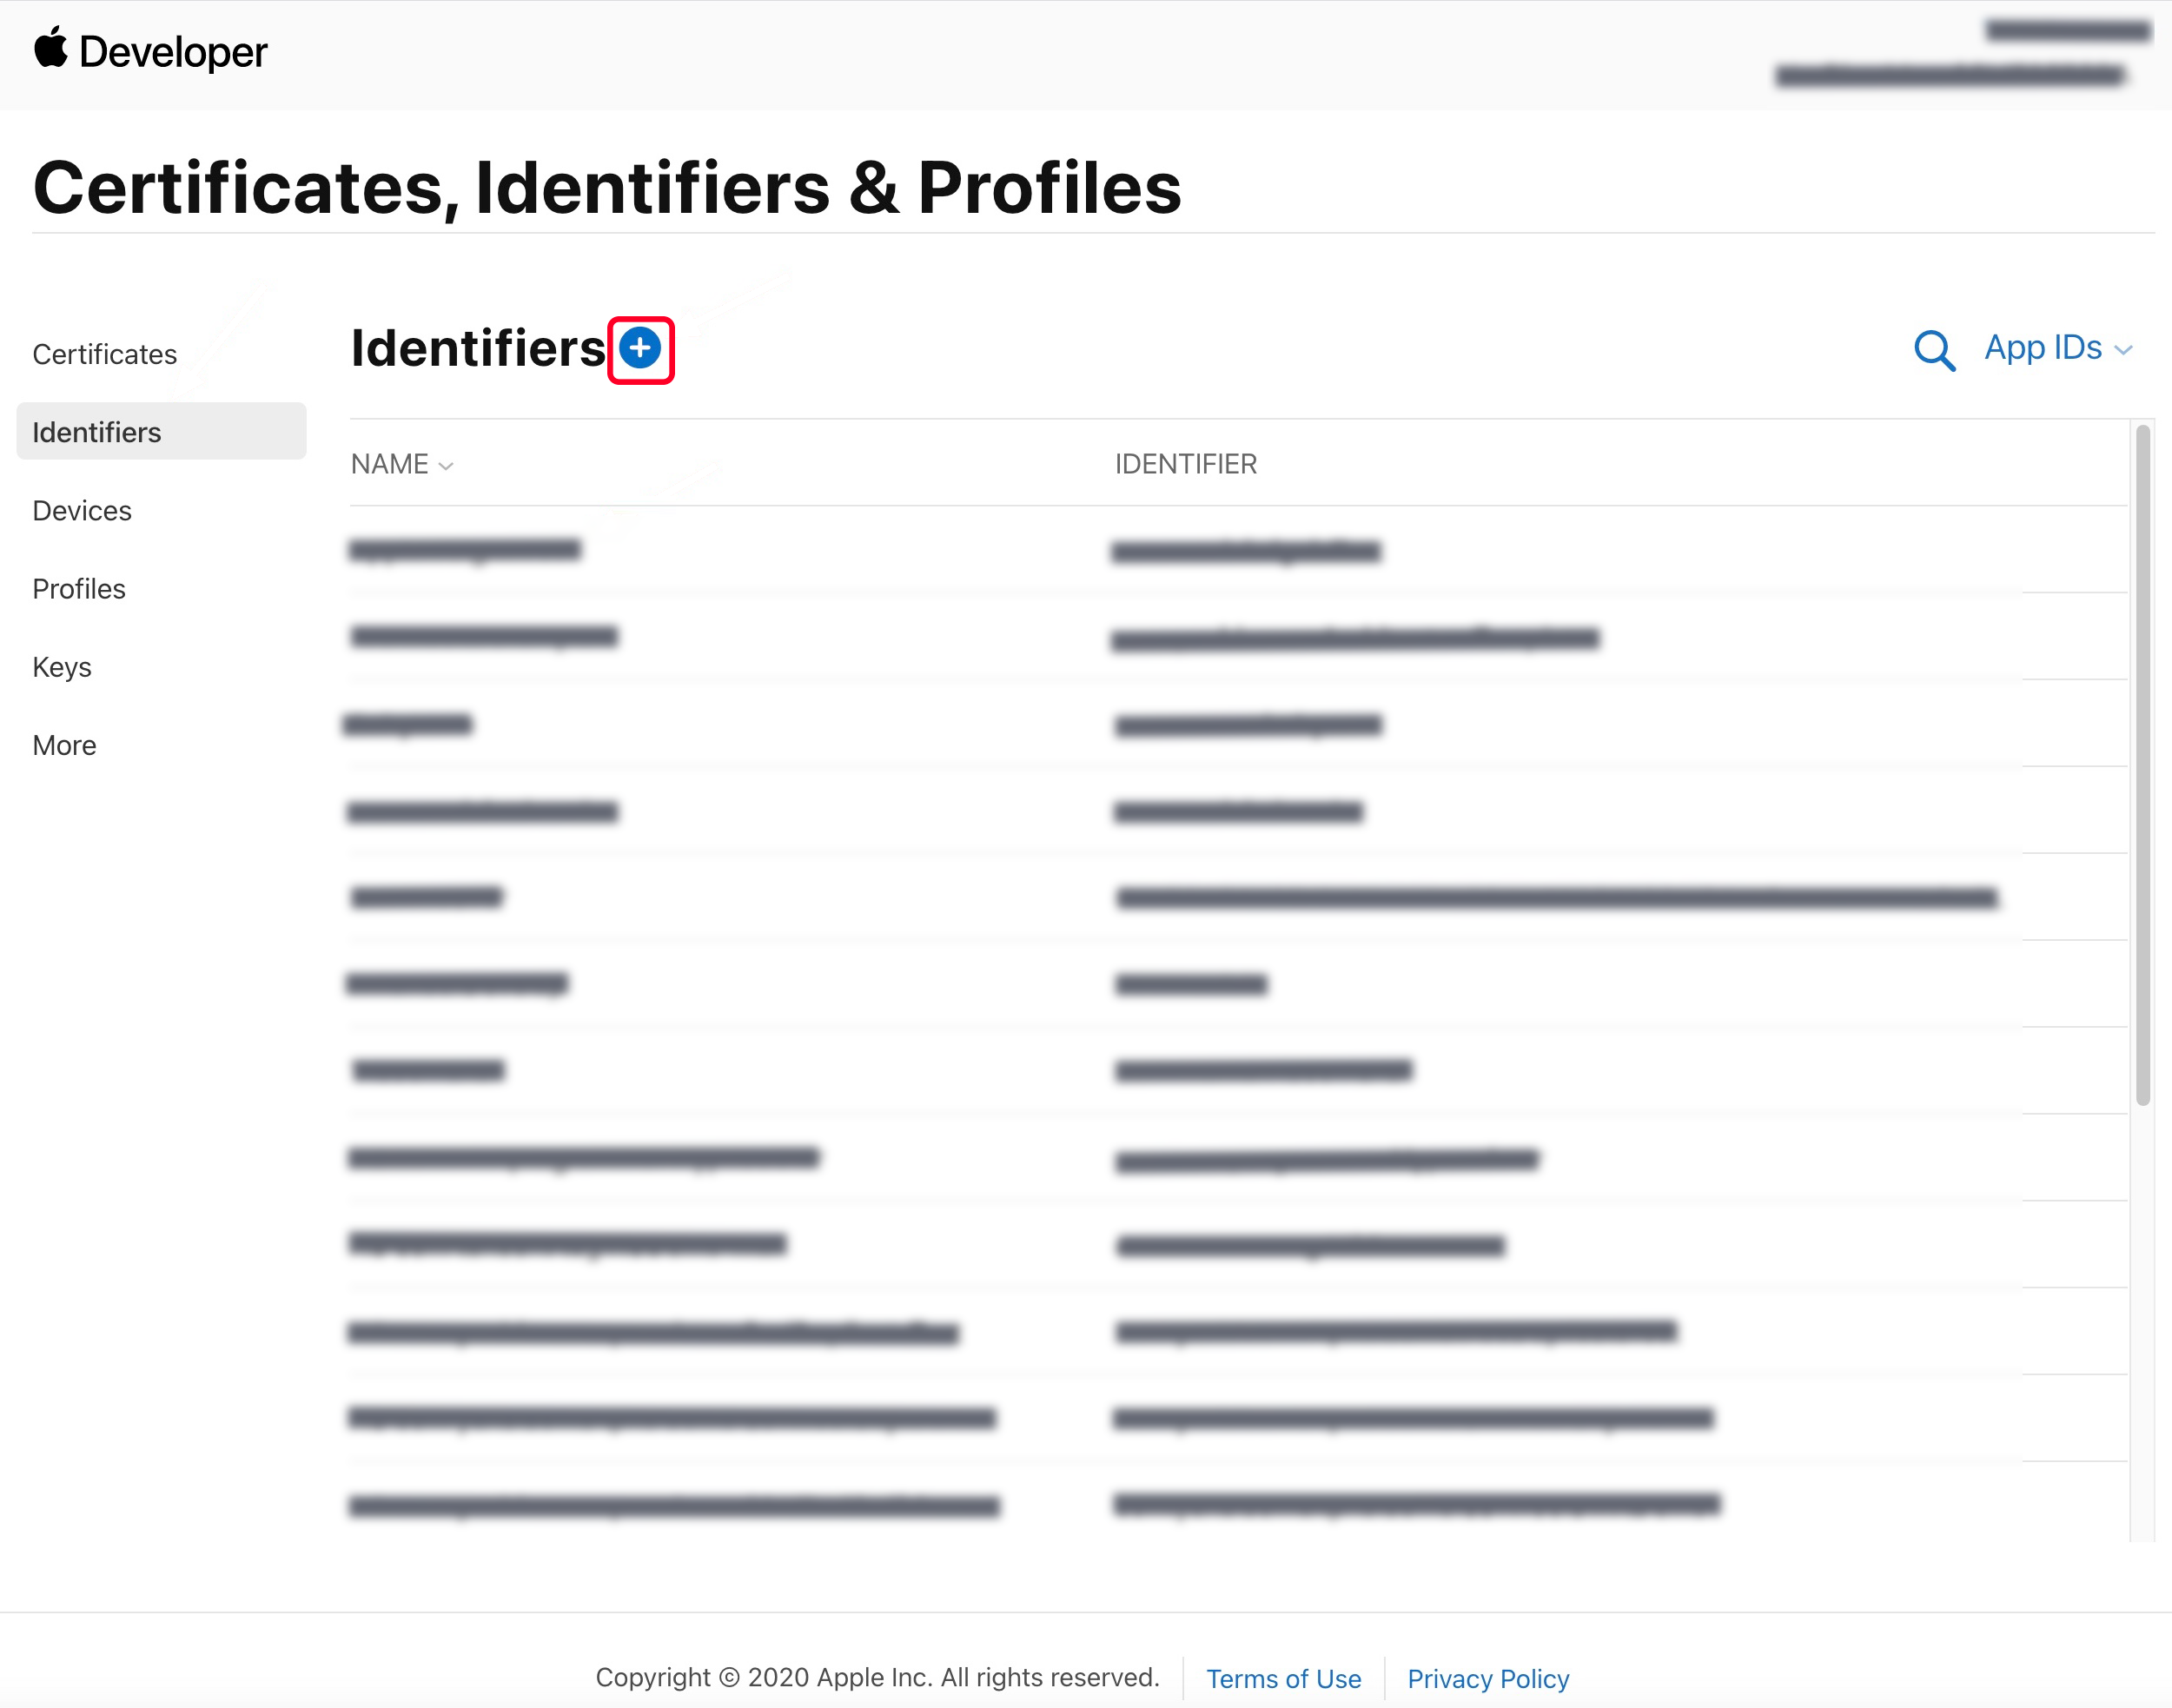
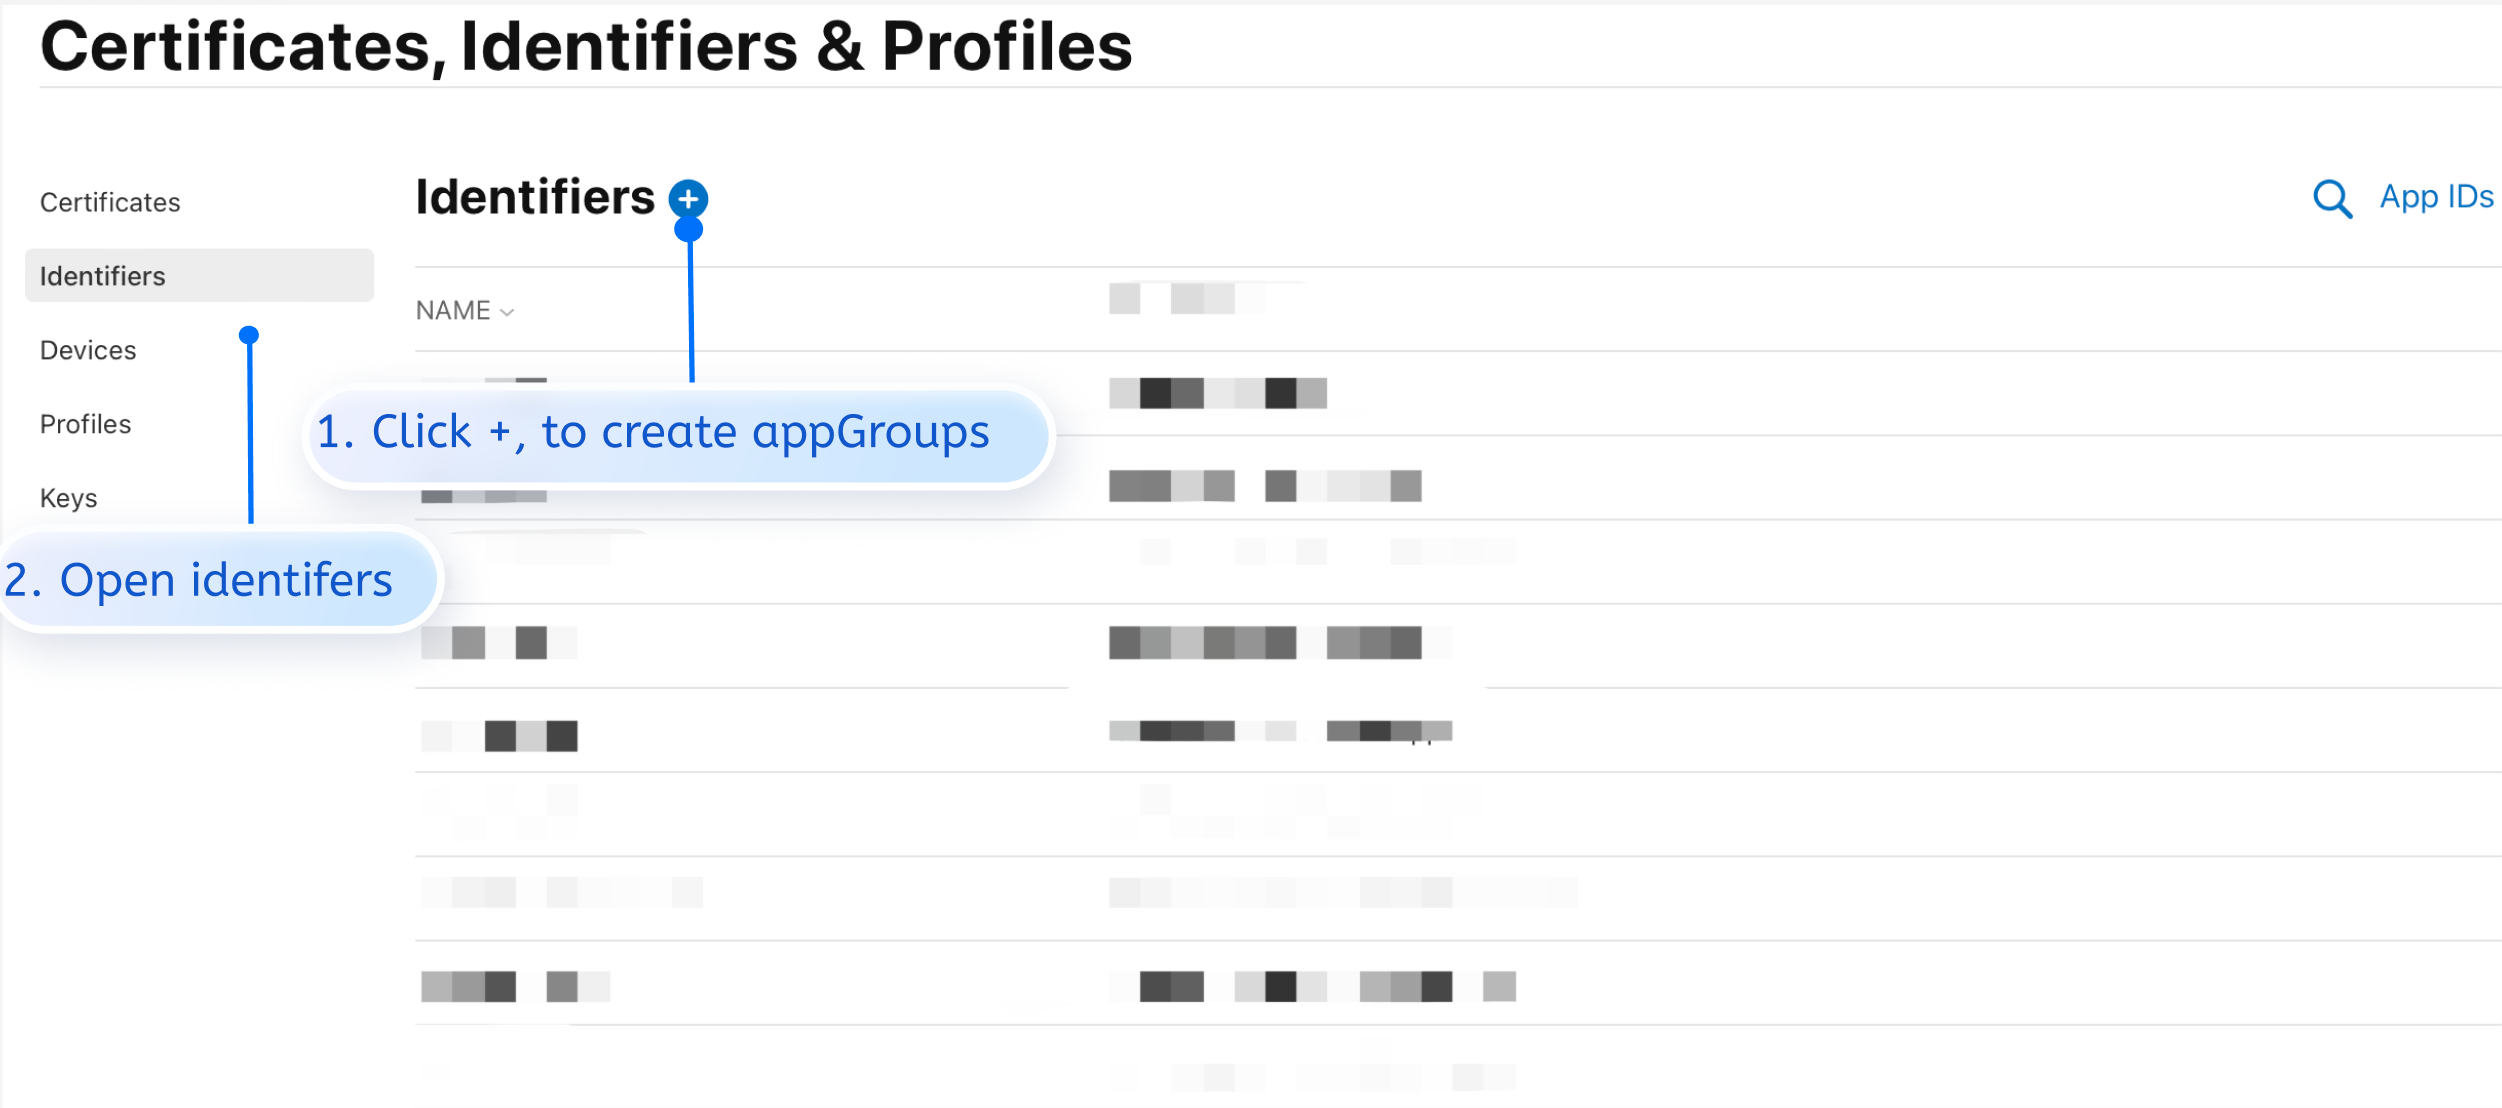
2. click the + next to Identifiers.
3. You can follow the steps below to create a new AppID or add a Push NotificationService to your existing AppID.
Note:
Your App's Bundle ID cannot use the wildcard *, otherwise, the remote push service cannot be used.
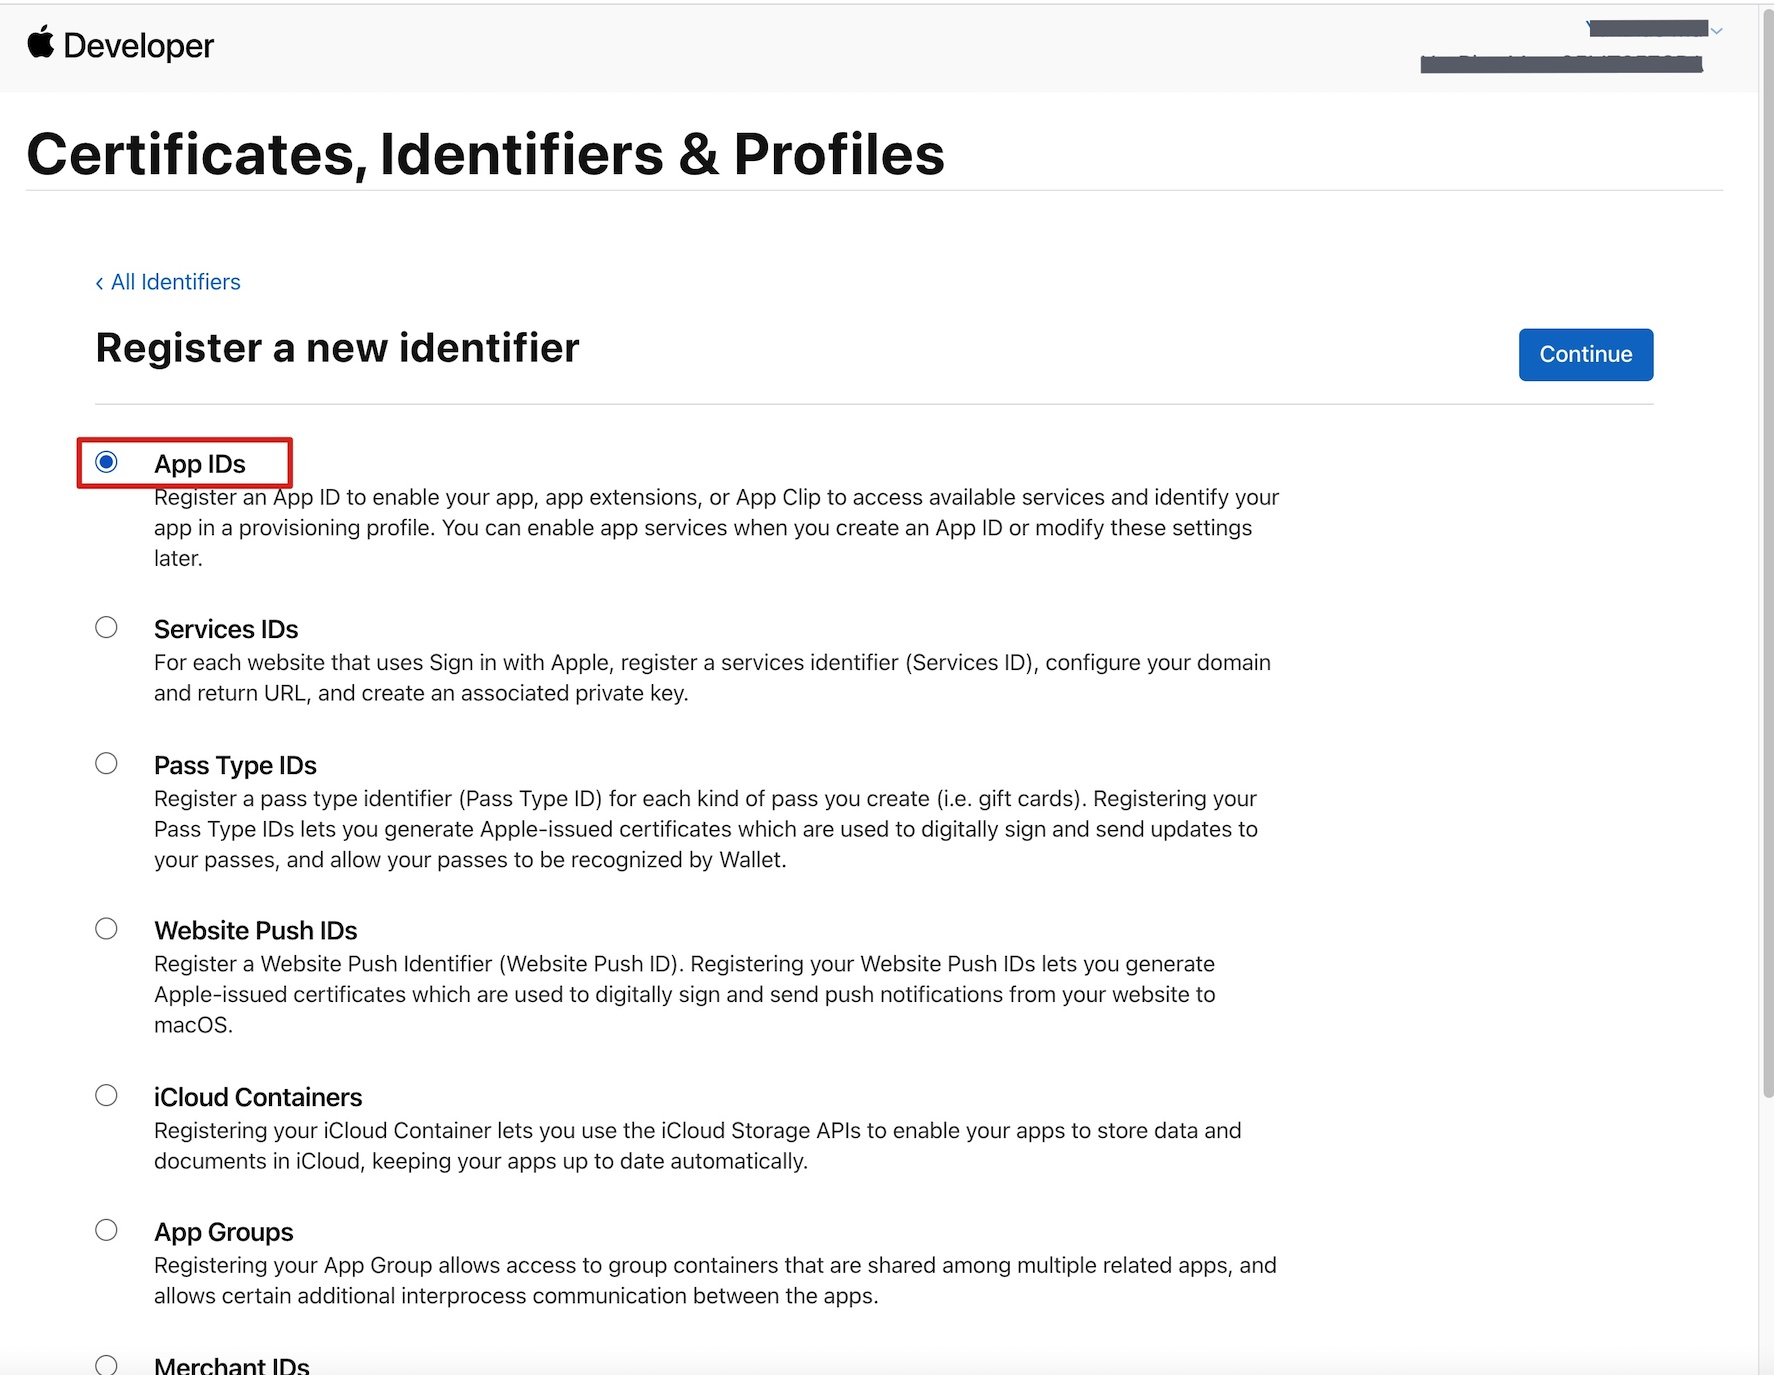
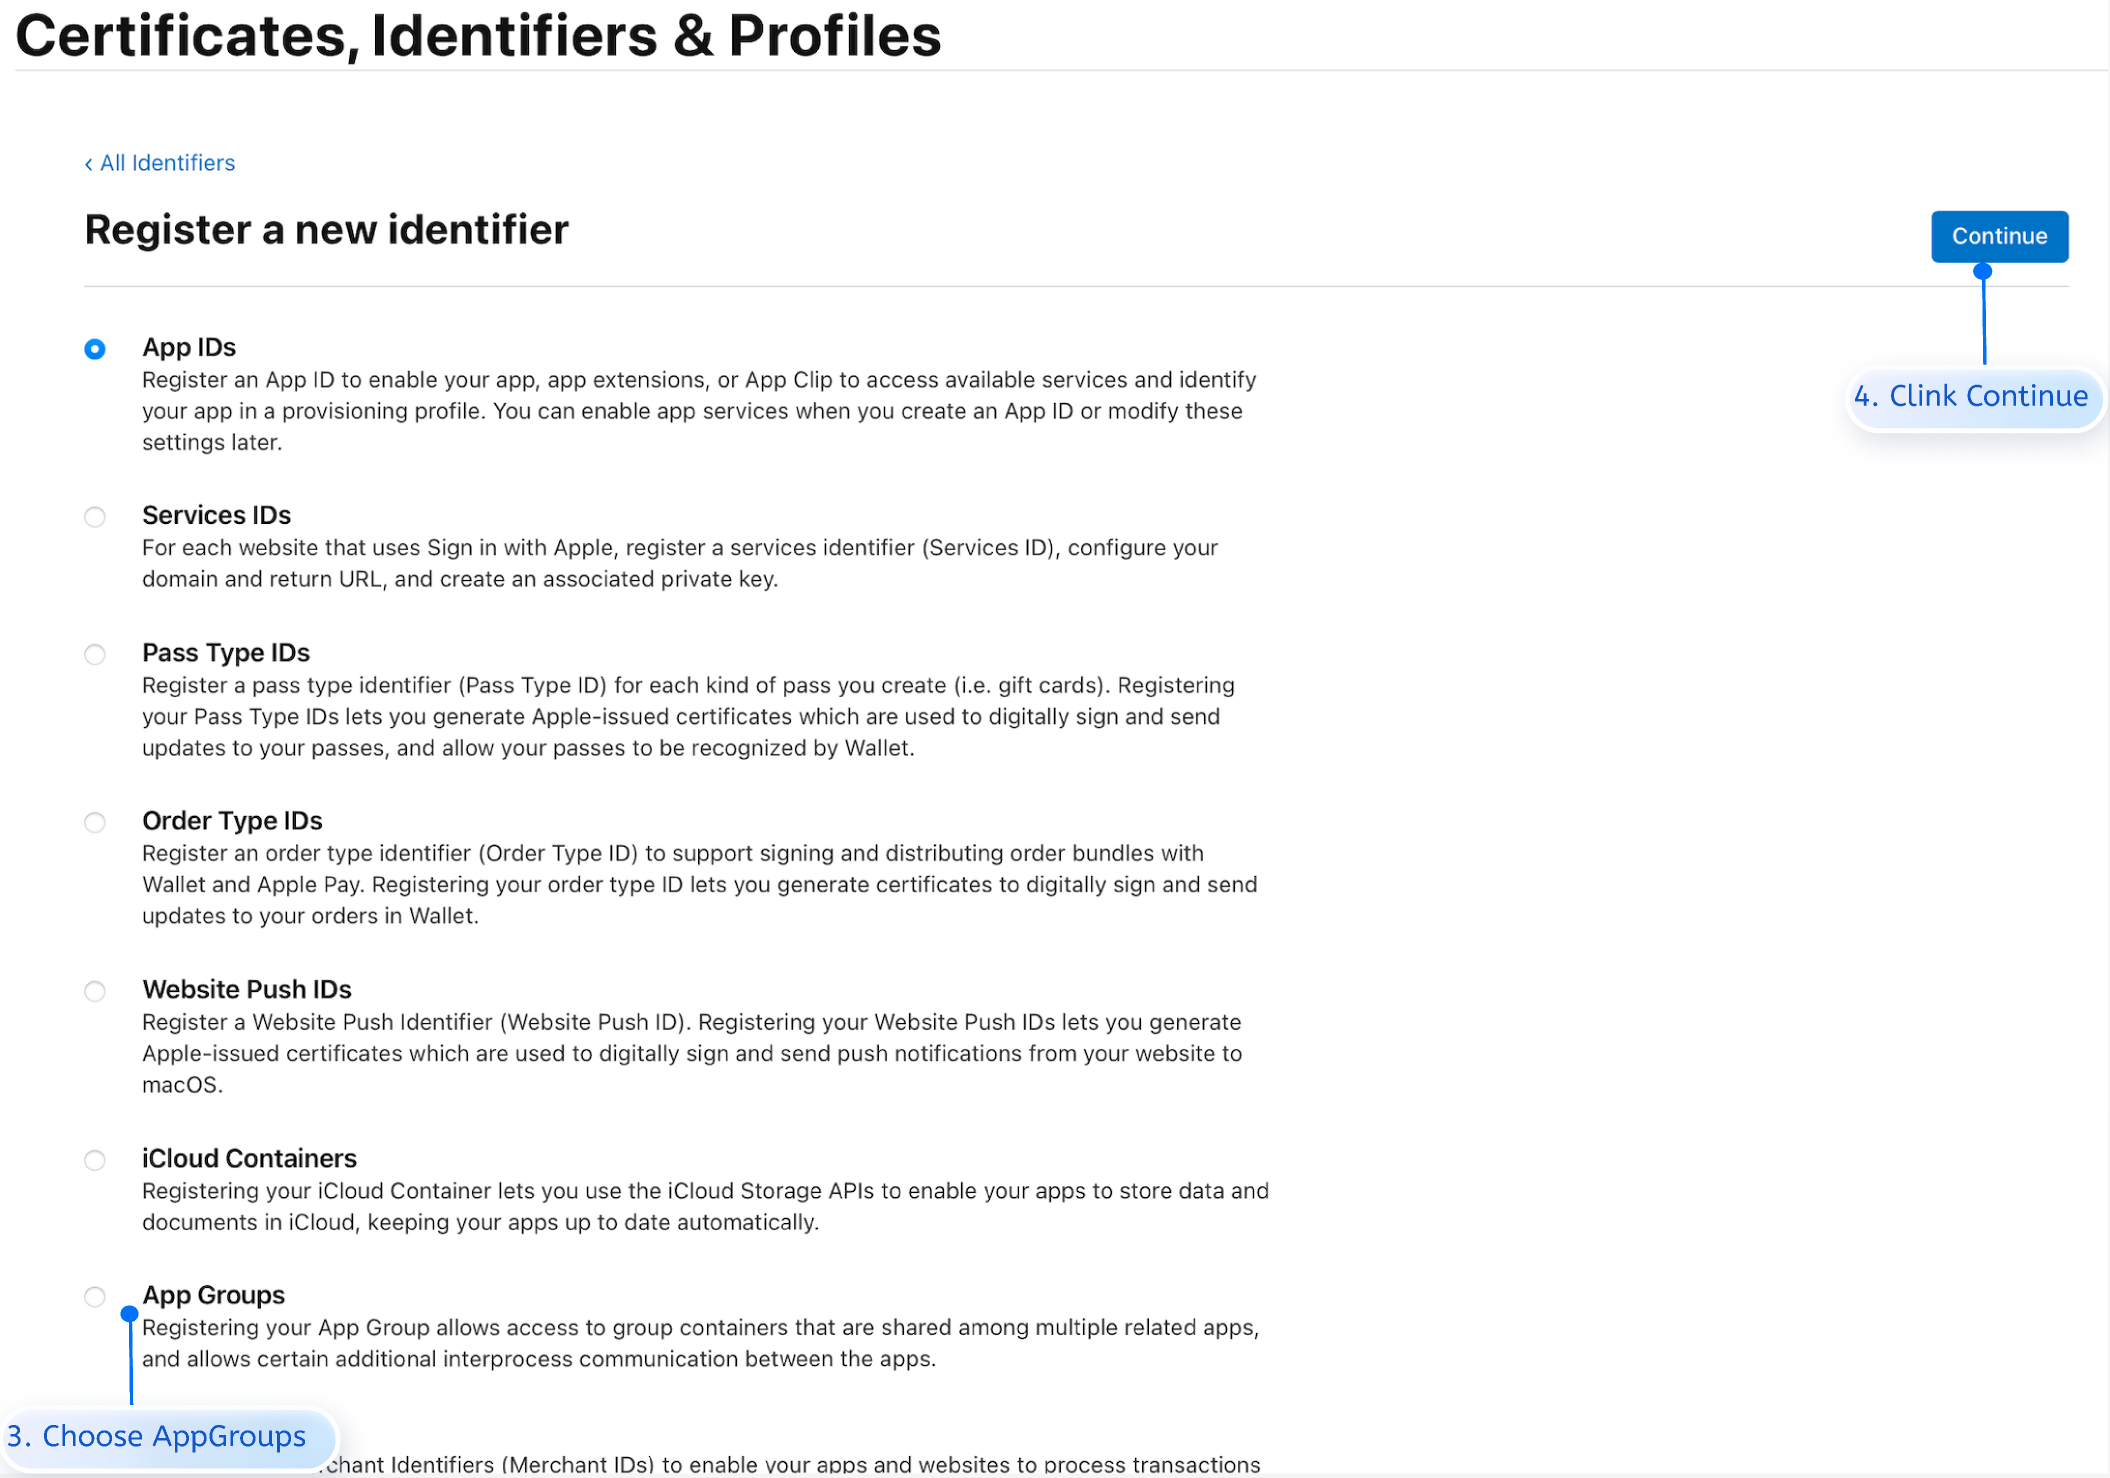
4. Check the App IDs box, click Continue to proceed to the next step.
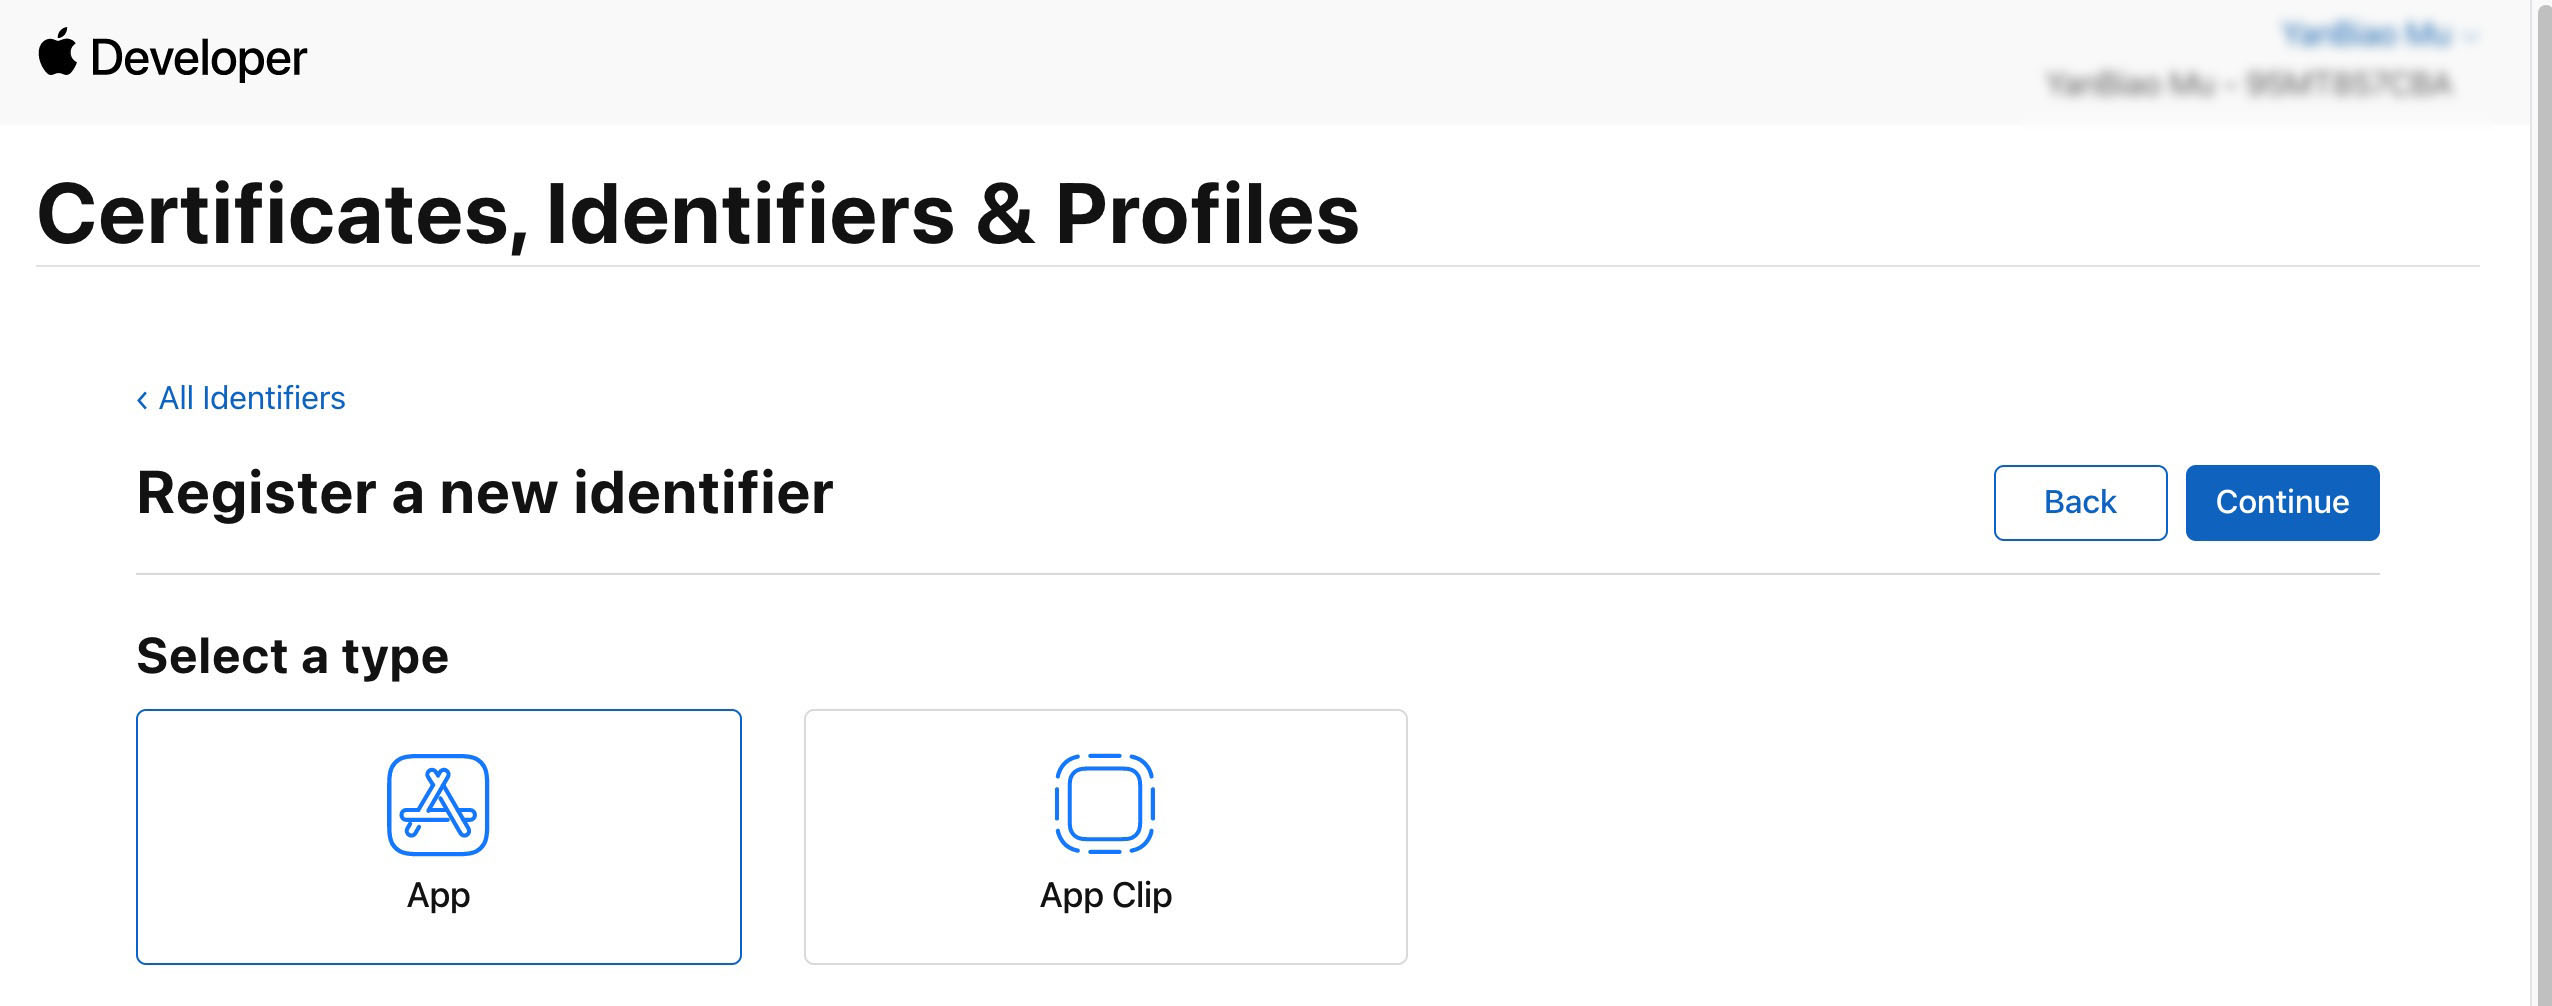
5. Select App, click Continue to proceed to the next step.
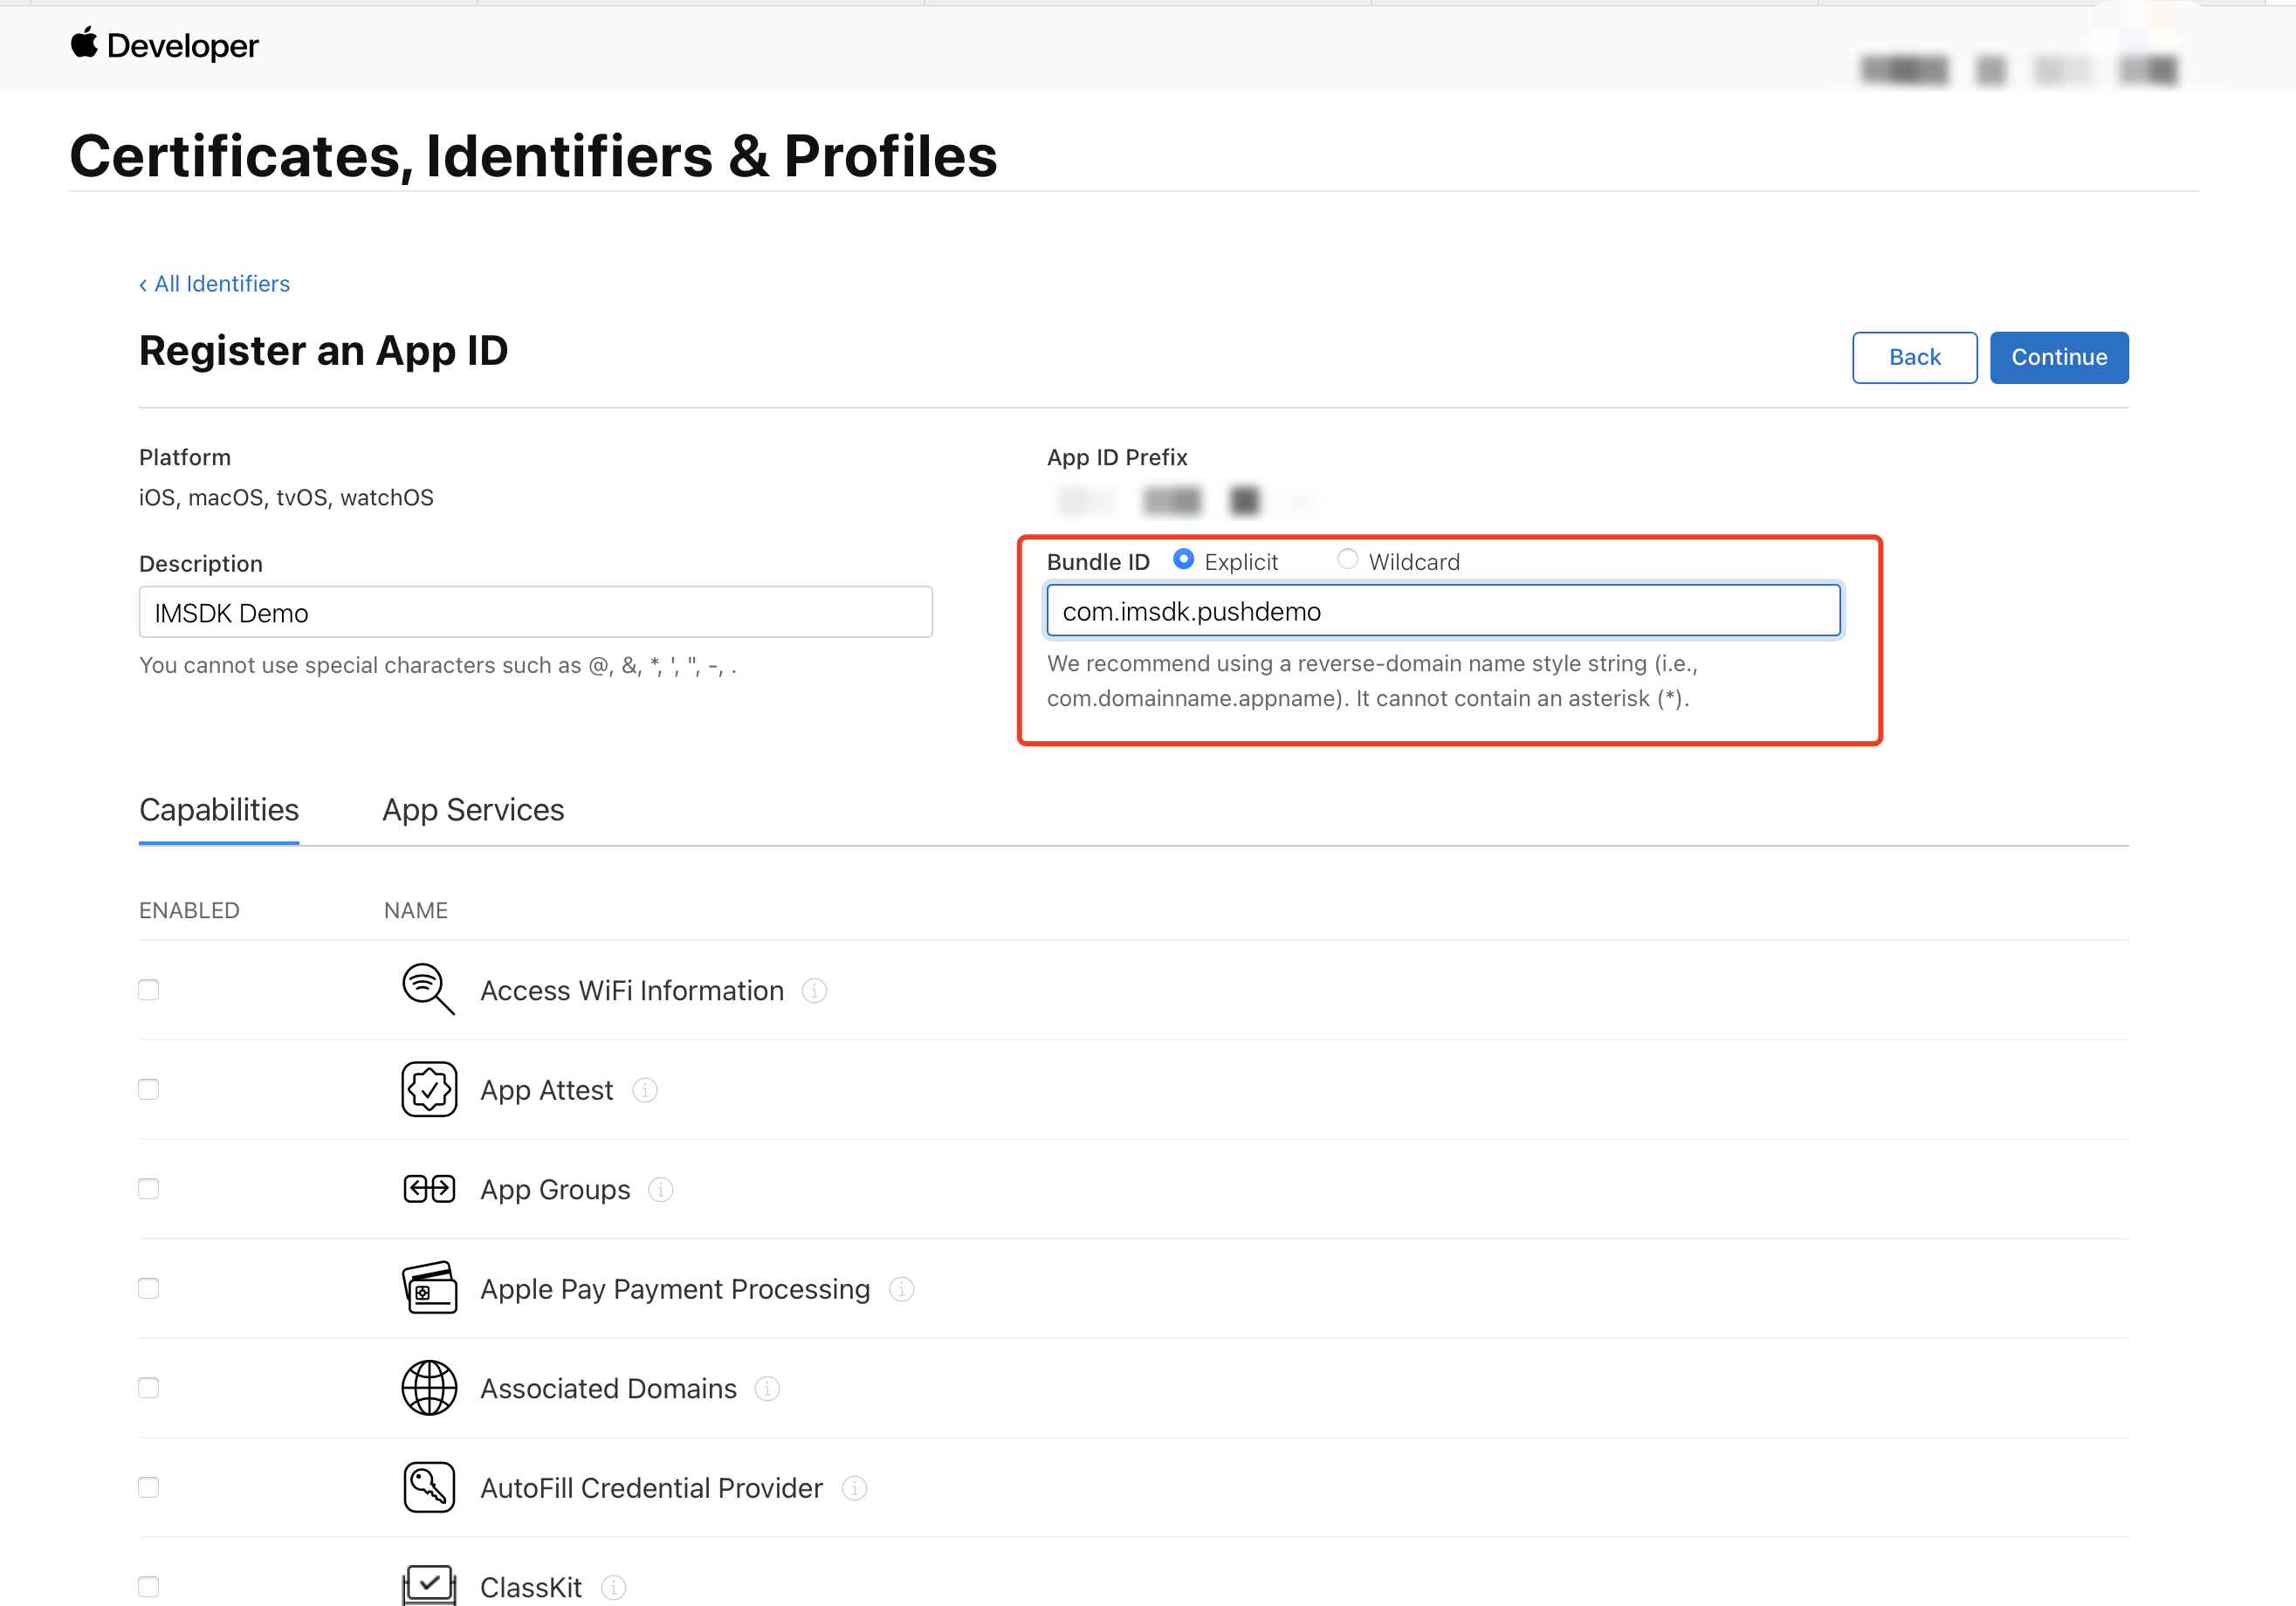
6. Configure the Bundle ID and other information, click Continue to proceed to the next step.
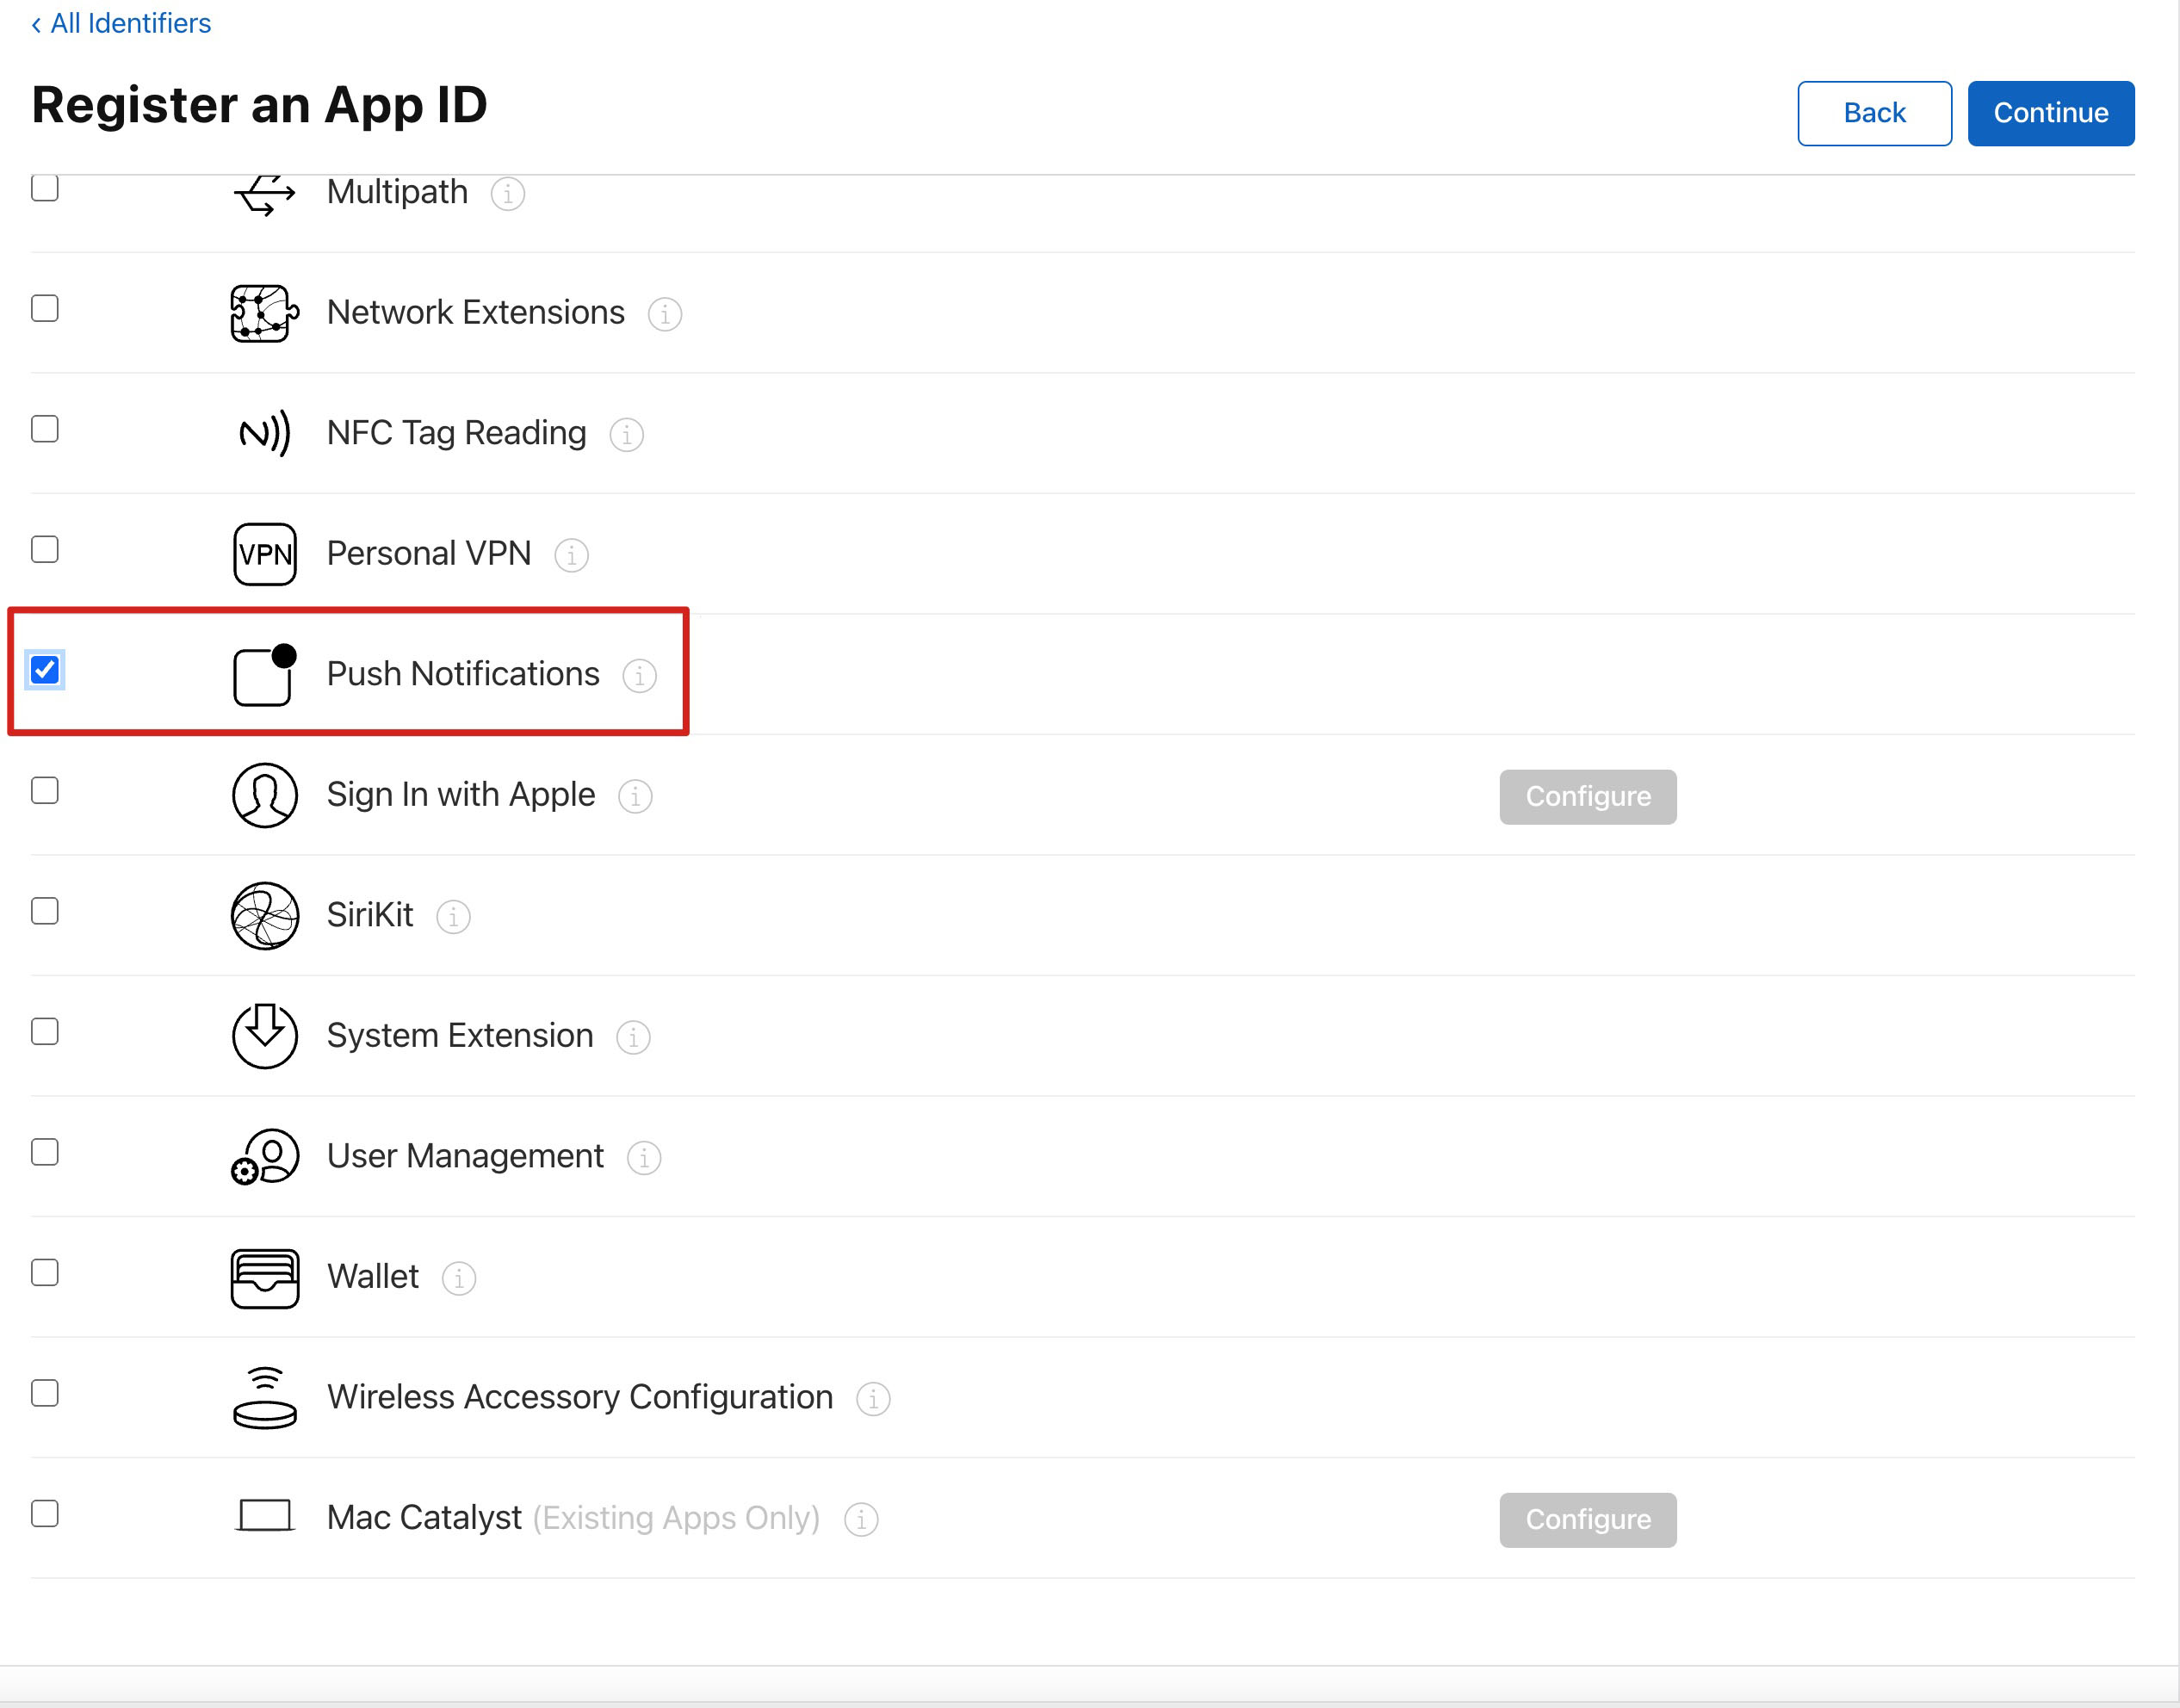
7. Check the Push Notifications box to enable the remote push service.
Certificate Generation
1. Select your AppID and choose Configure.
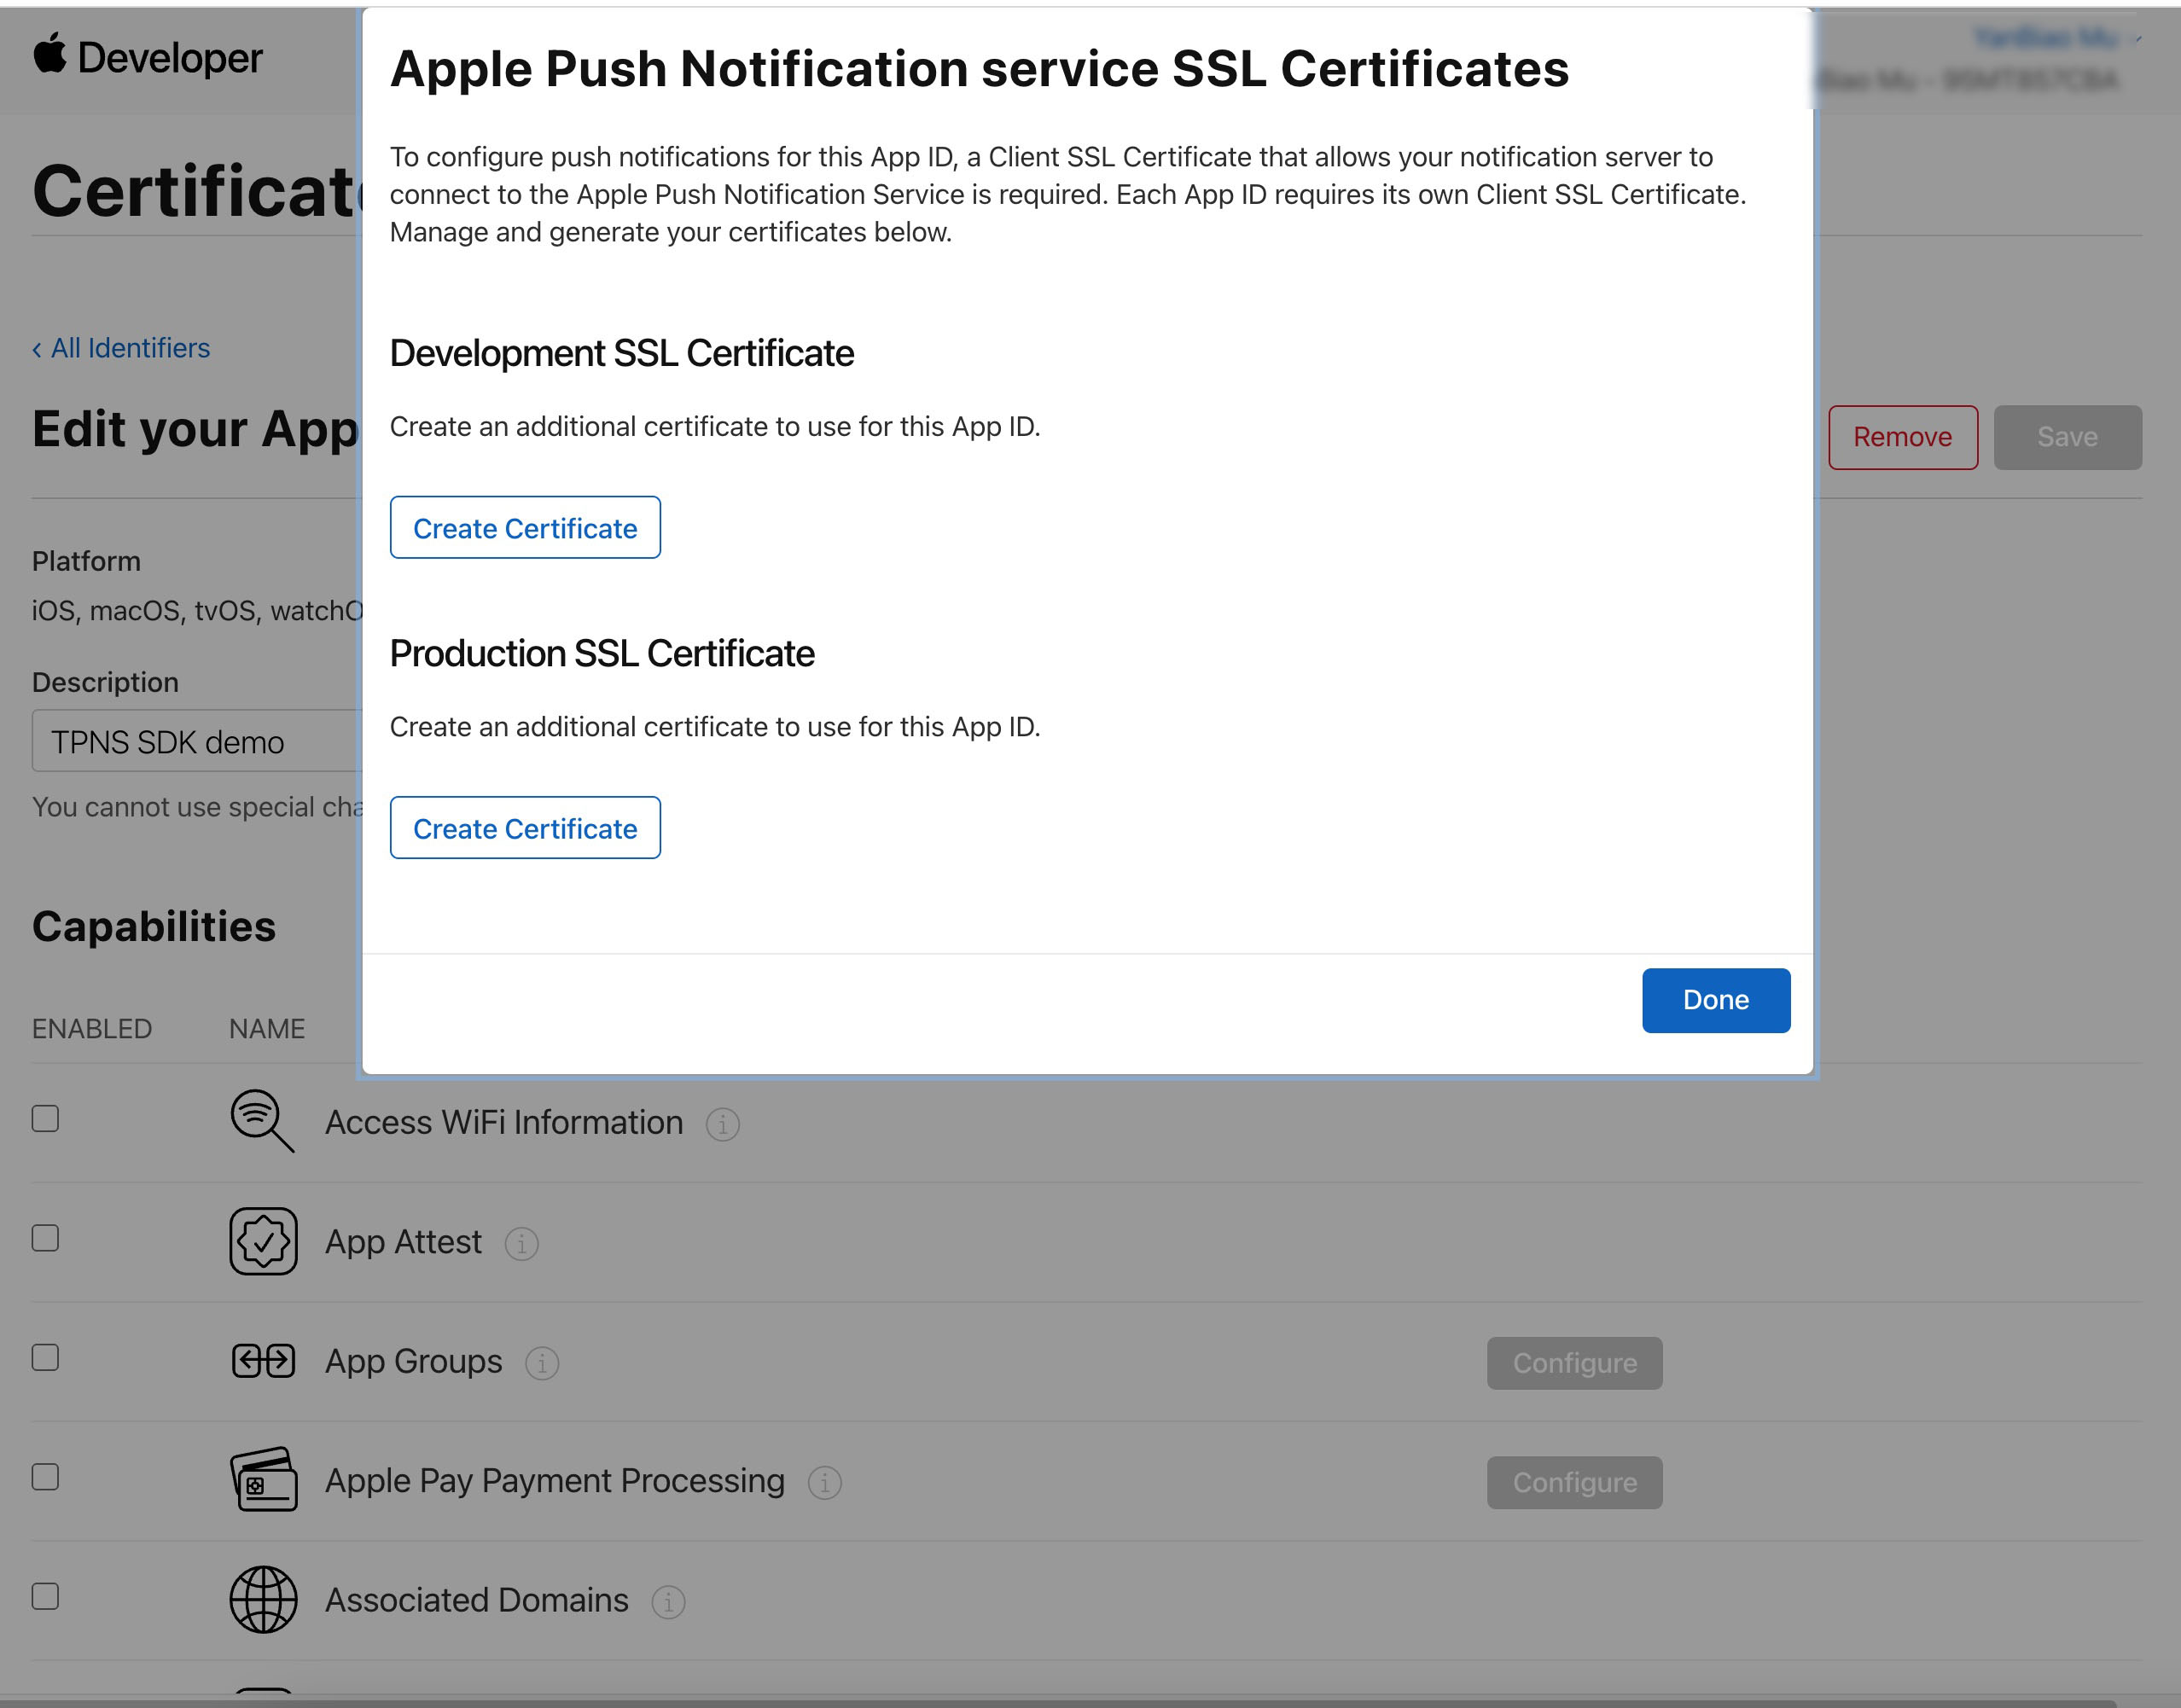
2. In the Apple Push Notification service SSL Certificates window, there are two SSL Certificates for the development environment (Development) and the production environment (Production), as shown below:
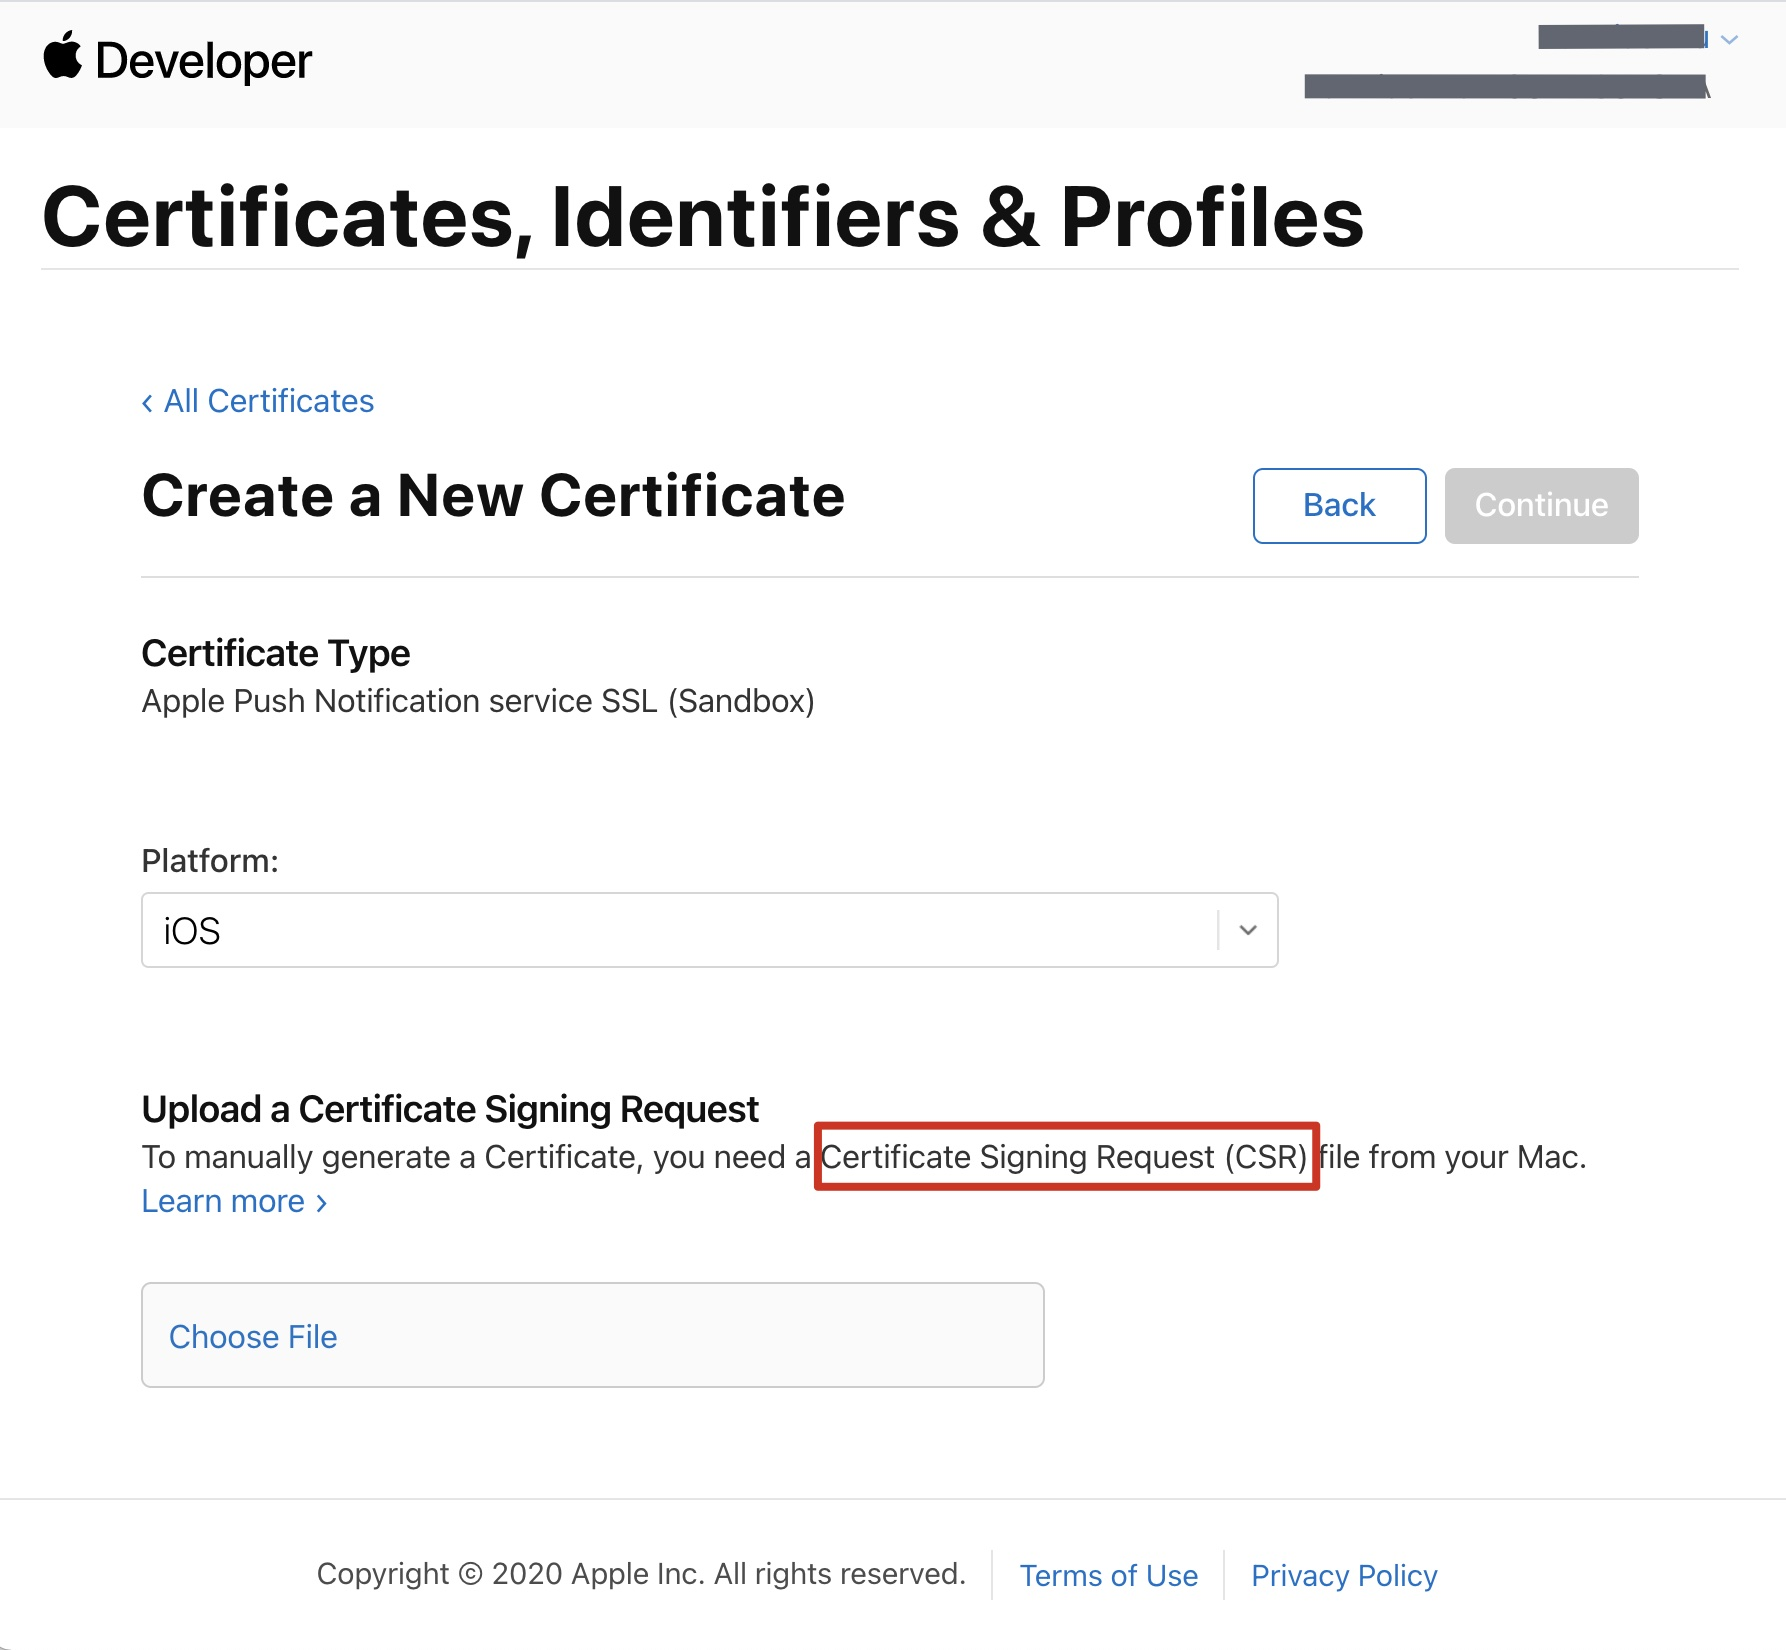
3.
We
first select the Create Certificate for the Development environment, the system will prompt us that we need a Certificate Signing Request (CSR).
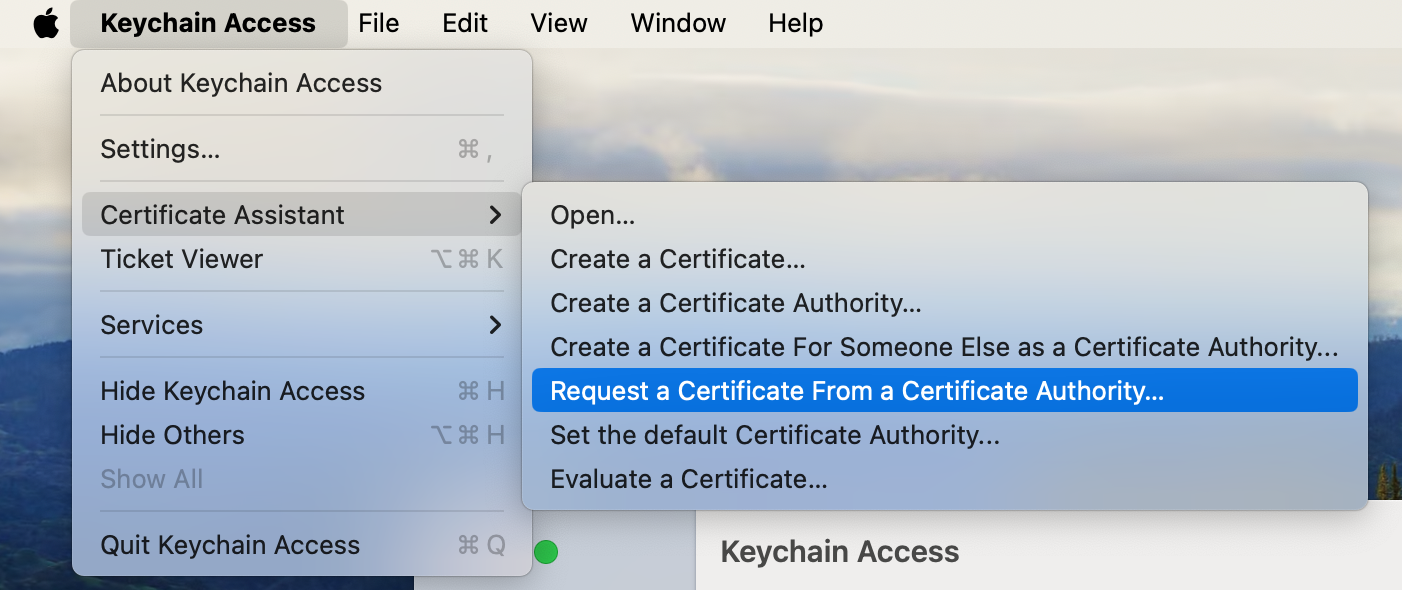
4. On a Mac, open Keychain Access tool, in the menu select Keychain Access > Certificate Assistant > Request a Certificate From a Certificate Authority (Keychain Access - Certificate Assistant - Request a Certificate From a Certificate Authority).
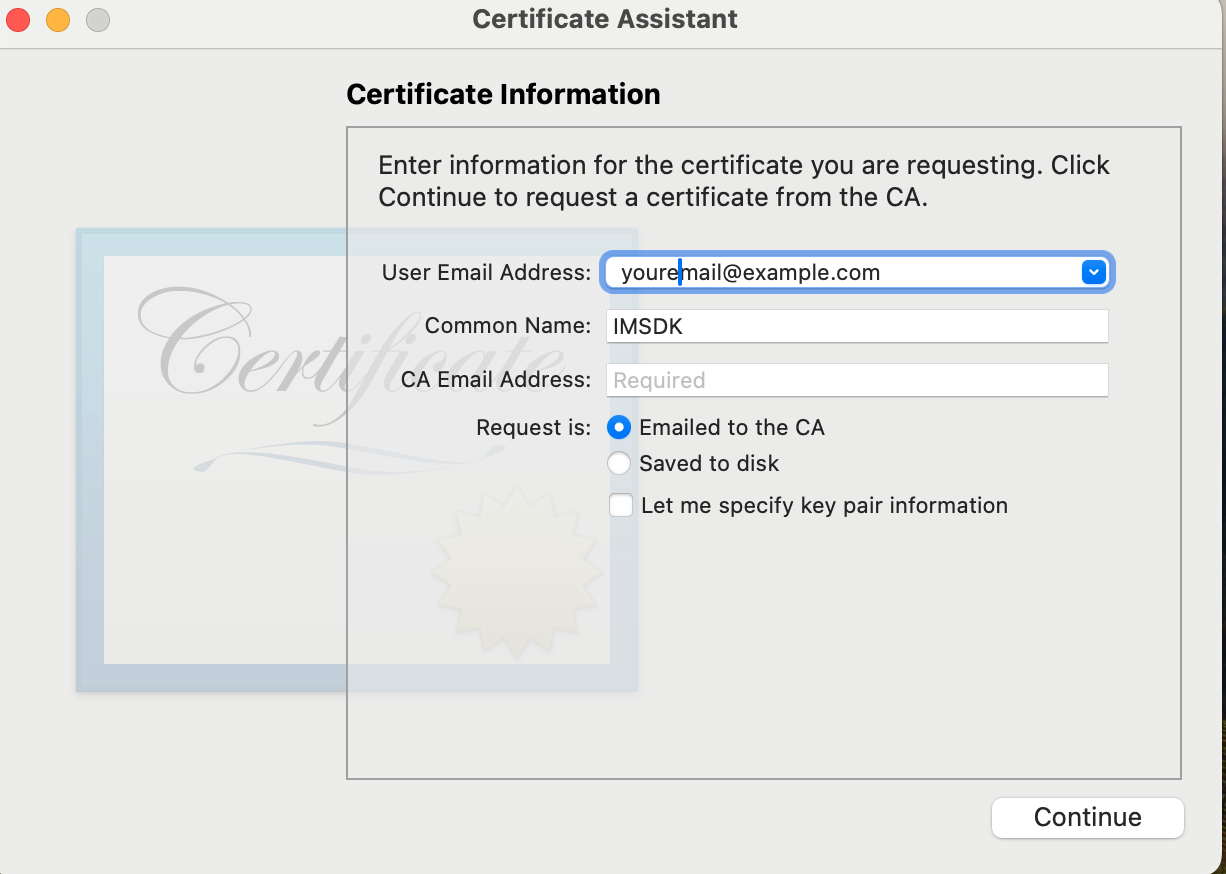
5. Enter your email address, Common Name (your name or company name), select Save to disk, click continue, the system will generate a *.certSigningRequest file.
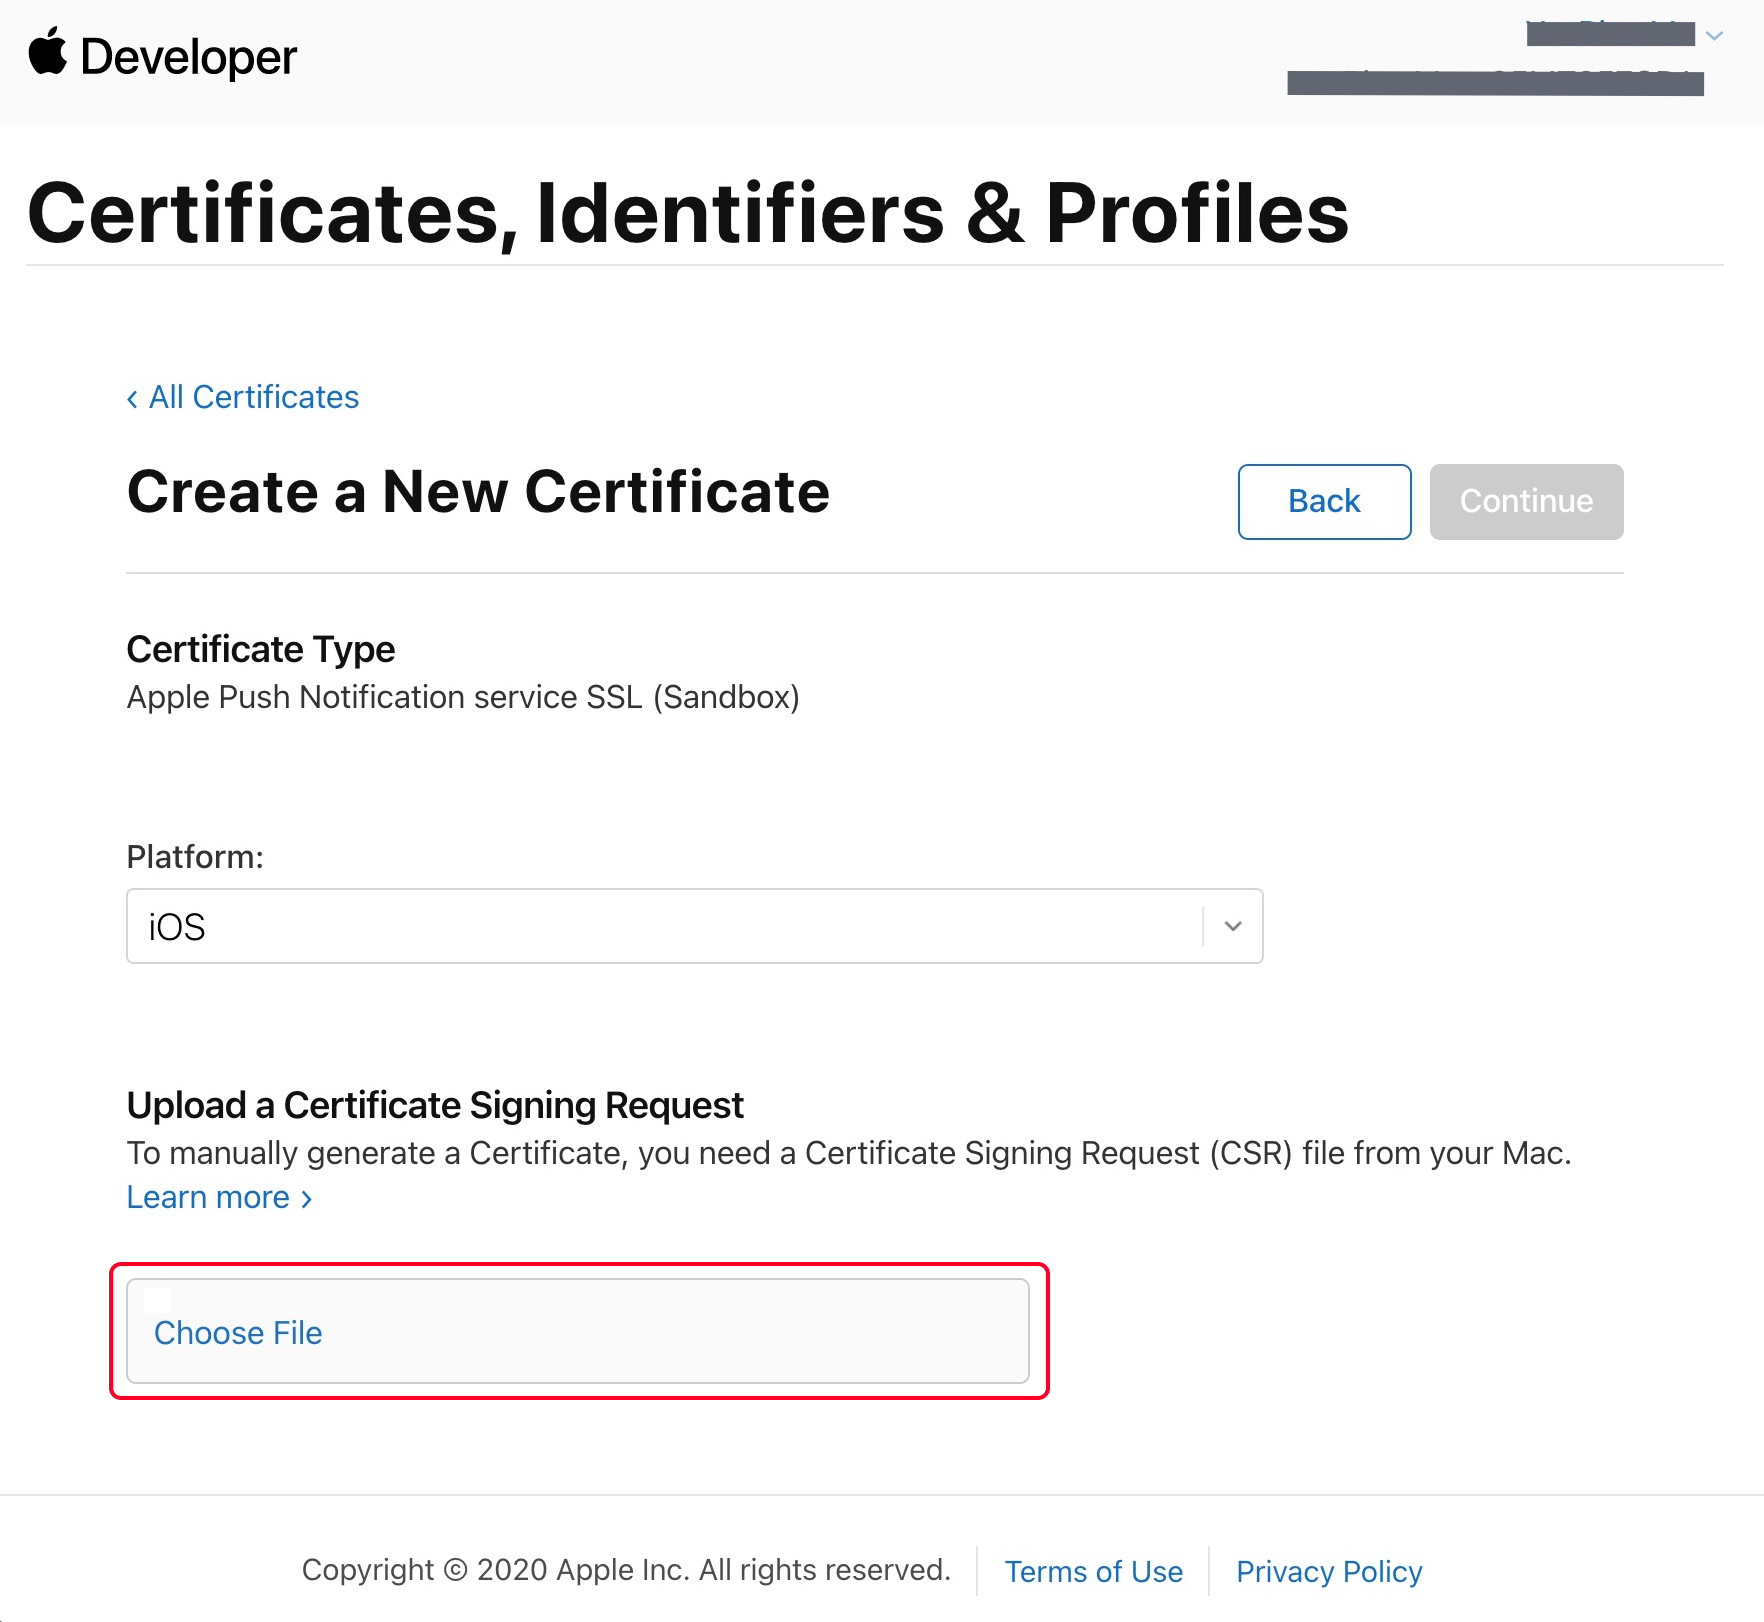
6. Go back to the page on the Apple Developer website mentioned in Step 3, click Choose File to upload the generated *.certSigningRequest file.
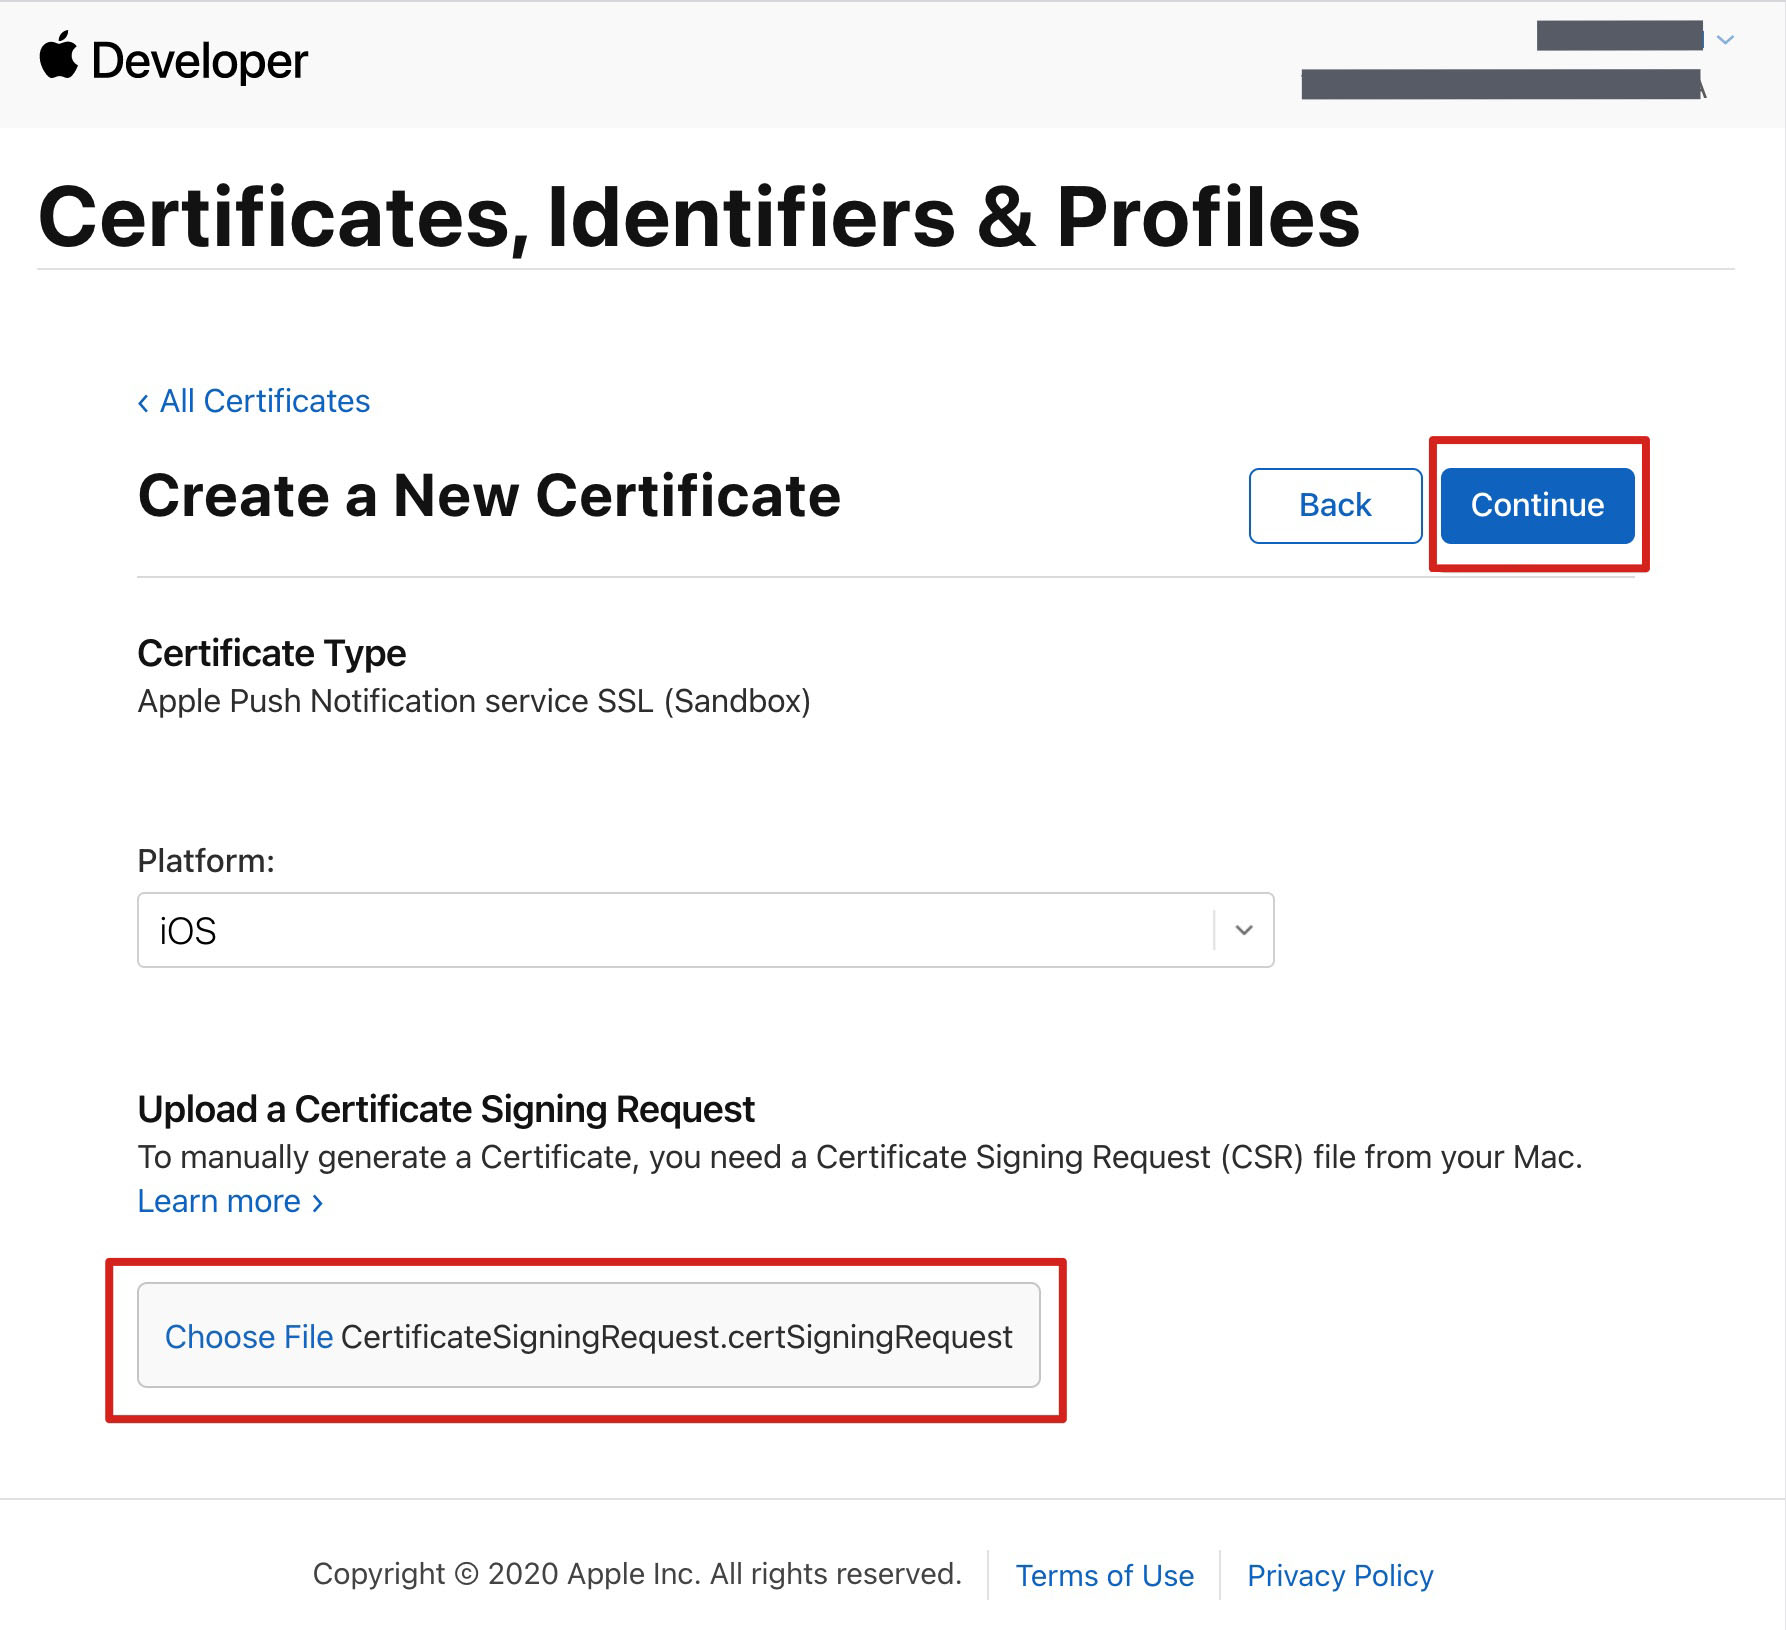
7. Click Continue to generate the push certificate.
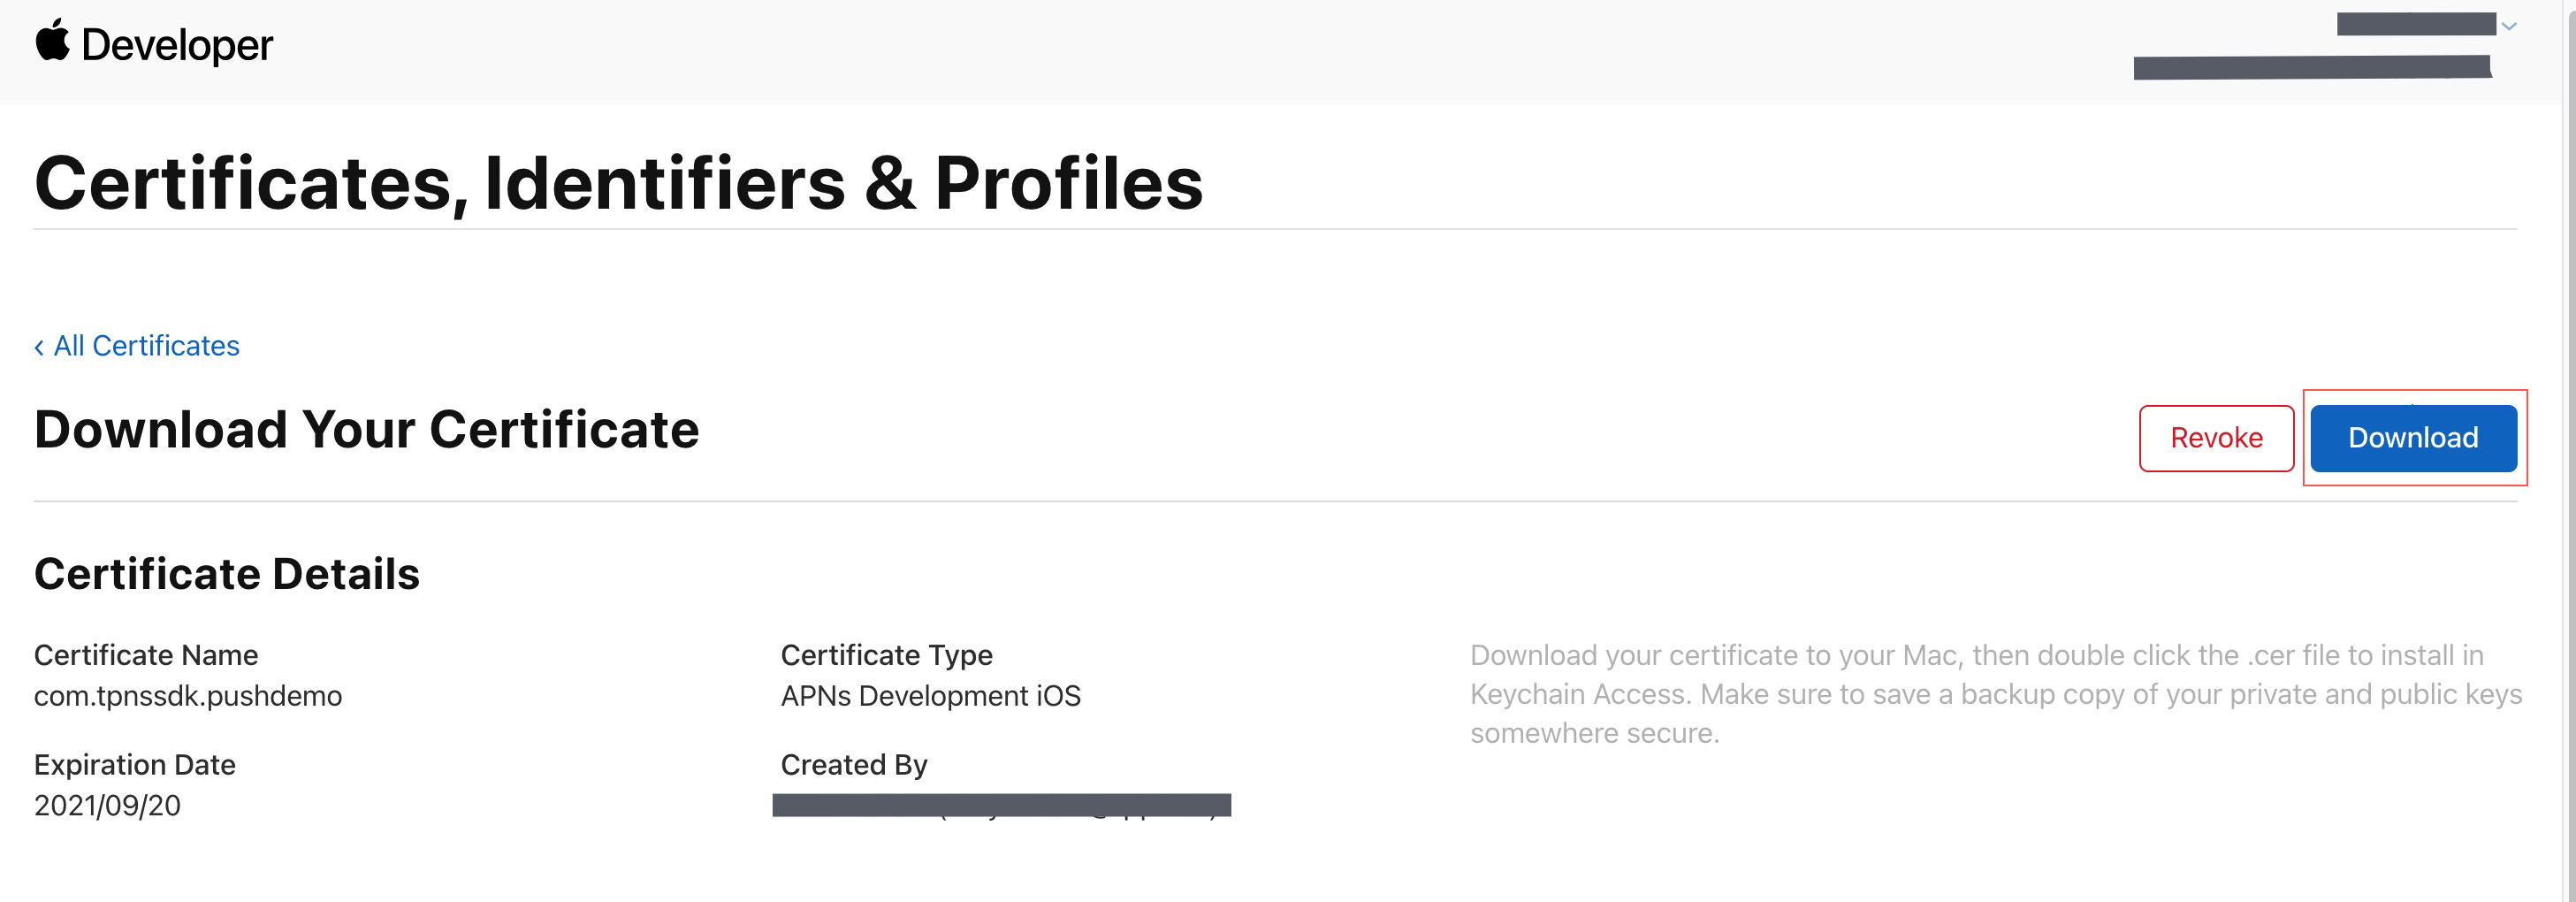
8. Click Download to download the Development SSL Certificate to your local environment.
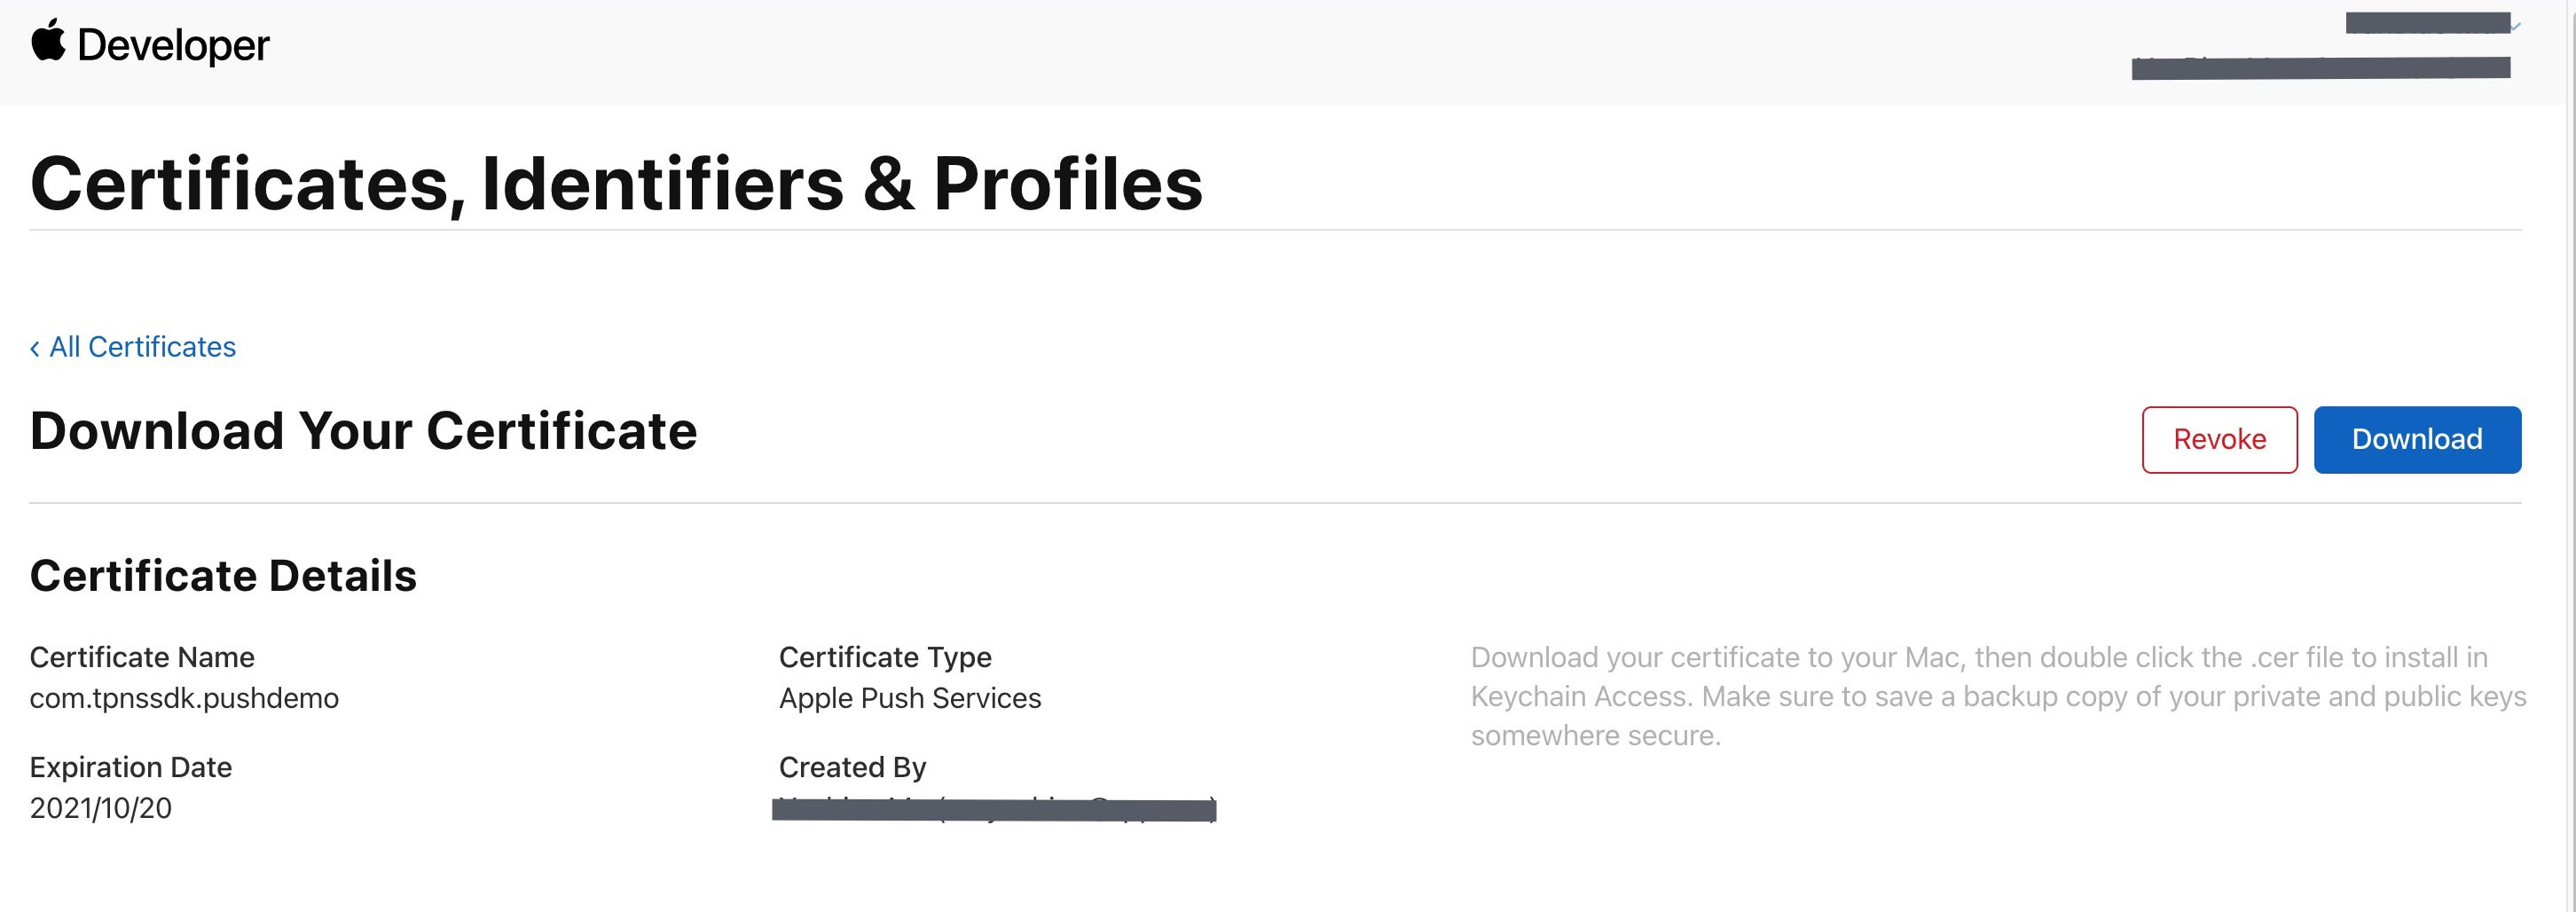
9. Repeat steps 1 - 8 above to download the Production SSL Certificate for the production environment to your local machine.
Note
The certificate for the production environment is actually a combined certificate of Development (Sandbox) + Production, and it can be used as a certificate for both the development and production environments.
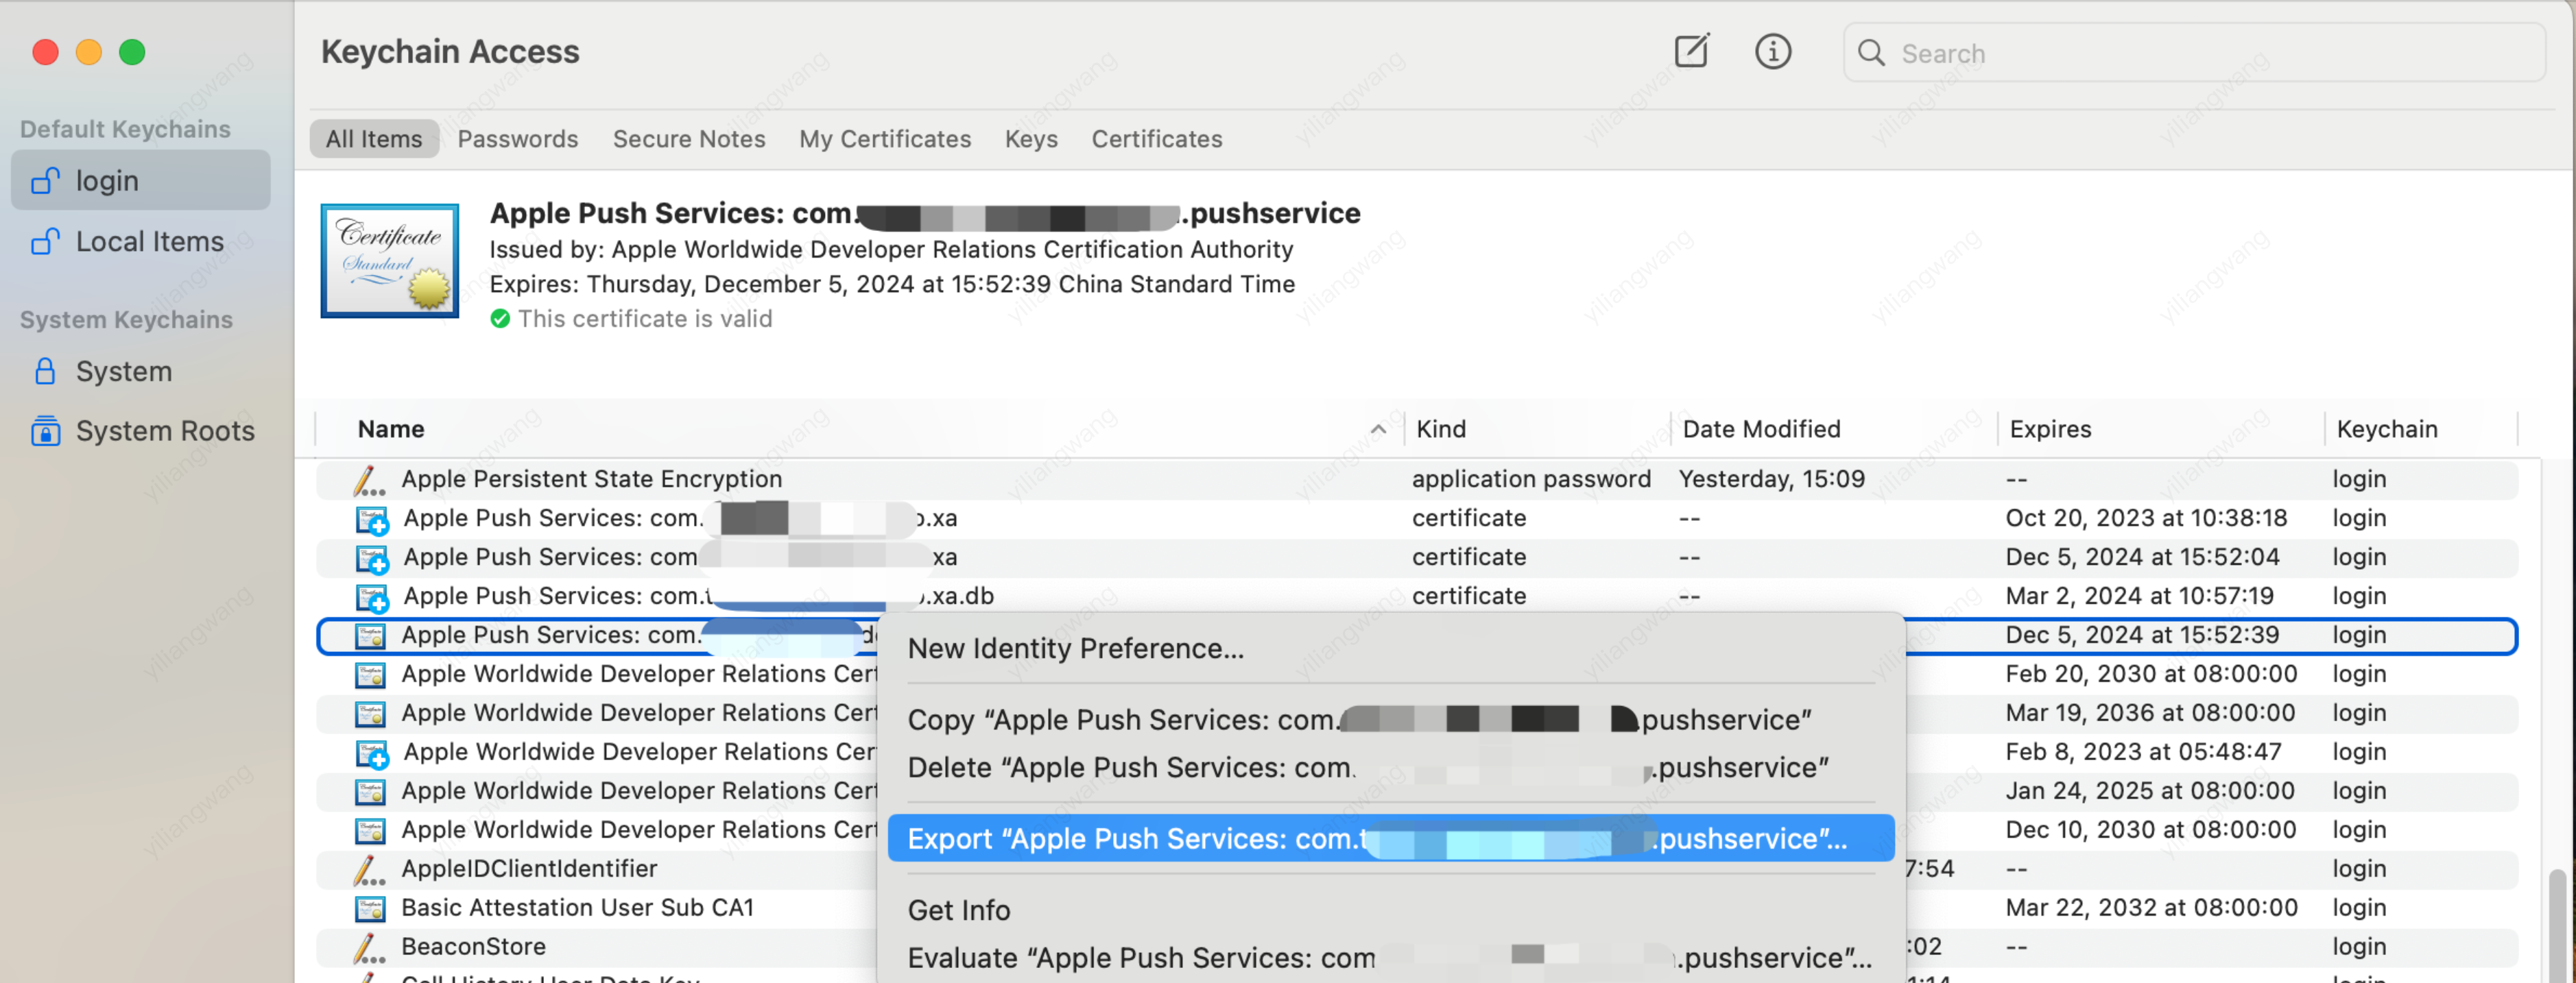
10. Double-click the downloaded SSL Certificate for the development and production environments. The system will import it into the keychain.
11. Open the Keychain App, go to log in to > My Certificates, right-click to export the newly created Apple Development IOS Push Services and Apple Push Services for the development and production environments as p12 files respectively.
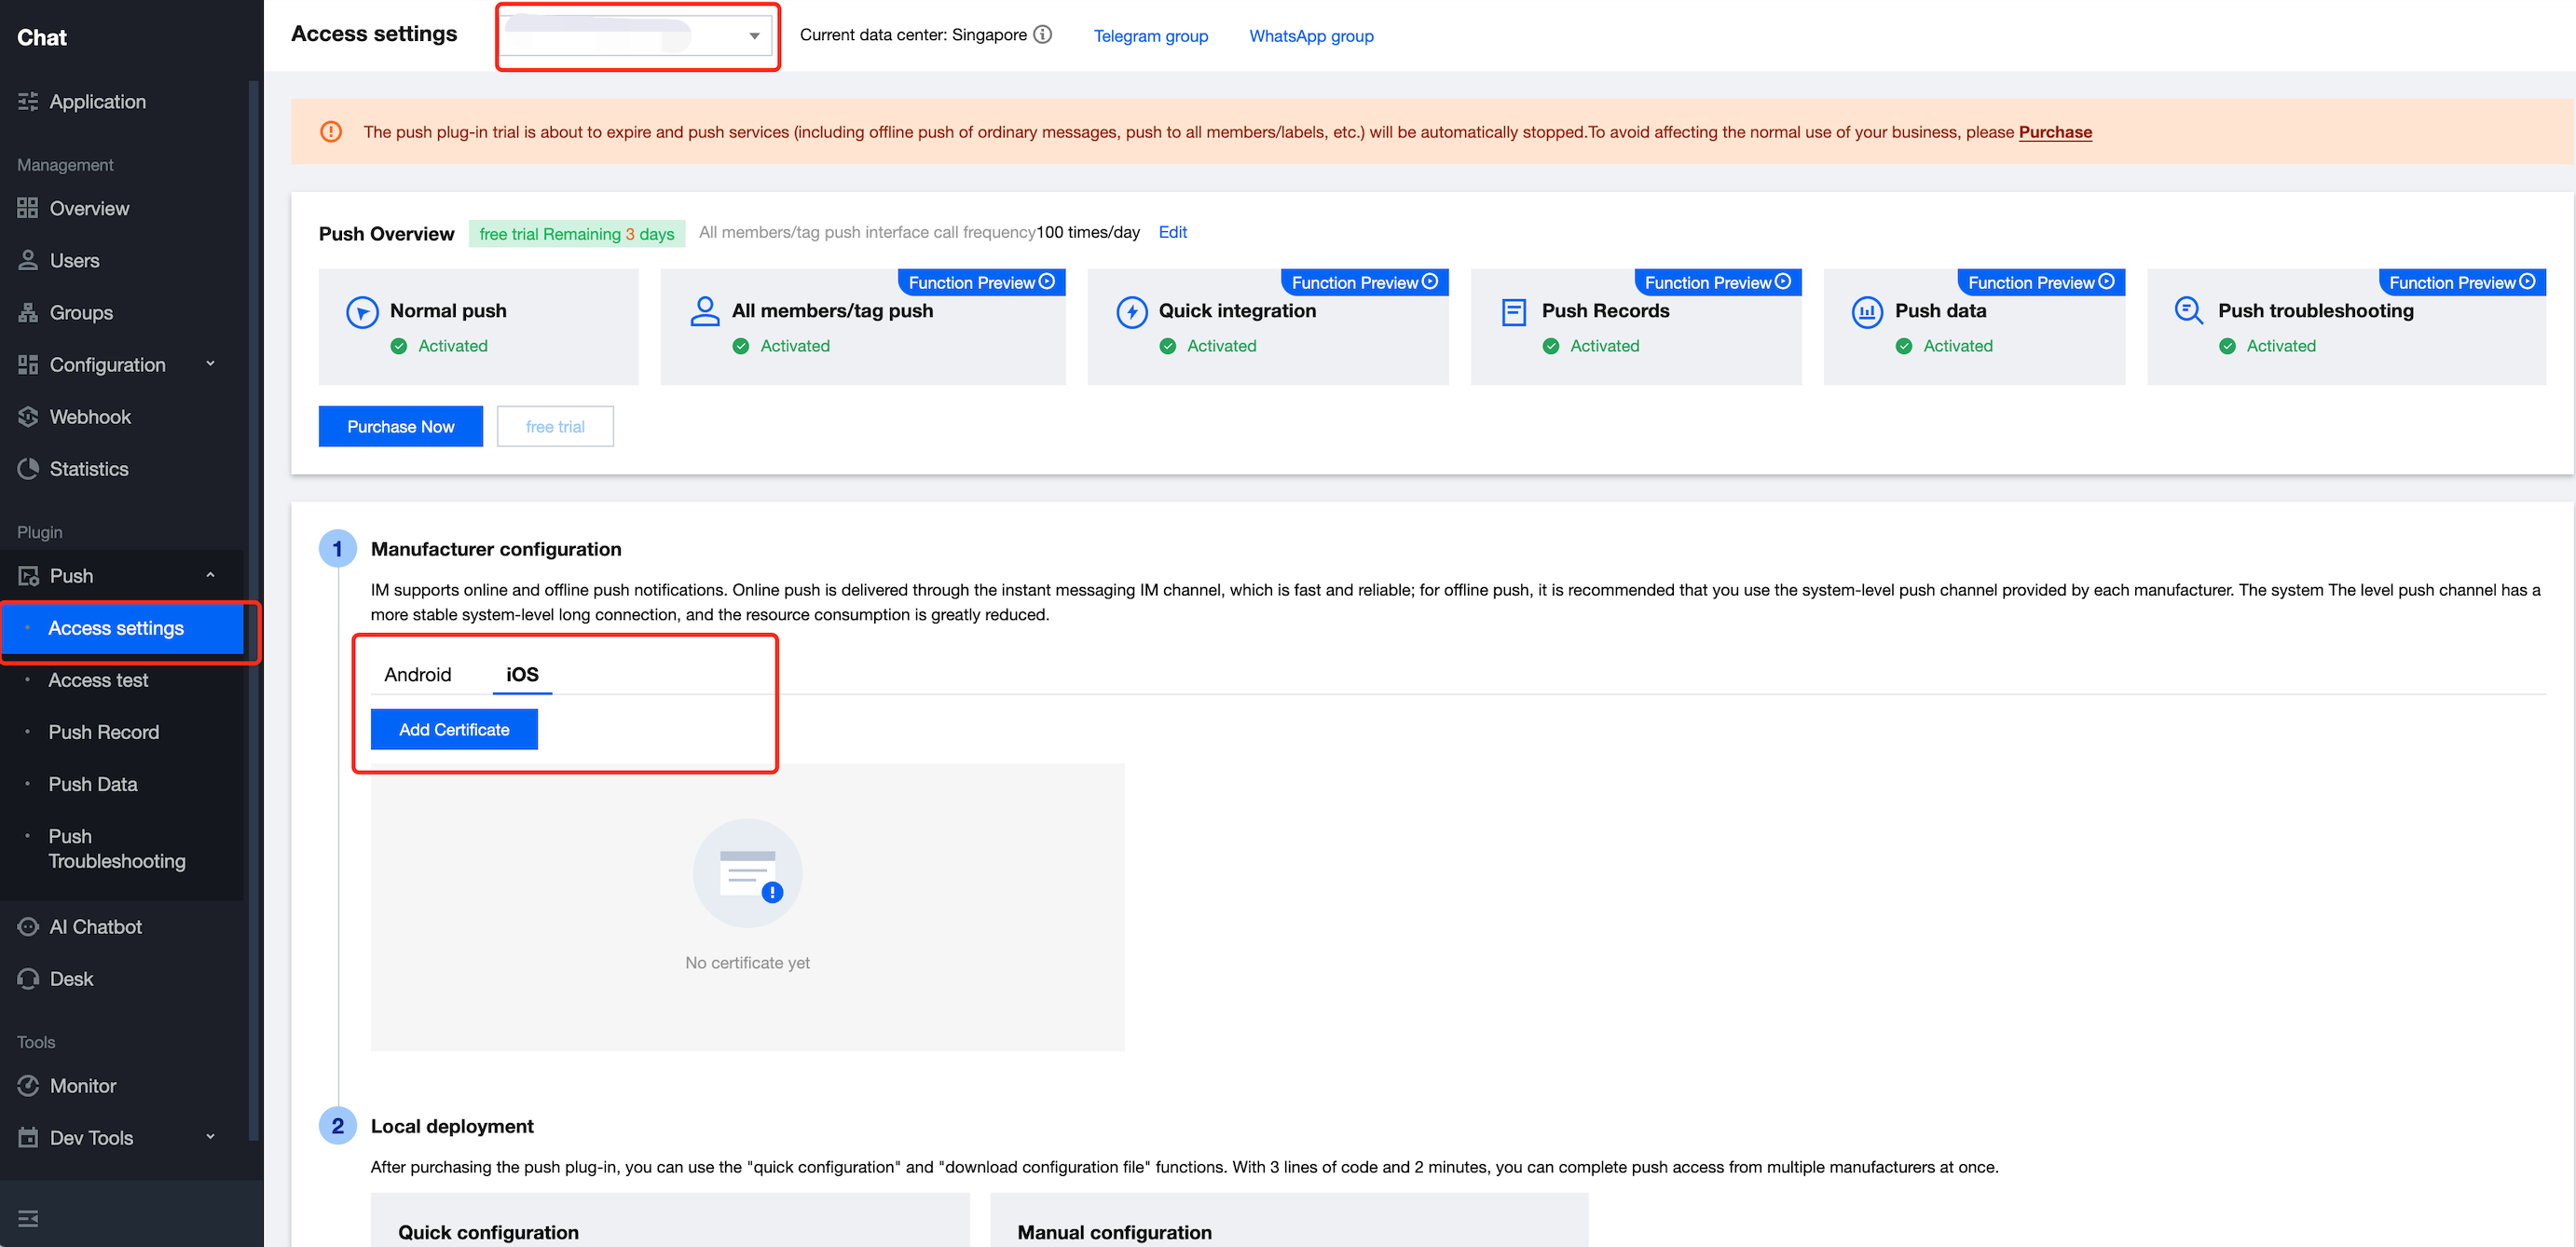
2. Click Plugin Service-Push-Access Settings to enter the access settings page
3. Click Add Certificate at the bottom of iOS in Vendor Configuration.
4. Select the certificate type, upload the iOS Certificate (.p12), set the certificate password, and click Confirm.
Note:
We recommend naming the uploaded certificate in English (special characters such as brackets are not allowed).
You need to set a password for the uploaded certificate. Without a password, push notifications cannot be received.
For an app published on App Store, the environment of the certificate must be the production environment. Otherwise, push notifications cannot be received.
The uploaded .p12 certificate must be your own authentic and valid certificate.
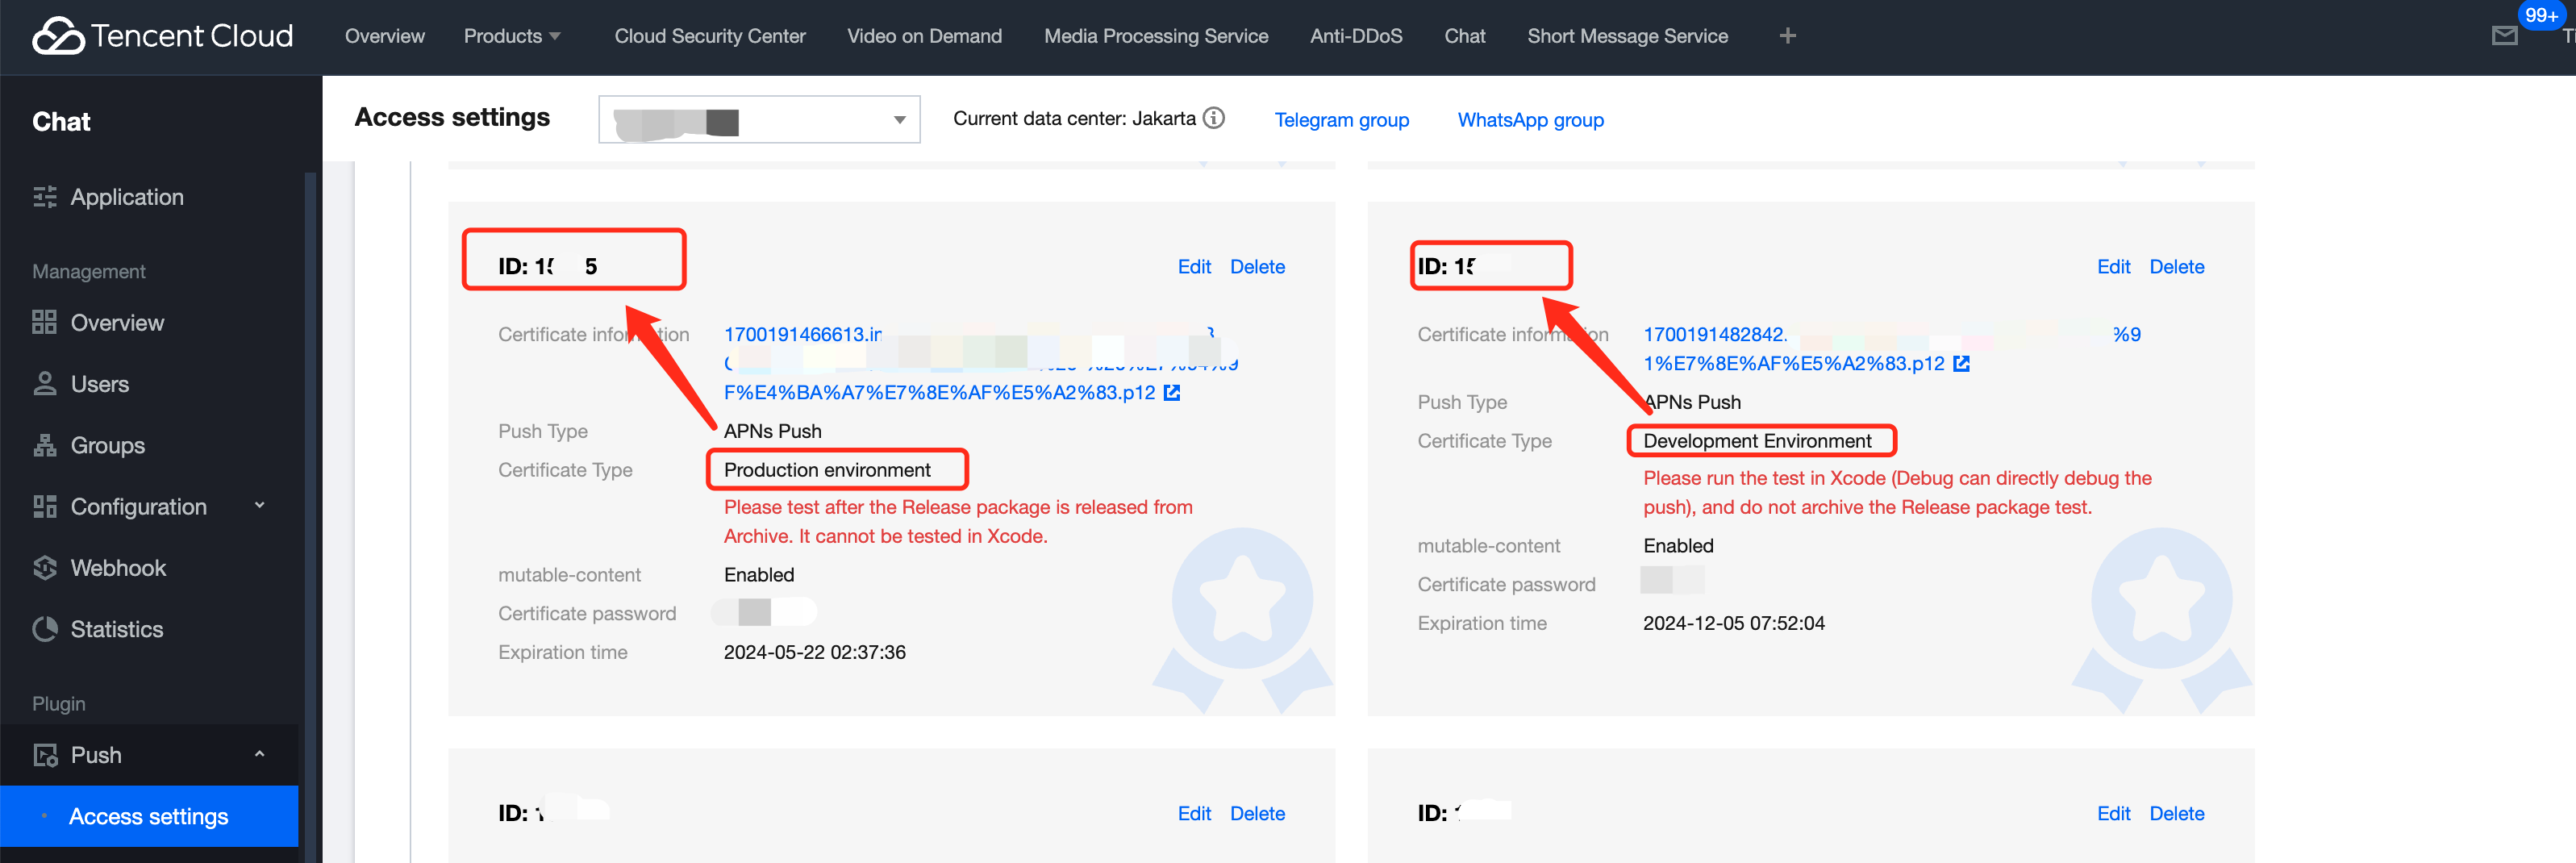
5. After the pending certificate information is generated, record the certificate's ID.
Method 2: Using a p8 certificate (supports Dynamic Island push notifications)
p8 Certificate: A p8 certificate does not have an expiration date, so you don't have to worry about the certificate expiring. Moreover, using a p8 certificate can simplify certificate management, as you can use a single p8 certificate to provide push notification services for multiple applications. In addition, p8 certificates support Dynamic Island push notifications.
1. Enter Certificates, Identifiers & Profiles: In the top right corner of the page, click Account, then select Certificates, Identifiers & Profiles from the dropdown menu.
2. To create a new App ID: in the left-hand menu, click Identifiers, then click the + on the right to create a new App ID. Fill in the relevant information and click Continue.
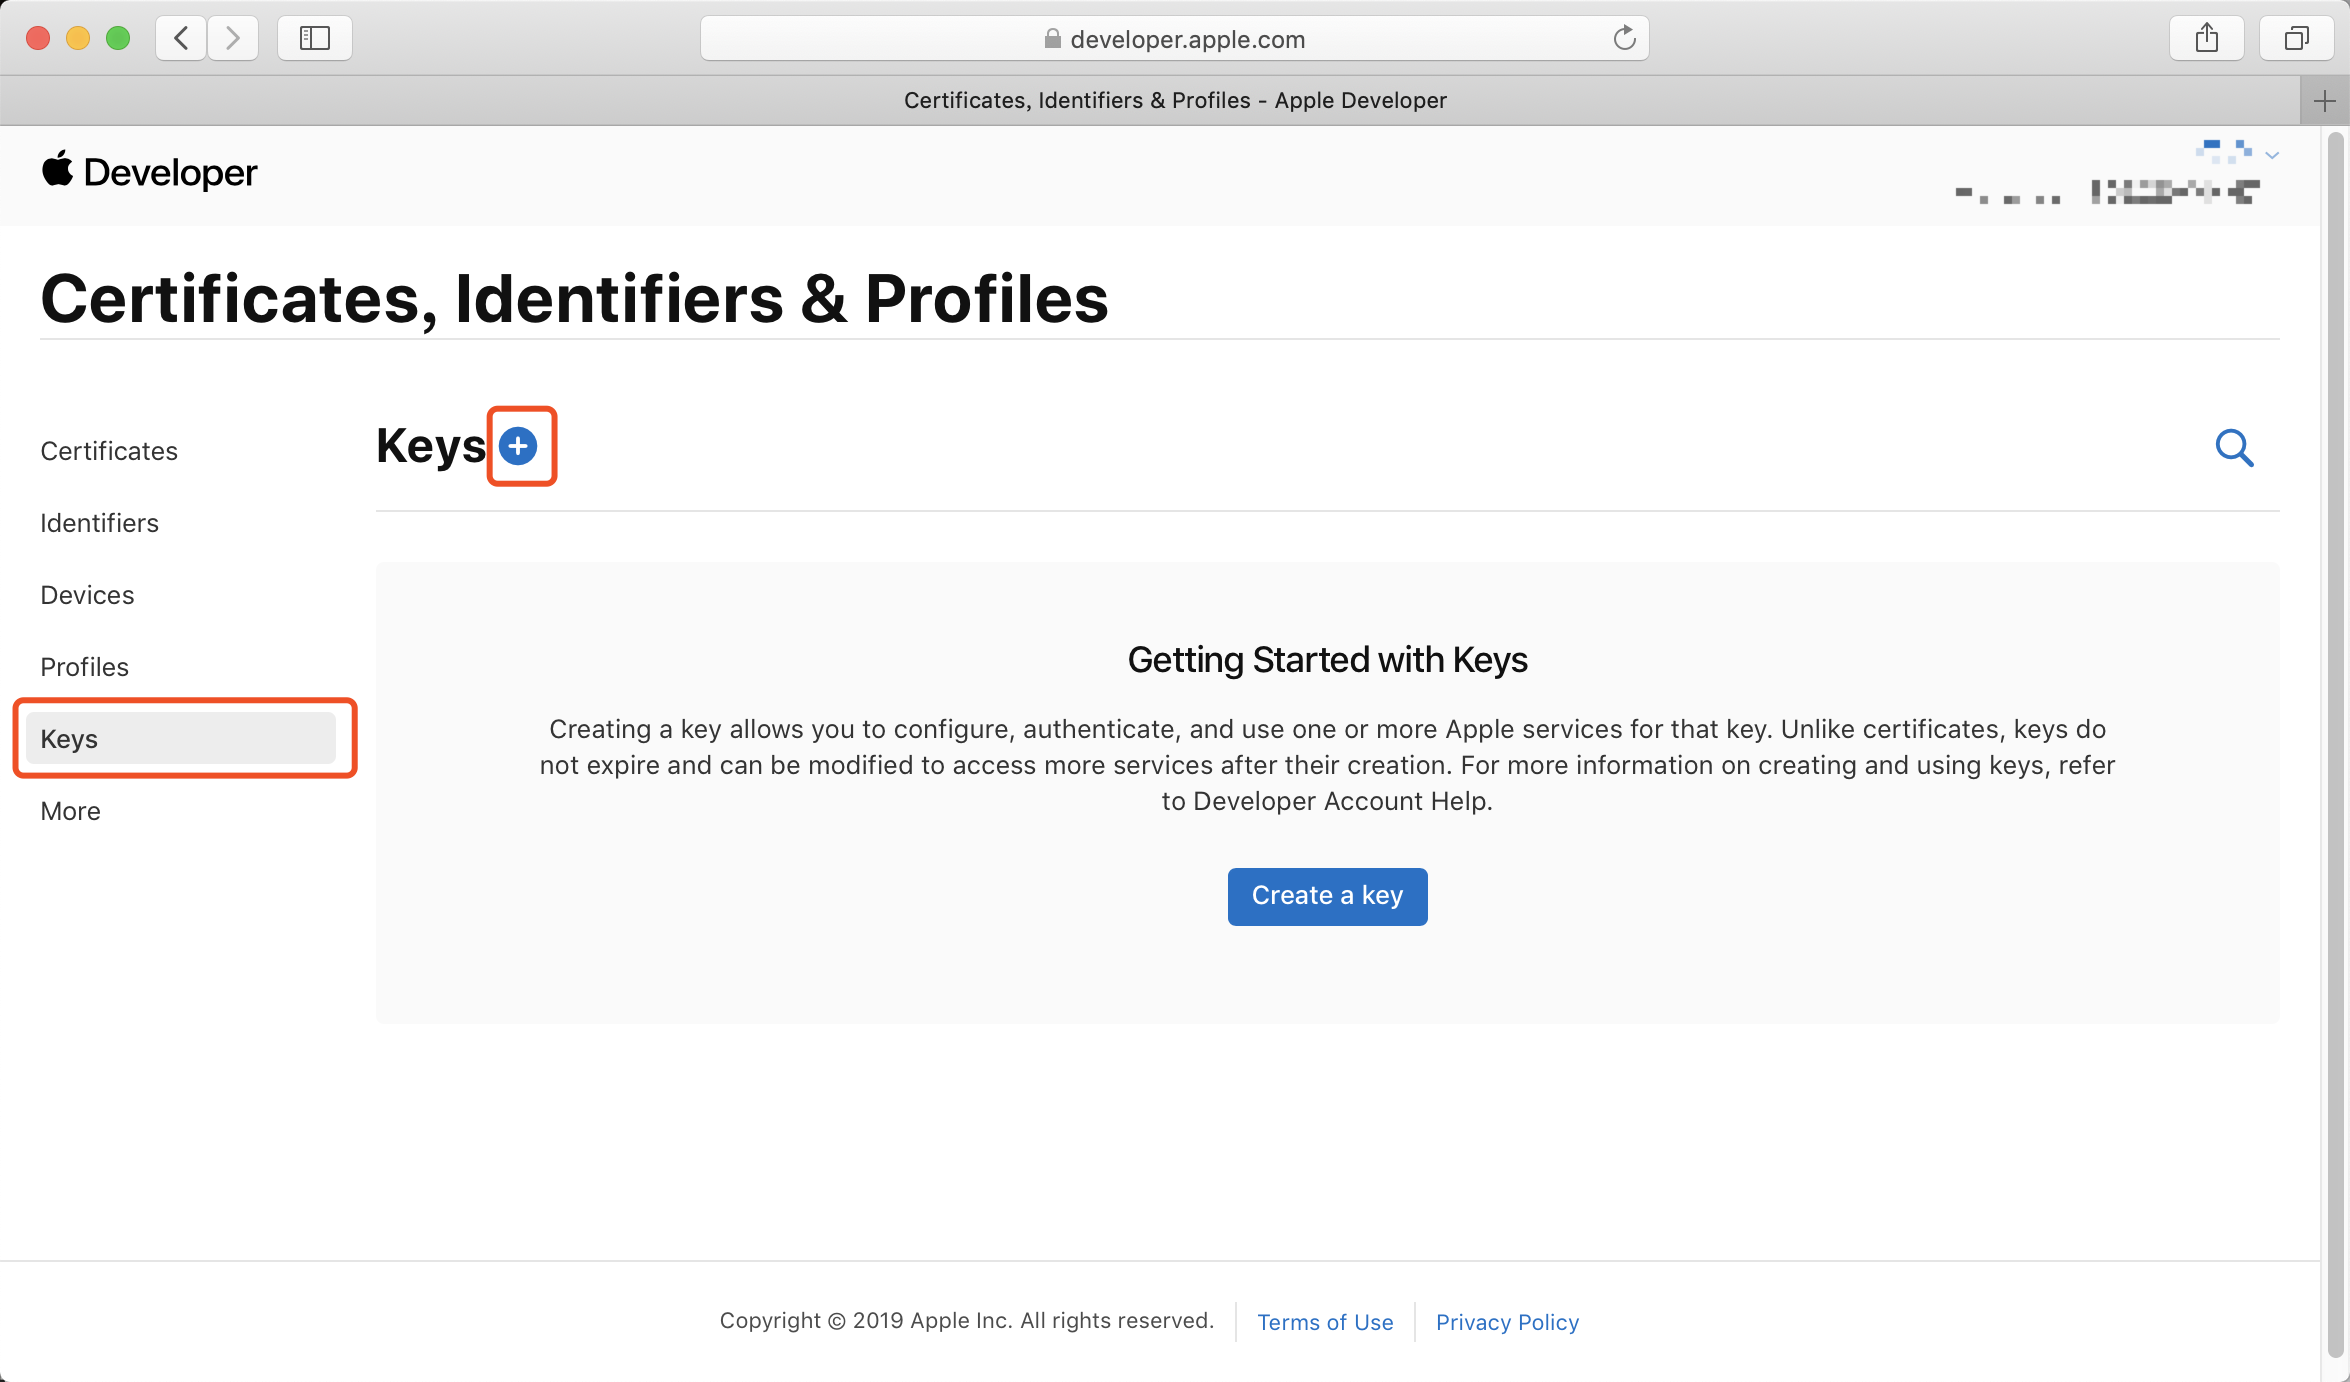
3. To create a new key: in the left-hand menu, click Keys, then click the + on the right to create a new key. Enter the name of the key, then check Apple Push Notifications service (APNs) and click Continue.
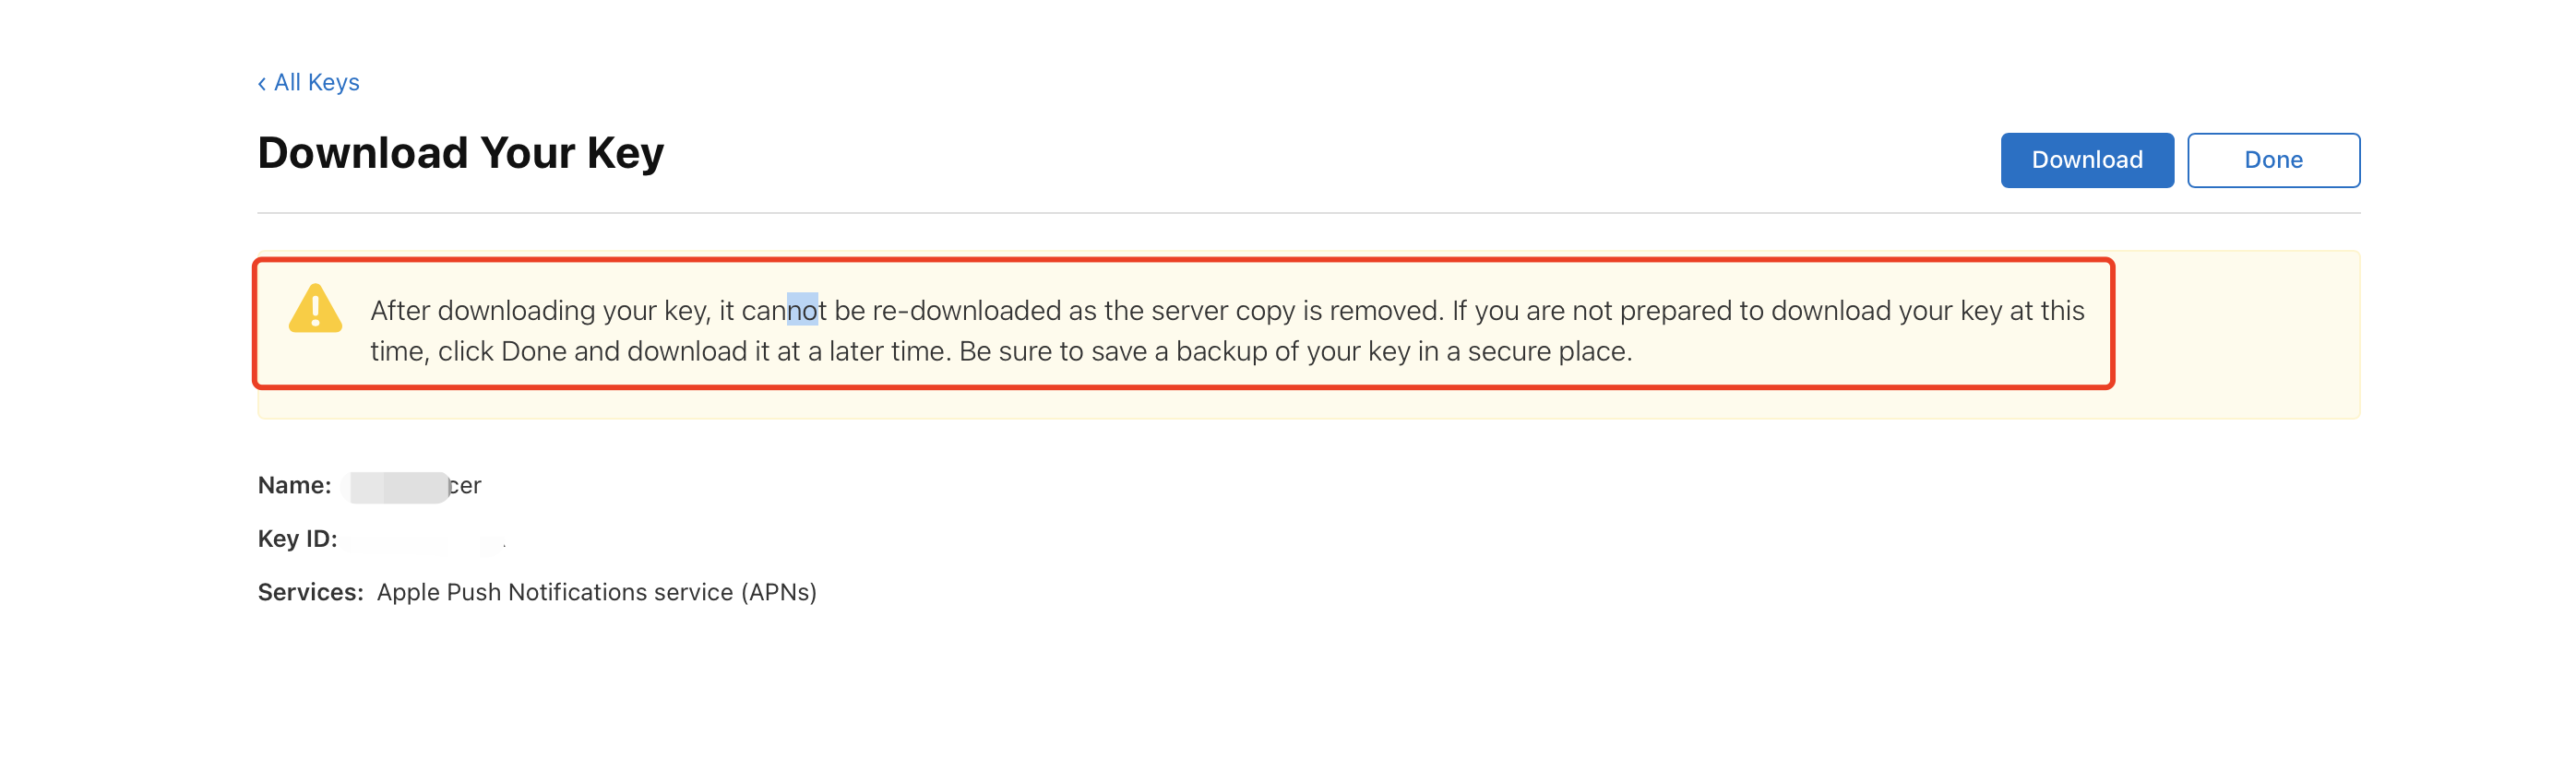
Confirm and generate the key: On the confirmation page, verify your key information, then click Register. Next, you'll see a page prompting you to download the key. Click Download and save the generated .p8 file to your computer.
Note:
The p8 certificate can only be downloaded once; please save it properly.
Please safeguard the downloaded p8 file, as you will not be able to download it again. You can use this p8 certificate to configure your iOS applications to receive push notifications.
Step 2: Upload the p8 certificate to the IM console
2. Click Plugin Service-Push-Access Settings to enter the access settings page
3. Click Add Certificate at the bottom of iOS in Vendor Configuration.
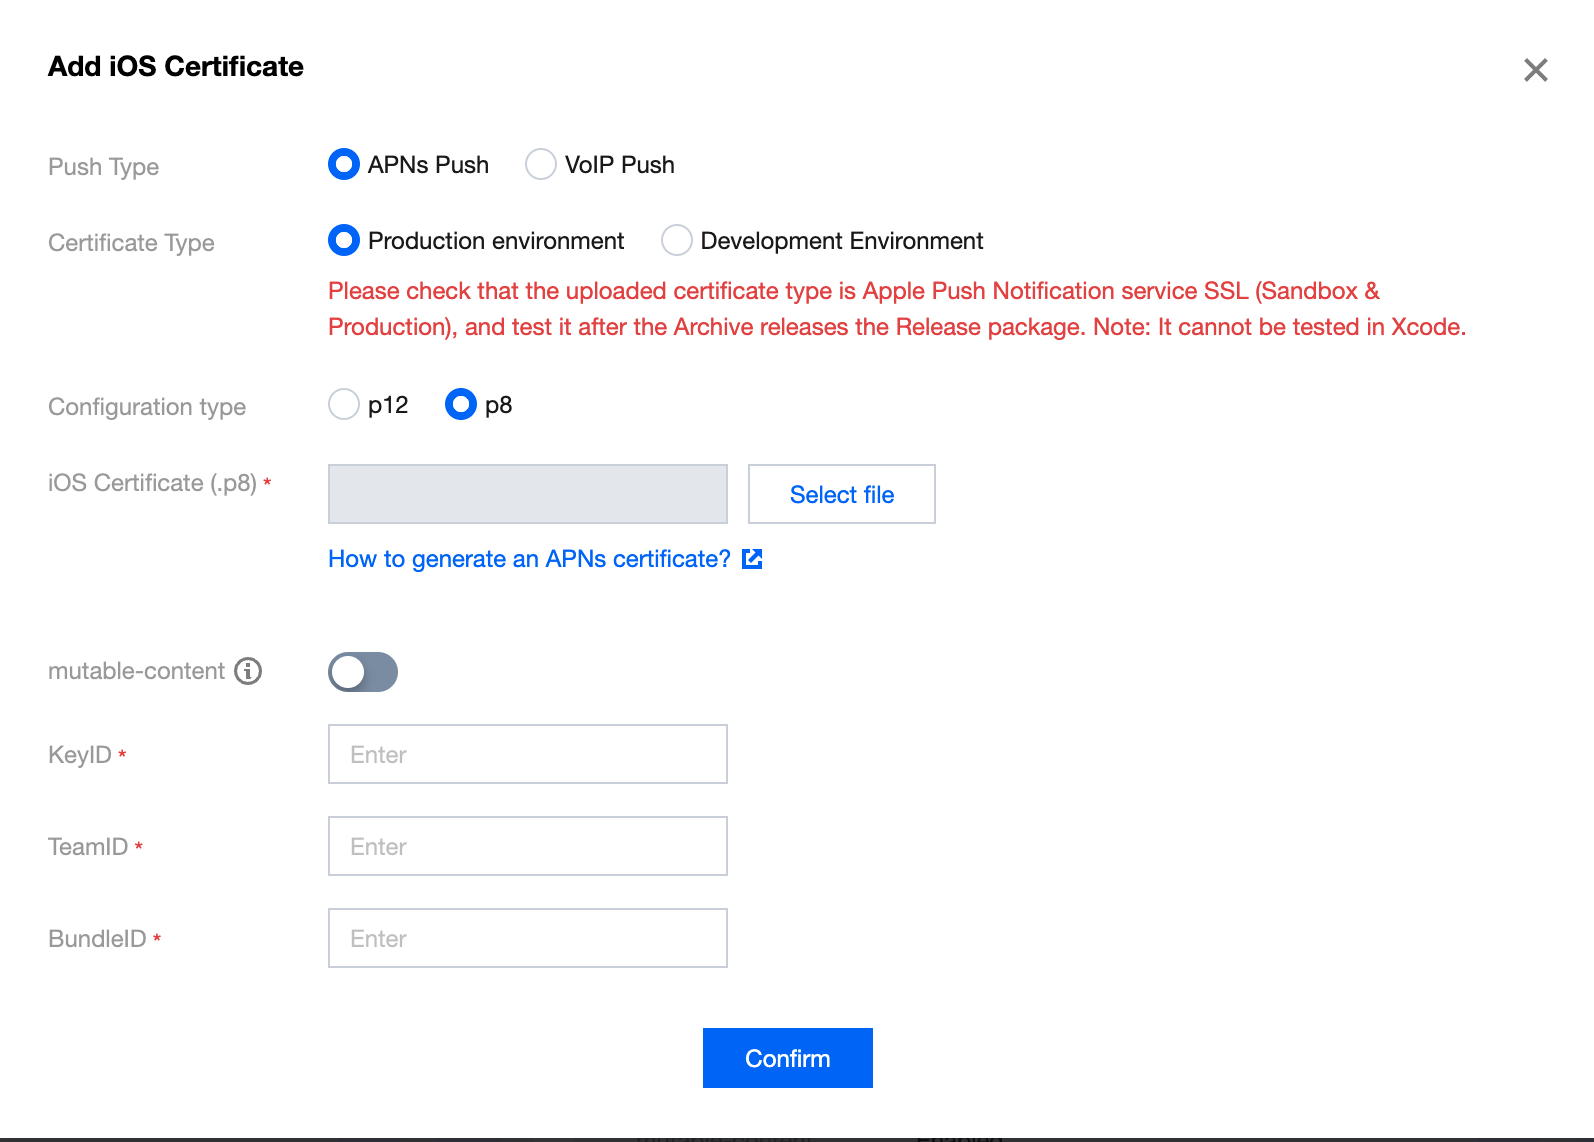
4. Select the .p8 certificate
Note:
Key ID: This is the unique identifier for your APNs Auth Key. When you create a new APNs Auth Key in the Apple Developer Center, a Key ID will be generated for you. You can find it in the "Certificates, Identifiers & Profiles" section under "Keys".
Team ID: This is the unique identifier for your developer account. You can find it on the account details page of the Apple Developer Center. Click "Membership" in the upper right corner, and you can find your Team ID in the "Membership Details" section.
Bundle ID: This is the unique identifier for your application, also known as the app ID. You can find it in the "Certificates, Identifiers & Profiles" section of the Apple Developer Center. Select "Identifiers", then find the corresponding Bundle ID in your list of applications.
2. Xcode adds push permissions
To add push permissions to your app, enable push notifications in your Xcode project.
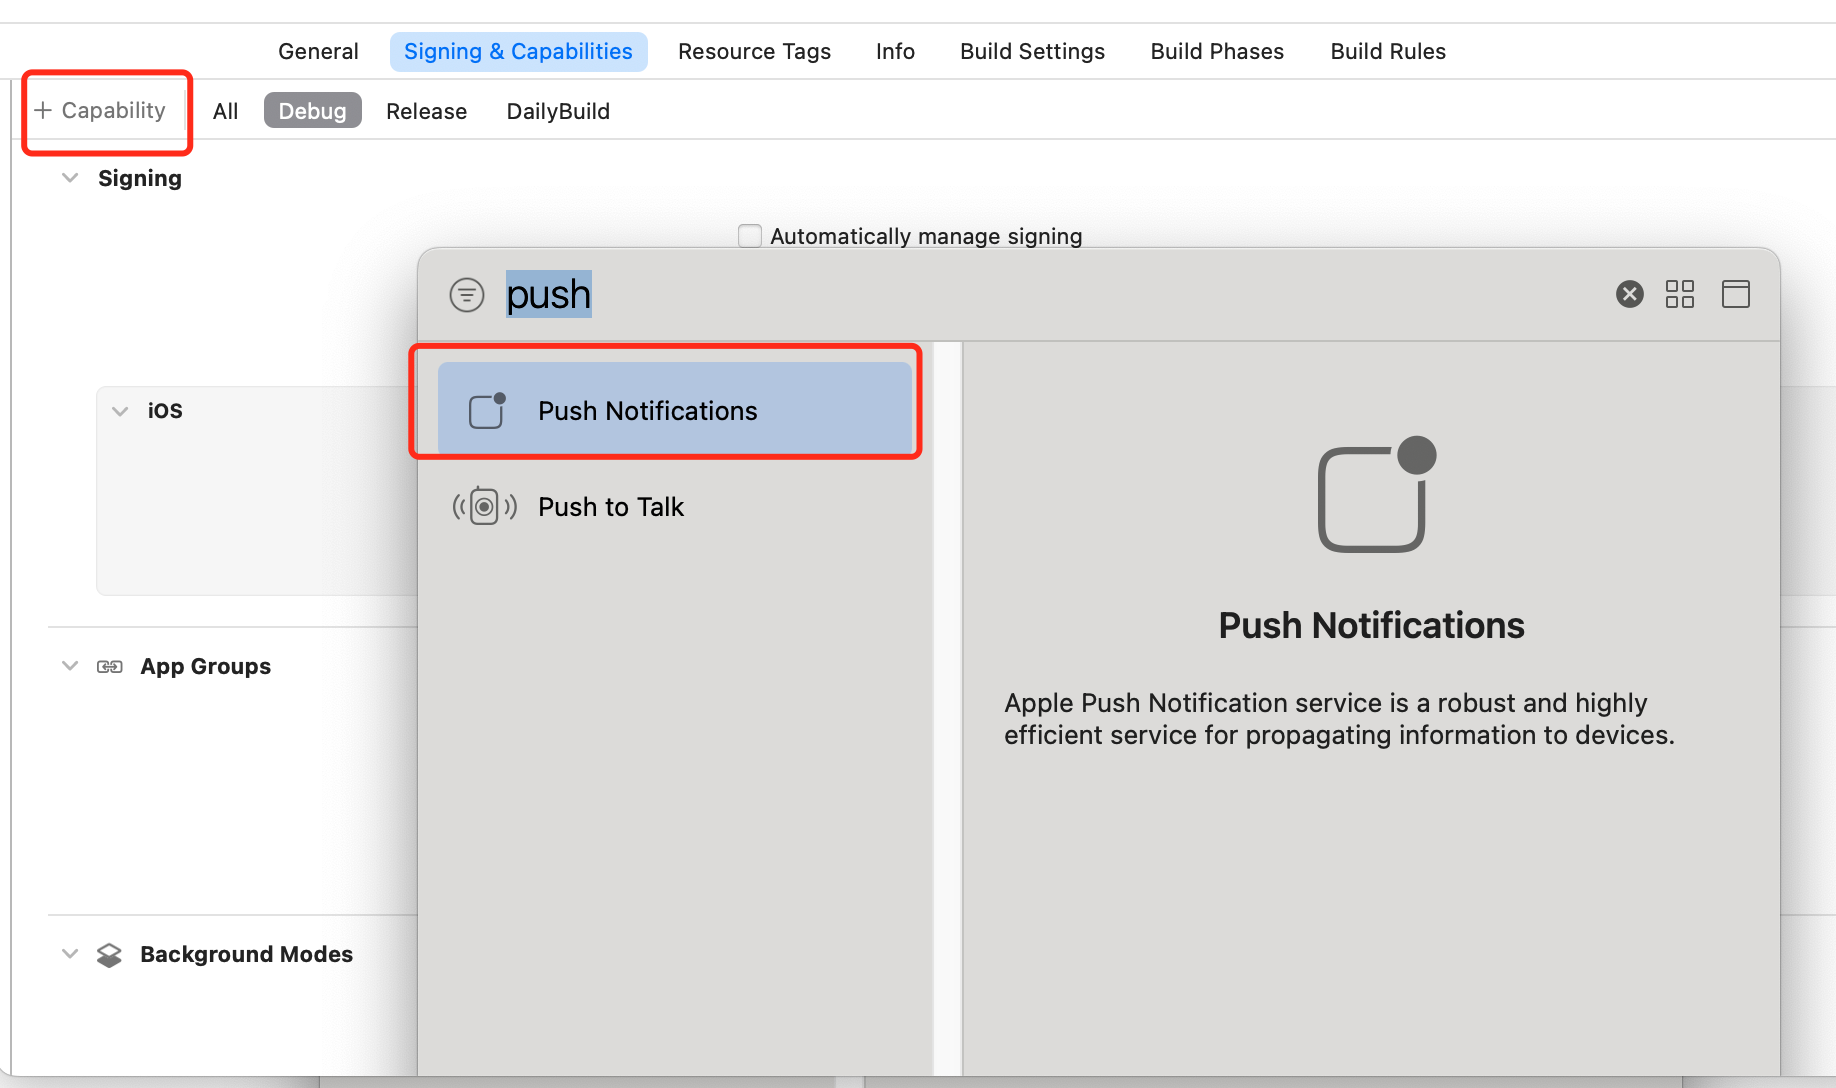
Open the Xcode project, click the plus button in the red box on the Project > Target > Capabilities page, then select and add Push Notifications.
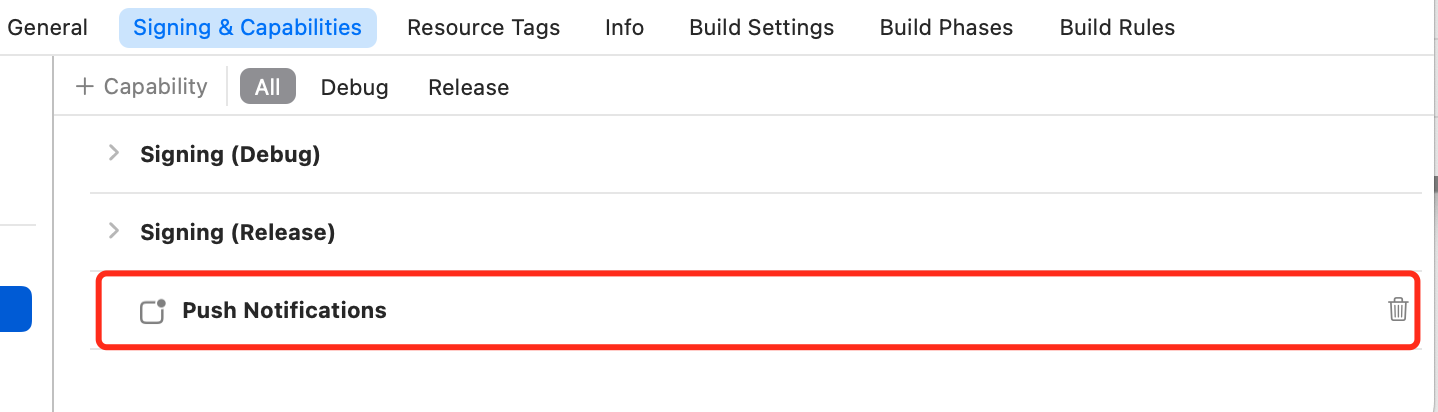
The result after addition is shown in the red box in the figure.
3. Generate App Group ID (Optional)
When you need to use the TIMPush component to calculate the Push Arrival Rate, it is recommended to configure the TIMPushAppGroupID, then follow the quick access instructions to use it.
App GroupID identifies the shared App Group between the Main App and Extension, which needs to be configured in the App Groups capability of the Main App's Capability.
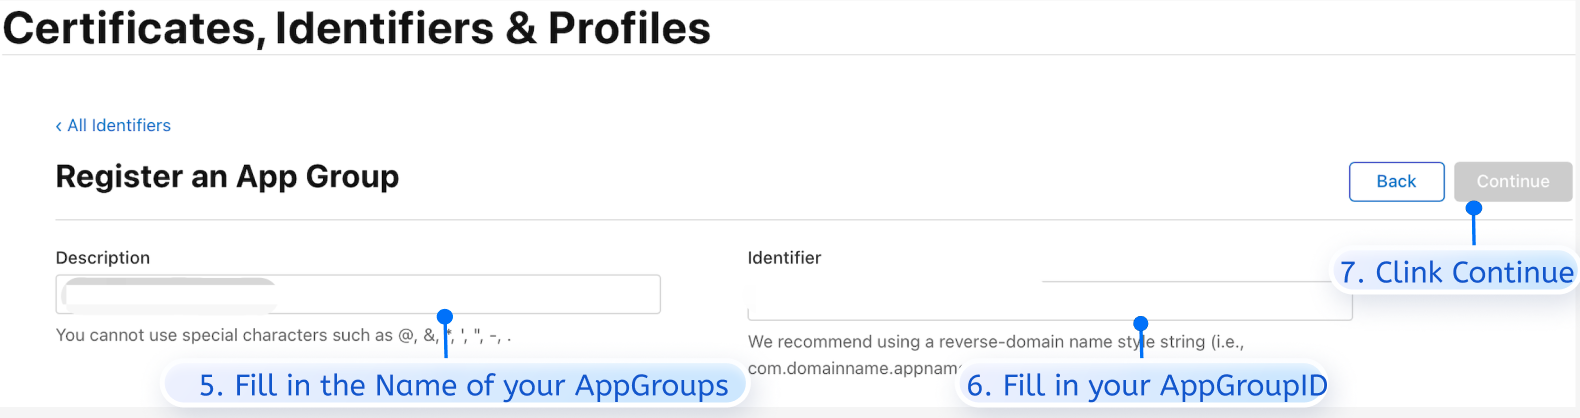
Step 1: log in to the Apple Developer Center website, go to [identifiers] -> [App Groups] to create AppGroups.
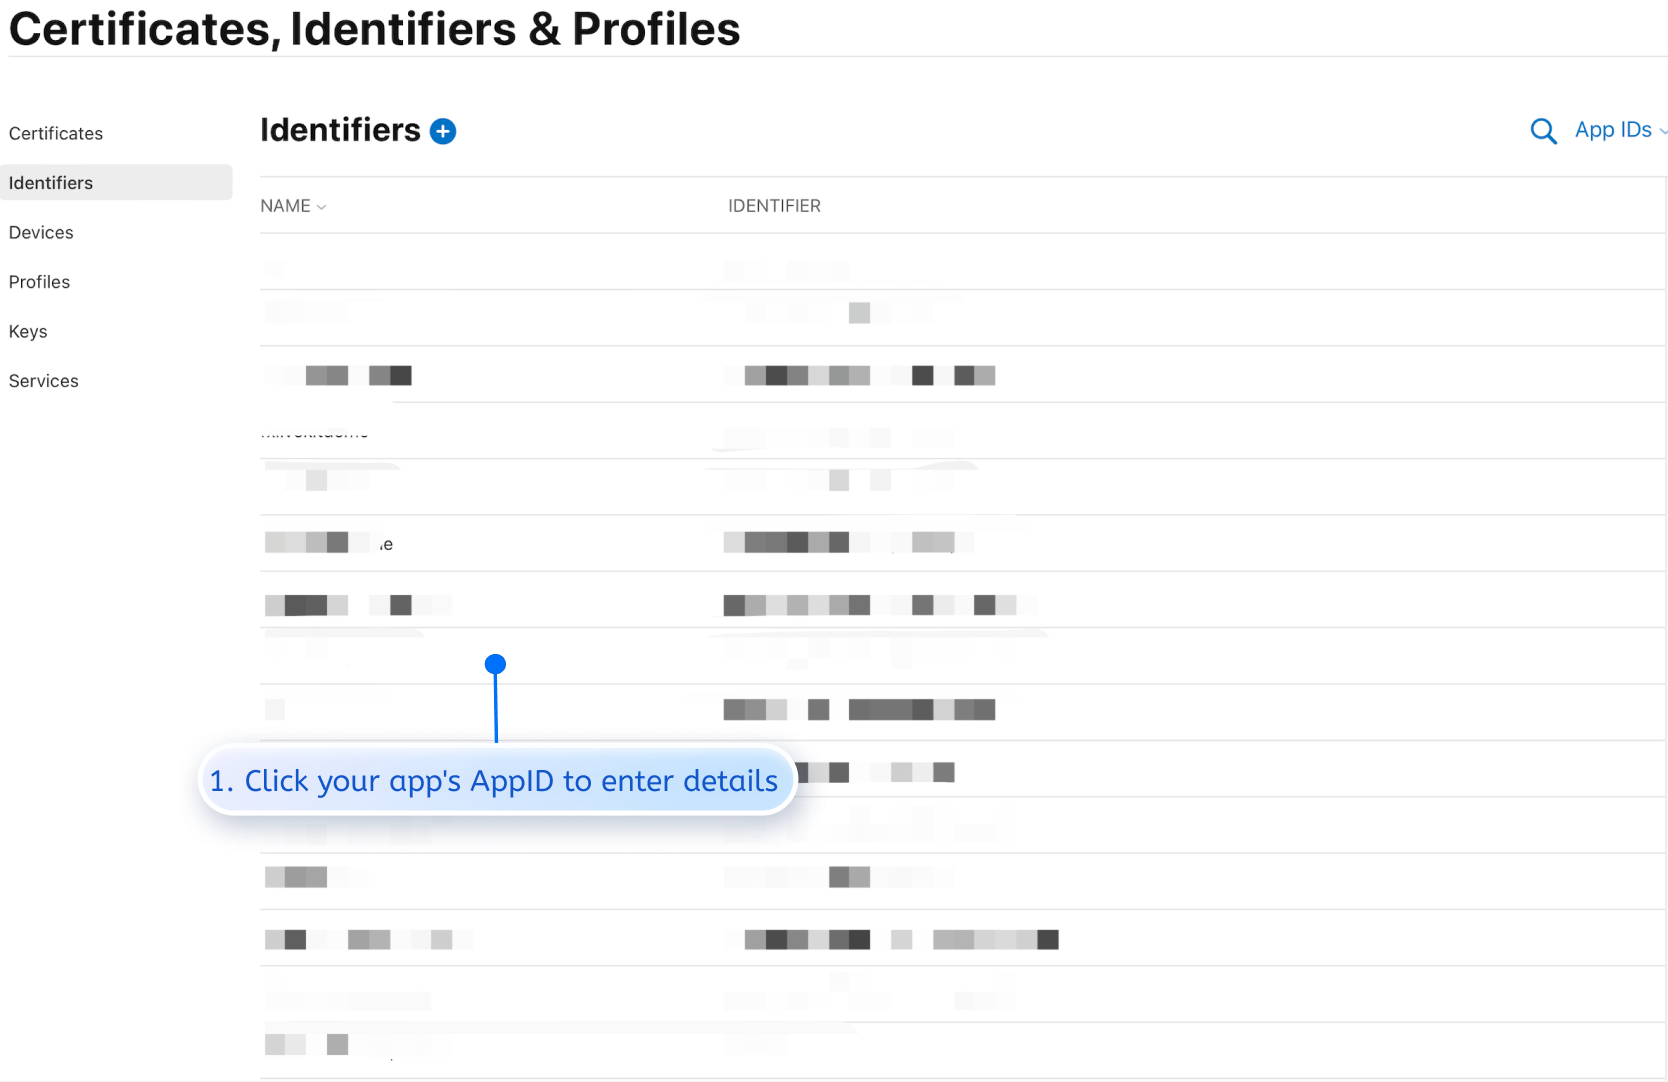
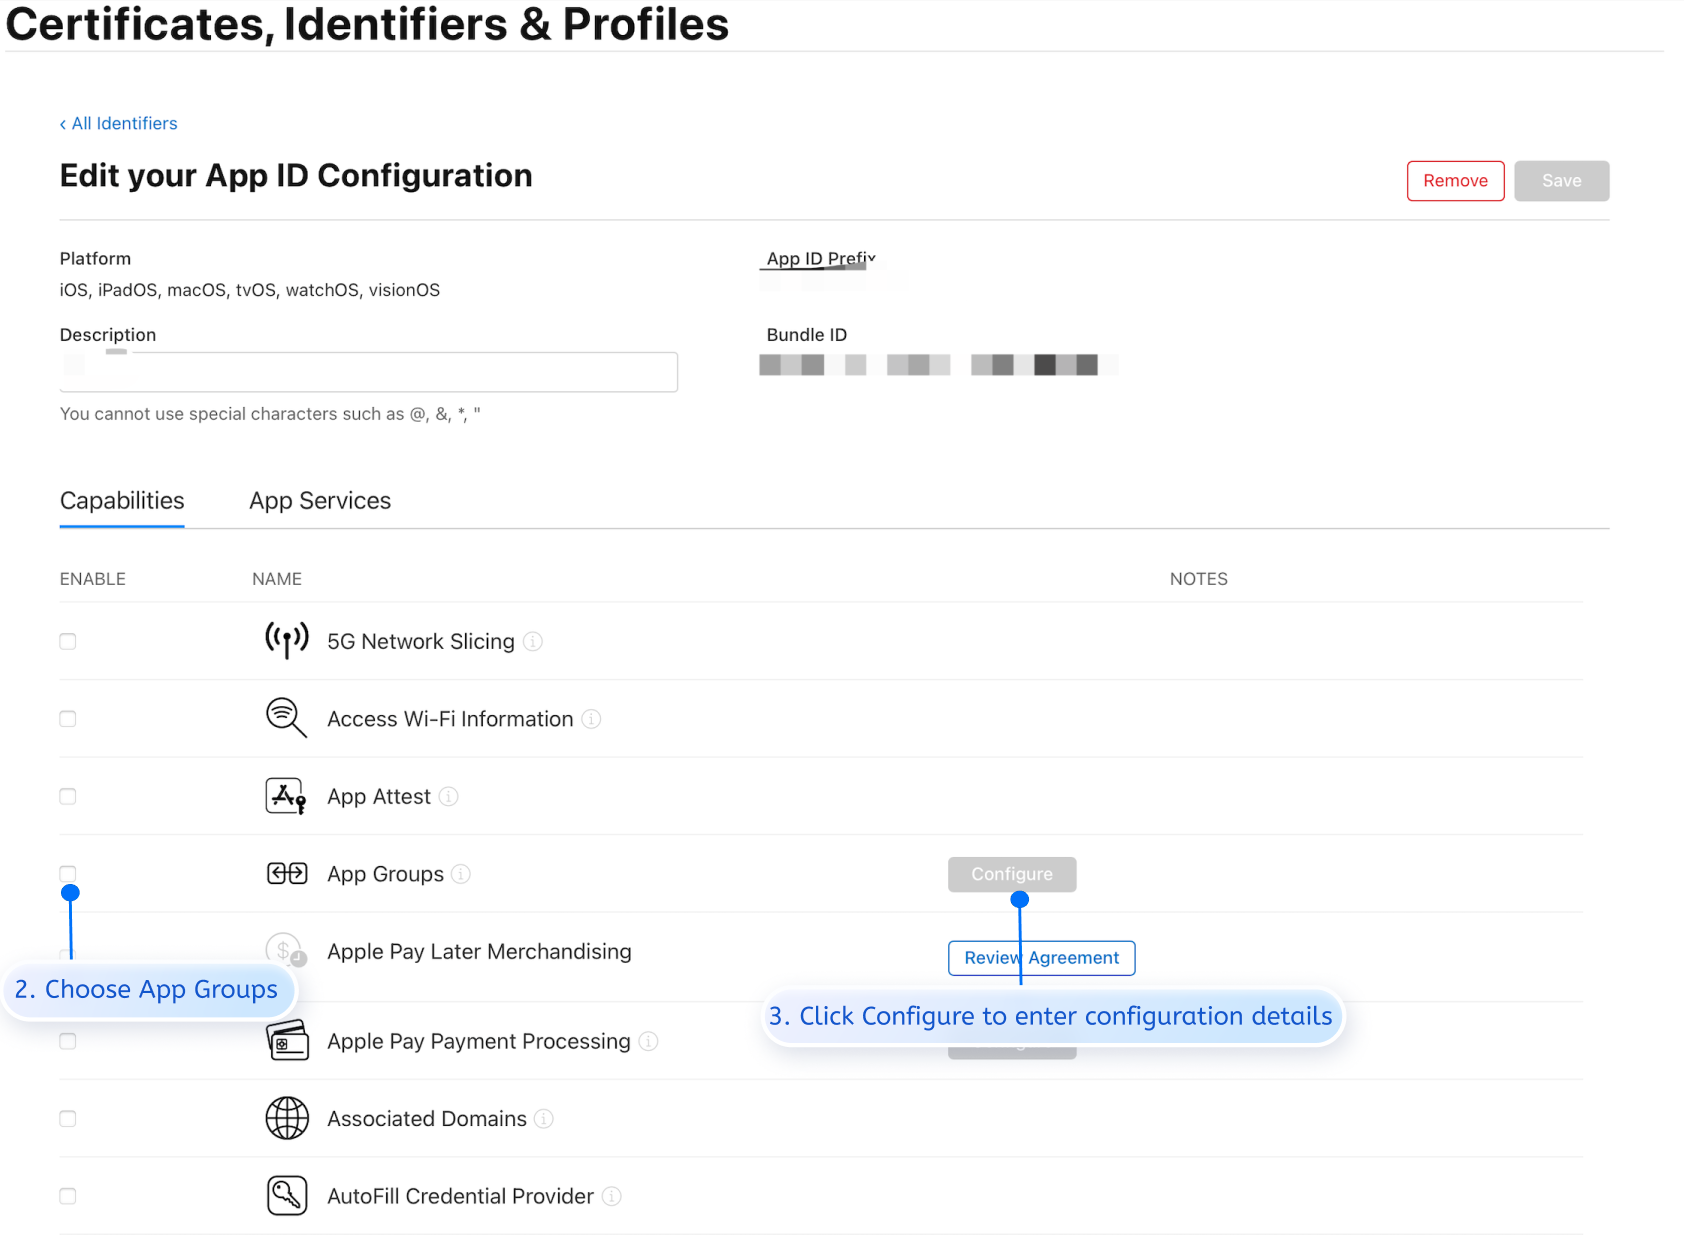
Step 2: bind the AppID of the application you want to use to the AppGroups.
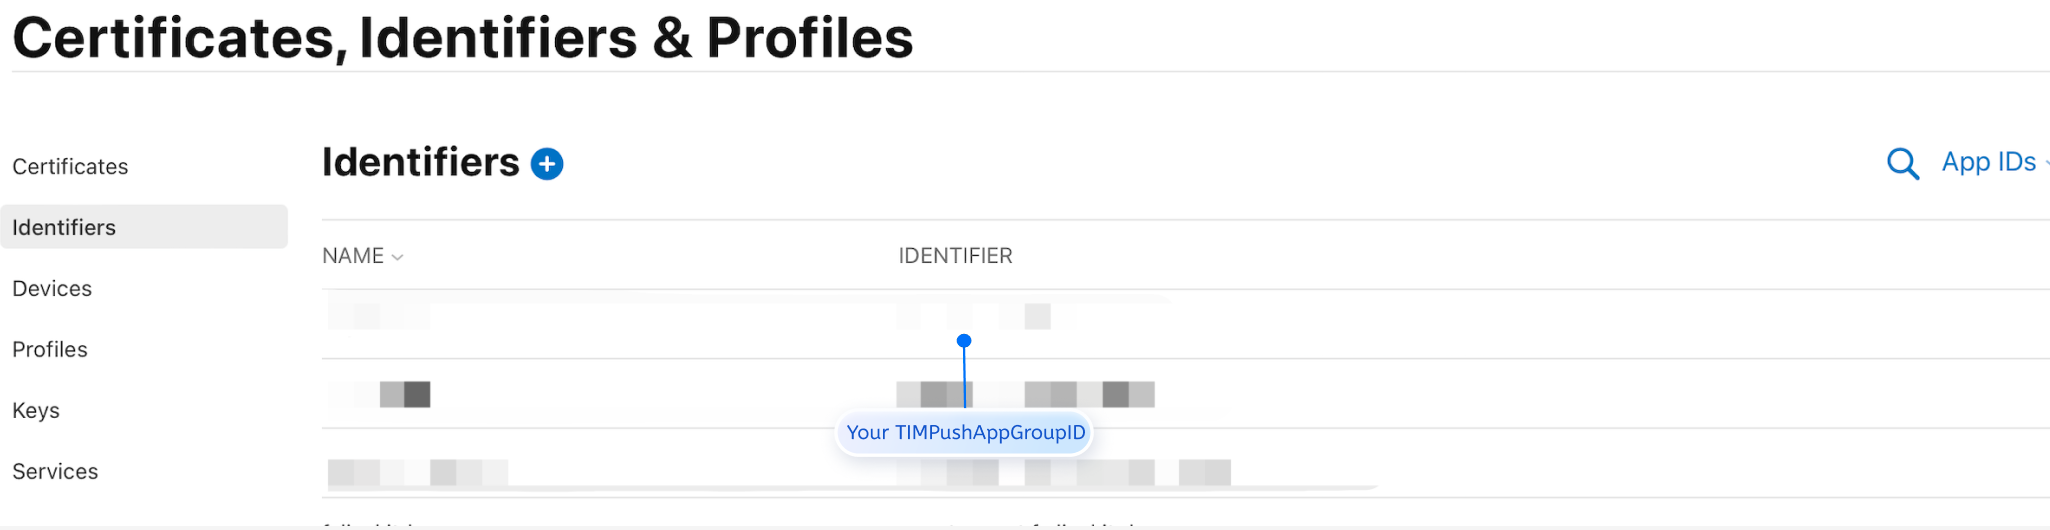
Step 3: obtain your TIMPushAppGroupID.
Step 4: configure TIMPushAppGroupID in Xcode.
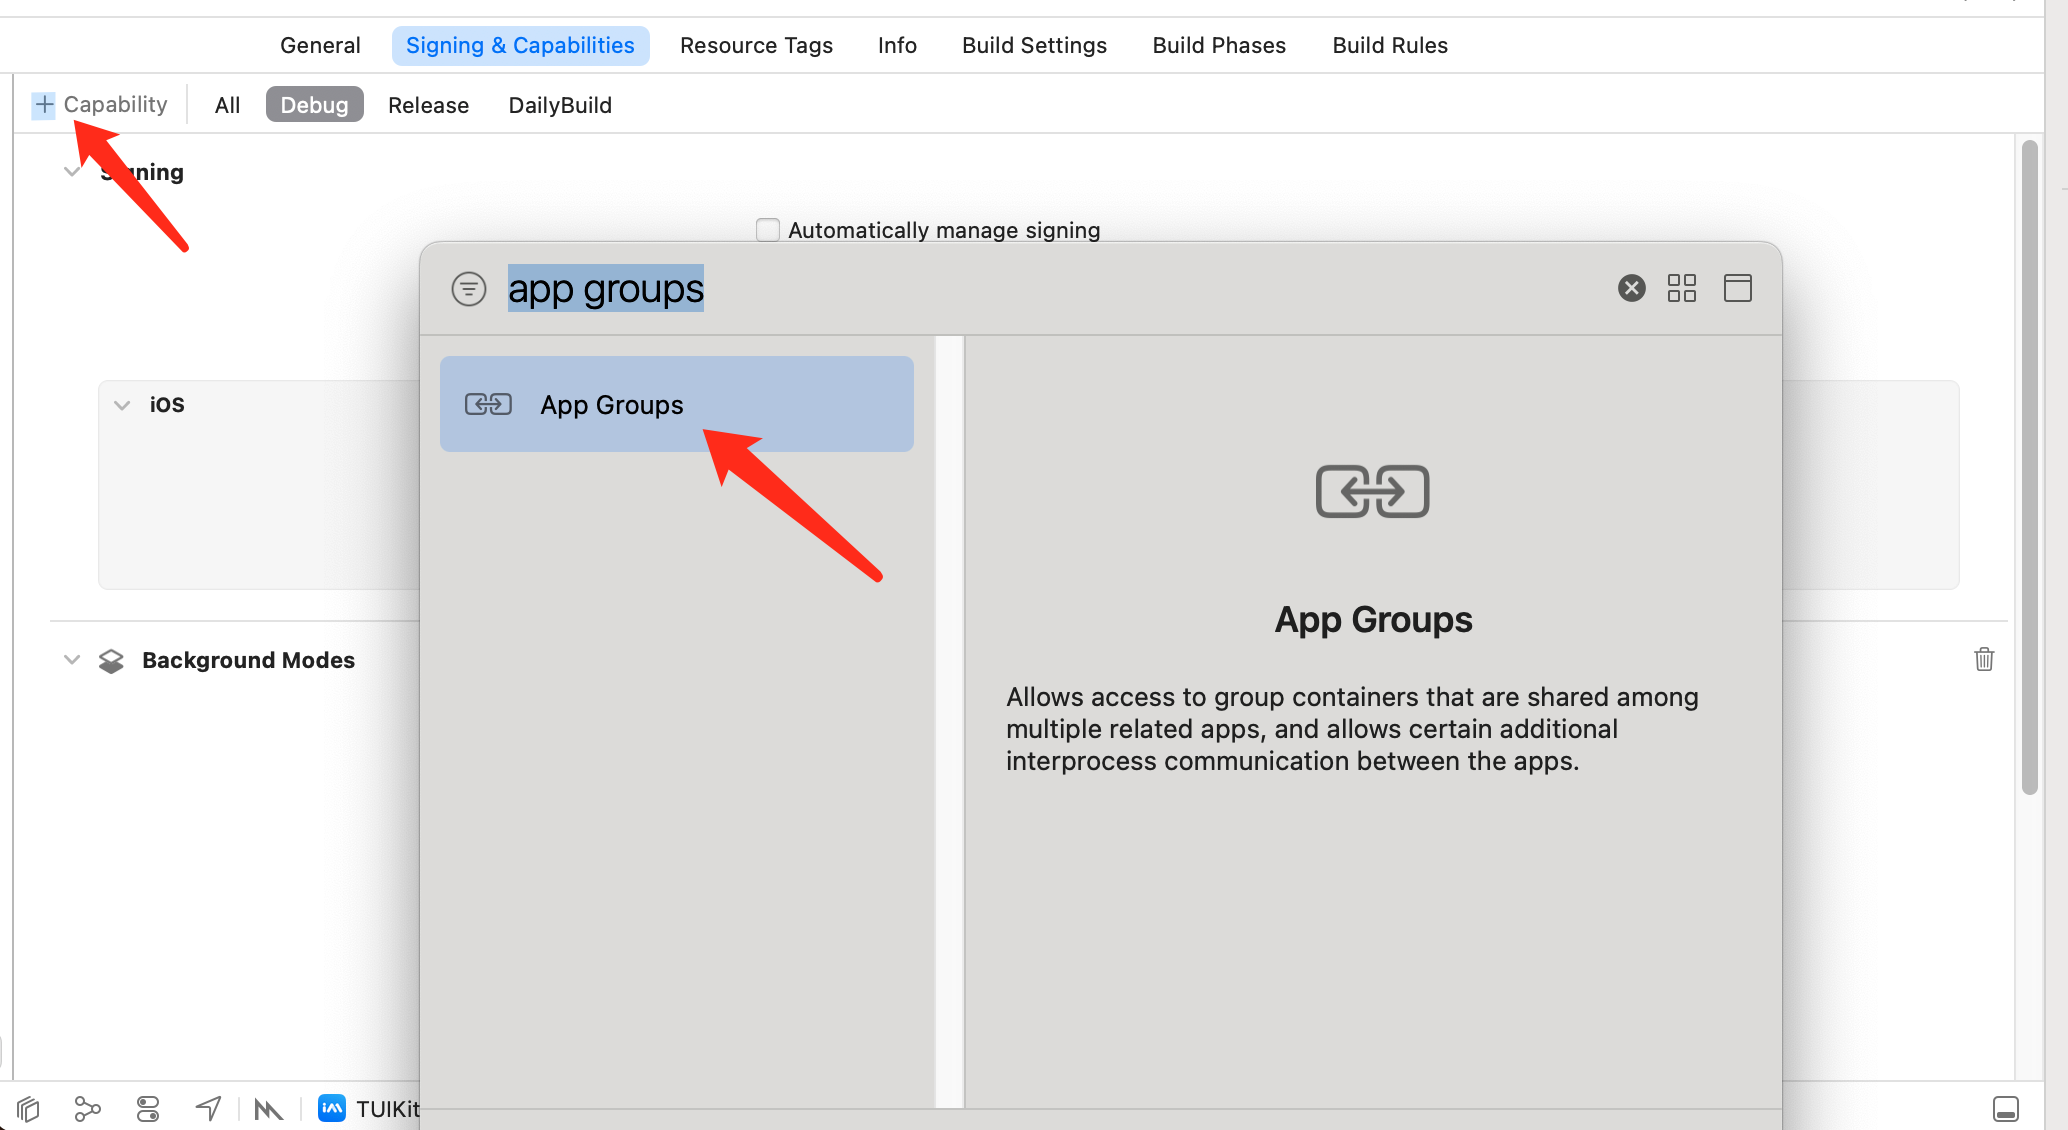
Open Xcode project, go to Project > Target > Capabilities page, click the plus button in the red box, and then select and add App Groups.
Enter the GroupID configured in step 3, such as group.com.tencent.im.pushkey:


 Yes
Yes
 No
No
Was this page helpful?