StreamLive supports different types of outputs. This document shows you how to create output groups and outputs.
Configuring multiple output groups for a channel
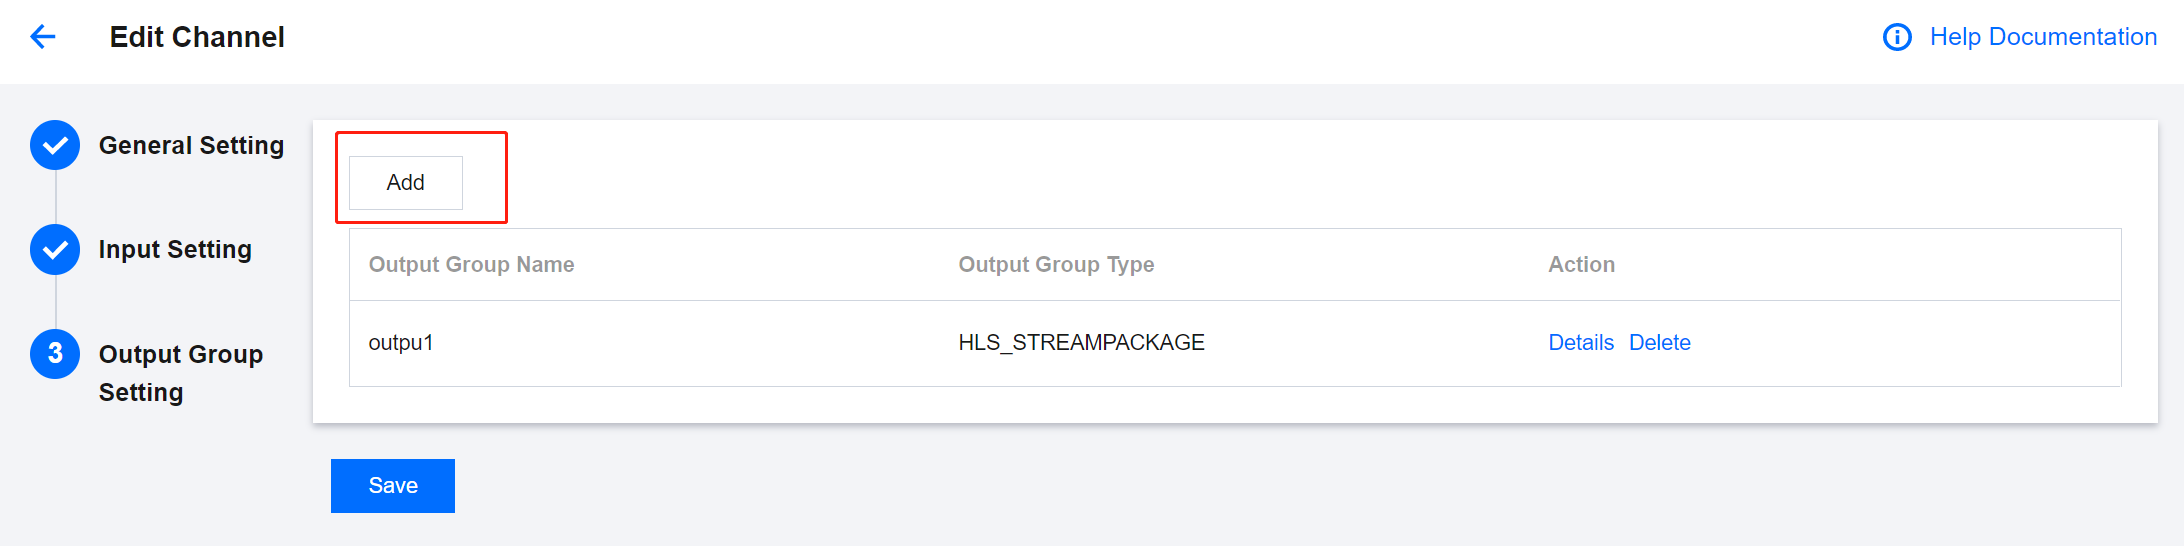
You can configure multiple output groups for a channel by clicking the Add button.
Setting the name and type of an output group
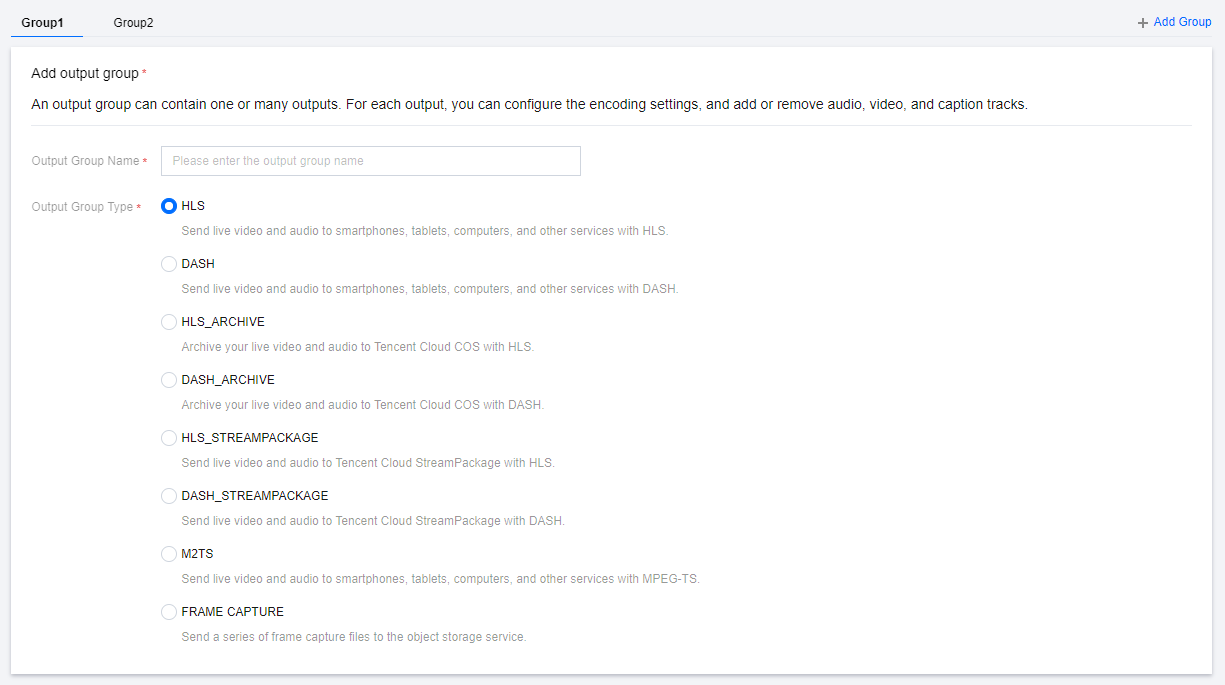
Set the name and type of an output group:
Currently, the types of outputs supported are HLS, DASH, HLS_STREAM_PACKAGE, DASH_STREAM_PACKAGE, HLS_ARCHIVE, DASH_ARCHIVE, M2TS, and FRAME CAPTURE.
HLS and DASH outputs are sent to the destination via HTTP PUT.
HLS_STREAM_PACKAGE and DASH_STREAM_PACKAGE outputs are sent to StreamPackage of the current account. You can use the outputs as origin servers to stream content via CDNs.
HLS_ARCHIVE and DASH_ARCHIVE outputs are saved to Tencent Cloud COS.
M2TS outputs are sent to the destination via SRT protocol. For each output in the output group, a separate destination configuration is required. Unlike other output groups, M2TS does not support configuration for Manifest, Segment, or DRM.
FRAME CAPTURE supports capturing images from live streams at fixed time intervals. Please refer to Frame Capture.
Configuring the destinations
If the output group type is HLS or DASH, enter the CDN URLs to push to. Enter the authentication information as well if the URLs require authentication.
If the output group type is HLS_STREAM_PACKAGE or DASH_STREAM_PACKAGE, enter the ID of the StreamPackage channel to push live streams to.
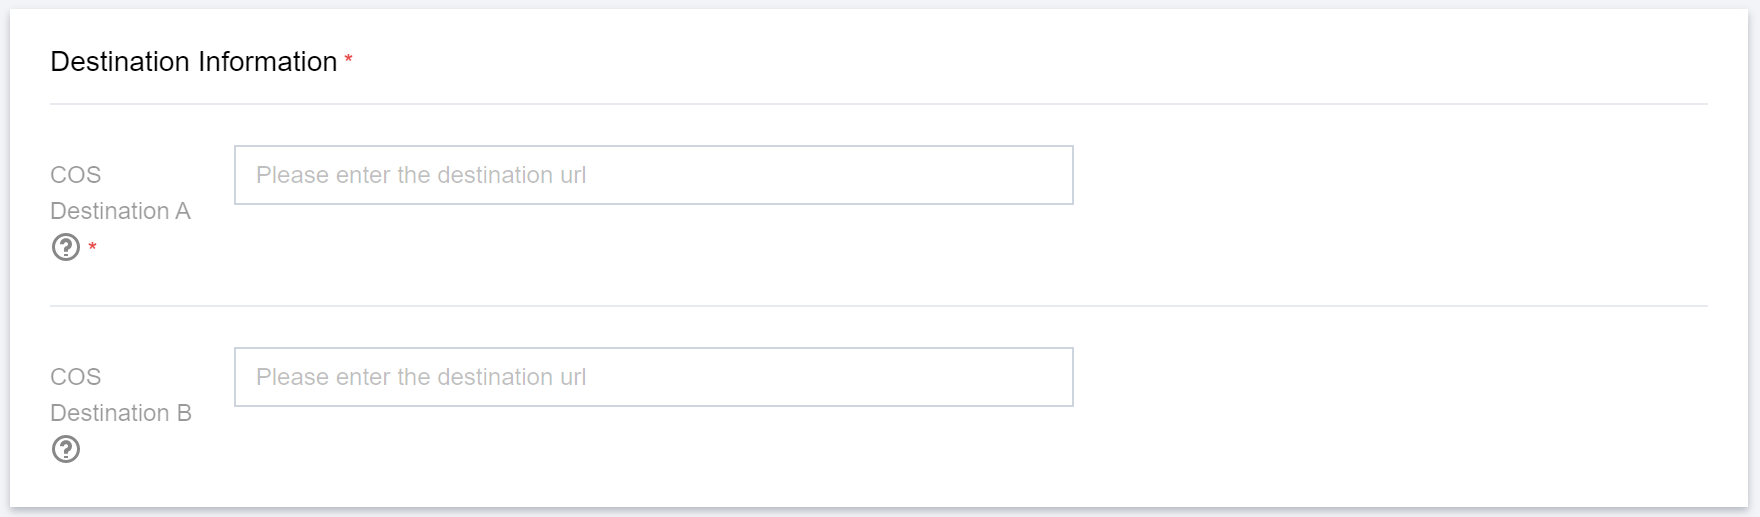
If the output group type is HLS_ARCHIVE or DASH_ARCHIVE, enter the COS destinations to save the output. StreamLive will save live streams in the last seven days to COS (the data will be overwritten after restart).
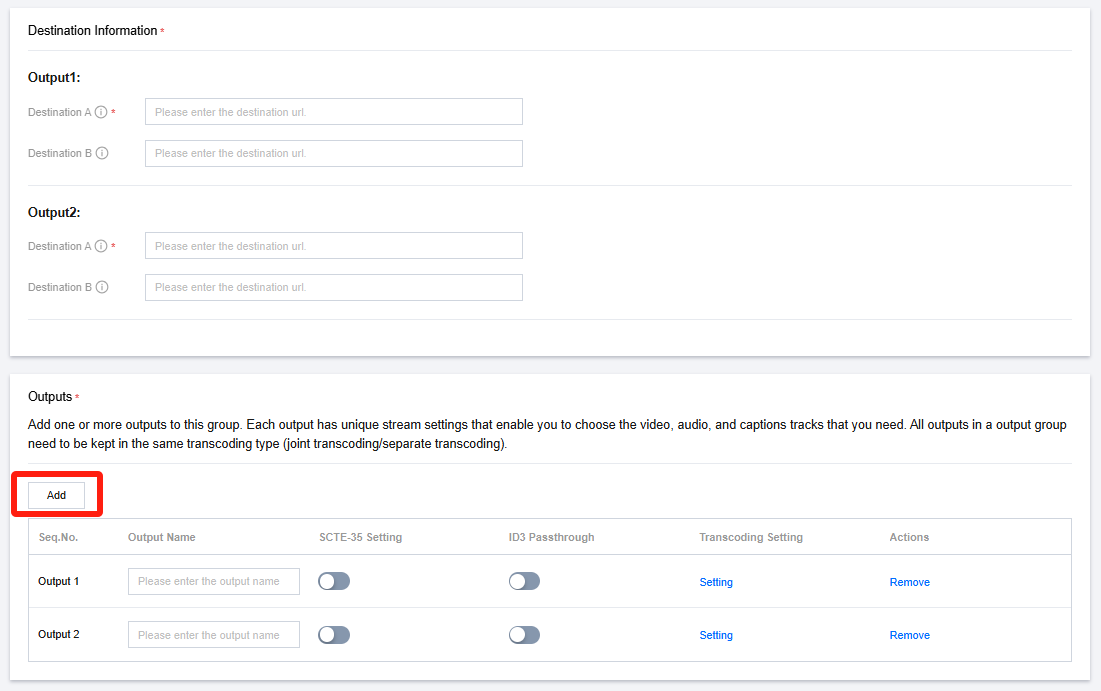
If the output group type is M2TS, the number of addresses in Destination Information is related to the number of outputs. When no outputs have been added, the content in Destination Information is empty. You can add outputs as needed, and Destination Information will display the corresponding Destination fields based on the number of outputs.
Note:
You can continue to set transcoding parameters for M2TS type outputs, but currently, configuration of Manifest, Segment, and DRM for M2TS outputs is not supported.
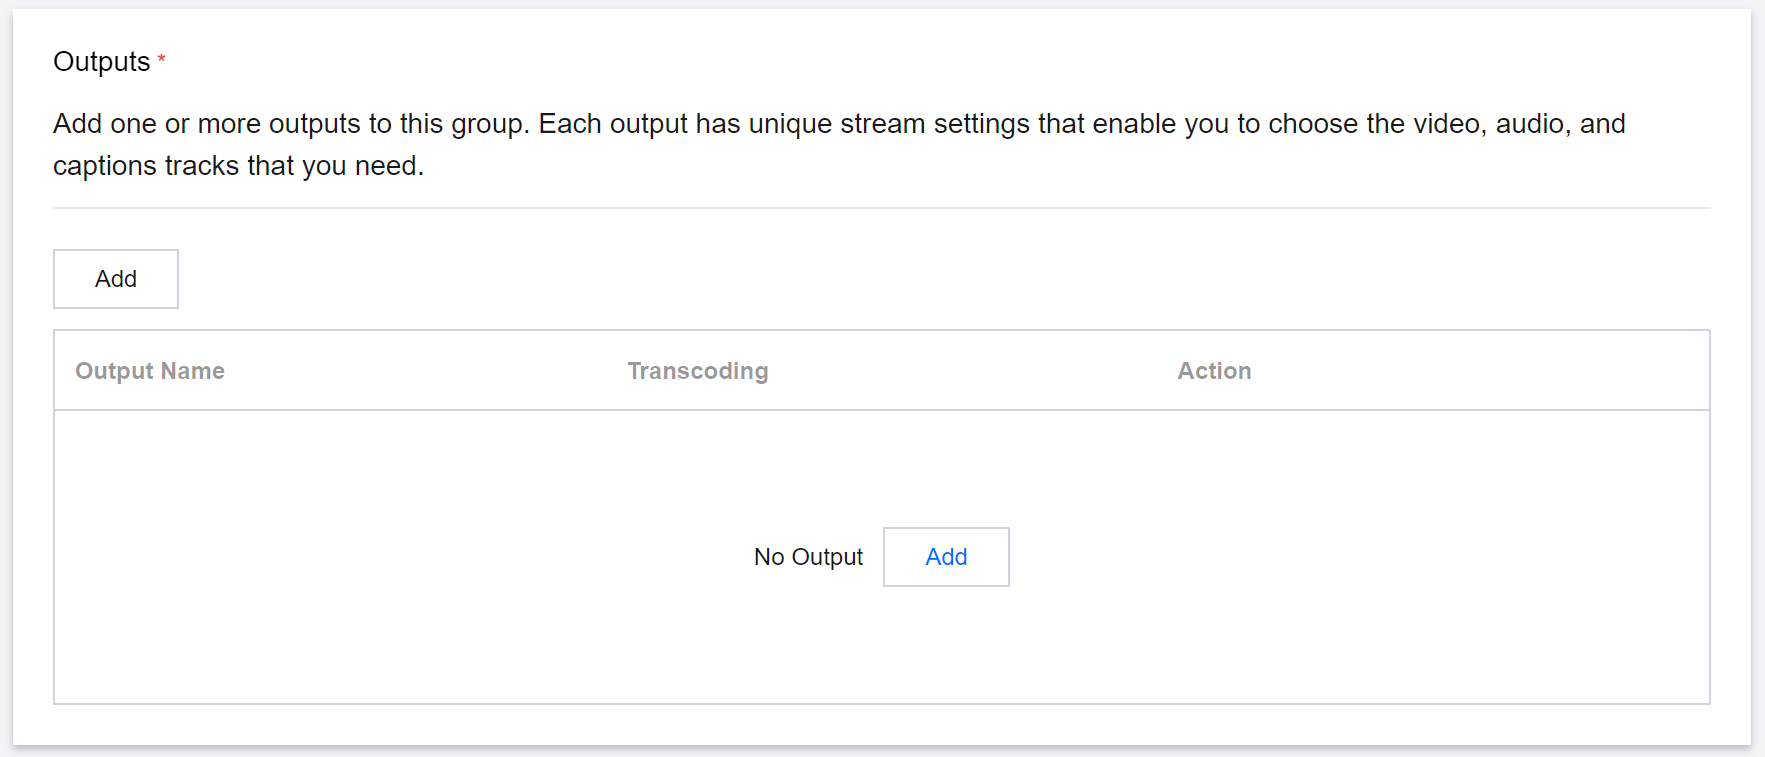
Configuring outputs
Click Add to add an output.
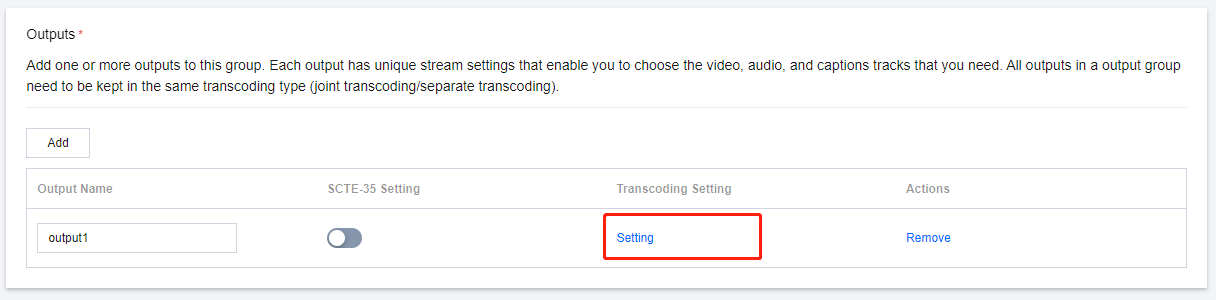
Configuring transcoding settings
For the added Output, click Setting in the Transcoding Setting to configure the transcoding parameters.
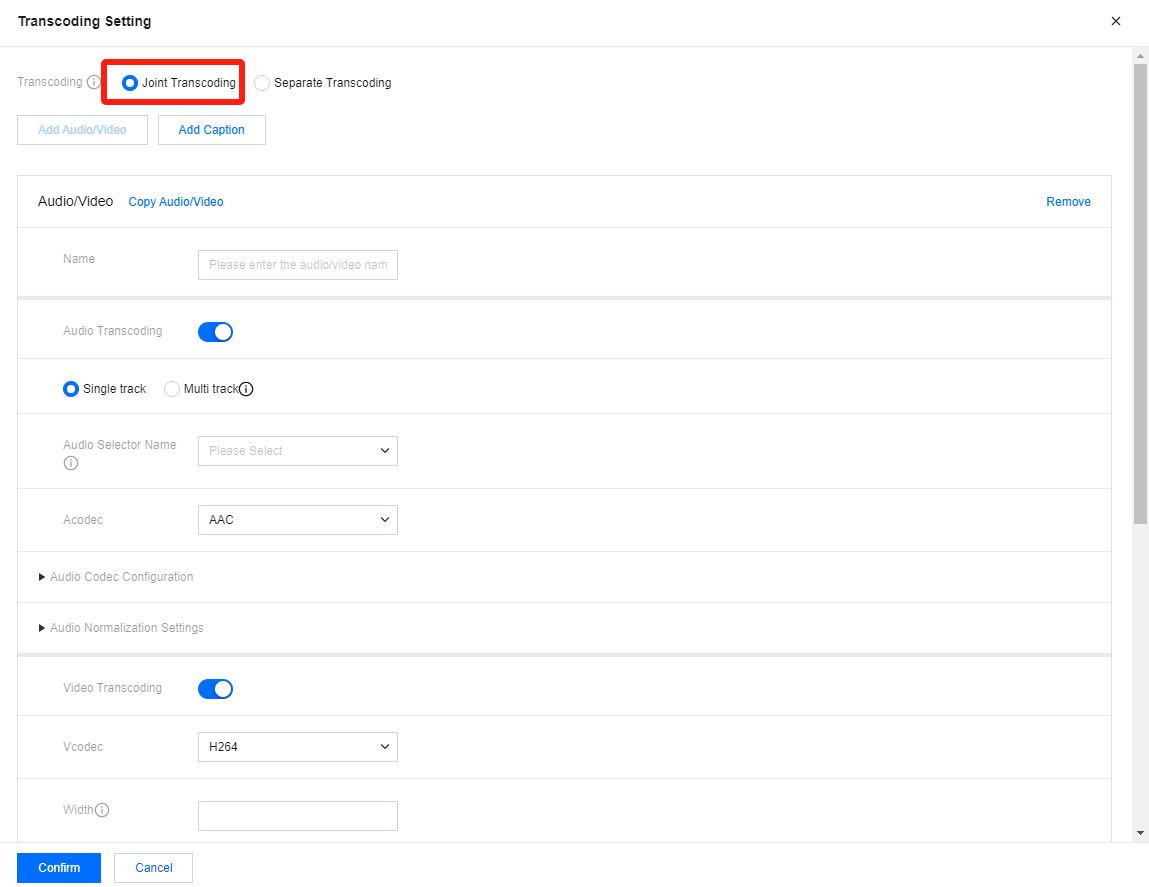
You can configure either joint or separate transcoding templates. For HLS outputs, separate transcoding allows you to set different audio tracks. If you don’t need this, we recommend you use joint transcoding.
A joint transcoding template includes settings for both audio and video transcoding.
Configuration Item
Description
Audio/Video Name
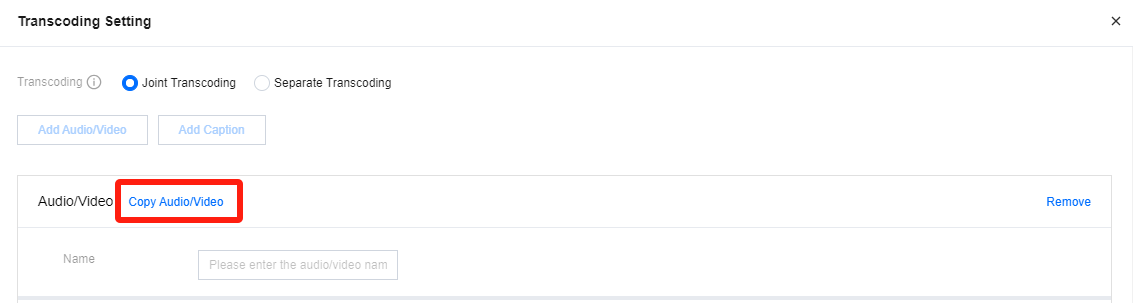
The name of the audio/video transcoding template. You can click Copy Audio/Video to duplicate the parameters of an existing transcoding template; or you can set a new transcoding template name and fill in the specific transcoding parameter settings. The name supports 1-20 characters of letters and numbers.
Audio Transcoding
Whether to enable audio transcoding. If not enabled, the output will not include audio.
Audio transcoding supports single and multiple audio tracks. However, it is recommended to use single audio track here. If you need multiple audio tracks, we recommend using the Separate Transcoding.
Audio Selector Name
For inputs with multiple audio tracks, you can first create audio selectors for the input in Input Setting, and then select the audio track to process and output here.
If the user does not set the audio selector name, the first audio track will be used by default.
Acodec
Select the audio codec, supporting AAC or Passthrough.
For passthrough, currently, AC3 (Dolby Digital), EAC3 (Dolby Digital Plus), and EAC3+ATMOS (Dolby ATMOS) can be supported.
Audio Codec Configuration
Support setting Mode, Profile, Bitrate, and Sample Rate.
Audio Normalization Settings
Adjust audio volume by setting the Target LUFS value.
Video Transcoding
Whether to enable video transcoding. If not enabled, the output will not include video.
Vcodec
Select the video codec, supporting H.264 and H.265.
Width
Set the output width, supporting even number between 0-3000. If you enter 0, it means the width will be the same as the input source.
Height
Set the output height, supporting even number between 0-3000. If you enter 0, it means the height will be the same as the input source.
Rate Control
Bitrate control mode, supporting CBR, VBR, ABR.
Constant Bitrate (CBR) ensures video encoding at a constant bitrate.
Average Bitrate (ABR) allows the bitrate to vary as needed while keeping an overall average bitrate for the entire video encoding.
Variable Bitrate (VBR) can change the bitrate in order to obtain the specified quality, but it can't exceed the maximum bitrate.
Frame Rate
Frame rate, can be set to follow the source, or set to a fraction value or HZ value.
Please note that in a channel, the frame rate settings for all output groups and outputs need to be the same.
GOP Structure
Set the GOP Size in milliseconds. Also supports setting the number of B-frames and the number of Ref frames.
Codec Details
Currently, this feature can only be used when the video codec is H.264. It supports setting for the Profile, Level, Entropy Encoding, Adaptive Quantization, and Look Ahead Rate Control.
Color Space
Currently, this feature can only be used when the video codec is H.265. And we only support Passthrough for color space at present.
Top Speed Codec Transcoding
Top Speed Codec Transcoding uses intelligent, dynamic transcoding technologies and a high-precision bitrate control model to produce videos with higher definitions and lower bitrates.
Video Watermark
Select the desired watermark from the pre-configured watermark templates.
Face Blurring
Perform face detection on the faces appearing in the video, and apply pixel blurring to the facial areas.
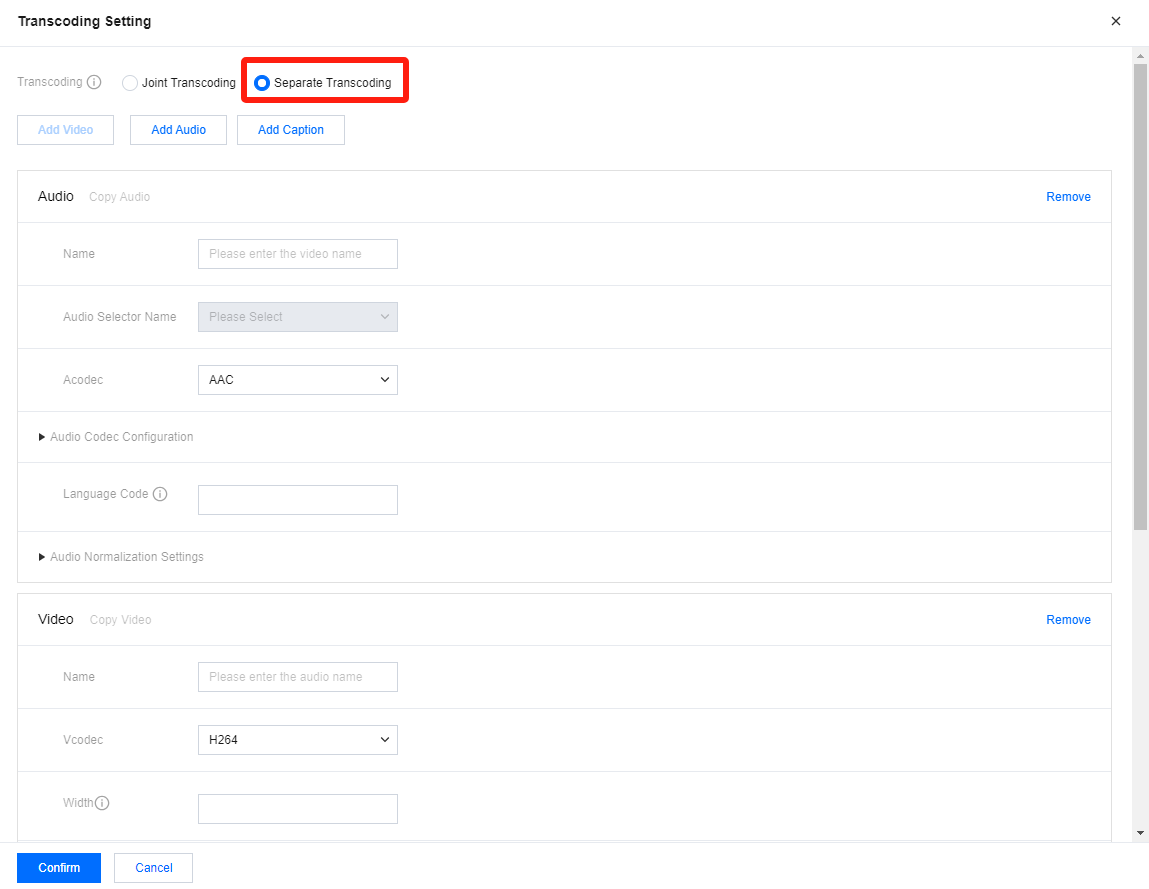
With separate transcoding, you need to set audio and video transcoding parameters separately. The audio transcoding templates specify parameters for the audio tracks the stream can use.
Audio Configuration:
Configuration Item
Description
Audio Name
The name of the audio transcoding template. You can click Copy Audio to duplicate the parameters of an existing transcoding template; or you can set a new transcoding template name and fill in the specific transcoding parameter settings. The name supports 1-20 characters of letters and numbers.
Audio Selector Name
For inputs with multiple audio tracks, you can first create audio selectors for the input in Input Setting, and then select the audio track to process and output here.
If the user does not set the audio selector name, the first audio track will be used by default.
Acodec
Select the audio codec, supporting AAC or Passthrough.
For passthrough, currently, AC3 (Dolby Digital), EAC3 (Dolby Digital Plus), and EAC3+ATMOS (Dolby ATMOS) can be supported.
Audio Codec Configuration
Support setting Mode, Profile, Bitrate, and Sample Rate.
Language Code
IS0 639 language code representing the language of the audio output track.
Audio Normalization Settings
Adjust audio volume by setting the Target LUFS value.
Additionally, if you have multi-track configuration needs, you can click Add Audio at the top of the page to add multiple track transcoding configurations.
Video Configuration:
Configuration Item
Description
Video Name
The name of the video transcoding template. You can click Copy Video to duplicate the parameters of an existing transcoding template; or you can set a new transcoding template name and fill in the specific transcoding parameter settings. The name supports 1-20 characters of letters and numbers.
Vcodec
Select the video codec, supporting H.264 and H.265.
Width
Set the output width, supporting even number between 0-3000. If you enter 0, it means the width will be the same as the input source.
Height
Set the output height, supporting even number between 0-3000. If you enter 0, it means the height will be the same as the input source.
Rate Control
Bitrate control mode, supporting CBR, VBR, ABR.
Constant Bitrate (CBR) ensures video encoding at a constant bitrate.
Average Bitrate (ABR) allows the bitrate to vary as needed while keeping an overall average bitrate for the entire video encoding.
Variable Bitrate (VBR) can change the bitrate in order to obtain the specified quality, but it can't exceed the maximum bitrate.
Frame Rate
Frame rate, can be set to follow the source, or set to a fraction value or HZ value.
Please note that in a channel, the frame rate settings for all output groups and outputs need to be the same.
GOP Structure
Support setting the number of B-frames and the number of Ref frames.
Codec Details
Currently, this feature can only be used when the video codec is H.264. It supports setting for the Profile, Level, Entropy Encoding, Adaptive Quantization, and Look Ahead Rate Control.
Color Space
Currently, this feature can only be used when the video codec is H.265. And we only support Passthrough for color space at present.
Top Speed Codec Transcoding
Top Speed Codec Transcoding uses intelligent, dynamic transcoding technologies and a high-precision bitrate control model to produce videos with higher definitions and lower bitrates.
Video Watermark
Select the desired watermark from the pre-configured watermark templates.
Face Blurring
Perform face detection on the faces appearing in the video, and apply pixel blurring to the facial areas.
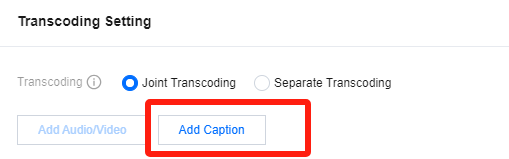
You also have the option to configure captions by clicking on Add Caption.
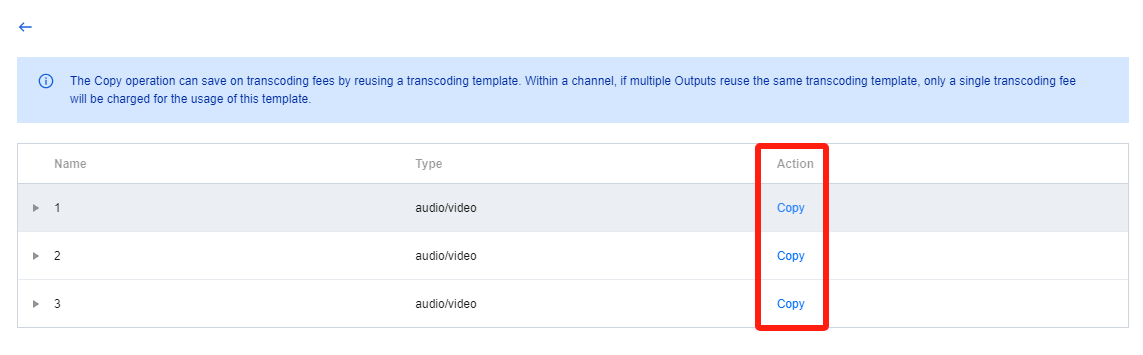
For transcoding parameters, you can create new parameters or use existing transcoding templates. Click Copy to reuse an existing transcoding template.
The Copy operation can save on transcoding fees by reusing a transcoding template. Within a channel, if multiple Outputs reuse the same transcoding template, only a single transcoding fee will be charged for the usage of this template.
Note:
Top Speed Codec Transcoding is a high-performance transcoding service developed by the Tencent Cloud Video team. It offers low-bitrate, high-quality transcoding by leveraging AI algorithms to dynamically determine the best encoding parameters. Bitrate Compression Ratio is the percentage of video bitrate expected to be reduced.
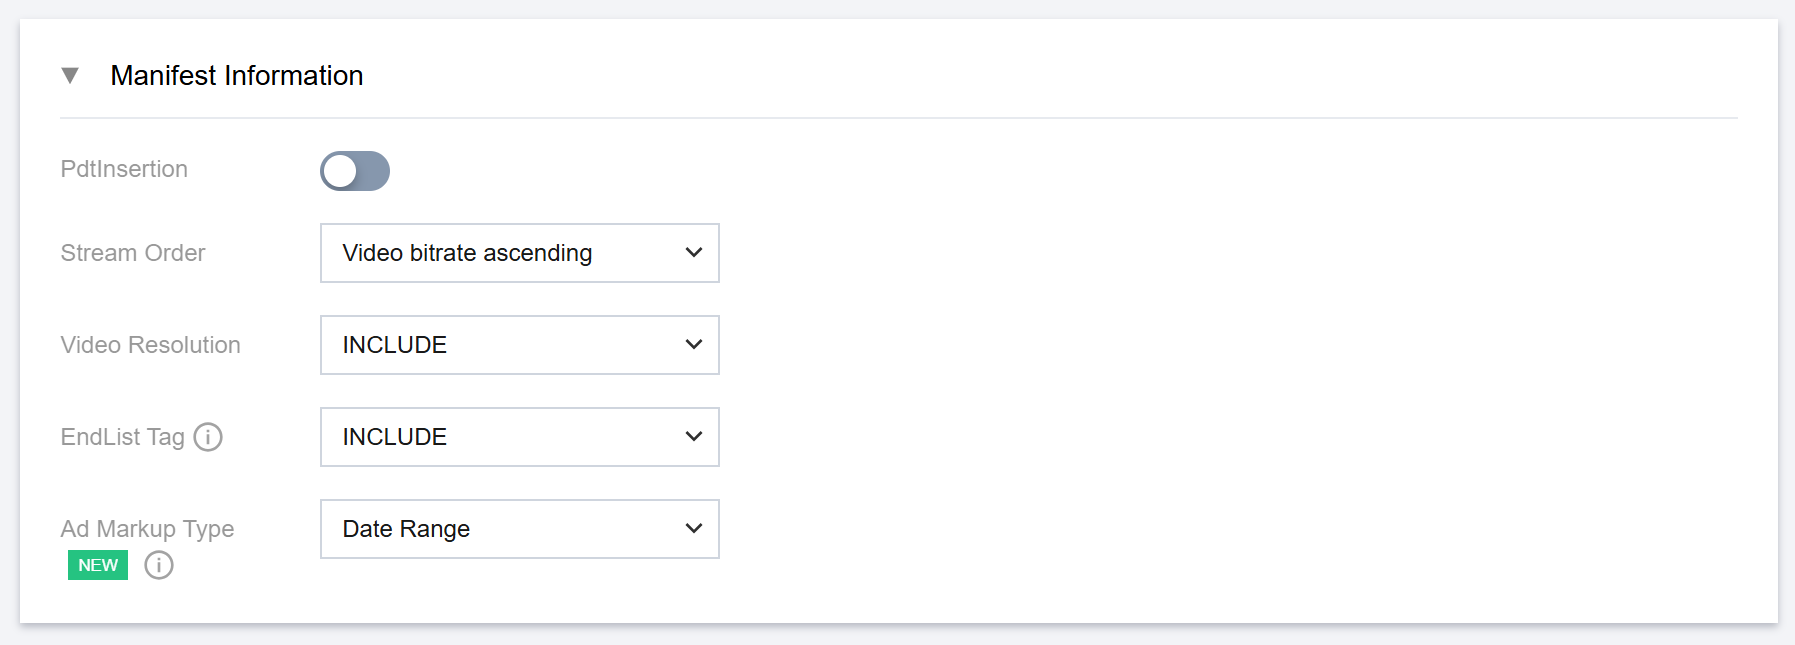
Configuring manifest information
PdtInsertion:Enable this function if you want to include the #EXT-X-PROGRAM-DATE-TIME tag in manifest files. PdtDuration is used to set the time interval for insertion of EXT-X-PROGRAM-DATE-TIME tags, in seconds.
Stream Order:For the master manifest in HLS, set the stream order by video bitrate ascending or descending.
Video Resolution:For the master manifest in HLS, set whether to include resolution information.
Endlist Tag:When the channel is stopped, set whether to include #EXT-X-ENDLIST tag in the media playlist in HLS.
Ad Markup Type:For ad marker, you can set the output format in StreamLive Output. Please choose according to your business needs: Enhanced SCTE-35 or Date Range. Examples of these two formats are shown below for reference:
You can also specify the Segment Information on this page, including the segment type, segment duration, and segment number. For some devices, such as Apple TV, to play H.265-encoded videos, you need to select fmp4 as the Segment Type and hvc1 as the Packaging Type.
When the Output group type is HLS_STREAMPACKAGE, you can enable Low Latency funcation (Low-Latency HLS, LL-HLS) and set the
corresponding Partial Segment Duration and Part Hold Back.