Introduction
You can use the scene configuration function to manage custom scenes and configure icons, home page addresses, custom JS, and custom CSS.
Create scene
2. Select Application Management in the left navigation bar to enter the application management interface.
3. Click Application Configuration to enter the application configuration interface.
4. Click Scene Configuration.
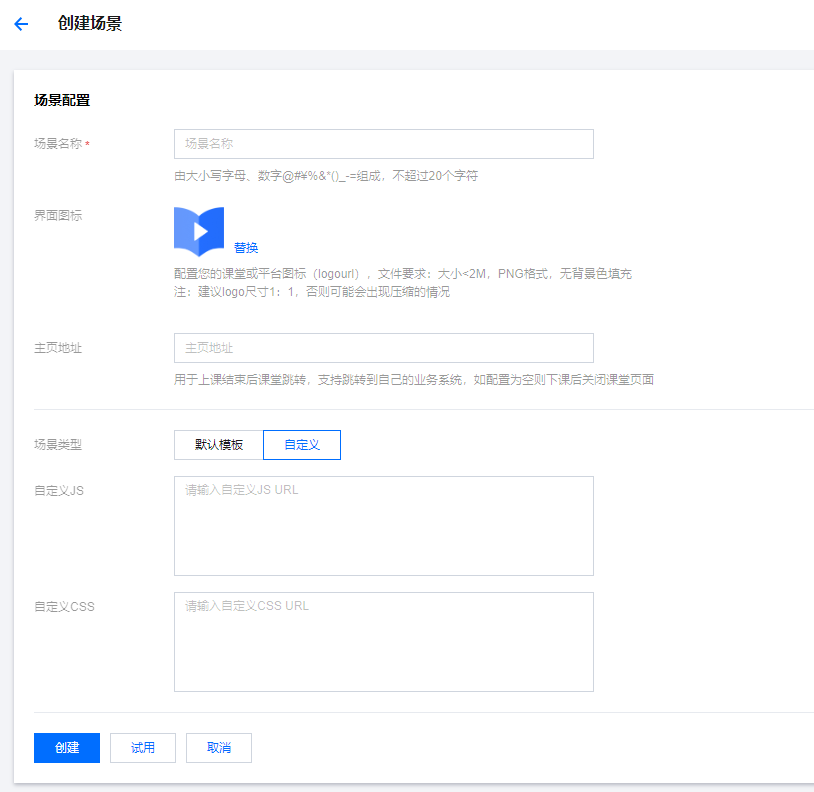
5. Click Create Scene to fill in the scene name, configure the interface icon, fill in the home page address, customize JS, and customize CSS in turn.
Scene name: required, that is, the Scene parameter, used to distinguish different scenes, and also supports configuration through the SetAppCustomContent interface. Interface icon: Optional, file requirements: size < 2M, PNG format, no background color filling.
Homepage address: Optional, used for classroom redirection after class ends, supports redirection to your own business system. If the configuration is empty, the classroom page will be closed after class.
Custom JS: Optional.
Custom CSS: Optional.
6. Click Create to finish configuring the scene.
View scene details
Click the View Details button to view scene details.
trial scene
Click Try to jump to the custom classroom you configured to view the configuration results.
Was this page helpful?