You can create an account, set account permissions, and change the account password in the TencentDB for MongoDB console to manage database access permissions more easily.
Overview
TencentDB for MongoDB has two default users: rwuser
and mongouser
. TencentDB for MongoDB 3.2 supports both of them by default, while v3.6, v4.0, v4.2, and v4.4 only support the mongouser
user by default.
Only rwuser is authenticated with MONGODB-CR.
You can set multiple accounts and grant each of them different database read/write permissions for database access at a finer granularity and higher data security.
Version Description
All TencentDB for MongoDB versions support database account management.
Note
After you create an account and grant it the access permission, it will take effect in 2 minutes after the system performs the backend configuration.
We recommend that you reset the database password periodically at least once every three months.
Prerequisites
The TencentDB for MongoDB replica set or sharded cluster instance is in Running status.
Directions
Viewing the account information
2. In the MongoDB drop-down list on the left sidebar, select Replica Set Instance or Sharded Cluster Instance. The directions for replica set instances and sharded cluster instances are similar.
3. Above the Instance List on the right, select the region.
4. In the instance list, find the target instance.
5. Click the target instance ID to enter the Instance Details page.
6. Select the Database Management > Account Management page to view the information of all accounts of the current database.
Creating an account
1. On the Account Management page, click Create Account.
2. On the Create Account tab in the Create Account pop-up window, configure the account information according to the table below and click OK.
|
Account ID | Yes | Set the name of the new account. | The account name requirements are as follows: It can contain 1–32 characters. It can contain letters, digits, underscores, and hyphens. | test |
Account Password | Yes | Set the password of the new account. | The password requirements are as follows: It can contain 8–32 characters. It must contain at least two of the following types of characters: letters, digits, and special symbols !@#%^*()_ . | test@123 |
Confirm Password | Yes | Confirm the password of the new account. | The password requirements are as follows: It can contain 8–32 characters. It must contain at least two of the following types of characters: letters, digits, and special symbols !@#%^*()_ . | test@123 |
Remarks | No | Remarks | Any characters | test |
mongouser password | Yes | Enter the password of the mongouser user. | The password of the mongouser user. Required password strength: It can contain 8–32 characters. It can contain letters and digits. It can contain special symbols !@#%^*()_ . It cannot all be letters or digits. | test@123 |
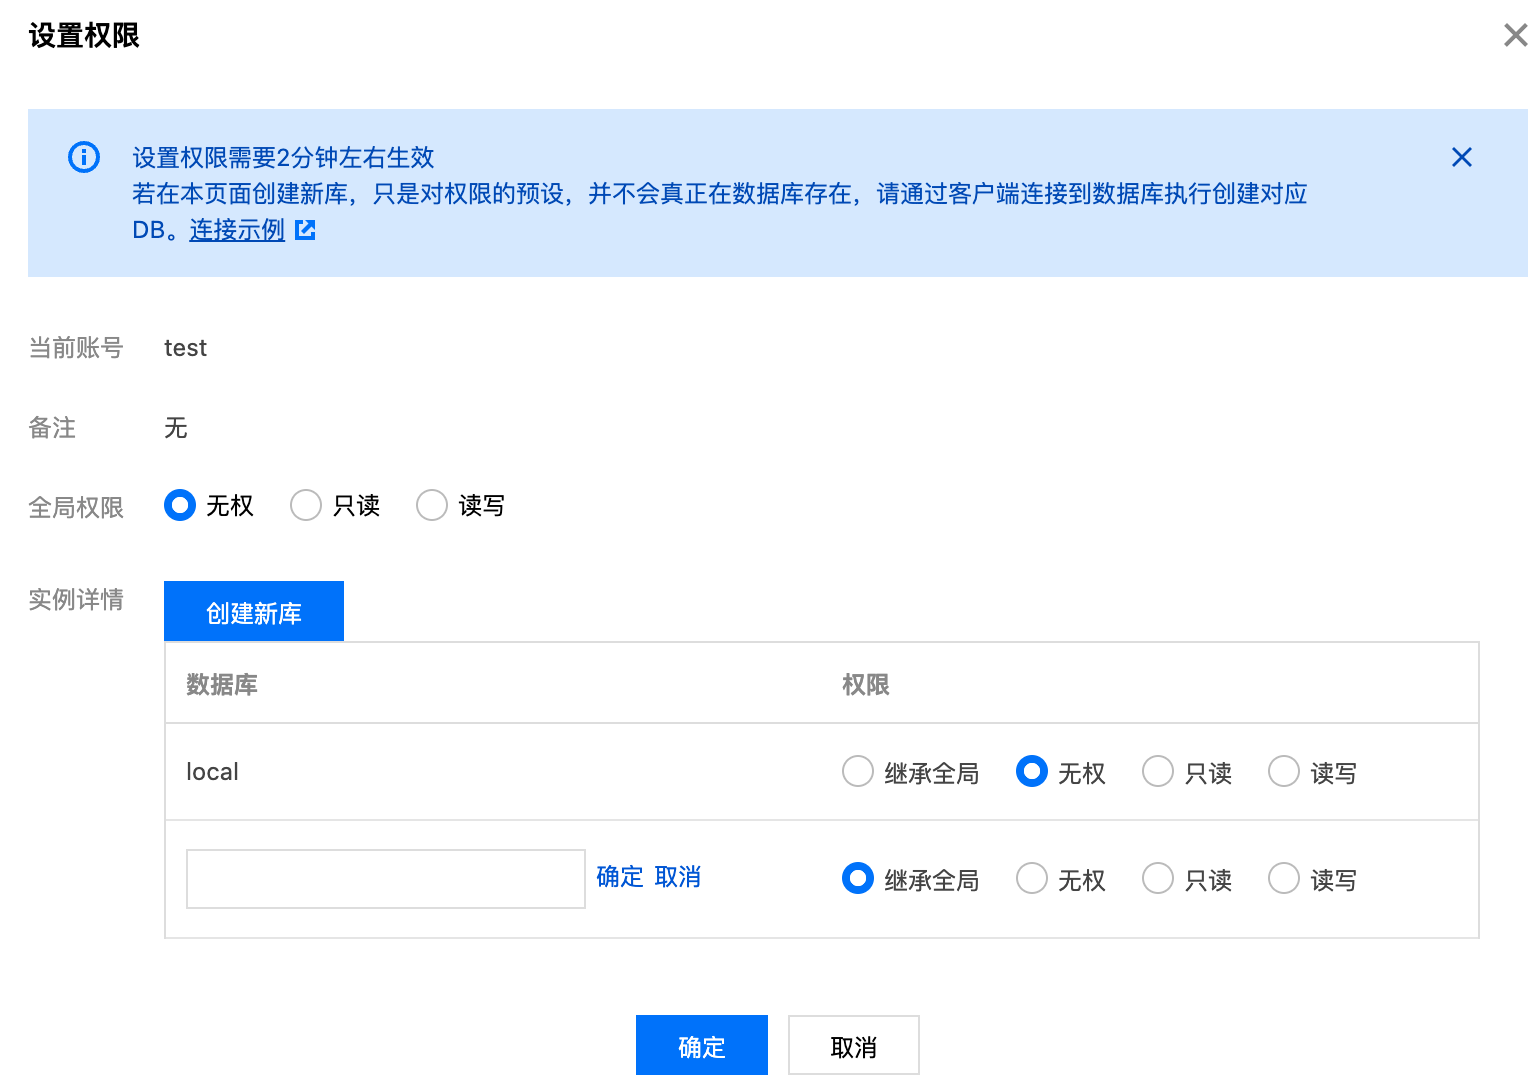
3. On the Set Permissions page, set the database access permissions for this account.
|
Global Permission | Set the global permission to access all databases for this account. | No permission: No data read/write permission. Read-Only: Only data read permission. Read/Write: Data read/write permission. |
Instance Details | Set the permission to access a specific database for this account. | Inherit global data: Global permission is inherited. No permission: No data read/write permission. Read-Only: Only data read permission. Read/Write: Data read/write permission. |
4. (Optional) Click Create Database, and a new database will be added to the database list. Enter the name of the new database in the input box, click OK after the input box, and set the access permission of this database.
Note:
The created new database is not a real database but is only used to preset the access permission of this database.
5. Click OK, wait 2 minutes for the system configuration to take effect, and then you can use this account to access databases.
Modifying the account permission
1. In the account list on the Account Management tab, find the target account.
2. Click View/Set in the Operation column.
3. In the Set Permissions pop-up window, modify the account permission.
4. Click OK.
Changing the account password
1. In the account list on the Account Management tab, find the target account.
2. Click Reset Password in the Operation column.
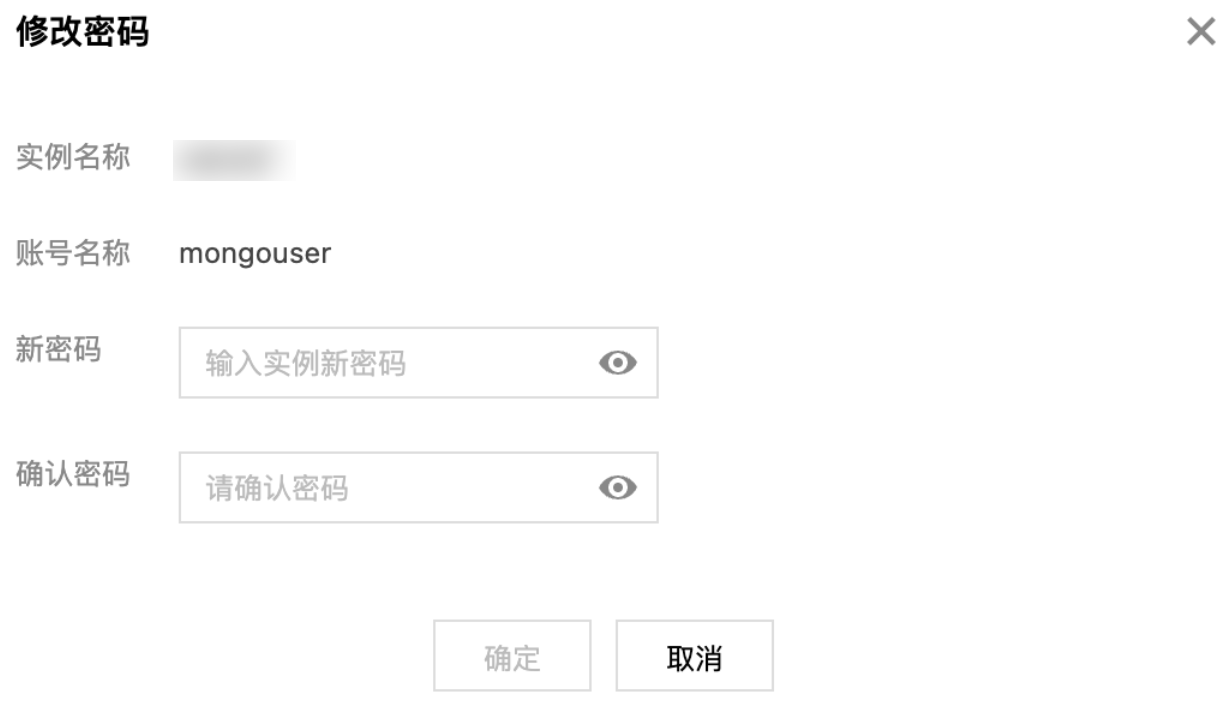
3. In the Reset Password pop-up window, enter the New Password and Confirm Password.
The password requirements are as follows:
It can contain 8–32 characters.
It must contain at least two of the following types of characters: letters, digits, and special symbols !@#%^*()_
.
4. Click OK.
Relevant Operations
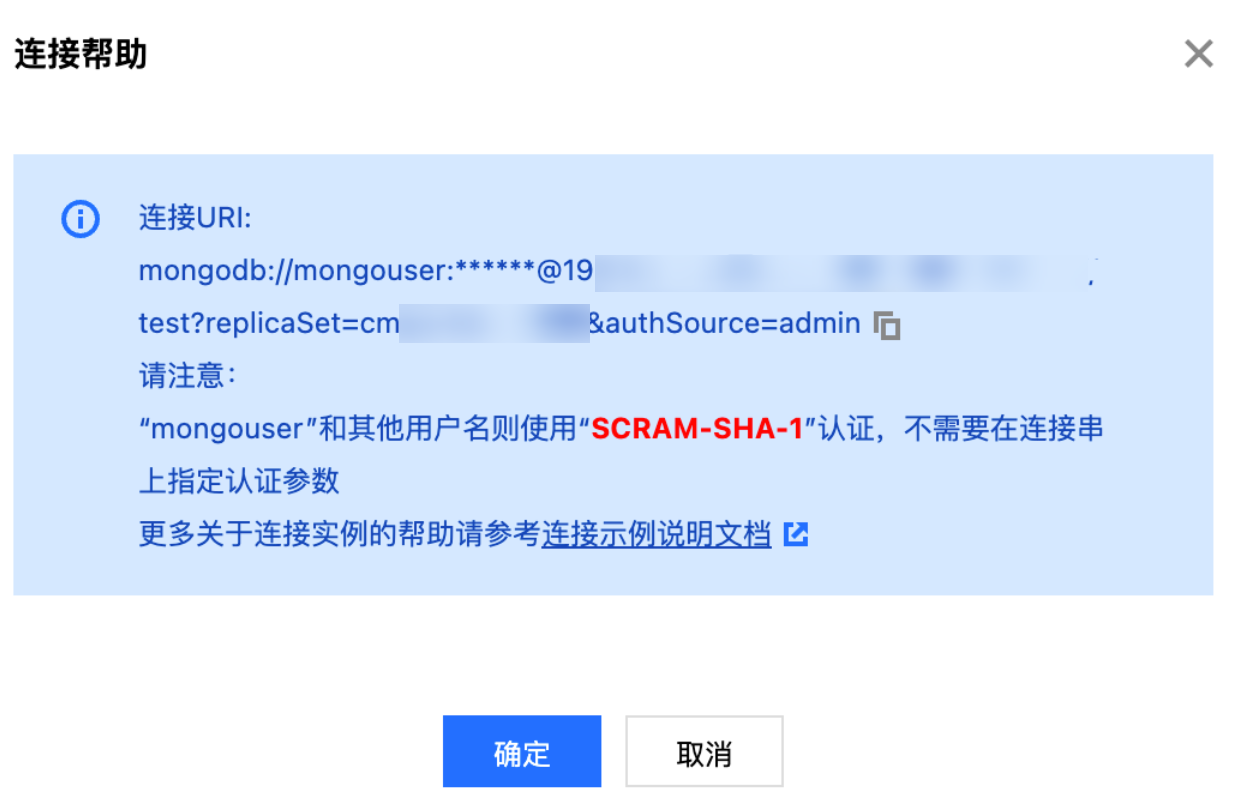
Viewing the account URI
1. In the account list on the Account Management tab, find the target account.
2. Click Connection URI in the Operation column.
4. Click OK.
Deleting an account
1. In the account list on the Account Management tab, find the target account.
2. Click Delete in the Operation column.
3. In the Delete User pop-up window, confirm the information of the account to be deleted.
4. Click OK.
Related APIs
Was this page helpful?