
库表回档

最后更新时间:2025-02-06 17:47:26
操作场景
当业务仅需要对数据库的多个库表进行恢复操作时,可以在控制台进行库表回档,将数据恢复在当前实例或新实例中。相对整实例回档,回档数据变少,库表回档会比整实例回档更快。
版本说明
版本信息 | 回档方式 |
3.2、3.6 | 整实例回档(逻辑备份) 库表回档(逻辑备份) |
| |
4.0、4.2、4.4 | 整实例回档(逻辑备份、物理备份) 库表回档(逻辑备份、物理备份) |
| |
5.0 | 整实例回档(逻辑备份、物理备份) 库表回档(逻辑备份) 说明: 5.0版本的实例暂时不支持库表回档到新实例。 按 Key 闪回(逻辑备份) |
使用限制
单个实例一次最多可选择2000个库表进行回档 。
仅支持回档7天内任意时间的数据。
注意:
请关注实例管理页系统监控里的 oplog 时间差监控指标,在业务有频繁写入、更新和删除操作时,该指标越小,oplog 被覆盖的风险越大。
若回档过程中客户端存在事务操作,请主动提交事务或设置超时时间,避免事务长时间占用锁资源而导致回档任务异常。
前提条件
云数据库 MongoDB 实例状态为运行中。
已 备份数据。
操作步骤
1. 登录 MongoDB 控制台。
2. 在左侧导航栏 MongoDB 的下拉列表中,选择副本集实例或者分片实例。副本集实例与分片实例操作类似。
3. 在右侧实例列表页面上方,选择地域。
4. 在实例列表中,找到目标实例。
5. 在实例详情页面,选择备份与回档页签。
6. 在备份与回档页签,进入备份任务列表页面。
7. 在备份任务列表中,找到需要恢复的备份文件。
8. 在其操作列,单击库表回档。

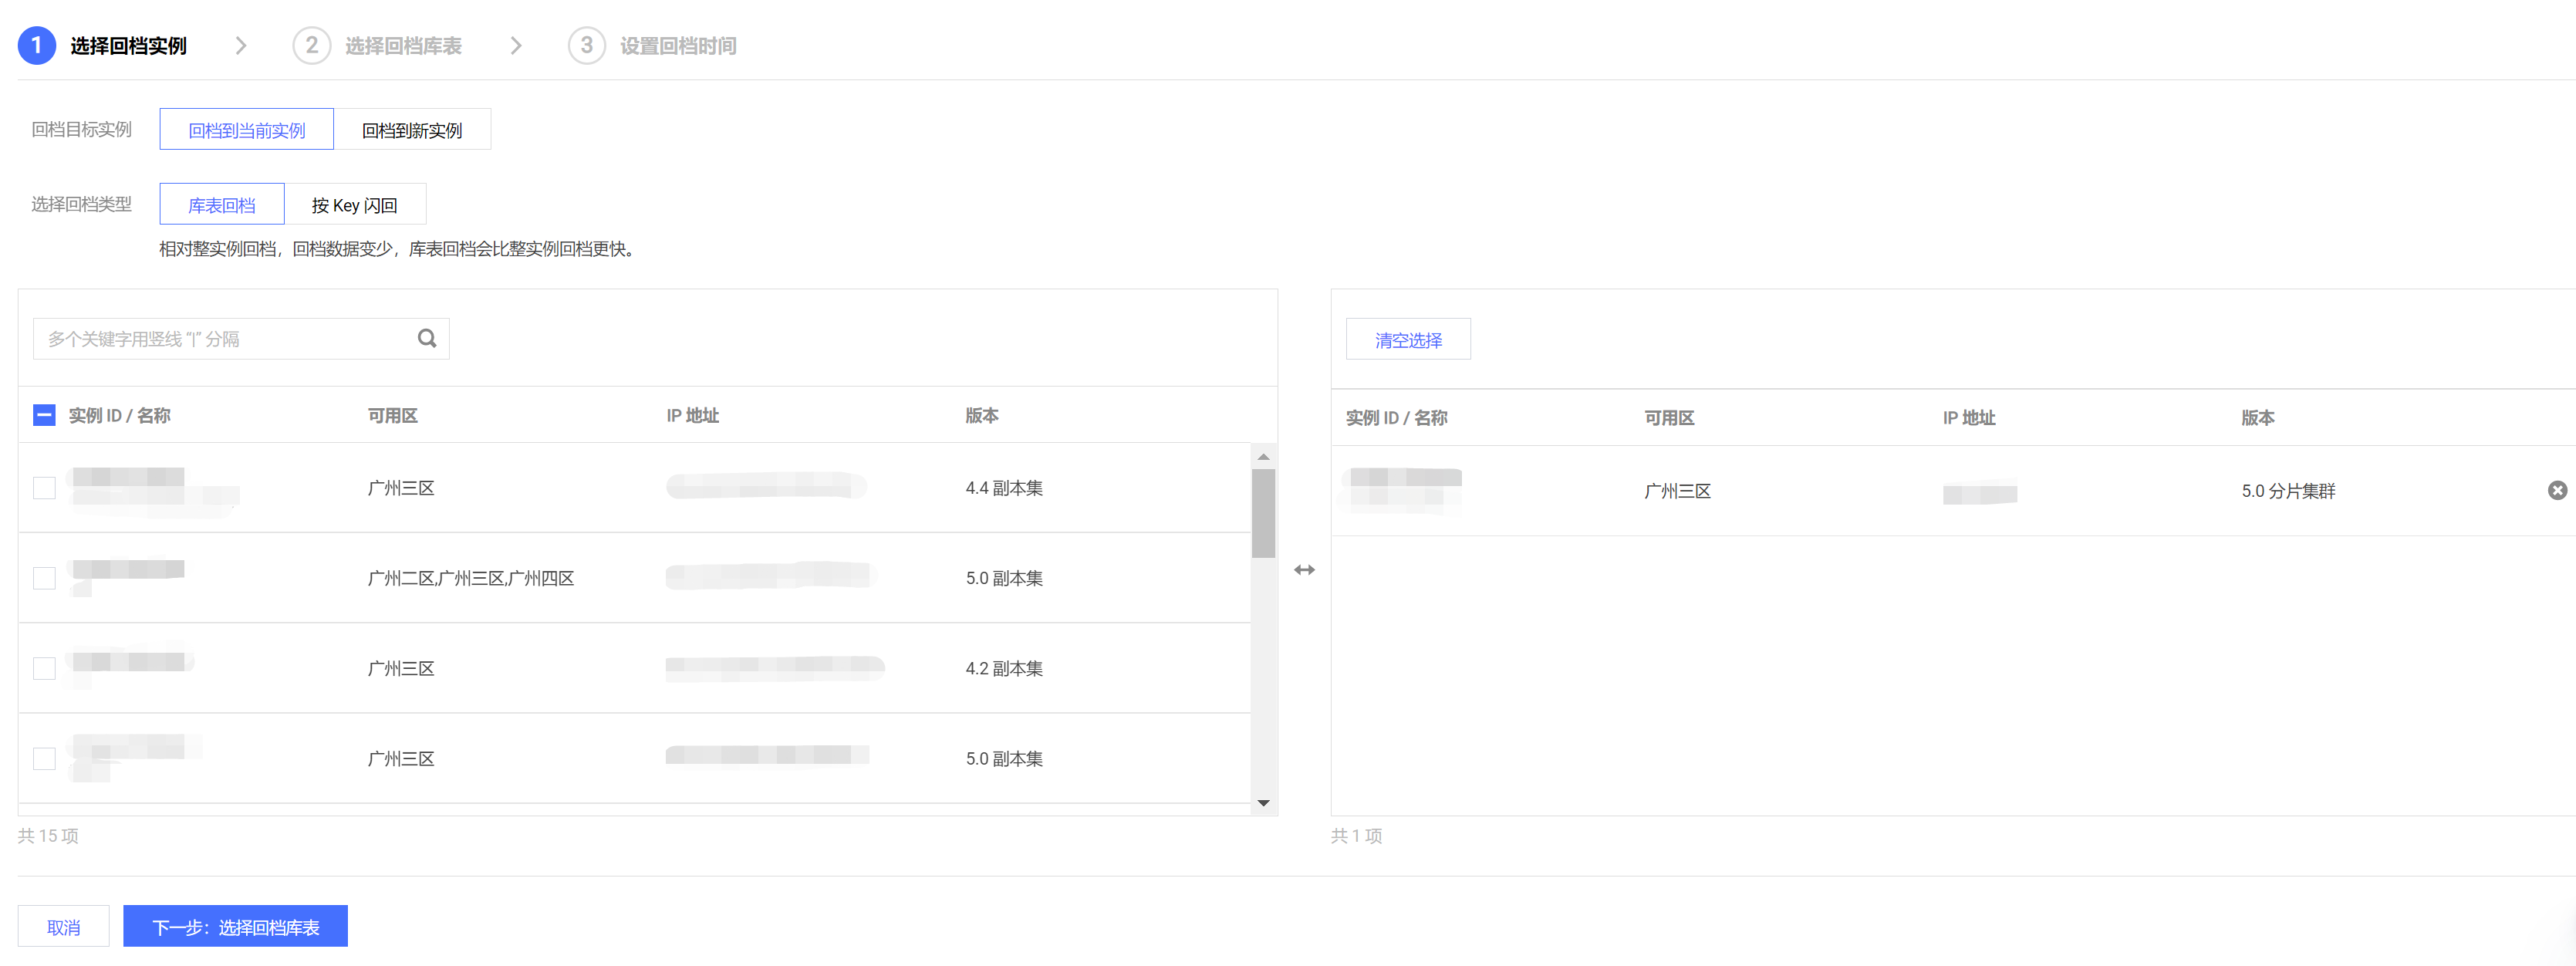
9. 在批量回档库表数据配置向导的选择回档实例页签,回档目标实例后面选择回档至当前实例或者回档到新实例,选择回档类型中选择库表回档。
说明:
回档到当前实例,无需购买新实例,恢复库表于当前实例,支持选择多个实例进行批量回档,可依据实际场景选择进行库表回档与按 Key 闪回。在下方实例列表中,勾选一个或多个待回档的实例(可在搜索框根据实例 ID、实例名称或者 IP 地址查找)。具体操作,请参见 库表回档至当前实例。
回档到新实例,需要购买新实例,对源实例无影响,不支持选择多个实例进行批量回档。可依据实际场景选择进行库表回档、按 Key 闪回或者克隆实例。在下方实例列表中,仅能勾选一个待回档的实例(可在搜索框根据实例 ID、实例名称或者 IP 地址查找)。具体操作,请参见 库表回档至新实例。
库表回档至当前实例
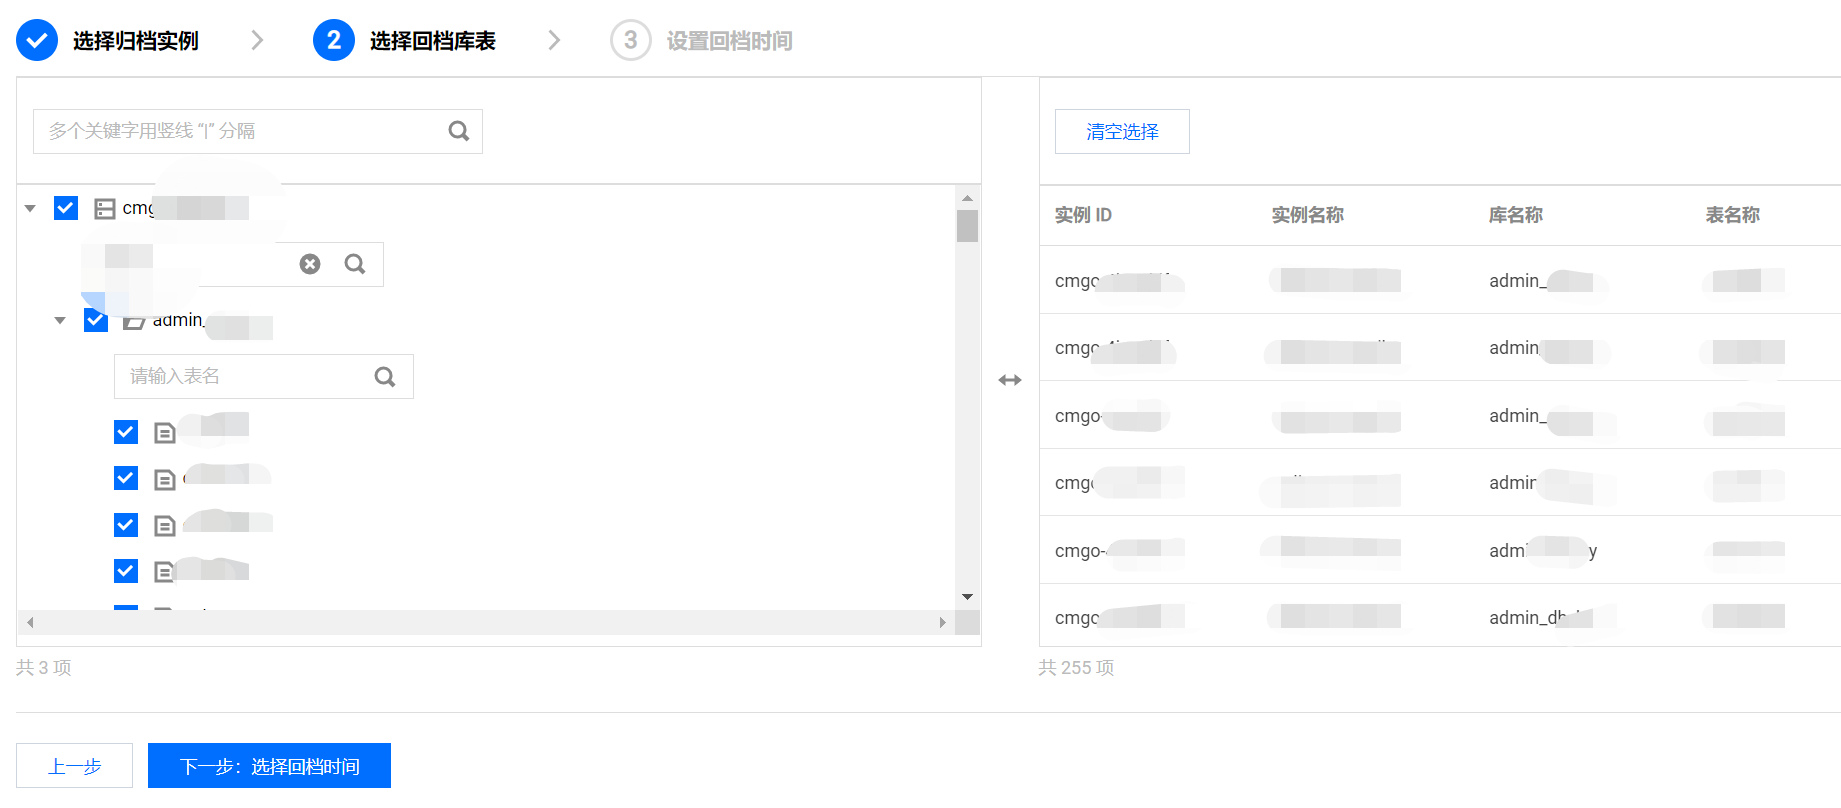
1. 单击下一步:选择回档库表,在选择回档库表页签,选择待回档的库表,并在右侧方框区域确认库表信息。如下图所示。
说明:
在右侧区域,可对已选择的库表进行确认并修改。
单击清空选择,在选择错误时,可清空已选择的库表。
单击
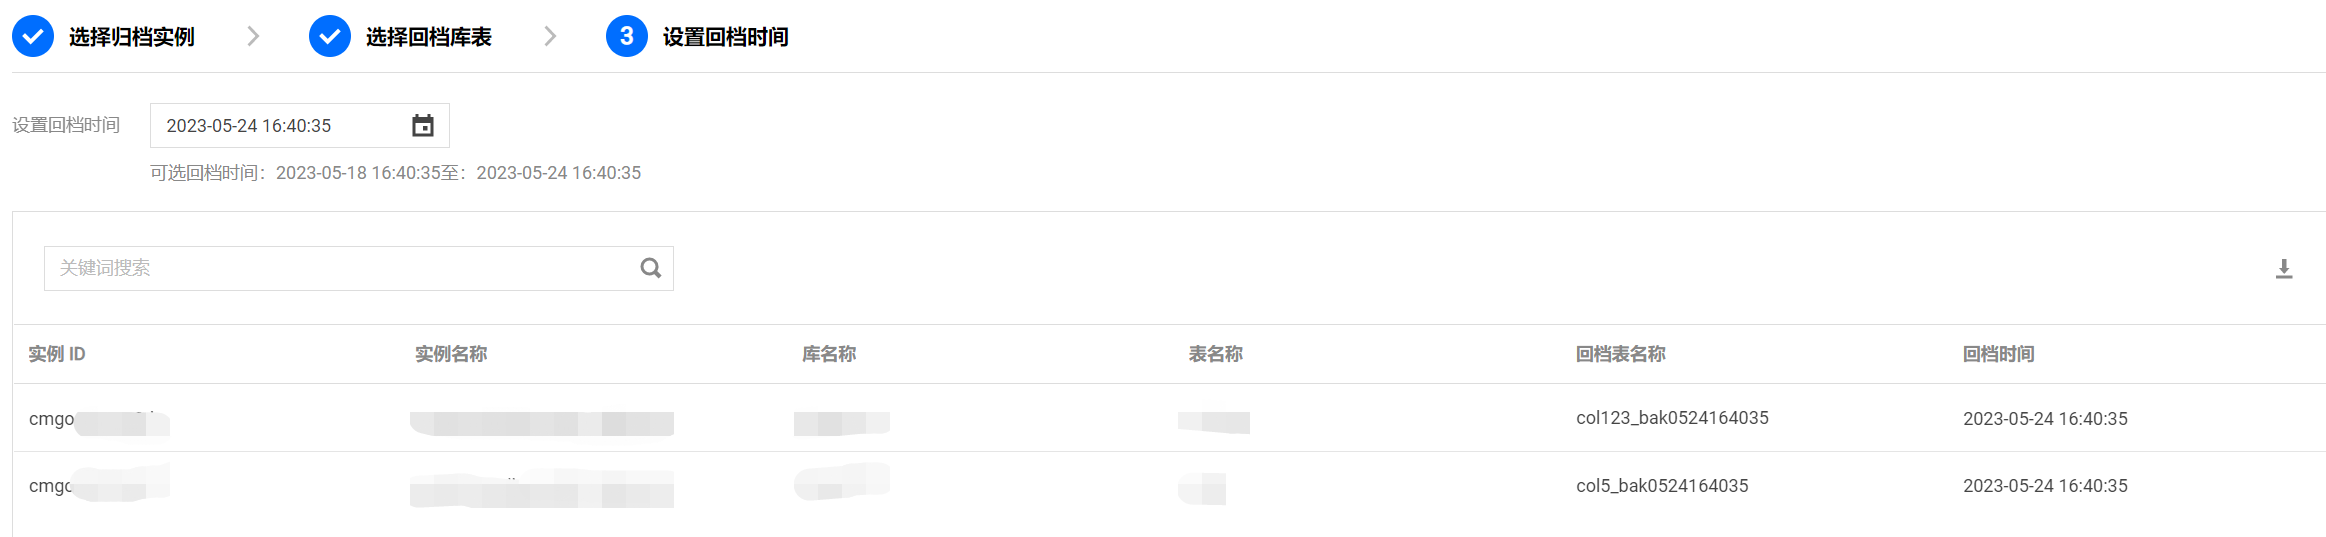
2. 单击下一步:选择回档时间,在设置回档时间页签的设置回档时间后面的时间框中,选择待回档的具体时间点,并确认预回档的实例信息及库表信息。
注意:
回档时间仅支持选择当前时间之前7天内任意时间点的数据。
回档到当前实例,并不会直接回档原表,而是新建一个备份文件,例如,源库表为 test,会新建一个 test_bak 的库表。如下图所示中,回档表名称为新建的库表名称。
回档任务完成之后,可根据需要批量修改库表名称。
云数据库 MongoDB 5.0以下版本分片集群通过库表回档到当前实例,无法修改集合名,只能手动将数据替换回原集合。
为防止生产库表被误删,如果回档 oplog 里包含 drop database 或 drop collection 操作,回档任务会中止。
3. 单击发起回档,返回批量回档库表数据的回档任务页签,可看到正在执行的回档任务。单击操作列的任务详情,可查看任务的详细信息。等待任务执行完成,可连接实例,确认回档数据正确性。

4. (可选)选择批量回档库表数据的批量改表名页签,找到已回档的任务,在其操作列,单击批量修改表名称,便在右侧区域看到待修改表的信息,包含原始表名、原始表新表名、回档表表名以及回档表新表名。
单击
确认修改,单击左下方的批量改表名,即可完成修改。
说明:
批量改表名,只能修改单个回档任务下单个实例下的所有库表。如果用户发起了一个批量回档任务,回档了多个实例的库表,需逐一修改库表名。具体操作,请参见 批量回档。
批量修改表名,包含修改原始表表名以及回档表表名。
原始表,在其原始表表名加上 _ori 的标识。
回档表,将回档表表名改为原始表表名。

库表回档至新实例
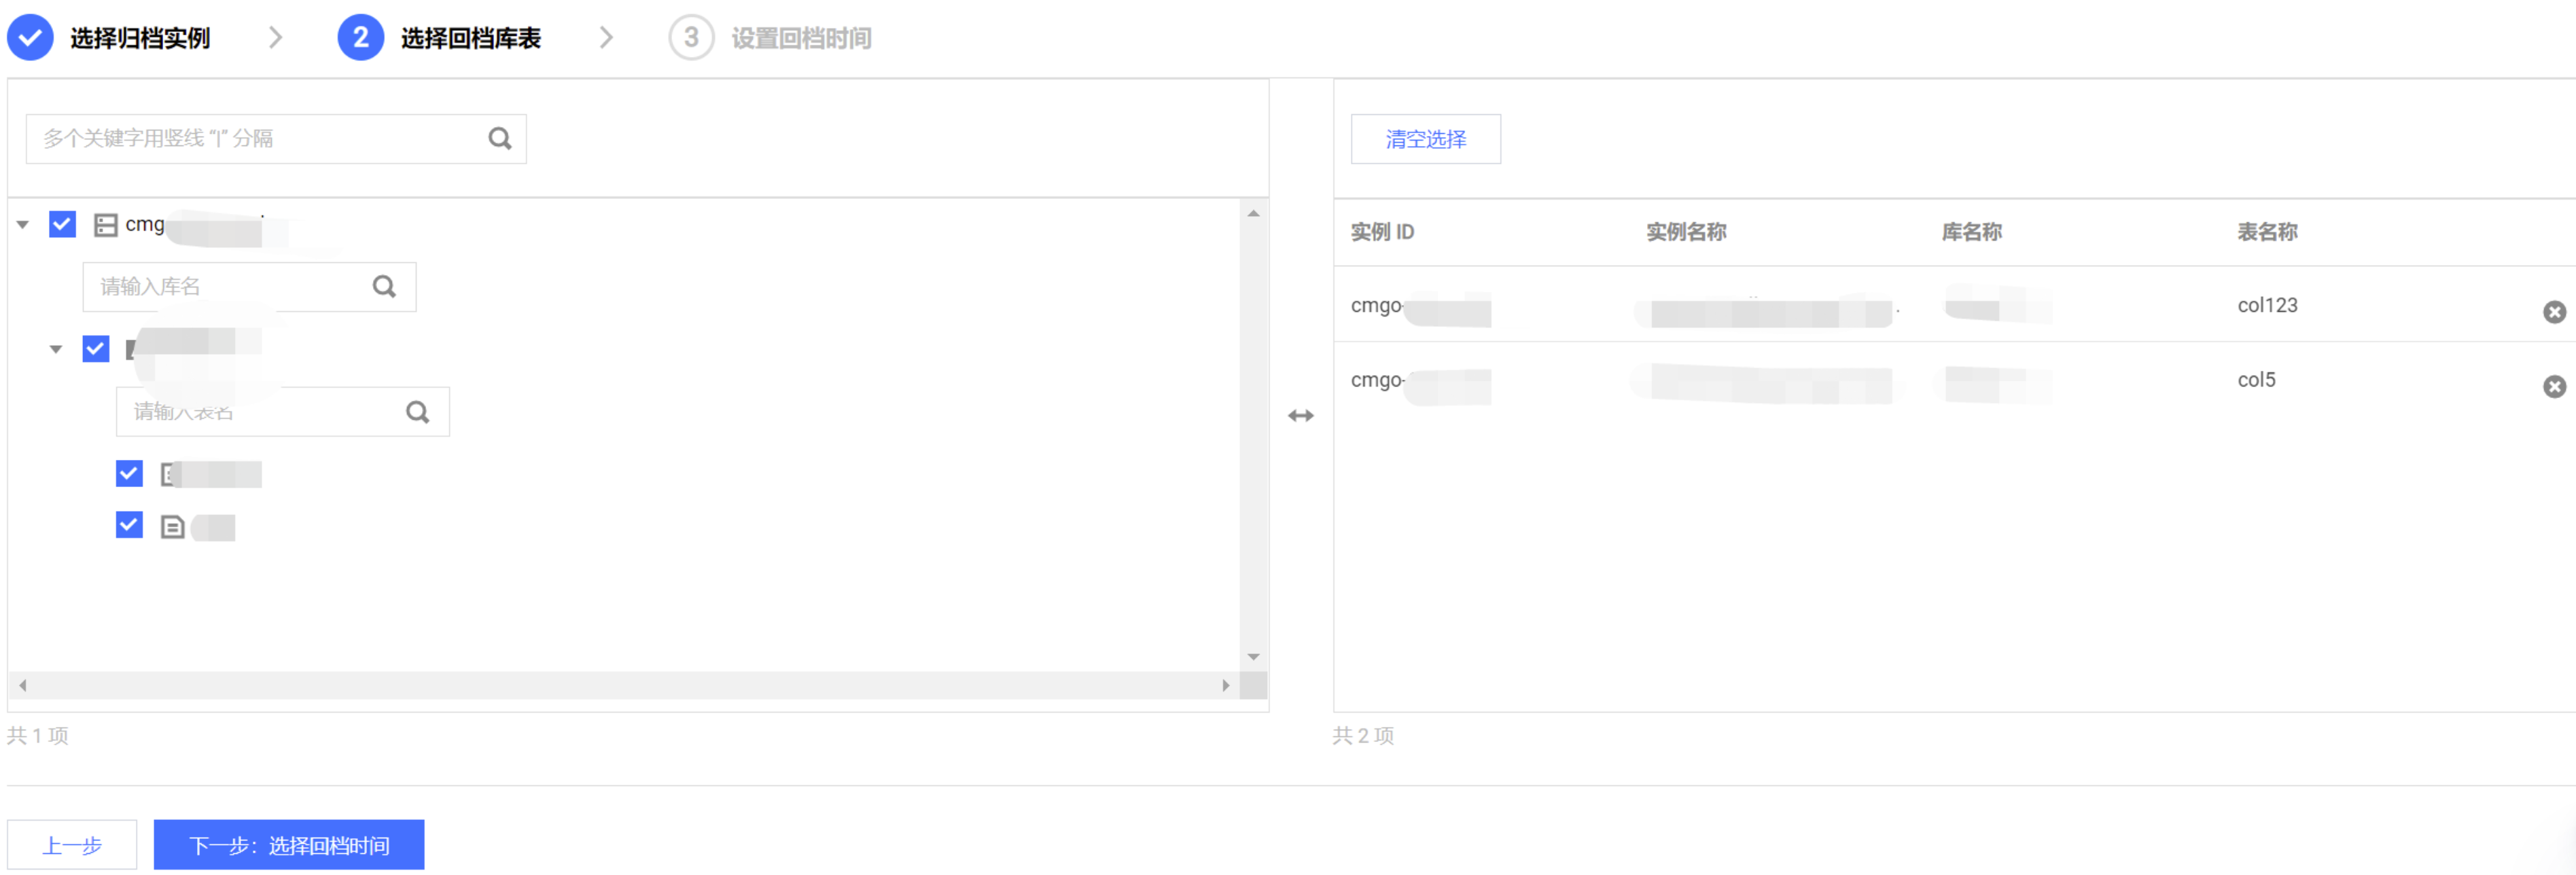
1. 单击下一步:选择回档库表,在选择回档库表页签,选择待回档源实例的库表。在搜索框,可根据库名称和表名称搜索待回档库表。并在右侧方框区域查看选中的库表信息。如下图所示。在右侧方框区域,对已选中的库表,可进行管理。
单击清空选择,在选择错误时,可清空已选择的库表。
单击
2. 单击下一步:选择回档时间,在设置回档时间页签的设置回档时间的时间框中选择待回档的时间点,并确认预回档的实例信息及库表信息。
3. 单击前往购买和配置克隆实例,进入云数据库 MongoDB 克隆实例页面,选择新实例的计费模式、配置规格等。具体信息,请参见 创建 MongoDB 实例。
4. 确认费用,单击立即购买。
5. 返回实例列表页面,待实例完成创建,源实例的库表已同步至新购买的克隆实例中,可连接新实例确认回档数据的正确性。
文档反馈