Kubectl is a command line tool provided by Kubernetes for performing operations on clusters. It uses kubeconfig as a configuration file (the default path is ~/.kube/config) to configure the information of multiple clusters, and manage and operate multiple clusters.
To manage and operate the TKE or TKE Serverless cluster through Kubectl, you need to enable the APIServer's public or private network access on the cluster basic information page to obtain kubeconfig (cluster access credentials). If you need to use kubectl to manage multiple clusters, generally you need to extract the contents of each field in kubeconfig and merge them into the kubeconfig file of the device where kubectl locates. This method is complicated and may easily cause an error.
Through the kubecm tool, you can merge multiple cluster access credentials into kubeconfig more simply and efficiently. This document describes how to use kubecm to efficiently manage the kubeconfig of multiple clusters.
You have installed the kubectl command line tool on the device used for managing multiple clusters.
Directions
Installing kubecm
Install kubecm on the device used for managing multiple clusters.
Obtaining cluster access credential
After creating a cluster, you need to follow the steps below to obtain access credential for the cluster:
1. Log in to the TKE console and click Cluster in the left sidebar.
2. Click the ID/name of the cluster for which the access credential needs to be obtained to go to the basic information page of the cluster.
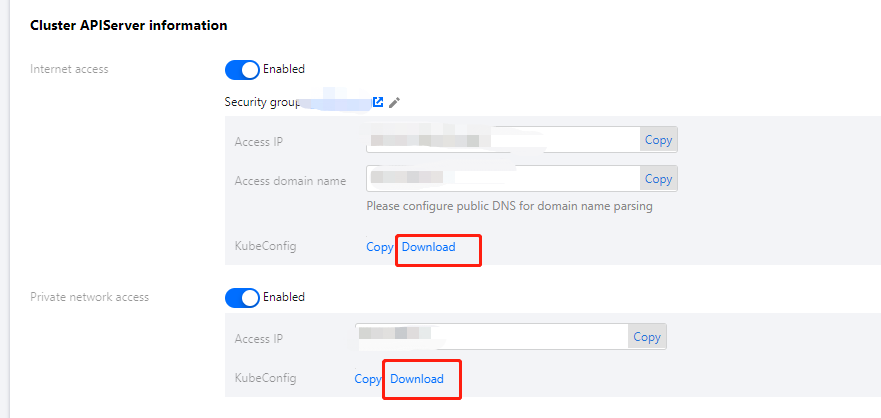
3. On the Basic Information page, enable Internet access and Private network access in the Cluster APIServer Information section.
4. Click Download on the right of KubeConfig.
Using kubecm to add access credential to kubeconfig
This document takes the cluster access credential cls-l6whmzi3-config as an example. Run the following command to use kubecm to add the access credential to kubeconfig (-n means you can specify the context name):
kubecm add -f cls-l6whmzi3-config -n cd -c
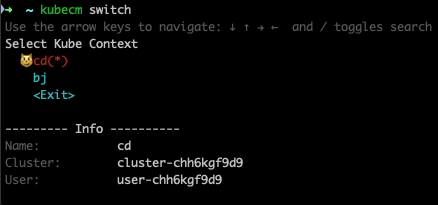
Viewing the cluster list
Run the following kubecm ls command to view the cluster list in kubeconfig (the asterisk identifies the cluster under operation):