Create CAPTCHA
Create CAPTCHA
1. Log in to the Captcha console and select Manage CAPTCHA on the left navigation pane.
2. On the Manage CAPTCHA page, click Create CAPTCHA.
Note:
Note: Up to 50 CAPTCHAs can be created in the Captcha console. You can create multiple CAPTCHAs according to different business requirements and configure different client types and security policies for each CAPTCHA.
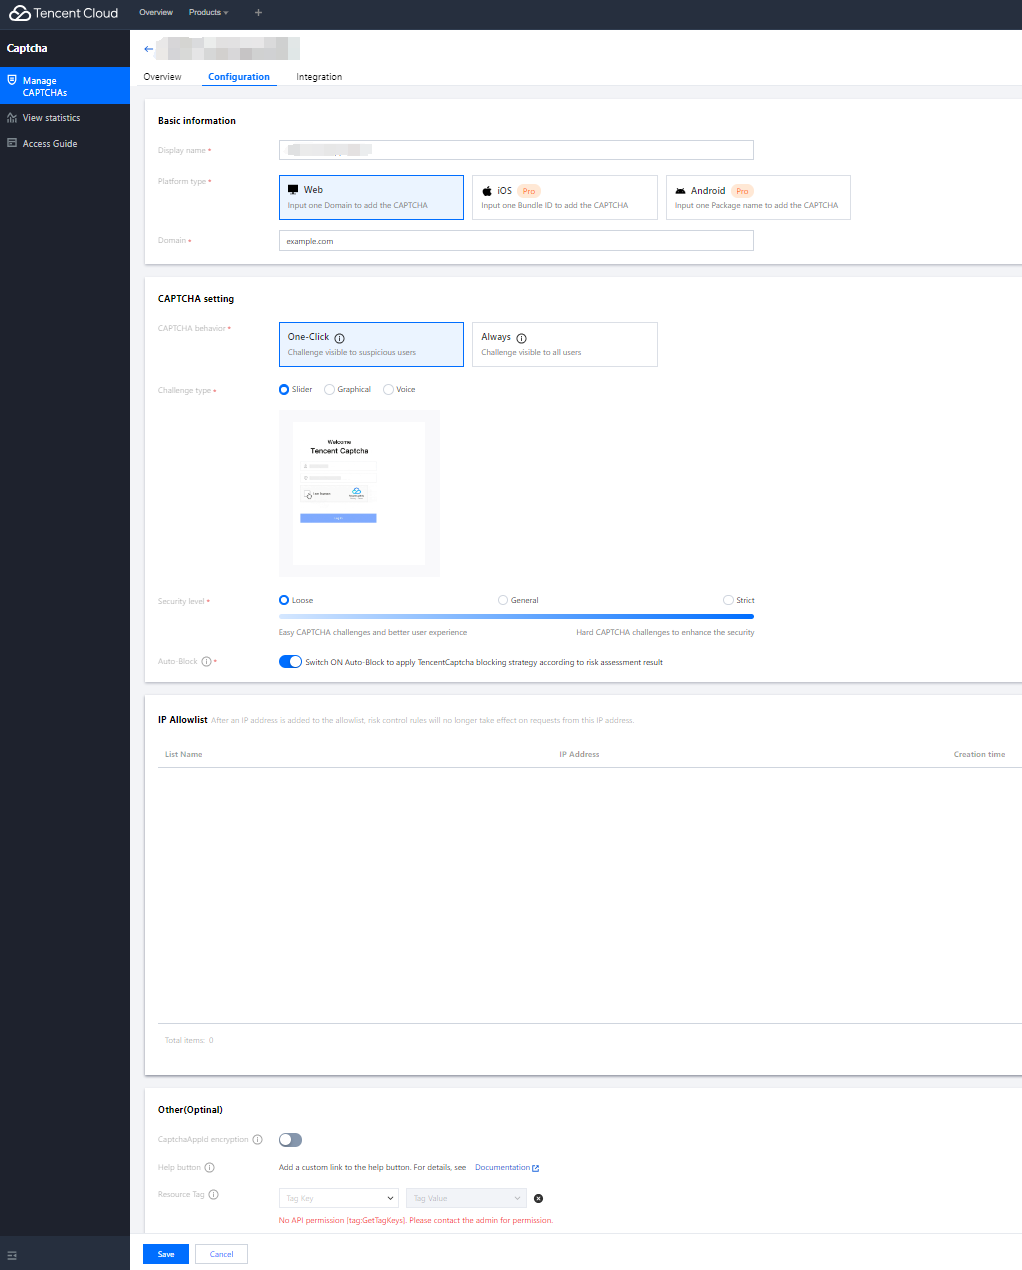
3. On the Create CAPTCHA page, set parameters such as display name according to your business scenario requirements, and click Save.

4. After completing new verification, you can view the quick access Captcha guide on the integration page:

5. Return to the verification management page to view all created verifications:

Data Stati
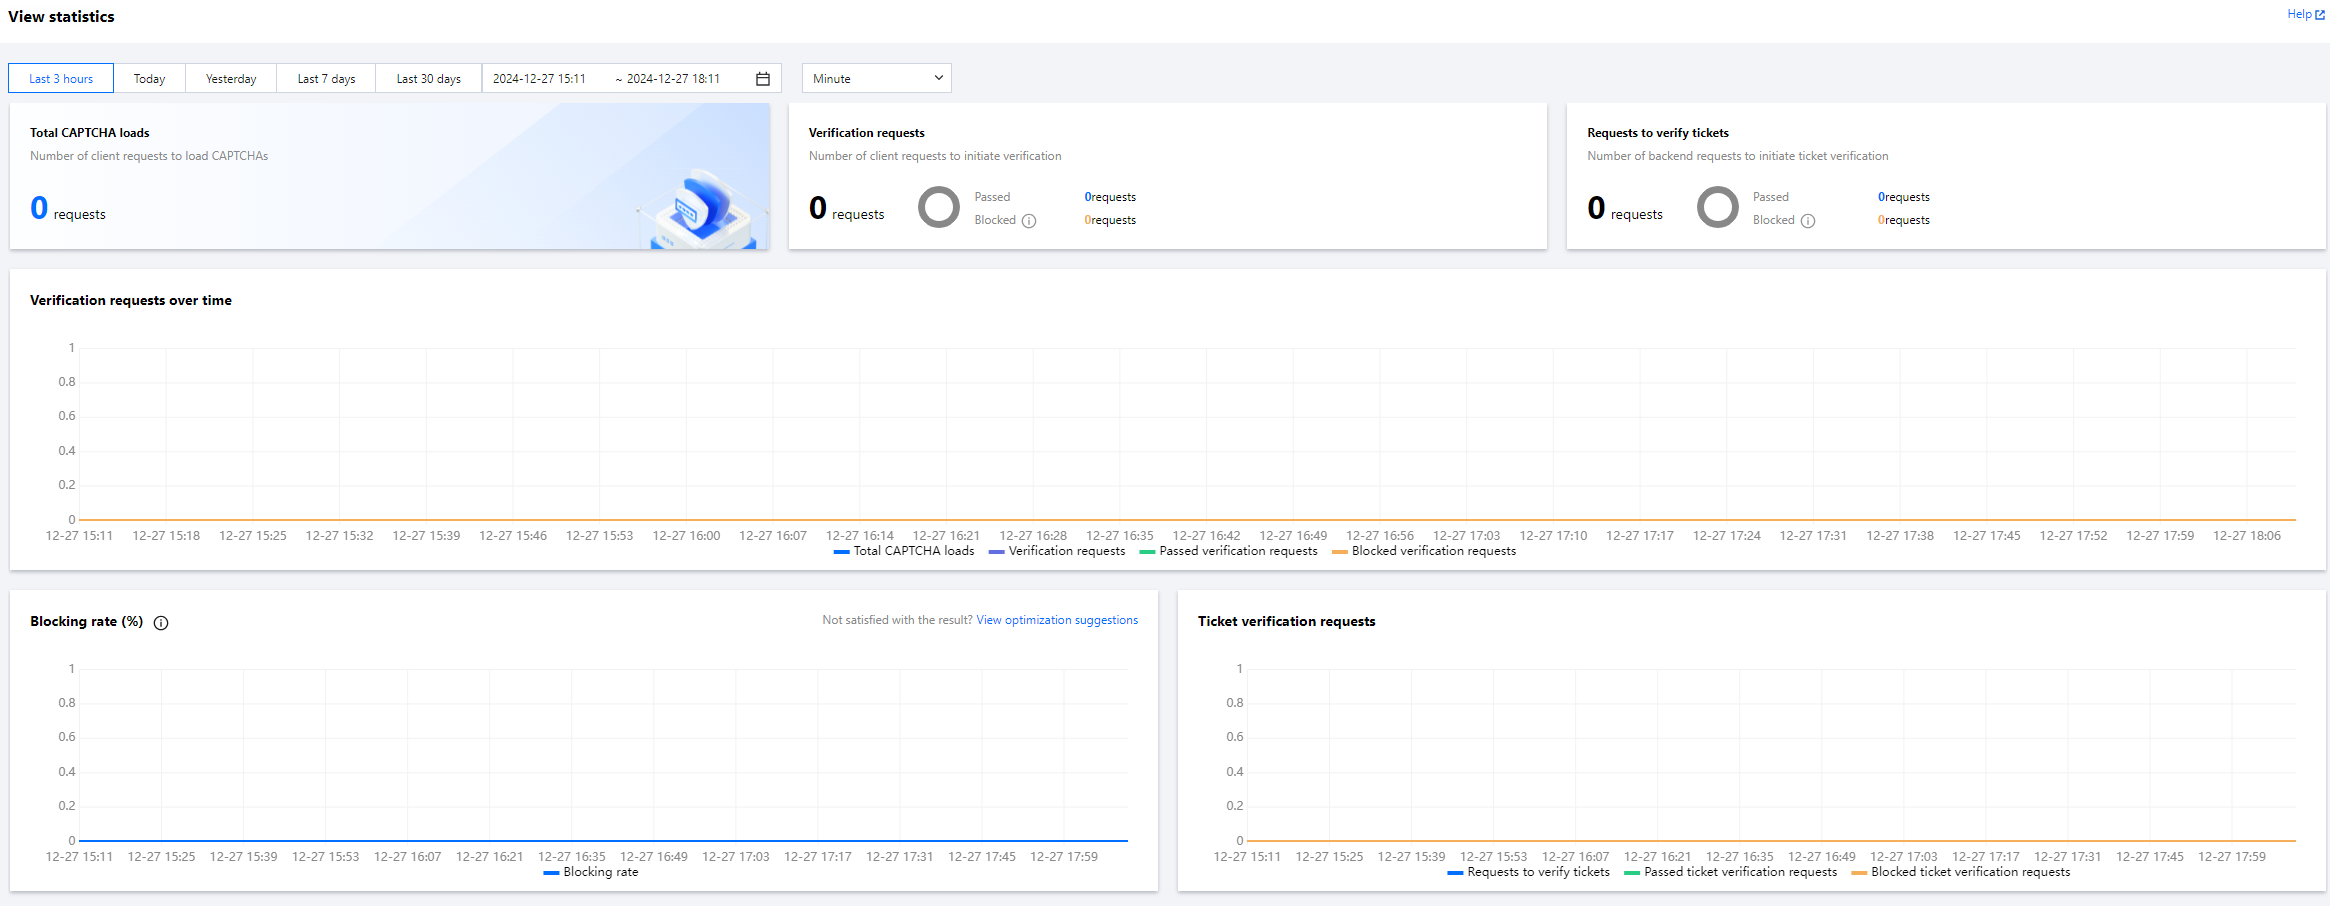
On the CAPTCHA Statistics page, you can view the statistics of all CAPTCHAs.

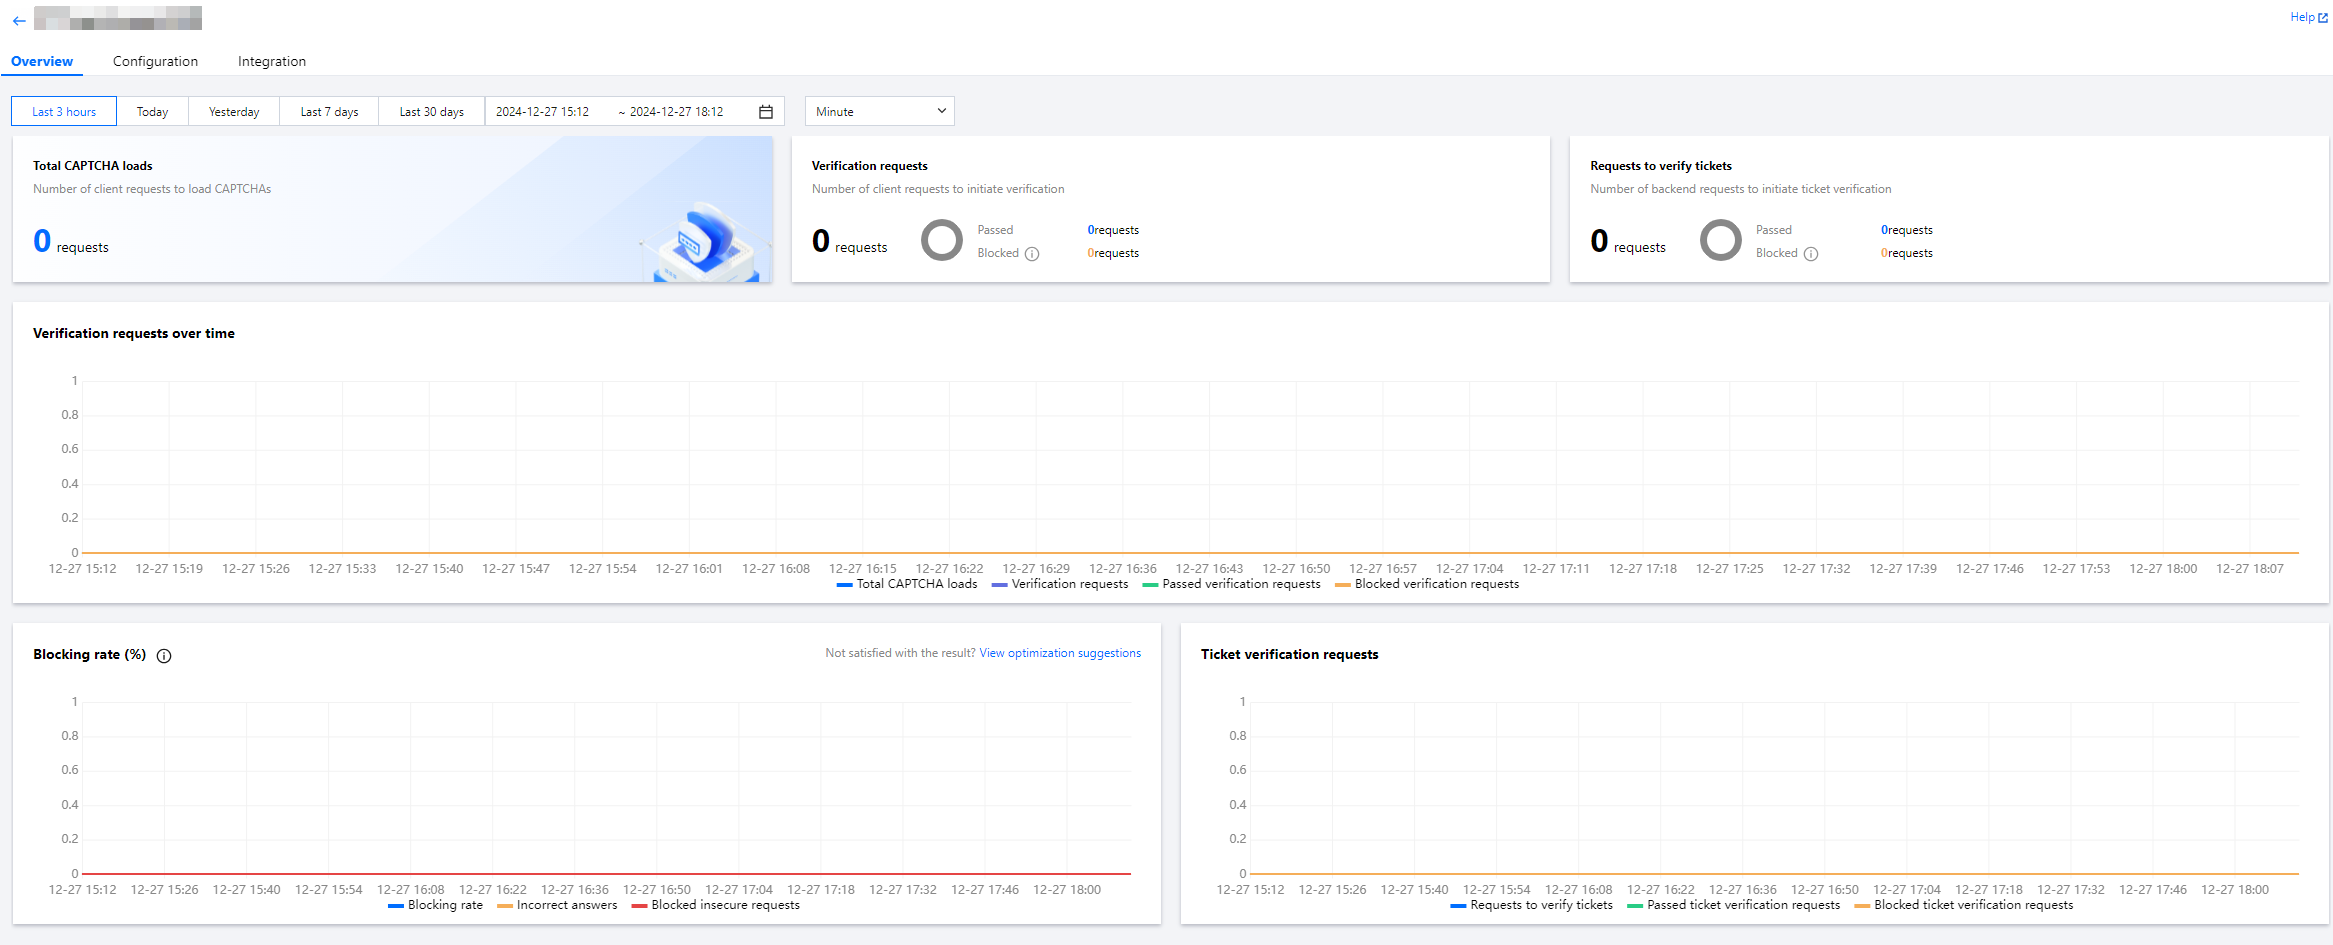
On the Manage CAPTCHA page, go to the CAPTCHA you want to view and click CAPTCHA Details to enter the CAPTCHA Details page, where you can view the statistics of a single CAPTCHA.

You can view the following metrics in the Captcha console:
Metric Name | Metric Description |
Requests | Number of client loading verifications |
Verification requests | Number of verifications initiated after users answer verification questions |
Number of successful verifications | Number of times verification was successful |
Verification block rate | Block rate for failed verifications |
Block rate for incorrect answers | Block rate due to incorrect answers |
Block rate by security policy | Block rate due to security policy enforcement |
Number of ticket verifications | Number of server-initiated ticket verifications |
Number of successful ticket verifications | Number of times ticket verification was successful |
Number of ticket verification interceptions | Number of times ticket verification failed |
Thres
1. Log in to the Captcha console and select Manage CAPTCHA from the left navigation bar.
2. On the Manage CAPTCHA page, select the CAPTCHA you want to configure and click CAPTCHA Details.
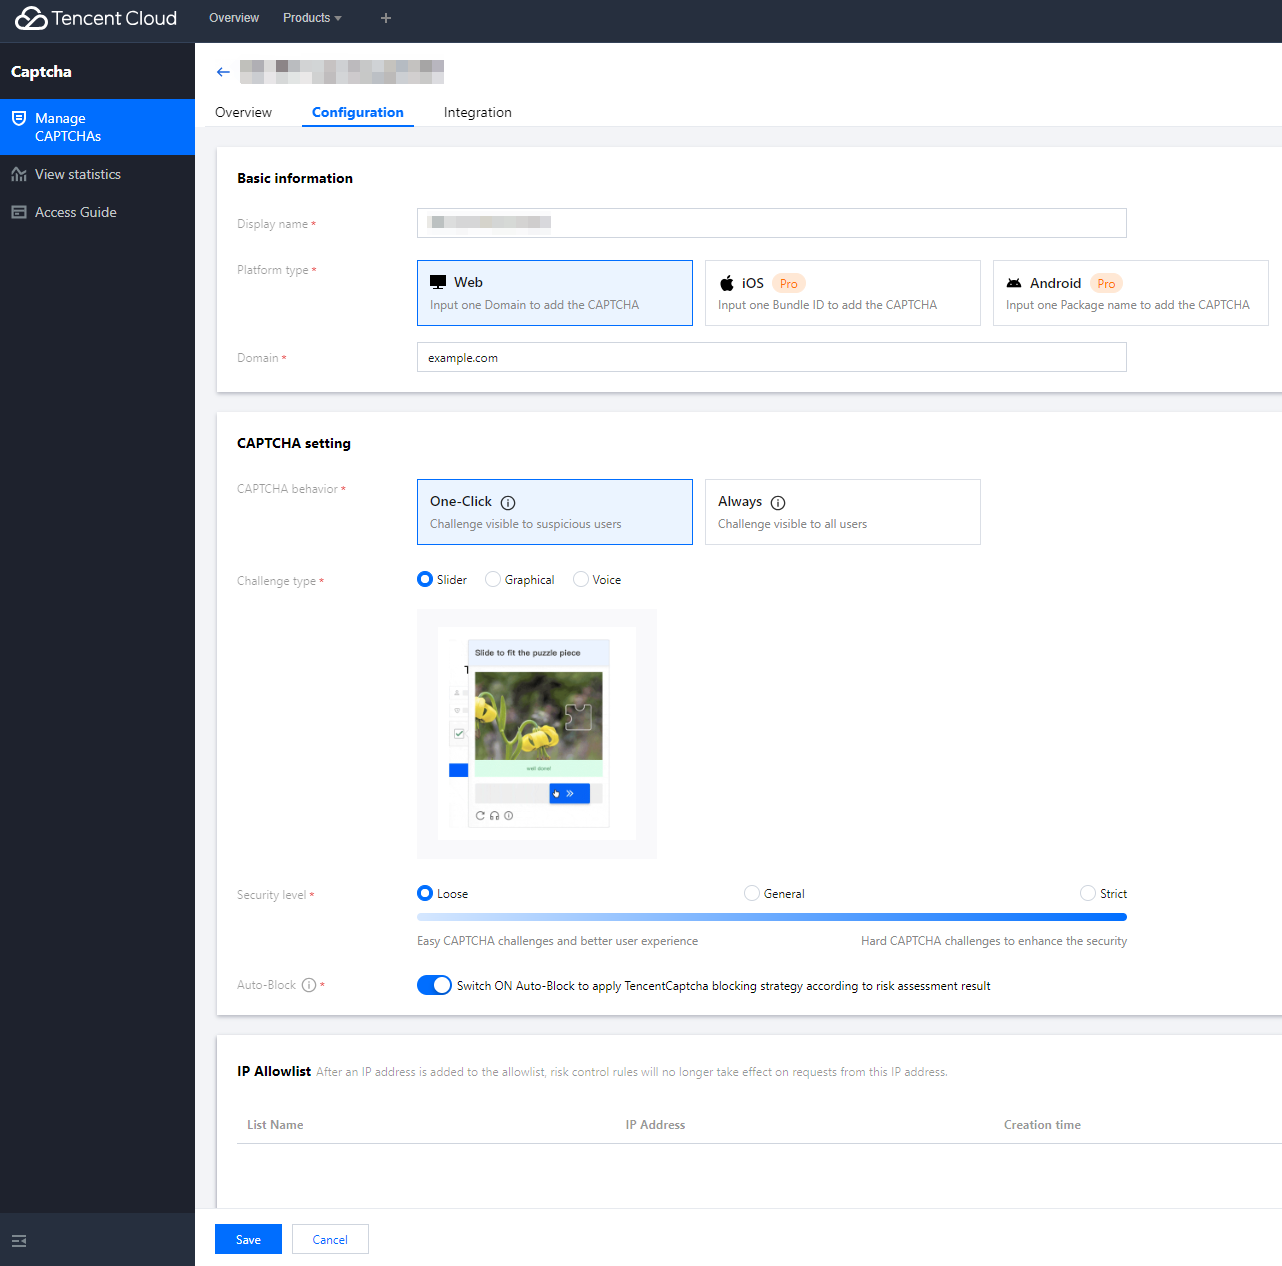
3. On the CAPTCHA Details page, click Configuration > Modify to modify the display name, platform type, domain name, and other information, and click Save.

Captcha Settings
1. Log in to the Captcha console and select Manage CAPTCHA from the left navigation bar.
2. On the Manage CAPTCHA page, select the CAPTCHA you want to configure and click CAPTCHA Details.
3. On the CAPTCHA Details page, click Configuration > Modify, make the necessary changes, and then click Save Modifications.

Parameter description:
Verification mechanism: Currently, you can choose one-click verification or always verify.
Verification type: Currently, you can choose slide puzzle verification, graphic click verification, or voice verification.
Risk control levels: Three levels are available, Experience First, Balanced, and Security First.
Interception policy management: Once enabled, TencentCaptcha decides whether to intercept risky requests and require a retry.
More information
You can log in to the Captcha console, and click Quick Consulting in the upper right corner to learn more.

 Yes
Yes
 No
No
Was this page helpful?