Cloud Connect Network
- Release Notes and Announcements
- Product Introduction
- Getting Started
- Operation Guide
- Instance Management
- Route Management
- Route Tables and Route Overview
- Bandwidth Management
- Monitoring and Alarms
- Troubleshooting
- Service Agreement
Connecting Network Instances Across Accounts
Last updated: 2024-01-10 14:41:59
This document describes how to associate VPCs under another account with your CCN instance.
Prerequisites
The VPCs you want to associate with have been created.
The IP ranges of the VPCs and IDCs do not overlap.
Step 1. Create a CCN Instance under Account A
1. Log in to the CCN console with account A and click + New on the CCN instance management page.
2. Enter a name for the CCN instance and a description. Select billing mode, service quality and bandwidth limit.
Note
You can associate instances after creating the CCN.
3. Click OK.
Step 2. Use Account B to Apply for Associating VPC with CCN
1. Log in to the VPC console with account B and click the ID of the VPC to be associated with the CCN instance in the VPC list to enter the details page.
2. Click Associate Now.

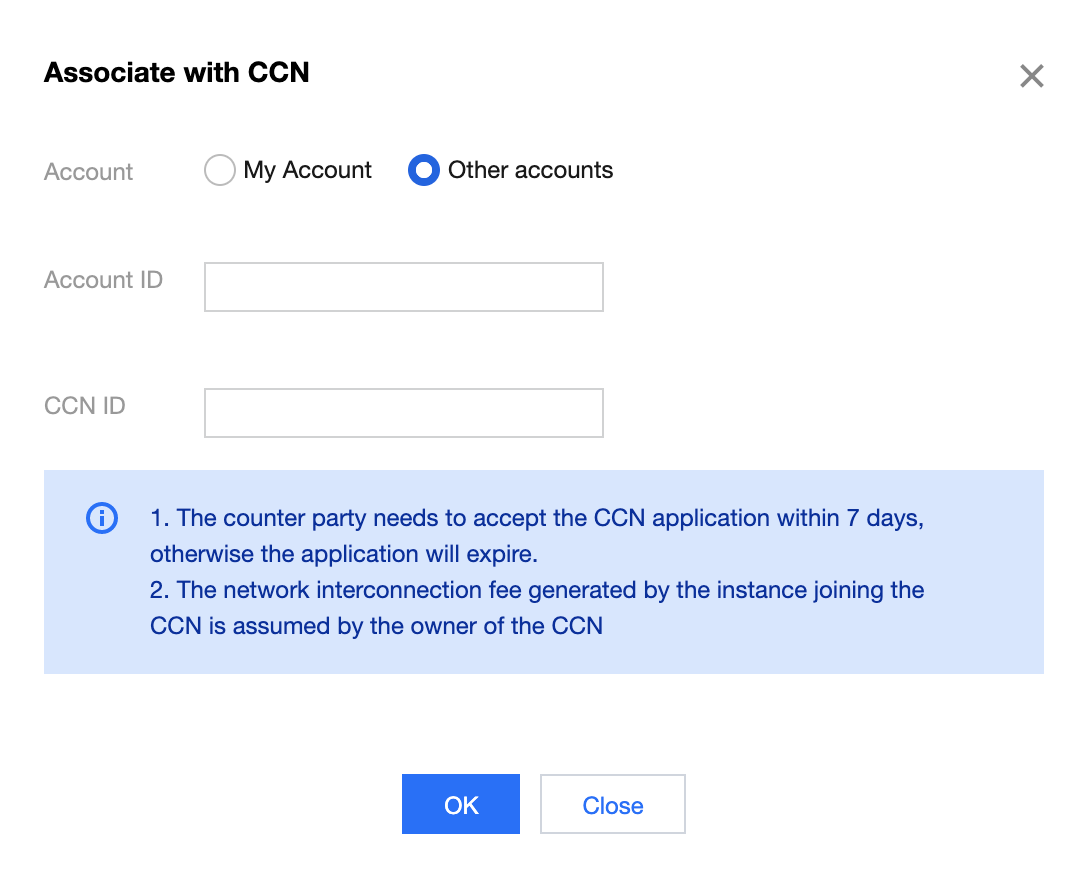
3. In the pop-up window, select Other accounts and enter the ID of account A and the CCN instance ID.

4. Click OK to send the association request to account A.
Step 3. Use Account A to Accept the Association Request
1. Log in to the CCN console with account A.
2. Click the ID/Name of the CCN instance with a pending association request.
3. On the Associated Instances page, locate the VPC to be associated, and click Agree to add the VPC to the CCN instance.

Step 4. Check the Route Table
IP range conflicts produce invalid routes. To check if such conflicts exist, perform the following steps:
1. Log in to the CCN console, click the ID/Name of the desired CCN instance.
2. Click the Route Table tab to view the route table of this CCN instance.
3. Check if there is any invalid routing policy.

4. See Route Limits to learn more about route conflicts. If you want to enable a route, please see Enabling a Route.
Step 5. Set Cross-region Bandwidth Cap (Optional)
1. Log in to the CCN console, click the ID/Name of the CCN instance for which to set the bandwidth.
2. Select the Bandwidth Management tab on the details page of the CCN instance.
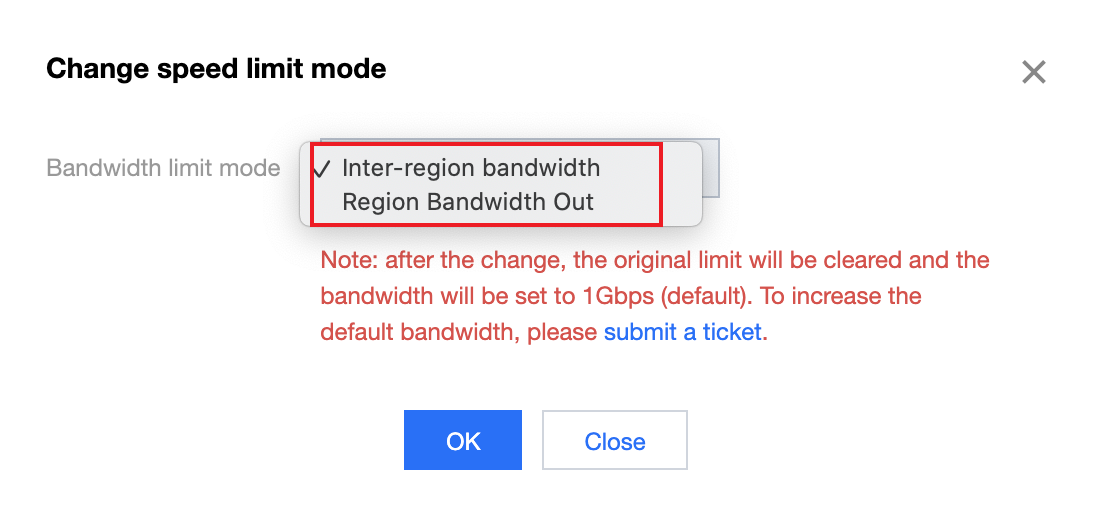
3. (Optional) Click Change to select the bandwidth limit mode as needed.


4. Configure the bandwidth cap depending on the bandwidth limit mode of the CCN instance:
Note
Inter-region bandwidth limit
Click Change Bandwidth. In the pop-up window, select Region A and Region B from the drop-down list and enter the Bandwidth Cap. You can also click Add to configure multiple bandwidth limit rules, and then click OK.

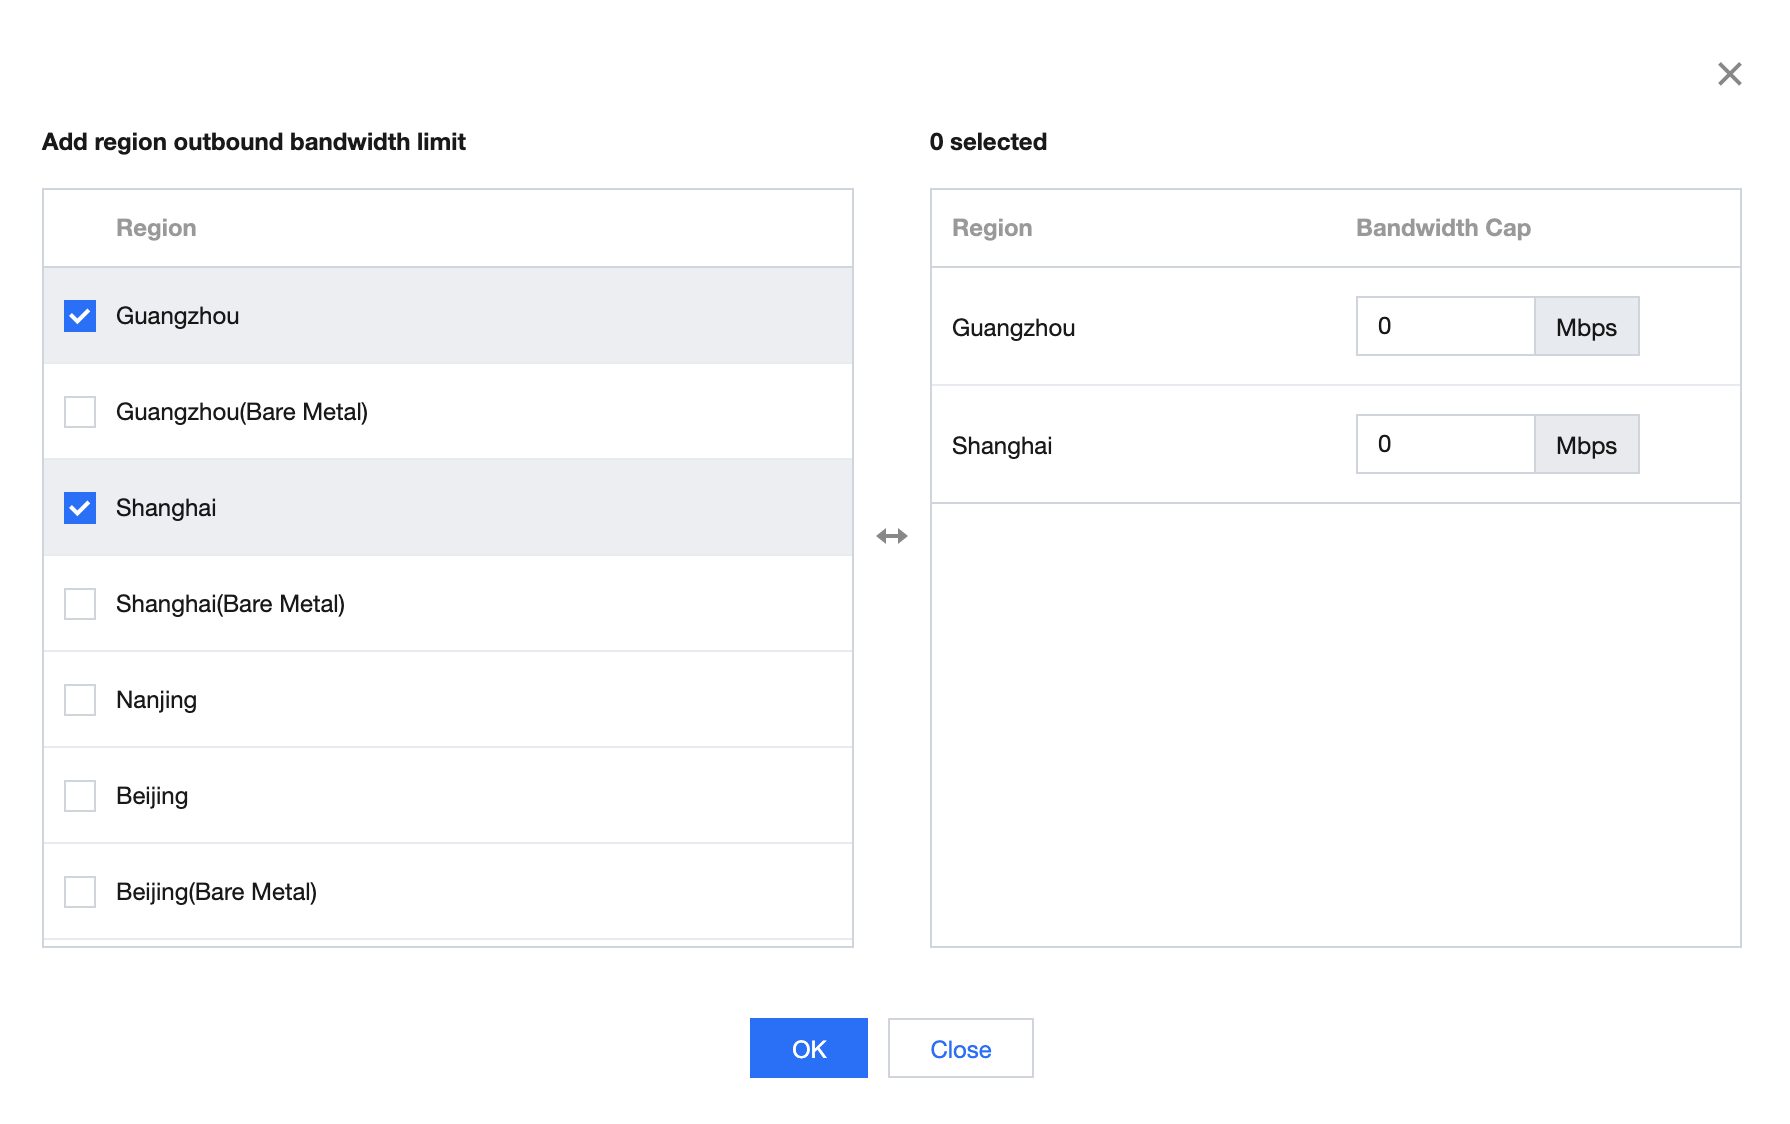
Region outbound bandwidth limit
Click Adjust bandwidth cap. In the pop-up window, select regions for which you want to limit the bandwidth on the left and set the bandwidth cap on the right. Click OK.

Note
Was this page helpful?
You can also Contact Sales or Submit a Ticket for help.
Yes
No

