
触发器(Webhook)

最后更新时间:2025-09-25 17:39:30
操作场景
腾讯云容器镜像服务(Tencent Container Registry,TCR)支持用户配置并使用灵活的触发器 (Webhook) 功能。可通过在实例内配置合适的触发器,快速接入现有研发流程及 CI/CD 平台,实现镜像更新自动触发应用部署等容器 DevOps 场景。
触发器功能允许用户自定义创建触发器规则,并支持查看触发日志。其中,触发动作同时支持容器镜像及 Helm Chart 的推送,拉取及删除操作。触发规则支持灵活的正则表达式过滤、指定实例内命名空间及通过配置镜像仓库和版本的正则过滤规则,实现仅部分仓库或特殊命名格式的镜像版本可启动触发器。自定义 Header 功能支持以
Key:Value 的形式配置访问目标 URL 时的 Header,可用于鉴权等场景。前提条件
在创建并管理 TCR 企业版实例的触发器前,您需要完成以下准备工作:
已成功 购买 TCR 企业版实例。本功能仅适用于企业版实例。
如果使用子账号进行操作,请参考 企业版授权方案示例 提前为子账号授予对应实例的操作权限。
操作步骤
创建触发器
1. 登录 容器镜像服务 控制台,选择左侧导航栏中的 触发器。
在“触发器”页面即可查看当前实例内的触发器规则列表。如需切换实例,请在页面上方的“实例名称”下拉列表中进行选择。
2. 单击新建,在弹出的“新建触发器”窗口中,参考以下提示进行规则配置。如下图所示:

名称:实例规则名称,支持小写字母、数字及(
-、.、 _)三种符号,且需以字母数字开头。本文以 webhook-demo 为例。描述:规则描述,支持中文。
触发动作:当前支持推送镜像、删除镜像,上传 Helm Chart 及删除 Helm Chart 四种触发动作。触发器执行时,发起的 webhook 请求内将包含该触发动作信息。
触发规则:
触发实例:触发器所属的实例,即为当前已选择实例,不可修改。
命名空间:触发器生效的命名空间,如果列表为空,请先在该实例内 创建命名空间。
仓库名称:触发器生效的仓库名称,支持对镜像仓库及 Helm Chart 仓库进行 正则匹配。
版本Tag:触发器生效的 Tag,支持 正则匹配。如需所有版本均可触发,可不填写。
URL:触发器被触发后,发起请求的目标 URL,即用户配置的 Webhook Server 的访问地址。触发器将向该 URL 地址发起 POST 请求,请求 body 中将包含触发动作、触发规则等信息。
Header:触发器发起 POST 请求时,支持以 Key:Value 形式输入可携带的 Header 信息。例如,
Authentication: xxxxxxx。3. 单击确定即可创建同步规则。
管理触发器规则
成功创建后即可在“触发器”页面查看已创建的触发器规则,您可执行以下操作管理触发器规则。如下图所示: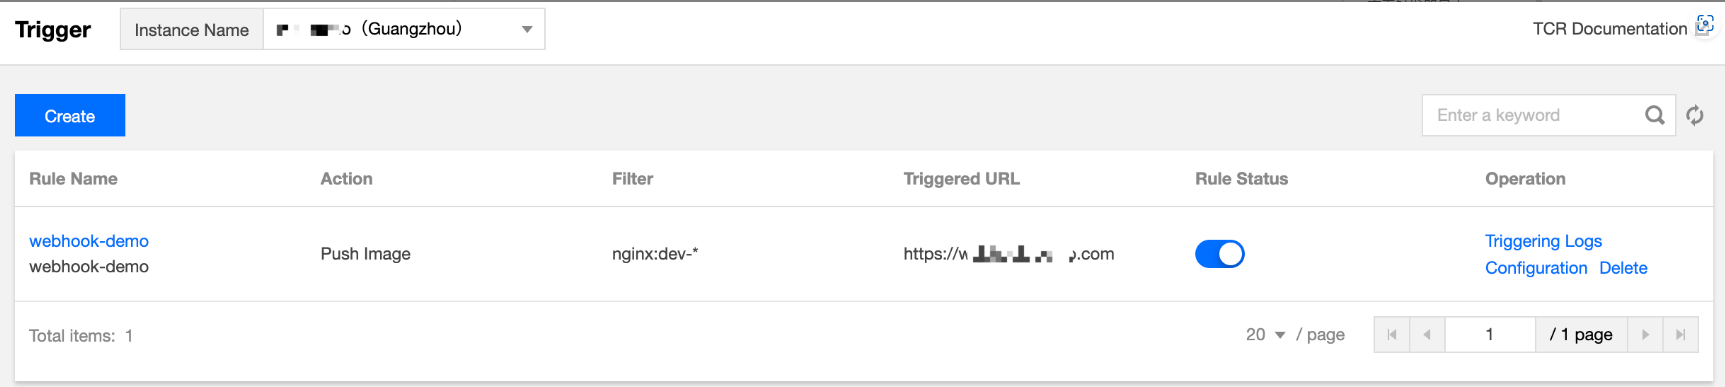
查看触发日志:单击触发器规则名称,或触发器规则名称右侧的触发日志即可查看该规则触发日志,详情请参见 查看触发器日志。
修改规则状态:

配置:重新配置触发器规则,可配置全部参数。
删除:删除该触发器规则。
查看触发器日志
单击指定触发器规则名称,或触发器规则名称右侧的触发日志,即可查看该规则的触发日志。如下图所示: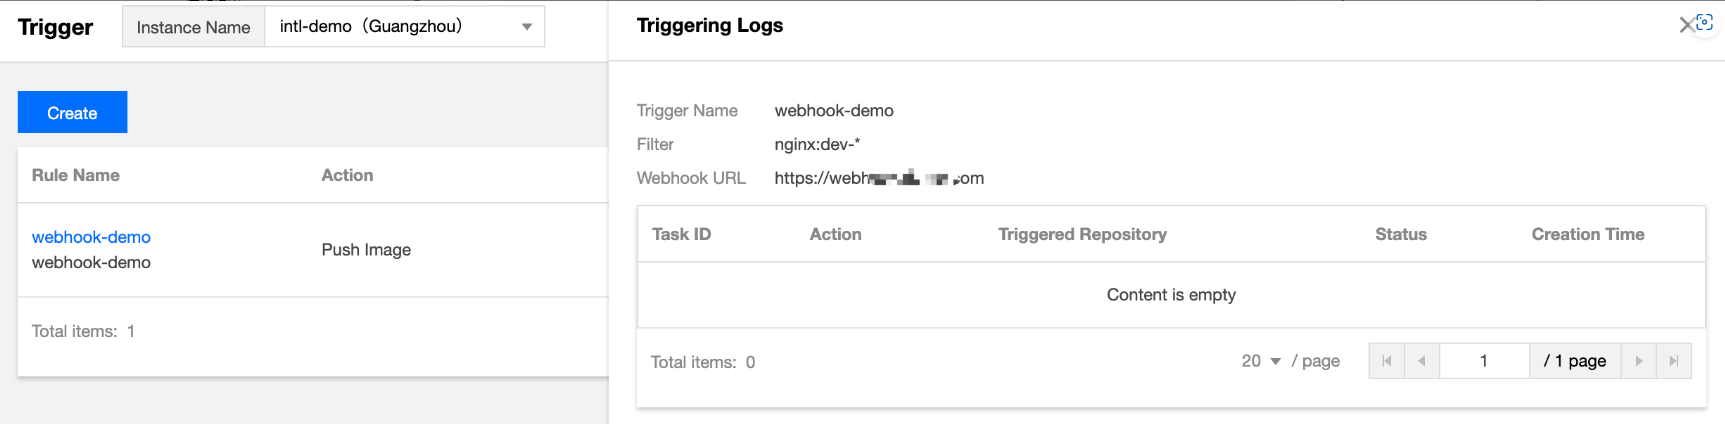
包含信息如下:
任务ID:实例内唯一的触发器任务 ID。
触发动作:产生该次触发的触发动作,例如推送镜像。
触发仓库:产生该次触发动作的仓库资源。
状态:触发器执行 webhook 请求的成功状态 。
创建时间:该次触发的启动时间,即发起 webhook 请求的时间。
相关信息
Webhook 请求格式参考
当用户对符合规则的资源执行相应动作时,例如向指定镜像仓库推送新的镜像时,则相应触发器将被触发,并向规则中配置的 URL 发起 HTTP POST 请求,请求 Body 中包含的触发动作、仓库路径等信息。以下为推送镜像触发后并经解析的请求 Body 信息,可供开发 Webhook 服务端参考。
{"type": "pushImage","occur_at": 1589106605,"event_data": {"resources": [{"digest": "sha256:89a42c3ba15f09a3fbe39856bddacdf9e94cd03df7403cad4fc105xxxx268fc9","tag": "v1.10.0","resource_url": "xxx-bj.tencentcloudcr.com/public/nginx:v1.10.0"}],"repository": {"date_created": 1587119137,"name": "nginx","namespace": "public","repo_full_name": "public/nginx","repo_type": "public"}},"operator": "332133xxxx"}
使用正则表达式新建规则
正则匹配规则
以下是填写“仓库名称”和“版本Tag”时,其正则表达式支持的匹配规则:
* :匹配所有不包含路径分隔符(/)的任意长字符串。** :匹配所有的任意长字符串,包括路径分隔符(/)。注意:
** 必须作为一段完整的相对路径,如果使用 /path** ,其作用将等同于 /path* ,仅能匹配以path为名称前缀的一级仓库。要想匹配path下的所有仓库,应使用 /path/** ;要想匹配以path为名称前缀的所有仓库,则应使用 /path*/** 。?:匹配除 ‘/’ 以外的任意单个字符。{alt1, alt2, …}:同时匹配多个正则表达式。典型场景
匹配选定命名空间内所有仓库 | ** 或者不填 |
匹配选定命名空间内以 path 为名称前缀的所有一级仓库 | /path* |
匹配选定命名空间内以 path1 和 path2 为名称前缀的所有一级仓库 | /{path1, path2}* |
匹配选定命名空间内 path1 和 path2 目录下的所有仓库 | /{path1, path2}/** |
匹配选定命名空间内以 path1 和 path2 为名称前缀的所有仓库 | /{path1, path2}*/** |
匹配选定仓库内所有 1.x 的版本Tag | 1.? |
匹配选定仓库内所有以 env1 和 env2 为名称前缀的版本 Tag | {env1, env2} |
文档反馈