Simple Email Service
- News and Announcements
- Product Introduction
- Purchase Guide
- Getting Started
- Console Guide
- Email Sending
- API Documentation
- Making API Requests
- Domain Verification APIs
- Email APIs
- Template APIs
- Statistics APIs
- Sender Address APIs
- Blocklist APIs
- Sending Status Query APIs
- Batch Task APIs
- SMTP Documentation
- Webhook Documentation
- Email Sending Restrictions
- FAQs
Recipient Group
Last updated: 2024-09-05 09:47:39
Overview
This document describes how to create a recipient group in the SES console.
Directions
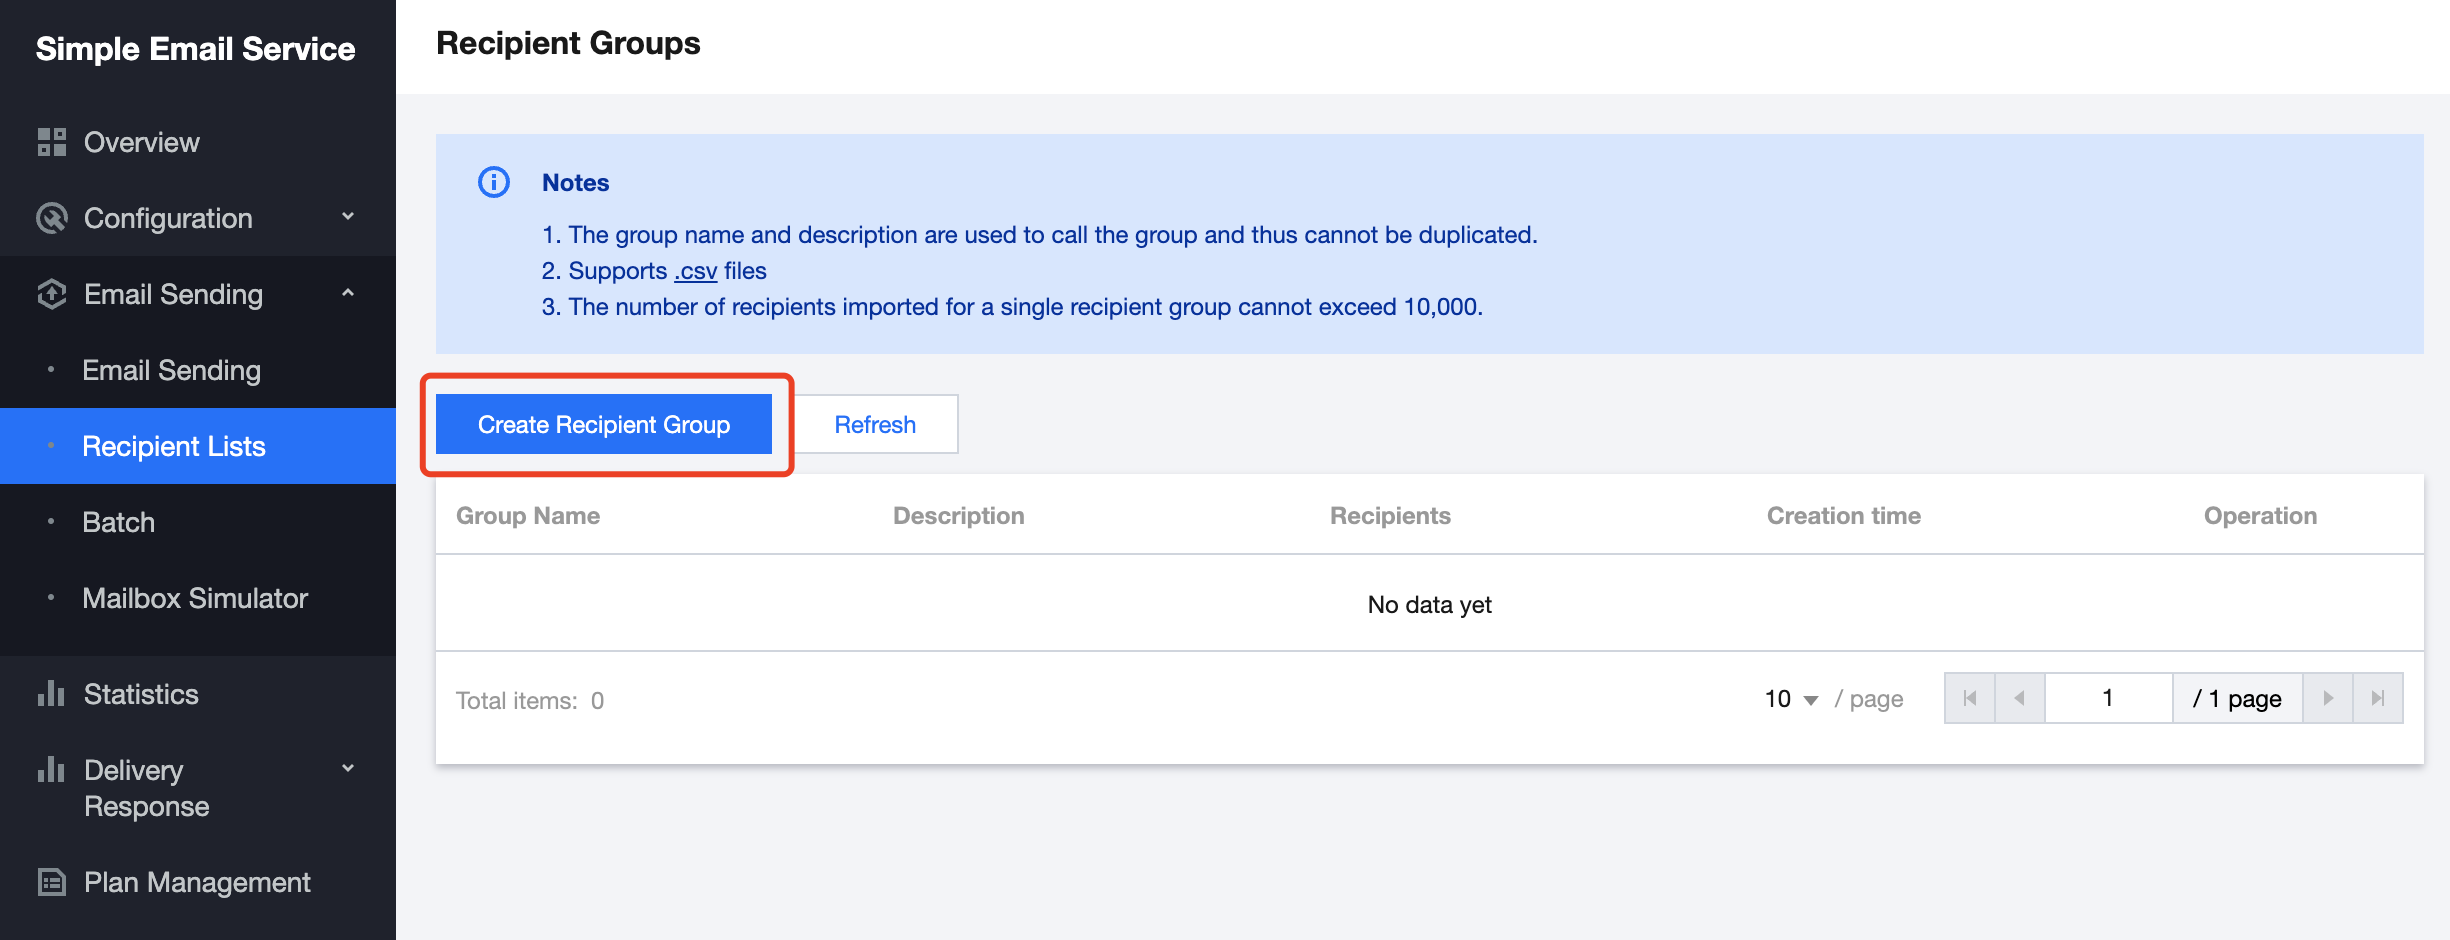
1. Log in to the SES console, select Email Sending > Recipient Groups to enter the Recipient Groups page, and click Create Recipient Group.


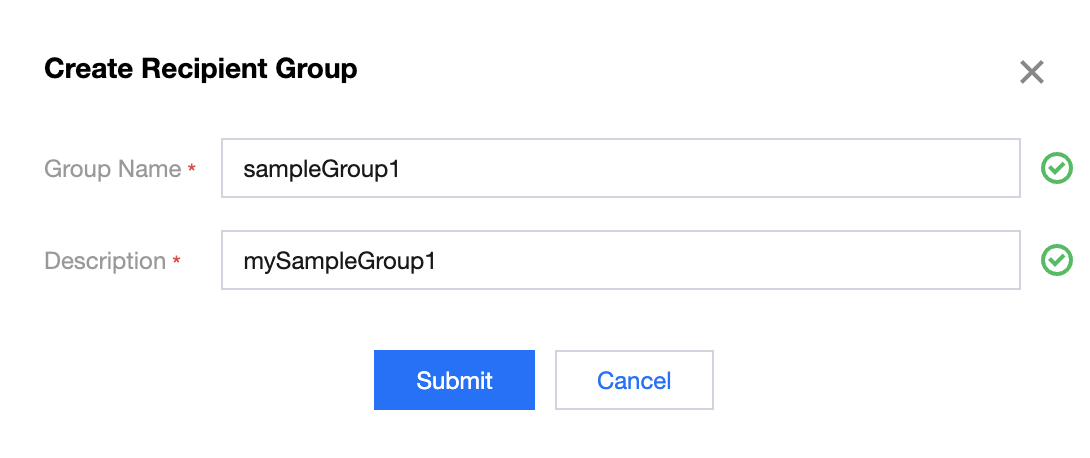
2. On the Create Recipient Group page, configure relevant information and click Submit.


3. Return to the Recipient Groups page, click Import in the Operation column on the right, and upload your local recipient group.


Note:
You can only import a file edited on your local computer but can't edit the recipient group online.
You can only import a CSV file containing no more than 10,000 recipients.
You can set multiple variables for the recipient group. You can also set different variable values for different recipient addresses.
You can download a sample CSV file on the Recipient Groups page in the console.
Was this page helpful?
You can also Contact Sales or Submit a Ticket for help.
Yes
No

