Hyper Computing Cluster takes high-performance CVMs as nodes and interconnects with RDMA (Remote Direct Memory Access), providing high bandwidth and ultra-low latency network services, significantly improving network performance, and meeting the parallel computing requirements of large-scale high-performance computing, artificial intelligence, big data recommendation, and other applications.
Purchase Must-Know
The Purchase Page and Console of Hyper Computing Cluster instances are the same as that of CVM, you can go to the CVM Purchase Page to purchase as needed. You can also see Customizing Linux CVM Configurations for more configuration information.
Ensure you understand the region where the selected Hyper computing instance is located. For information on available regions, please see Available Regions.
Purchase Steps
This document takes the standard Hyper Computing ClusterS5 as an example to guide you on how to quickly purchase a Hyper Computing Cluster instance:
Step 1: Create a Hyper Computing Cluster.
Note:
If you have never purchased a Hyper Computing instance, please see this step to create Hyper Computing Cluster. If you already have a Hyper Computing instance, please choose whether to create it as needed.
Instances within the same cluster are interconnected with the RDMA network, while instances across clusters are isolated.
1. Log in to the CVM Console, and choose Hyper Computing Cluster in the left sidebar.
2. At the top of the Hyper Computing Cluster page, select the region, and click Create. In this document, Shanghai is selected as an example. For regions where standard Hyper Computing ClusterS5 instances are available for sale, please see Available Regions.
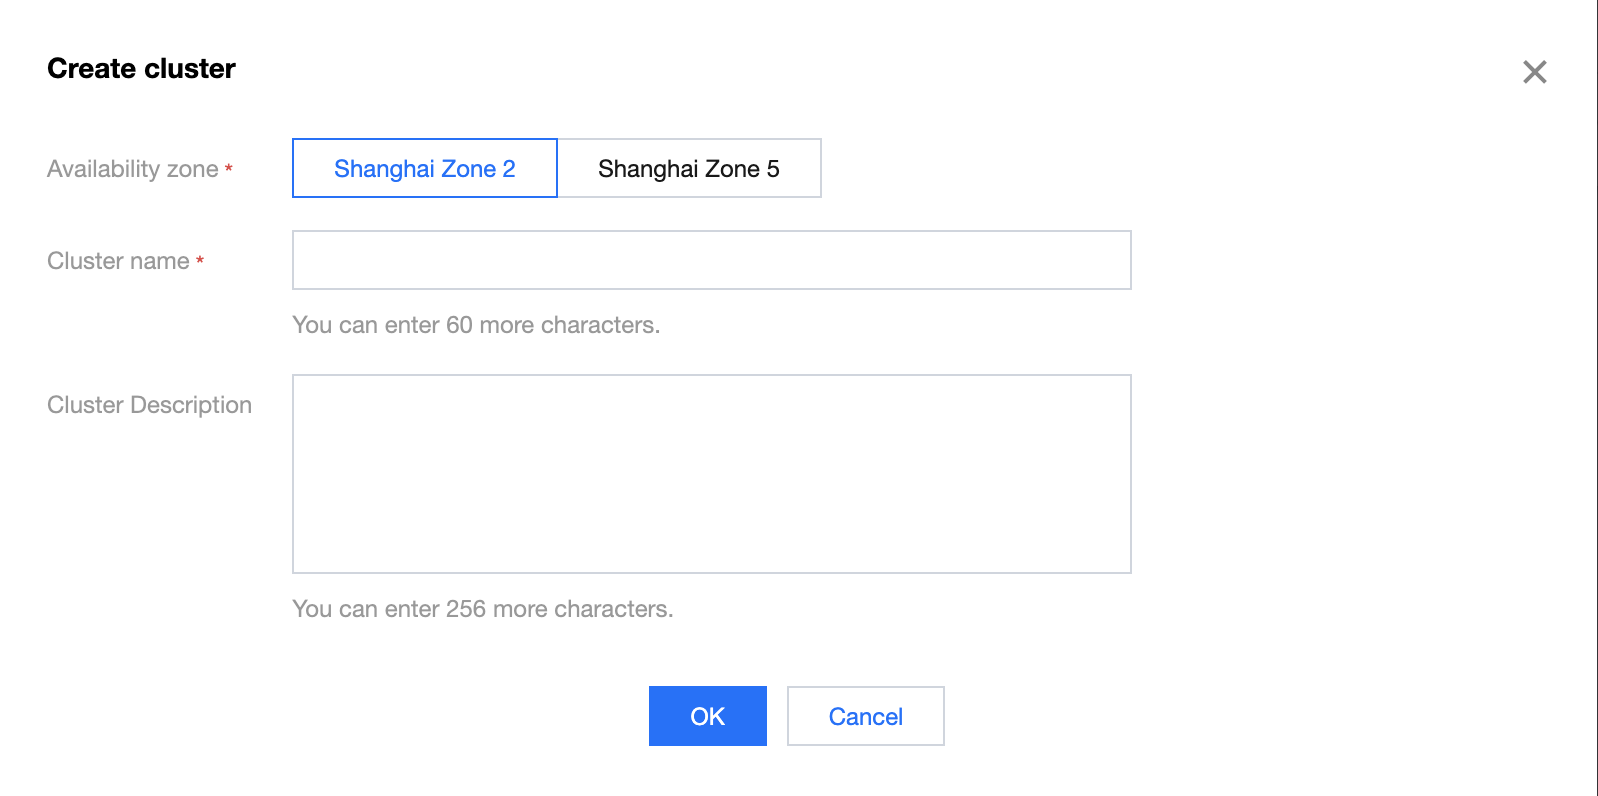
3. In the pop-up Create cluster window, select the availability zone as needed, enter the cluster name and description as shown below:
4. Click OK to create the cluster.
Step 2: Go to the purchase page.
You can enter the purchase page to start purchasing instances through the following two ways:
Choose Instance in the left sidebar, enter Instance page, and then click Create.
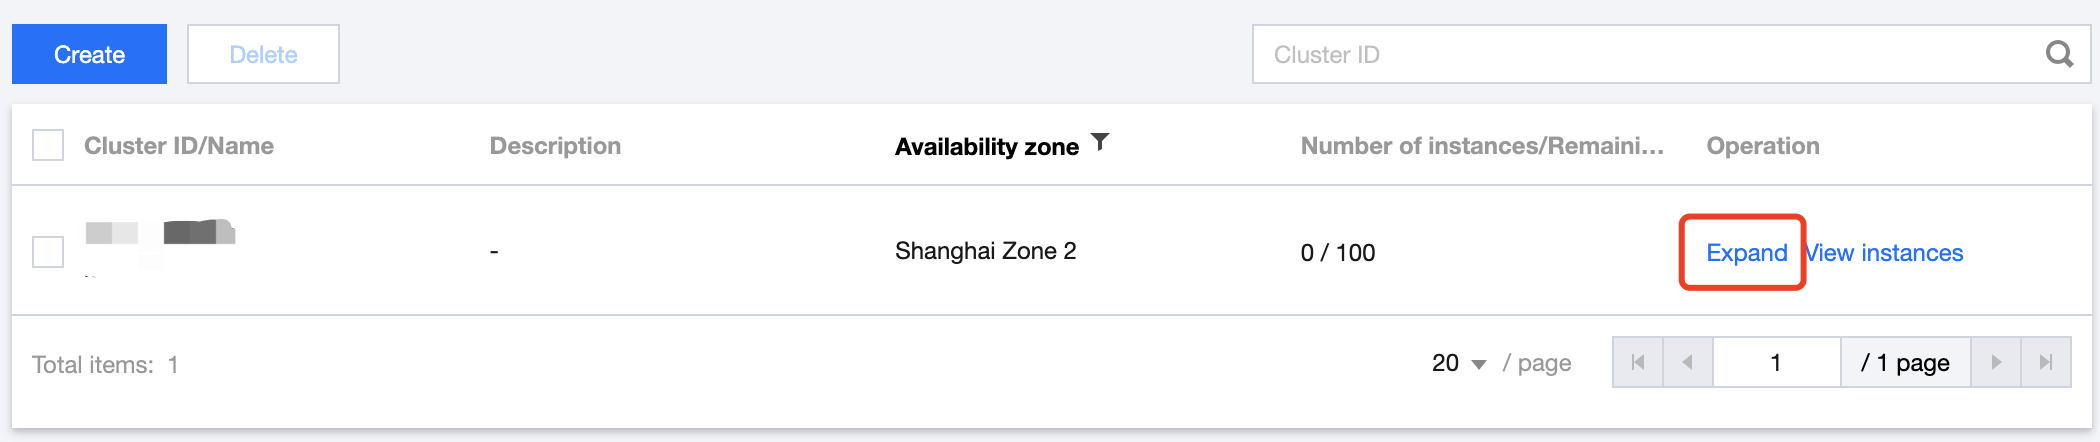
On the Hyper Computing Cluster page, click Scale-out on the right side of the cluster row. As shown in the figure below:
Step 3: Select the billing mode, network, region, and model.
After you enter the purchase page, select the billing mode, network, region, and model. This document takes Shanghai District V and Standard Hyper Computing ClusterS5 as examples. See the actual information on the purchase page for reference:
Billing modes: Pay-as-you-go. See Billing Modes for details.
Regions and availability zones: The available availability zones are subject to the instance purchase page.
Instances: This document takes Standard Hyper Computing ClusterS5 as an example. You can select as needed.
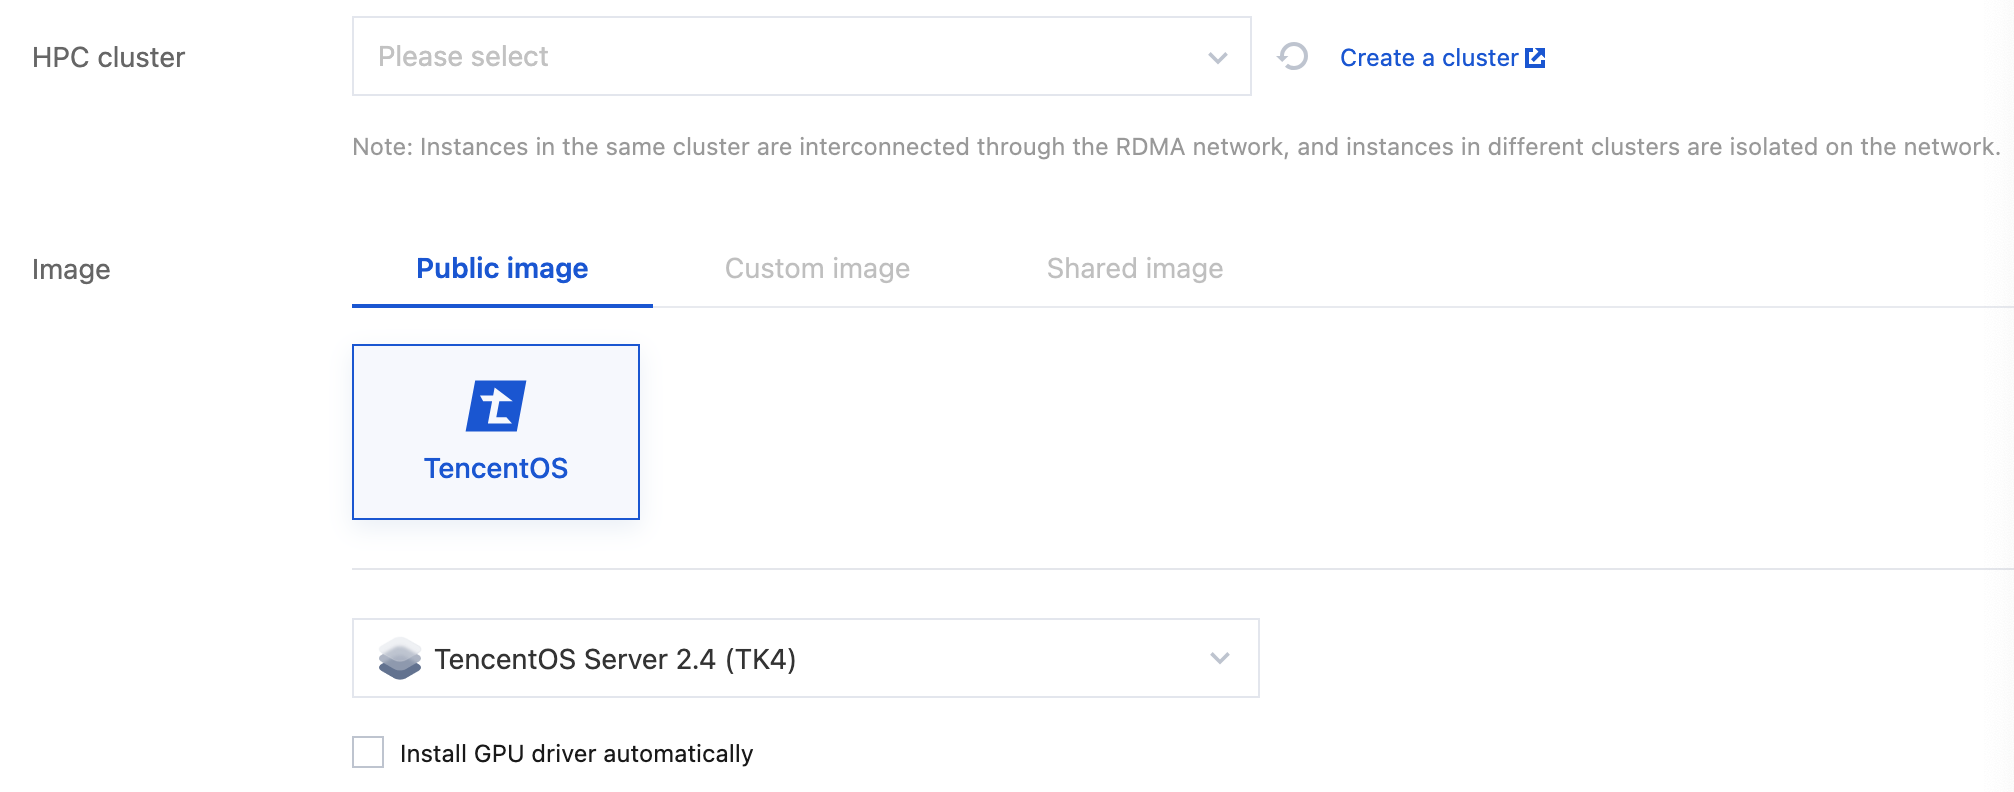
Step 4: Select the image and Hyper Computing Cluster.
1. Select the instance image as needed. Hyper Computing instances support four types of images: public image, custom image, shared image, and some images verified for compatibility in the mirror market.
2. Select the desired Hyper Computing Cluster cluster to join, as shown below:
Note:
GPU Hyper Computing instances must have the corresponding GPU driver to run normally. You can install the relevant driver in the following two ways:
If you select a public image, some instances support the option of Automatically install GPU driver in the background to pre-install the corresponding version of the driver. It is recommended to choose this method. This method only supports certain Linux public images.
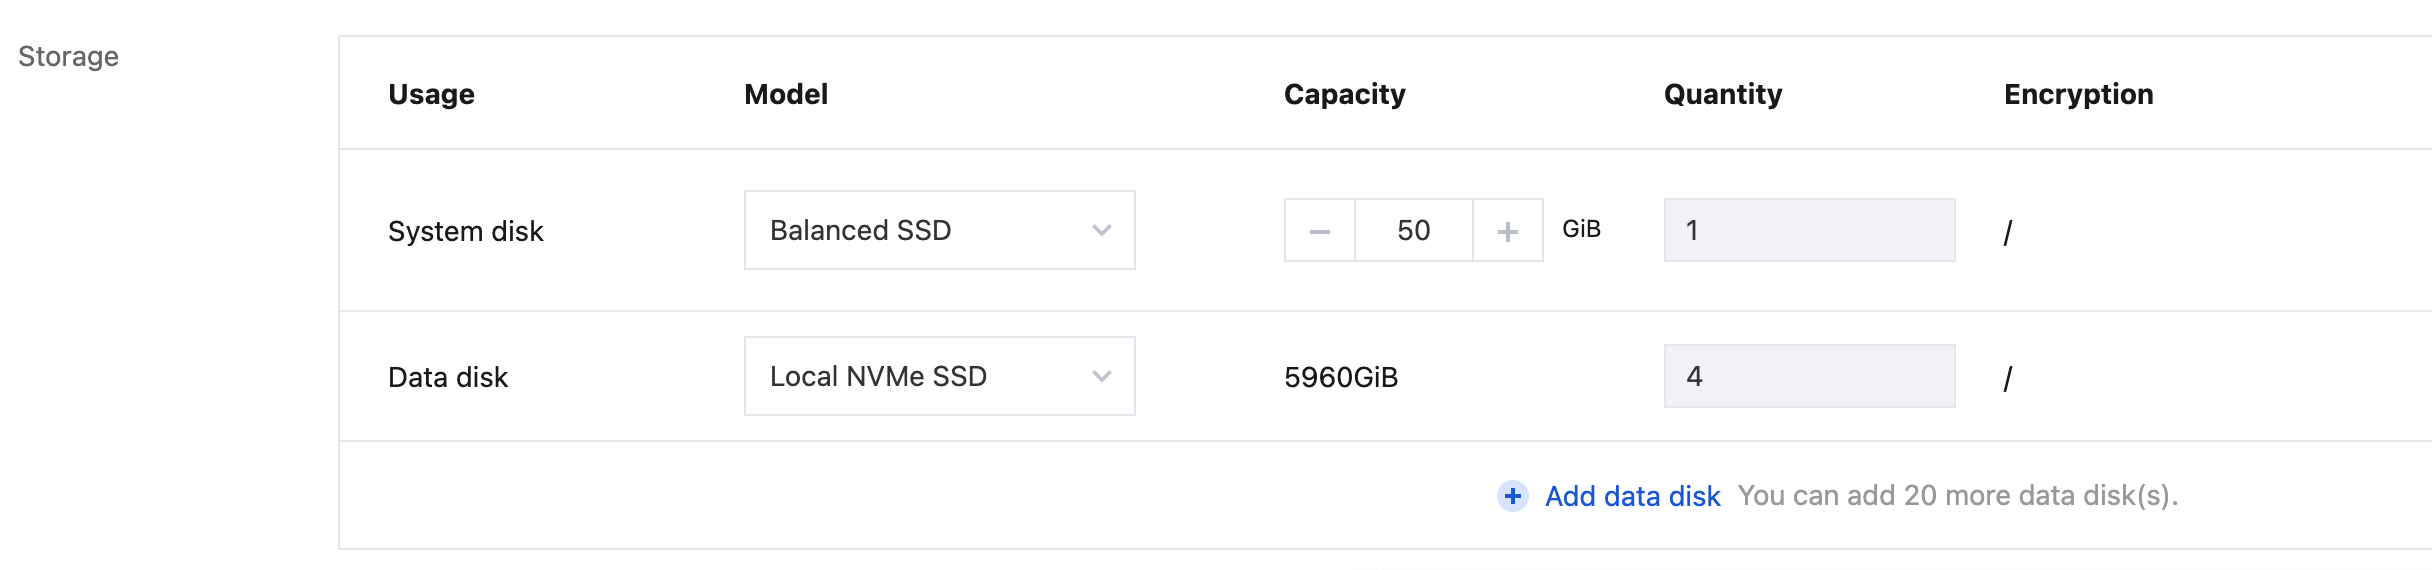
1. Select the storage for high-performance computing instances as shown below:
Main parameters are described as follows:
System disk and data disk: The type and size can be flexibly selected (the local system disk instances do not support the adjustment of storage capacity).
2. Click Next: Set Network and Host after setting is completed.
Step 6: Set the network, security group and host.
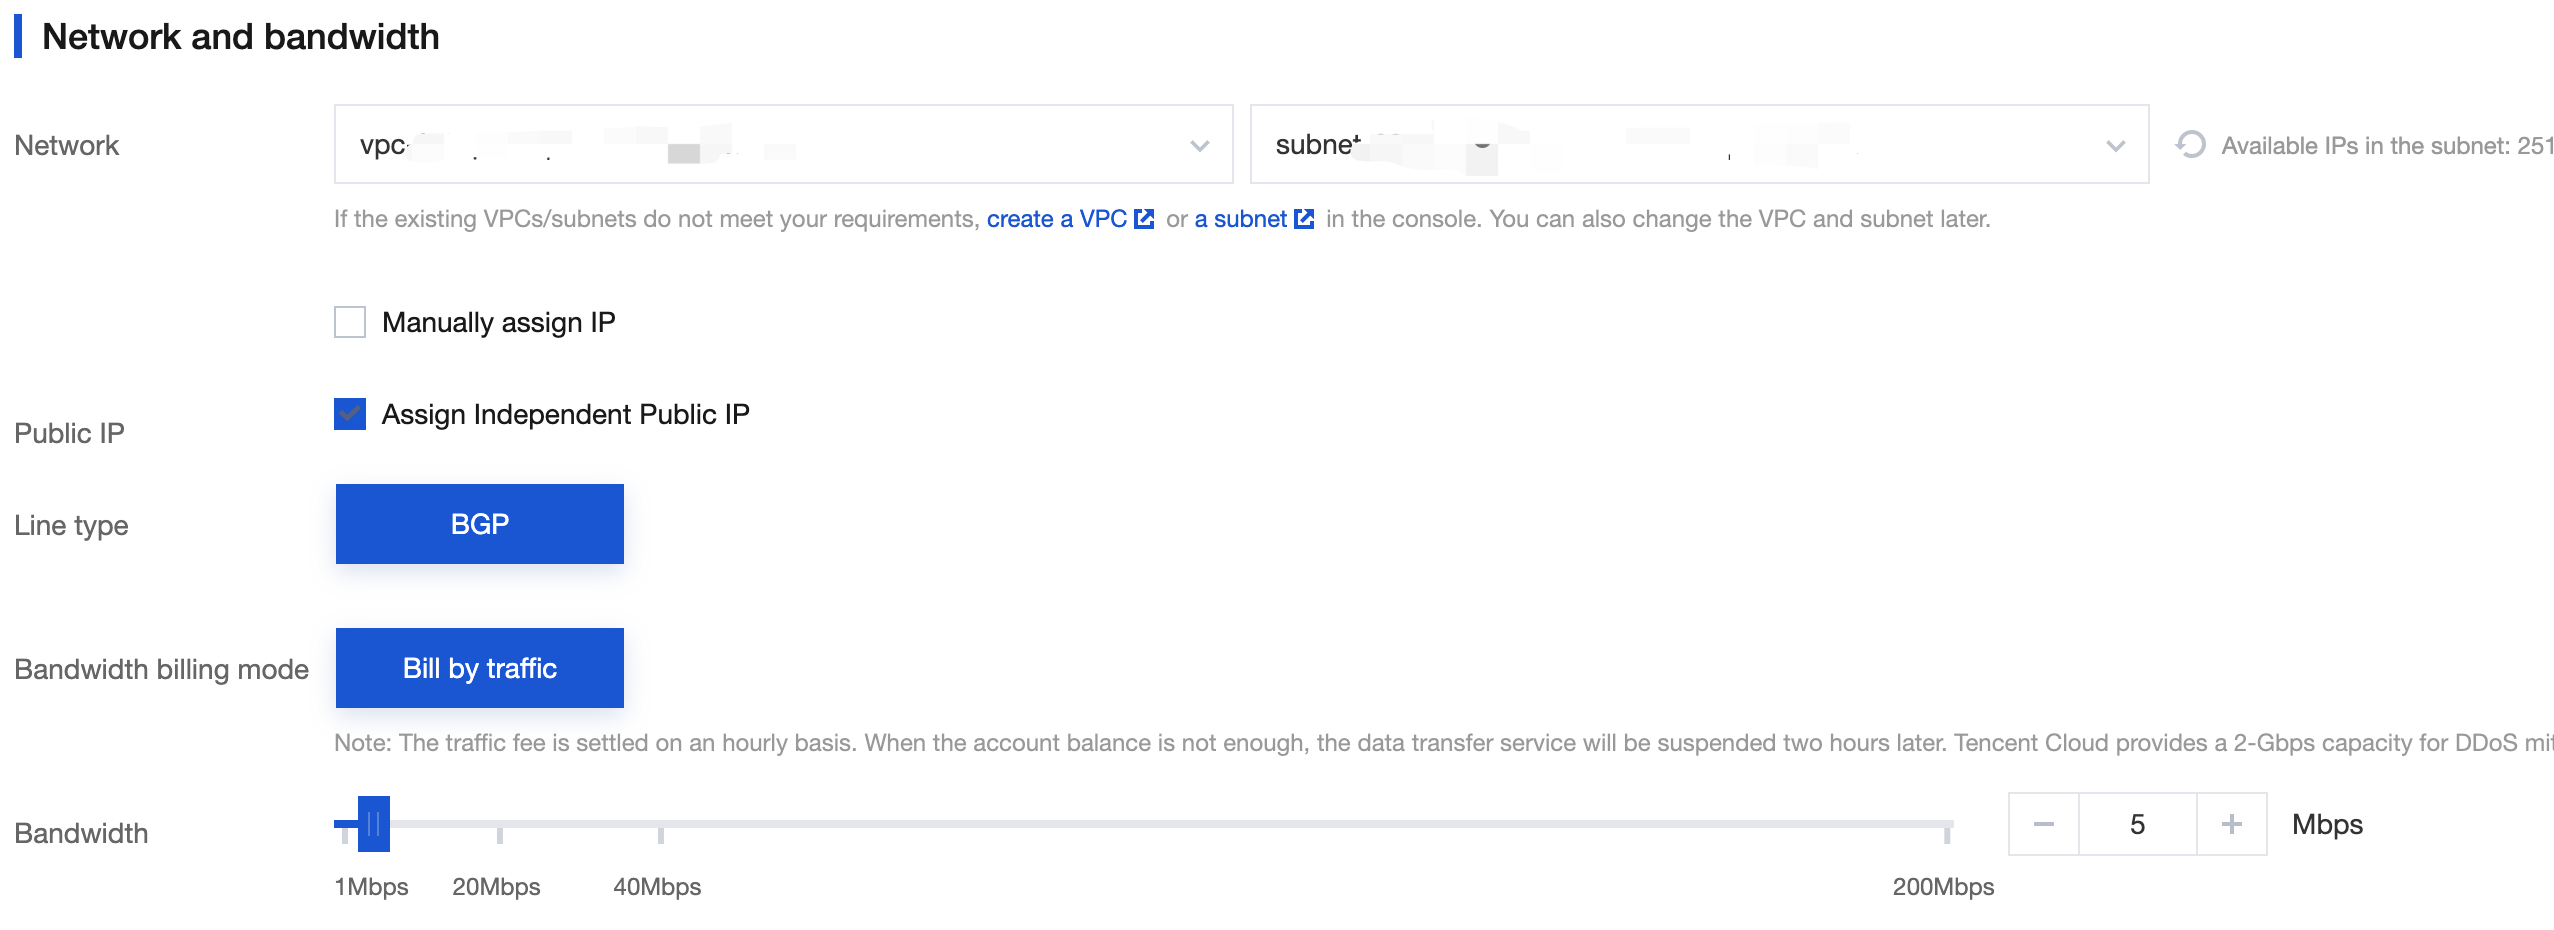
1. Select the network and bandwidth of Hyper Computing instance. As shown in the figure below:
Network: Select an existing VPC or create a new VPC.
Public IP: If your instance requires public network access, select the option. A public IP will be assigned after creation.
Bandwidth value: Set the public network bandwidth upper limit for the instance as needed.
IPv6 address: Enable IPv6 address for the instance.
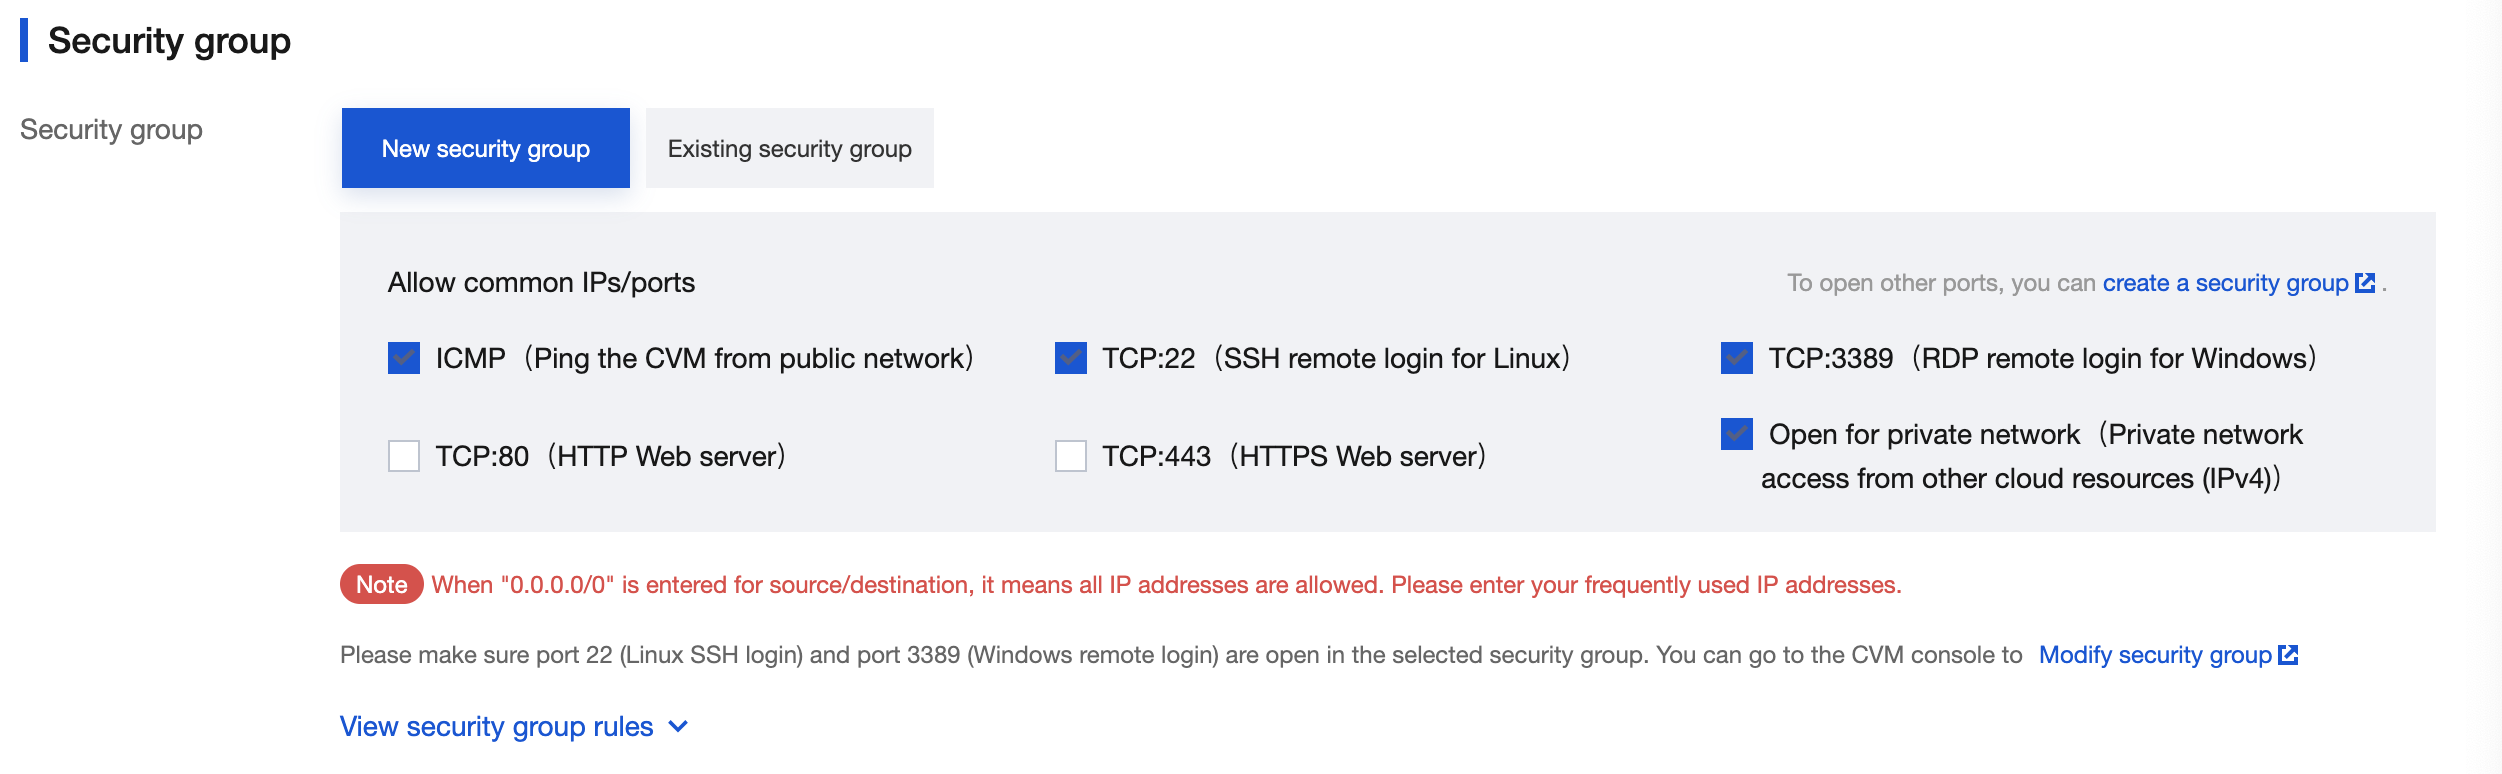
2. Select or create a Security group to control the port range as shown below:
3. Set the login password or key of Hyper Computing Cluster instances
4. Set other custom configurations as needed.
5. Click Next: Confirm configuration information.
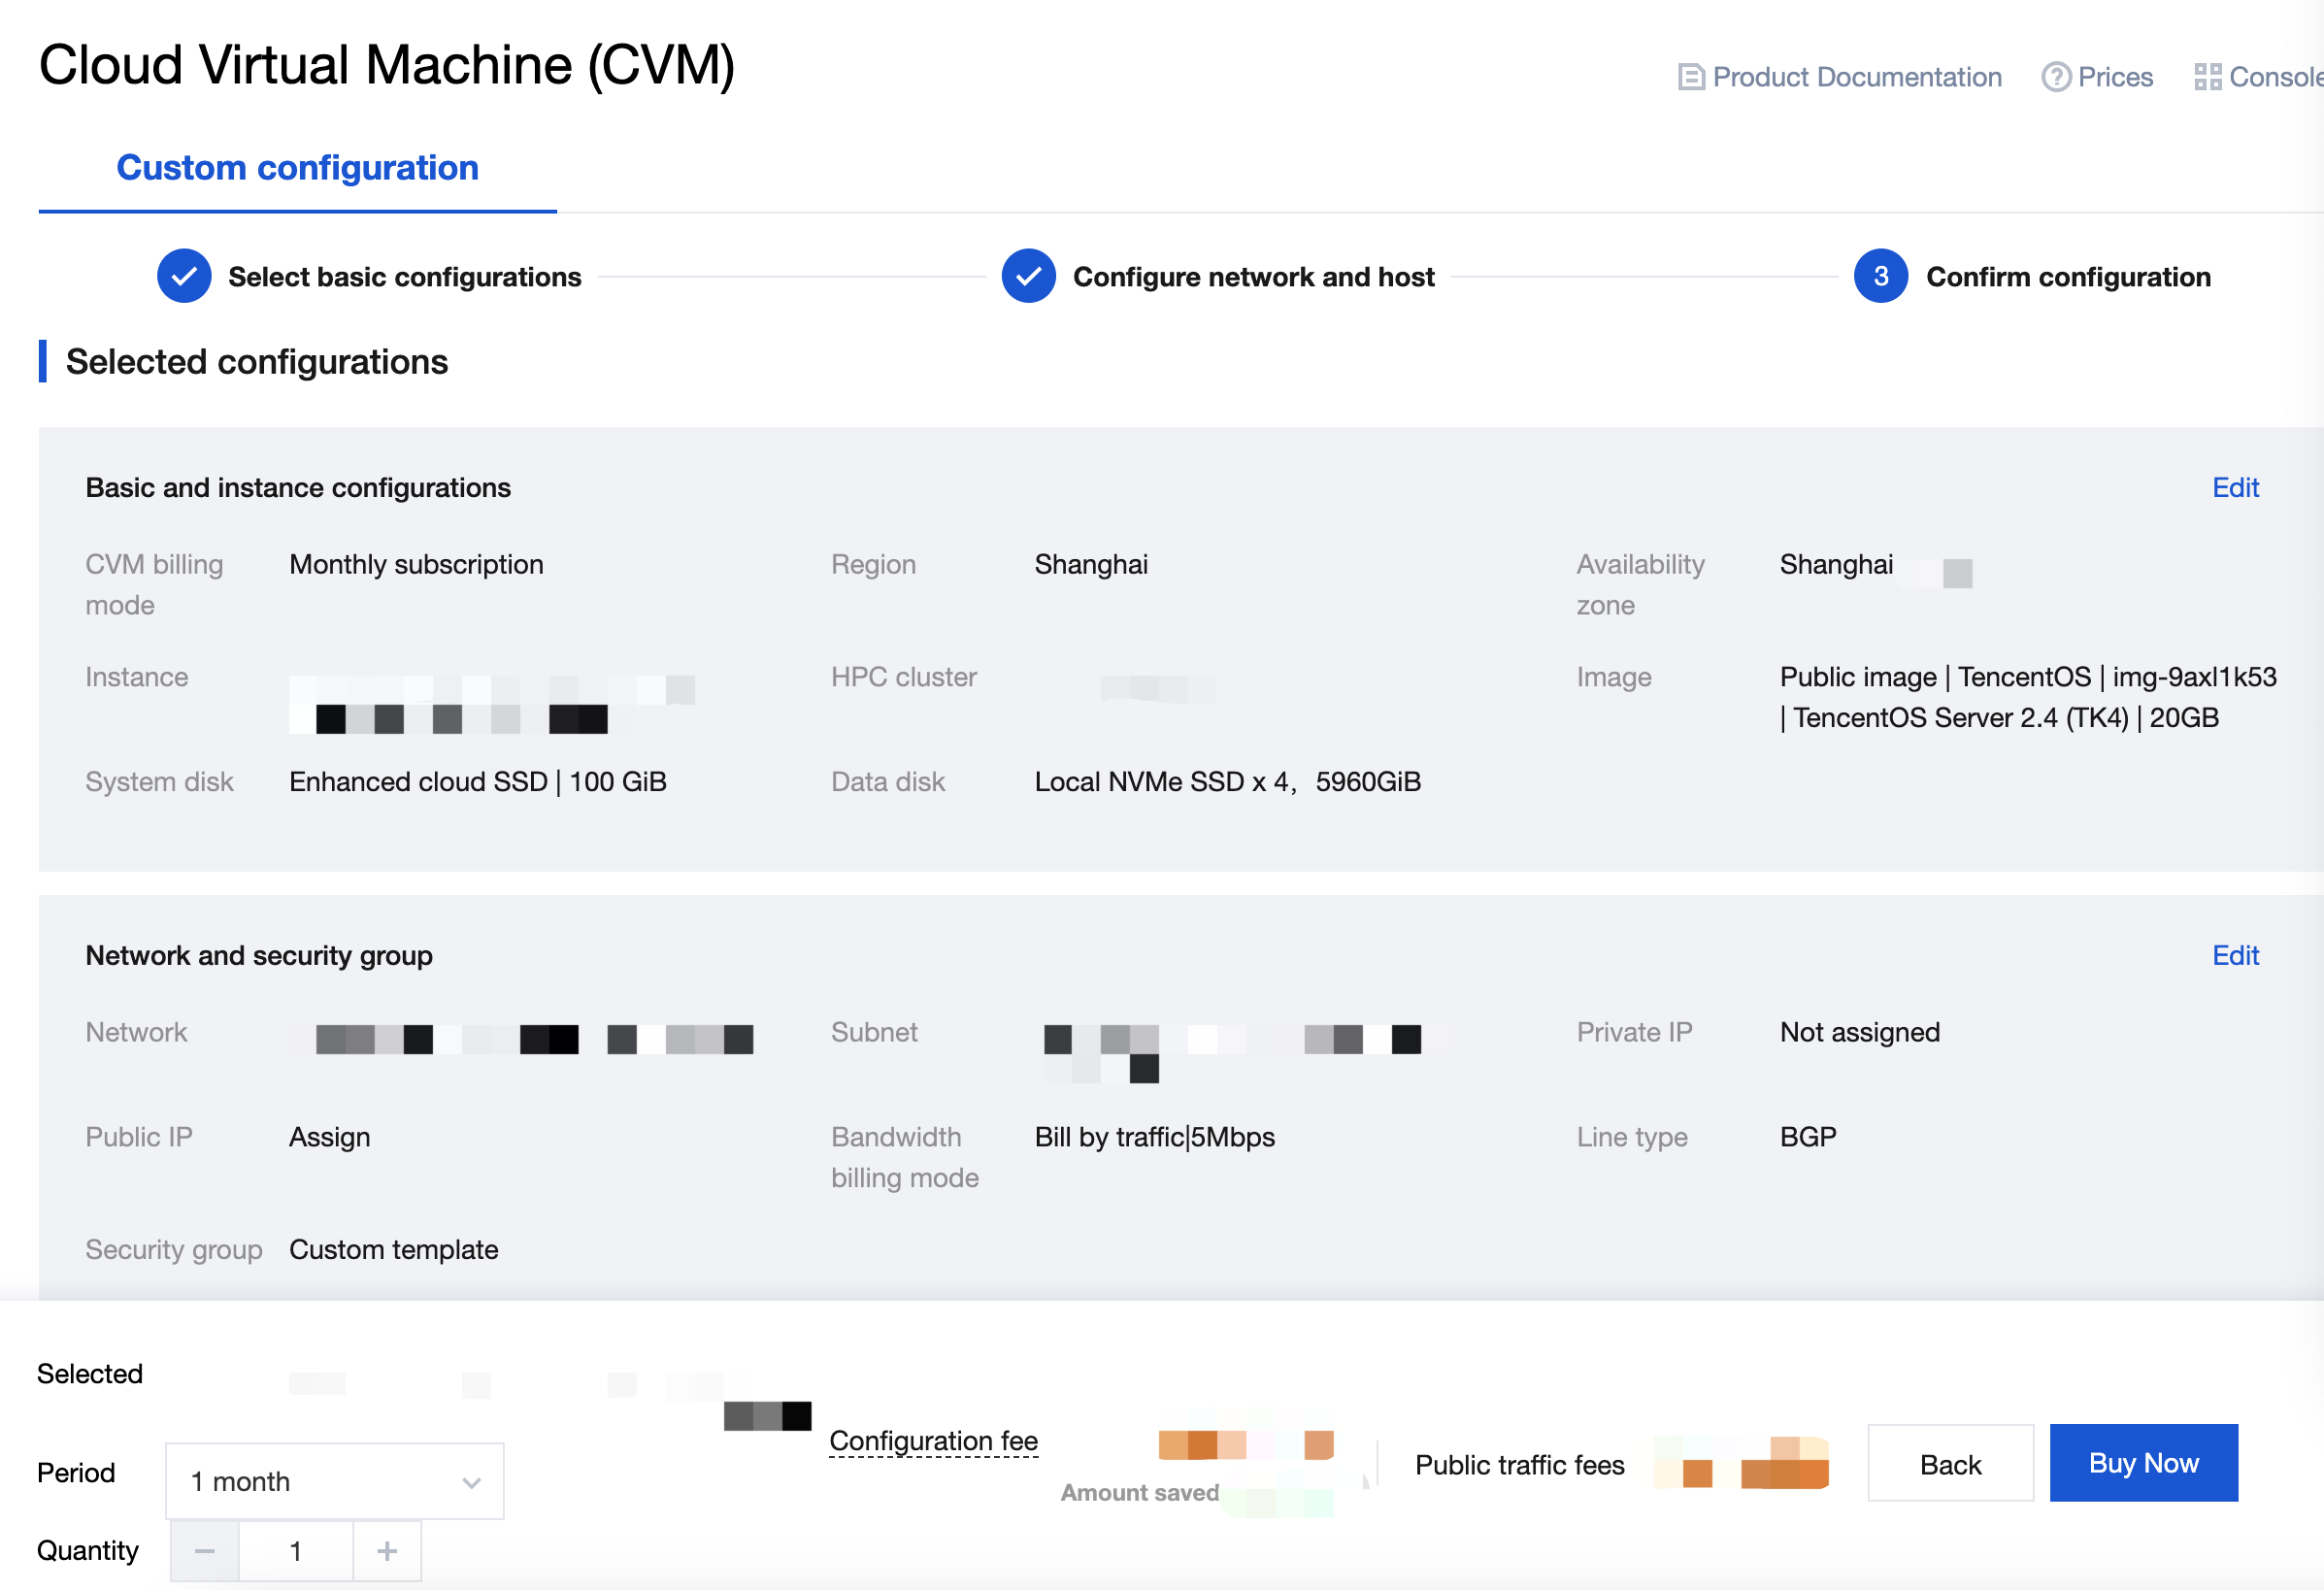
Step 7: Confirm the configuration information.
1. In the Confirm configuration step, verify the following details as shown below:
Confirm whether the configuration items such as instance specification, image selection, storage, public network configuration, and security groups meet expectations.
You can select or verify the quantity and duration of purchase.
2. Read and check Agree to the Tencent Cloud Terms of Service, Refund Rules, and Tencent Cloud Statement on the Prohibition of Virtual Currency Related Activities, and click Purchase Now.
Step 8: Check the order and make the payment.
Verify the order information and select the payment method.
After the payment is made, enter the console. Once the instance is created and started, you can log in to proceed.