When user operations are deployed simultaneously on Tencent Cloud and third-party cloud vendors, Tencent Cloud CSC supports centralized management of multi-cloud resources (currently supporting Amazon Web Services (AWS) and Microsoft Azure). By connecting to multi-cloud accounts, transparency and visualization of multi-cloud security management are achieved and the real-time monitoring of the security protection status, risks, and other information on third-party clouds are enabled.
Directions
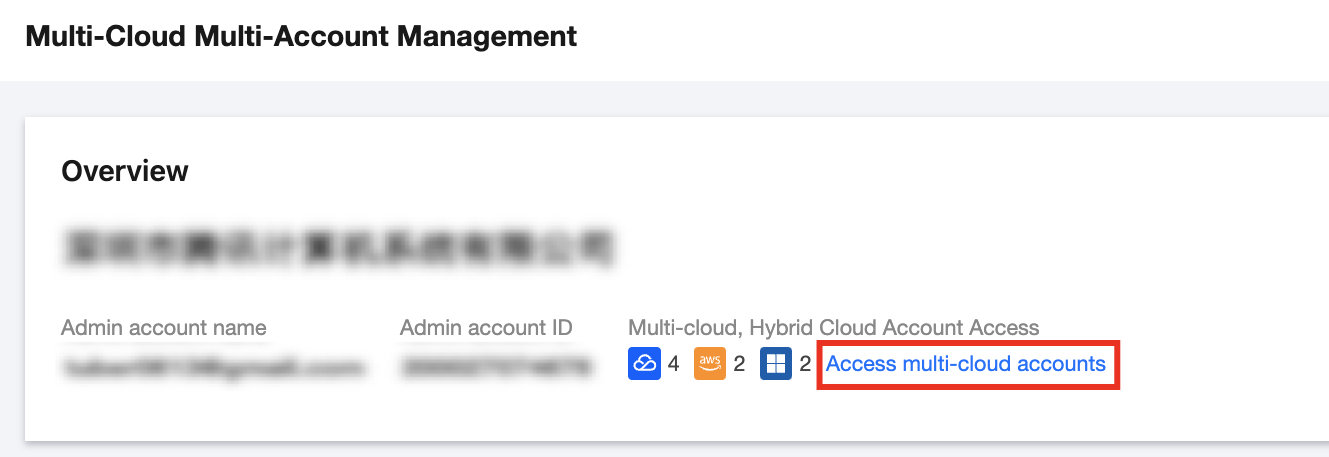
1. Log in to the CSC console. In the left sidebar, click Multi-Cloud Multi-Account Management.
2. On the multi-cloud multi-account management page, click Access multi-cloud accounts.
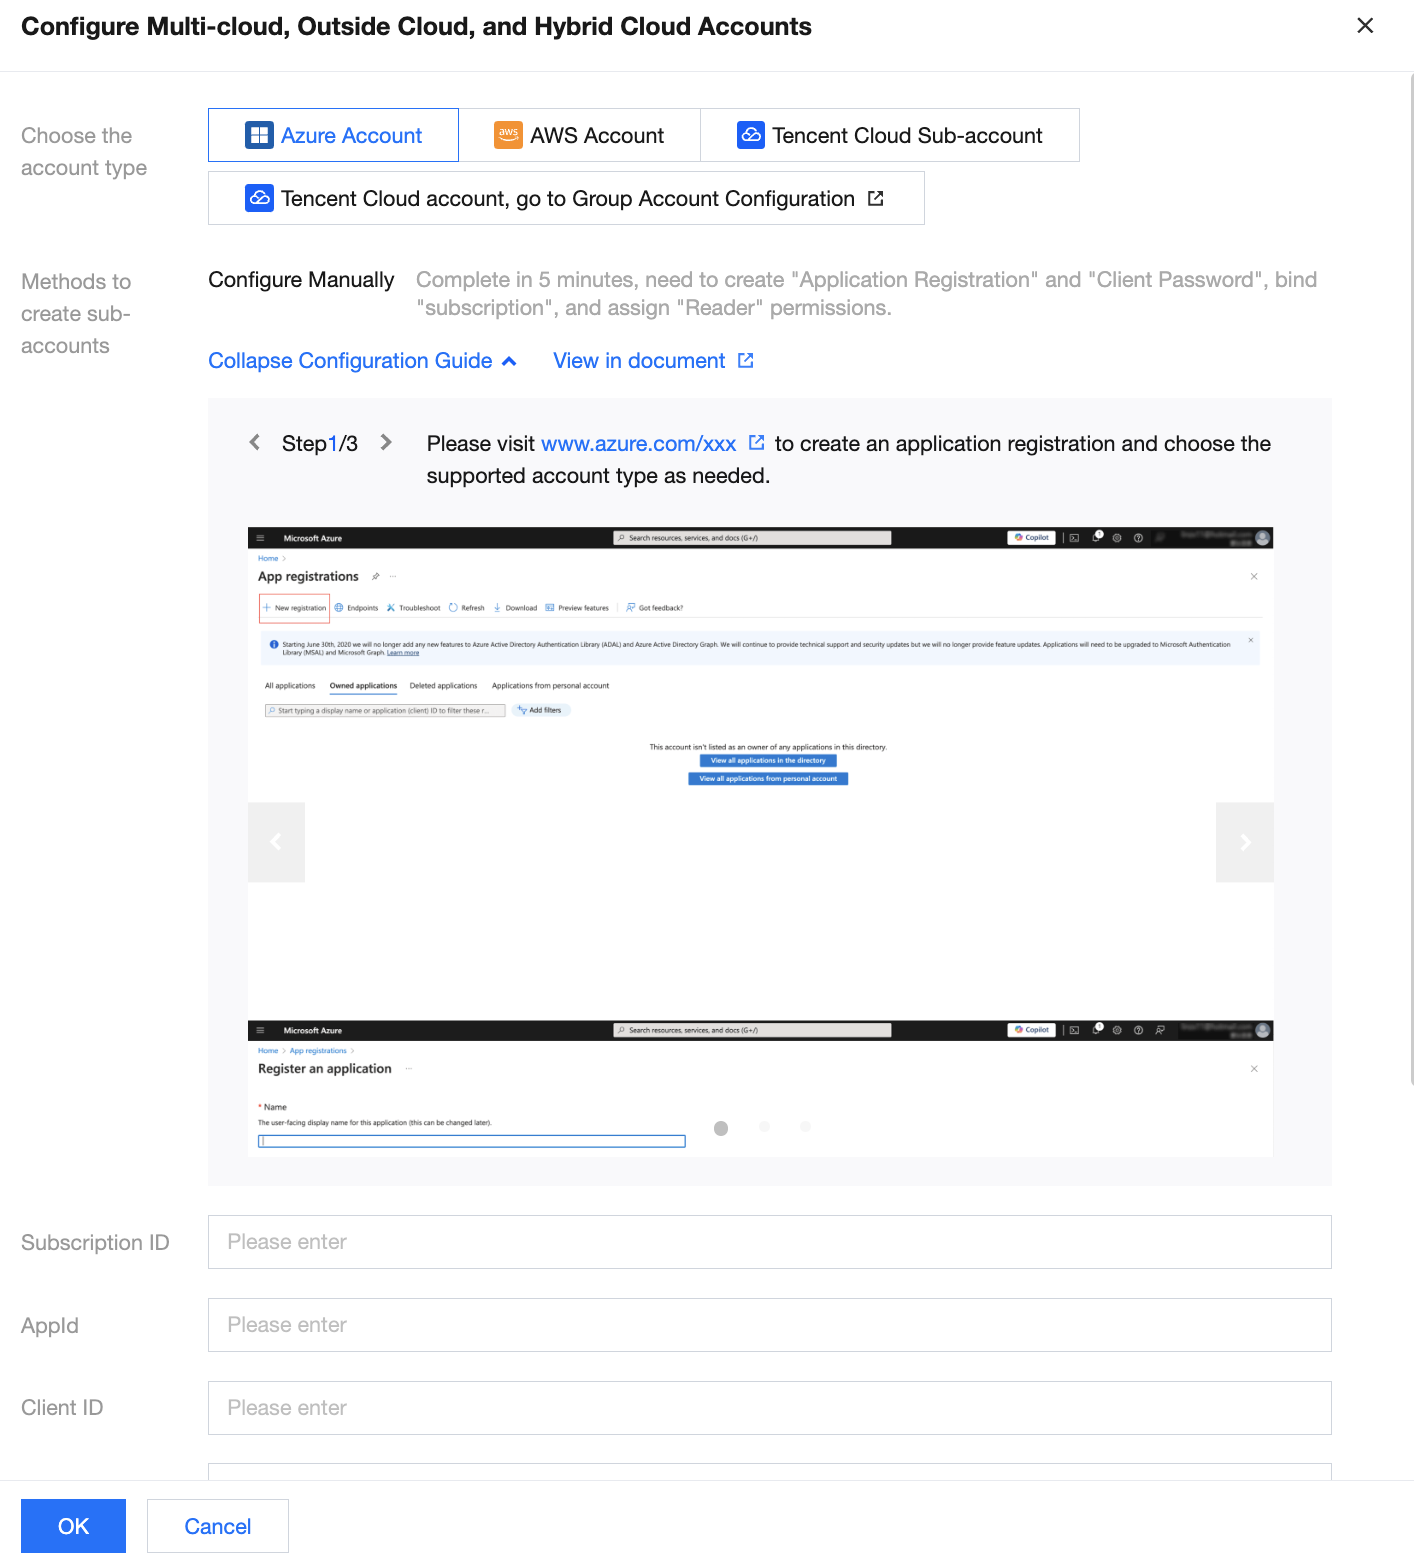
3. In the configure multi-cloud, outside cloud, and hybrid cloud accounts page, select the account type as Azure account or AWS account, and configure the relevant parameters, then click OK.
Azure Account
Step 1: Application Registration
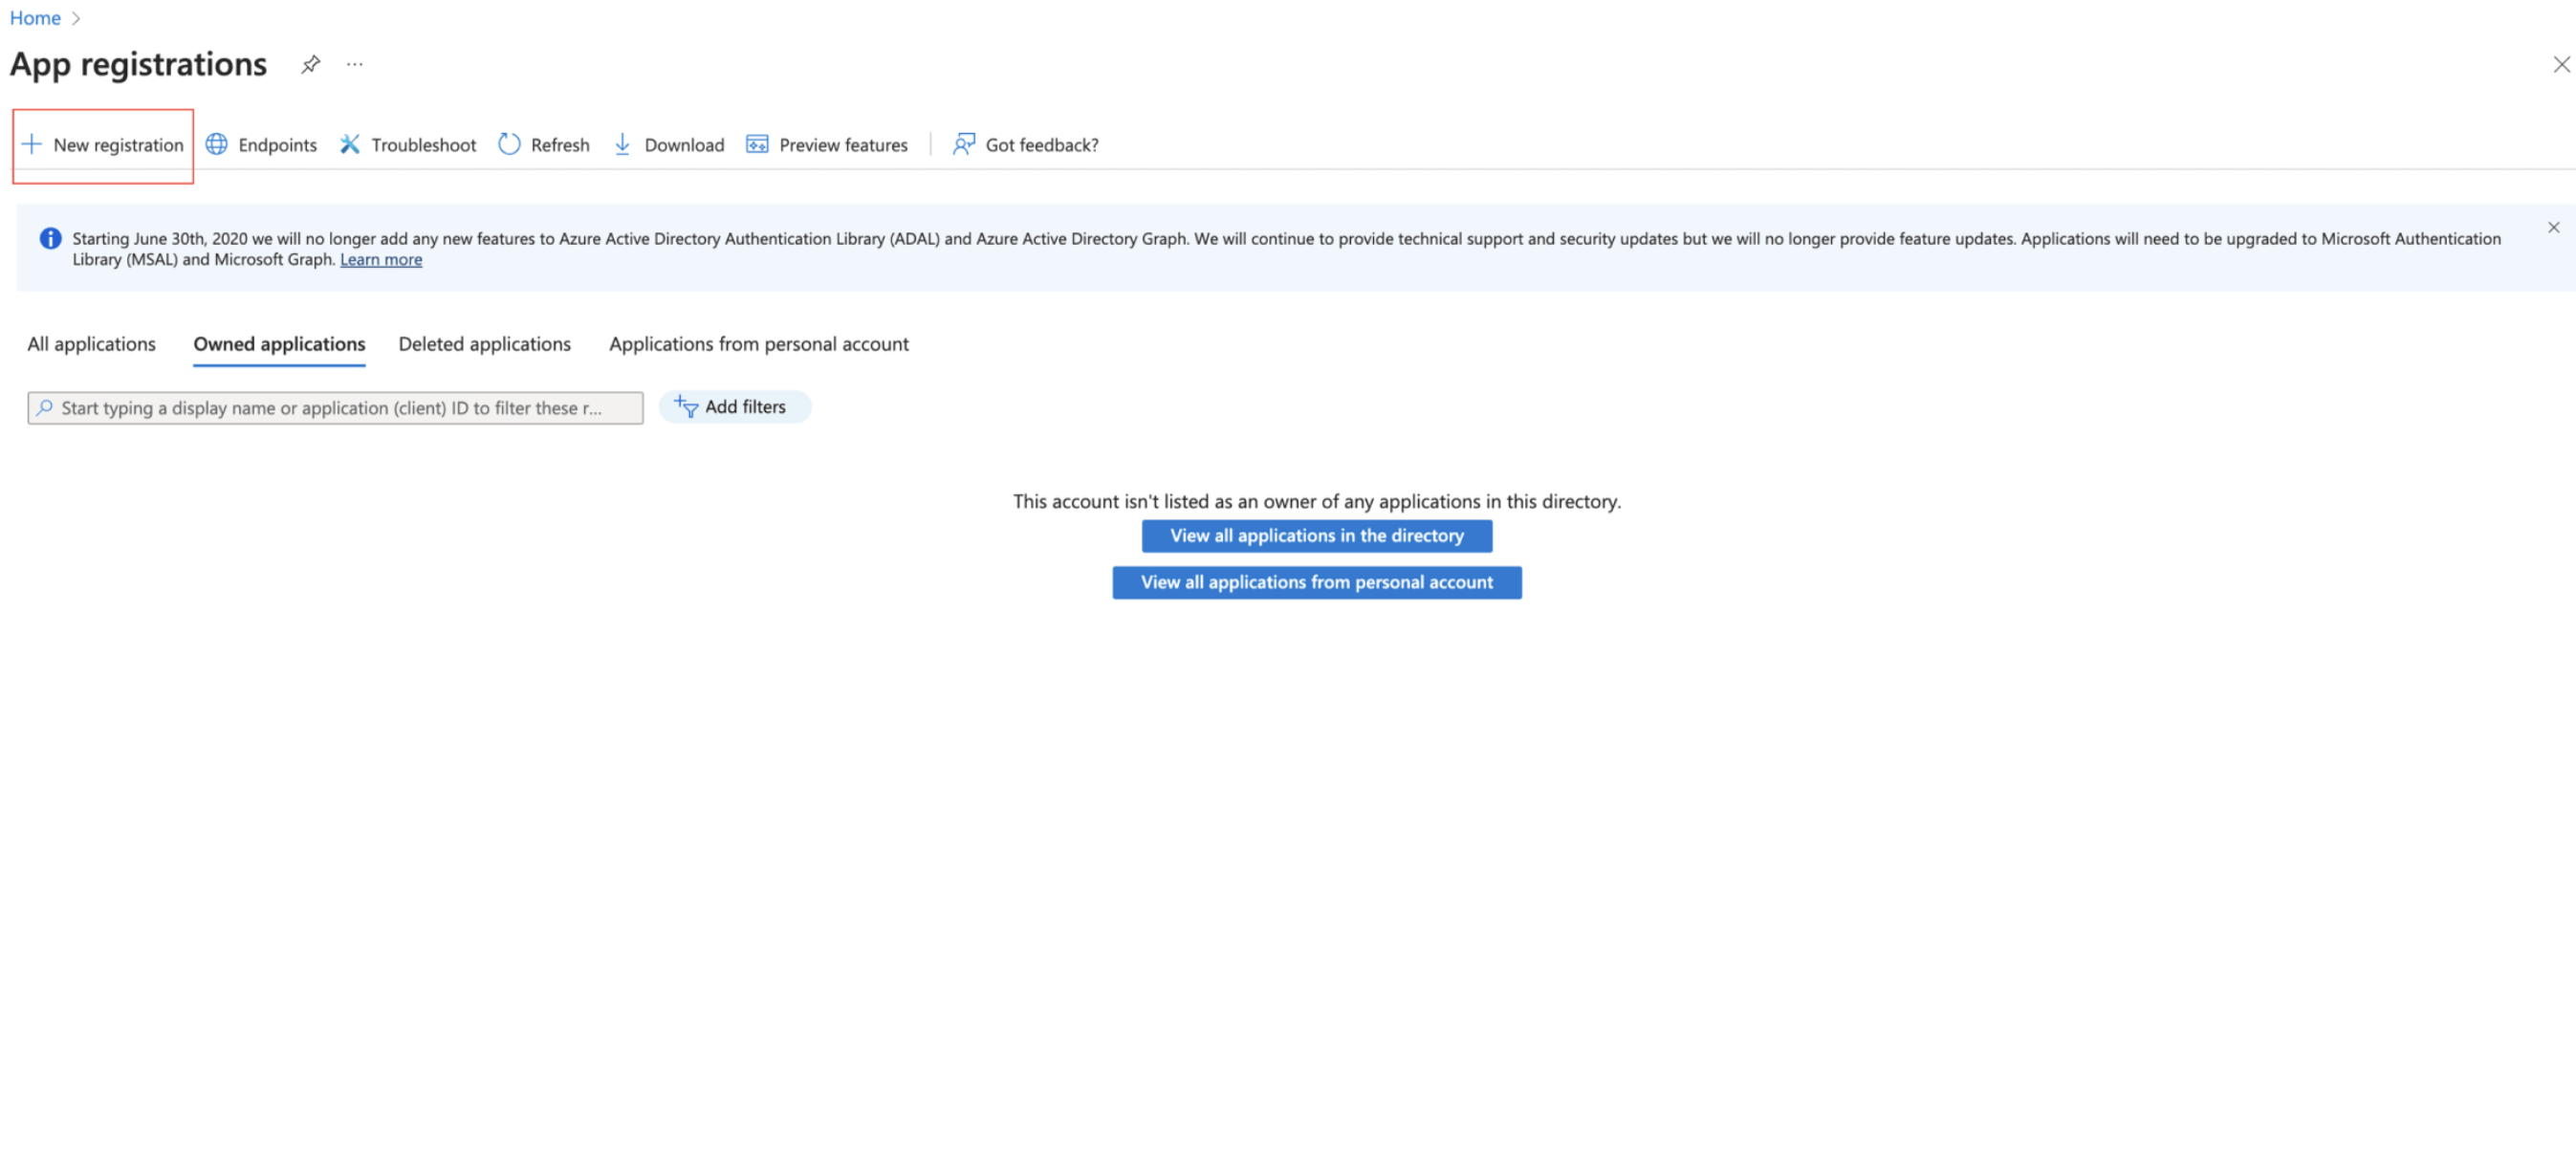
1. Log in to Azure, then go to the application registration page, and click New registration (if you already have an application registered, skip to Step 2.).
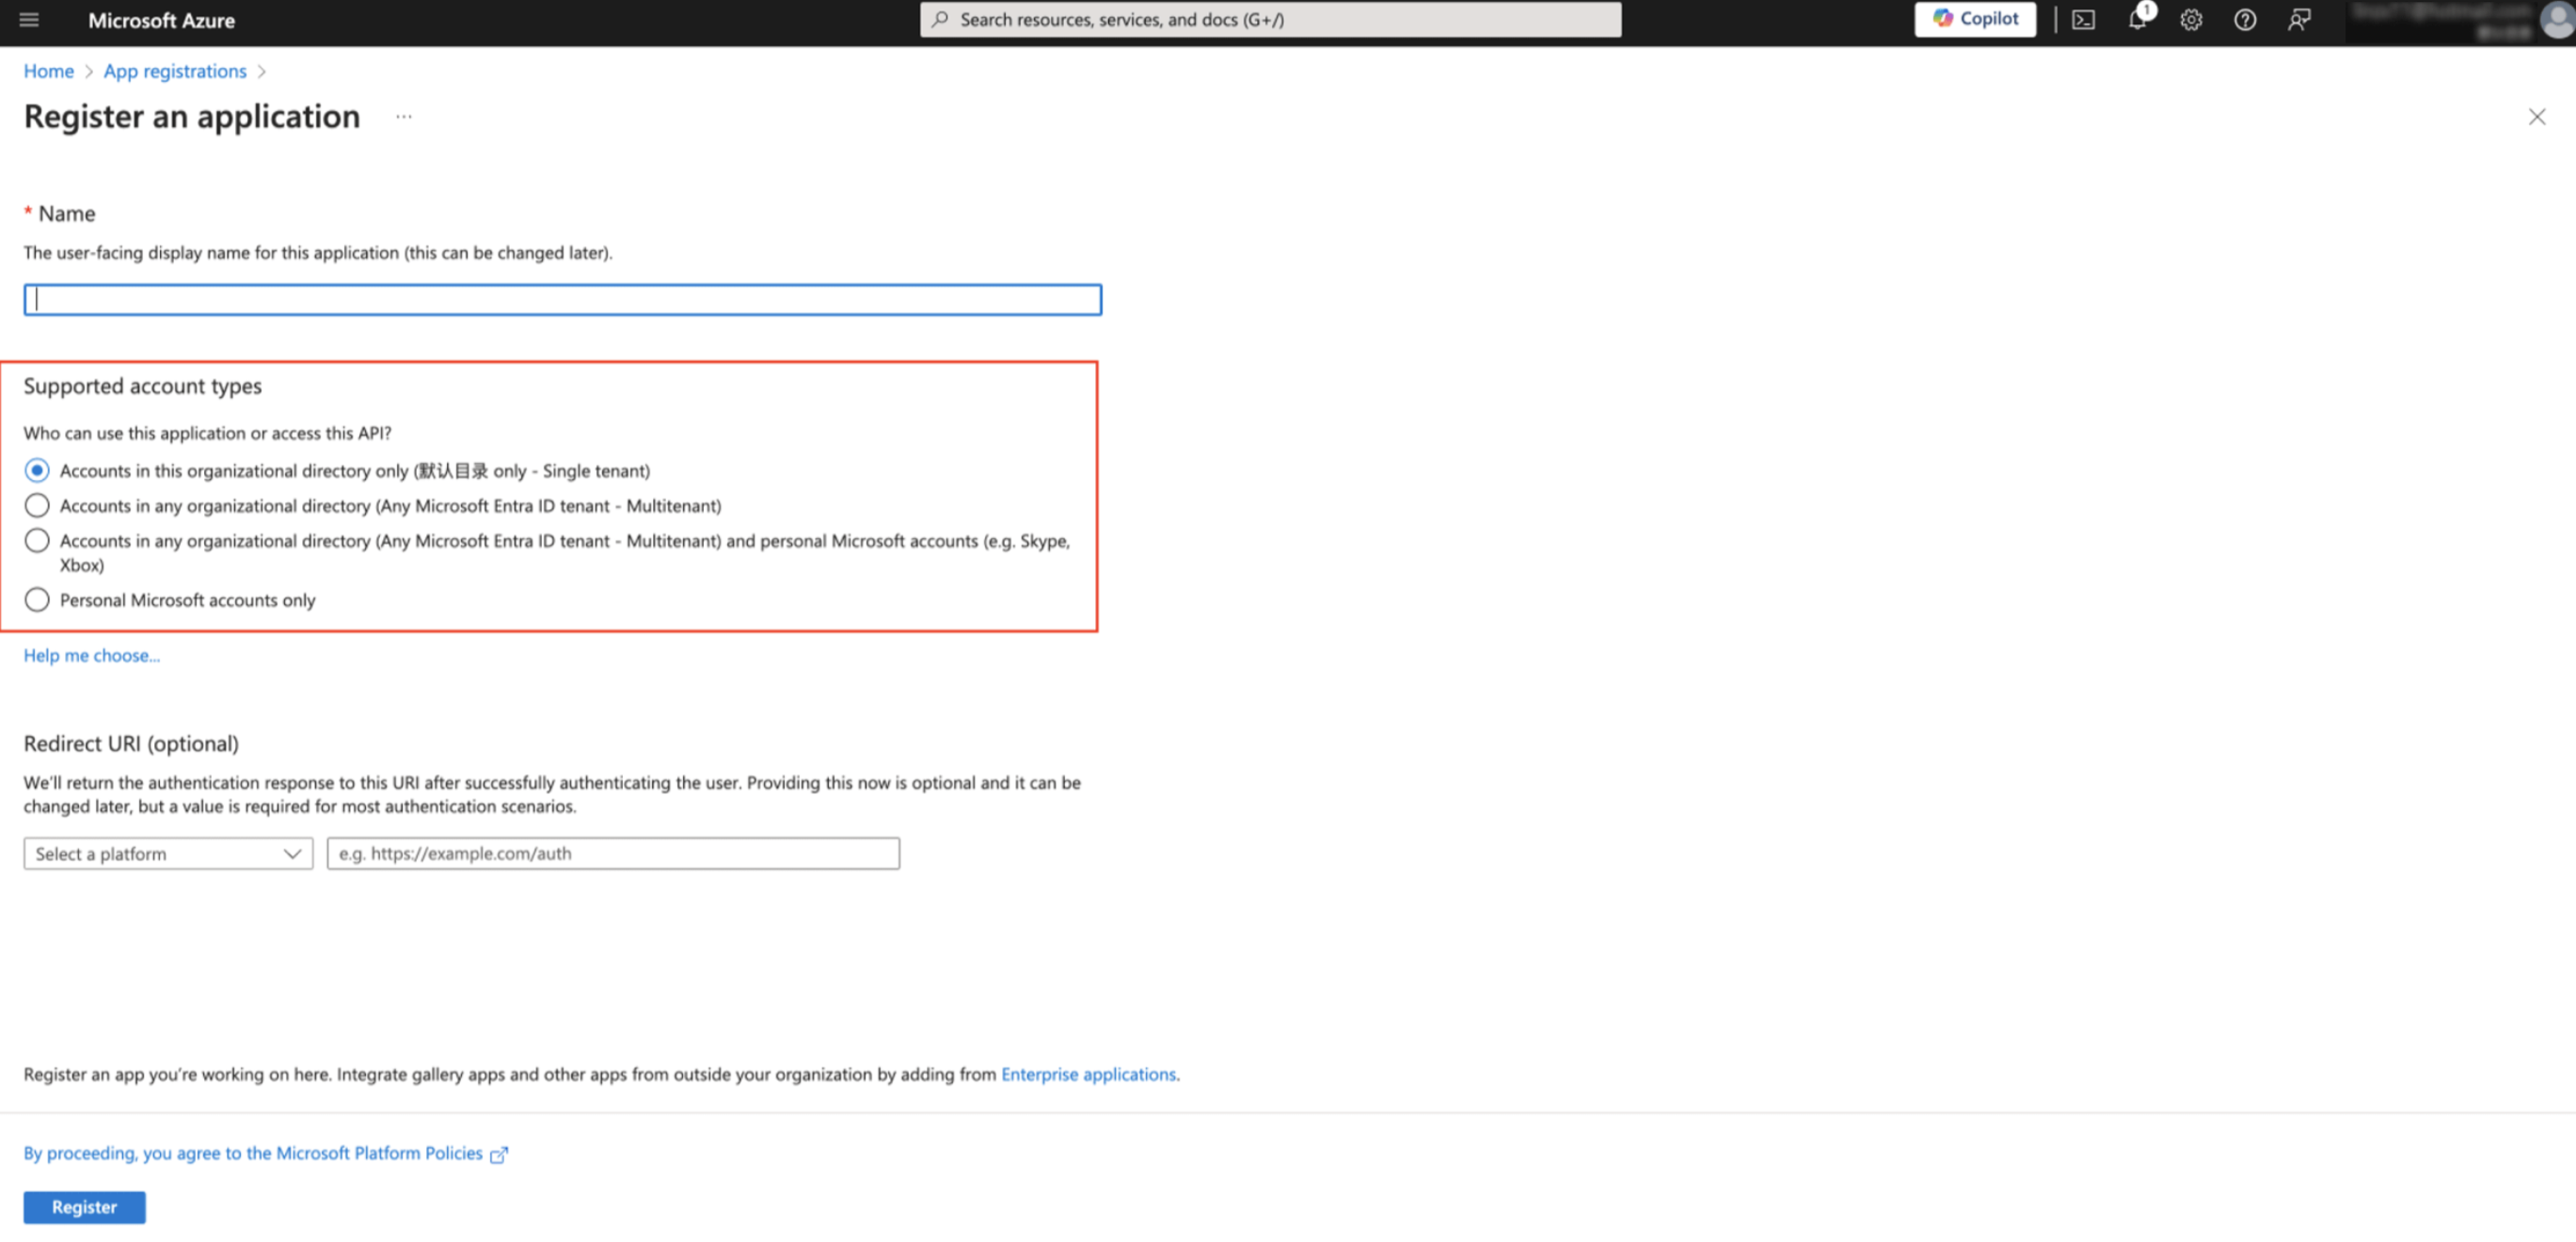
2. On the register an application page, fill in the application's Name and select the Supported Account Types according to your needs, and click Register.
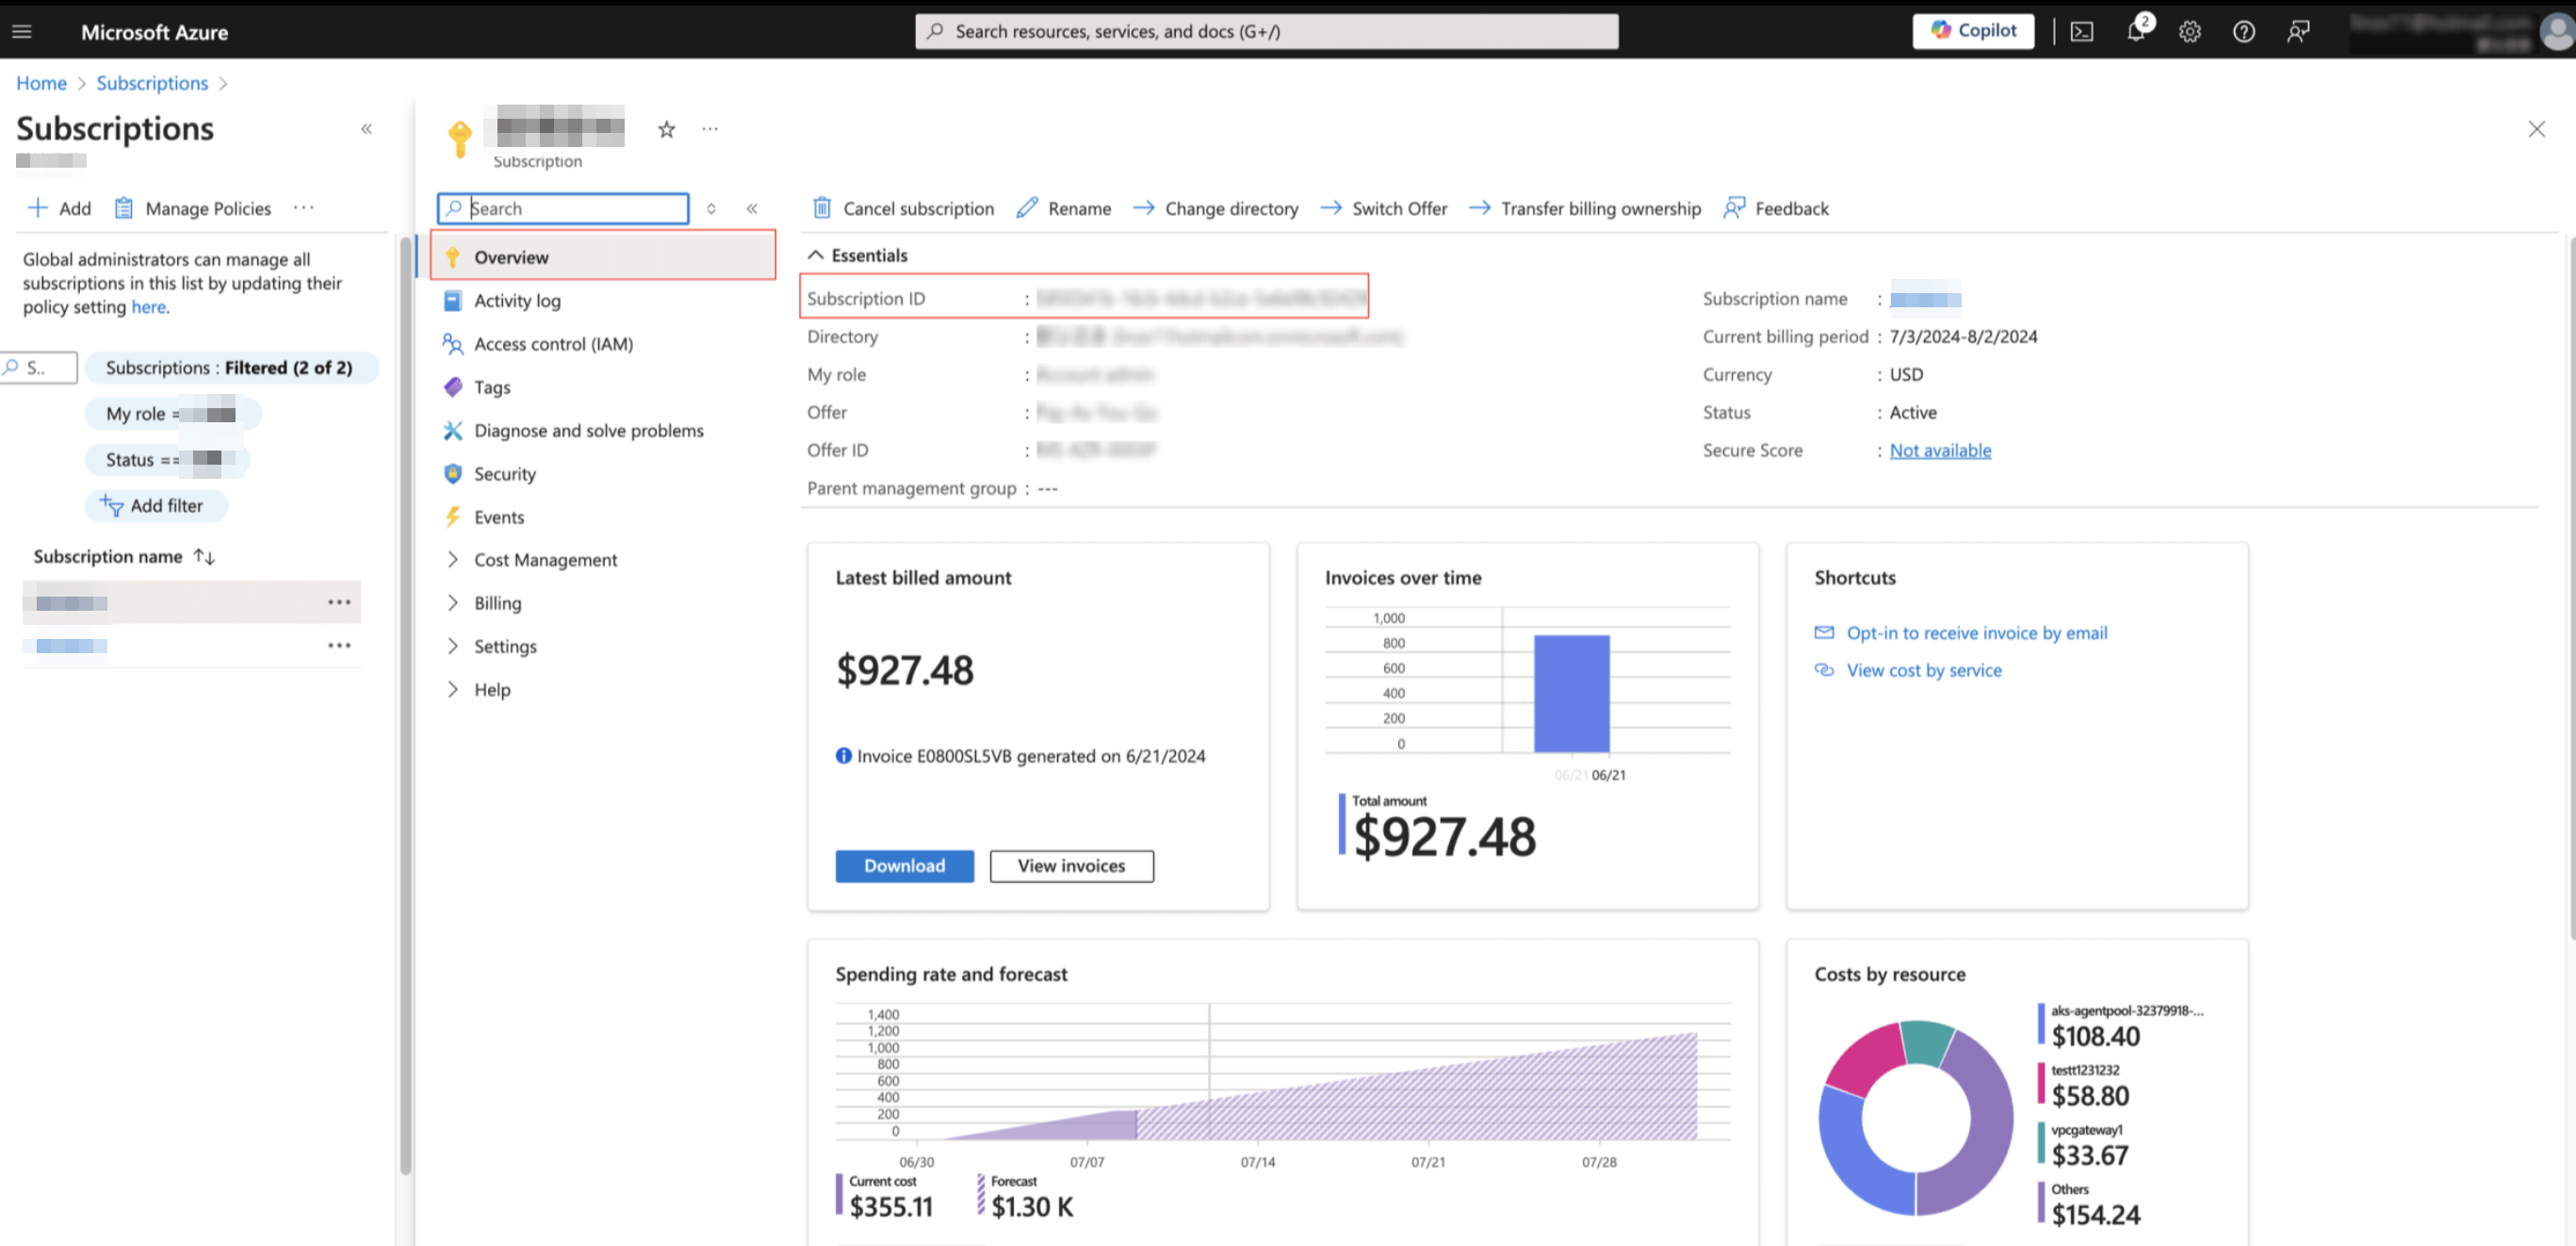
Step 2: Obtaining a Subscription ID
1. On the subscription list page, select the subscription to be connected (an application registration can be bound to multiple subscriptions), and click Subscription name.
2. On the subscription details page, click Overview to obtain the Subscription ID.
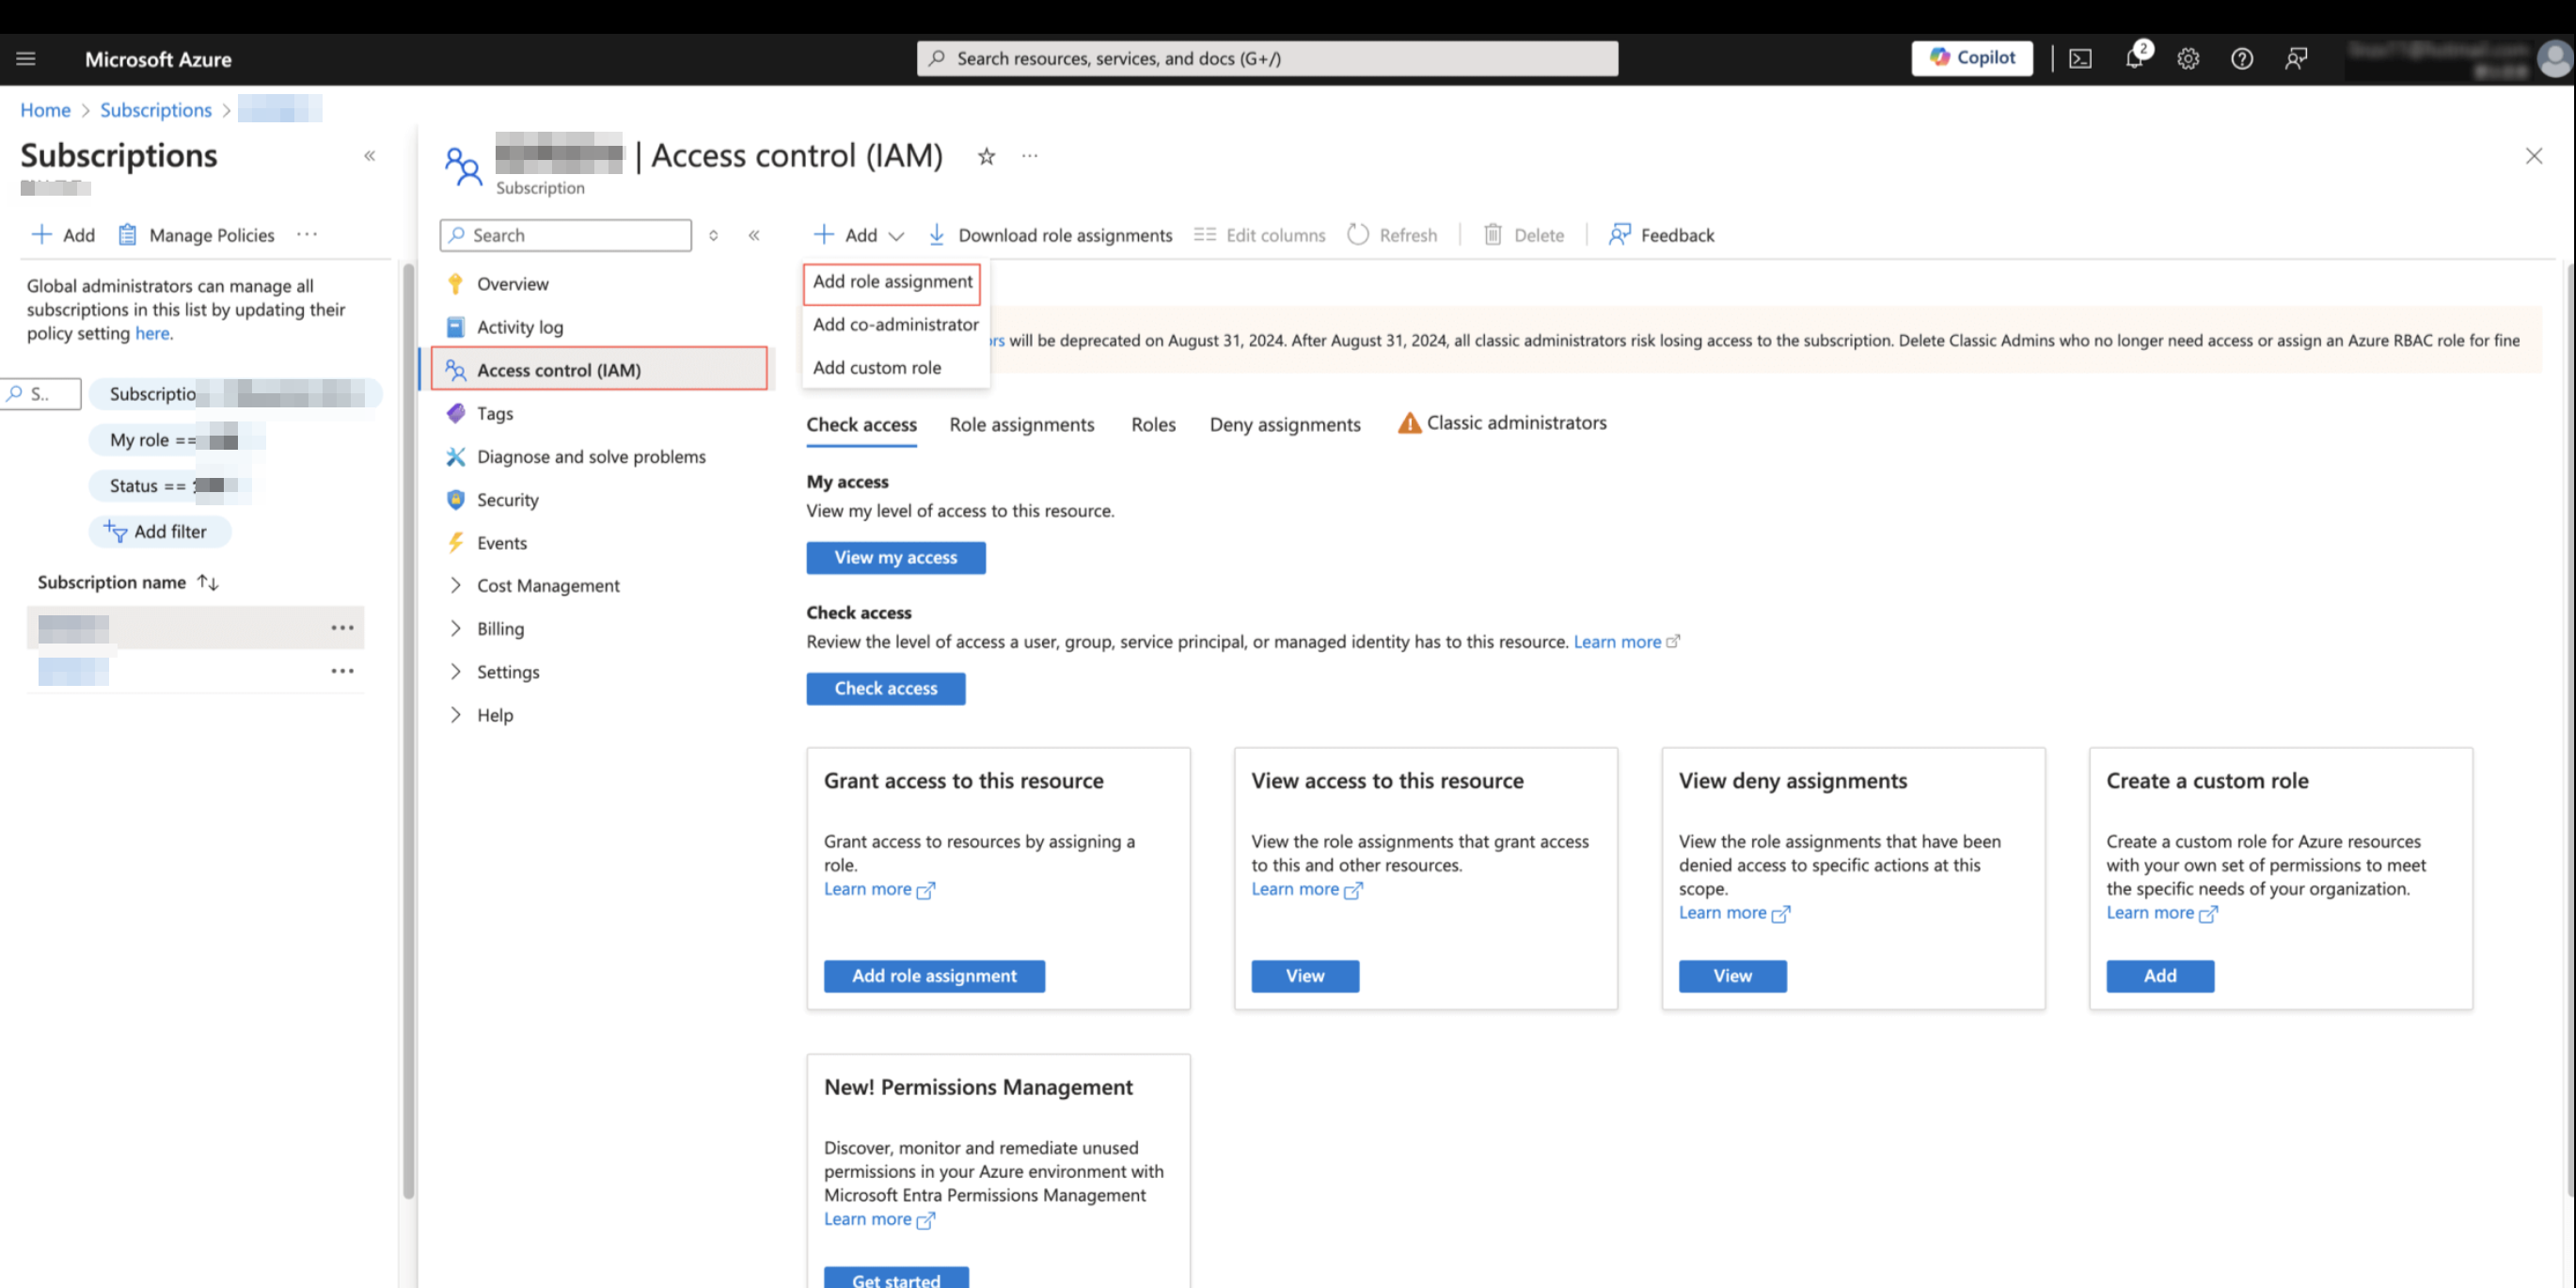
3. Select Access Control, click Add, and select Add role assignment.
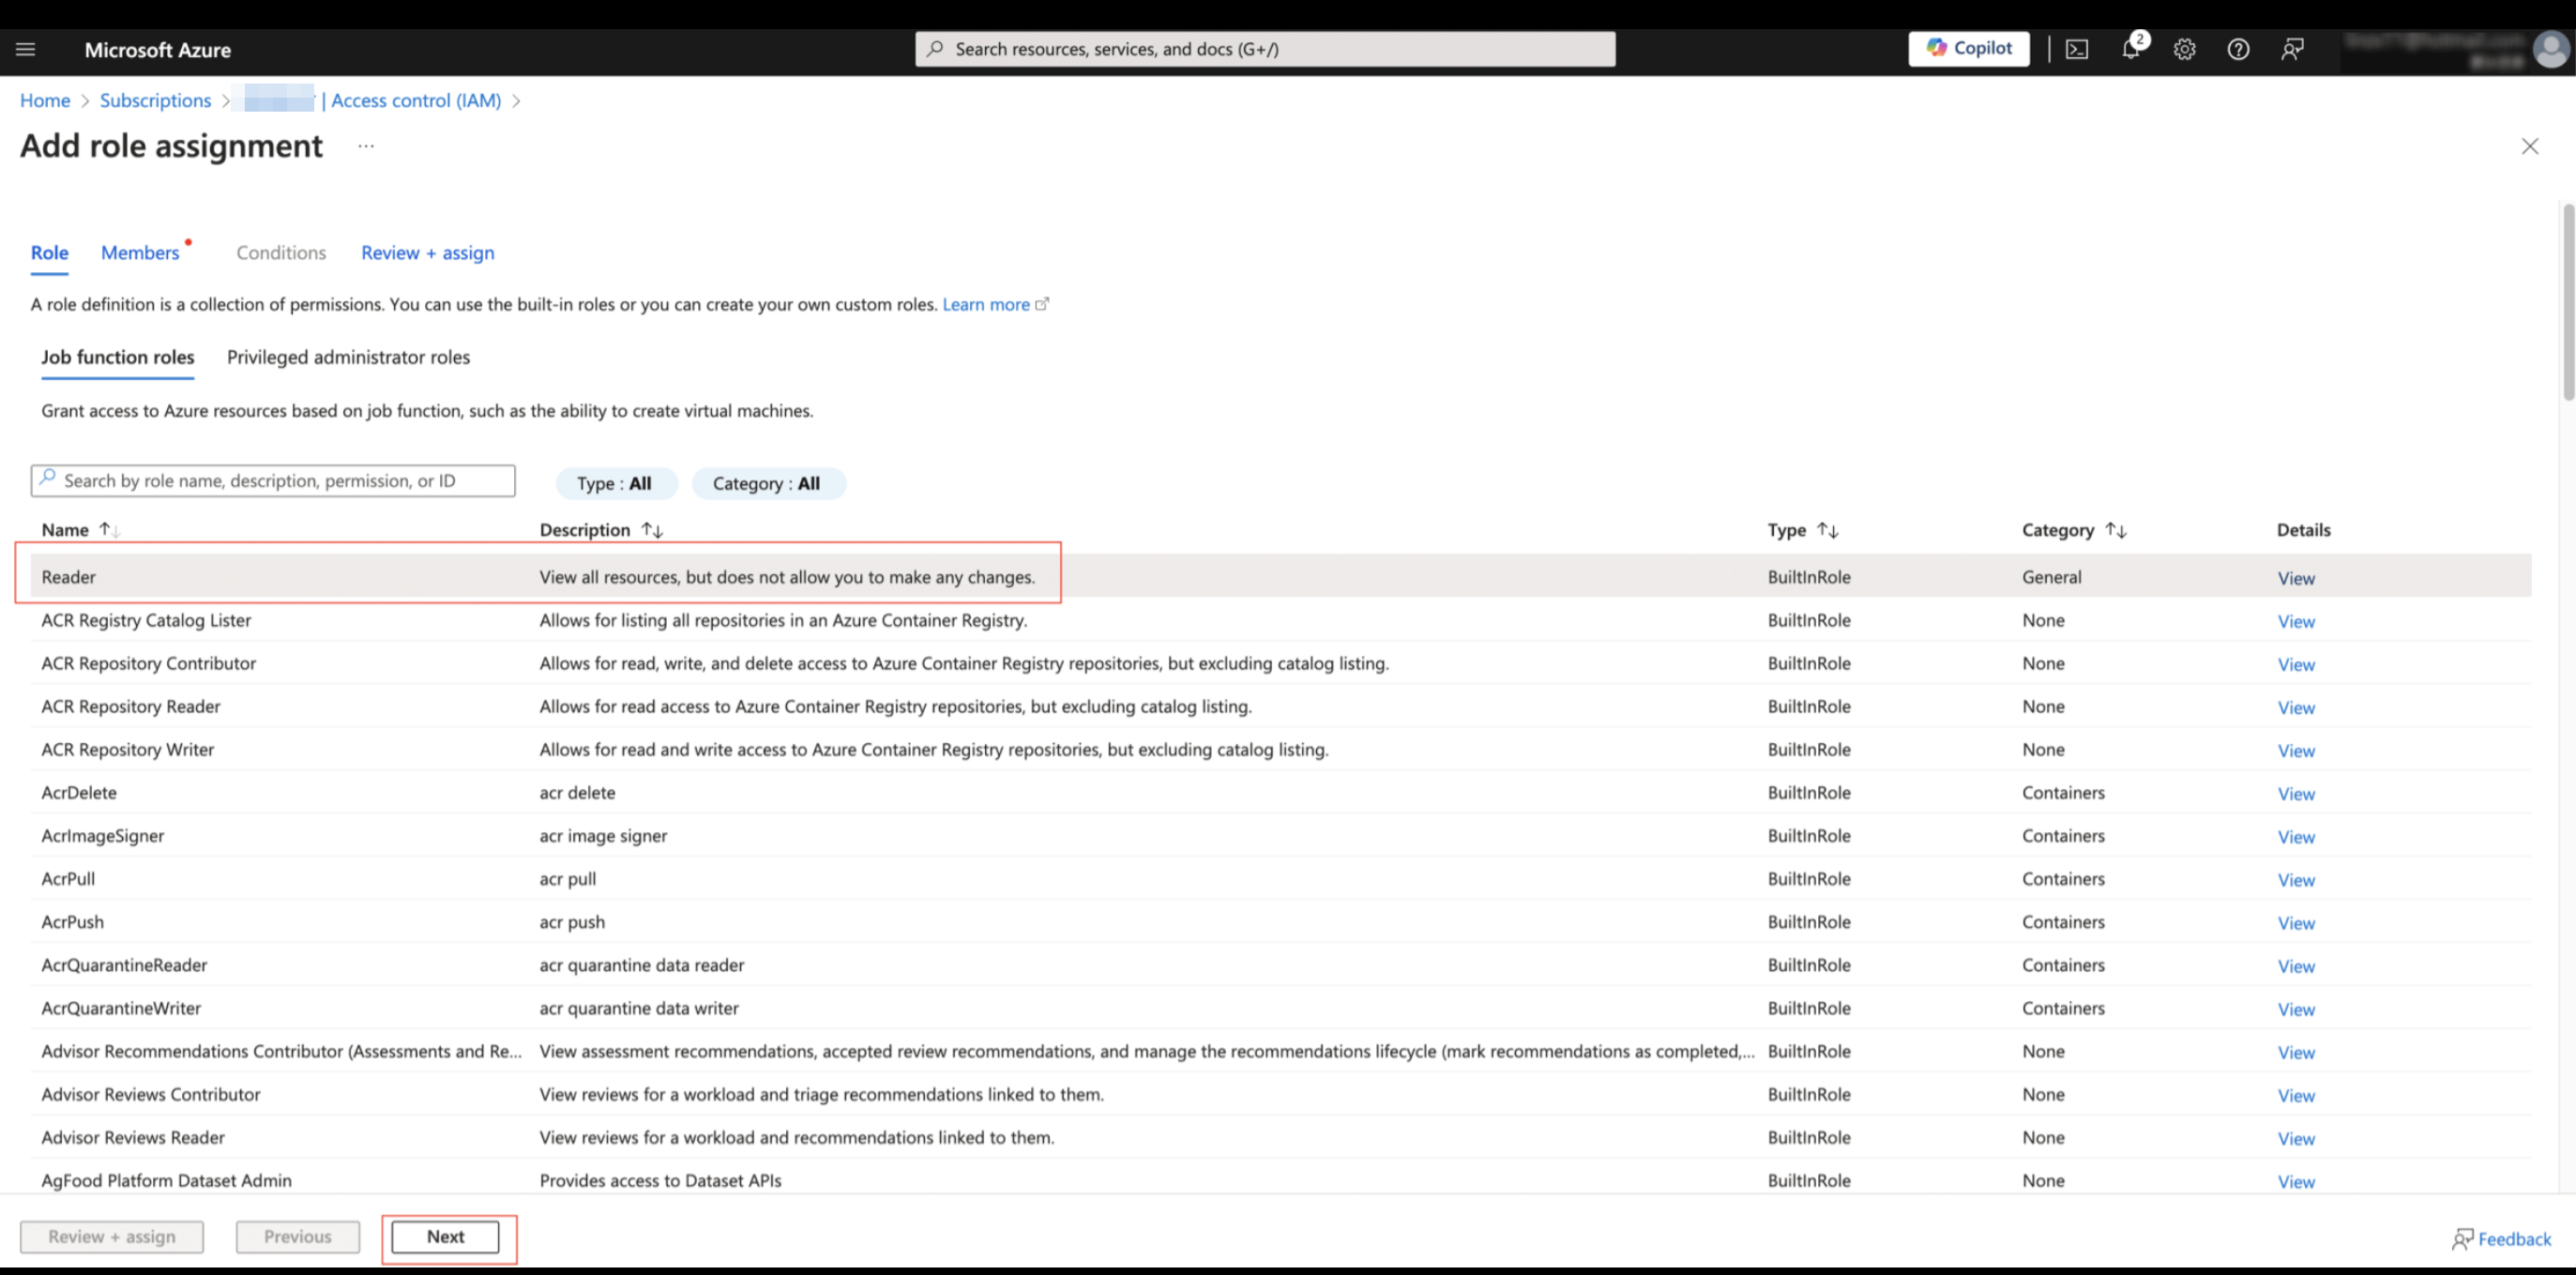
4. Select the role to be Assigned. It is recommended to select Reader and Azure Kubernetes Service Cluster User Roles in sequence. Click Next.
5. Add the user to be assigned, click Select Members, enter the name of the Application Registration to be added in the search box, select the Application Registration, and click Next.
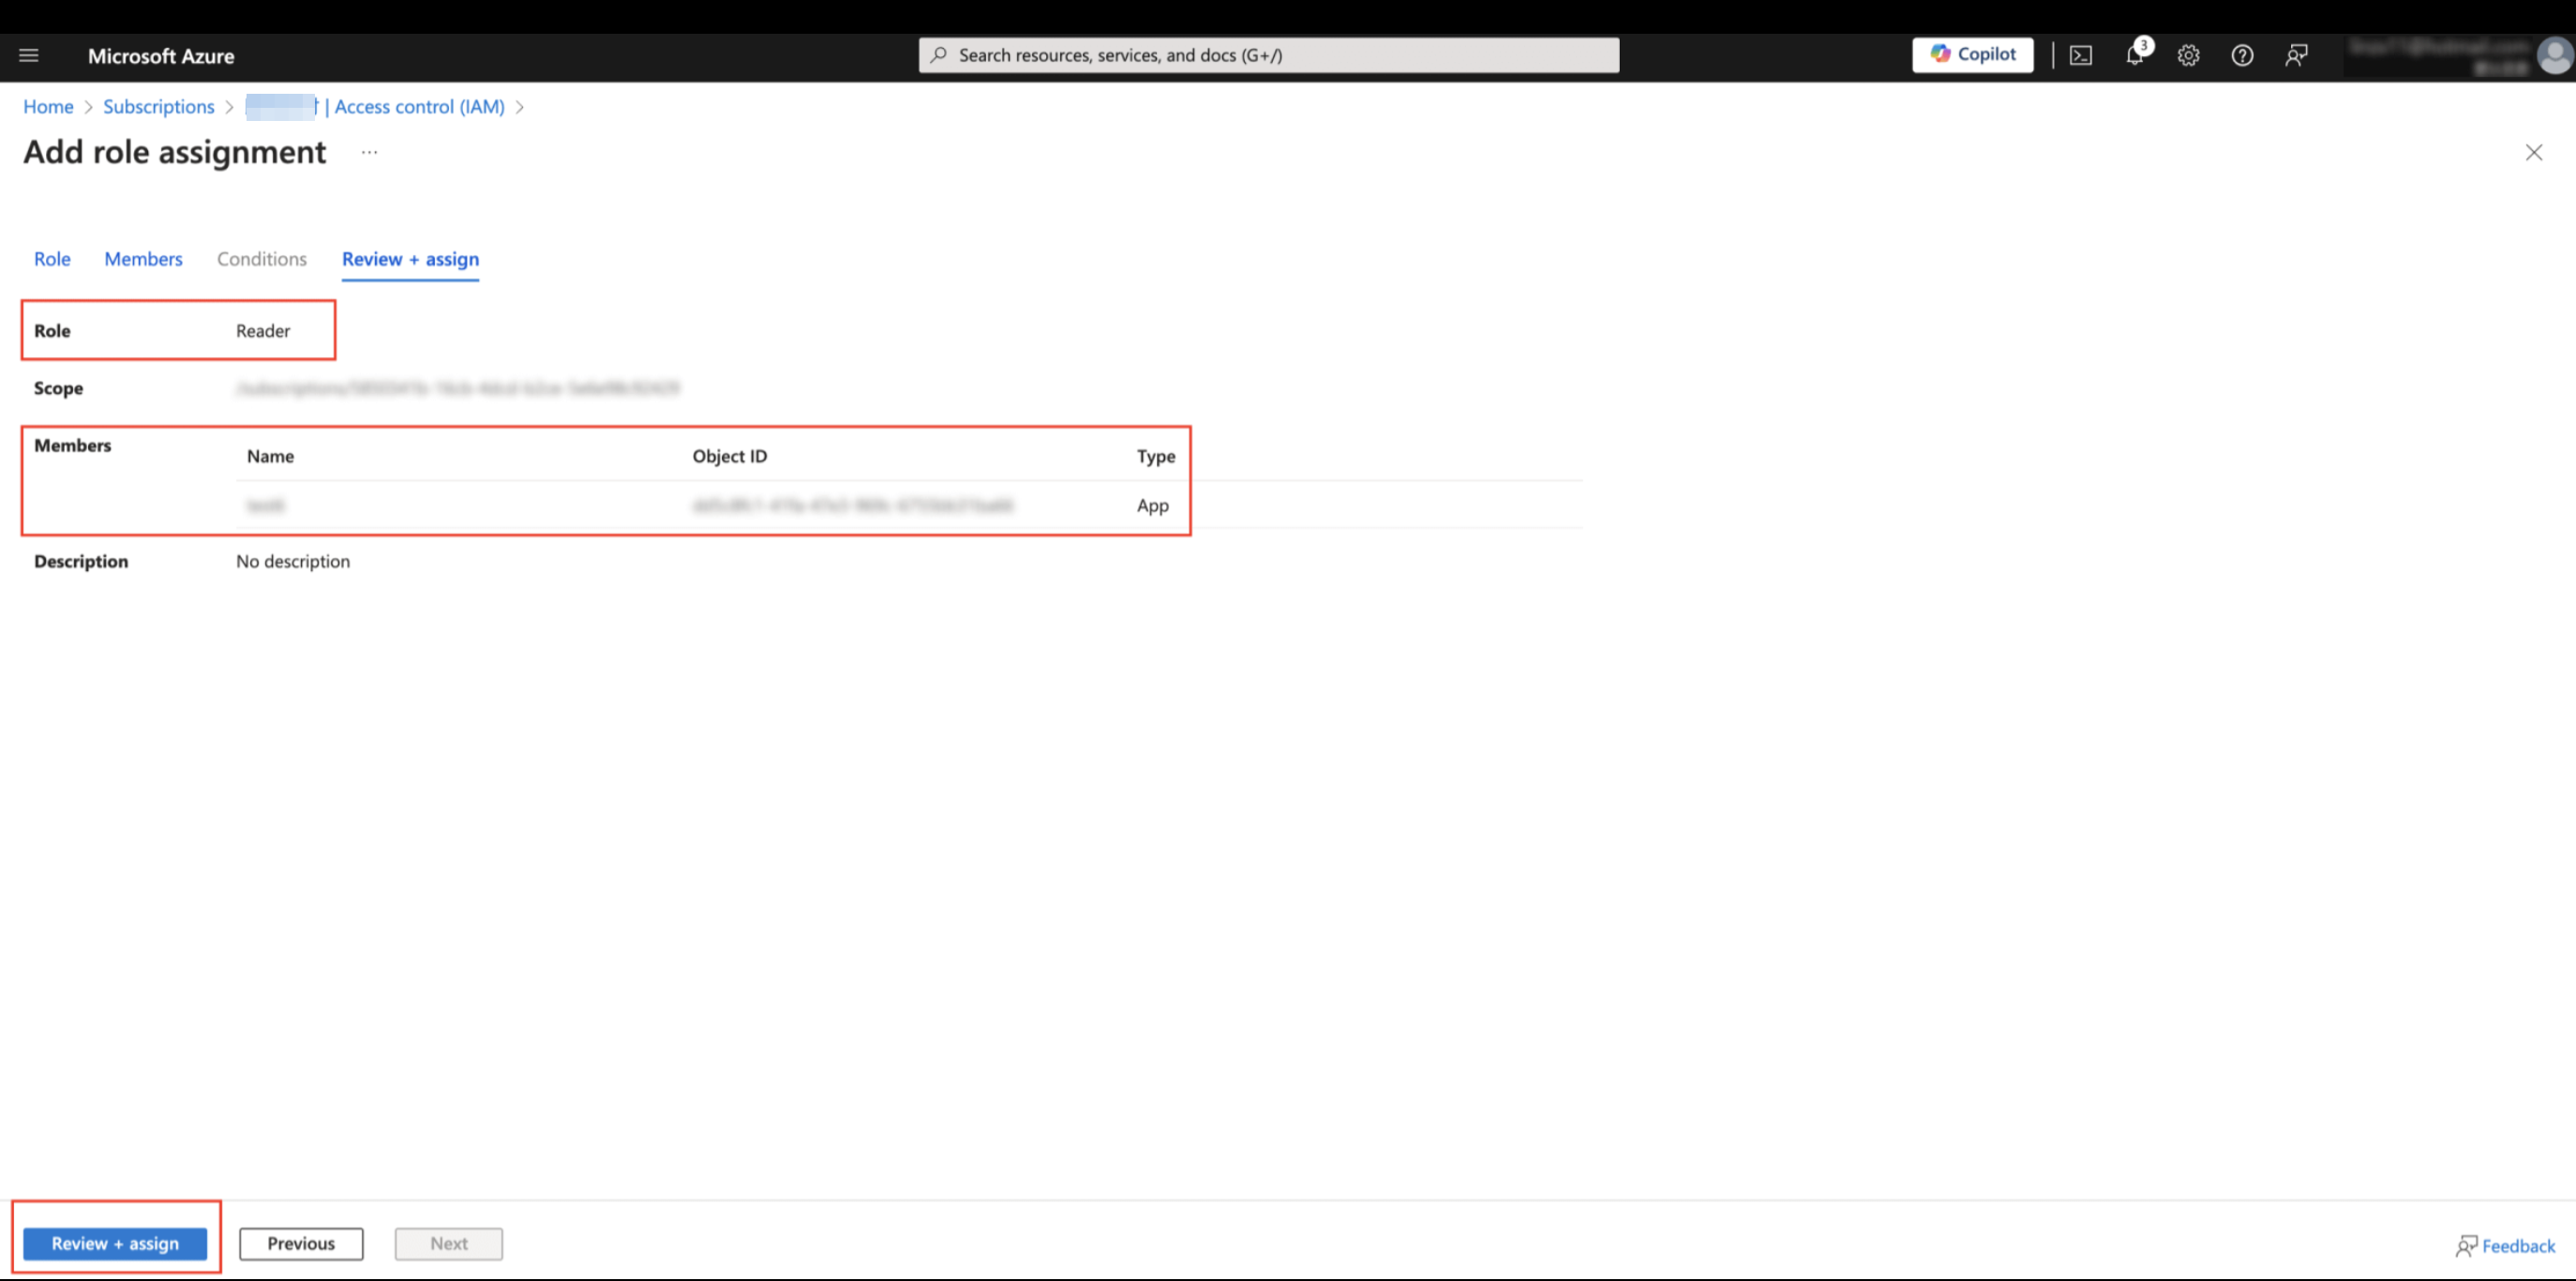
6. Confirm the roles and members, and click Review + assign.
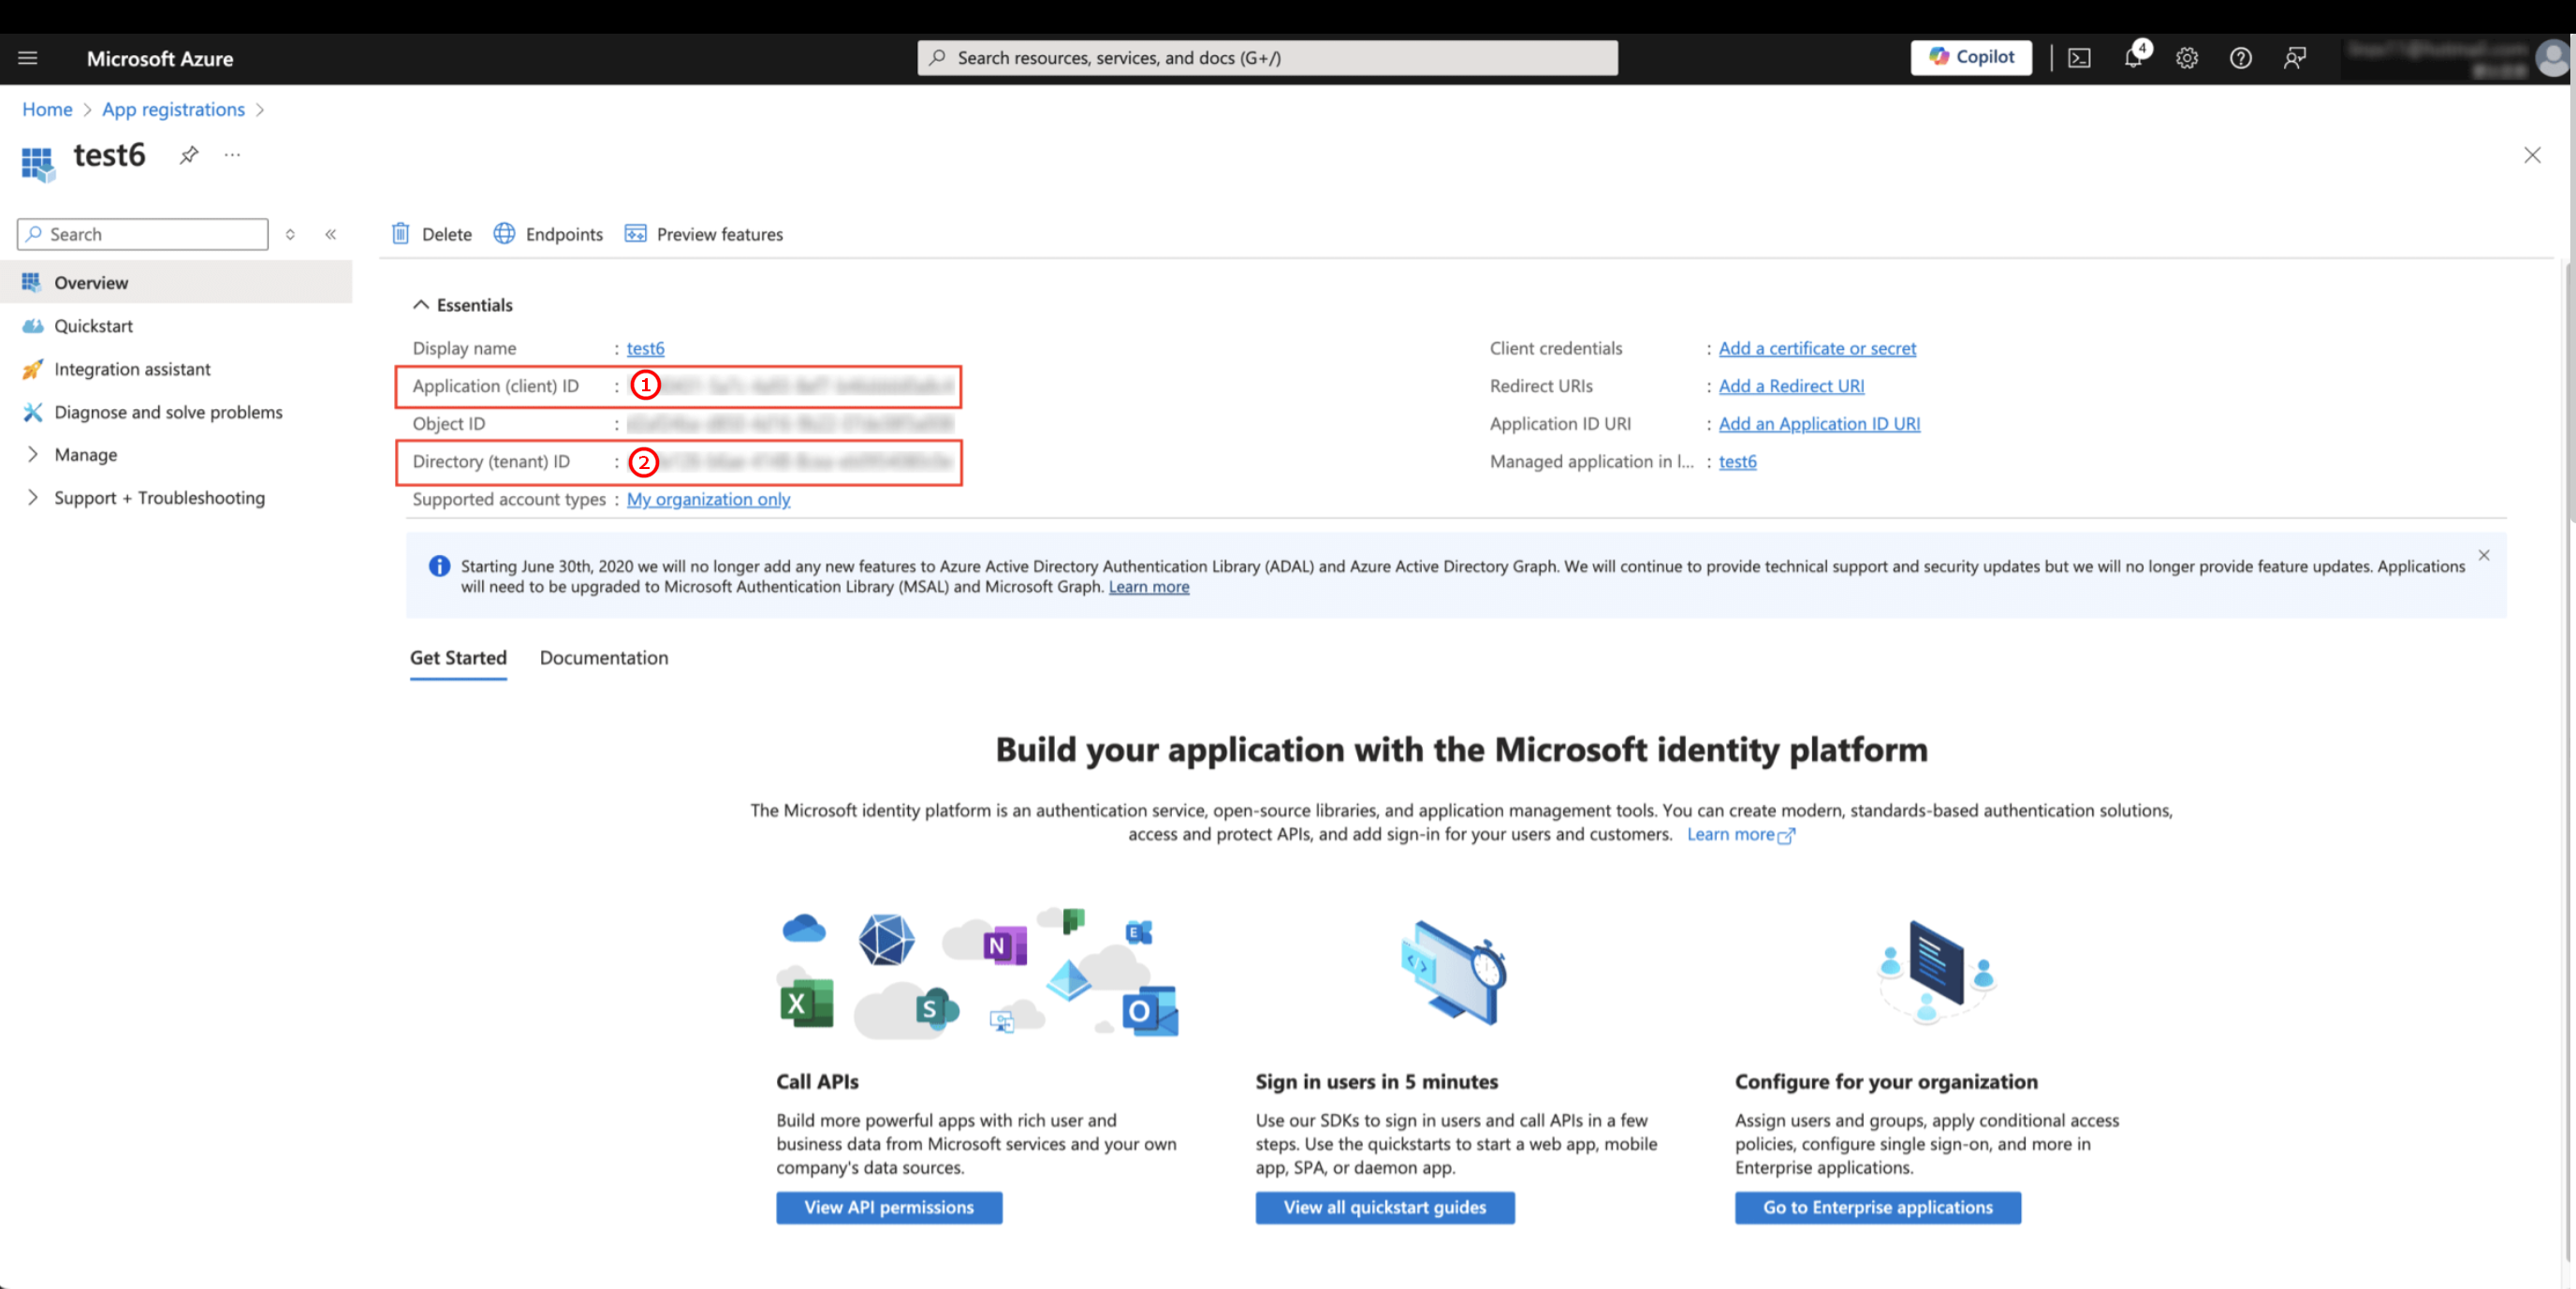
Step 3: Getting a Tenant ID, a Client ID, and a Client Key
1. Go to the page of the newly bound application registration, click Overview, and get ① Application (Client) lD and ② Directory (Tenant) ID.
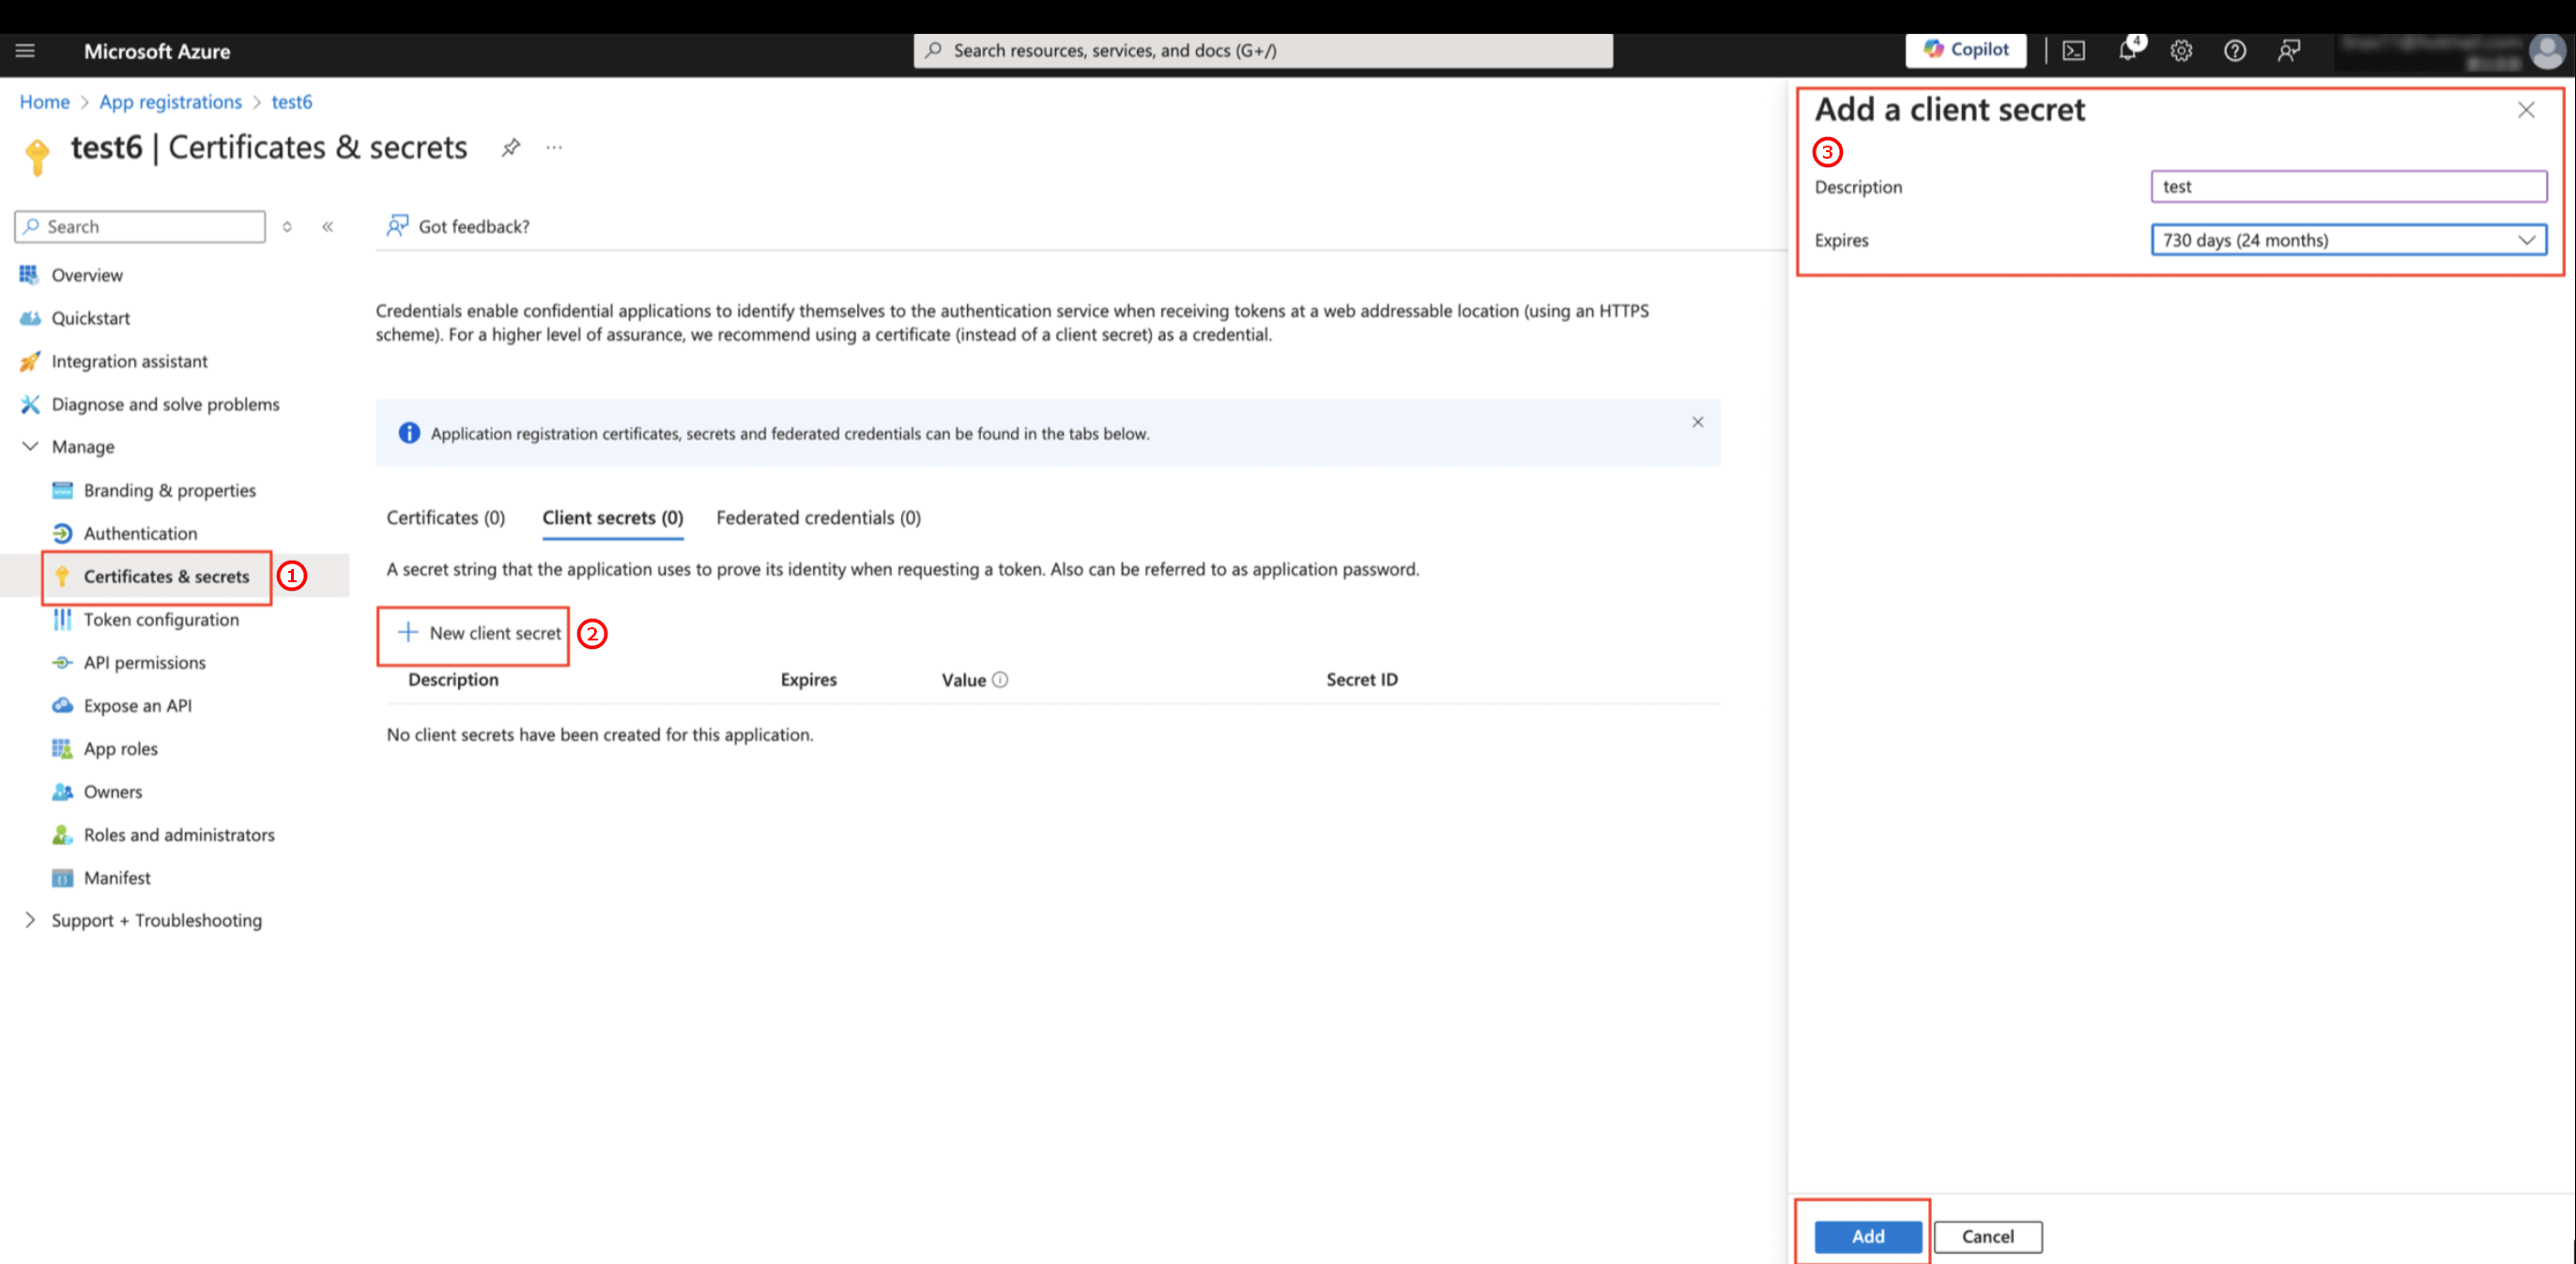
2. Click Certificates & secrets > New client secret, fill in the Description, select expires as 730 days (24 months), and click Add.
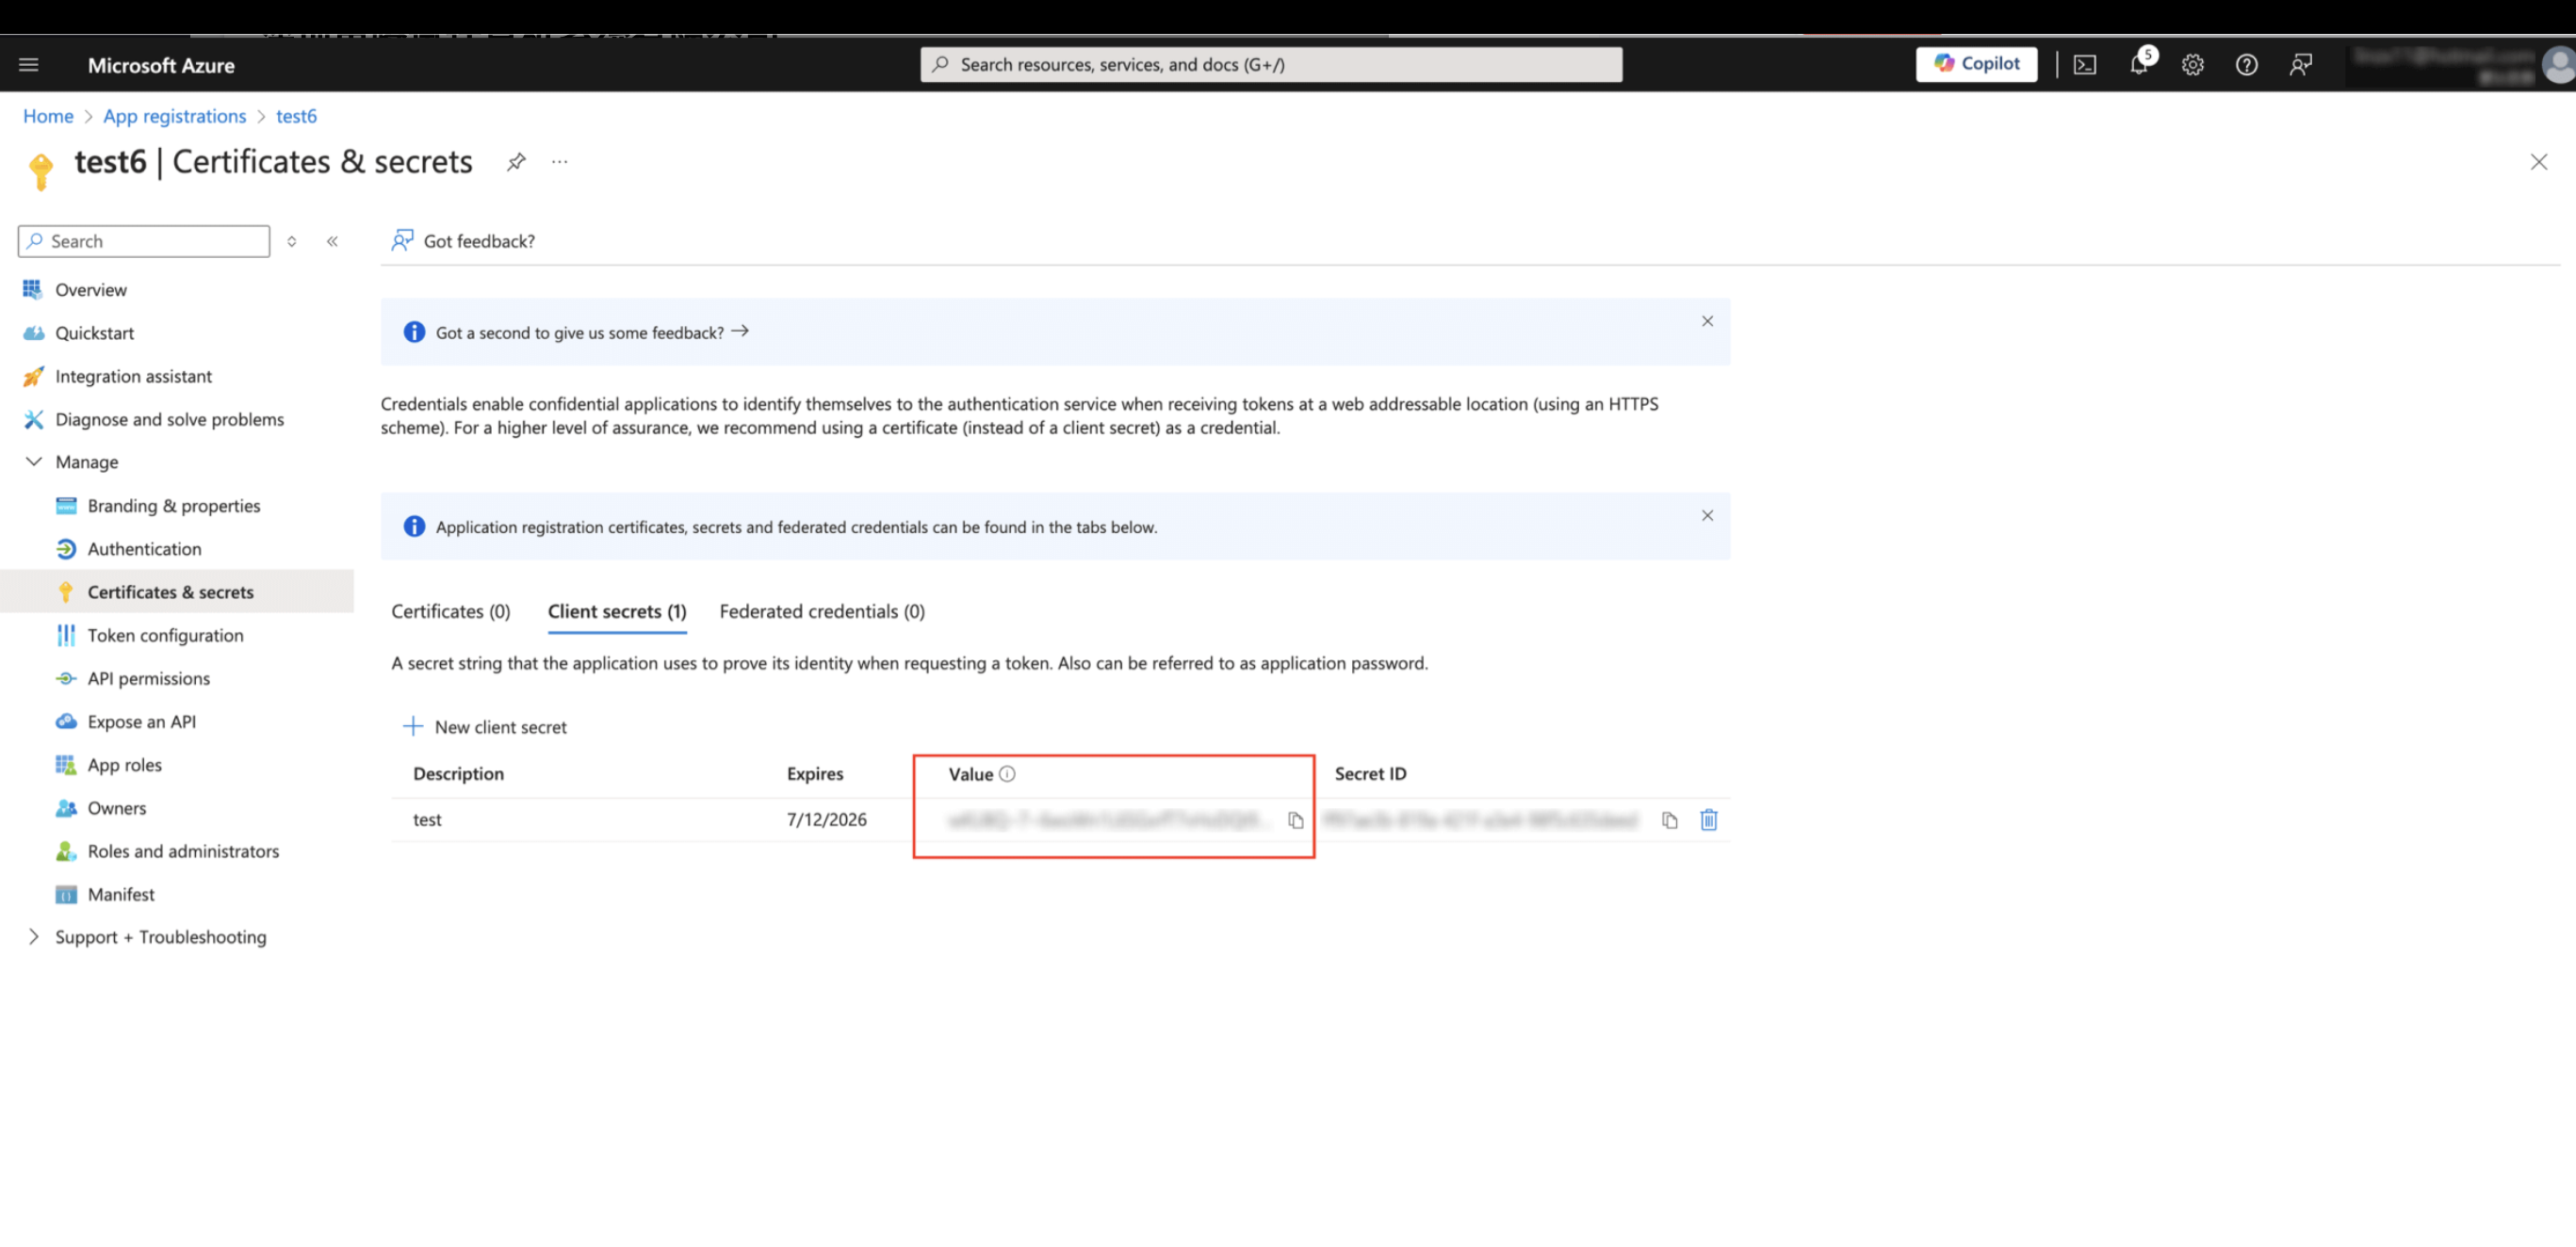
3. On the certificates and keys page, get the Client Secret.
AWS Account
Quick Configuration
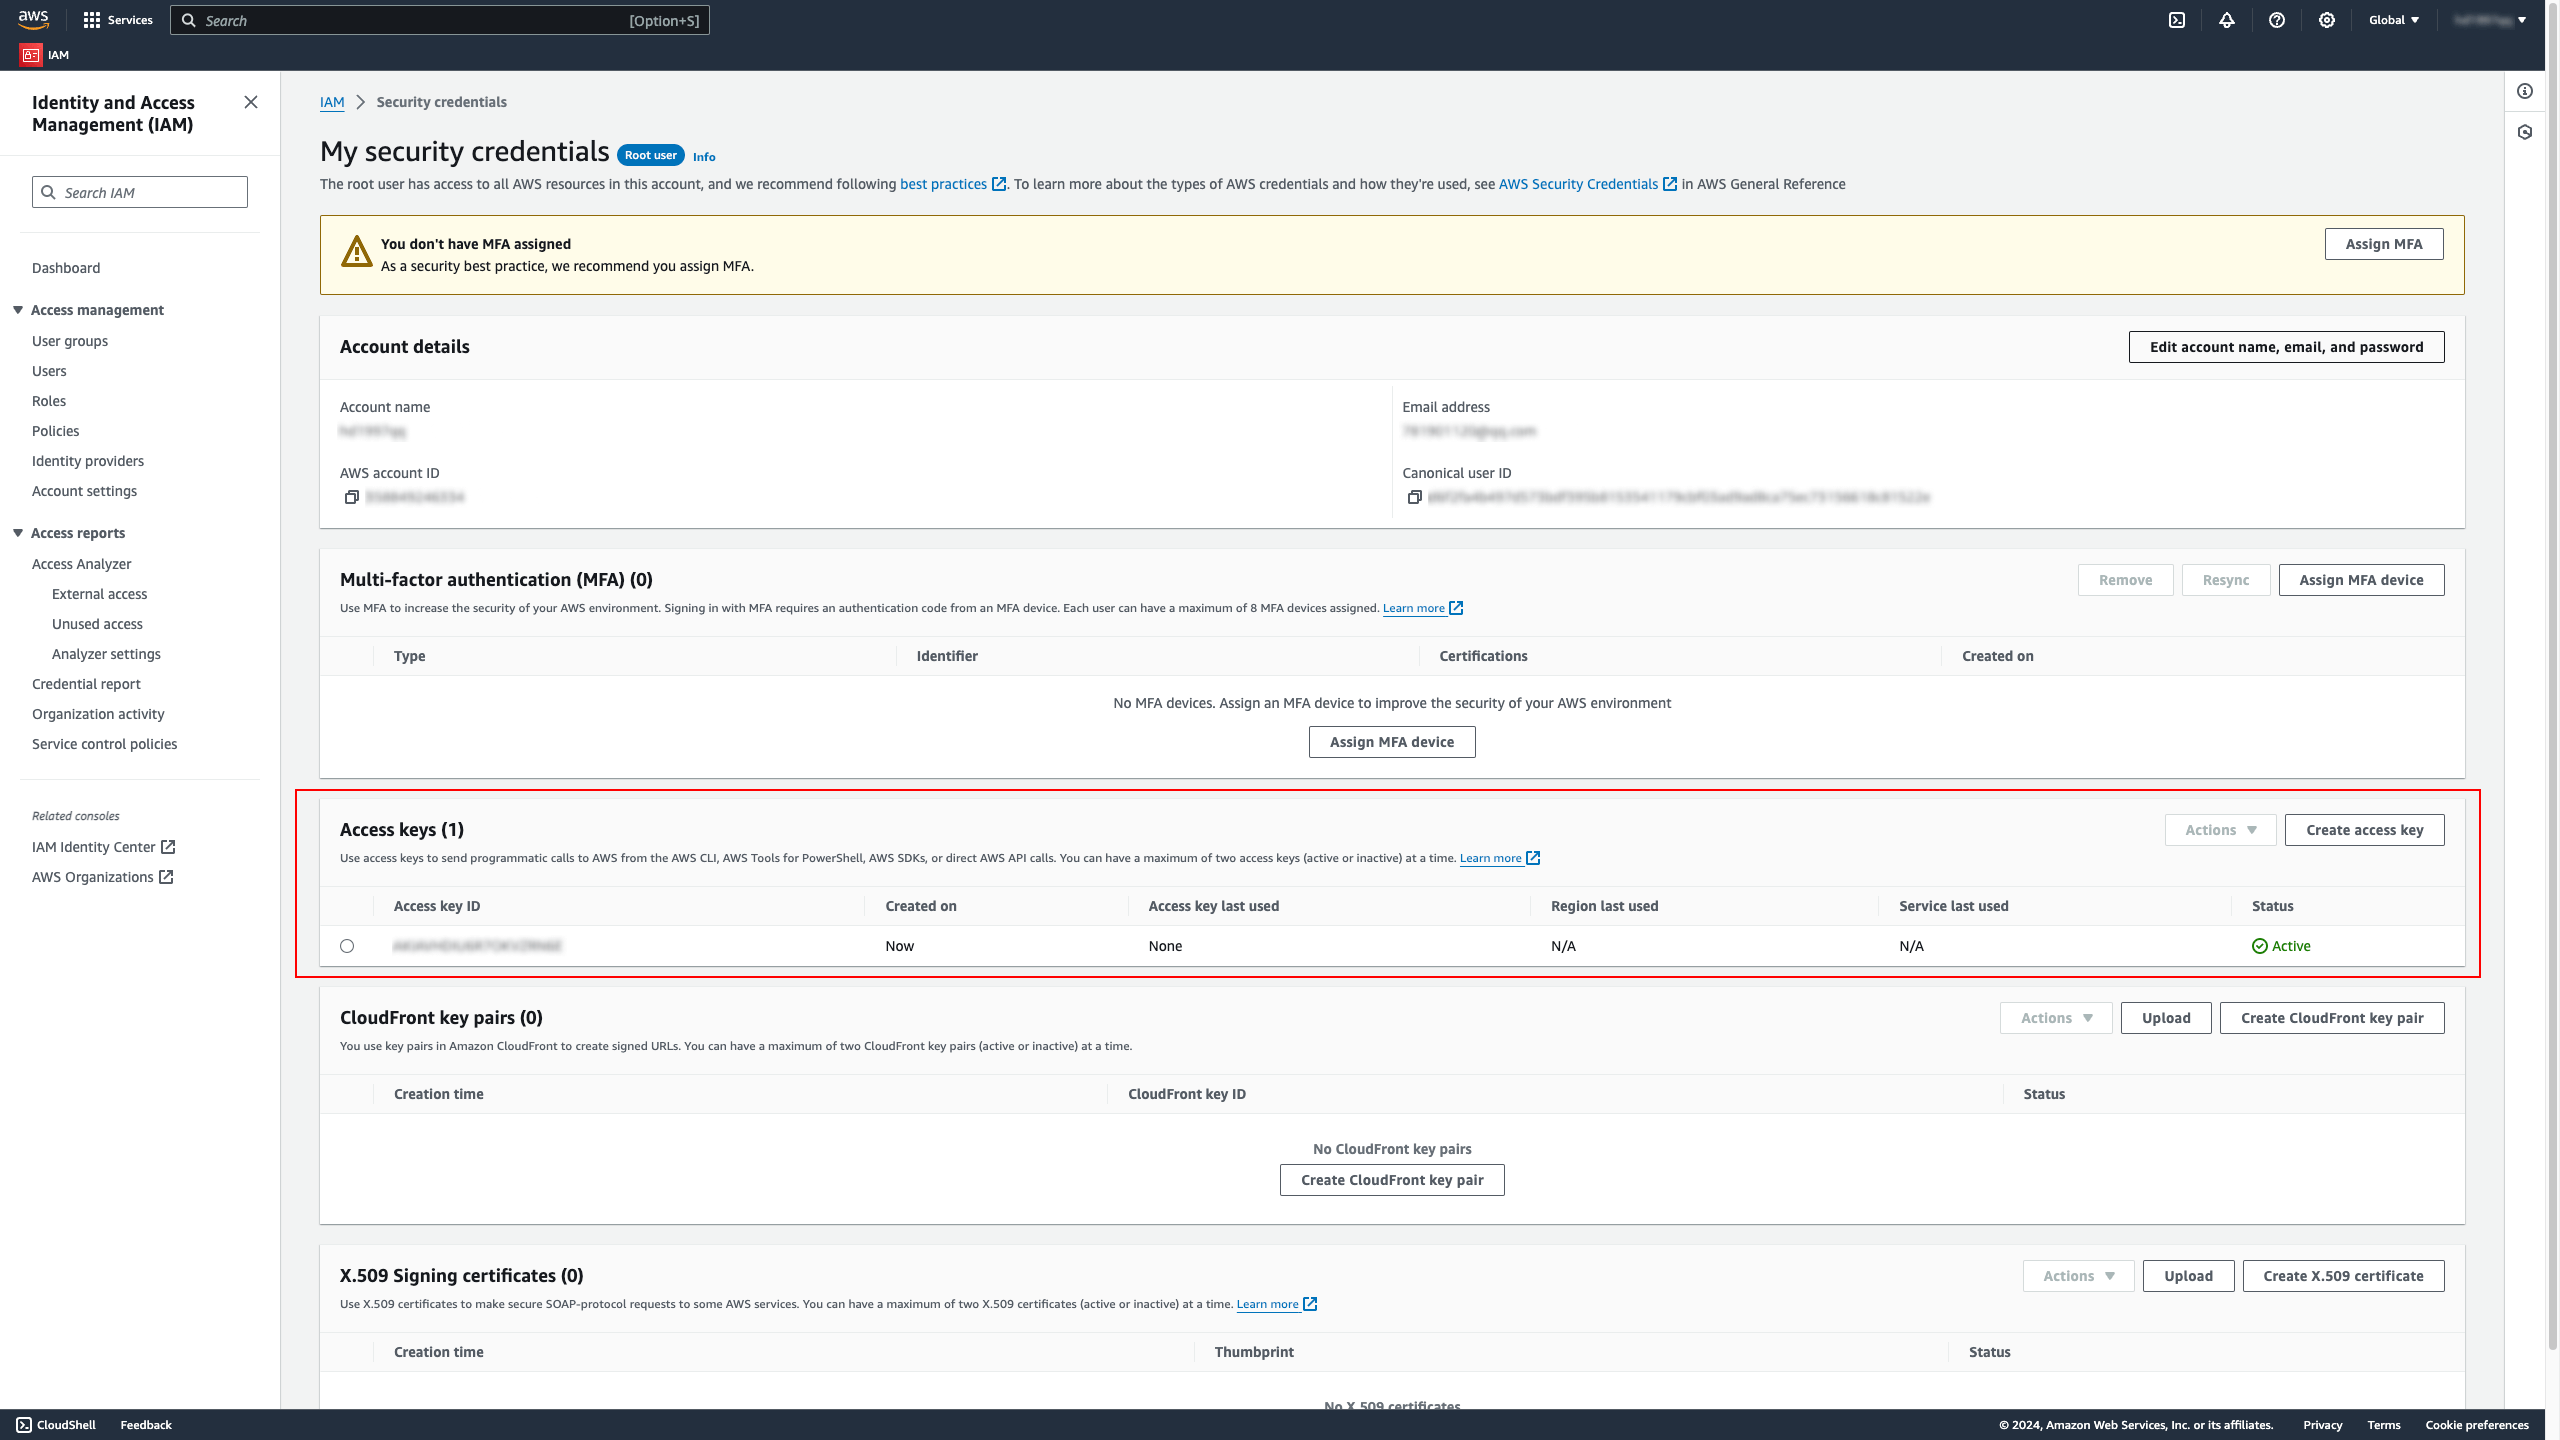
The completion time is approximately 1 minute, but due to the need for higher permissions, the root account's AK should be configured. After that, CSC will automatically create a sub-account AK to connect to assets and grant read-only permissions to all assets.
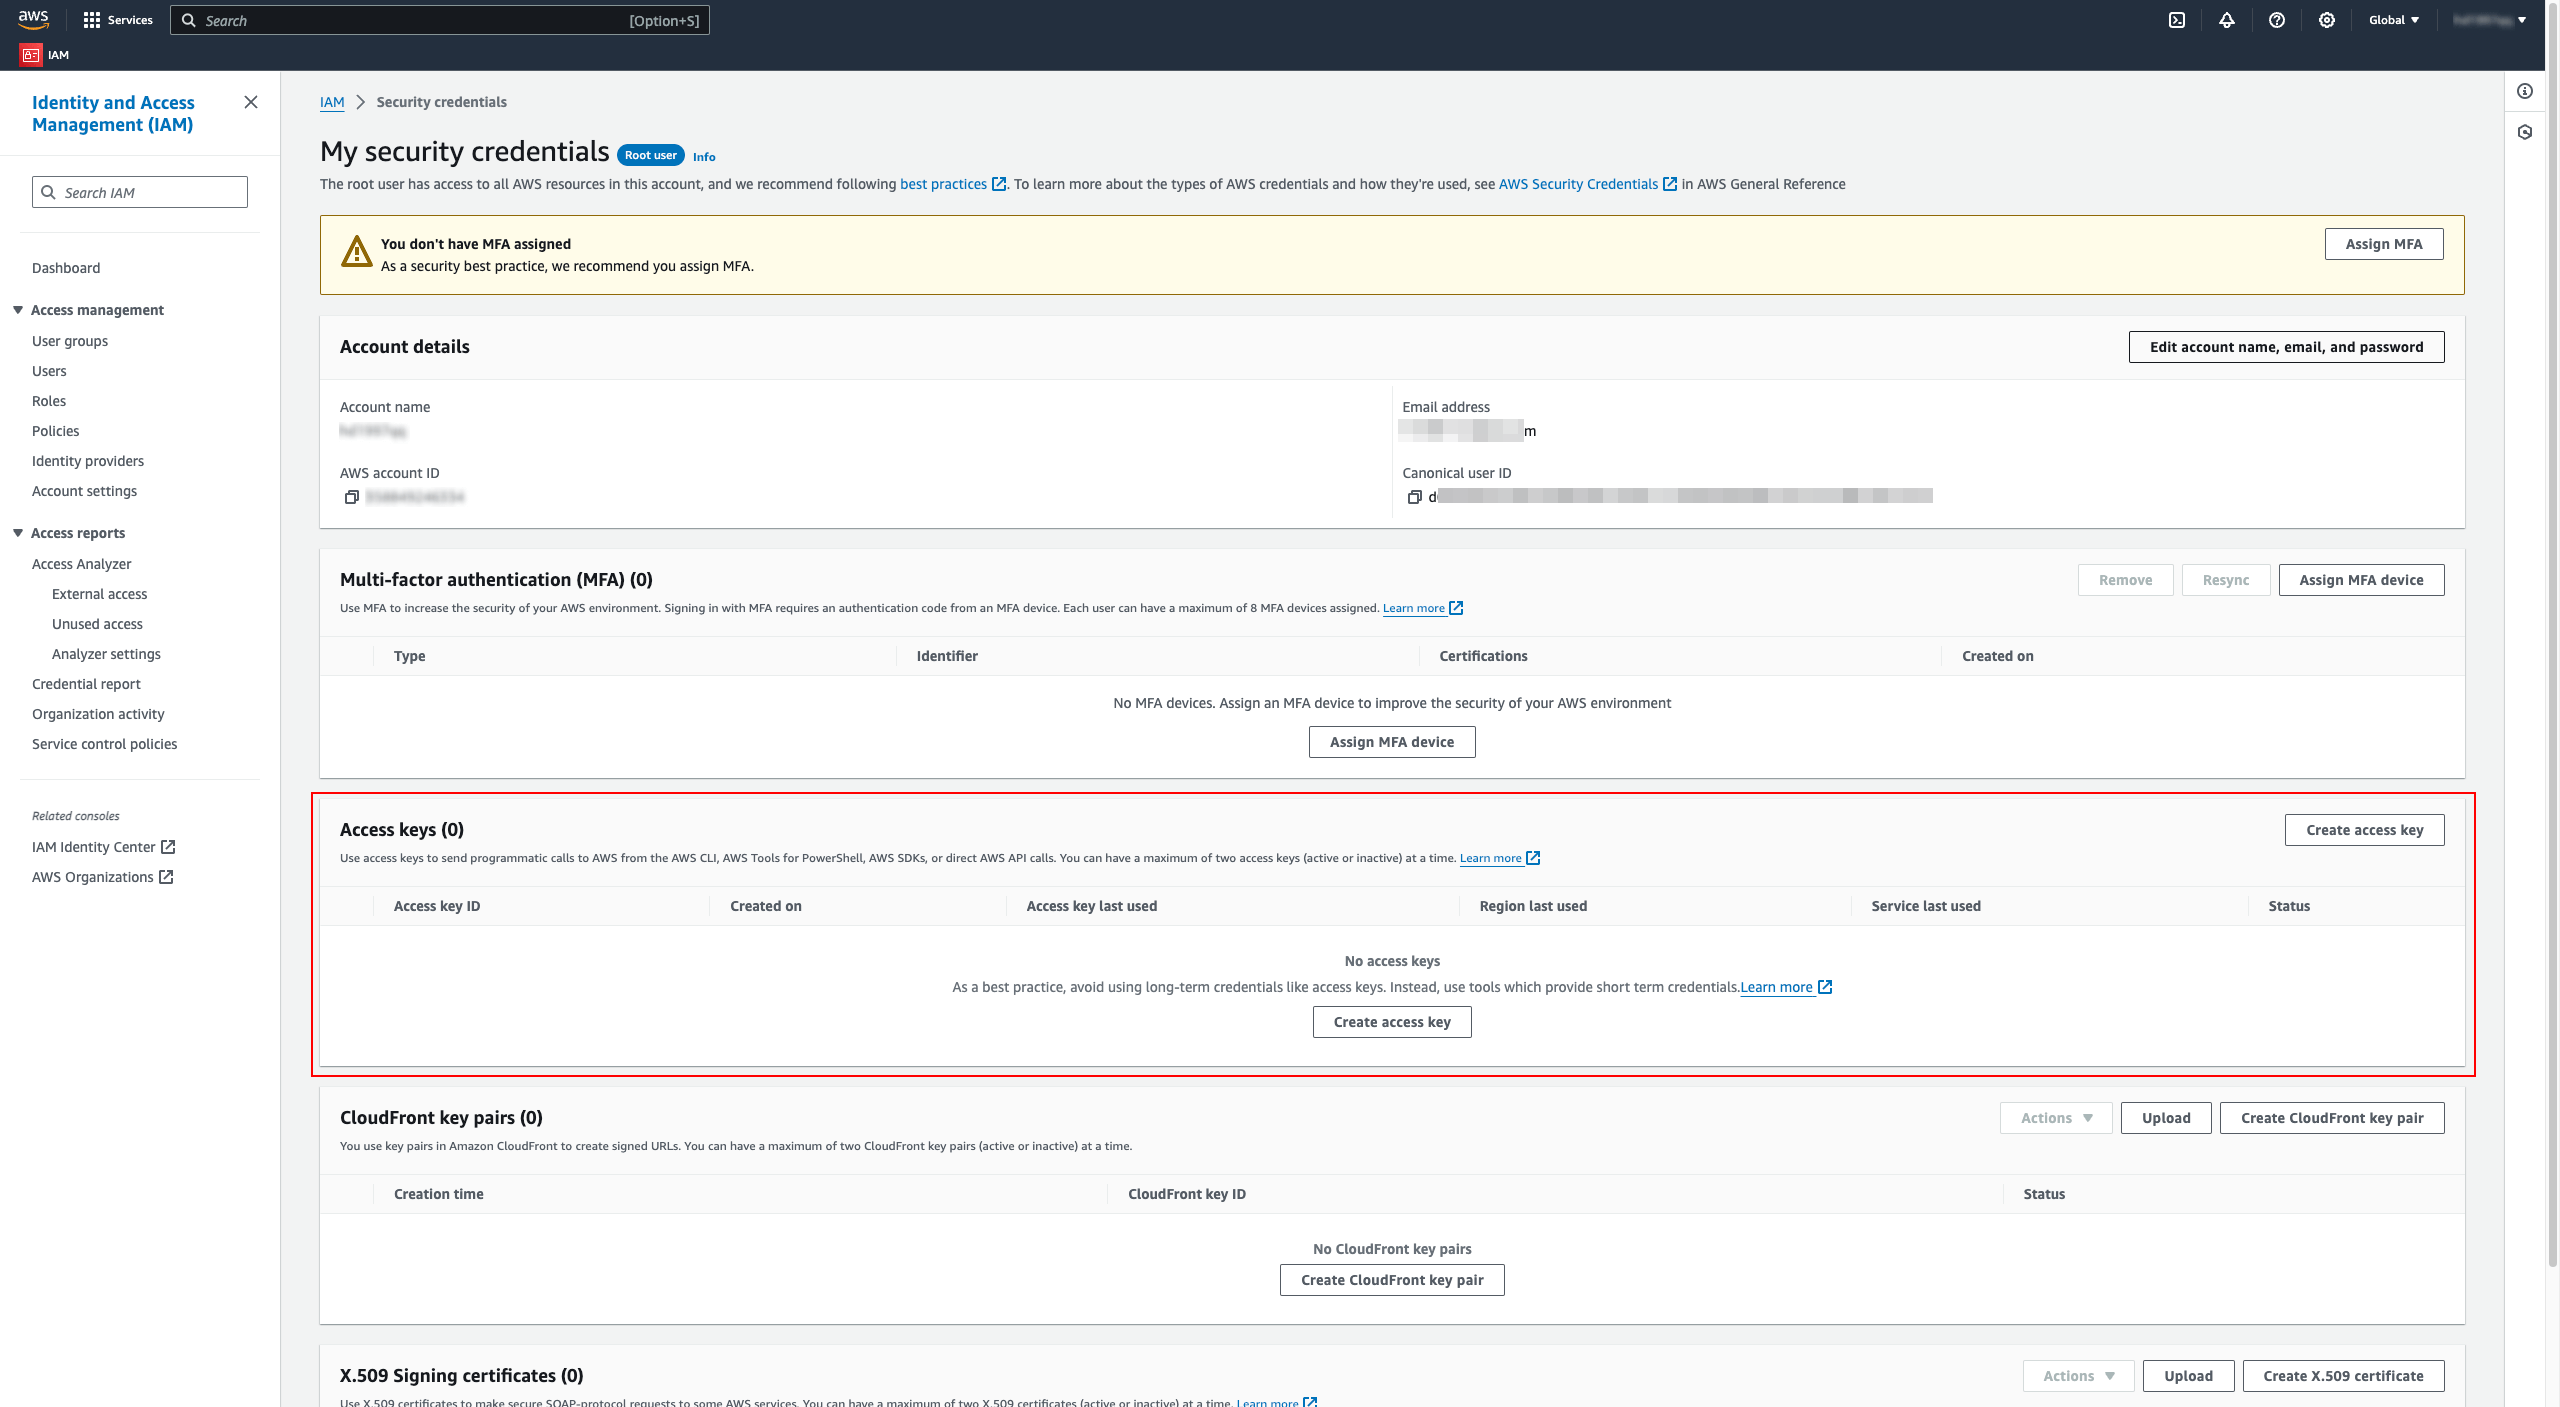
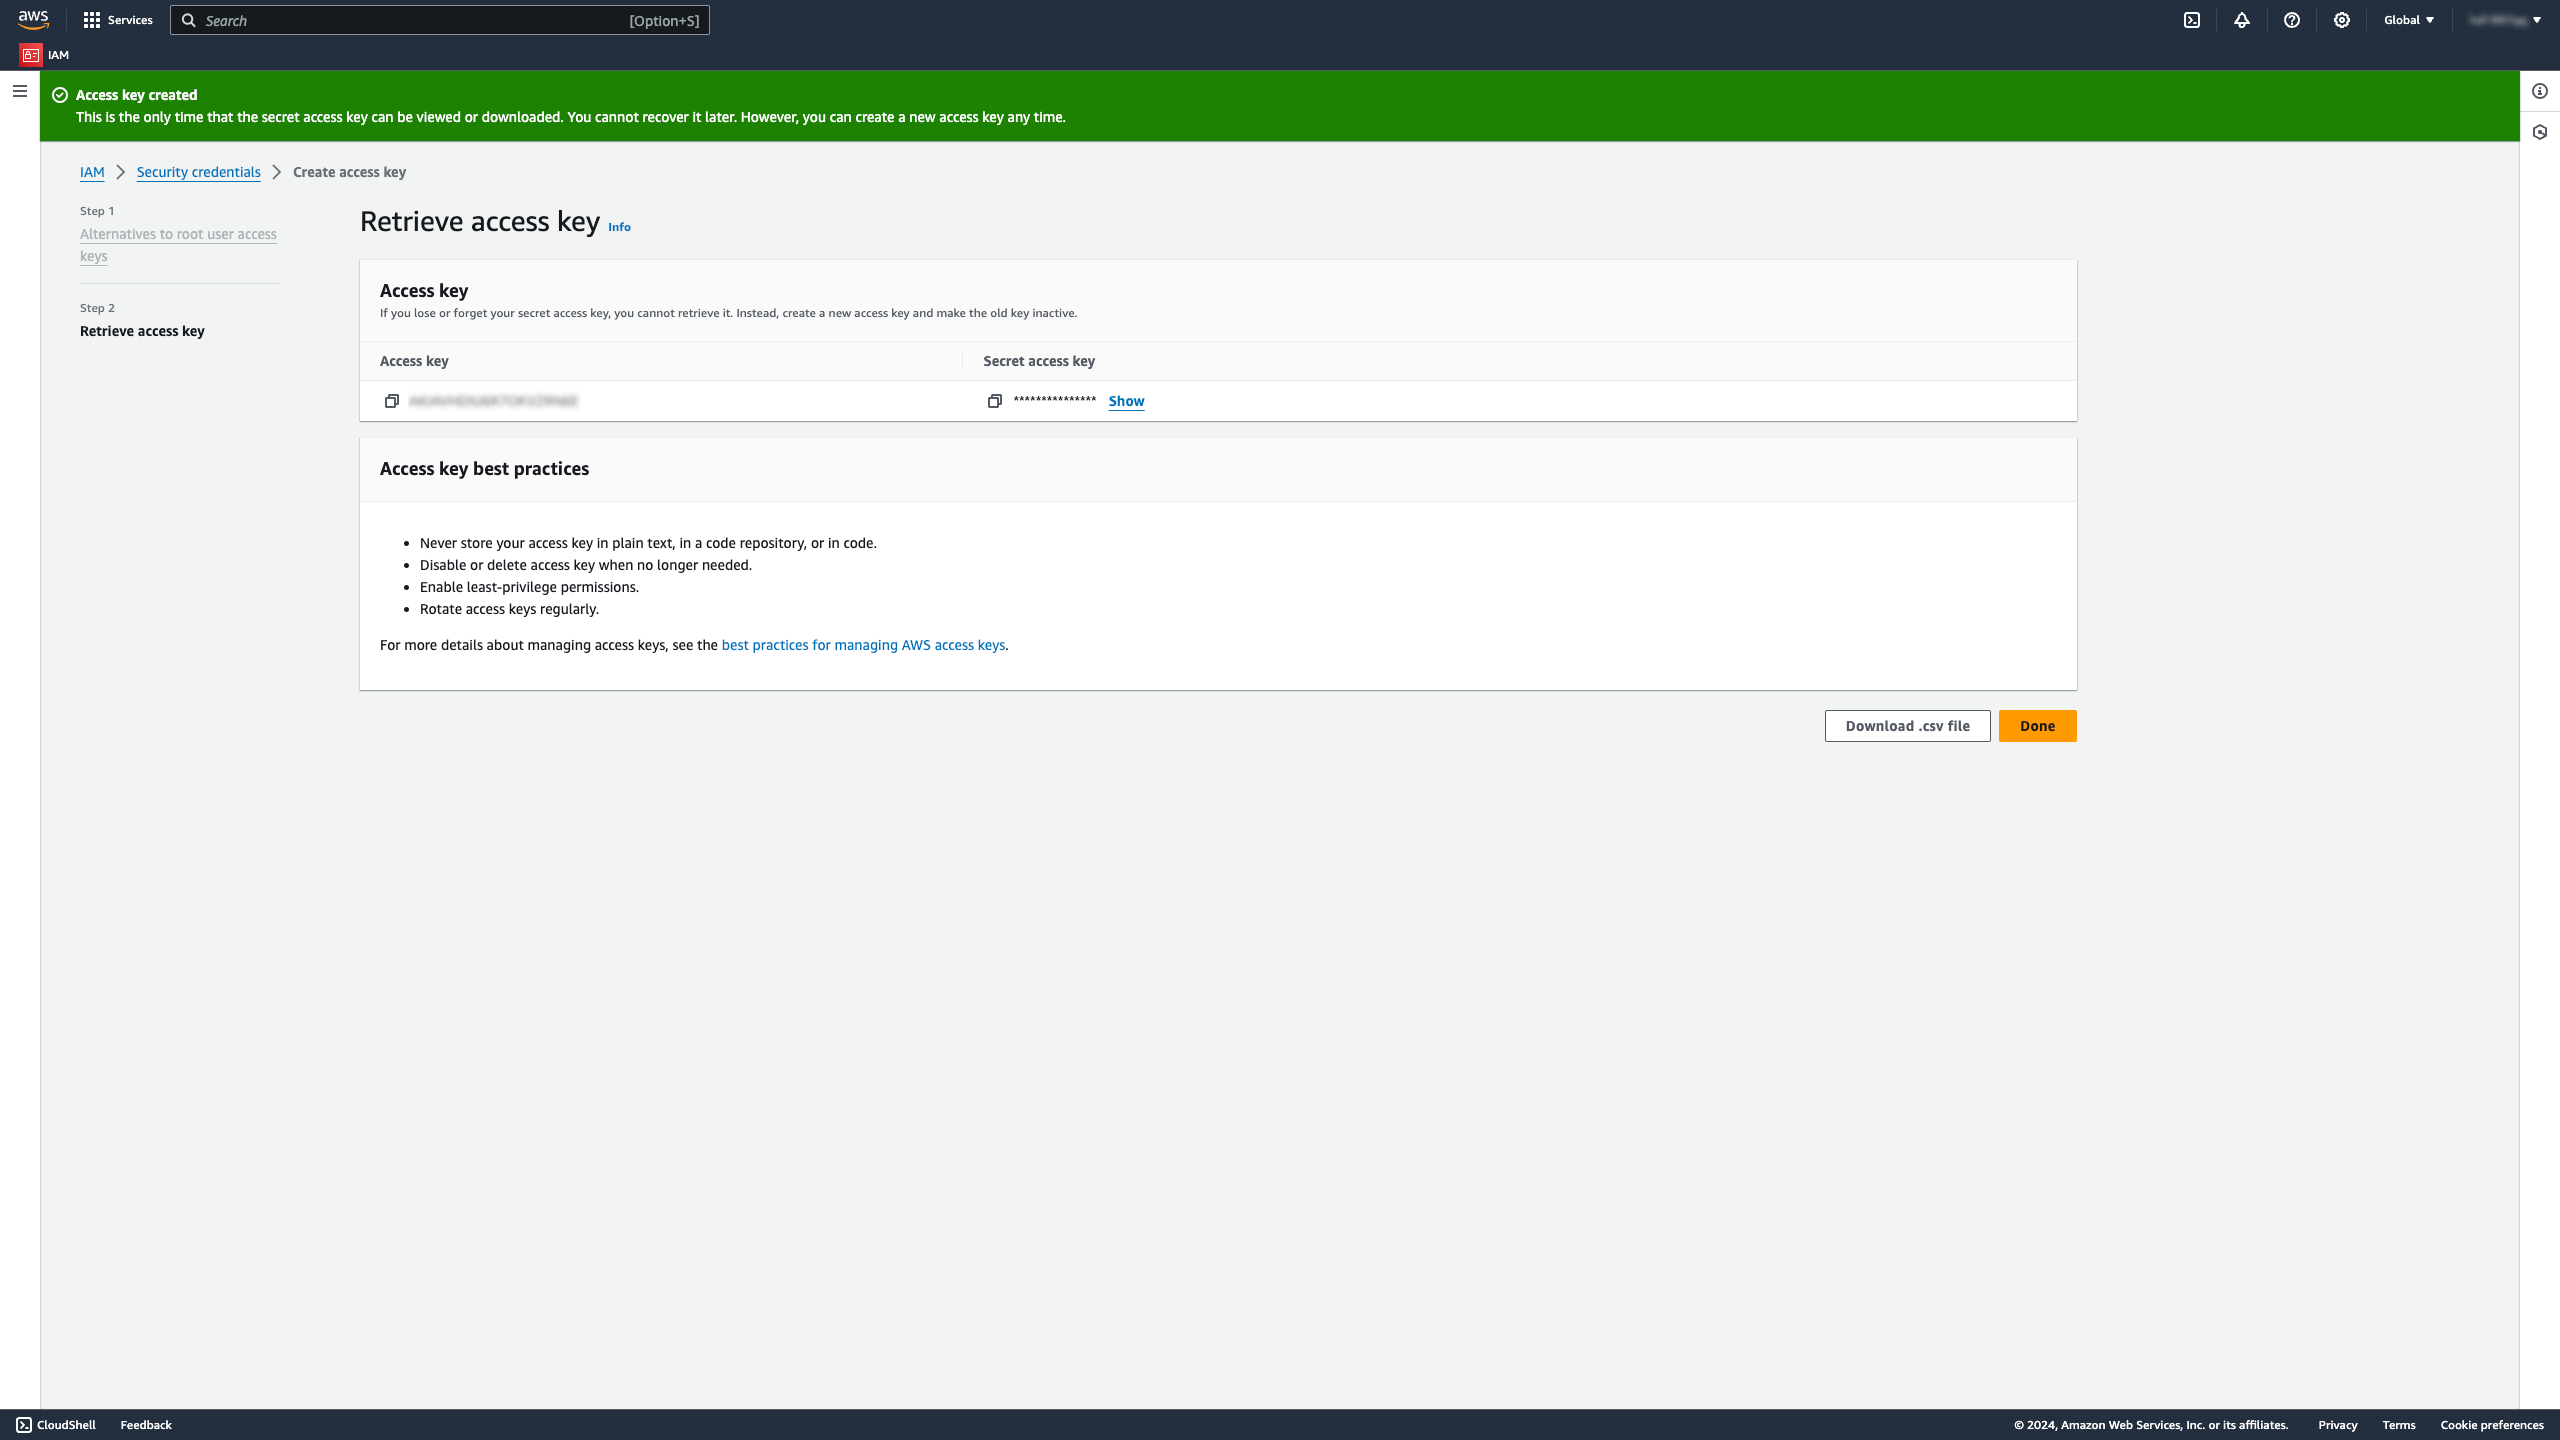
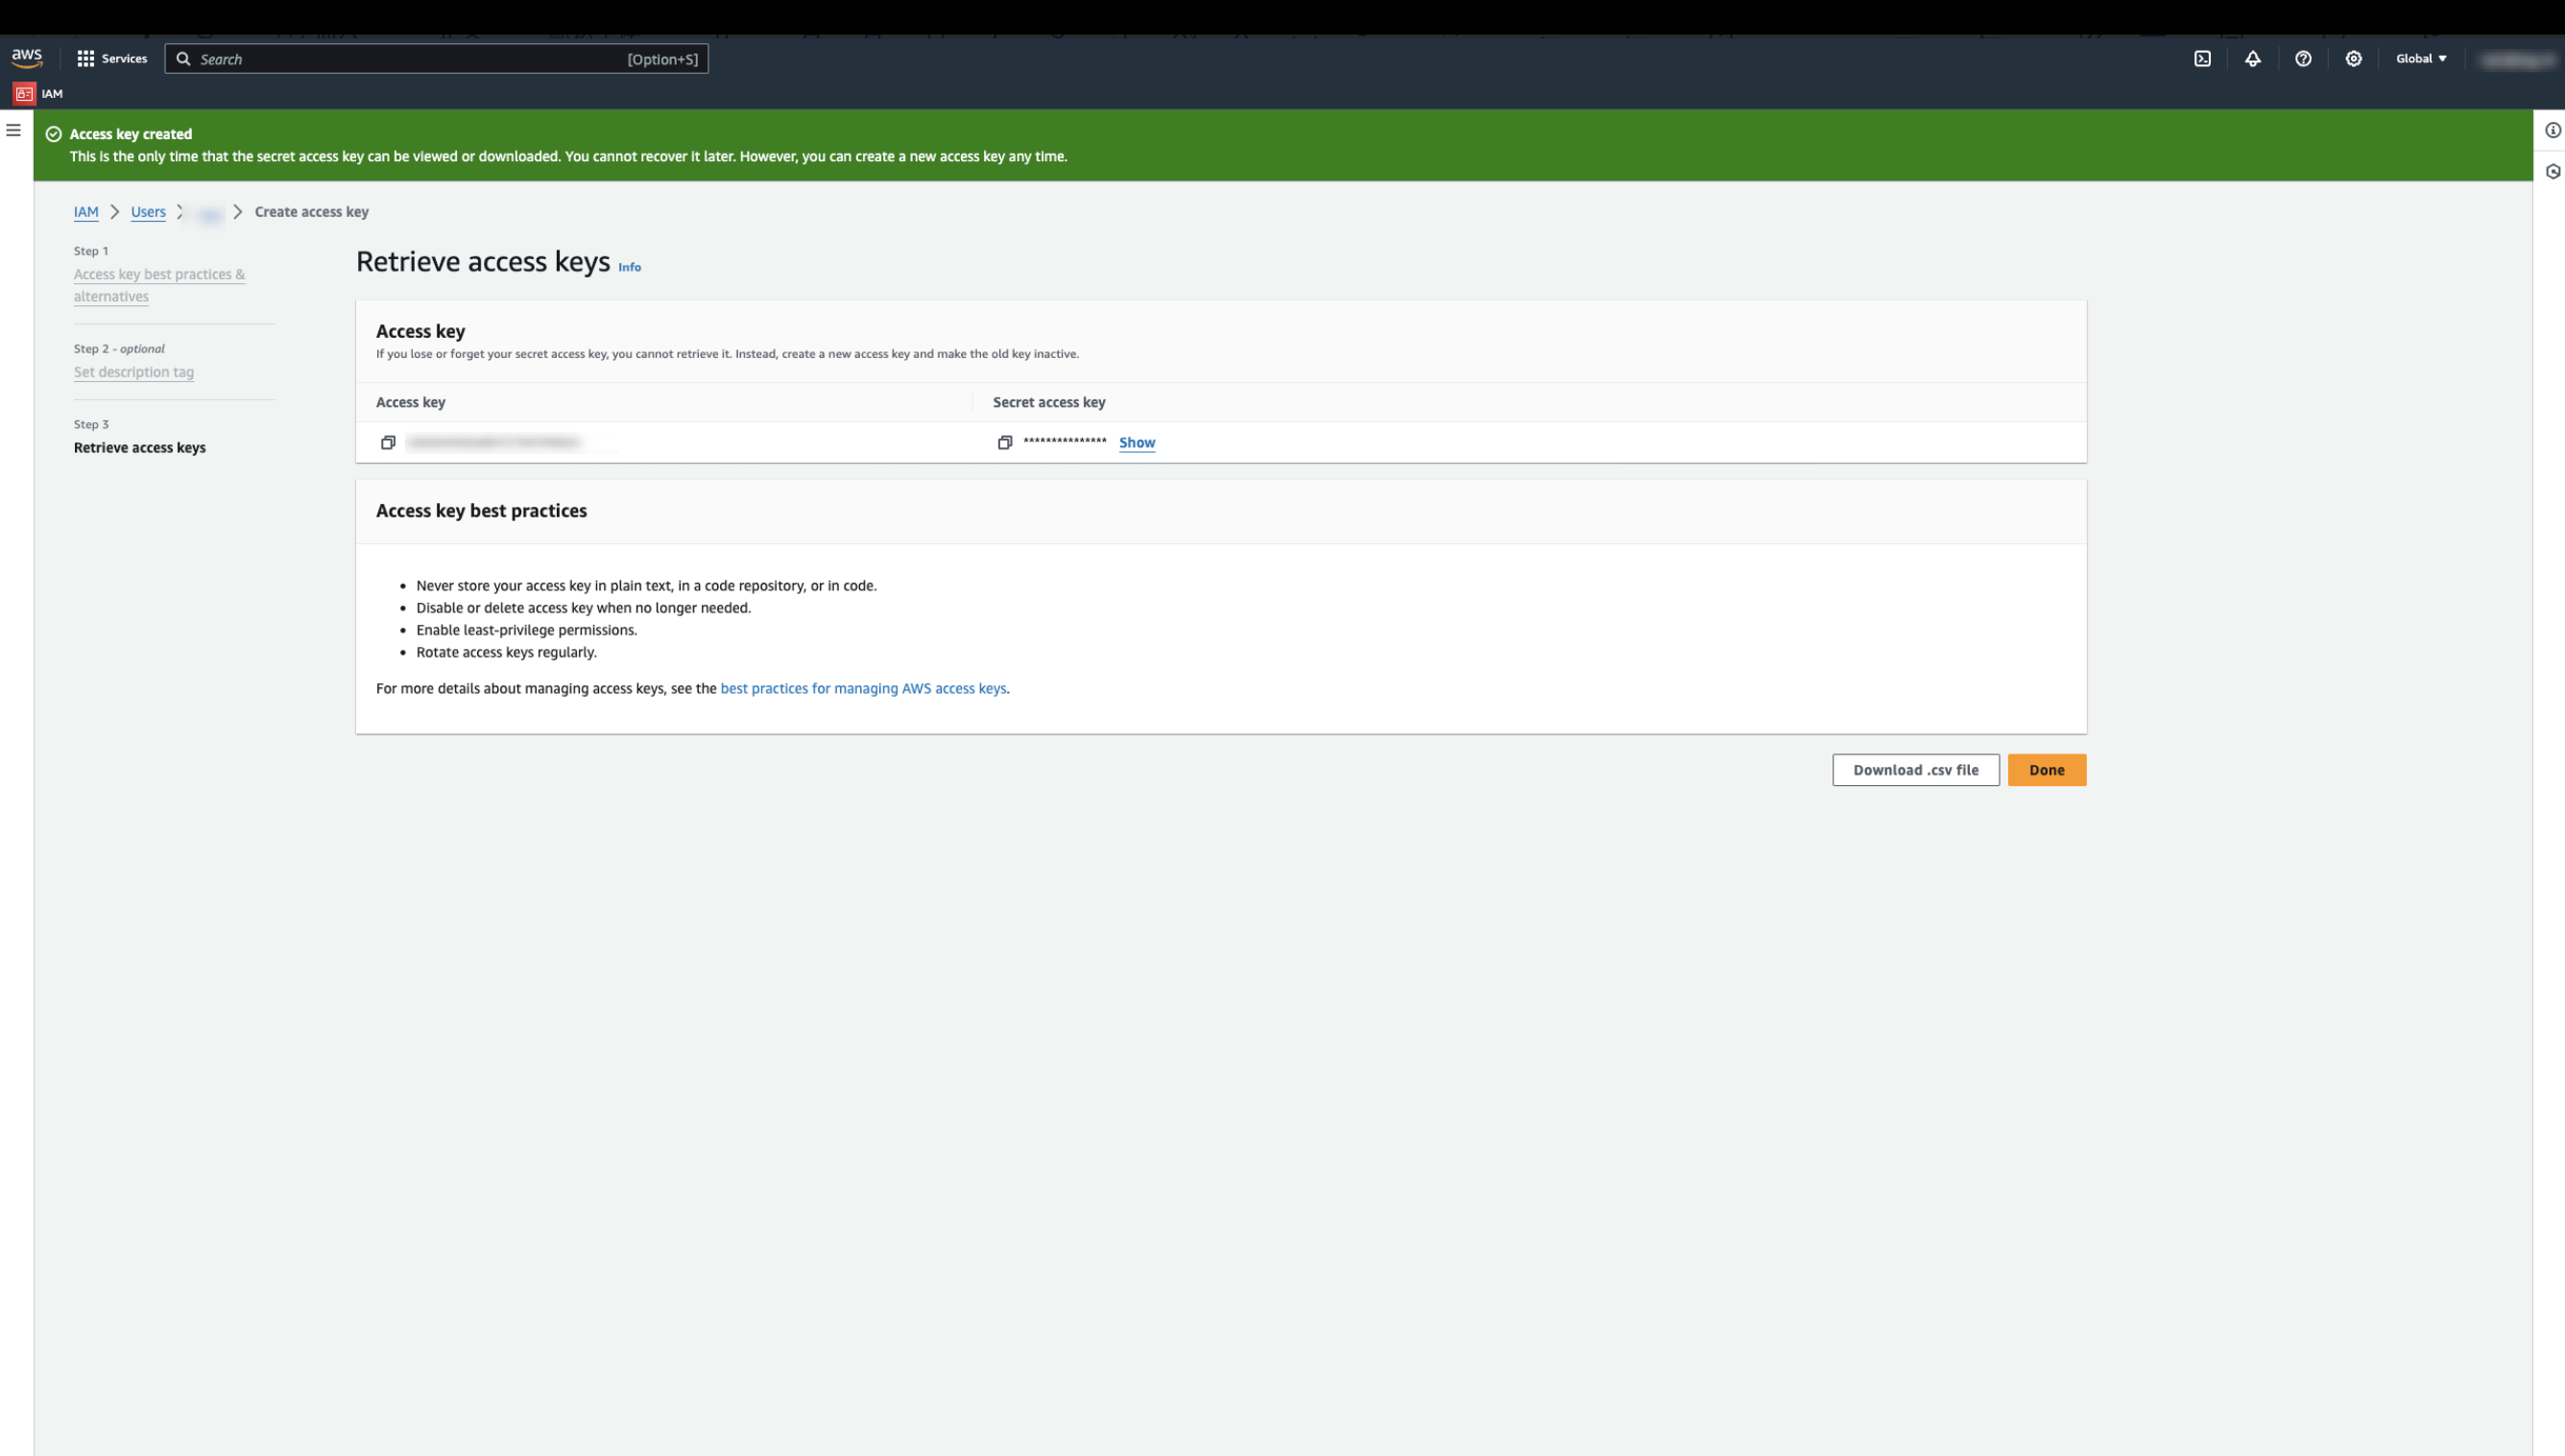
1. Log in to AWS and then go to my security credentials page. Click Create access key to generate an Access Key and Secret Access Key that can be used to monitor or manage AWS resources.
2. On the retrieve access key page, view or download the Access Key and Secret Access Key.
3. Ensure that the Access Key status is active, then fill in the Access Key and Secret Access Key in Root Account SecretID and Root Account SecretKey.
Configuring Manually
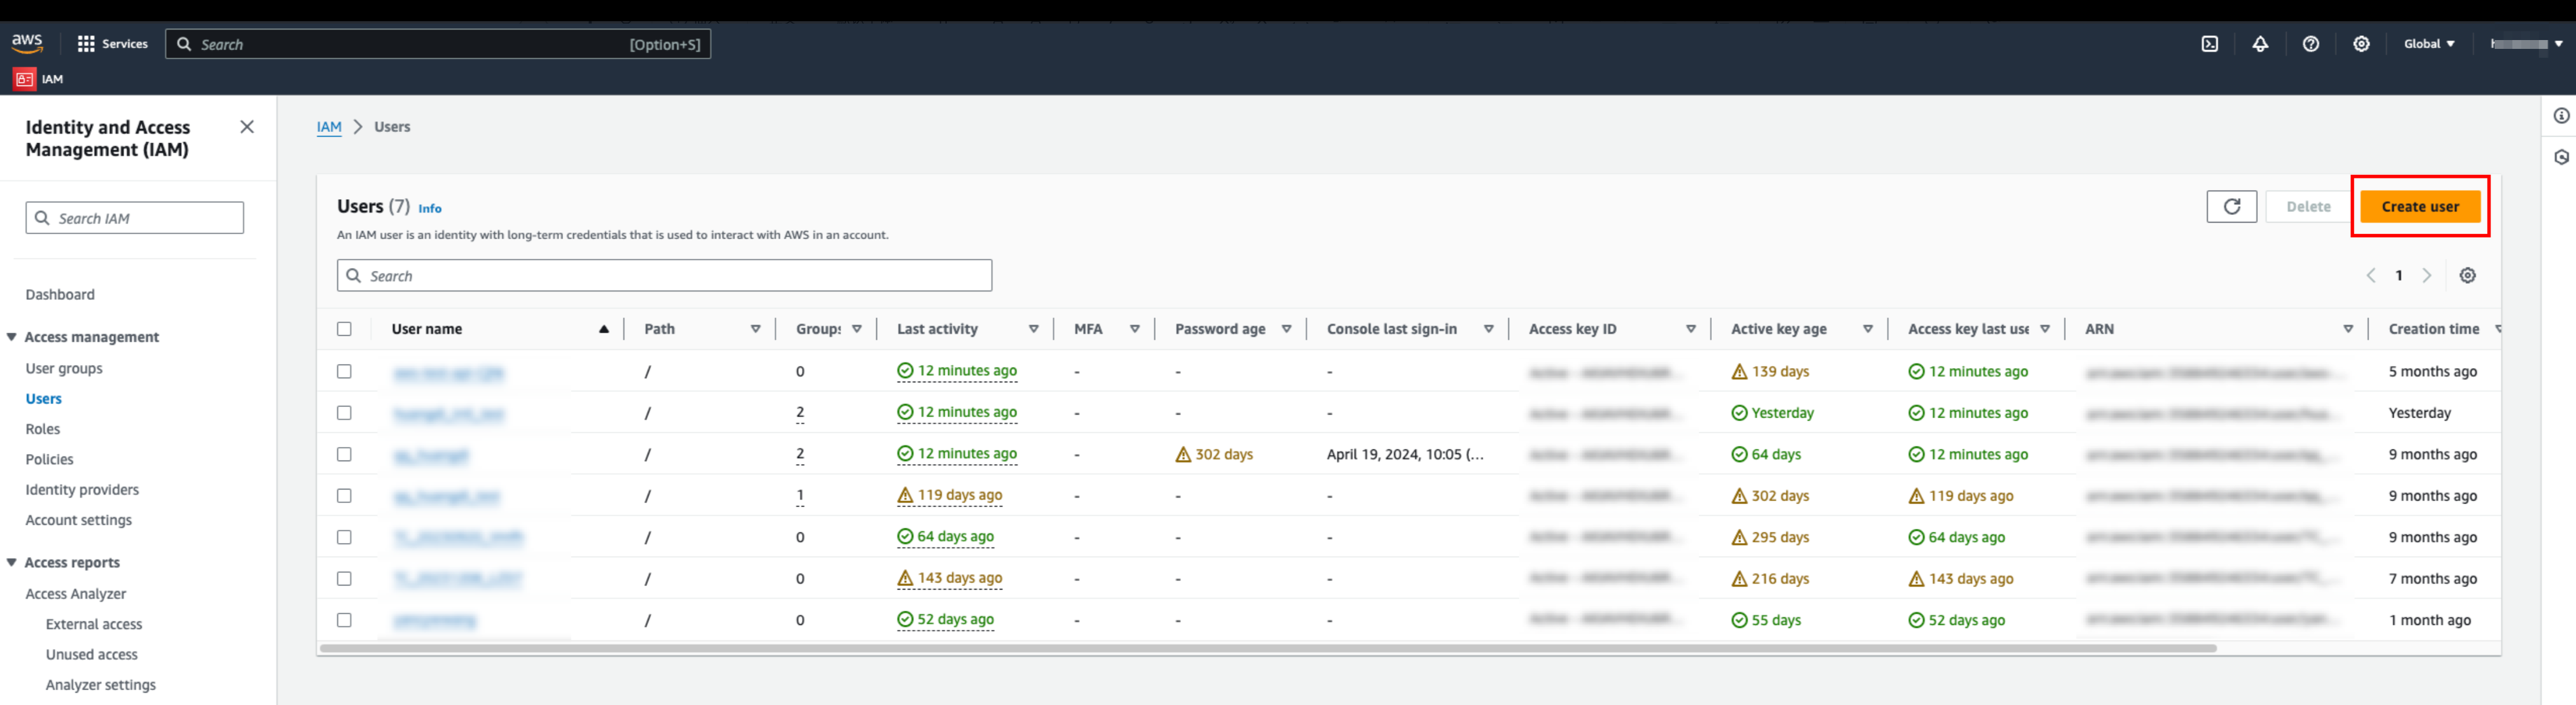
The completion time is approximately 5 minutes, but permission configuration is relatively complex. You need to configure the Access Key for the created sub-account to more flexibly control the range of permissions.
1. Log in to AWS and then go to IAM > users page, and click Create User to create a sub-account for interacting with AWS in your account.
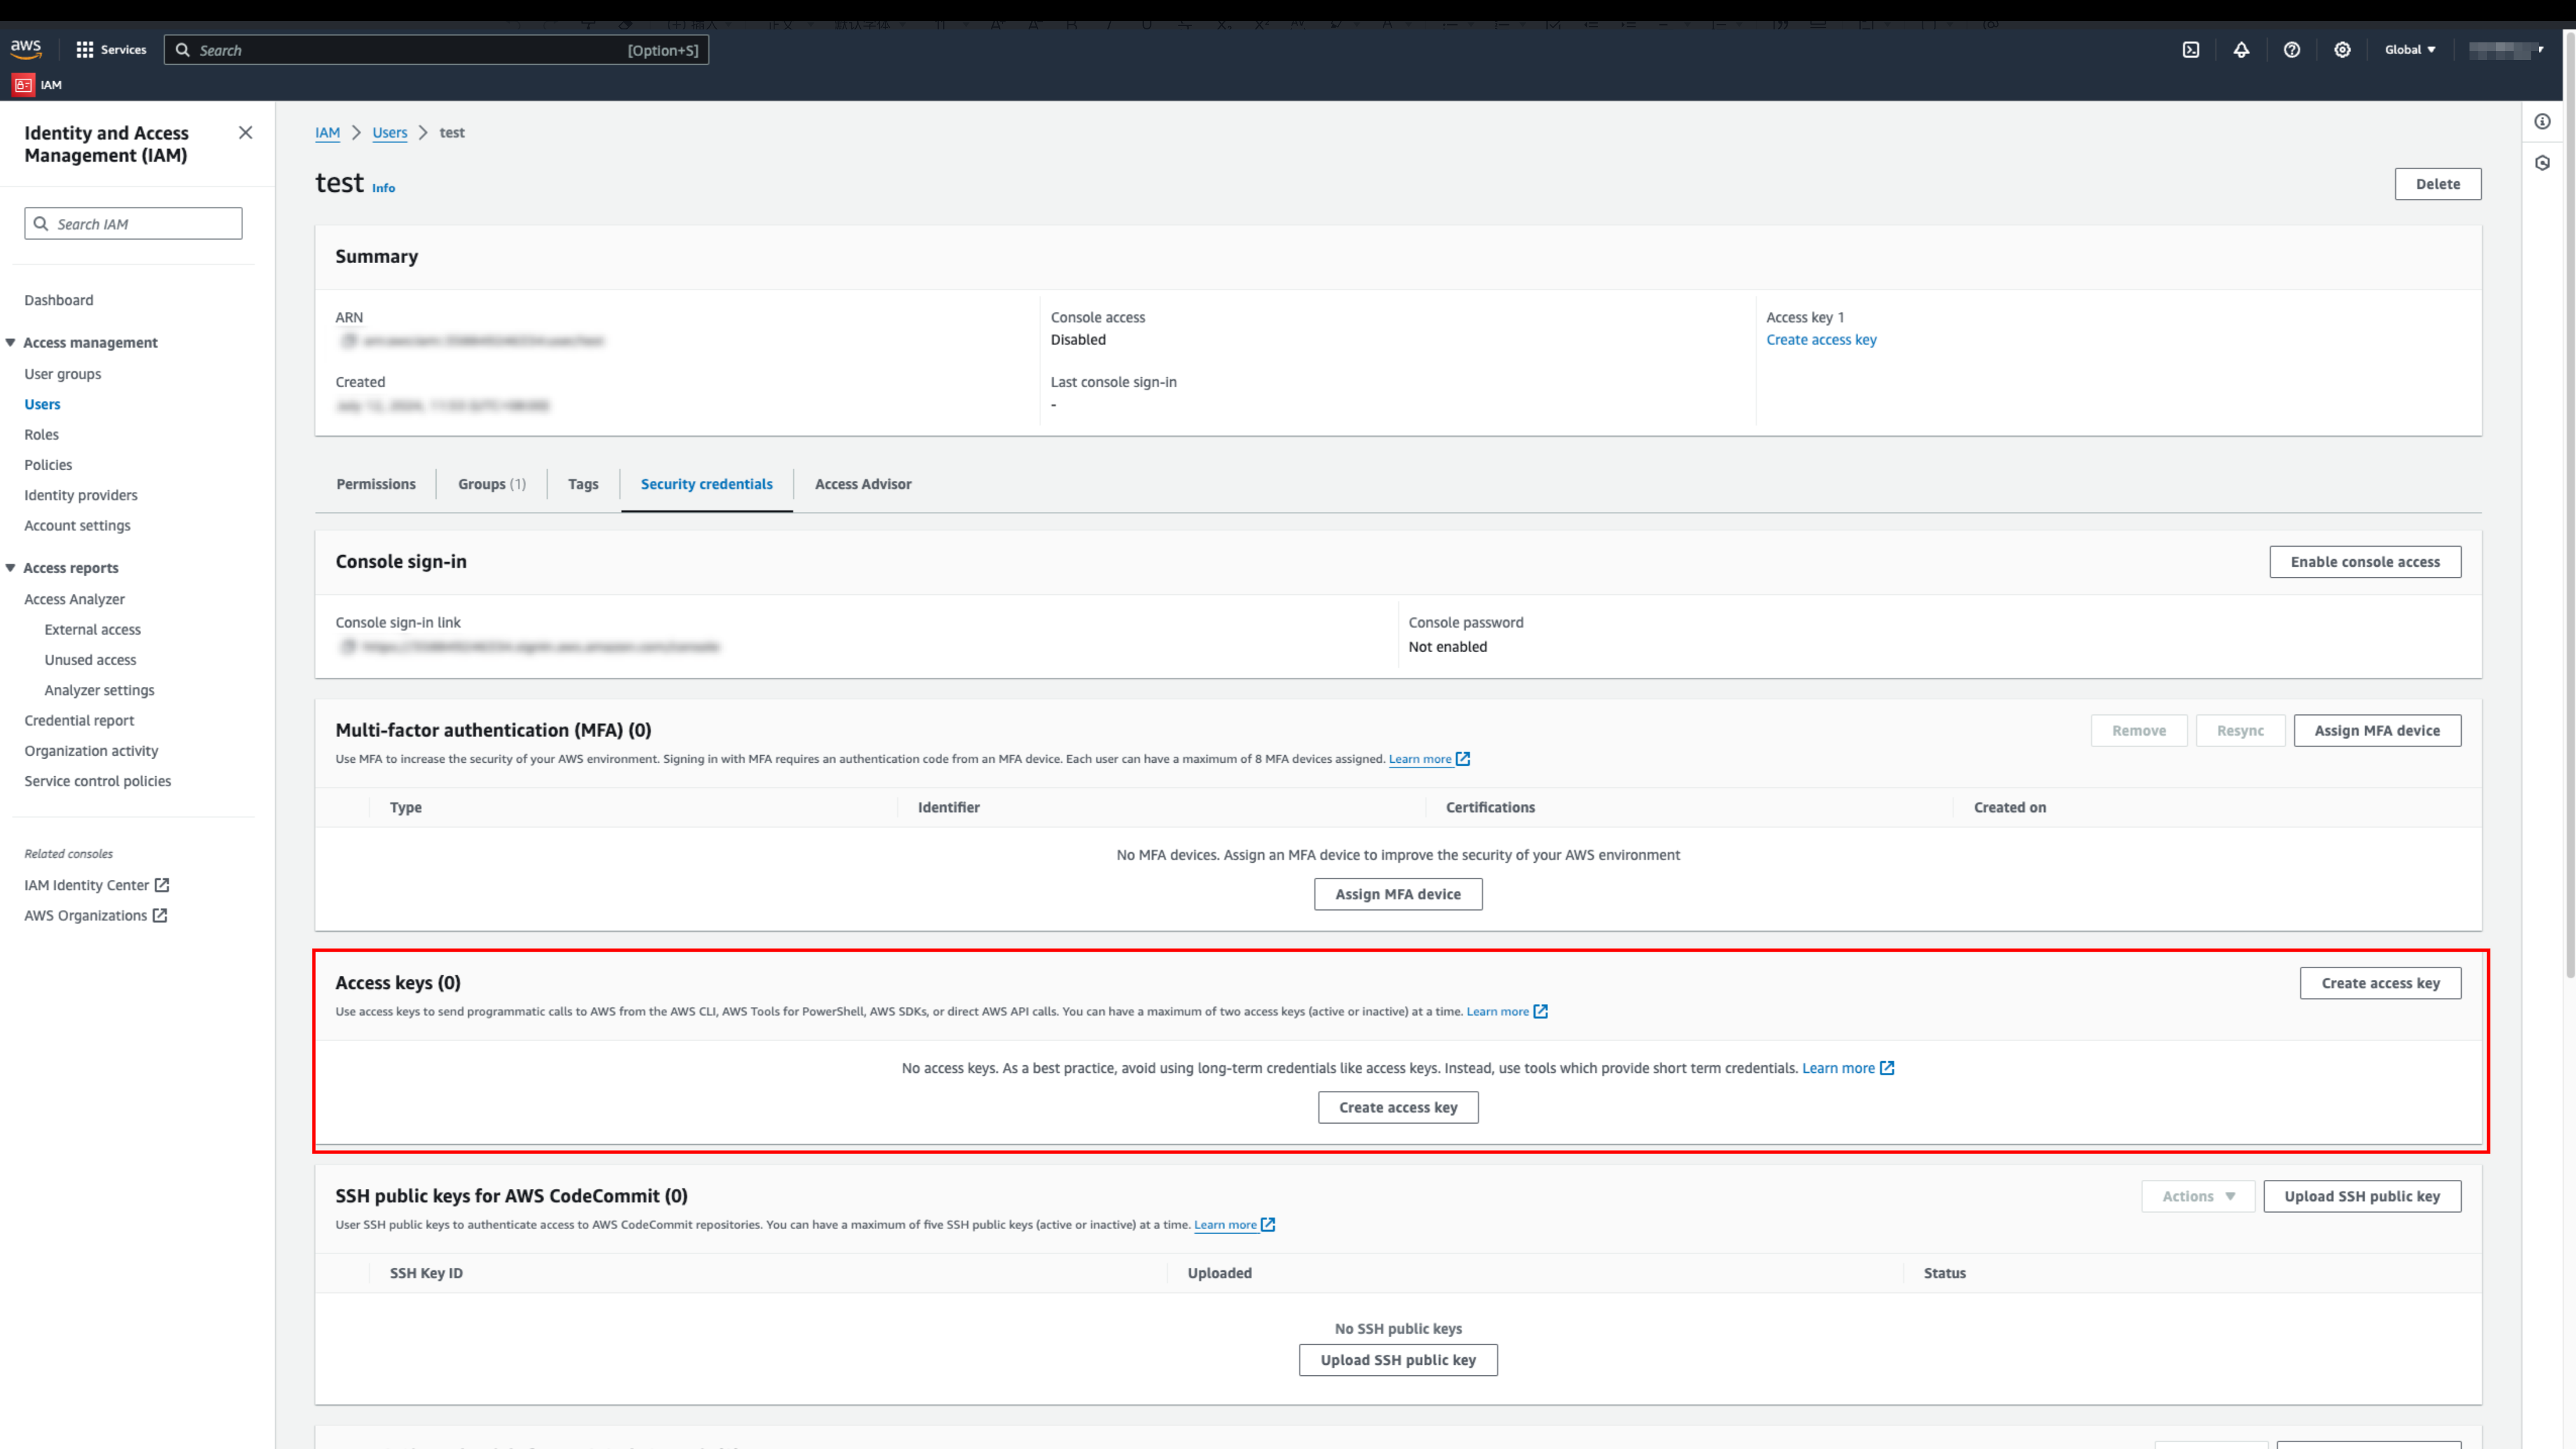
2. Go to the details of the sub-user, click Create access key to generate an Access Key and Secret Access Key that can be used to monitor or manage AWS resources.
3. View or download the Access Key and Secret Access Key. Ensure that the Access Key status is active, then fill in the Access Key and Secret Access Key in Sub-account SecretID and Sub-account SecretKey.
Advanced Configuration
It is relatively complex, but the range and duration of permissions are controllable. Create a role in AWS using the RoleArn provided by us, and authorize the specified ARN with a UUID to call the sts:AssumeRole API. This API is used to create a temporary access role for the account.
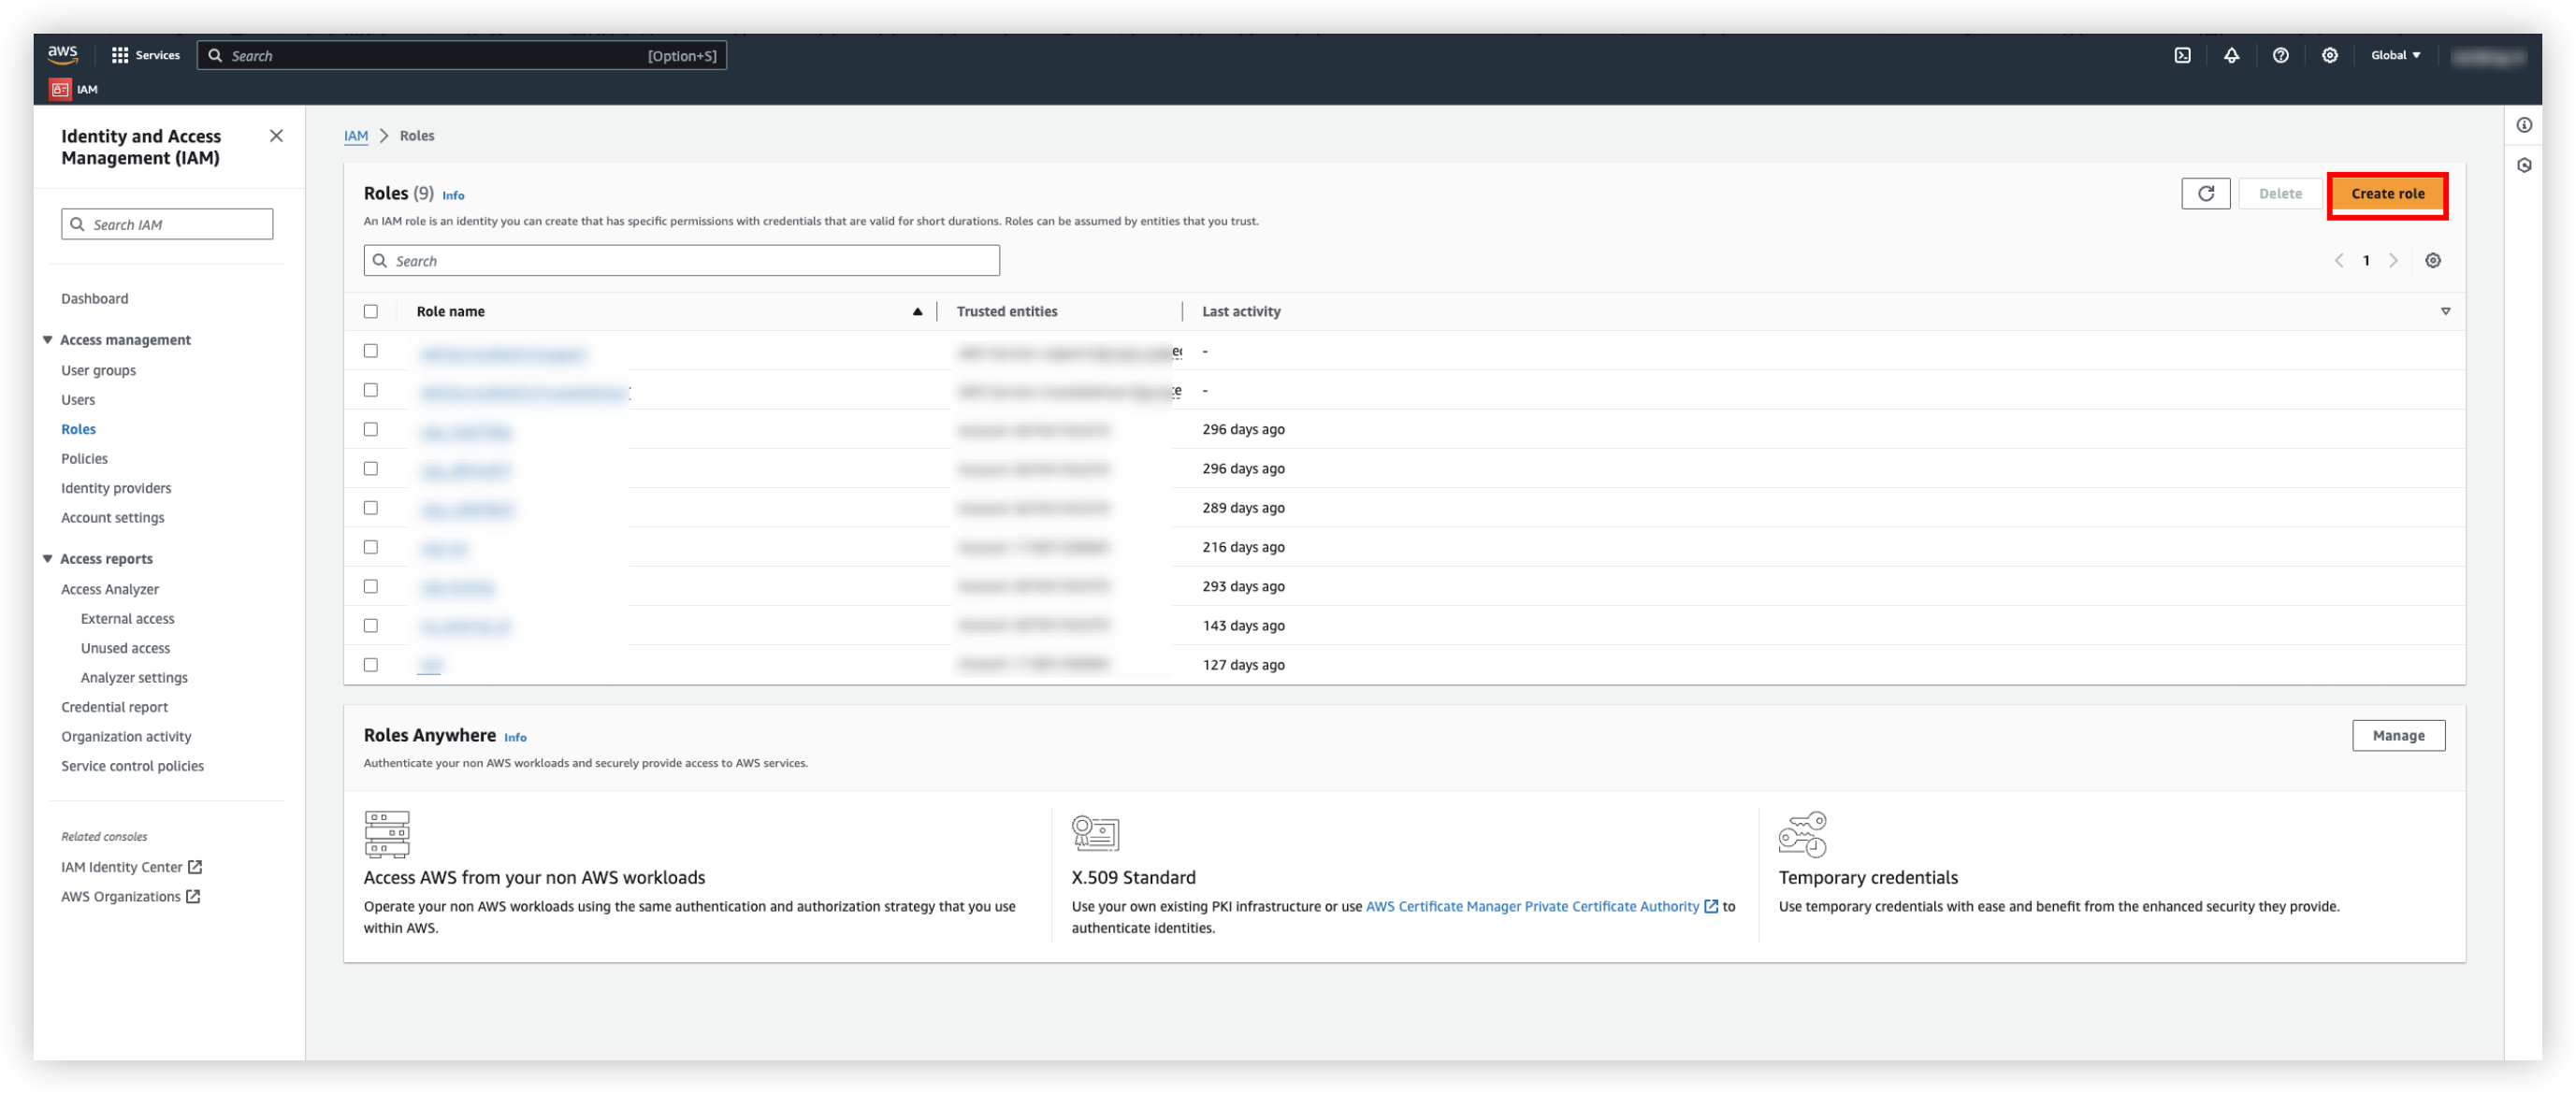
1. Log in to AWS and then go to IAM > roles page, and click Create role. This identity has specific permissions, and the credentials are valid for a short period. The role can be assumed by an entity you trust.
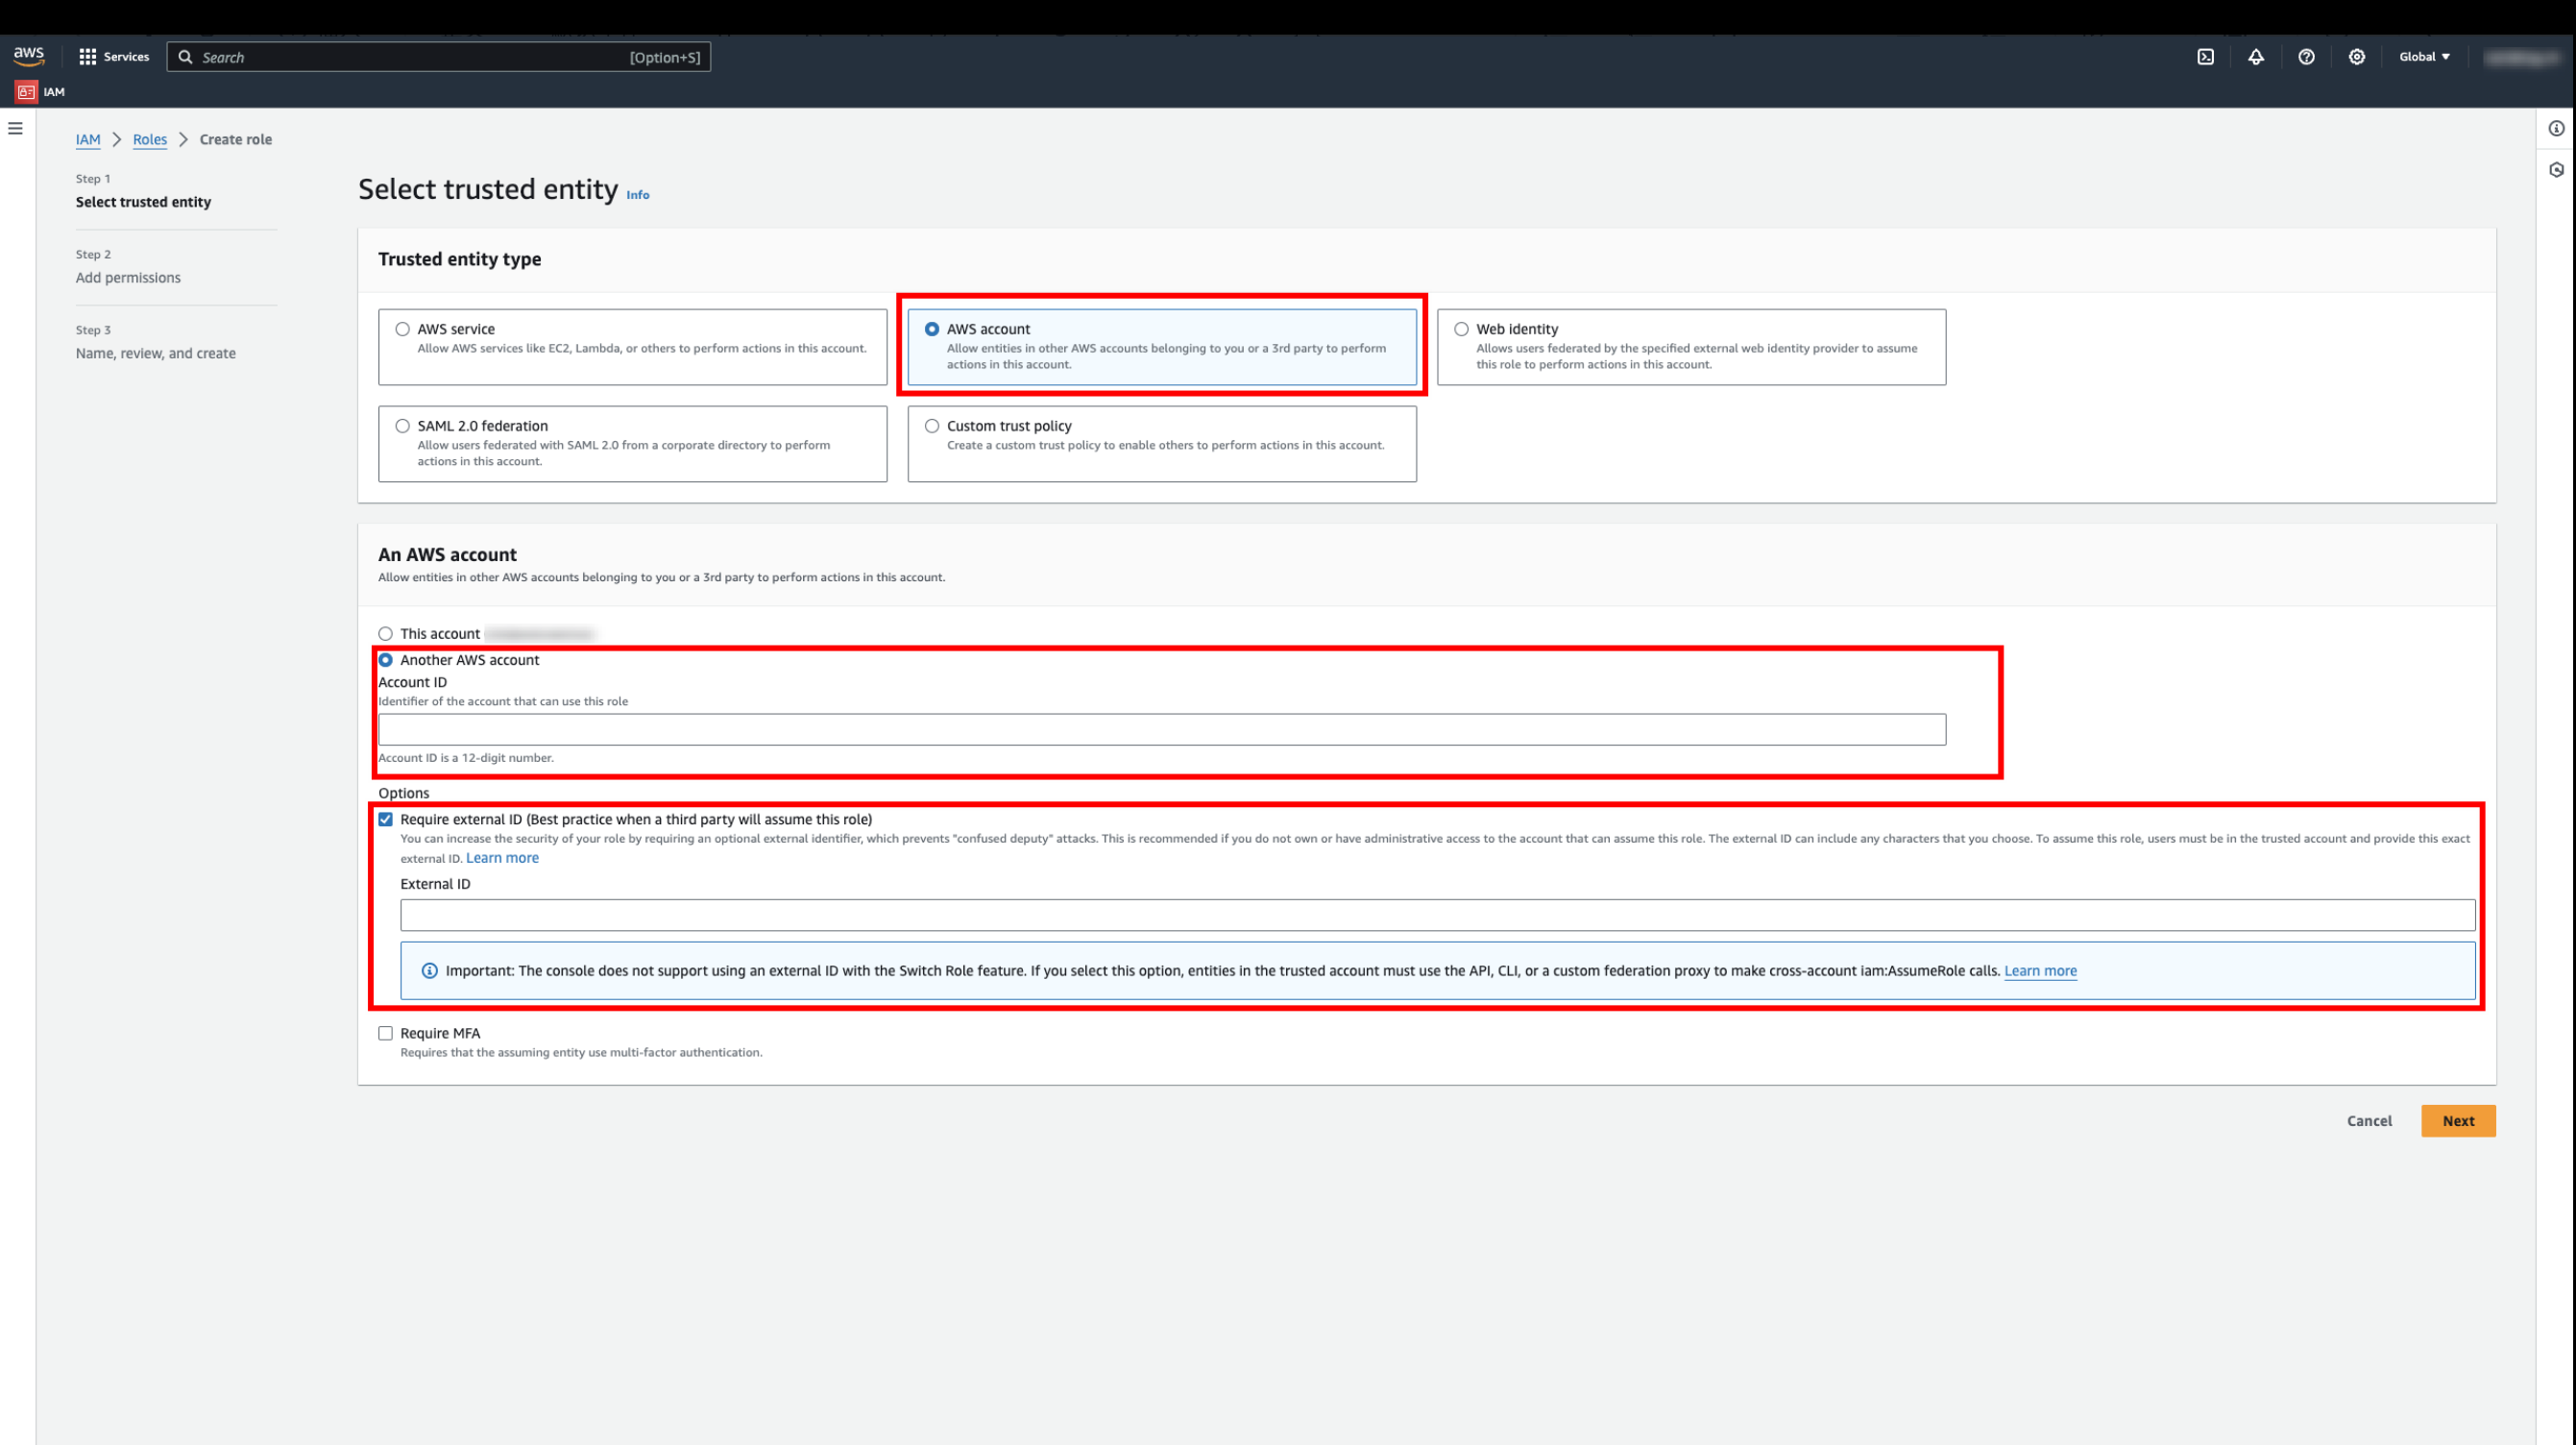
2. After you select AWS Account as the trusted entity type, create the role based on the required permissions.
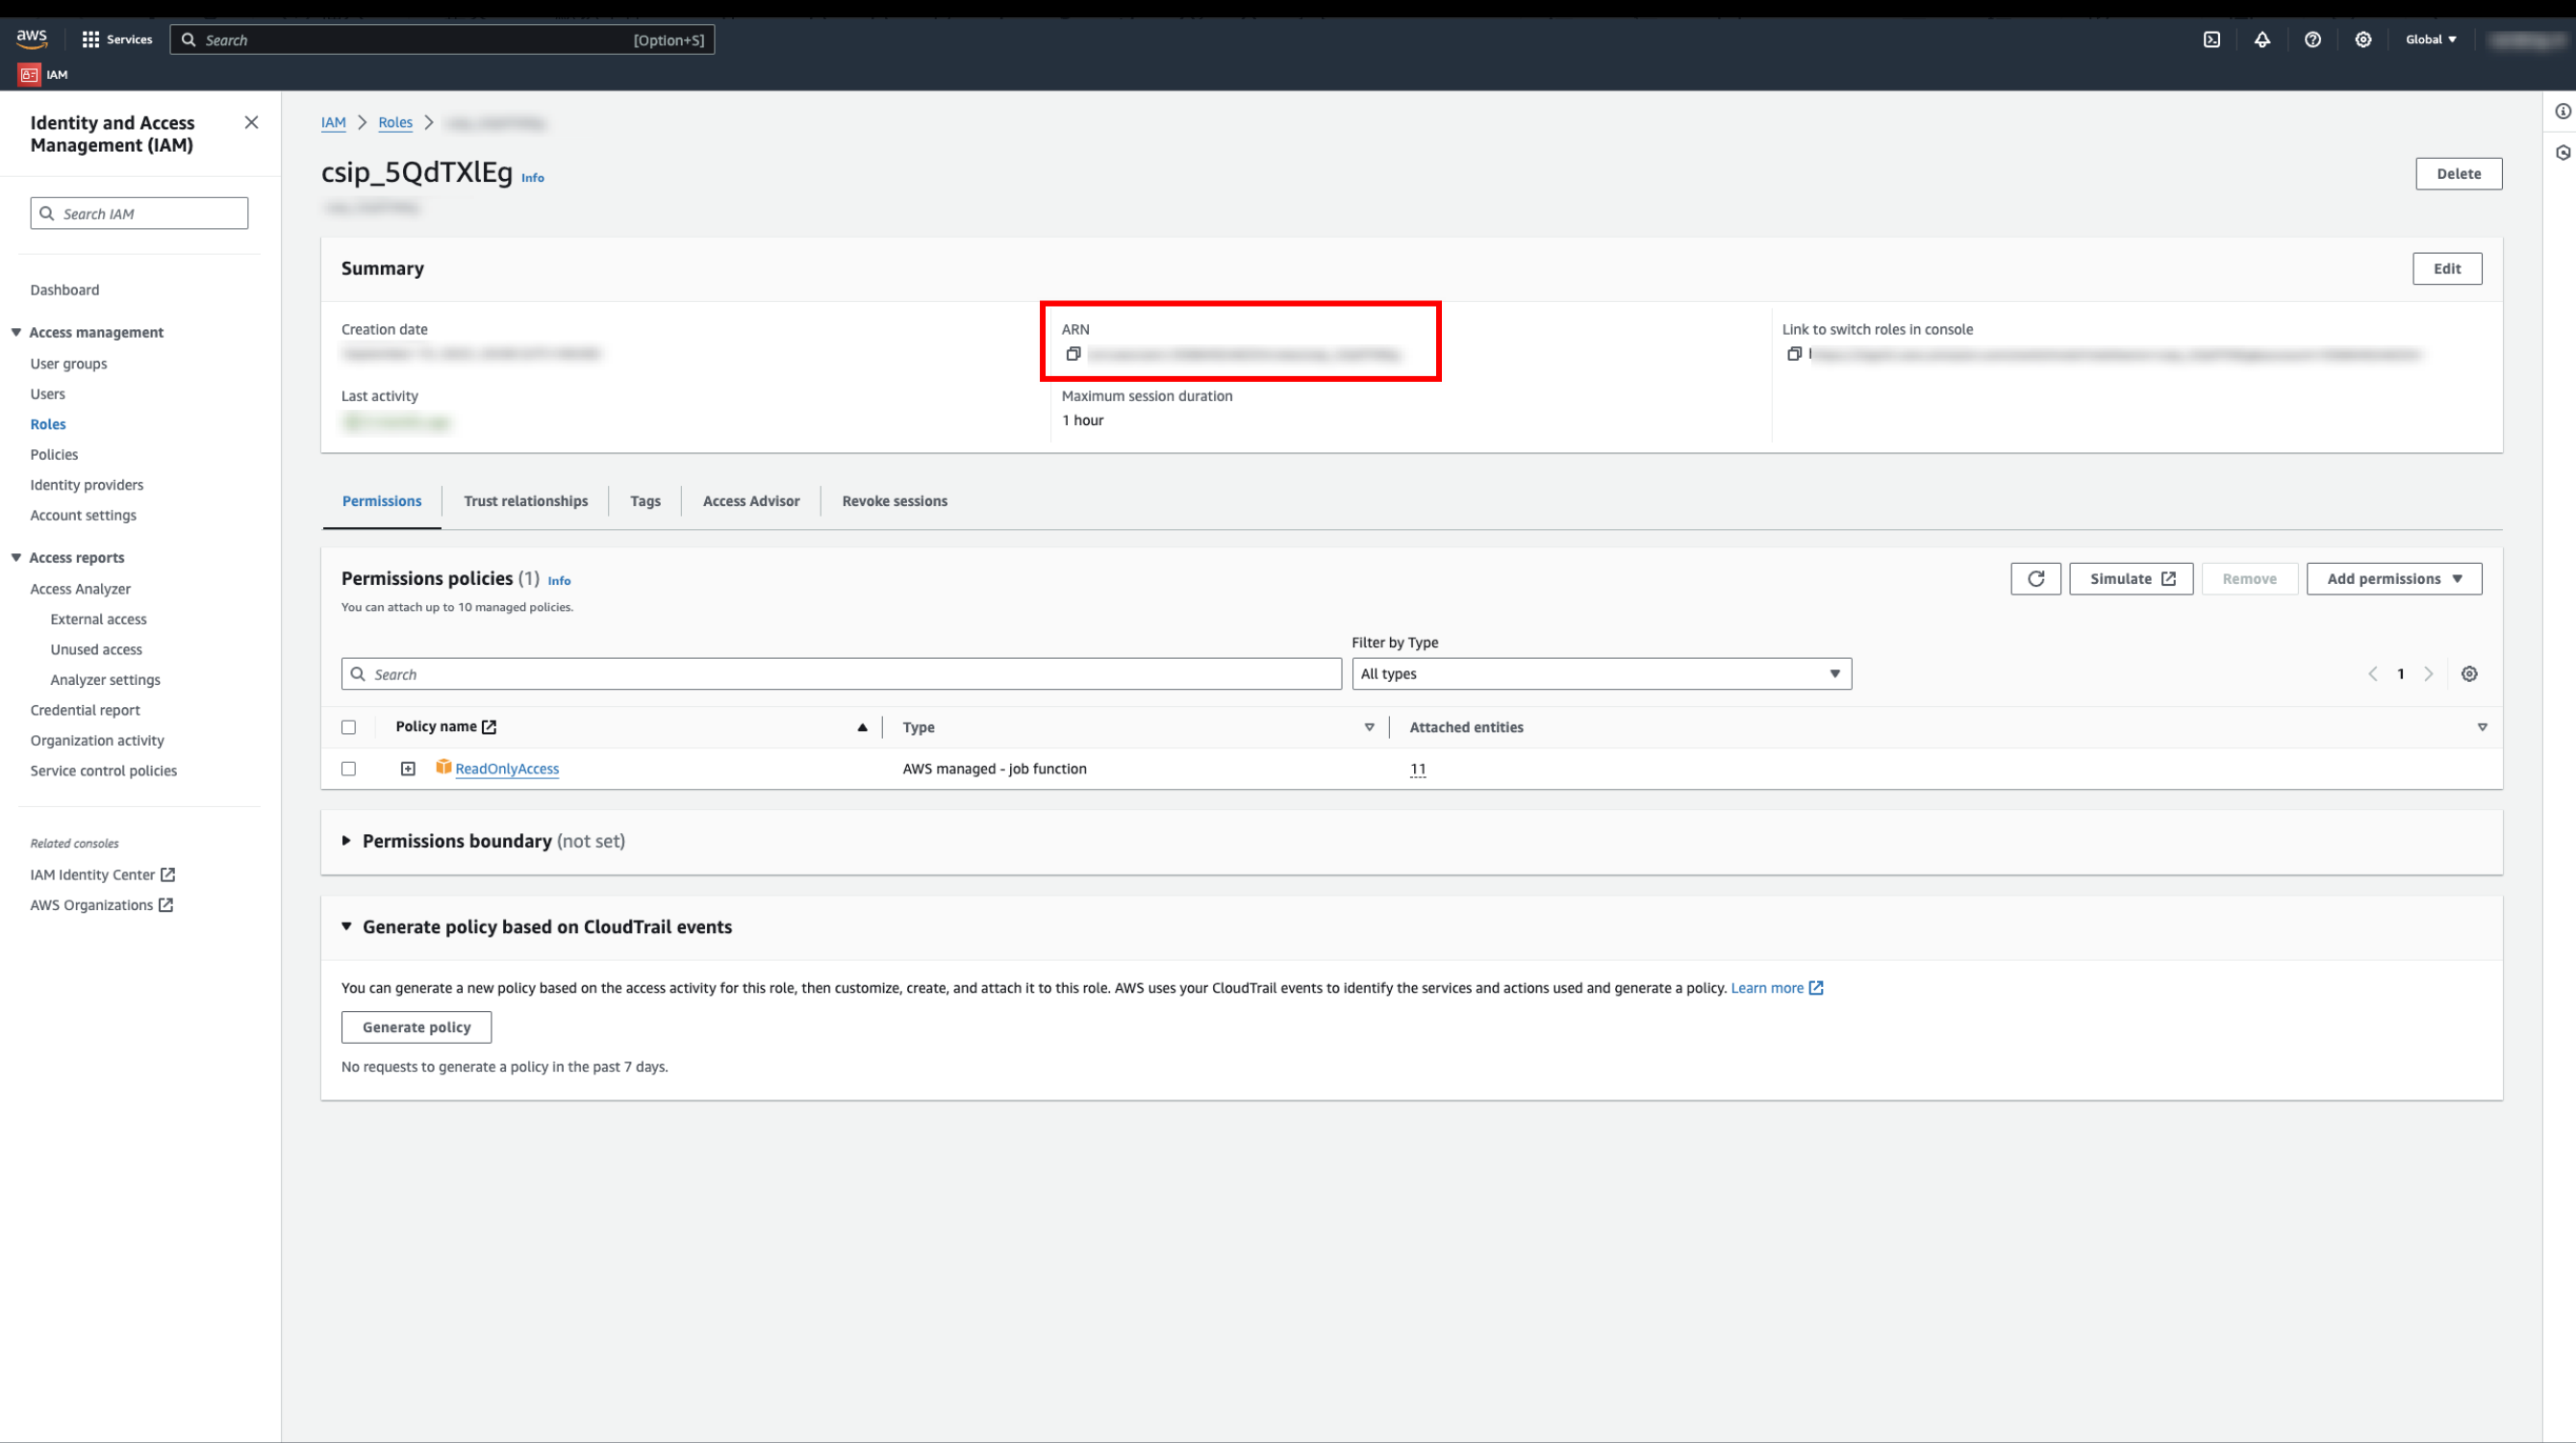
3. Go to the role details, copy the ARN and paste it into RoleArn.