After creating a tag policy, you can also enable tag policy key-value restrictions to achieve the following effects:
1. The tag key Department needs to be applied to both sub-user 1 and sub-user 2.
2. Sub-user 1 can only use Department: DepartmentOne, while sub-user 2 can only use Department: DepartmentTwo and Department: DepartmentThree.
According to Creating Tag Policy, the specified tag values can be fixed values and dynamic values. However, since the same tag key of sub-user 2 has two tag values, they can be only fixed values.
When creating tag policies for sub-user 1 and sub-user 2, it is necessary to create a dedicated tag policy for each sub-user. Specifically, the tag value in sub-user 1's policy should only include DepartmentOne, and the tag value in sub-user 2's policy should only include DepartmentTwo and DepartmentThree.
Step 1: Administrator Enables Restrictions
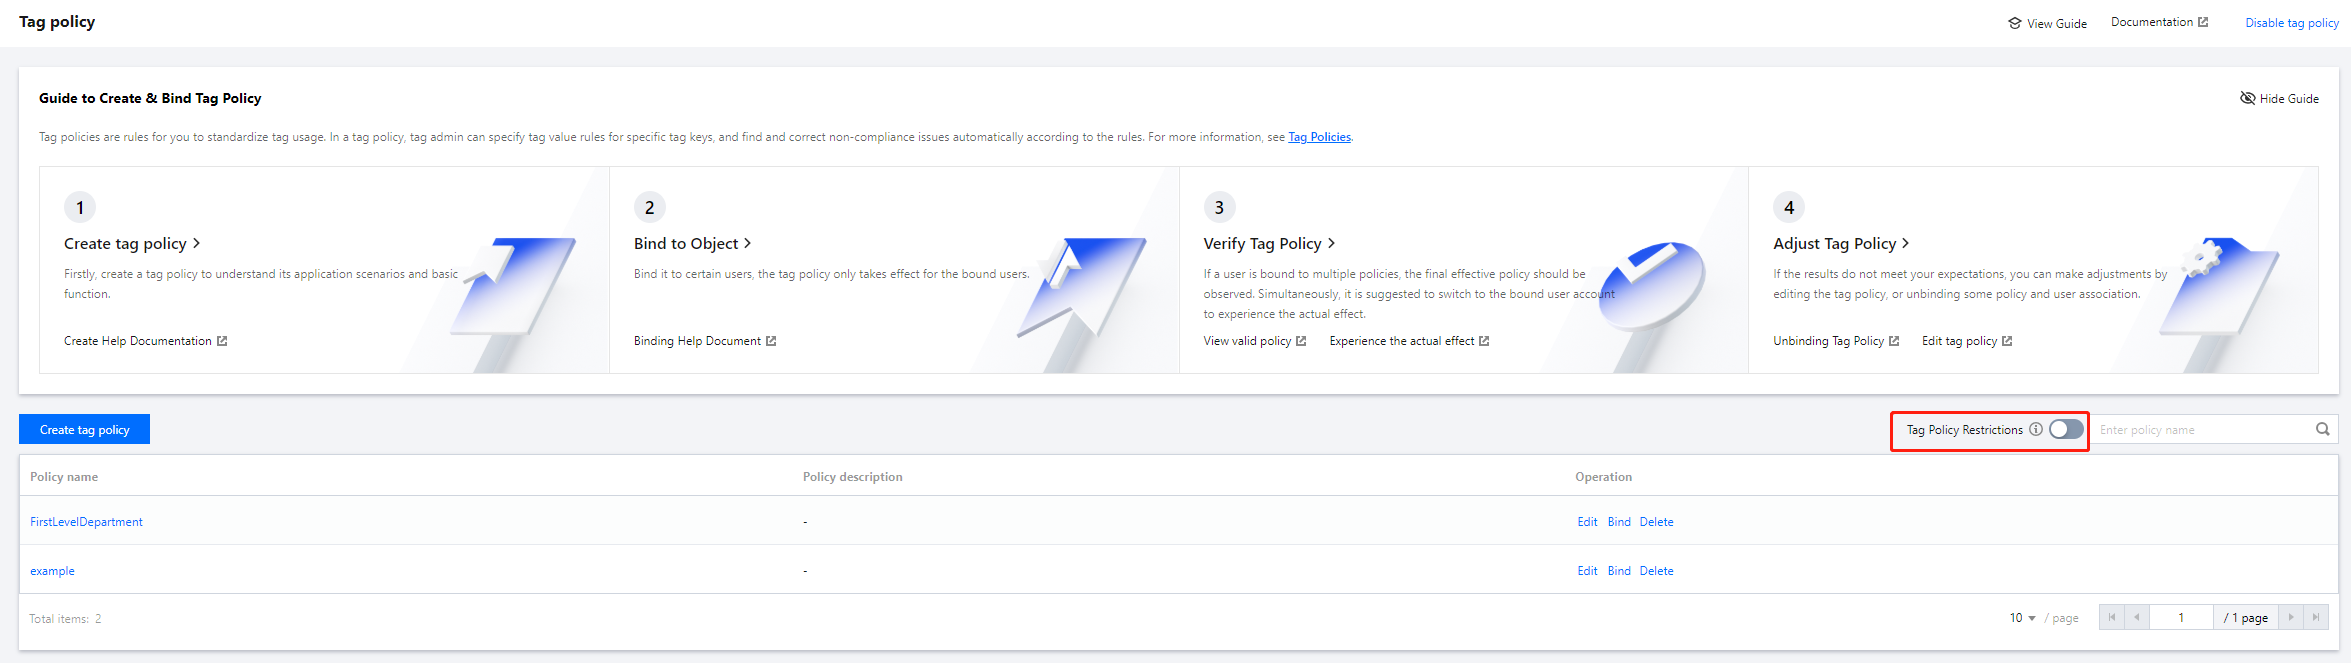
1. Log in to the tag console and click Tag Policy > Policy List on the left sidebar.
2. Click Create tag policy. For detailed steps, refer to Creating Tag Policy. There are 2 policies for 2 sub-users, as shown below:
2.1 Same for both policies:
2.1.1 "auto_assign": {"@@assign": "on"} indicates that the tag key for Department has auto-assignment enabled for both sub-user 1 and sub-user 2.
2.1.2 "tag_deletion_disable": { "@@assign": "on" } indicates that the Department tag key is not allowed to be deleted (that is, the delete button is disabled).
2.2 Different for two policies:
"auto_assign_value": {"@@assign": "on"} in sub-user 1's policy indicates that the tag value has auto-assignment for sub-user 1 because its tag value is unique and does not require manual selection. However, the Department tag value for sub-user 2 is not unique, so sub-user 2 needs to select it manually and it is not set in the policy.
Tag policy of sub-user 1
Tag policy of sub-user 2
{
"tags":{
"Department":{
"tag_key":{
"@@assign":"Department"
},
"tag_value":{
"@@assign":[
"DepartmentOne"
]
},
"resource_type_scope":{
"@@assign":[
"*"
]
},
"auto_assign":{
"@@assign":"on"
},
"auto_assign_value":{
"@@assign":"on"
},
"tag_deletion_disable":{
"@@assign":"on"
}
}
}
}
{
"tags":{
"Department":{
"tag_key":{
"@@assign":"Department"
},
"tag_value":{
"@@assign":[
"DepartmentTwo",
"DepartmentThree"
]
},
"resource_type_scope":{
"@@assign":[
"*"
]
},
"auto_assign":{
"@@assign":"on"
},
"tag_deletion_disable":{
"@@assign":"on"
}
}
}
}
3. Then bind policy 1 to sub-user 1 and policy 2 to sub-user 2. For details, see Binding Tag Policy.
4. In the tag policy list, enable Tag Policy Restrictions and confirm it in the pop-up window.
Step 2: Sub-User Performs Verification
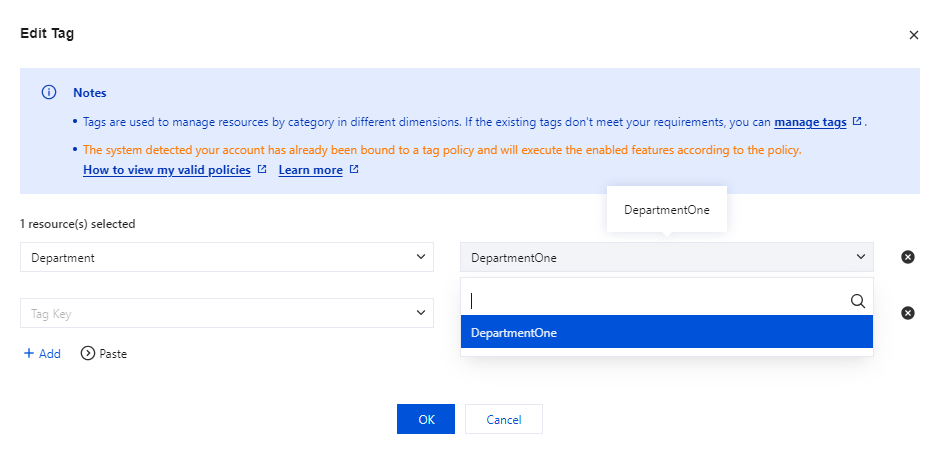
1. Switch to sub-user 1 and log in. The effect is as follows:
Condition
Use Tag Policy with Key-Value Restrictions Enabled
Use Tag Policy Without Key-Value Restrictions Enabled
Use No Tag Policy
Effect
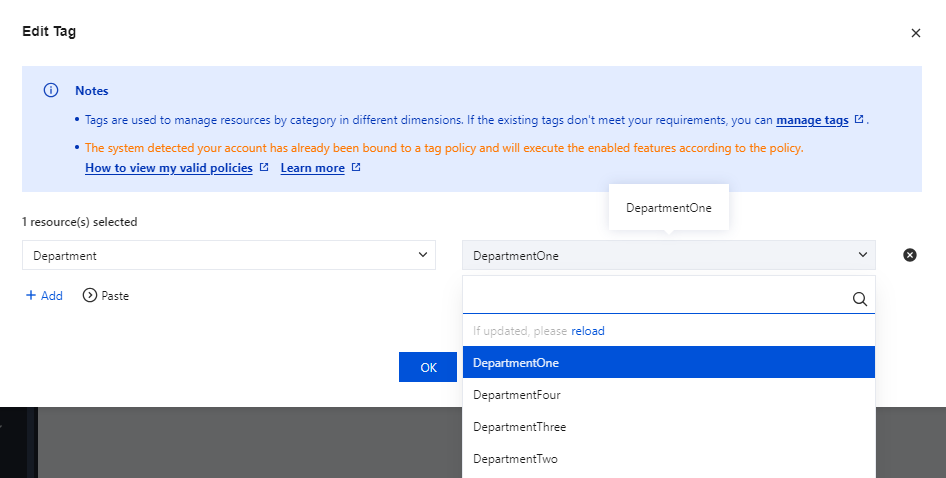
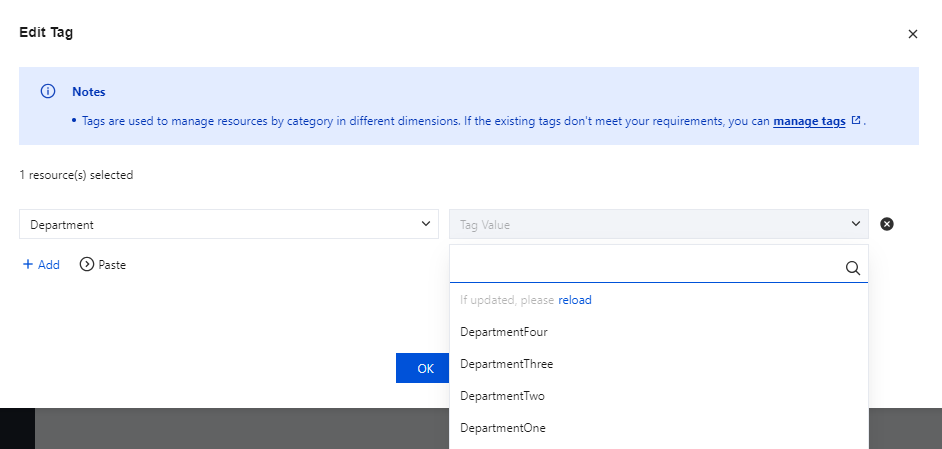
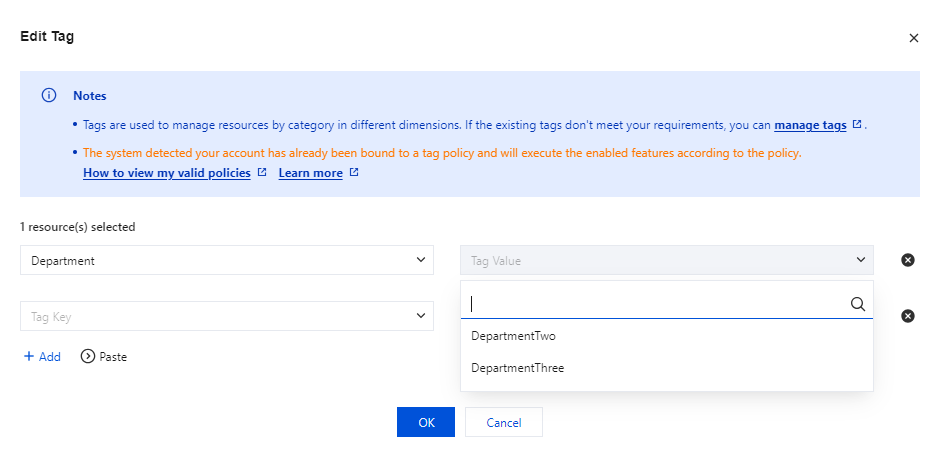
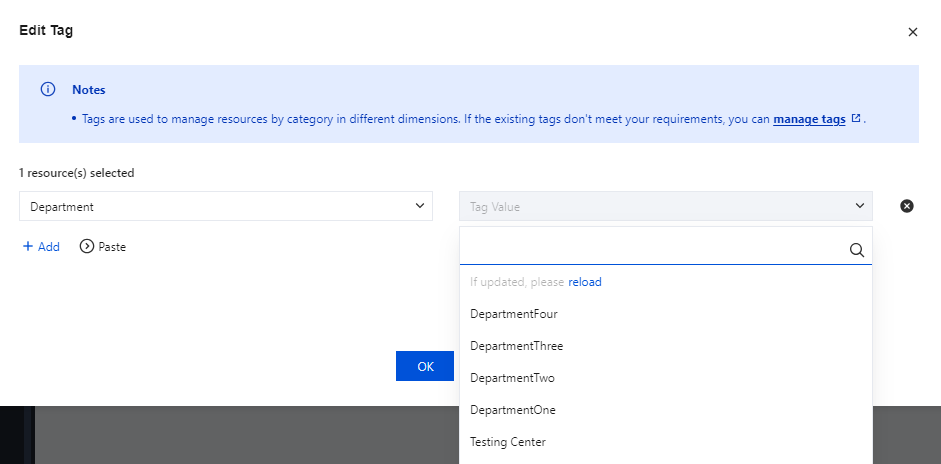
2. Switch to sub-user 2 to log in. The effect is as follows:
Condition
Use Tag Policy with Key-Value Restrictions Enabled
Use Tag Policy Without Key-Value Restrictions Enabled