Once a private NAT gateway is created, the cloud resources in the subnet can access public network resources through the private NAT gateway only after you configure the routing rule to the private NAT gateway.
This section describes how to configure a routing policy pointing to the private NAT gateway. The 2 optional methods are as follows:
Method 1: Configuring in the Private NAT Gateway Console
2. Click Private NAT Gateway on the left side and click on the network ID of the target NAT gateway instance in the private NAT gateway instance list.
3. In the target VPCDetails>Basic Information>Included Resources, click Subnet.
4. In the subnet list, select the associated route table ID in the row of the subnet that requires accessing public VPC/Direct Connect/CCN.
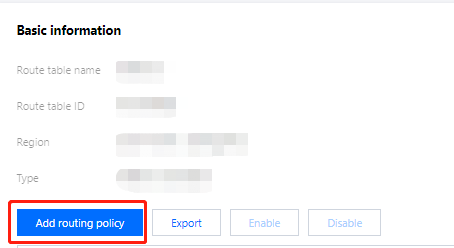
5. On the basic information page of the route table, click Add Routing Policy.
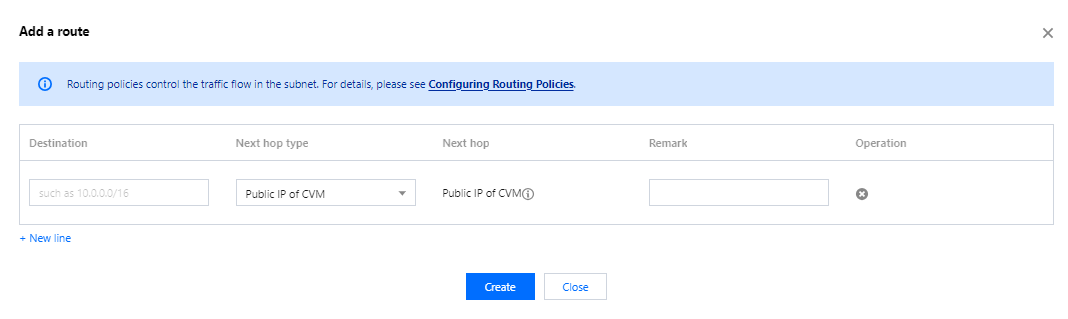
6. In the Add Routing pop-up box, enter the destination (IP range corresponding to the destination), select Private NAT Gateway as the next hop type, and select the created private NAT gateway ID as the next hop.
7. Click Create to complete the above configuration. Then the traffic will be directed to the private NAT gateway when a CVM in the subnet associated with this route table accesses the destination address.
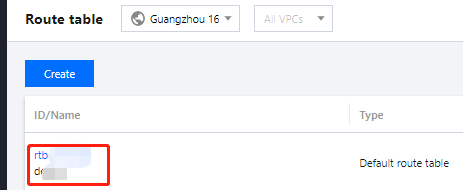
2. In the route table list, click the route table ID associated with the subnet that requires accessing public VPC/Direct Connect/CCN, to enter the details page.
3. On the basic information page of the route table, click Add Routing Policy.
4. In the Add Routing pop-up box, enter the destination (IP range corresponding to the destination), select Private NAT Gateway as the next hop type, and select the created private NAT gateway ID as the next hop.
5. Click Create to complete the above configuration. Then the traffic will be directed to the private NAT gateway when a CVM in the subnet associated with this route table accesses the destination address.