The Tencent Cloud network probe service is used to monitor the quality of VPC network connections, including latency, packet loss rate, and other key metrics.
Under the hybrid cloud network architecture, you create a network probe in the subnet that needs to communicate with your IDC to monitor the packet loss rate and latency of the probed linkage. The configuration allows you to:
Monitor the connection quality
Receive alerts in case of connection failures
Instructions
The network probe service adopts ping method with a frequency of 20 pings per minute.
Up to 50 probes are allowed for each VPC.
A maximum of 20 subnets under the same VPC can have network probes.
2. Select Diagnostic Tools -> Network Probe in the left sidebar to enter the management page.
3. Click +New at the top of the Network Probe page.
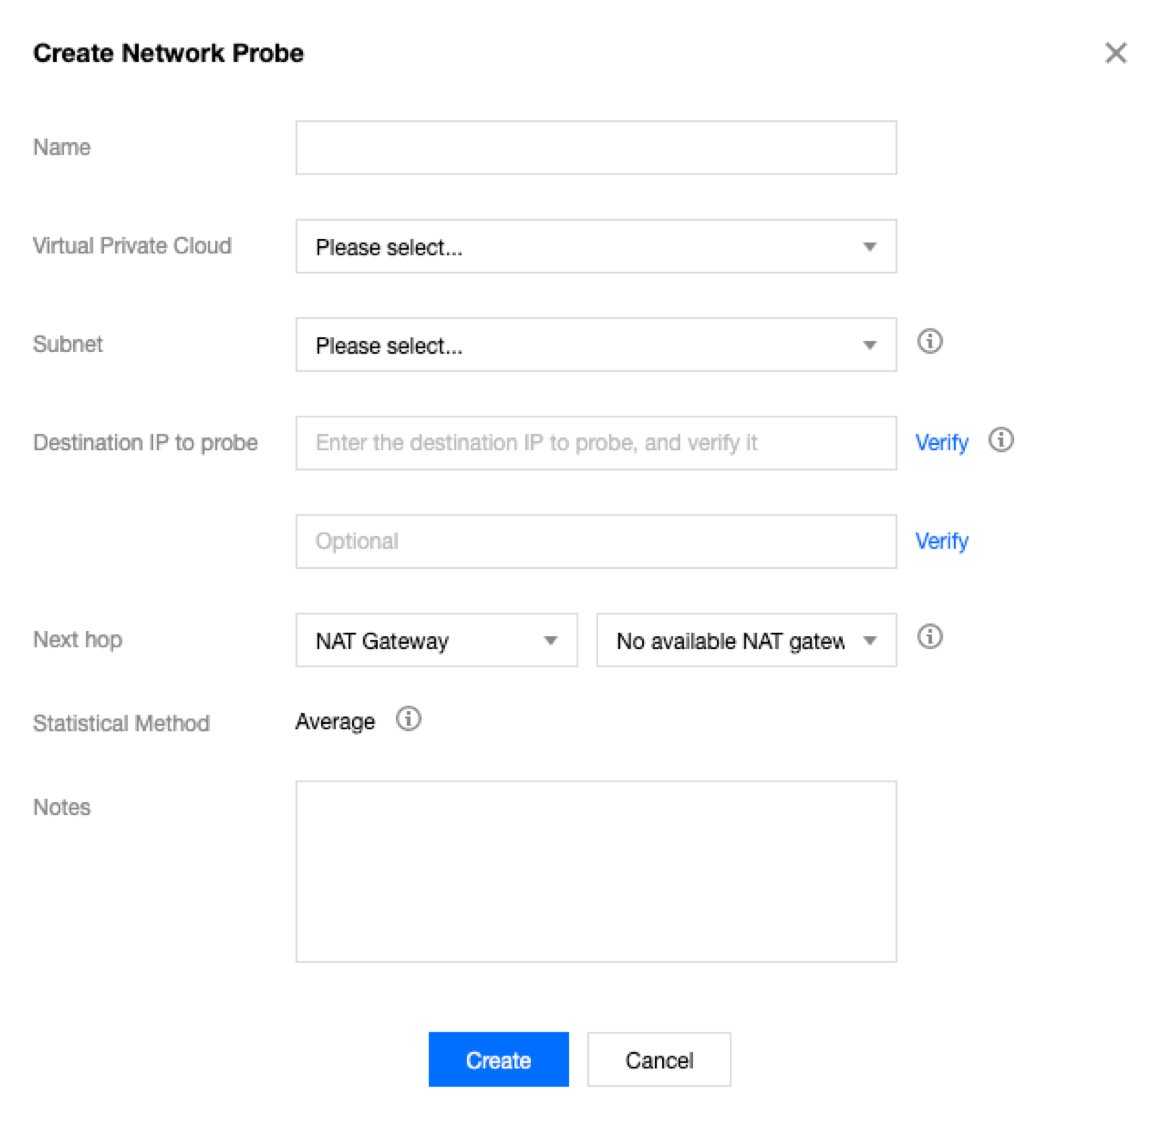
4. In the Create Network Probe pop-up window, fill in relevant fields.
Note:
The network probe route is assigned by the system and cannot be modified.
When you switch the route of subnet, this default route will be removed from the original route table associated with the subnet, and be added to the new route table associated.
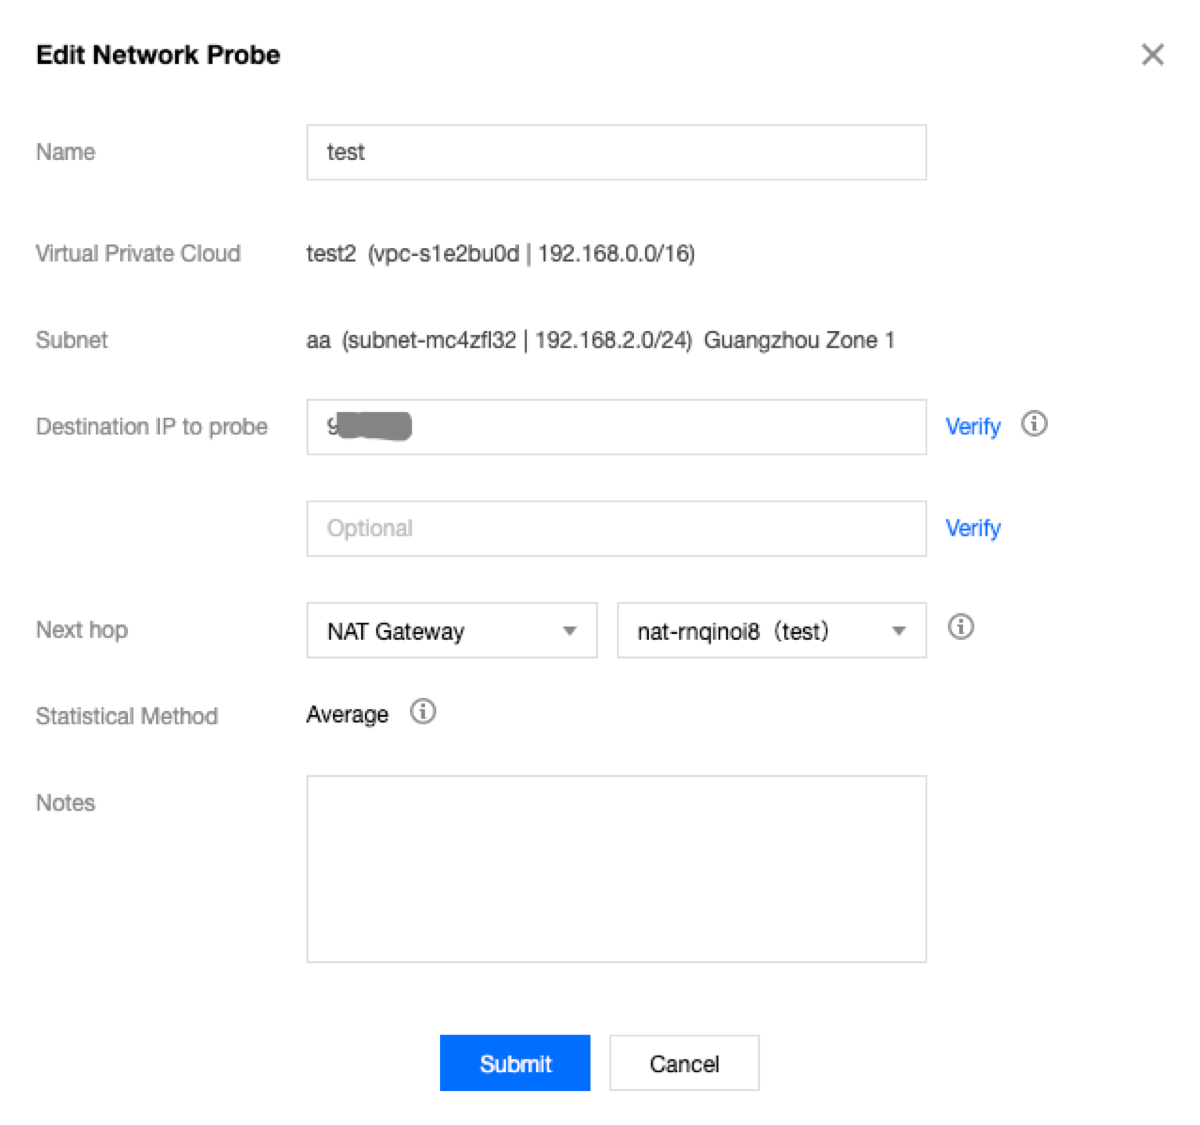
Field description
Field
Configuration
Name
Name of the network probe.
VPC
The VPC to which the probe source IP belongs.
Subnet
The subnet to which the probe source IP belongs.
Probe Destination IP
A maximum of two destination IPs are supported for the network probe. Please ensure that you’ve enabled ICMP firewall policy for the destination server of network probe.
Source Next Hop
You can choose to Specify or Do Not Specify the next hop.
If Do Not Specify is chosen, no next hop will be selected.
Note:
Do Not Specify is now only available to beta users. To enable it, please submit a ticket.
If you specify the next hop, select the next hop type and instances. And then, the system automatically adds the corresponding 32-bit route to the subnet-associated route table. Currently, the supported next hop type includes NAT Gateway, peering connections, VPN gateway, direct connect gateway,CVM(Public Gateway) , CVM, and CCN.
Note:
If you specify the CCN as the next hop and the probe destination IPs belong to two VPCs in the CCN, the IP range with the longest mask will be matched and take effect.
5. (Optional) Verify the Probe Destination IP.
Note:
Skip this step if you do not specify the next hop.
If the connection succeeds, click OK.
If the connection fails, check whether the subnet route is correctly configured, and whether the probed device enables Network ACL, security group or other firewalls, which may block the connection. For more information, see Managing Network ACLs and Modifying a Security Group Rule.
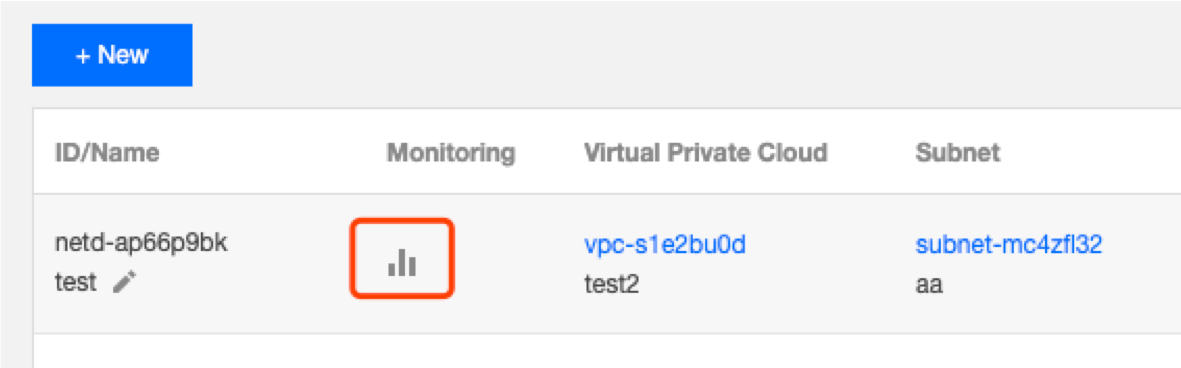
Checking the Latency and Packet Loss of a Network Probe
2. Select Diagnostic Tools -> Network Probe in the left sidebar to enter the management page.
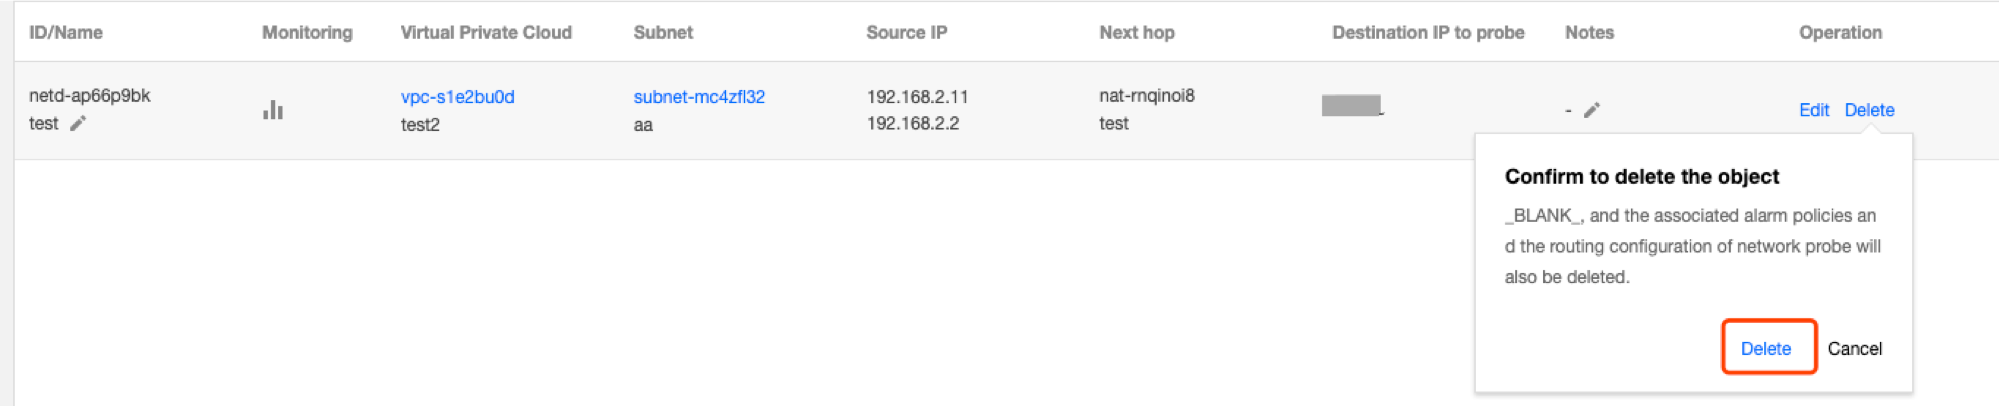
3. In the list, locate the network probe to delete and click Delete in the operation column.
4. Click Delete in the pop-up window to confirm the deletion.
Note:
Deleting a network probe also deletes all associated alarming policies and configured routes. Check whether your business will be affected before continuing.
Configuring an Alarm Policy
You can configure an alarm policy for the network probe service, so that you can promptly detect any route exception to help switch routes quickly and ensure business availability.
1. Log in to the CM console and go to the Alarm Policy page.
2. Click Create. In the Create Alarm Policy pop-up window, enter the policy name, select Network Probe for the policy type, configure the alarm object, alarm trigger condition and alarm policy, and click Complete.