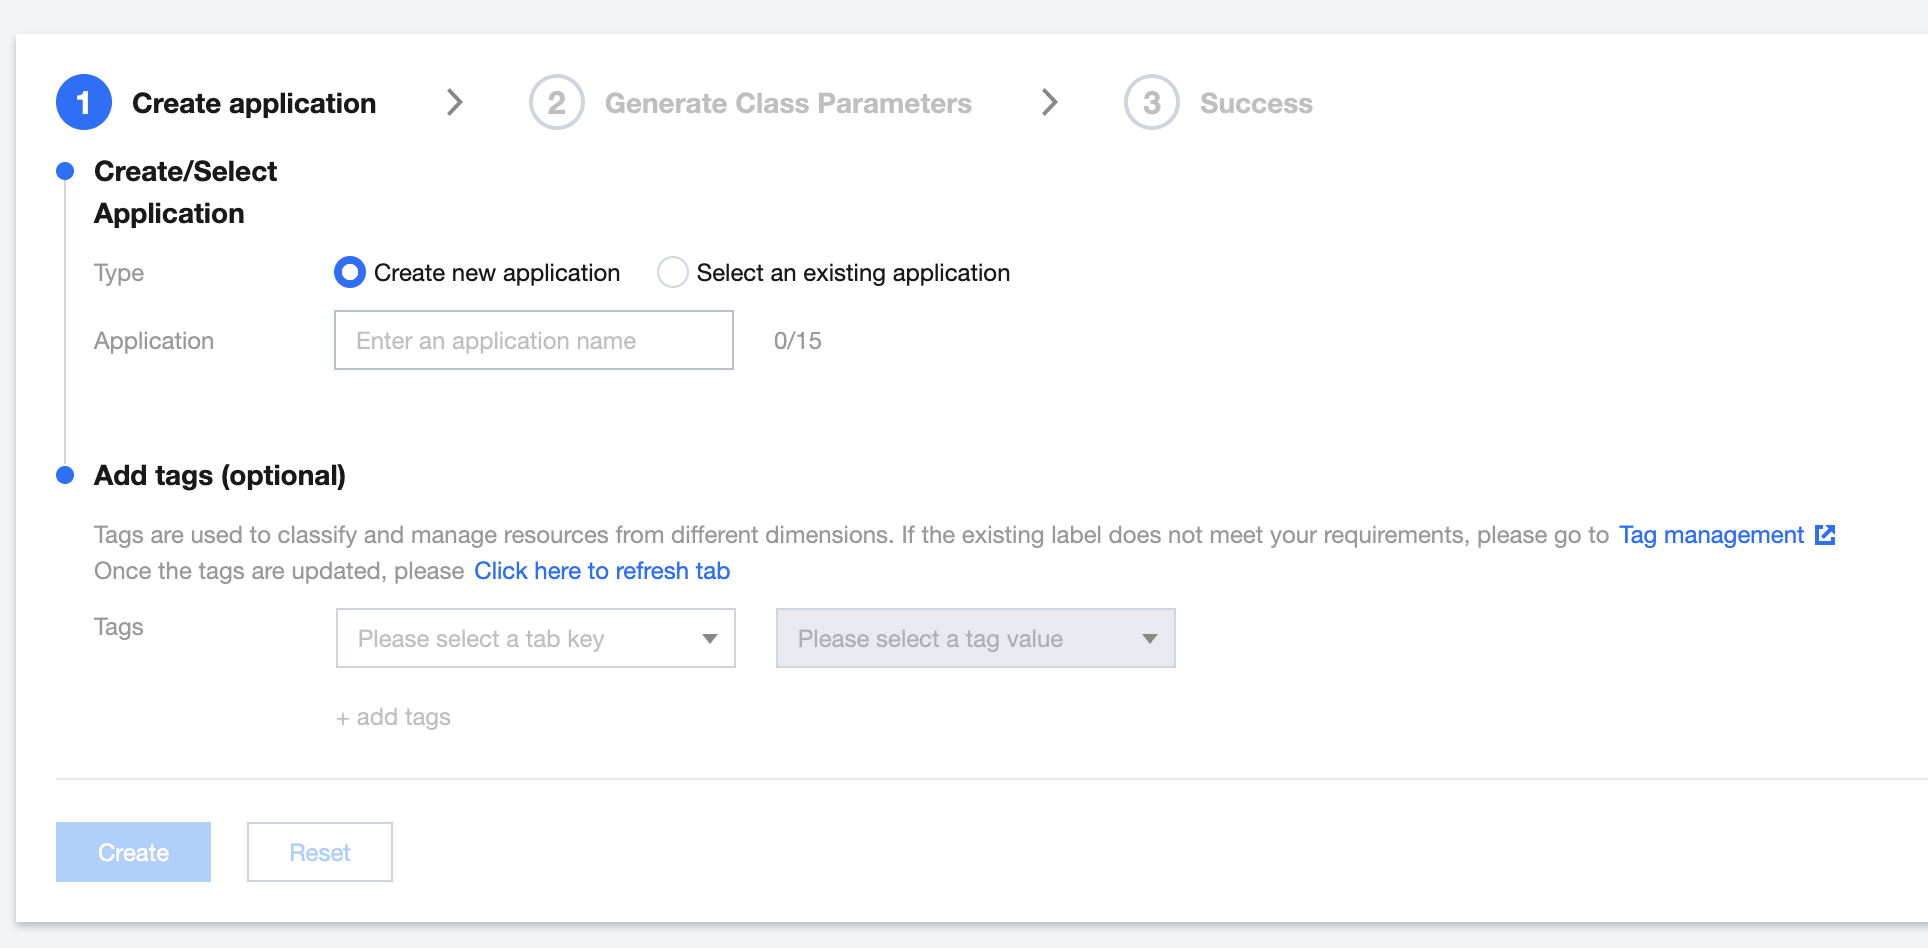
2. By default, you enter the "Create application" interface, where you can select "Create new application" for the application type. Enter the application name, such as TestLCIC.
If you have already created an application, you can click "Select an existing application" for the application type.
Note:
Each account can get a trial version application for free. If you need to create a commercial version, you can choose and purchase the corresponding version based on your business needs on the Purchase Page.
3. Add or edit Tag (optional), then click Create.
Note:
Application names may only contain underscores, digits, or alphanumeric characters in both English and Chinese.
Tags serve to identify and organize the various resources you possess within Tencent Cloud. For instance, a corporation with several business divisions might have one or more LCIC applications per division. In such cases, the corporation could assign tags to the LCIC applications to denote departmental information. Tags are not mandatory; you may add or edit them based on your actual business requirements.
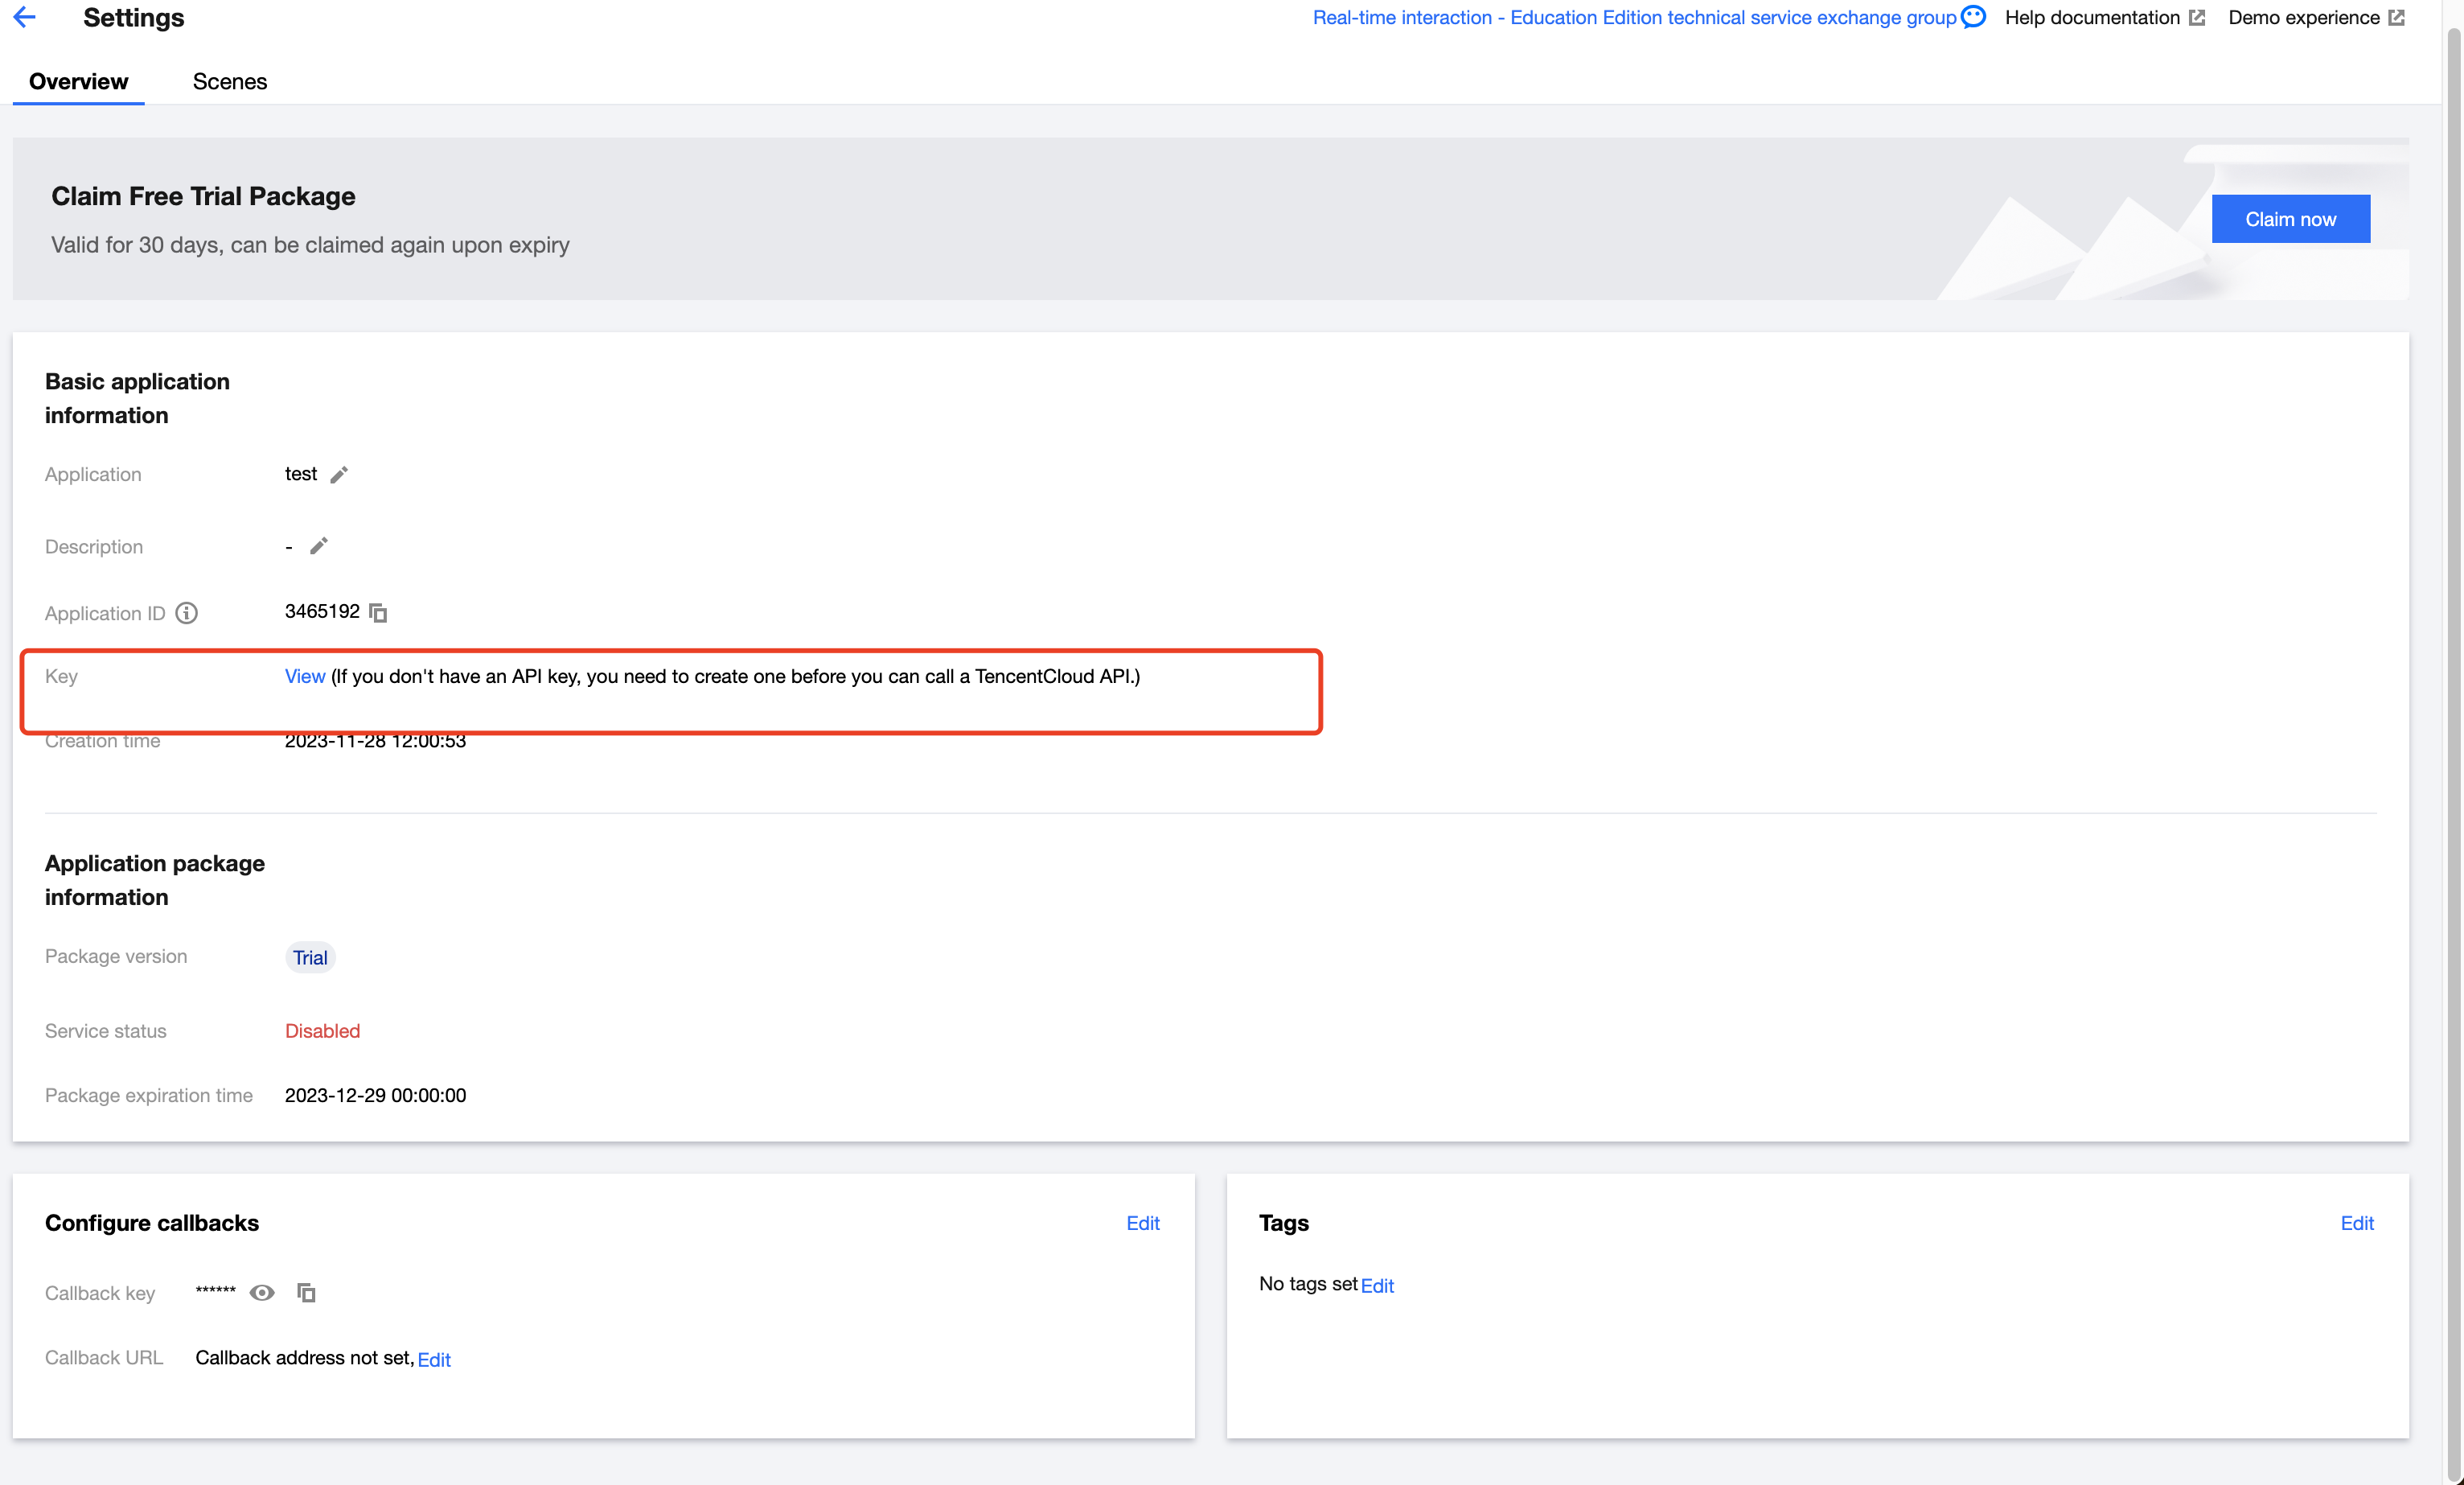
2. Enter the Cloud Access Management obtain the key. If there is no key, you need to create a new one in API Key Management. For details, refer to Key Management.
Step 3: Access Parameters Required to Enter the Classroom
1. By calling the TencentCloud API interface RegisterUser to register a user, you can obtain the corresponding user ID (userid) information.
2. Through the TencentCloud API interface LoginUser to log in, you can obtain the user authentication token information.
3. By using the Application Programming Interface CreateRoom to create a classroom, you can access the Classroom ID (classid) information.
4. Specify the version of the classroom you need to integrate: latest.
5. The scene, debugjs, and debugcss are optional parameters, only needed when defining UI. See Custom UI Integration for more details. debugjs and debugcss are used only for the debugging of customized layouts and components, and only accessed via localhost or 127.0.0.1. Do not use this parameter for the release stage.
6. lng, location, layout are also optional parameters. Businesses can determine whether they need to be entered. If not, they will use the default value. the layout parameter is only effective when the classroom layout is set to video plus document layout (videodoc).
Select the corresponding version by releasing logs. Note: For the interactive classroom client version, we recommend using 'latest'
Yes
scene
string
Scenario name
Used to distinguish different custom layouts, configure via the SetAppCustomContent interface, default is default
No
debugjs
string
JS link of the custom defined UI
Access through the custom defined UI integration
No
debugcss
string
CSS link of the custom defined UI
Access through the custom defined UI integration
No
role
string
Role for entering the classroom, default is empty
Optional parameter supervisor (patrolling/content review), only registered users in the application have the authority
No
lng
string
Language parameter, default is zh-CN
Supports Chinese (simplified), Chinese (traditional), English, Korean, and Japanese. Corresponding parameters can be concatenated to display the corresponding languages. Parameters: zh-CN, zh-TW, en-US, ka, ja.
Also supports multilingual languages such as Spanish, French, German, Thai, Malay, and Indonesian. You can contact sales or product for details.
No
location
boolean
Whether to report geographical location information
Default false, no reporting
No
layout
string
Page layout
Default is top layout (top), currently only effective for video document pattern, support for double row layout (double), right layout (right), left layout (left), three-part layout (three)
No
boardColor
string
Whiteboard color
Whiteboard color setting, default is: #182E25, supports Hex format, also supports rgba(0, 0, 0, .3) setting
No
back_url
string
Exit Classroom Callback Address
Default is empty. It's the page address that needs to be bounced back when clicking return or exiting the classroom. The parameter needs to be encoded using encodeURIComponent
No
Step 4: Enter the Classroom
Standard Feature
Connect the recently accessed parameters to form the URL for user entry into the classroom according to the following standard. You can achieve web integration by jumping to this URL link.
If the userid in the appended URL matches the teacher's ID (teacherid) specified in the create classroom, then the current user is a teacher. If it matches the current classroom's assistant's ID (assistantid), the user is an assistant, otherwise, the user is a student.
Iframe integration
If you need to integrate the classroom page into an iframe, you need to add the allow attribute to the iframe element to ensure the classroom page can correctly obtain the required browser permissions:
LCIC Web/H5 also provides an integration solution for customizing the UI. Users can custom define the layout and style during business, and by customizing the interface, you can access the JS and CSS links on the business side. You can add the parameters debugjs and debugcss to the link above (these parameters are only used for debugging) as shown below:
When your custom JS and CSS have been debugged, you can use the SetAppCustomContentAPI or the Low-code Interative Classroom > Application Management > Settings > Scenes to bind the scene, and the links to the custom JS and CSS (You cannot use an address with a port, otherwise it will be blocked). When entering the classroom, append the scene parameter to the URL to load the layout and components of the corresponding scene. When dealing with various types of classes and various layouts, the business side can switch scenes according to this parameter, as shown below:
On the course page, if the business side wishes to hide the classroom domain and only display the business domain, you can create a new business domain through the CDN (CDN) Console and backsource to the classroom domain. For the detailed process, please refer to Custom Business Domain.