When data is lost or corrupted, you can use the console's instance cloning feature to restore data to a specific time point or from a backup set. The restorable time is determined by the log retention period and the full-backup time. You can also directly download the backup and restore it to a self-built database. A detailed description is provided below. Note:
Should a TencentDB for PostgreSQL instance have transparent data encryption (TDE) enabled, it will not support restoration to a self-built database.
Downloading a Backup in the Console for Restoration
1. Preconditions
2. Create a restoration directory as the postgres user
Create a restoration directory on the CVM and set permissions.
mkdir -p /var/lib/pgsql/16/recovery
chown postgres /var/lib/pgsql/16/recovery
Here, recovery is an example directory. Users can modify the restoration directory as needed. Subsequent examples will not distinguish between directory names of different versions. The actual directory name should prevail. For example, it is /var/lib/pgsql/12 for PostgreSQL 12.x.
3. Download the full-backup file
3.1. Log in to the PostgreSQL console. In the instance list, click Manage in the Operation column to go to the management page. 3.2. Select the Backup and Restoration tab. In the Data Backup List, choose the backup set to be restored based on the backup time and click Download in the Operation column.
3.3. Download the backup file from the provided VPC address or public network address.
Note:
When the backup file is downloaded from the VPC address, the cloud database must be in the same VPC as the CVM. The backup should be downloaded to the /var/lib/pgsql/16/recovery directory.
Note: When the backup file is downloaded from the public network address, it needs to be uploaded to the /var/lib/pgsql/16/recovery directory in the CVM after the download. For more information, see Copying Local Files to CVMs. After the upload, the following example information is displayed:
[postgres@VM-0-5-tencentos recovery]$ ls -lh
total 9.1M
-rw-r--r-- 1 postgres postgres 9.1M Aug 5 12:40 pgsql_1026780_data_2024-08-05_automatic-20240805015133.tar.zst
4. Decompress the full-backup file
Execute the following command to decompress the full-backup file. After the file is downloaded, it needs to be decompressed with zstd. If the tool is not available, it needs to be installed.
cd /var/lib/pgsql/16/recovery
tar -I zstd -xvf pgsql_1026780_data_2024-08-05_automatic-20240805015133.tar.zst
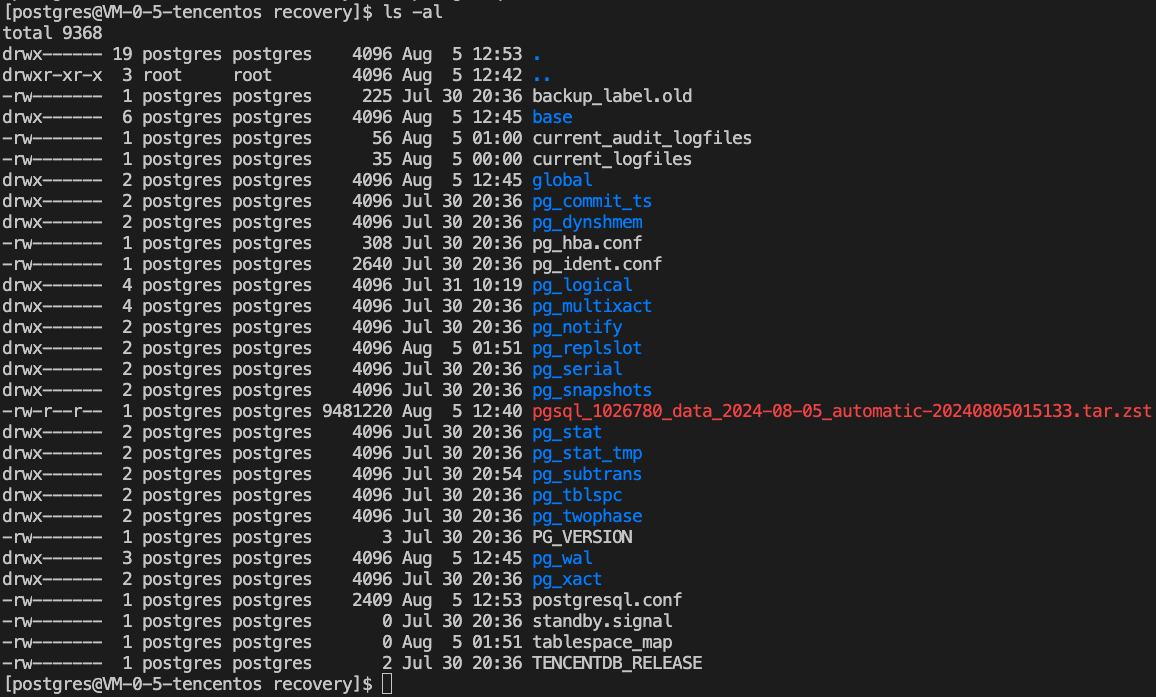
After the decompression, the following information is displayed:
[postgres@VM-0-5-tencentos recovery]$ ls -lh
total 9.2M
-rw------- 1 postgres postgres 225 Aug 5 01:51 backup_label
-rw------- 1 postgres postgres 225 Jul 30 20:36 backup_label.old
drwx------ 6 postgres postgres 4.0K Aug 5 12:45 base
-rw------- 1 postgres postgres 56 Aug 5 01:00 current_audit_logfiles
-rw------- 1 postgres postgres 35 Aug 5 00:00 current_logfiles
drwx------ 2 postgres postgres 4.0K Aug 5 12:45 global
drwx------ 2 postgres postgres 4.0K Jul 30 20:36 pg_commit_ts
drwx------ 2 postgres postgres 4.0K Jul 30 20:36 pg_dynshmem
-rw------- 1 postgres postgres 308 Jul 30 20:36 pg_hba.conf
-rw------- 1 postgres postgres 2.6K Jul 30 20:36 pg_ident.conf
drwx------ 4 postgres postgres 4.0K Jul 31 10:19 pg_logical
drwx------ 4 postgres postgres 4.0K Jul 30 20:36 pg_multixact
drwx------ 2 postgres postgres 4.0K Jul 30 20:36 pg_notify
drwx------ 2 postgres postgres 4.0K Aug 5 01:51 pg_replslot
drwx------ 2 postgres postgres 4.0K Jul 30 20:36 pg_serial
drwx------ 2 postgres postgres 4.0K Jul 30 20:36 pg_snapshots
-rw-r--r-- 1 postgres postgres 9.1M Aug 5 12:40 pgsql_1026780_data_2024-08-05_automatic-20240805015133.tar.zst
drwx------ 2 postgres postgres 4.0K Jul 30 20:36 pg_stat
drwx------ 2 postgres postgres 4.0K Jul 30 20:36 pg_stat_tmp
drwx------ 2 postgres postgres 4.0K Jul 30 20:54 pg_subtrans
drwx------ 2 postgres postgres 4.0K Jul 30 20:36 pg_tblspc
drwx------ 2 postgres postgres 4.0K Jul 30 20:36 pg_twophase
-rw------- 1 postgres postgres 3 Jul 30 20:36 PG_VERSION
drwx------ 3 postgres postgres 4.0K Aug 5 12:45 pg_wal
drwx------ 2 postgres postgres 4.0K Jul 30 20:36 pg_xact
-rw------- 1 postgres postgres 2.3K Jul 30 20:36 postgresql.conf
-rw------- 1 postgres postgres 0 Jul 30 20:36 standby.signal
-rw------- 1 postgres postgres 0 Aug 5 01:51 tablespace_map
-rw------- 1 postgres postgres 2 Jul 30 20:36 TENCENTDB_RELEASE
5. Remove unnecessary temporary files
Execute the following command to remove unnecessary temporary files.
6. Modifying the Configuration File
6.1. Use # at the beginning of a line to comment out the following options in the configuration file postgresql.conf.
If there are multiple such options, comment them all out.
synchronous_standby_names
shared_preload_libraries
local_preload_libraries
pg_stat_statements.max
pg_stat_statements.track
archive_mode
archive_command
synchronous_commit
tencentdb_az_five
extension_blacklist
disable_dblink_connect_to_other
tencentdb_enable_trusted_extension
basebackup_exclude_paths
tencentdb_enable_superuser_unsafe_behaviour
soft_limit_connections
Note:
You need to comment out the line include = 'standby.conf'.
log_destination = 'csvlog,auditlog' needs to be changed to log_destination = 'csvlog'.
6.2. Modify the configuration file postgresql.conf.
6.3. Append configurations to the postgresql.conf file, indicating that the strong sync mode will no longer be used.
synchronous_commit = local
synchronous_standby_names = ''
7. Modify folder permissions as the root user
chmod 0700 /var/lib/pgsql/16/recovery
chown postgres:postgres /var/lib/pgsql/16/recovery -R
After the modification, the following information is displayed:
8. Use the incremental backup file (optional)
If this step is skipped, the content of the database will be that when the full backup is started.
Put the xlog files in the /var/lib/pgsql/16/recovery/pg_wal folder. If the downloaded backup does not contain the pg_wal directory, modify pg_xlog to pg_wal, and PostgreSQL will automatically place the xlog files again.
For example, if a full backup has been performed at 12:00 and all xlog files between 12:00 and 13:00 are put in the pg_wal folder, then the database can be restored to the data content at 13:00.
Note:
For PostgreSQL 9.x, the folder is /var/lib/pgsql/9.x/recovery/pg_xlog.
8.1. Select the Backup and Restoration page. In the Log Backup List, choose the log backup set to be restored, and click Download in the Operation column. After the download, the following information is displayed:
8.2. Decompress the log to the pg_wal folder.
tar -I zstd -xvf pgsql_1026780_xlog_2024-08-05_20240805133238_20240805133241-20240805133241-00000001000000000000000B_00000001000000000000000F.tar.zst
9. Start PostgreSQL as the postgres user.
/usr/local/pgsql/bin/pg_ctl start -D /var/lib/pgsql/16/recovery -l logfile
10. Log in to the database for verification.
10.1. Verify whether the database is running.
/usr/local/pgsql/bin/pg_ctl status -D /var/lib/pgsql/16/recovery
If a "server is running" message is displayed, it indicates that the database is running.
10.2. Log in to the database.
[postgres@VM-0-5-tencentos recovery]$ /usr/local/pgsql/bin/psql -h127.0.0.1 -p 5432 -Udbadmin -dpostgres
psql (16.0)
Type "help" for help.
postgres=>
Manually Exporting Data for Restoration
You can also manually export backup data and then restore it on the CVM. This scheme is applicable to both Windows and Linux regardless of the file system where physical files reside.
Note:
It is recommended not to use the postgres database as the target database.
Note: It is recommended to use a newly created database on the target side to import data.
If you use a database with existing data on the target side to import, it may fail due to object conflict.
1. Dump data from the CVM
|
host | The connection address of the TencentDB for PostgreSQL instance. |
port | The port of the TencentDB for PostgreSQL instance. |
username | The account name of the TencentDB for PostgreSQL instance. |
-Fc | Output format, which is suitable for pg_restore for restoration. |
dbname | The name of the database to be exported. |
dumpdir | The path and name of the exported backup file. |
For example:
pg_dump -h 10.0.13.13 -p 5432 -U dbadmin -Fc testdb > testdb_bkp.dump
When the command prompts Password:, enter the access account password, and the file will be successfully exported. You can run ll testdb_bkp.dump to ensure the file is generated.
2. Create the corresponding user in the self-built database
Connect to the self-built database on the target side, create the corresponding database account, and ensure the target account exists. An example is as follows:
[postgres@VM-0-14-tencentos root]$ psql -h127.0.0.1 -p5432 -Upostgres -dpostgres
psql (16.0)
Type "help" for help.
postgres=# \du
List of roles
Role name | Attributes
-----------+------------------------------------------------------------
postgres | Superuser, Create role, Create DB, Replication, Bypass RLS
postgres=# CREATE USER dbadmin WITH PASSWORD '123456' SUPERUSER;
CREATE ROLE
postgres=# \du
List of roles
Role name | Attributes
-----------+------------------------------------------------------------
dbadmin | Superuser
postgres | Superuser, Create role, Create DB, Replication, Bypass RLS
postgres=#
The account created in the above example is a superuser. You can also grant system and object permissions to the user based on your needs.
3. Create the corresponding database in the self-built database
Log in to the database using the newly created user. If the database to be restored does not exist, create the database. An example is as follows:
[postgres@VM-0-14-tencentos root]$ psql -h127.0.0.1 -p5432 -Udbadmin -dpostgres
psql (16.0)
Type "help" for help.
postgres=# select datname from pg_database;
datname
-----------
template1
template0
postgres
(3 rows)
postgres=# create database testdb;
CREATE DATABASE
postgres=# select datname from pg_database;
datname
-----------
template1
template0
postgres
testdb
(4 rows)
postgres=#
4. Restore the data on the CVM
|
host | The connection address of the self-built PostgreSQL instance. |
port | The port of the self-built PostgreSQL instance. |
username | The account name of the self-built PostgreSQL instance. |
dbname | The name of the database to be imported. |
dumpdir | The path and name of the backup file to be imported. |
-c | -c is an optional parameter, indicating that the relevant data in the target database will be cleared before data restoration. |
For example:
pg_restore -h 127.0.0.1 -p 5432 -U dbadmin -d testdb testdb_bkp.dump -c
5. Log in to the database to verify the data
Log in to the database using the newly created user and check whether the data has been restored. An example is as follows:
[postgres@VM-0-14-tencentos root]$ psql -h127.0.0.1 -p5432 -Udbadmin -dpostgres
psql (16.0)
Type "help" for help.
postgres=# \c testdb
You are now connected to database "testdb" as user "dbadmin".
testdb=# SELECT table_name FROM information_schema.tables WHERE table_schema = 'public';
table_name
------------
sbtest1
sbtest10
sbtest2
sbtest3
sbtest4
sbtest5
sbtest6
sbtest7
sbtest8
sbtest9
(10 rows)
testdb=#