This document provides an example showing how to deploy a permission configuration (CVM-test) for an Identity Center user (user1) to a member account (member_1). The permission configuration defines CVM-related access permissions, allowing the Identity Center user (user1) to only access CVM resources for the member account (member_1).
Directions
Step 1: Inputting Enterprise Employee Information
Input enterprise employee information into User Management of the Identity Center by creating identity center users. Manual creation and SCIM synchronization are supported. The following example shows creating a user manually:
2. In the left sidebar, select User Management > Users and then click Create User.
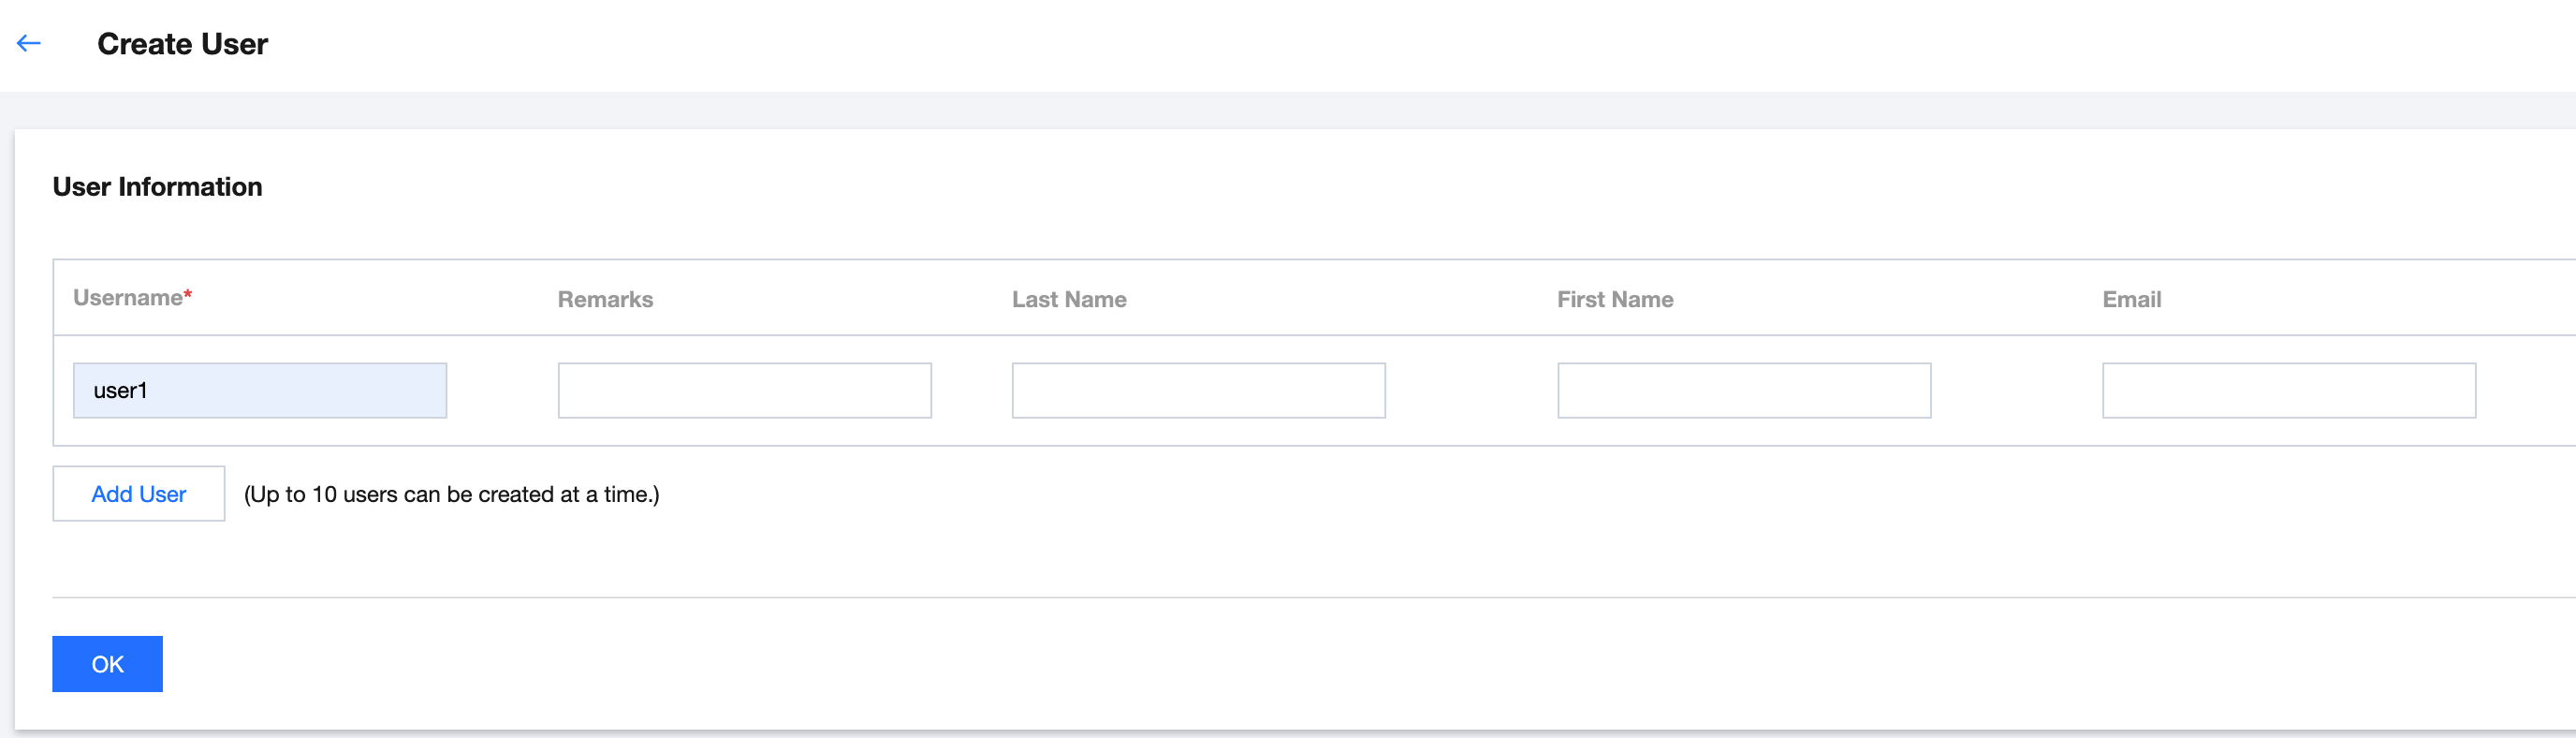
3. On the Create User page, configure basic information of a user.
Username: Required. It must be unique within the space. The username can contain up to 64 characters including English letters, digits, plus signs (+), equal signs (=), commas (,), periods (.), at signs (@), hyphens (-), and underscores (_). It is configured as user1 here.
Remarks, Last Name, First Name, and Email: Optional. You can input them as needed.
4. Click OK to complete the creation.
Step 2. Configuring Permissions
Before configuring CAM role synchronization, you should configure permissions first. After a permission is deployed to a member account, a corresponding CAM role will be automatically created for the member account. The role is named in the format of TencentCloudSSO-PermissionName.
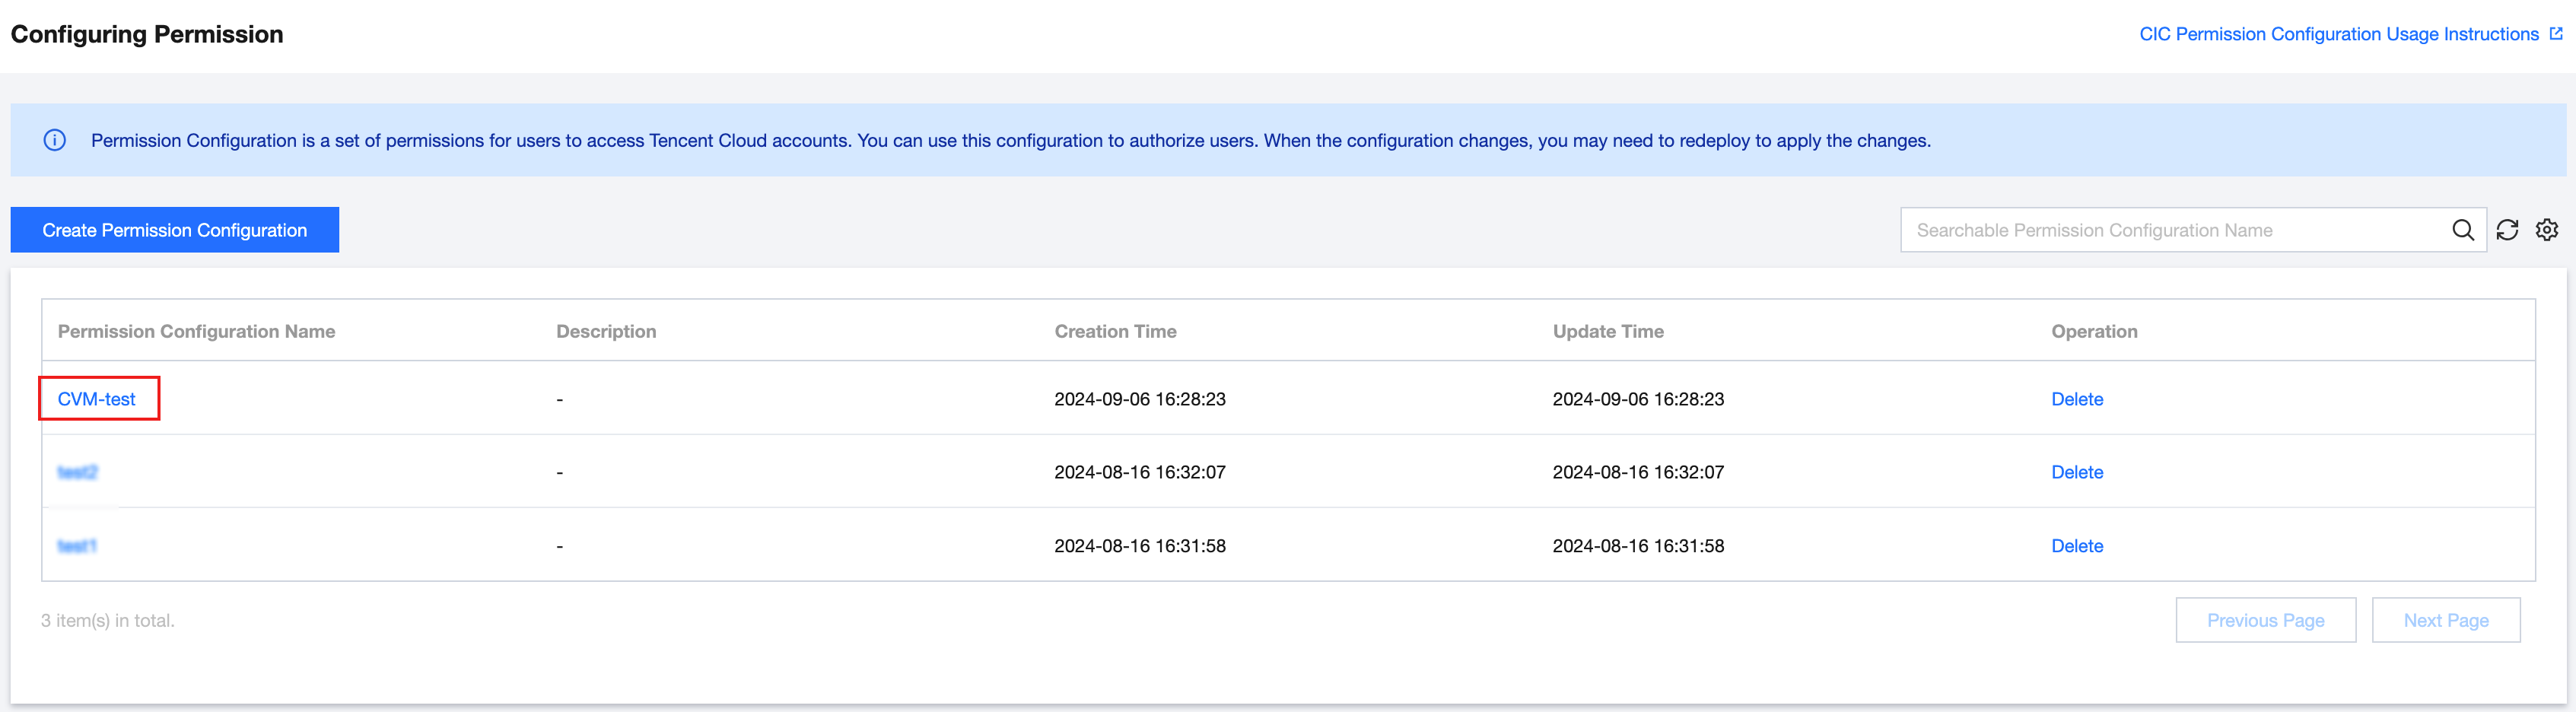
1. In the left sidebar, click CAM Synchronization > Configuring Permission.
2. On the Configuring Permission page, click Create Permission Configuration.
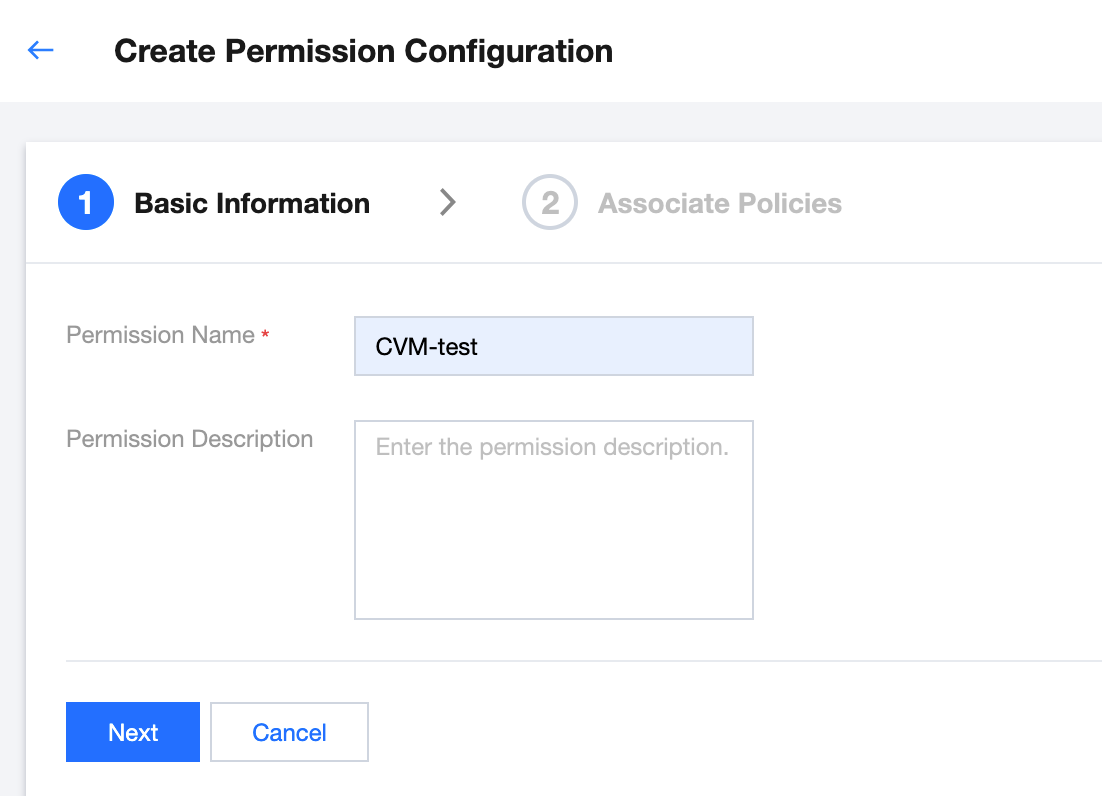
3. On the Create Permission Configuration page, configure the following basic information and then click Next.
Permission Name: Required. It must be unique within the space and is configured as CVM-test here.
Permission Description: Optional. You can input the description of a permission configuration.
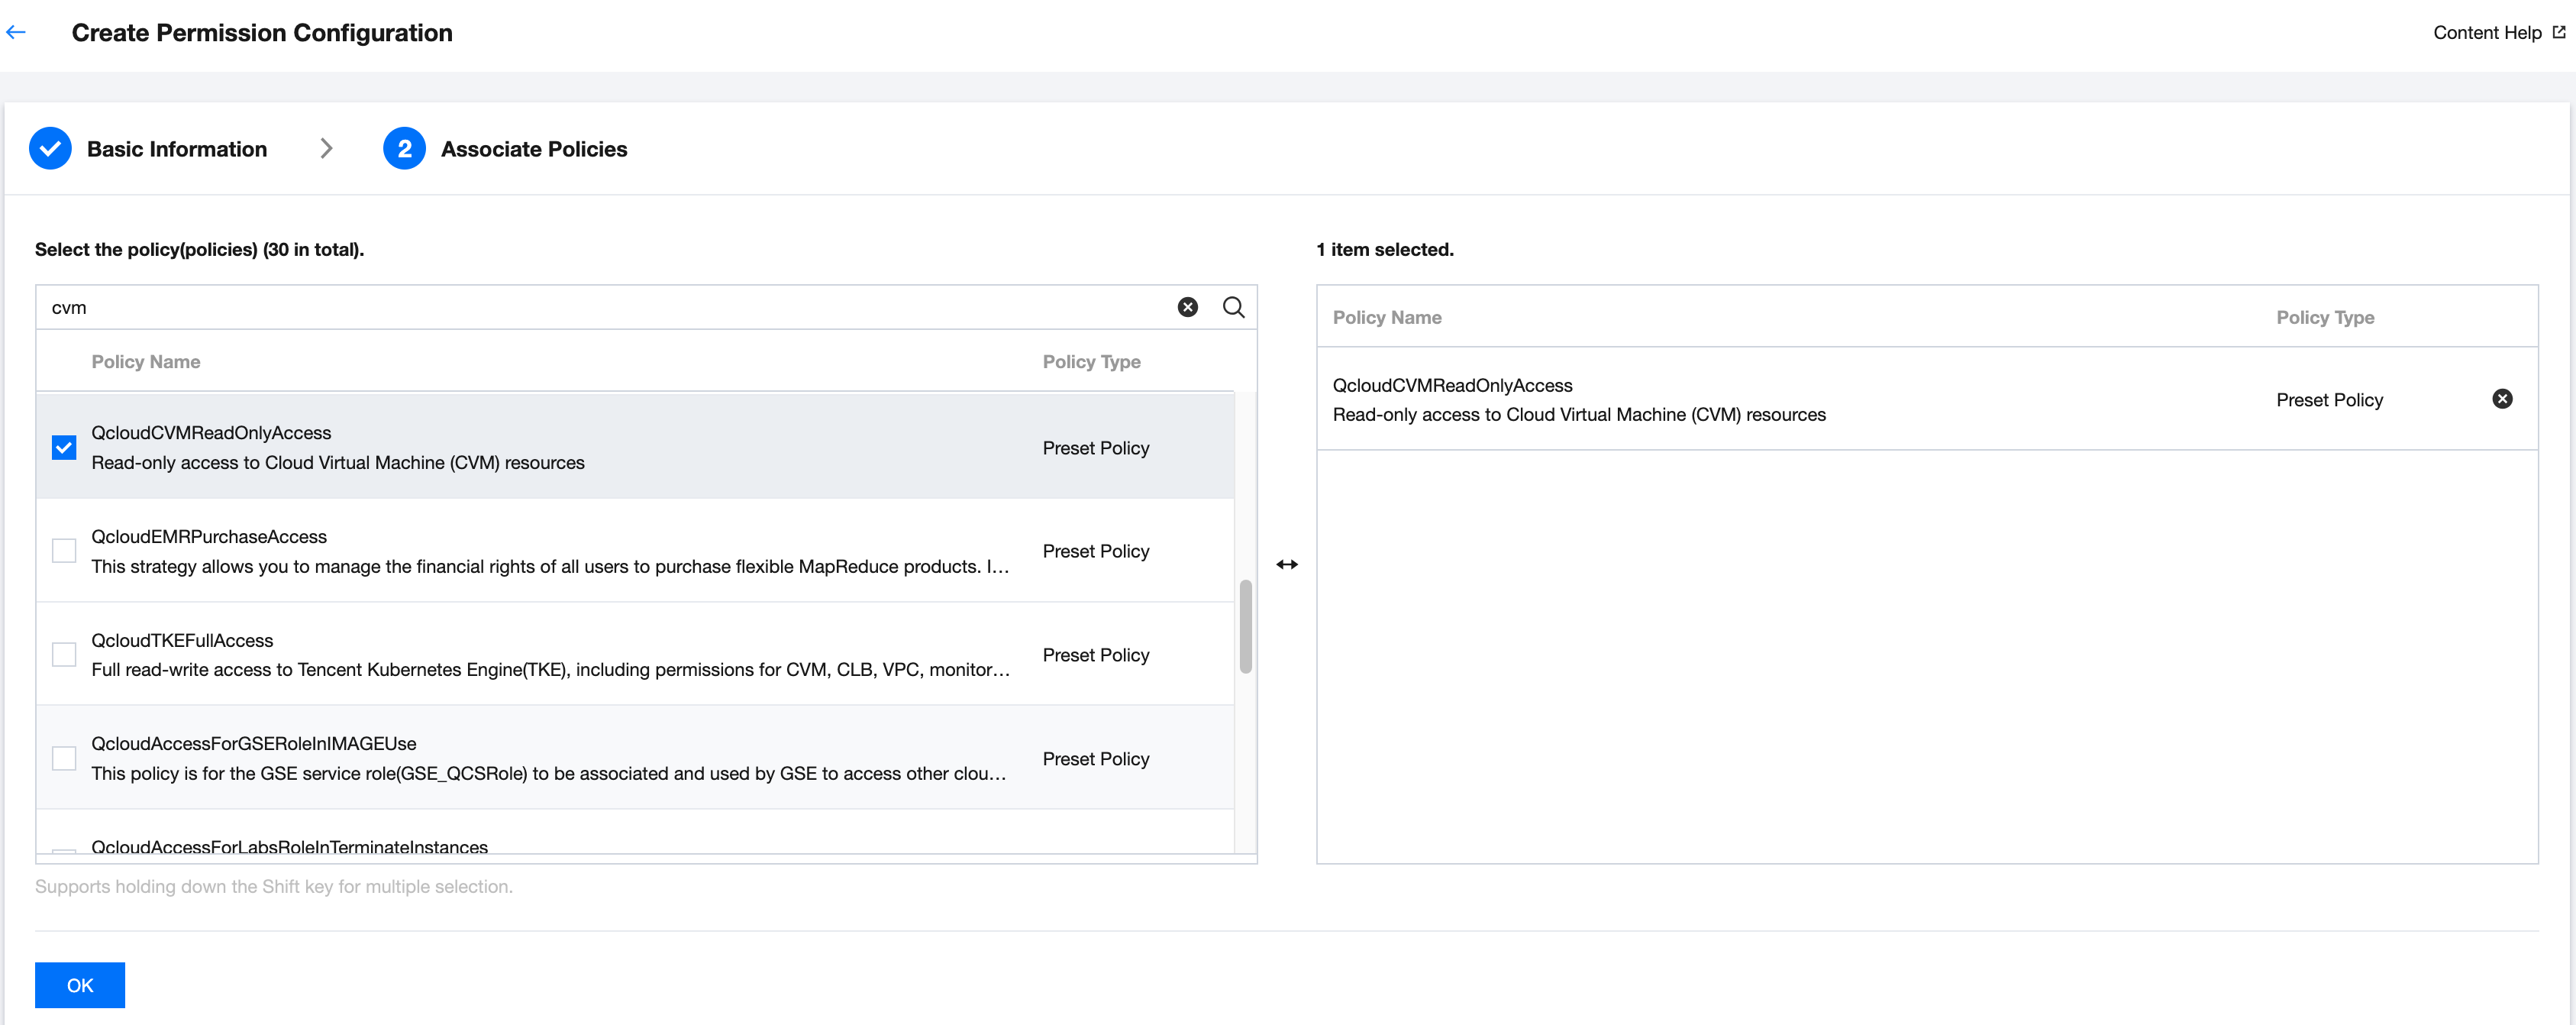
4. Configure associated policies. You can select preset policies as needed. A preset policy for read-only access to CVM resources is selected here.
5. Click OK to complete the creation.
Step 3: Configuring CAM Role Synchronization
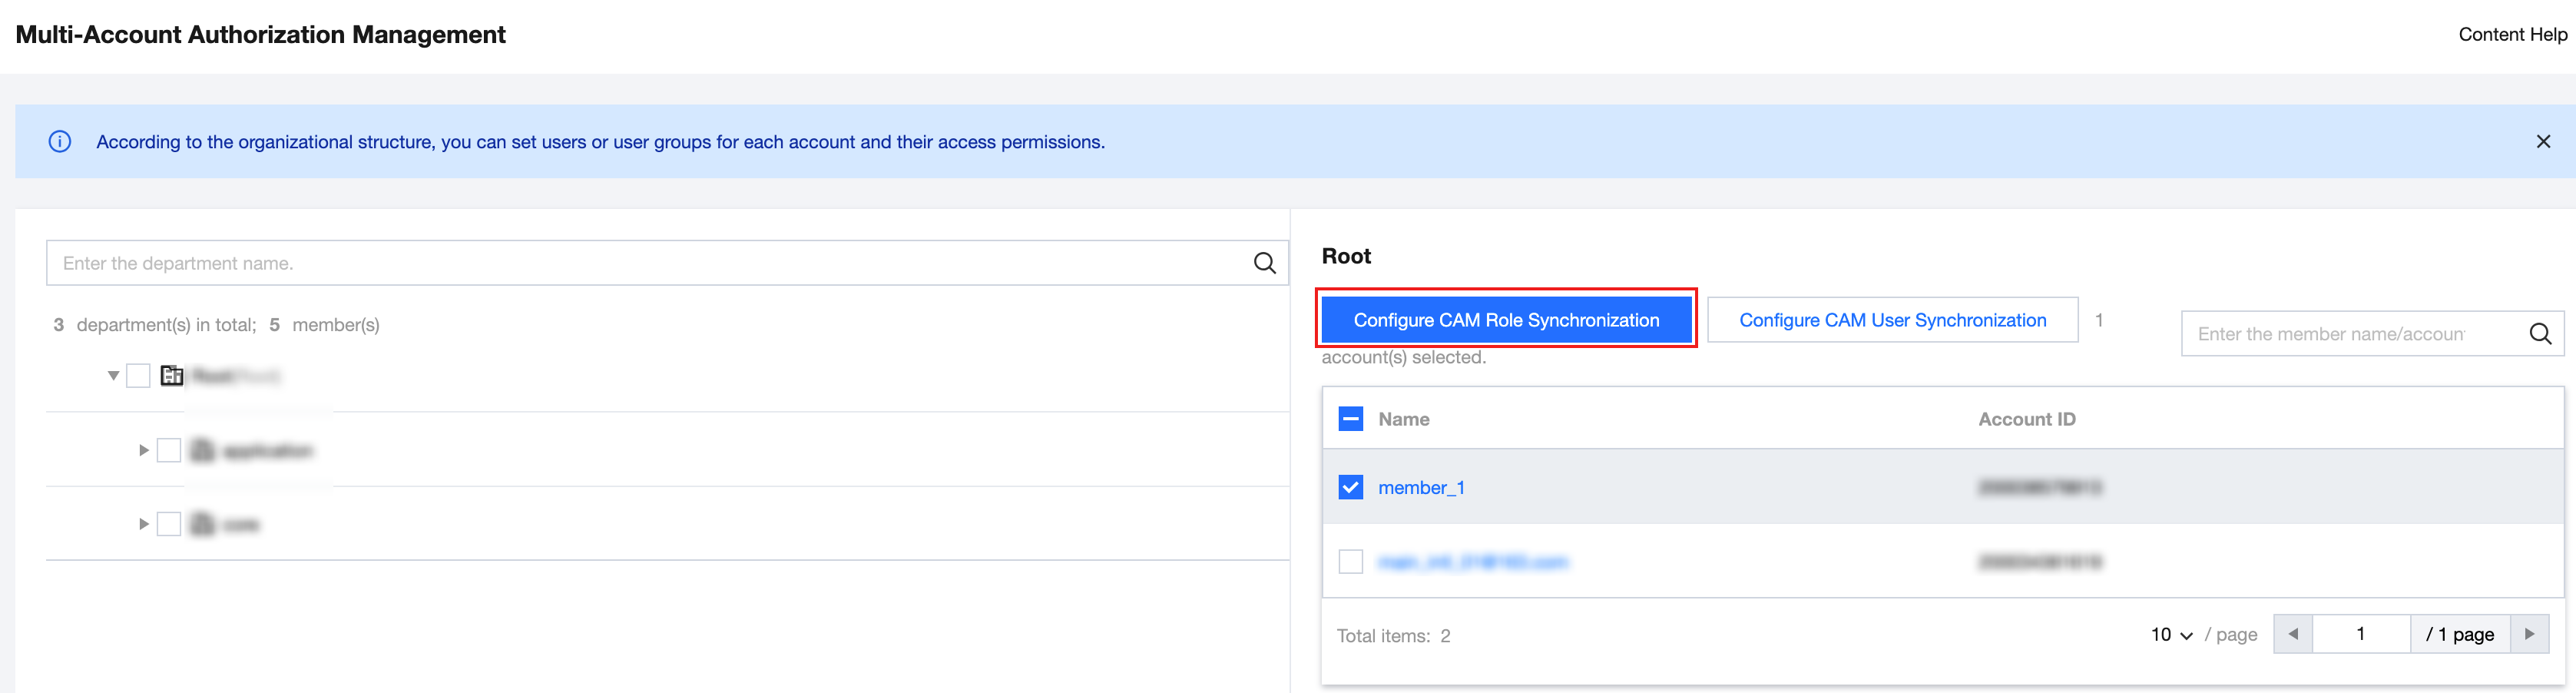
1. In the left sidebar, click CAM Synchronization > Multi-Account Authorization Management.
2. On the Multi-Account Authorization Management page, select a target account.
Note:
In this example, a member account (member_1) is selected.
3. Click Configure CAM Role Synchronization.
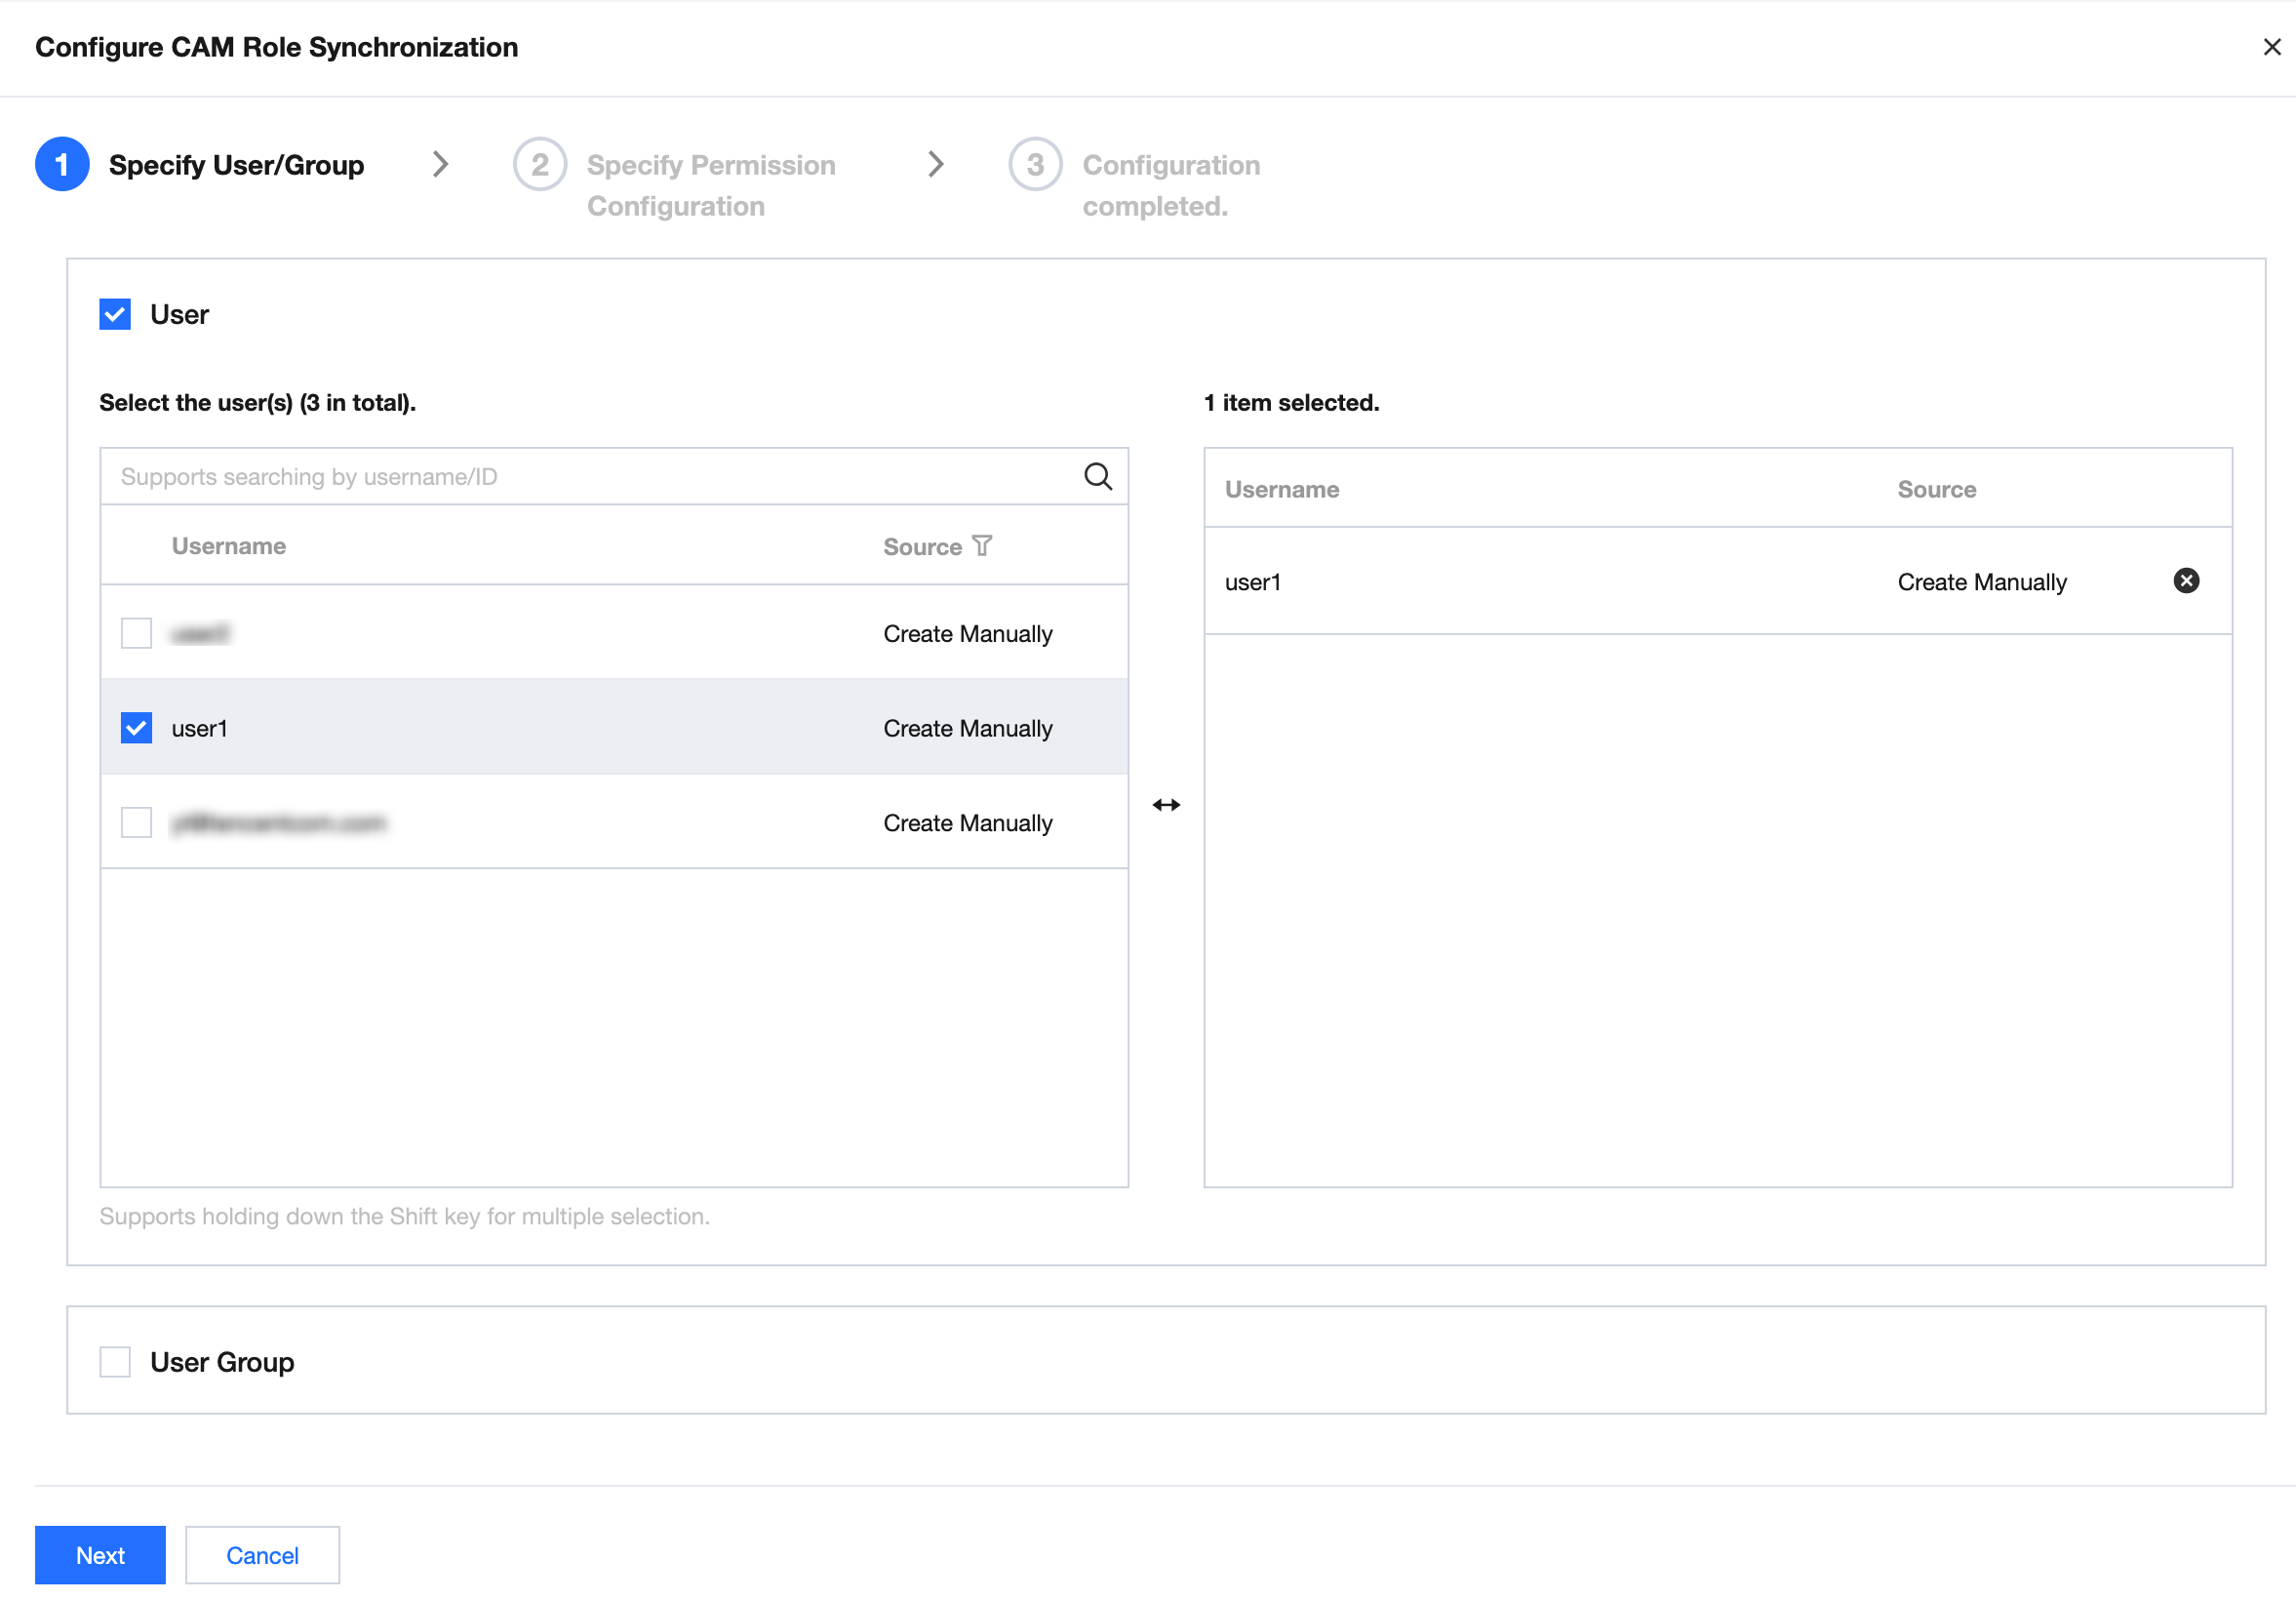
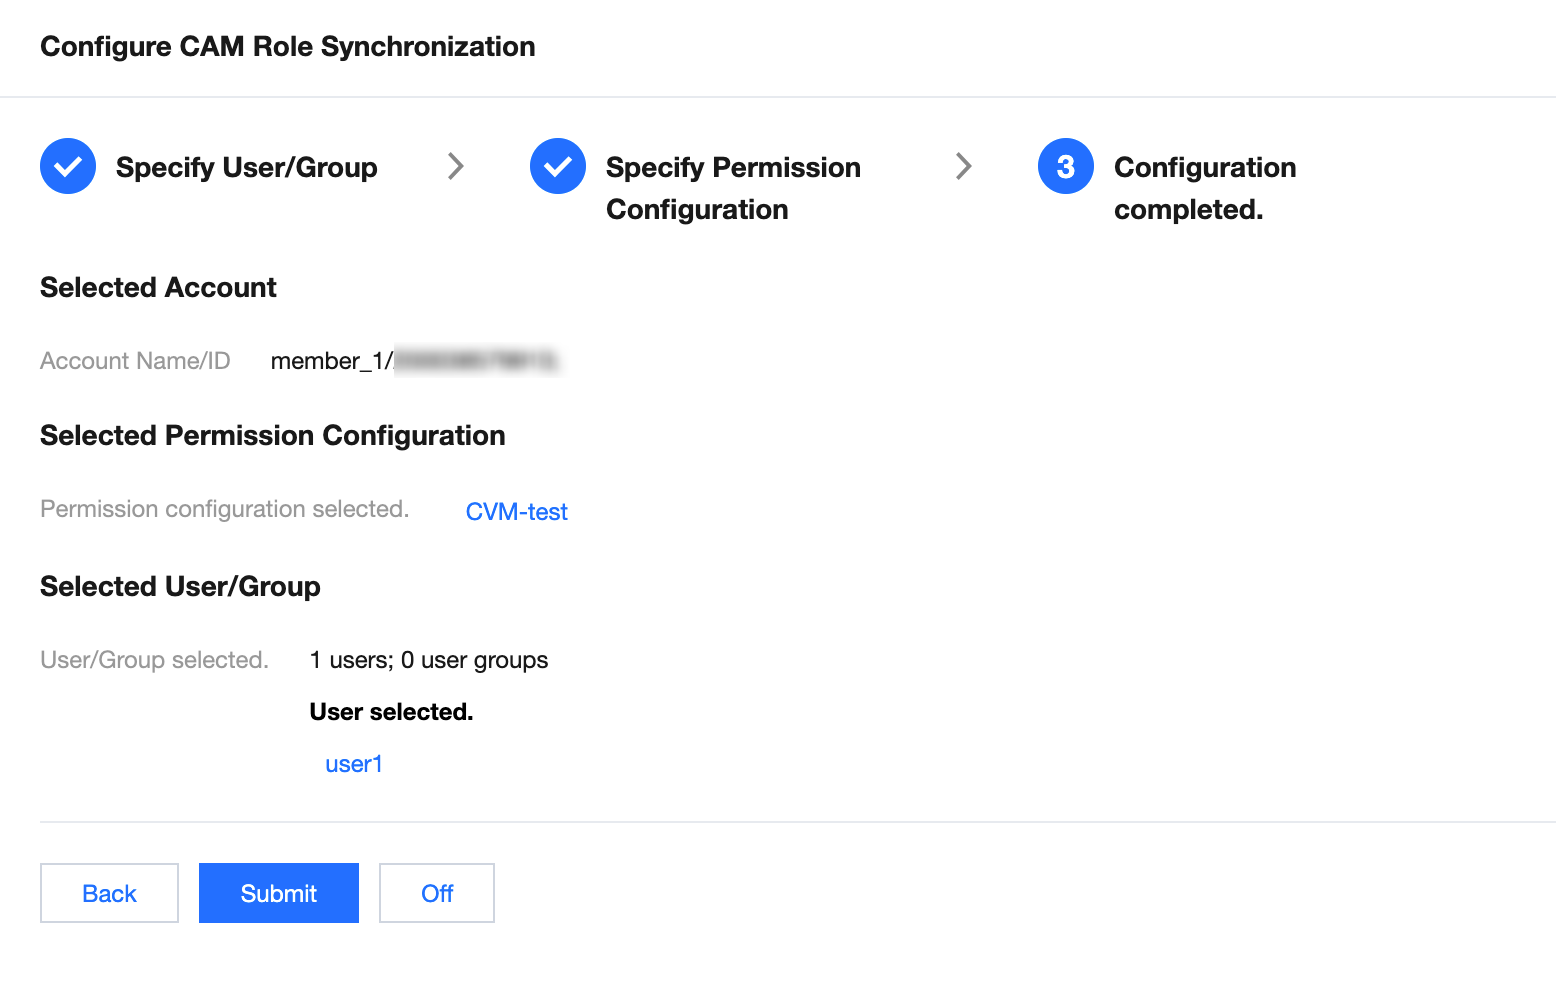
4. On the Configure CAM Role Synchronization page, select a target user or user group and then click Next.
Note:
In this example, a user (user1) is selected.
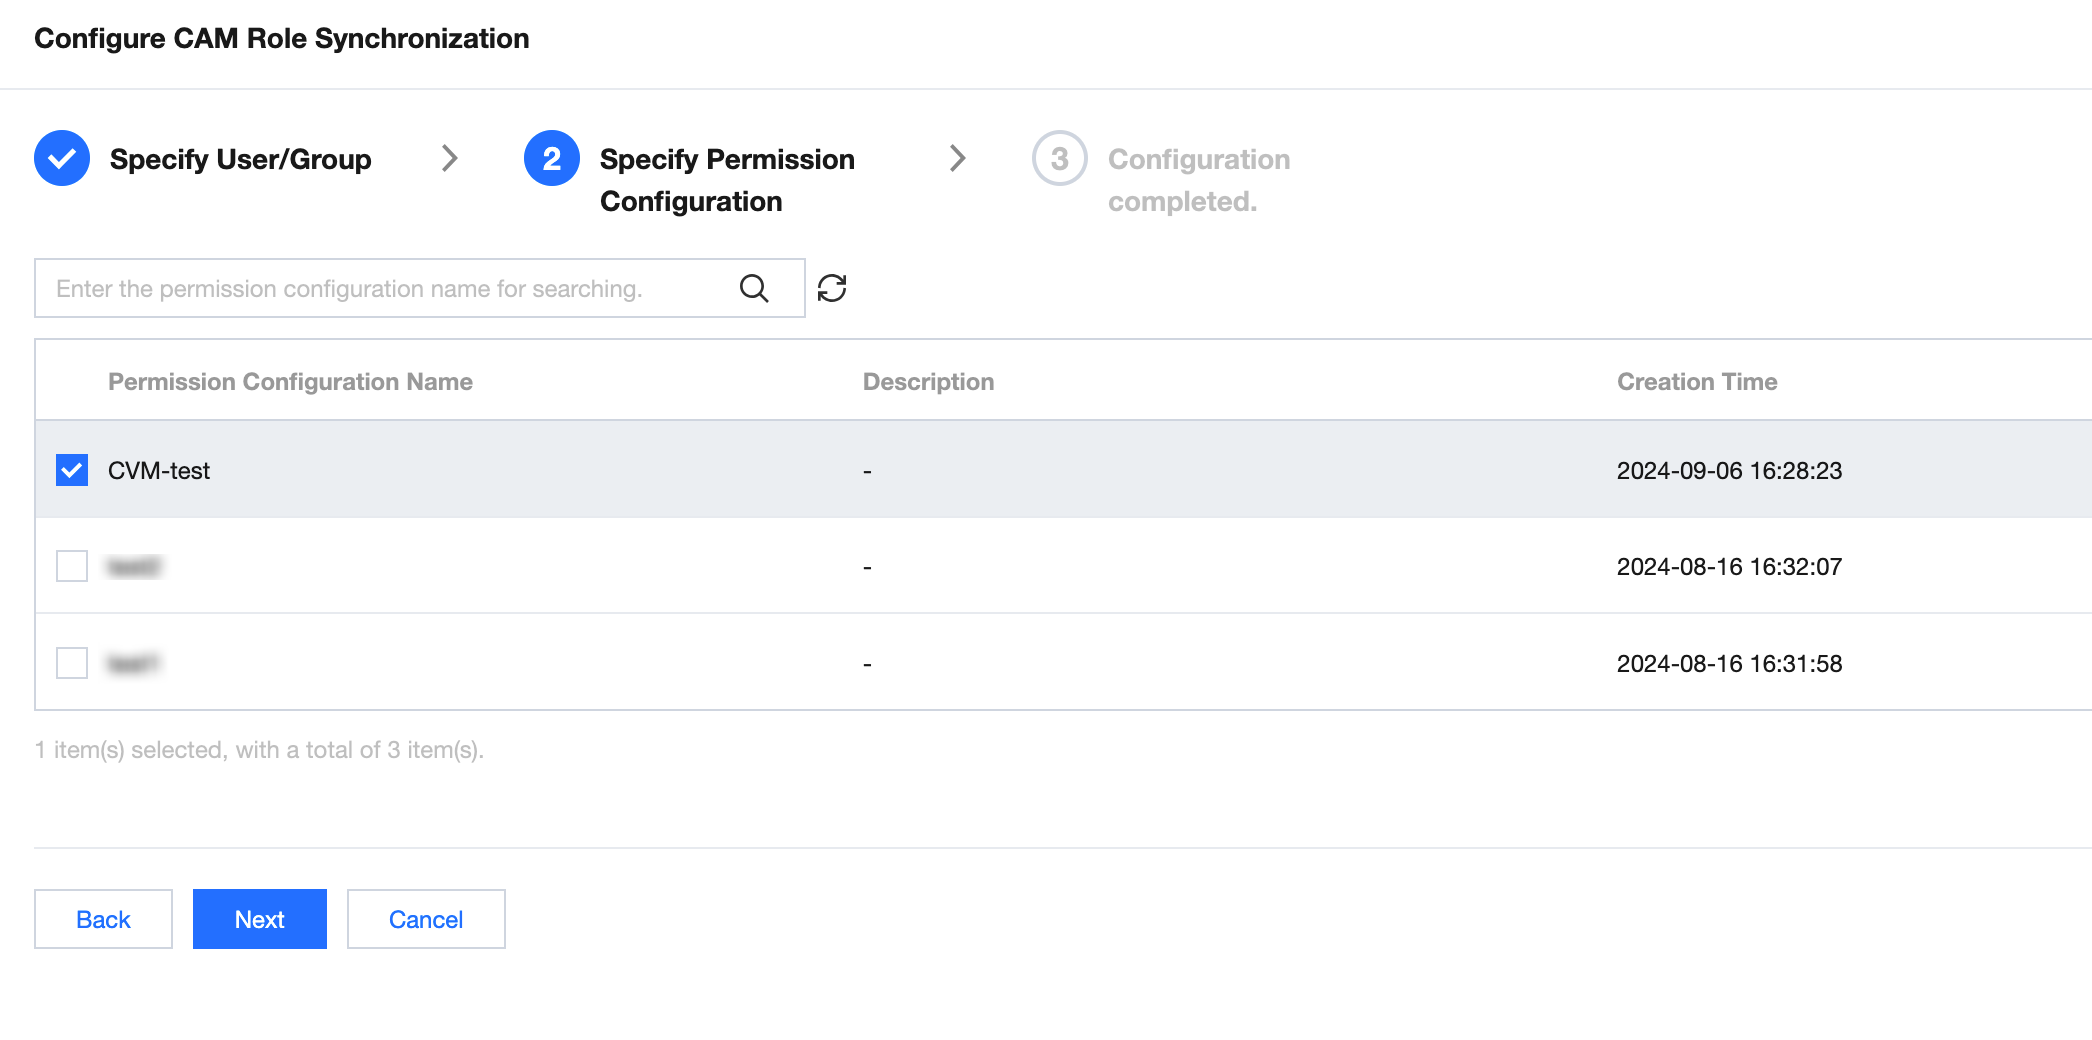
5. Select a target permission configuration and then click Next.
Note:
In this example, CVM-test is selected.
6. View the configuration information and then click Submit.
7. Wait for successful configuration and then click Complete.
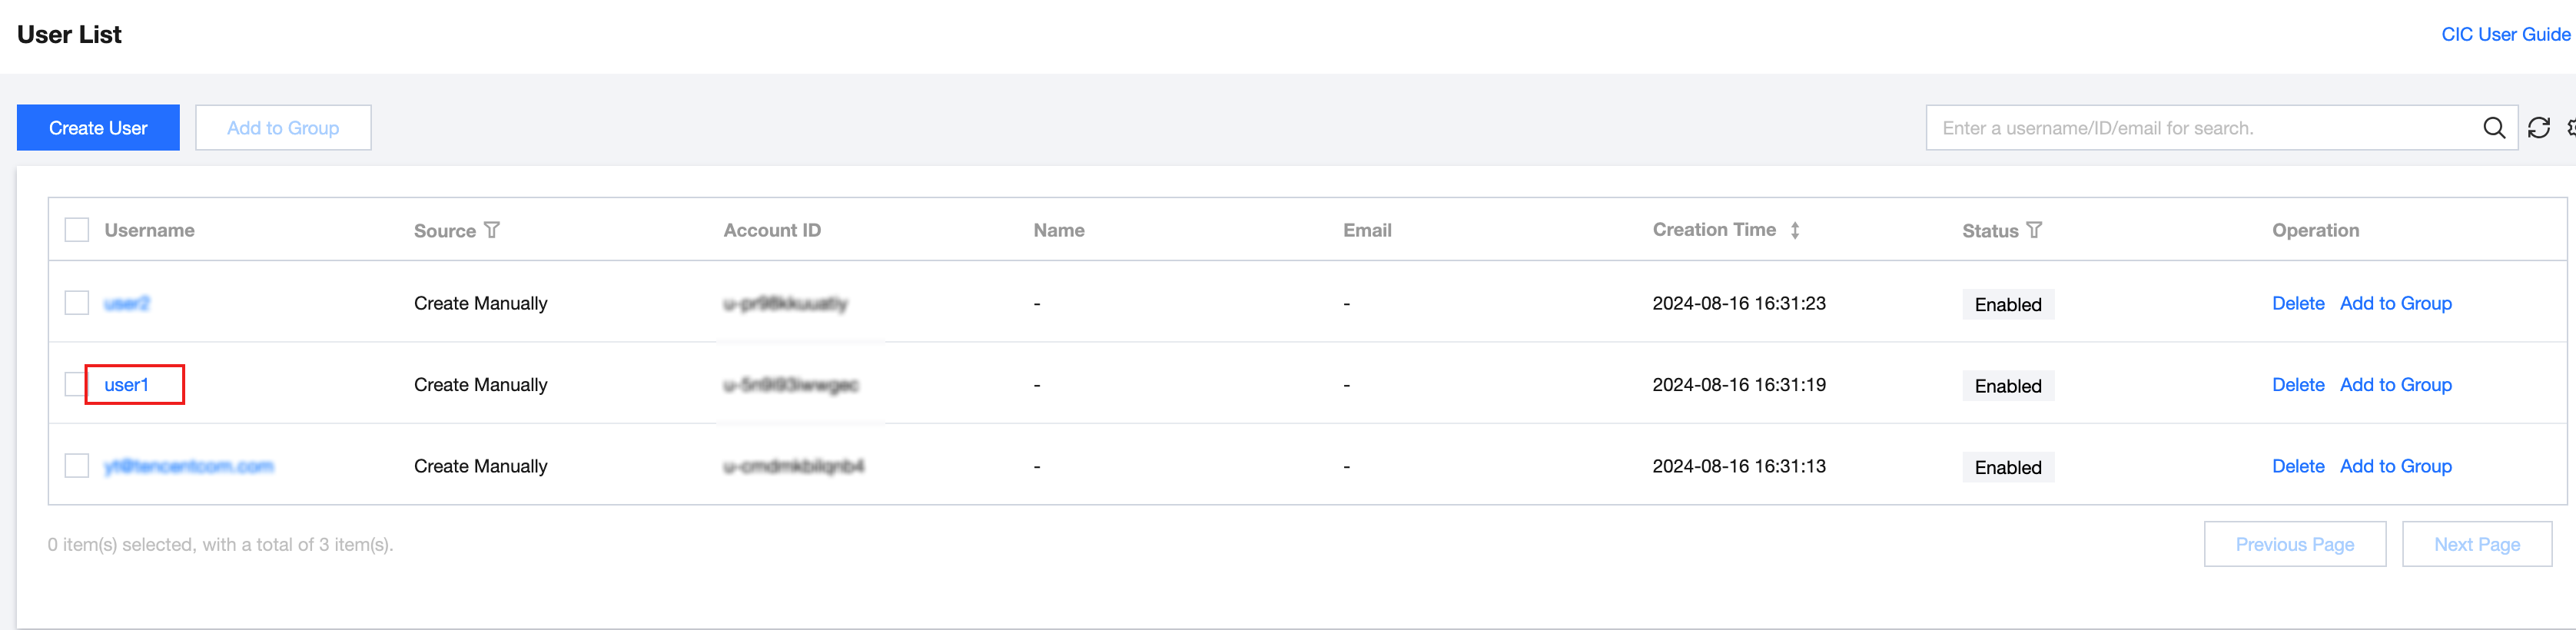
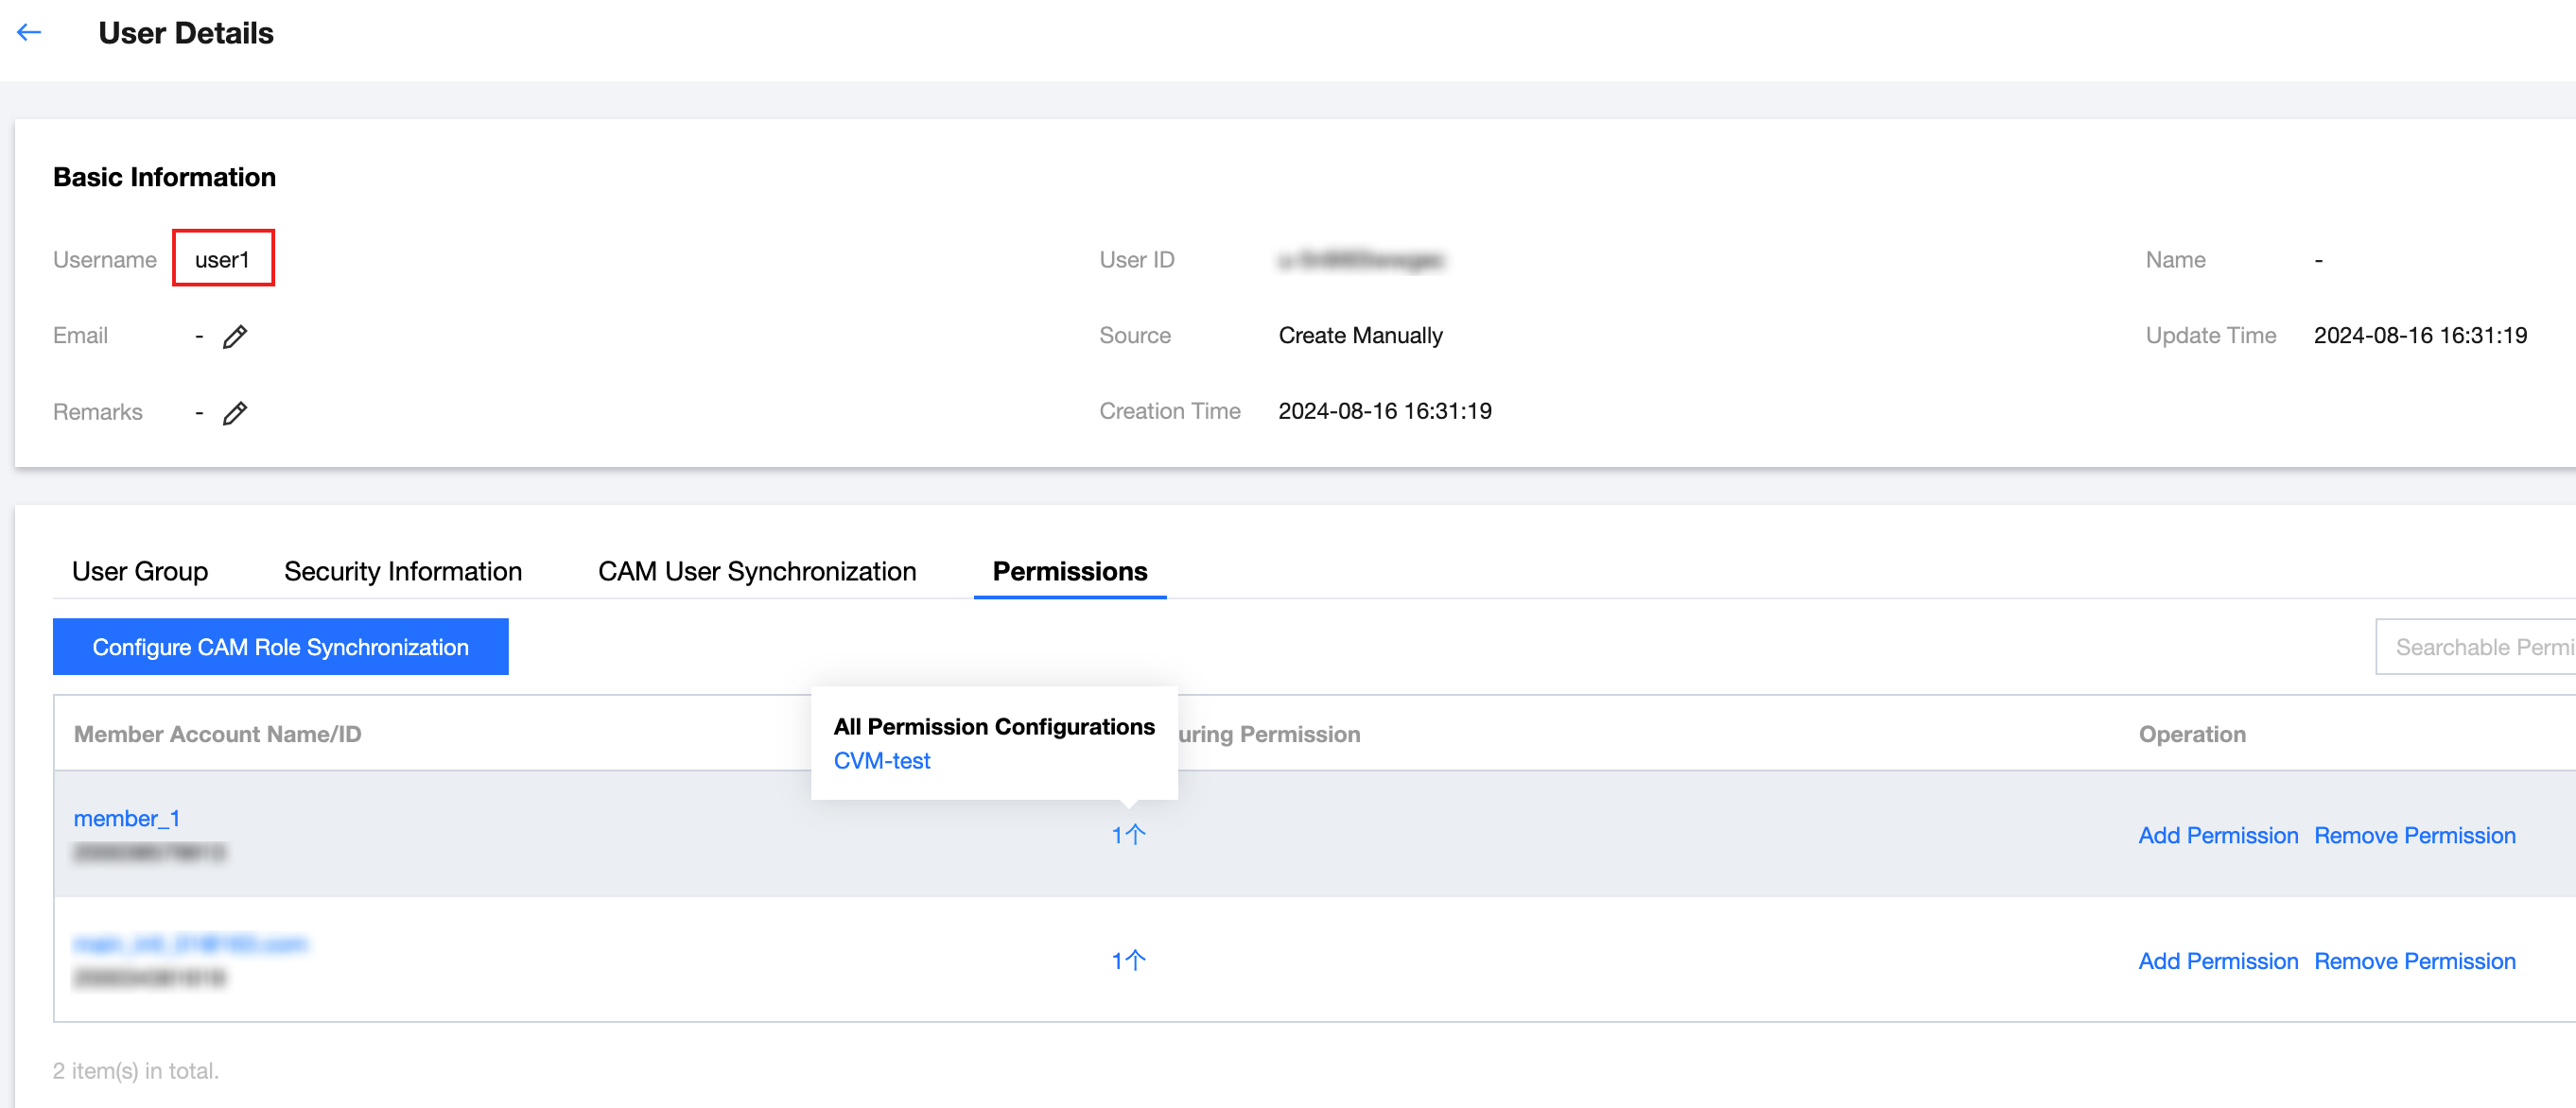
8. After the configuration is completed, you can click User Management > Users, enter the user details page of user1, and then select the Permissions tab to view the permissions.
Effect in CAM
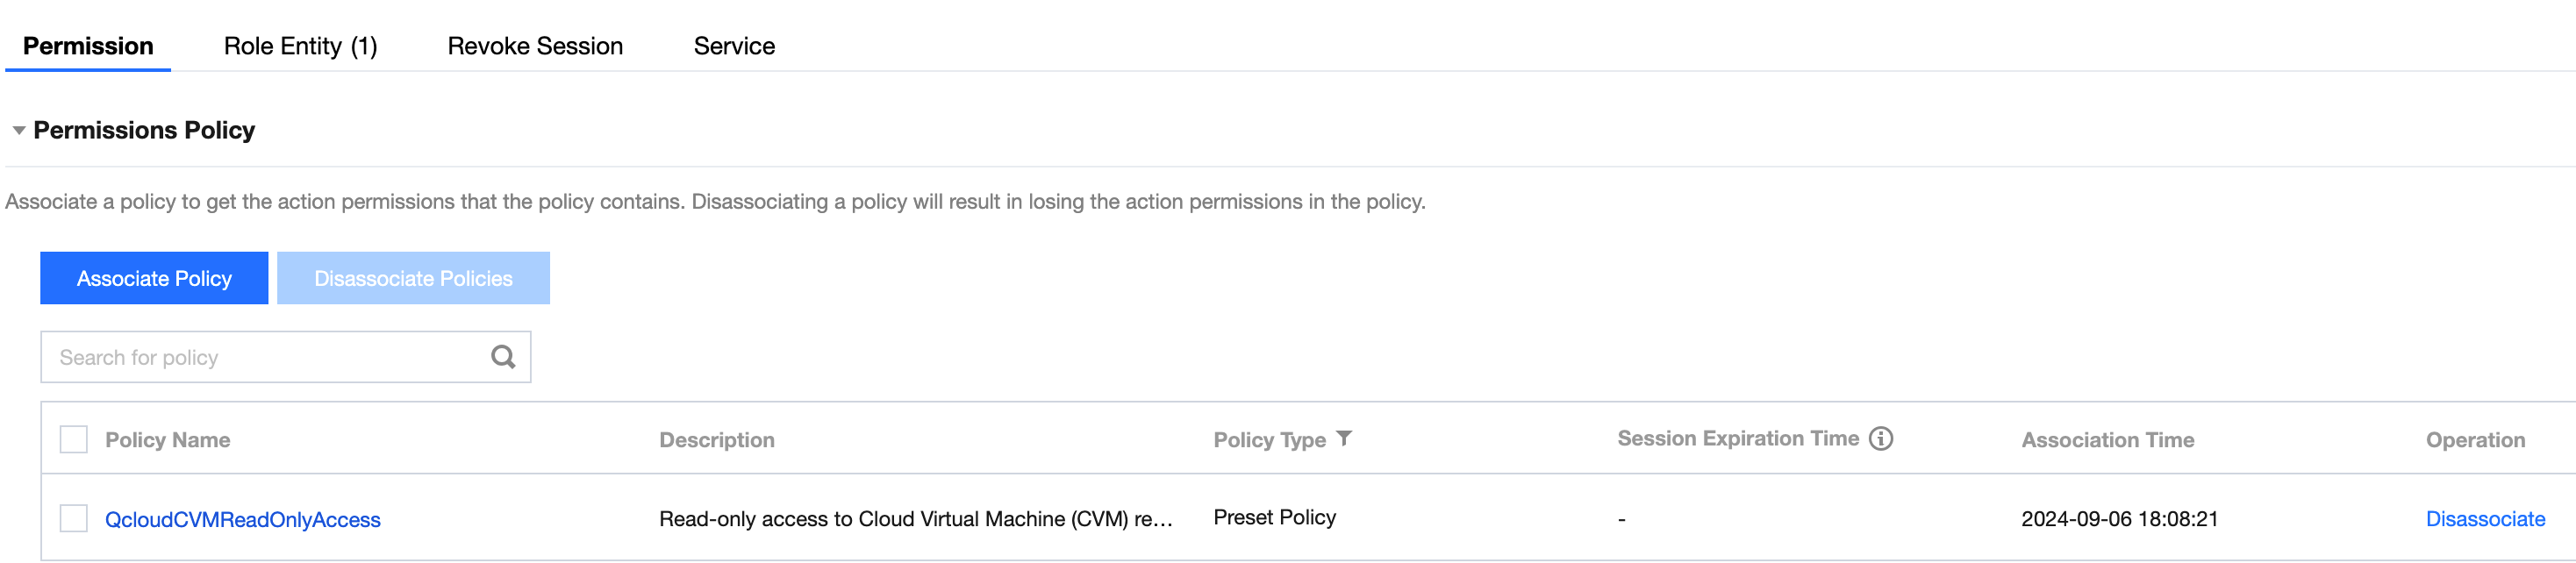
1. After the configuration is completed, the system will automatically create a role (TencentCloudSSO-CVM-test) in the member account (member1) through synchronization. You can enter the Roles page to view it.
2. On the Roles page, you can click a target role name to view associated policies.
Step 3: Logging In as a Role
Obtaining a User Login URL
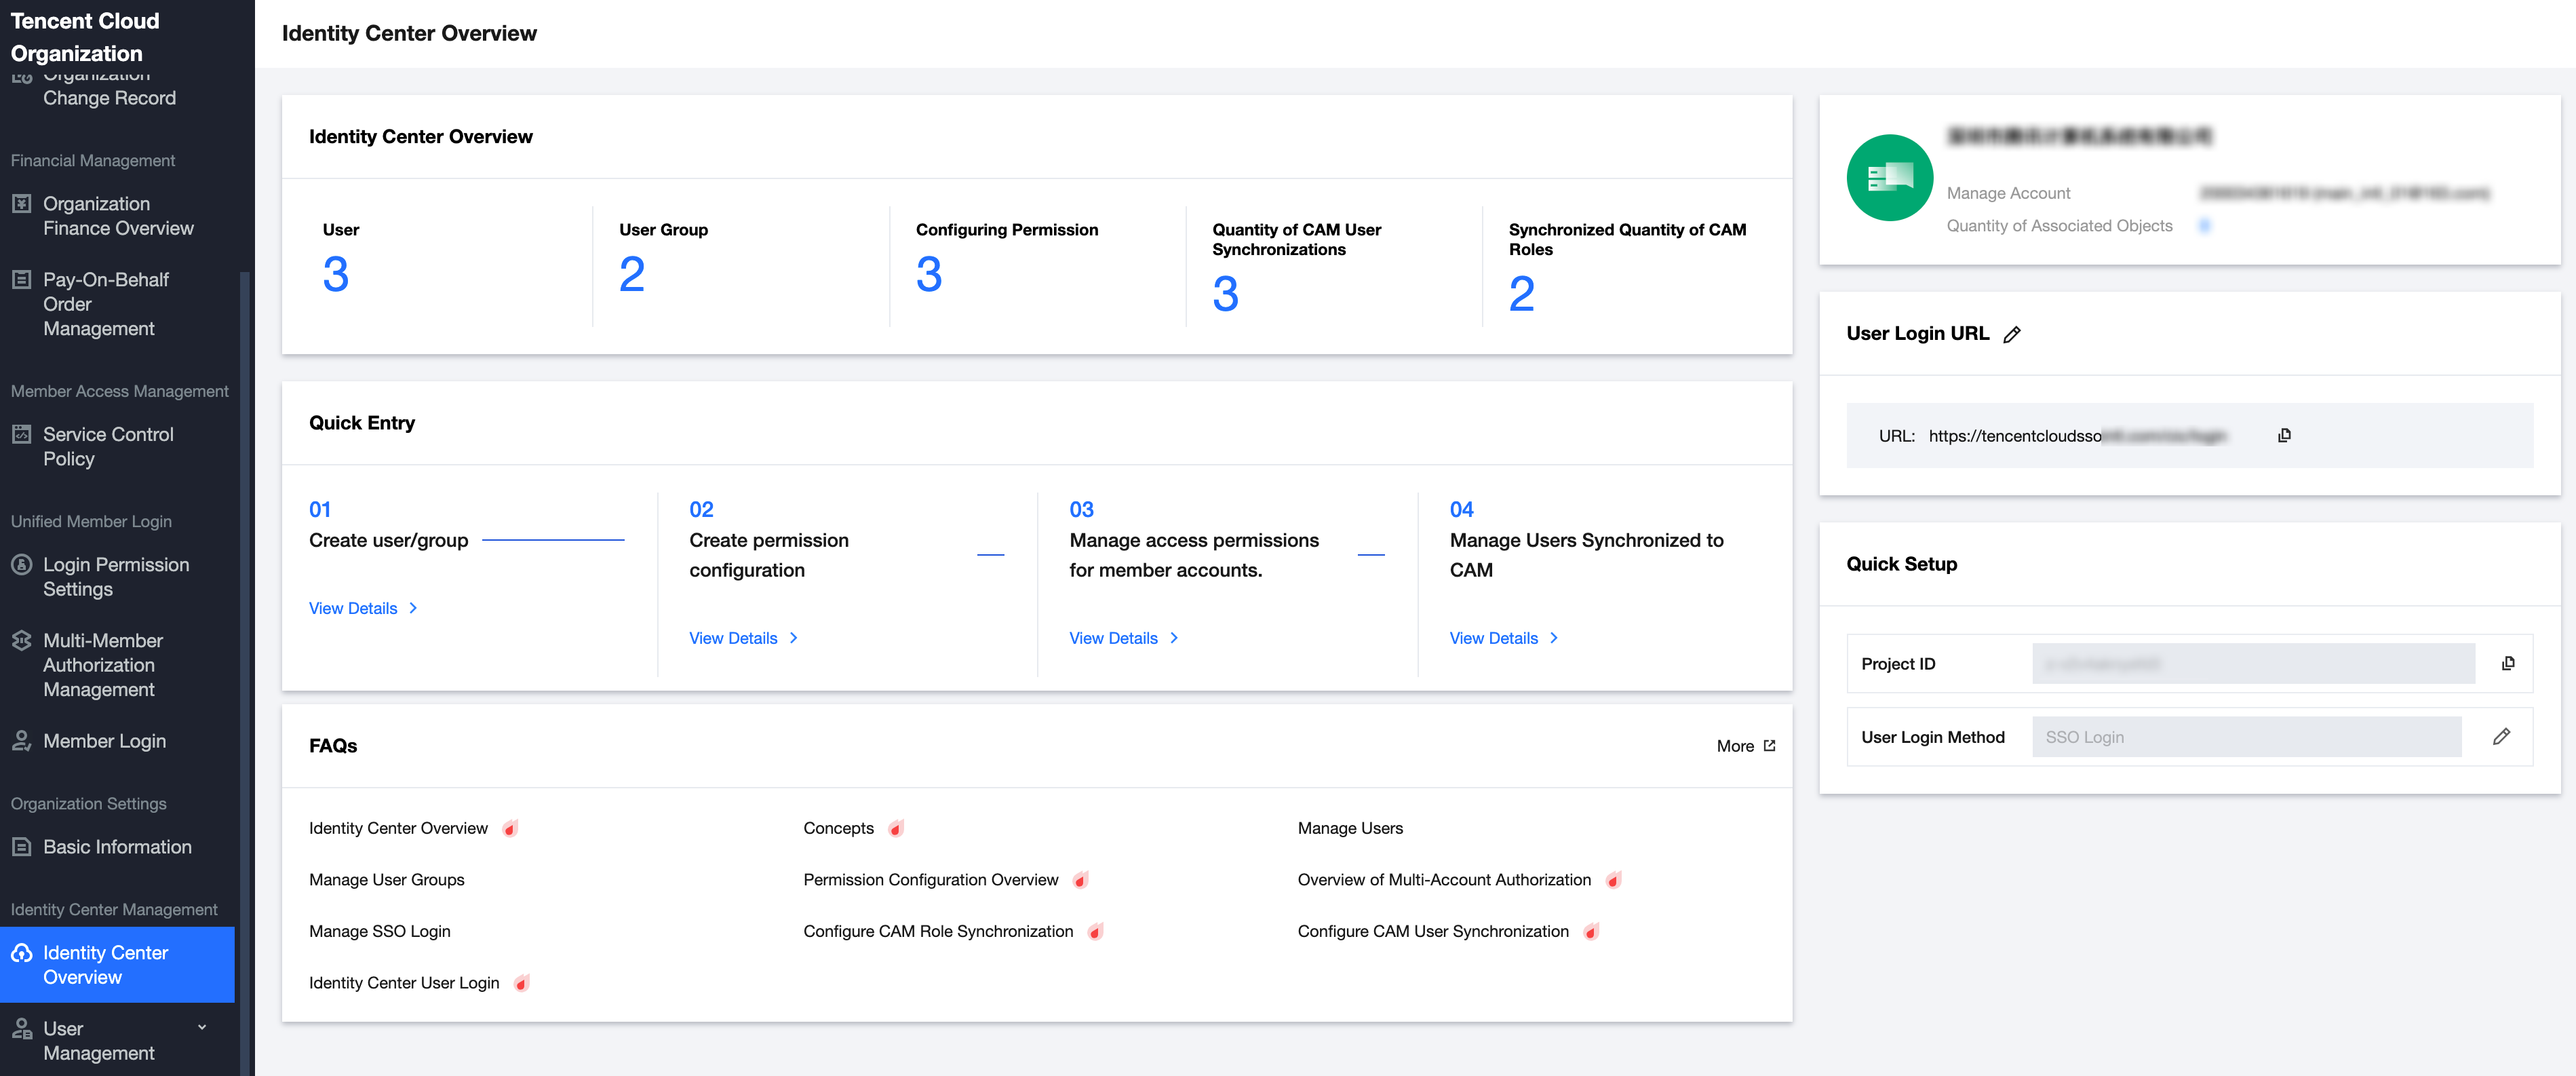
1. In the left sidebar, click Identity Center Overview.
2. On the right side of the overview page, view or copy the user login URL.
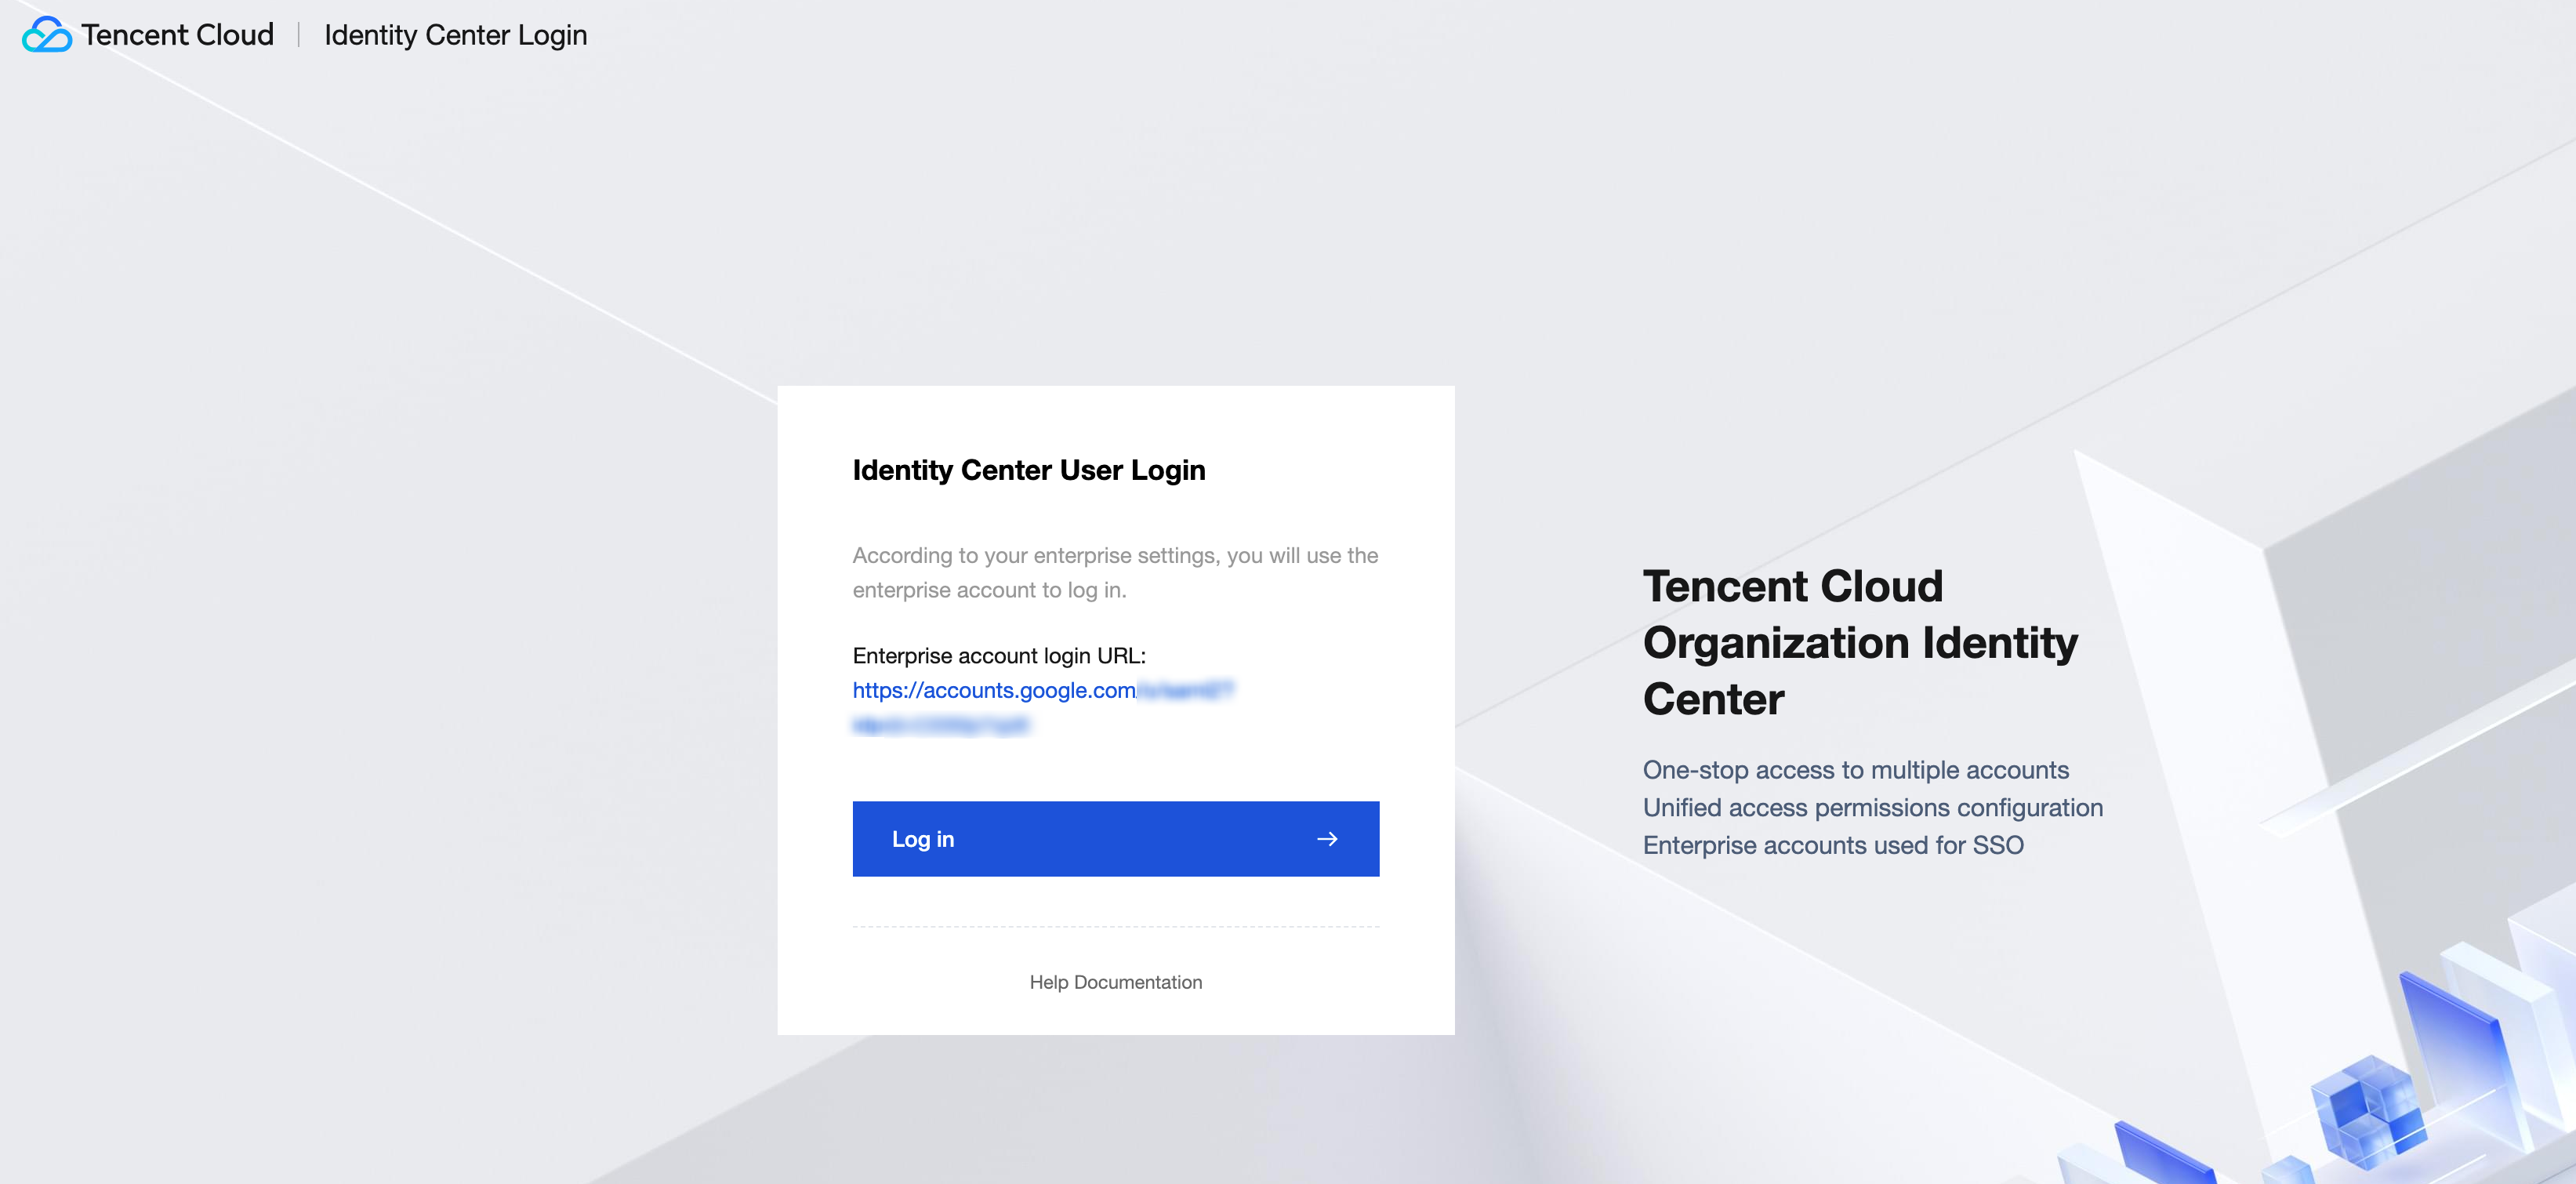
Accessing the User URL in the Browser
1. On the Identity Center login page, click Login.
Note:
Currently, only user-based SSO is supported. Account password login is not supported yet. You should configure SSO first.
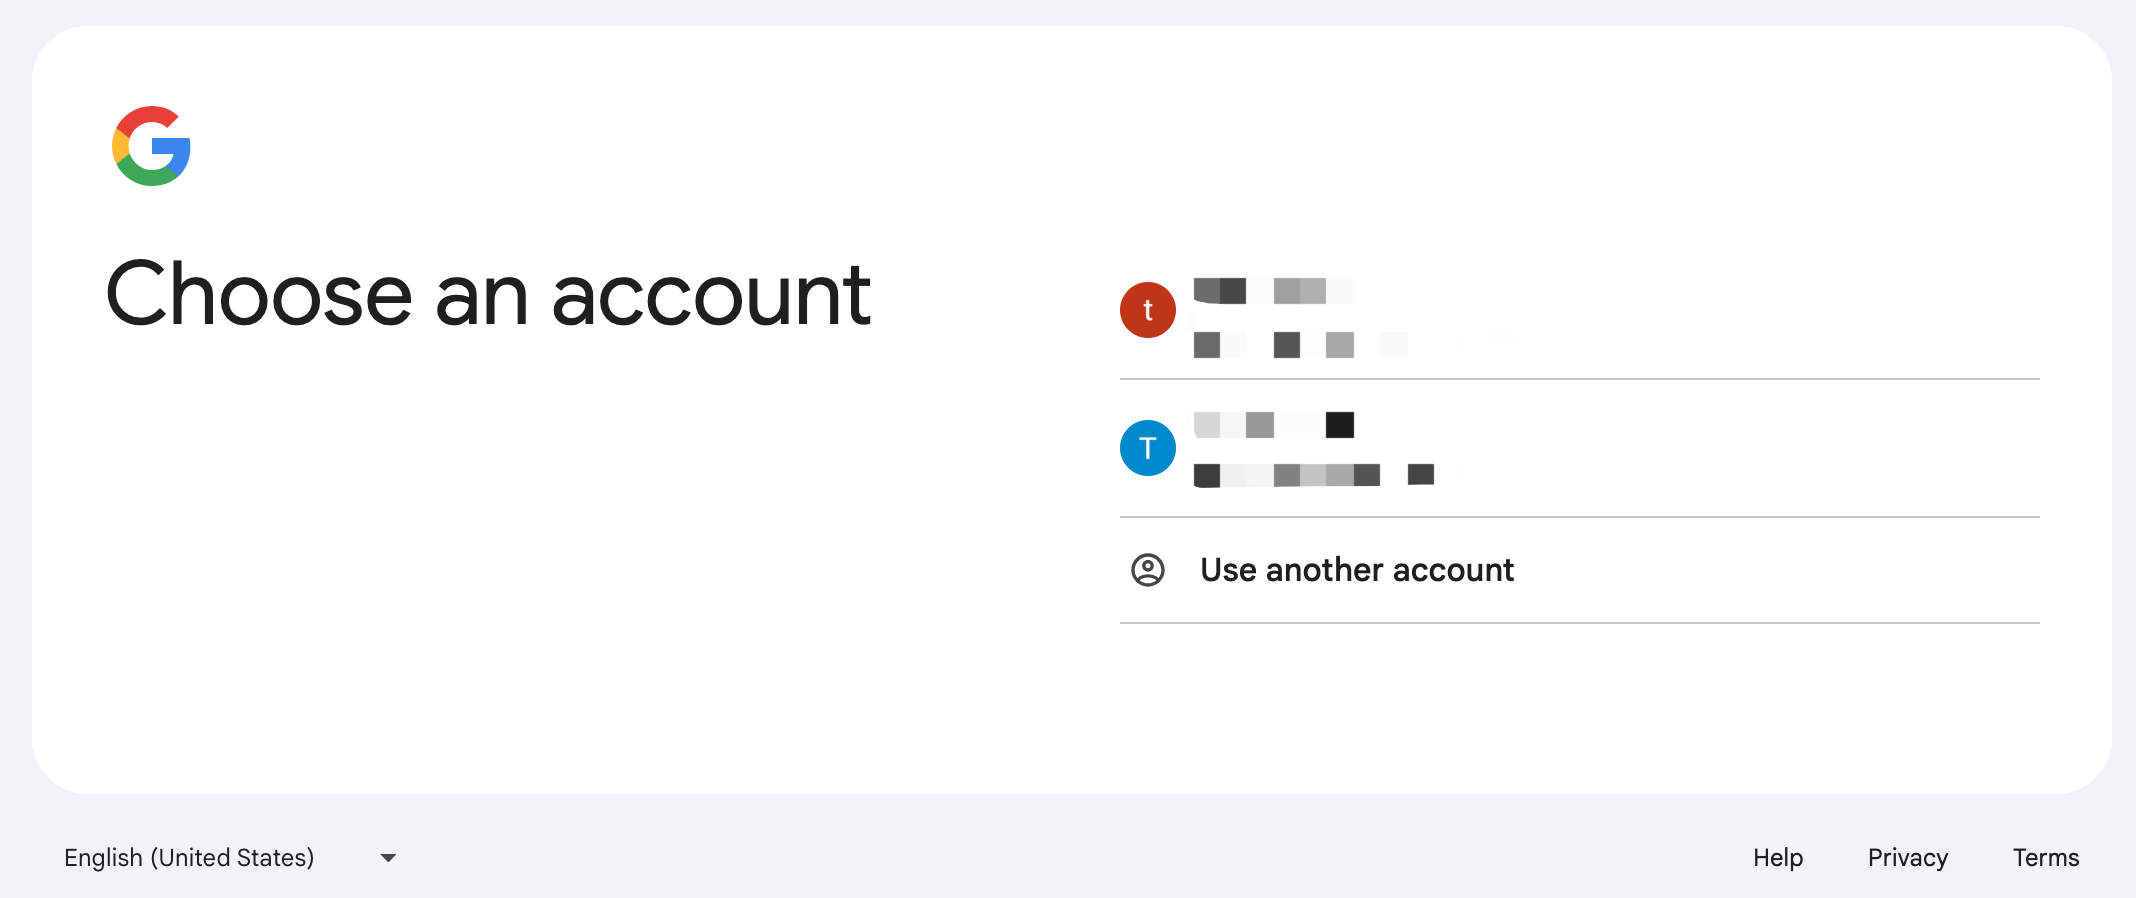
2. The system will automatically redirect to the **login page of an enterprise identity provider (IdP)**. Google IdP is used in this example.
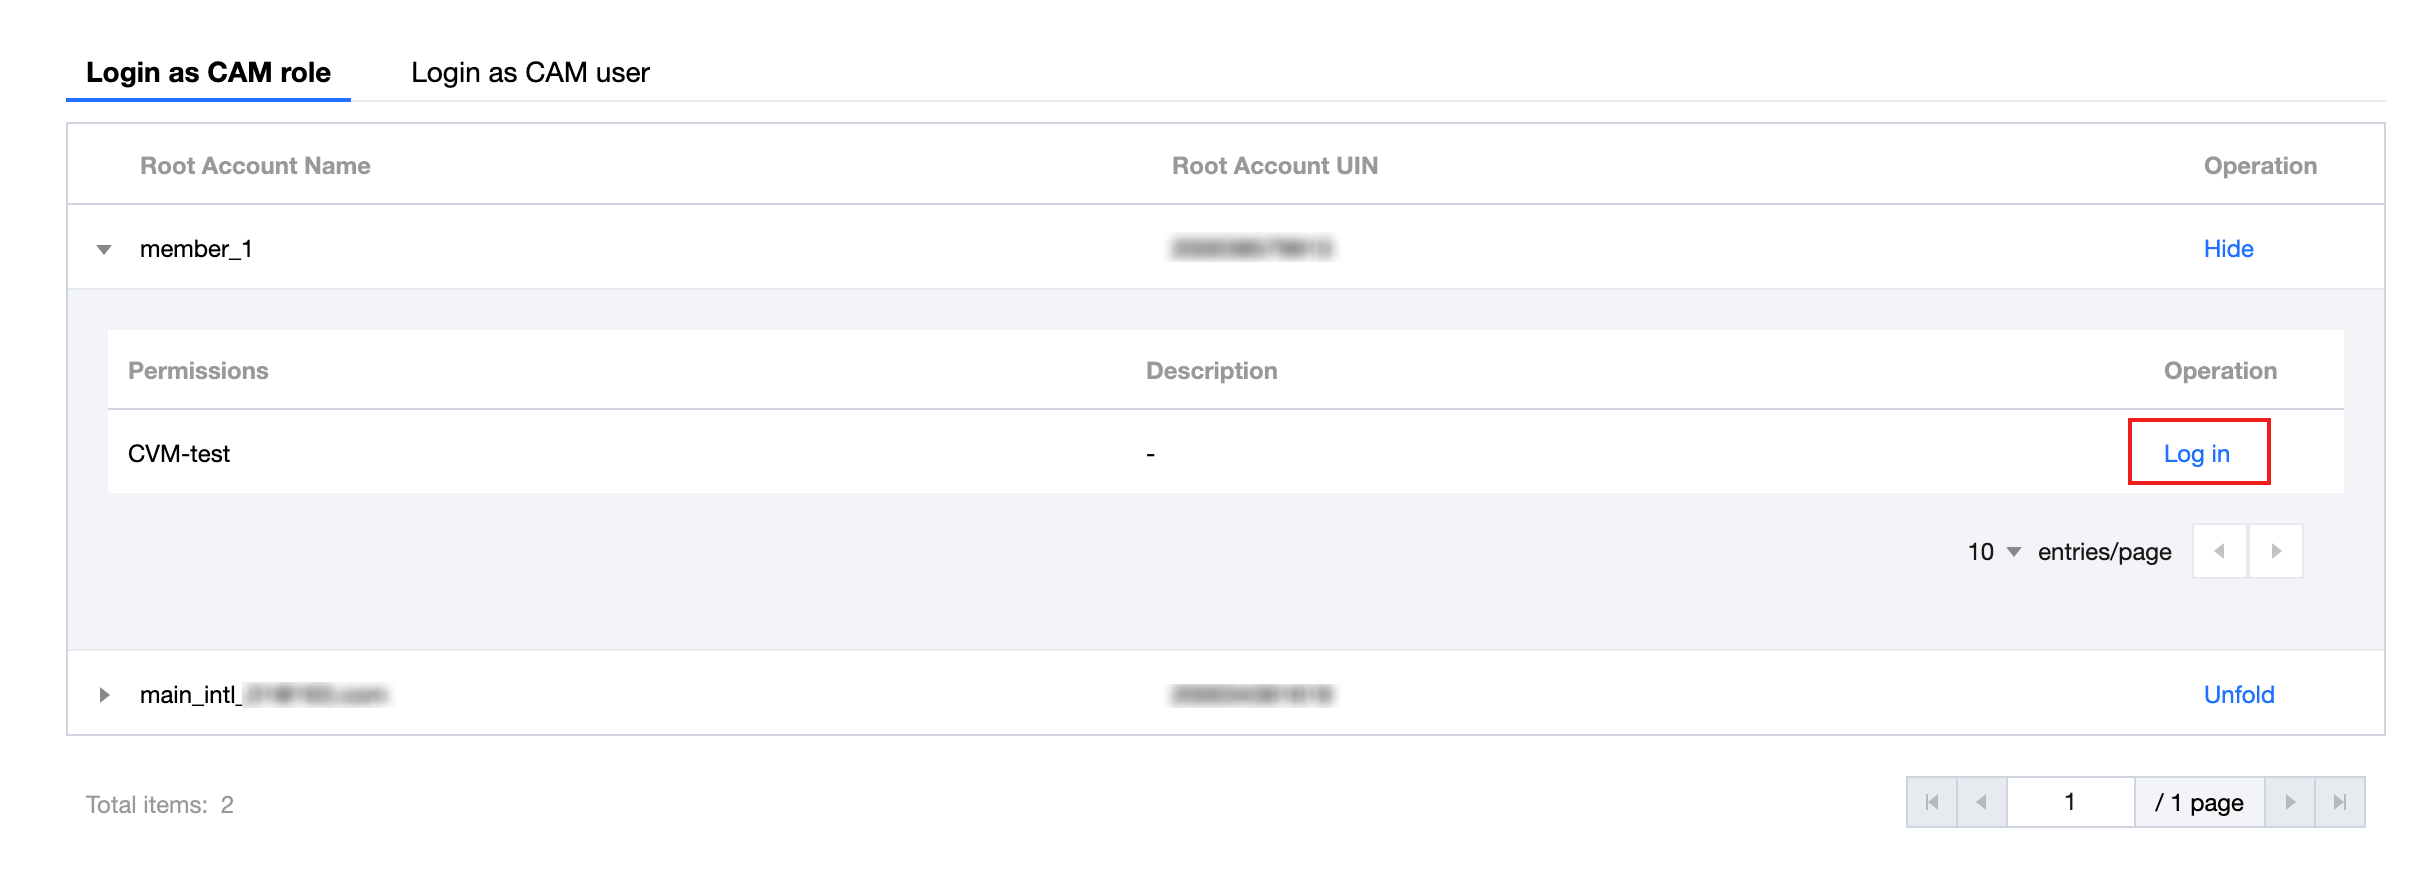
3. After verification is passed, click the Login as CAM Role tab, expand the member account (member_1) list, and select a permission (CVM-test) for login.