Overview
You can create integration apps to meet your integration needs. You can create multiple integration apps for different integration scenarios in each project.
After creating an integration app, you can view the project details or rename or delete the project.
- Project name: The list displays the names of all projects for which you have permissions.
Default project: All members have the permissions for the default project by default. You cannot add or delete members of the default project, or delete or rename the project. - Project admin: Up to three project admins are displayed.
- Description: You can enter text to briefly describe the project content so as to help members identify and understand the project.
- Project members: It is the number of project members.
- Creation time: It is the time when the project is first created.
- Operation: You can add members or rename or delete the project.
Prerequisites
You have created an integration app.
Directions
Adding a project
You can manage integration apps by project for business scenario identification and permission assignment. You can view the details of, rename, and delete projects.
- Log in to the iPaaS console and click Management center > Project management on the left sidebar.
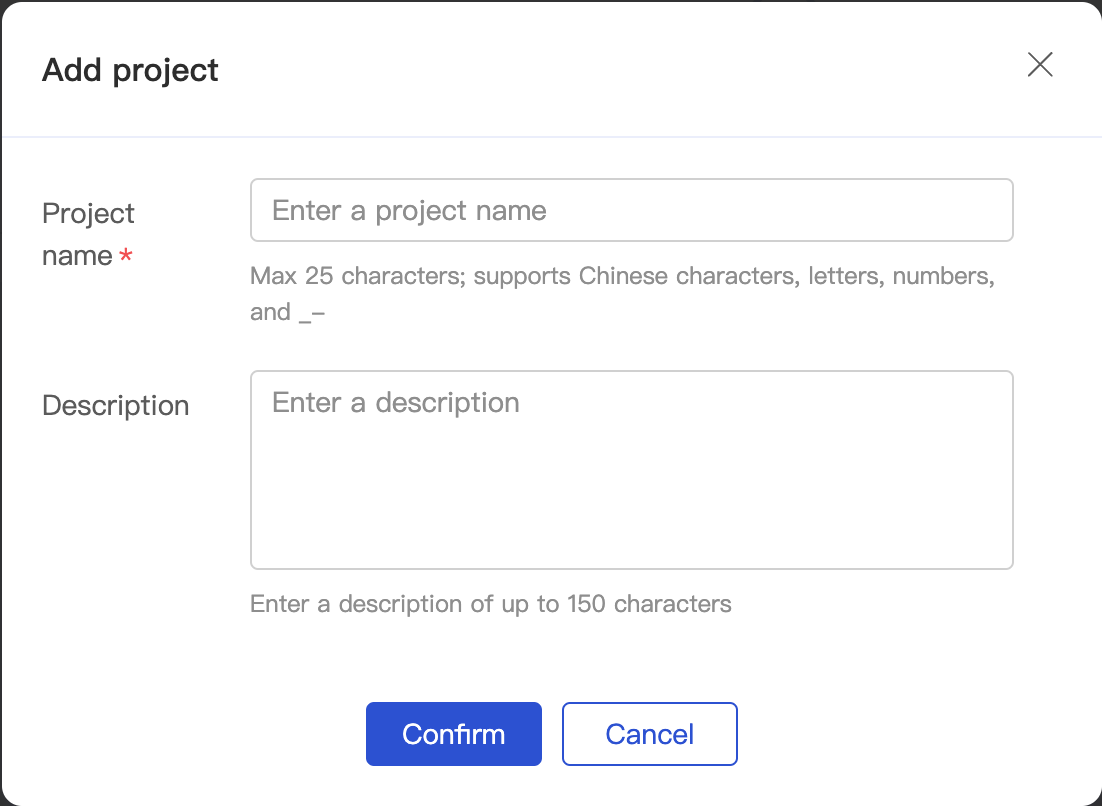
- On the Project management page, click Add project.
- Enter a project name and description and click Confirm.
Deleting a project
If you no longer use a project, you can stop all apps in it and then delete it.
Note:A project with running apps cannot be deleted. Once a project is deleted, its data cannot be recovered, so proceed with caution.
- Log in to the iPaaS console and click Management center > Project management on the left sidebar.
- On the Project management page, click Delete in the Operation column. In the pop-up window, click Confirm.

Viewing a project
- Log in to the iPaaS console and click Management center > Project management on the left sidebar.
- On the Project management page, click the name of the target project to enter the Project details page.
The Project details page displays the lists of integration apps, connections, security gateways, and custom errors under the project. You can click the target tab to quickly enter the editing page.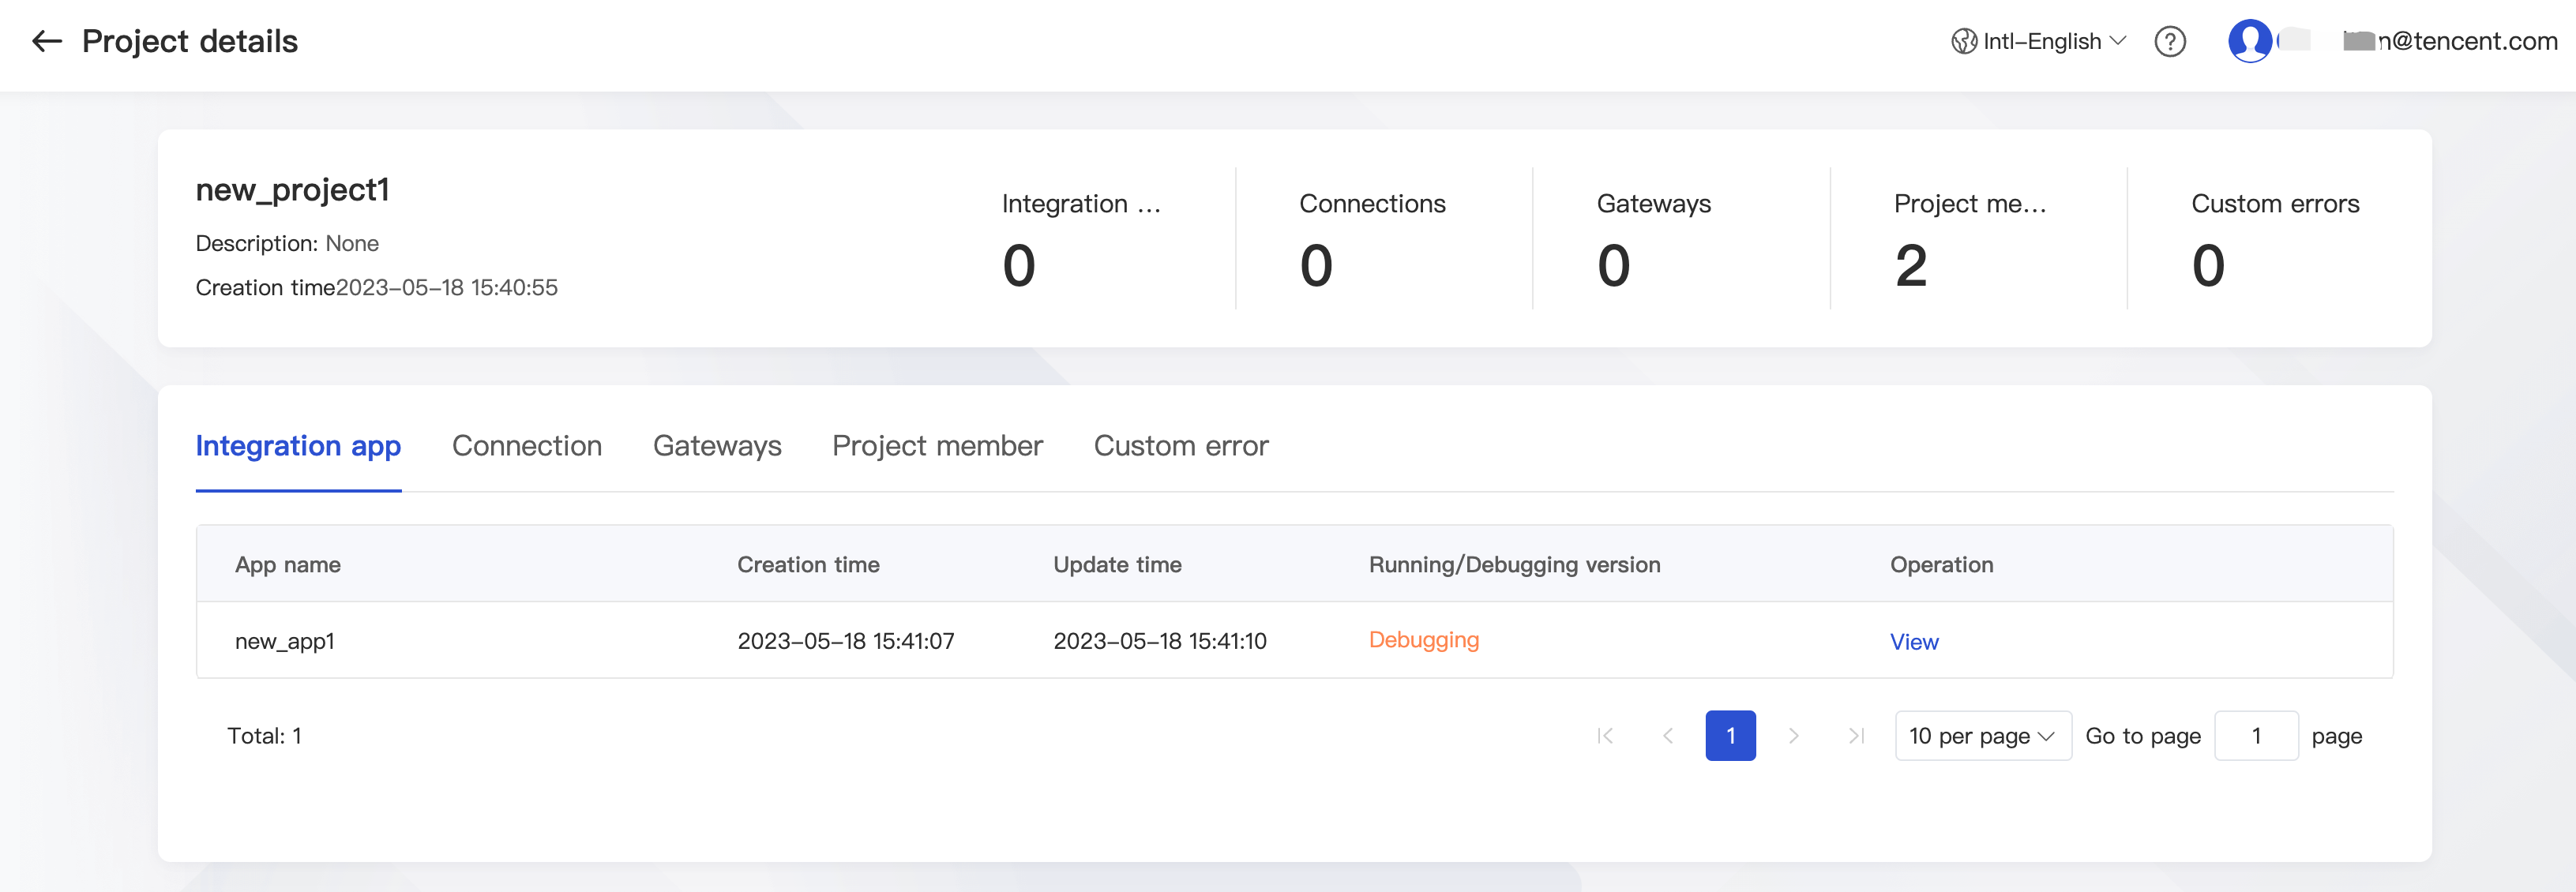
Member management
You can manage project members for collaborative development, Ops, and publishing by adding or deleting members. The list of members who can be added or deleted are from the member management module.
System and project admins can add or delete general members in the project, set or unset general members as the project admin, and modify the read-only, edit, and edit and publish permissions of general members for integration apps under the project.
iPaaS has a default project, for which all iPaaS members have permissions. In the default project, you cannot add or delete members, so the member management operation is not supported for the default project.
- Log in to the iPaaS console, click Management center > Project management on the left sidebar, and select Member management.

- Add a member.
You can add only members of existing sub-users in CAM.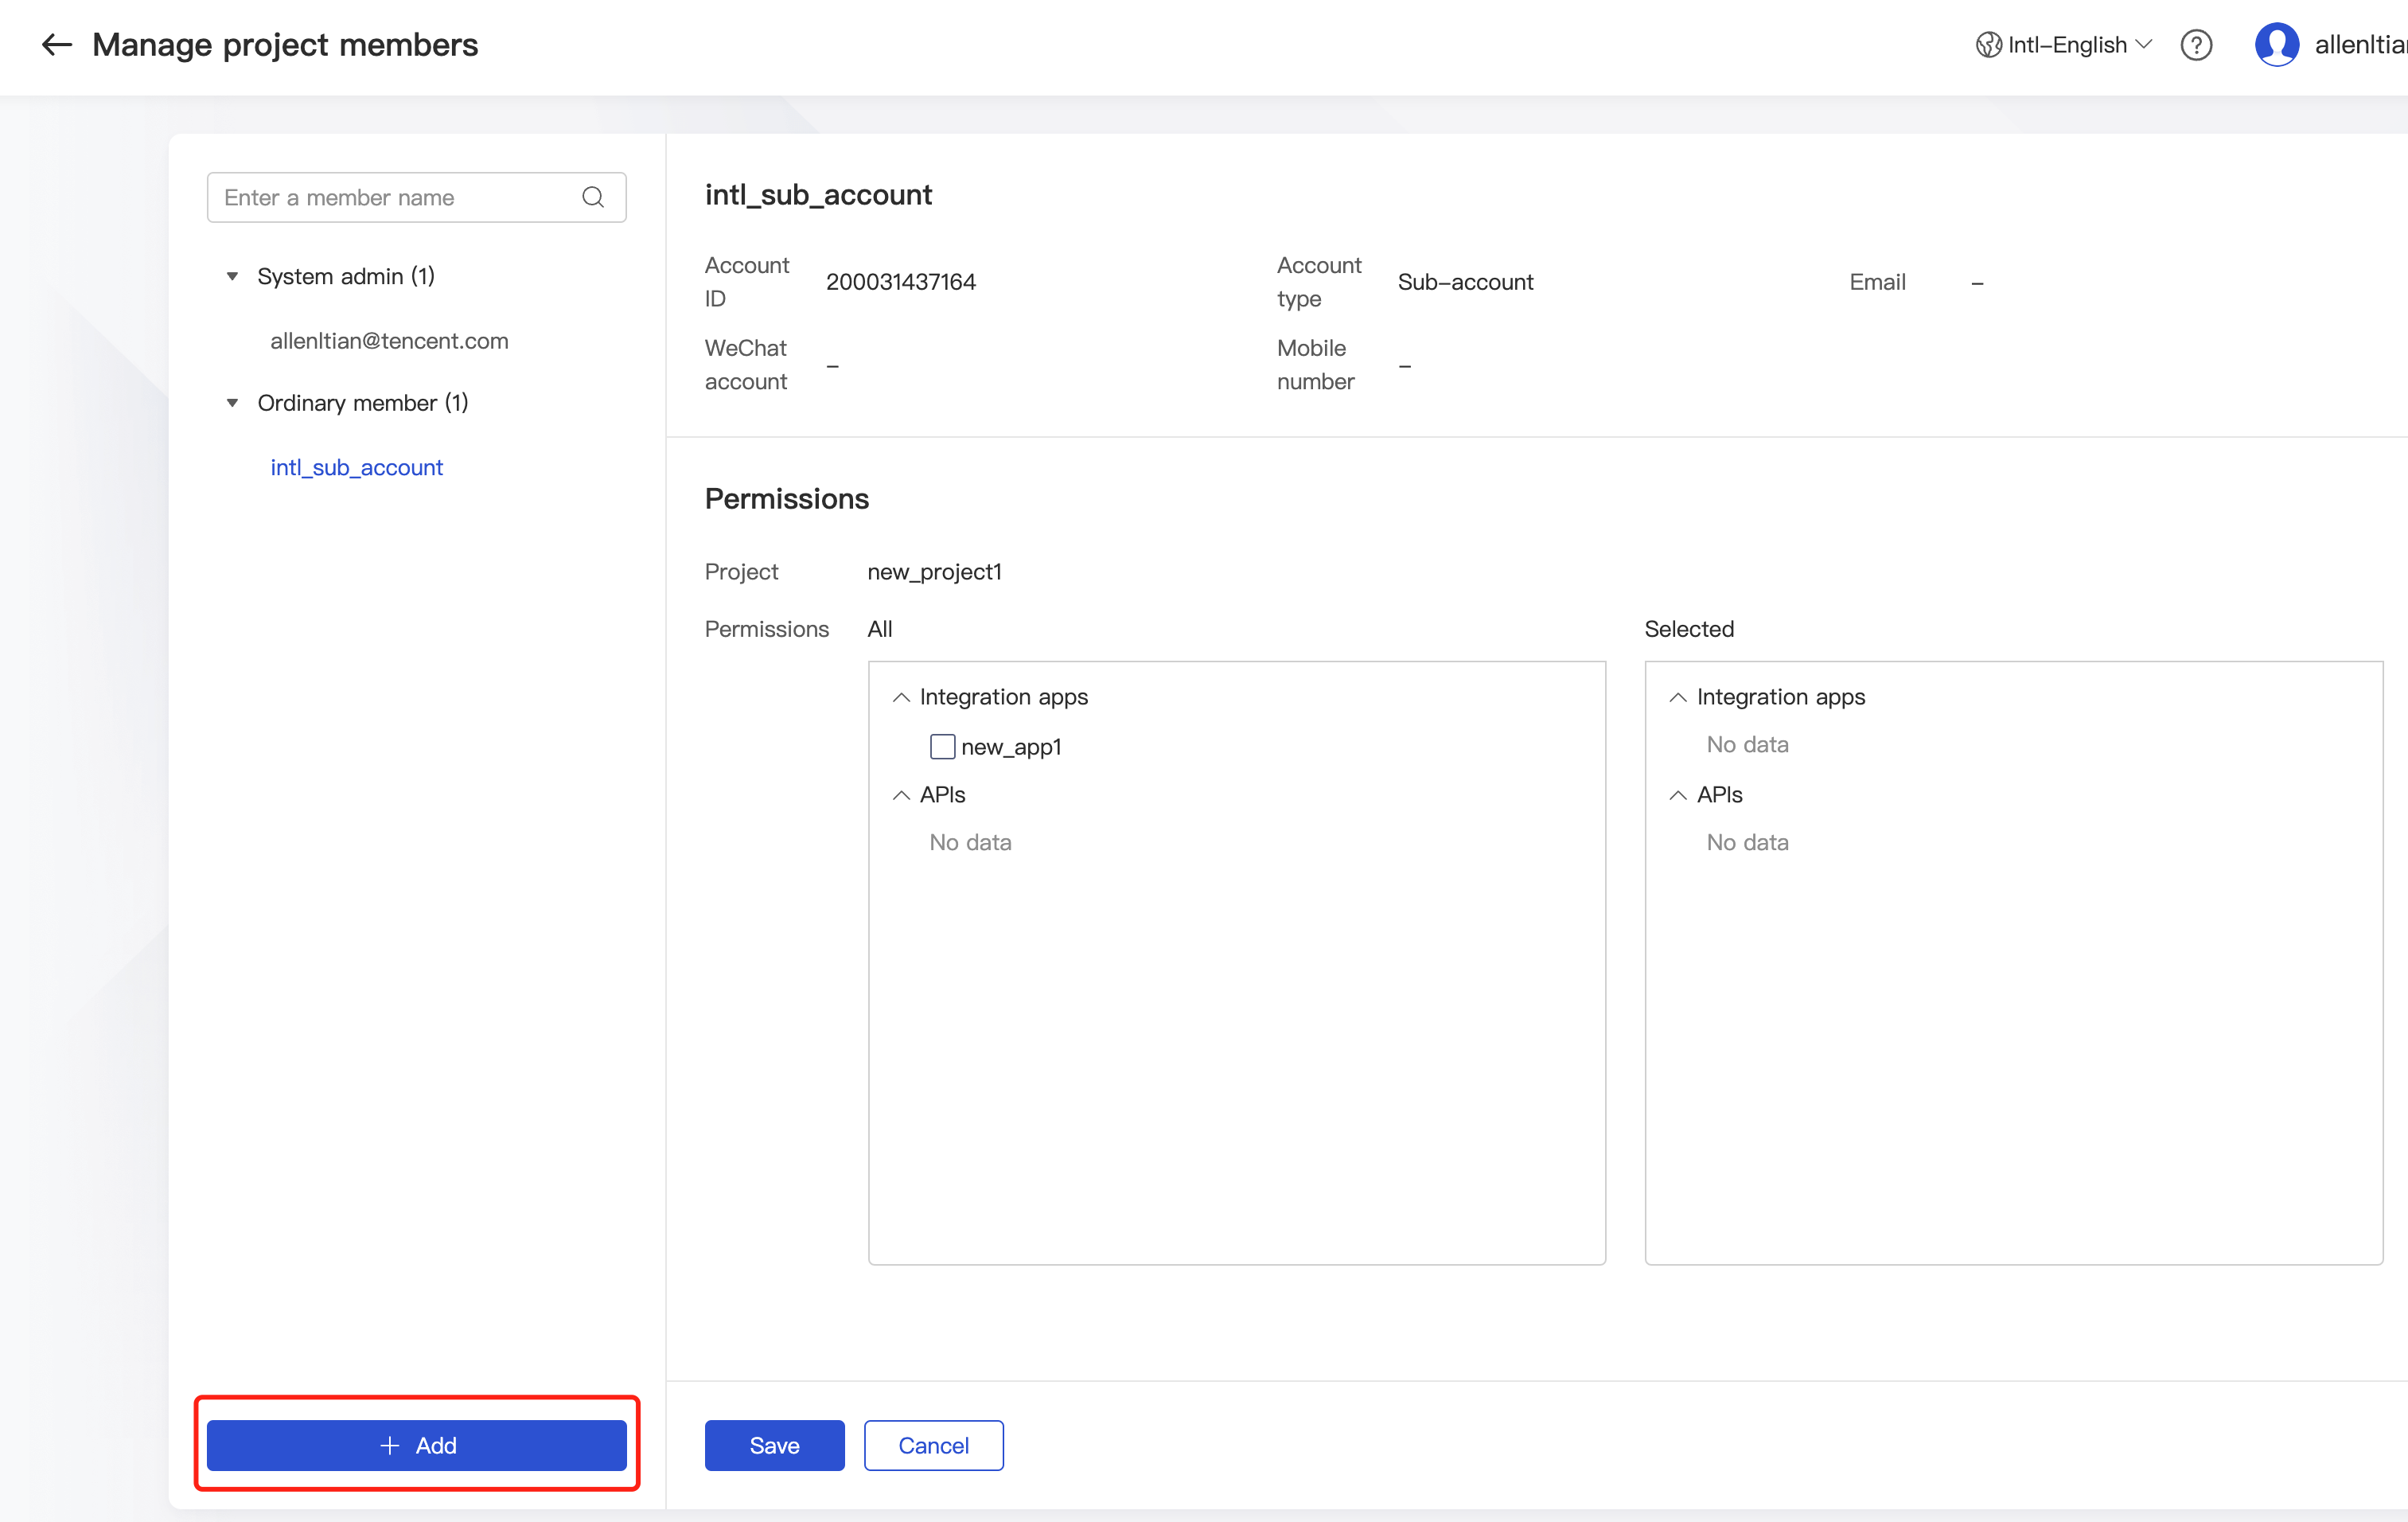
- Configure member permissions.
Grant the member the read-only, edit, or edit and publish permission for apps in the project.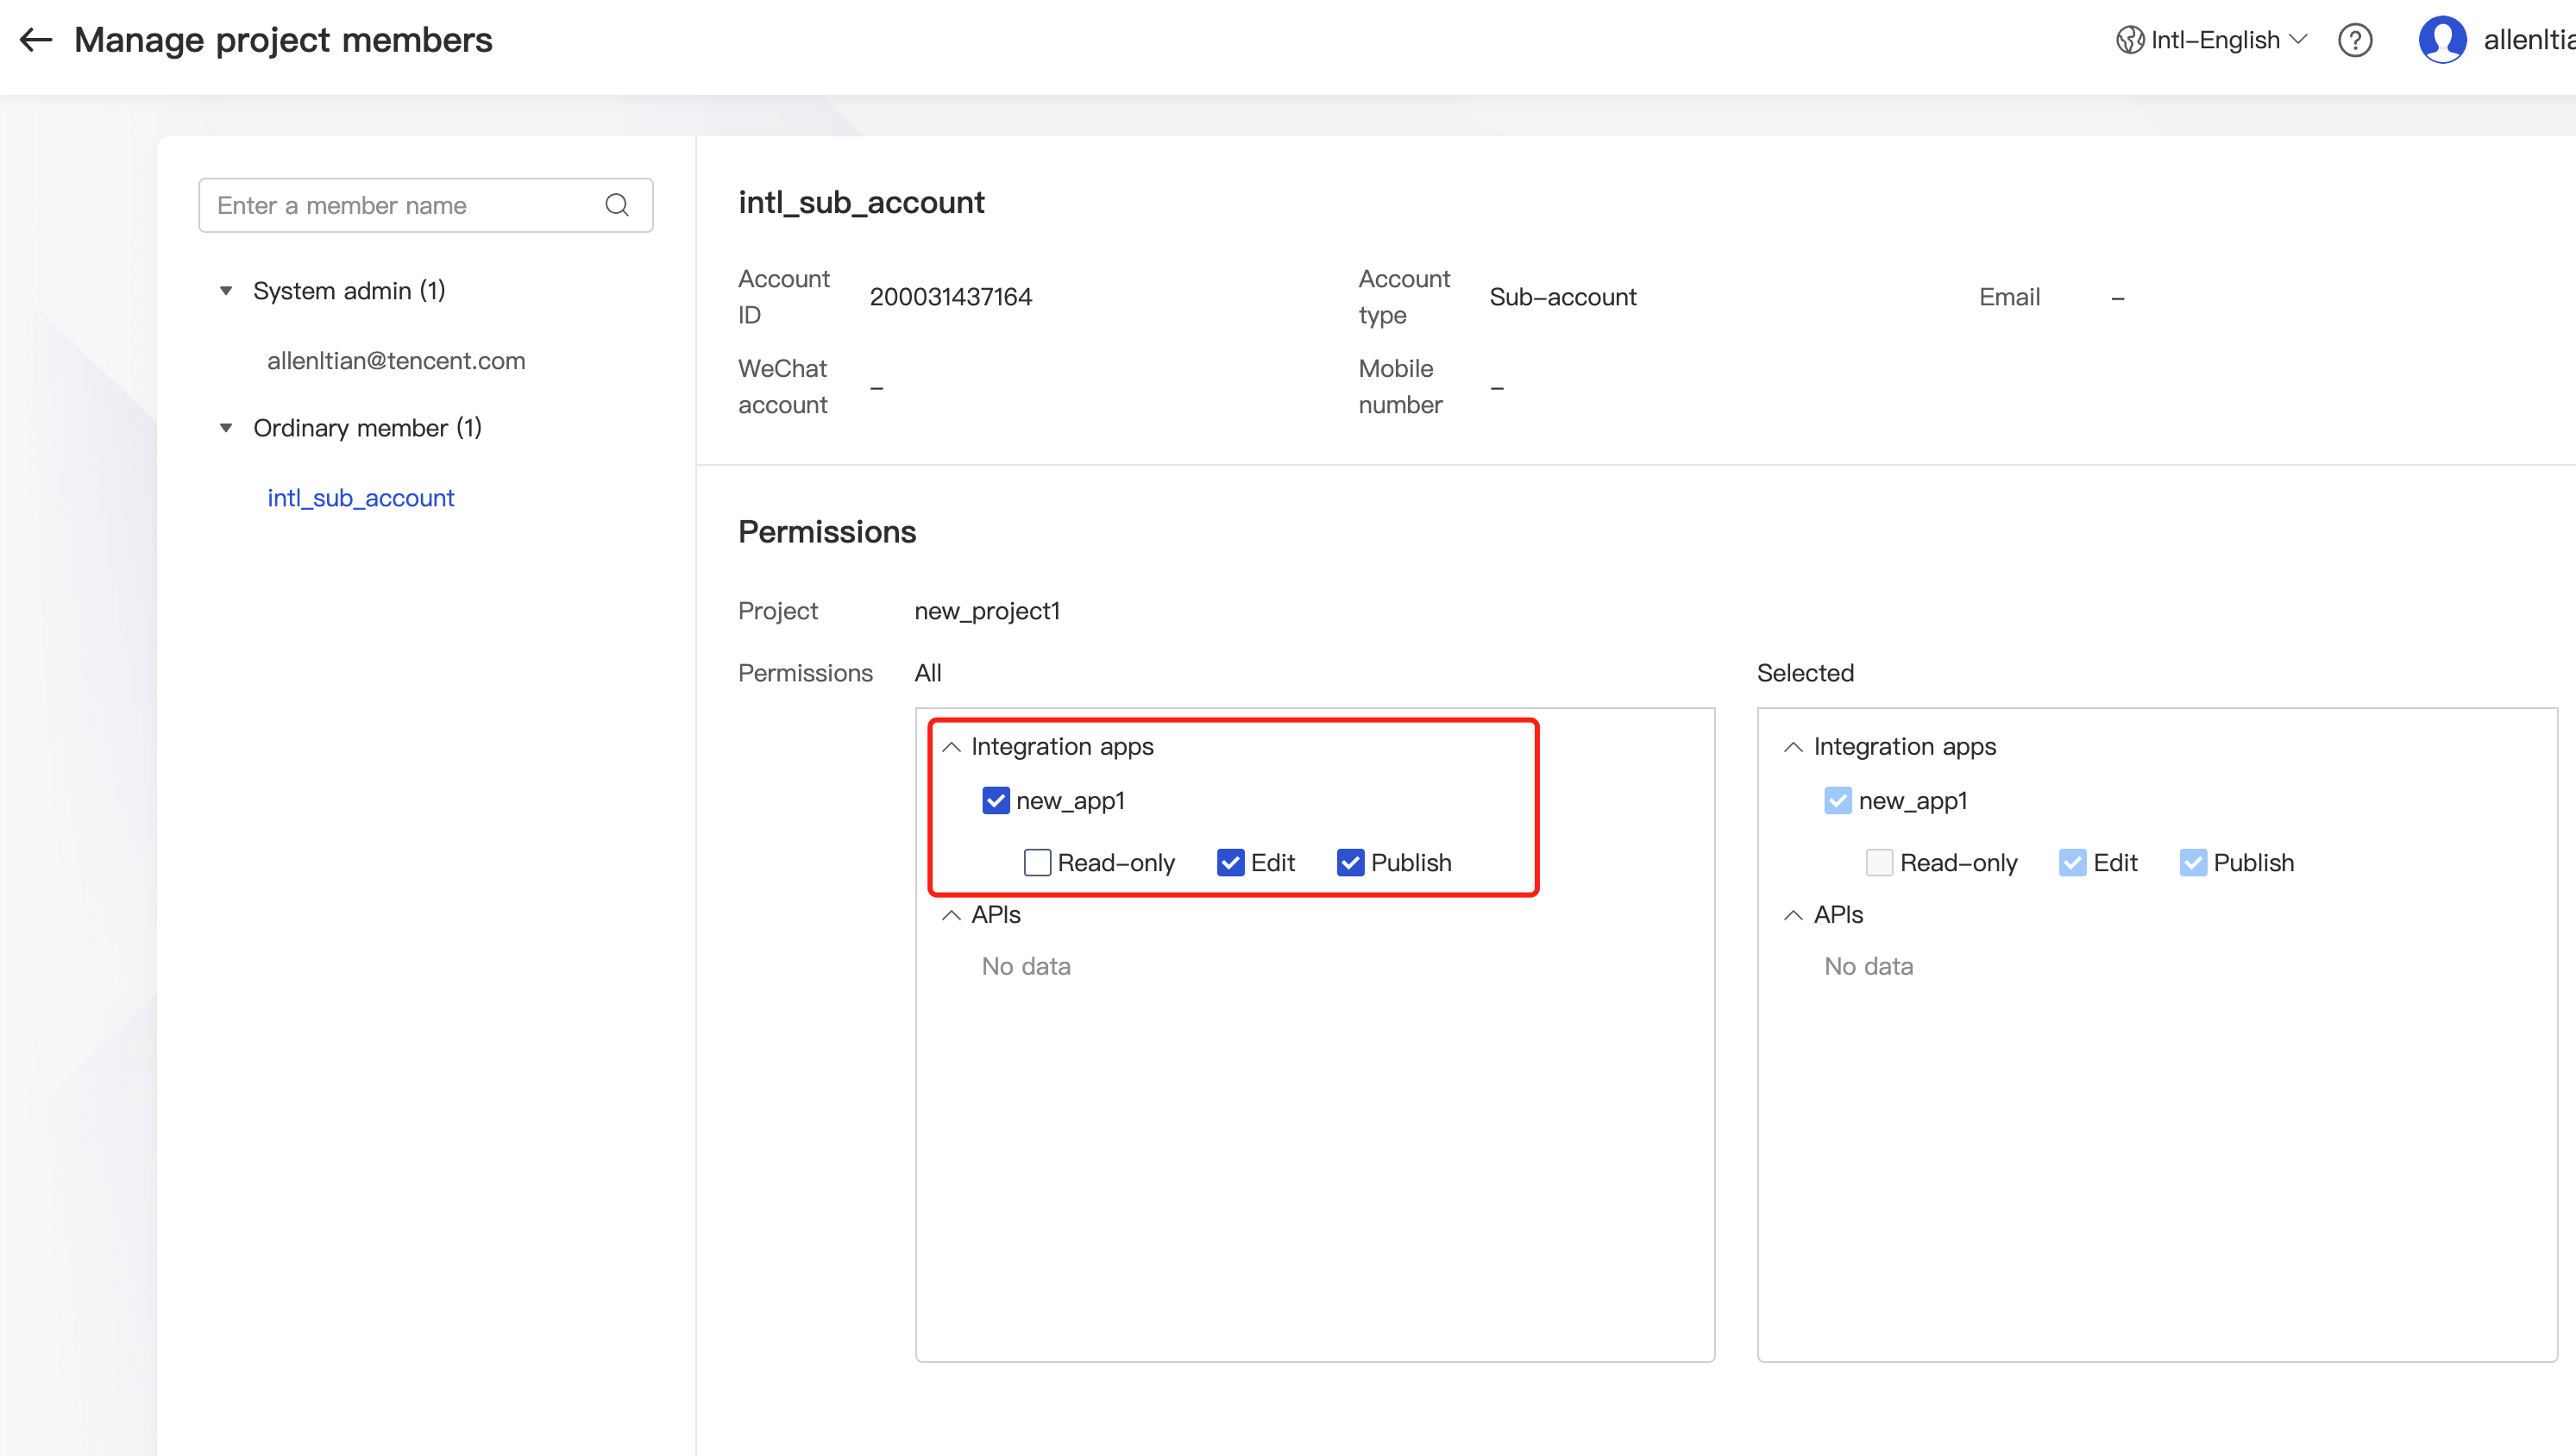
- Delete a member.
Once deleted, a member no longer has the permissions for the project.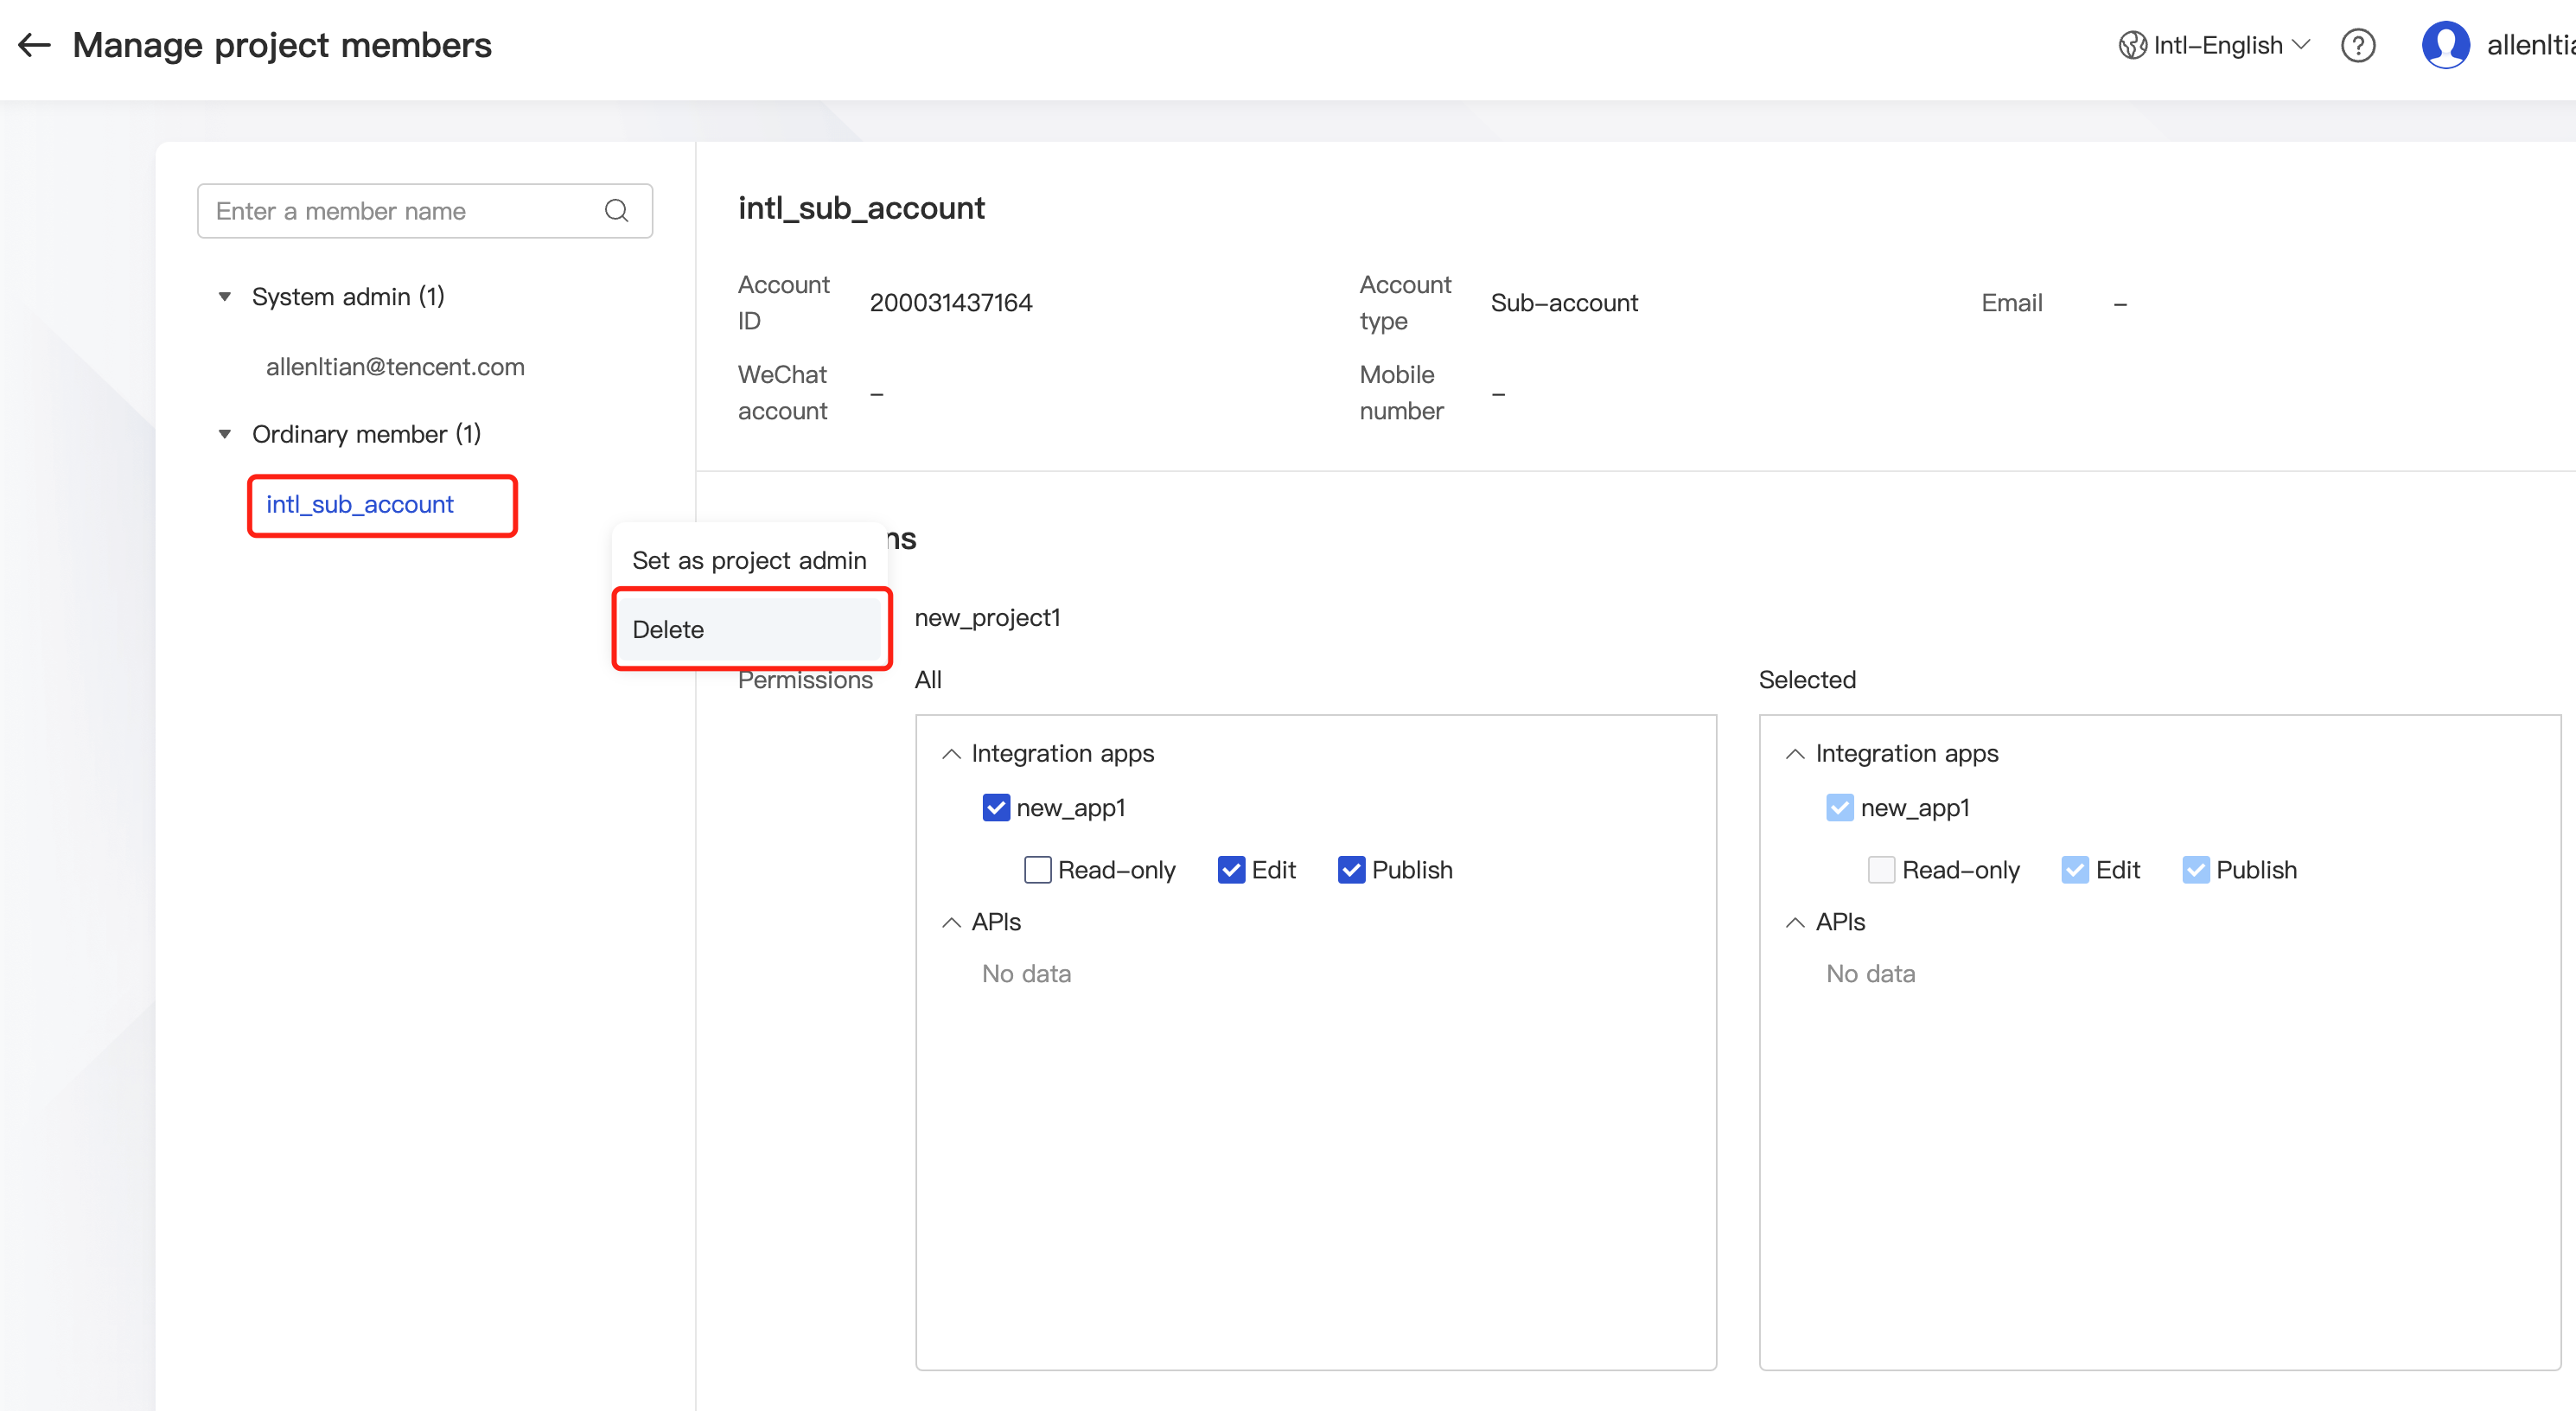
Setting an admin
You can set a project admin for an existing project. After you set a project member as a project admin, the member will have the highest privileges for the project. Only members in the project can be set as a project admin.
- Log in to the iPaaS console, click Management center > Project management on the left sidebar, and select Set admin. After the admin is set successfully, the corresponding member name will be displayed in the Project admin column.

Modifying a project
You can rename an existing project or modify its description.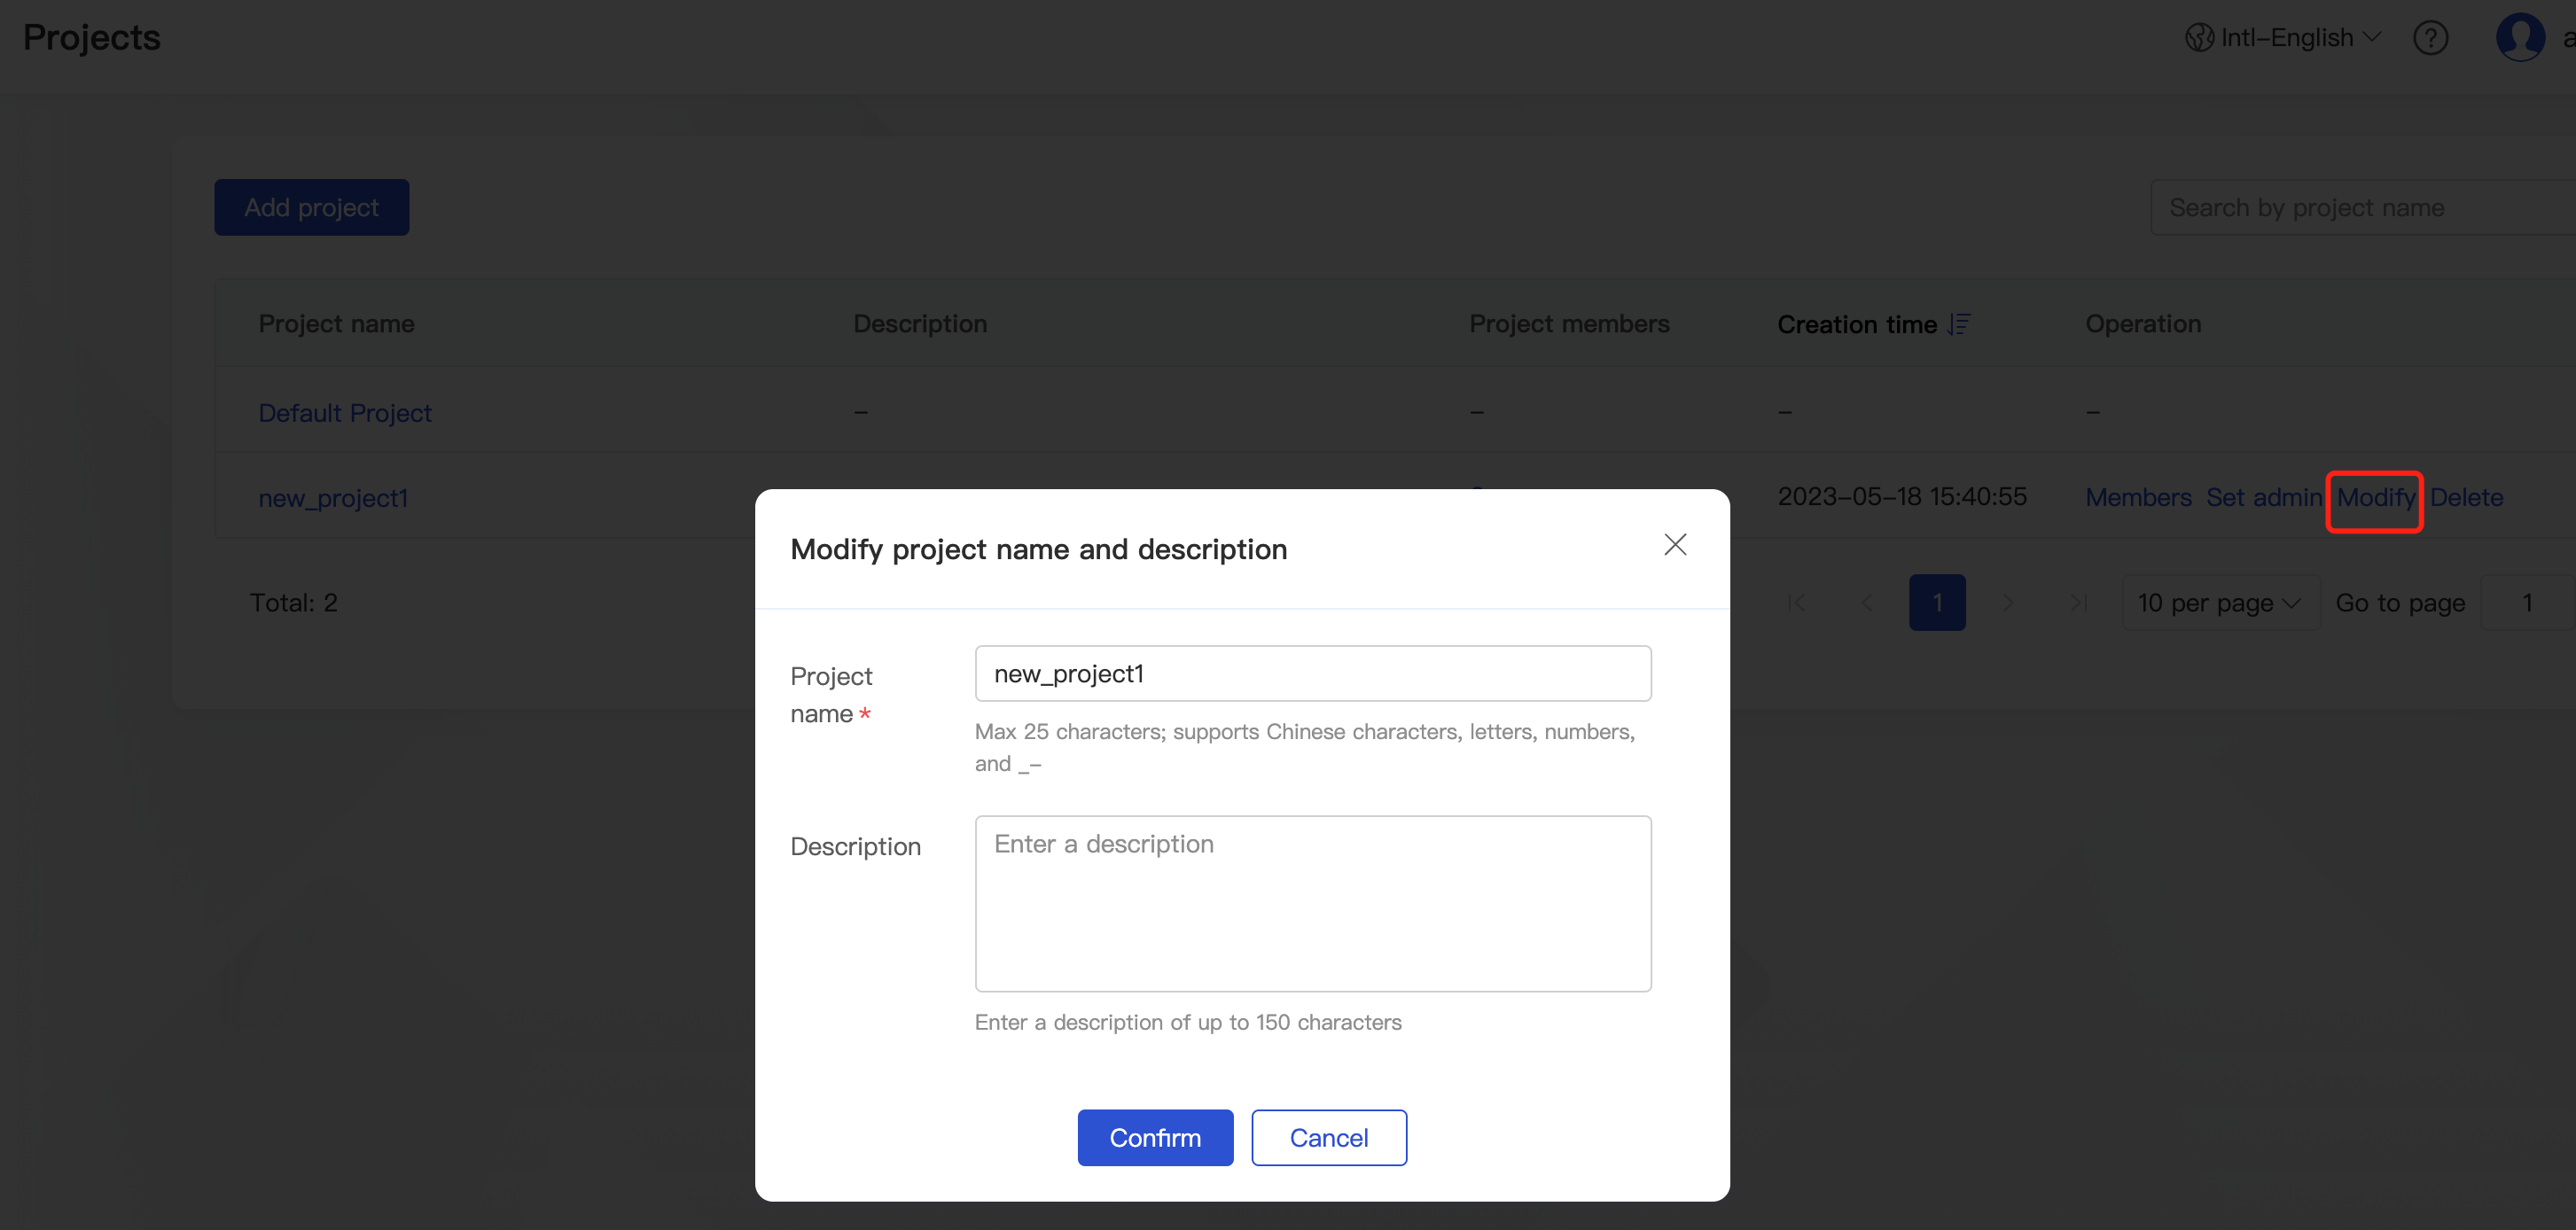

 Yes
Yes
 No
No
Was this page helpful?