TencentDB for SQL Server
- Release Notes and Announcements
- Announcements
- Product Introduction
- Product Architecture
- Instance Specifications
- Purchase Guide
- Product Pricing
- Getting Started
- Connecting to TencentDB for SQL Server Instance
- Operation Guide
- Maintaining Instance
- Adjusting Instance Configuration
- Read-Only Instance
- Network and Security
- Account Management
- Database Management
- Data Security
- Access Management
- Parameter Configuration
- Monitoring and Alarms
- Backup and Restoration
- Backup
- Setting Automatic Backup
- Log Management
- Publish-Subscribe
- SSIS
- Data Migration (New)
- Using DTS to Migrate Data
- Pre-Validation Failure Handling
- Data Migration (Legacy)
- Migrating Data from SQL Server Instance Purchased at Other Cloud Service Provider or Built In-house
- Practical Tutorial
- API Documentation
- Sales and fee related APIs
- Operation and maintenance management related APIs
- Network management related APIs
- Account management related APIs
- Instance Management APIs
- Data security encryption related APIs
- Parameter configuration related APIs
- Log management related APIs
- Extended Event APIs
- Read only instance management related APIs
- Data migration (cold standby migration) related APIs
- Data migration (DTS old version) related APIs
- Making API Requests
- Database APIs
- Other APIs
- FAQs
- Service Agreement
- Performance Evaluation
Managing TencentDB for SQL Server Instance
Last updated: 2025-04-02 11:03:53
Instance List Page
Log in to the TencentDB for SQL Server console, and enter the instance list page to view the instance information and manage your instances.

Feature | Description |
Restart | In the instance list, select an instance and click Restart at the top to restart it. You can also select multiple instances for batch restart. The instance will be inaccessible during the restart, and existing connections to it will be closed. If the number of business writes is high during the restart, the restart will fail. In this case, the instance will go back to the state before the restart and become accessible. Restart the instance during off-peak hours to ensure success and minimize the impact on your business. |
Renew | In the instance list, select one or more target instances, click Renew to renew them by month or year. |
Set Auto-Renewal | In the instance list, select one or more target instances, and click More > Set Auto-Renewal to set monthly auto-renewal for them. After you click OK, the instances will be automatically renewed monthly upon expiration if your Tencent Cloud account balance is sufficient. |
Disable Auto-Renewal | In the instance list, select one or more target instances marked with Renew before their name, click More > Disable Auto-Renewal, and click OK. |
Edit Tag | You can click More > Edit Tag above the instance list or in the Operation column of an instance to manage its tags. If you haven't created a tag, you can click Tag Management to create one. |
Adjust Configuration | In the instance list, you can adjust the configuration of your database instance. Both instance upgrade and disaster recovery mode adjustment are supported. For more information, see Overview. |
Publish/Subscribe | In the instance list, you can select More > Publish/Subscribe in the Operation column of an instance to perform publish/subscribe to meet the data replication and sync requirements of your business. |
Termination/Return | In the instance list, you can select More > Terminate/Return to terminate/return a database instance. For more information, see Terminating Instance. |
Switch to Monthly Subscription | You can switch the instances from pay-as-you-go to monthly subscription. In the instance list, click More > Switch to Monthly Subscription in the Operation column, select renewal period, and click OK after reading the rules. |
Read-Only Instance | In the instance list, you can click More > Read-Only Instance in the Operation column of an instance to view its read-only instances and configure the RO group. If there are no read-only instances, you can click Create after redirection to add one or more read-only instances. |
Instance Management Page
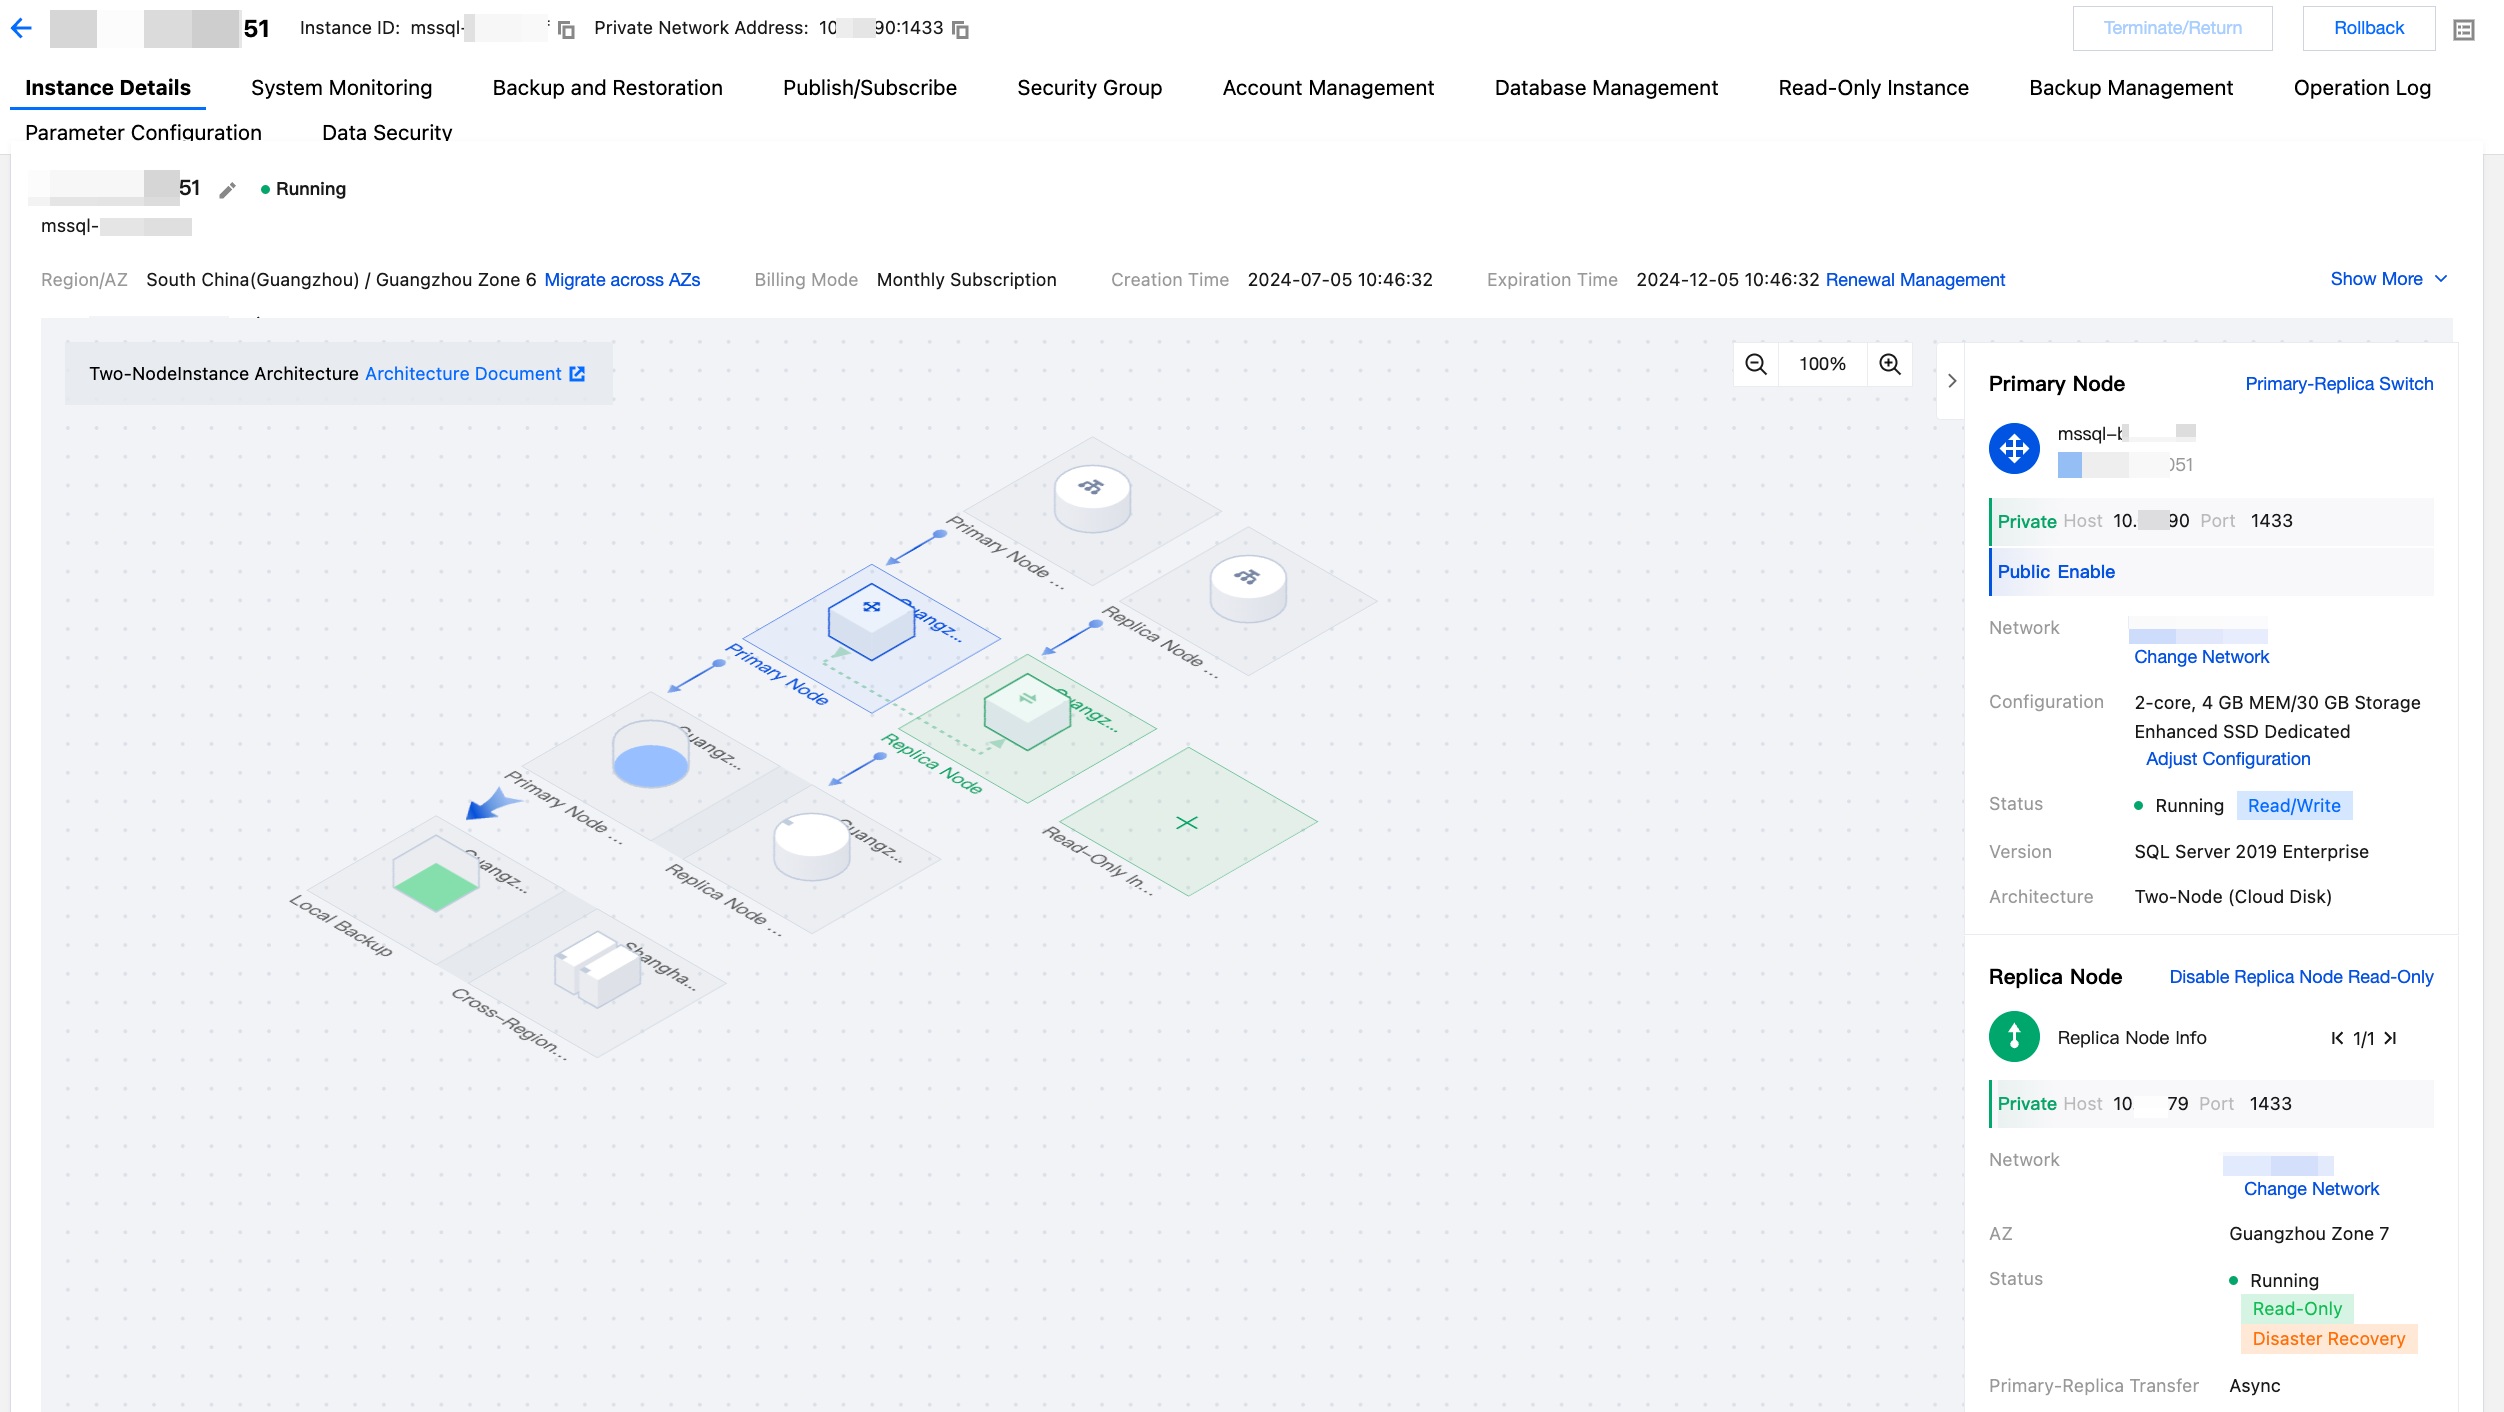
Log in to the TencentDB for SQL Server console. In the instance list, click the Instance ID or Manage in the Operation column to access the instance management page, where you can view its details, monitor it, and manage databases.
Feature | Description |
Instance Details | On the Instance Detail tab, you can view and manage various information of your databases, including setting maintenance information and adding read-only instances in the instance architecture diagram. |
System Monitoring | On the Instance Monitor tab, you can view the monitoring data of various core metrics of the current database. For more information, please see Monitoring Feature and Alarming Feature. |
Backup and Restoration | On the Backup and Restoration tab, you can query the backup and restoration records and create a backup and restoration task. Supported backup upload methods include uploading file and downloading file from COS, and supported restoration modes include full backup file, full backups + logs, and full backups + differential backups. |
Publish/Subscribe | On the Publish/Subscribe tab, you can create or delete one or more publish/subscribe linkage services. For details, see Publish-Subscribe. |
Security Group | On the Security Group tab, you can configure security groups for your databases. For more information, see Configuring Security Group. |
Account Management | On the Account Management tab, you can manage the administrator account, such as modifying permissions and resetting password. You can also create and delete accounts. For more information, see Creating Account. |
Database Management | On the Database Management tab, you can create, delete, and set permissions of databases. For more information, see Database Management. |
Read-Only Instances | On the Read-Only Instance tab, you can create one or more read-only (RO) instances, which can be applied to read/write separation and one-primary-multiple-replica application scenarios to boost the read load capacity of your databases. For more information, see Read-Only Instance Overview. |
Backup Management | On the Backup and Restoration tab, you can manually create, download, and restore backups. You can also set scheduled backups, and perform rollbacks. For more information, see Backup Management. |
Operation Log | On the Operation Log tab, you can download the slow logs, enable blocking and deadlock event collection, and query blocking and deadlock event records. |
Parameter Configuration | On the Parameter Configuration tab, you can view and modify certain parameters and query the parameter modification logs. For more information, see Parameter Configuration. |
Data Security | On the Data Security tab, you can enable transparent data encryption and set up encrypted databases, or enable SSL encryption. For details, see Transparent Data Encryption and Setting SSL Encryption. |
Instance Details Page
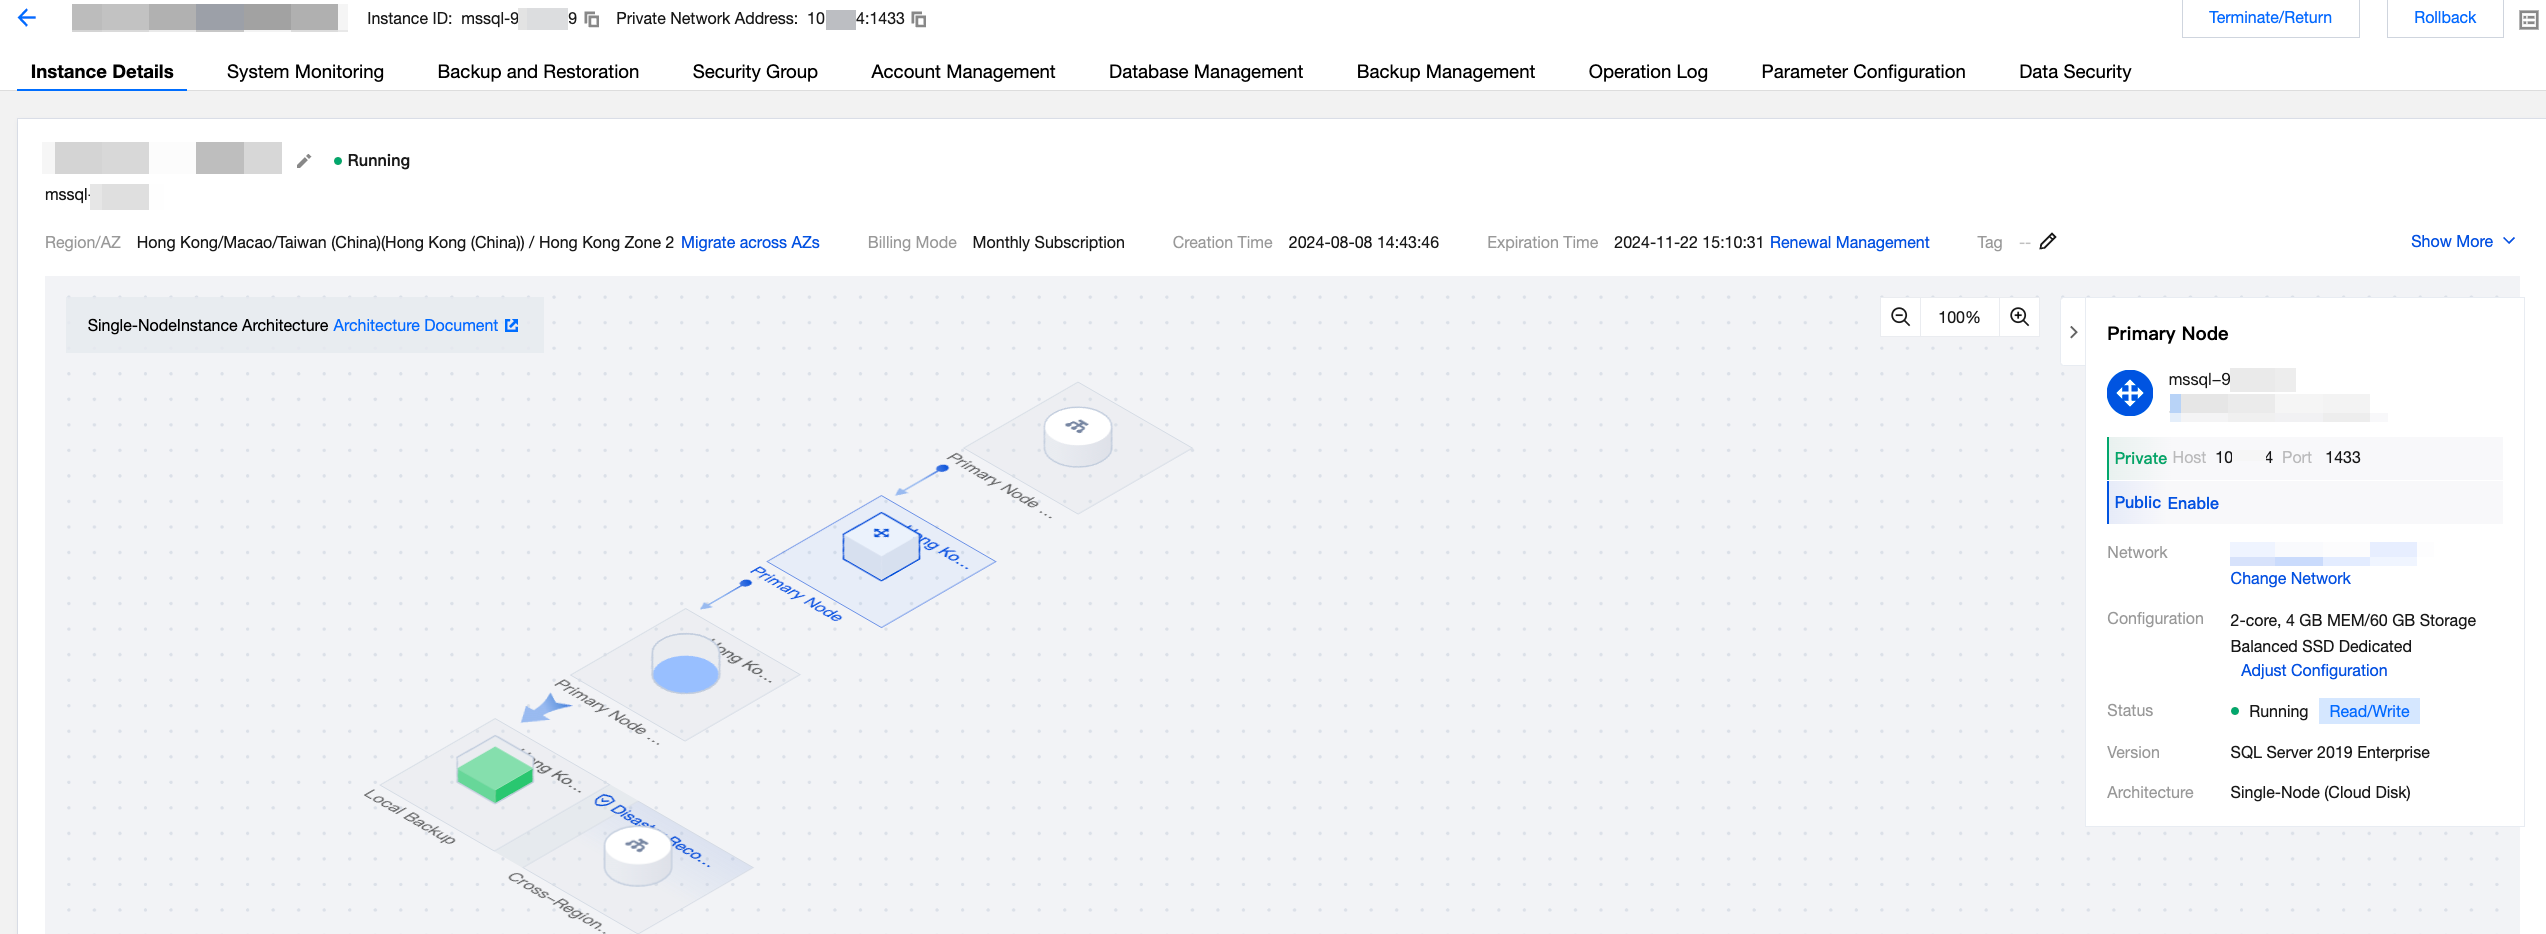
In the instance list, click the Instance ID or Manage in the Operation column to enter the instance management page, and then select the Instance Details page. On the Instance Details page, you can view and manage the instance information such as the instance architecture diagram, corresponding node addresses, storage and backup status, etc.
The Instance Details page of a single-node instance is shown below:
Feature Area | Illustration | Feature | Description |
Top information |  | Renaming instances | Instance names are primarily used to differentiate and manage SQL Server instances. For details, seeRenaming Instance. |
|  | Migrating across AZs | |
|  | Switch to Monthly Subscription | Switch the instance billing mode from pay-as-you-go to monthly subscription. For details, see From Pay-as-You-Go to Monthly Subscription. |
|  | Renewal Management | |
|  | Tag | You can use the tags to perform classified management on the TencentDB for SQL Server resources. For details, see Setting Instance Tag. |
|  | Switch to Another Project | |
|  | Instance Remarks | Set or modify instance remarks for easier distinction and management of instances. For details, see Setting Instance Remarks. |
|  | Maintenance cycle and time | Set the maintenance cycle and maintenance time for the instance. For details, see Setting Instance Maintenance Information. |
Topology diagram (architecture diagram) | 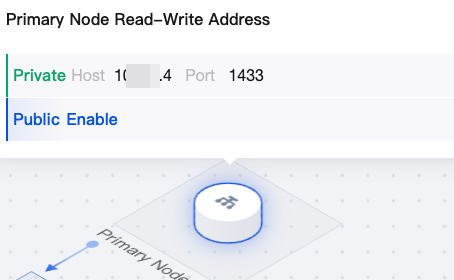 | Primary Node Read-Write Address | You can hover the mouse over the primary node read-write address in the topology diagram to quickly view the private or public network address of the primary node. If the public network address is not enabled, you can click Enable. For details, see Enabling Public Network Address. |
| 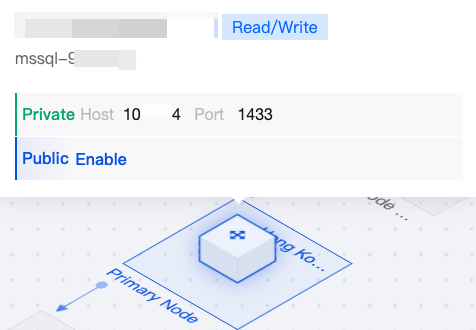 | Primary Node | You can hover the mouse over the primary node in the topology diagram to quickly view the instance name and the private or public network address of the primary node. If the public network address is not enabled, you can click Enable. For details, seeEnabling Public Network Address. |
| 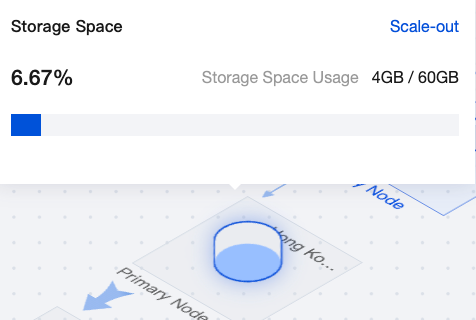 | Primary node storage | You can hover the mouse over the primary node storage in the topology diagram to view the storage space usage of the instance. Click Scale-out to enter the configuration adjustment page for setup. |
| 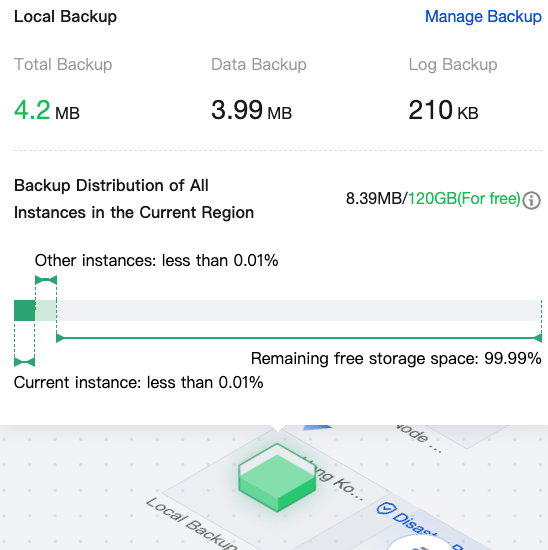 | Local Backup | You can hover the mouse over the local backup in the topology diagram to view the details of local backups, such as total backup, data backup, log backup, and actual occupied space/total free space quota. Click Manage Backup to enter the backup space page for management. For details, see Viewing Backup Space. |
| 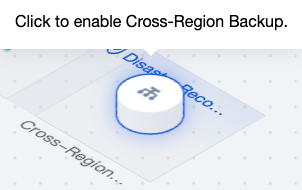 | Cross-Region Backup | If cross-region backup is not enabled, you can click the + icon on the cross-region backup in the topology diagram to enable it. If cross-region backup is enabled, you can hover the mouse over the cross-region backup in the topology diagram to view its detailed usage. |
|  | Topology diagram view scale | You can adjust the display scale of the topology diagram. |
Instance information (on the right side) |  | Hiding/Showing instance information | You can hide or show the instance information section. |
| 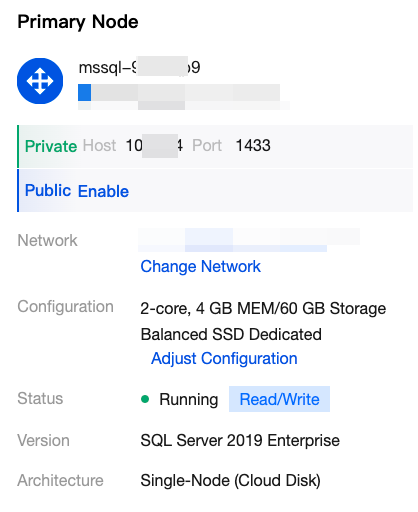 | Primary node information | Under the primary node on the right side, you can view the primary node information such as private network address, public network address, network, configuration, instance status, edition, and architecture. Operations that can be performed include changing network, enabling public network address, and adjusting configuration. |
The Instance Details page of a two-node instance is shown below:
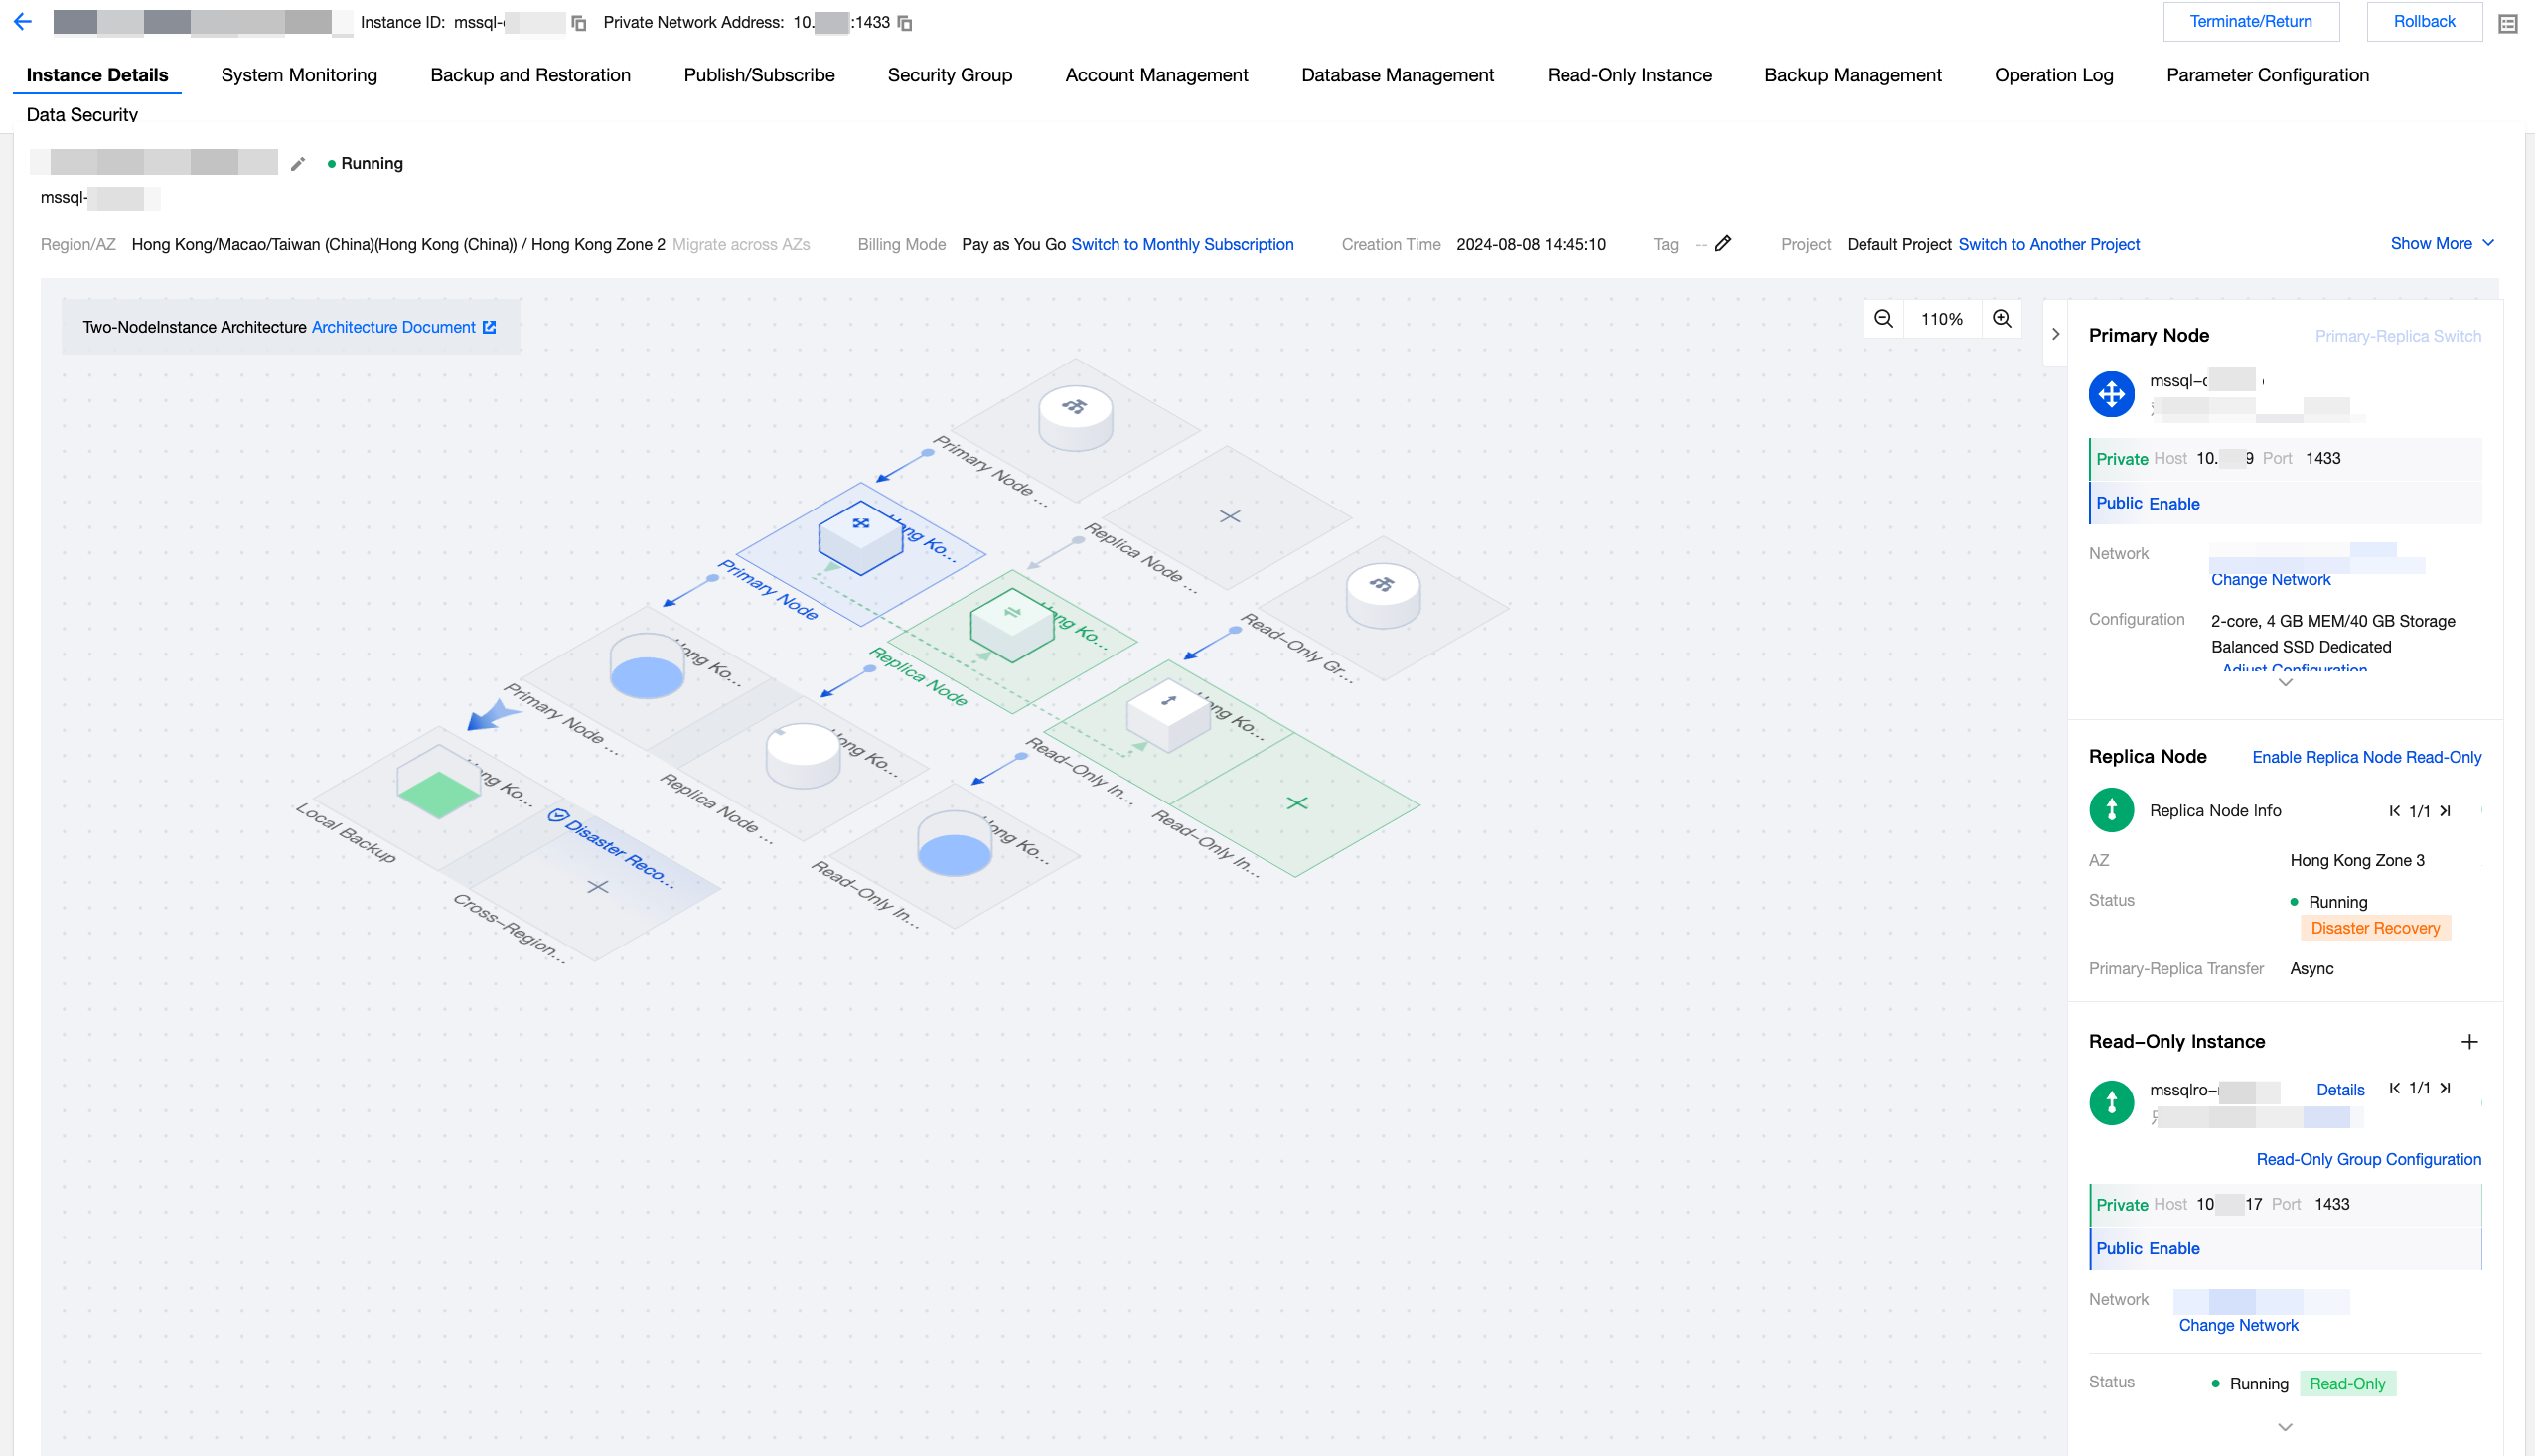
Feature Area | Illustration | Feature | Description |
Top information |  | Renaming instances | Instance names are primarily used to differentiate and manage SQL Server instances. For details, see Renaming Instance. |
|  | Migrating across AZs | |
|  | Switch to Monthly Subscription | Switch the instance billing mode from pay-as-you-go to monthly subscription. For details, see From Pay-as-You-Go to Monthly Subscription. |
|  | Renewal Management | |
|  | Tag | You can use the tags to perform classified management on the TencentDB for SQL Server resources. For details, see Setting Instance Tag. |
|  | Switch to Another Project | |
|  | Instance Remarks | Set or modify the instance remarks for easier distinction and management of instances. For details, see Setting Instance Remarks. |
|  | Maintenance cycle and time | Set the maintenance cycle and maintenance time for the instance. For details, see Setting Instance Maintenance Information. |
Topology diagram (architecture diagram) | 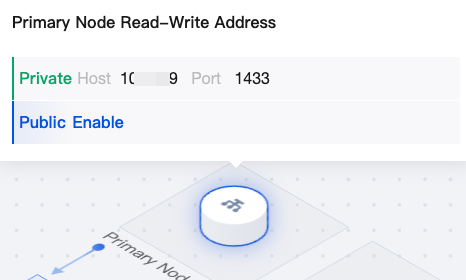 | Primary node Read-Write Address | You can hover the mouse over the primary node read-write address in the topology diagram to quickly view the private or public network address of the primary node. If the public network address is not enabled, you can click Enable. For details, see Enabling Public Network Address. |
| 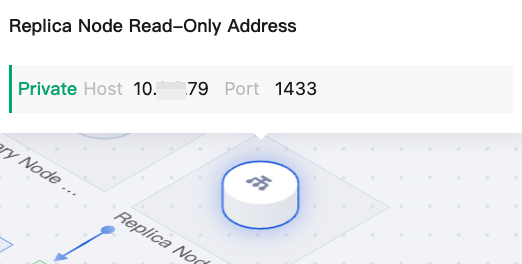 | Replica Node Read-Only Address | If the replica node read-only feature is not enabled, you can click the + icon on the replica node read-only address in the topology diagram to enable it. If the replica node read-only feature is enabled, you can hover the mouse over the replica node read-only address in the topology diagram to quickly view the replica node read-only address. For details, see Replica Node Read-Only. |
| 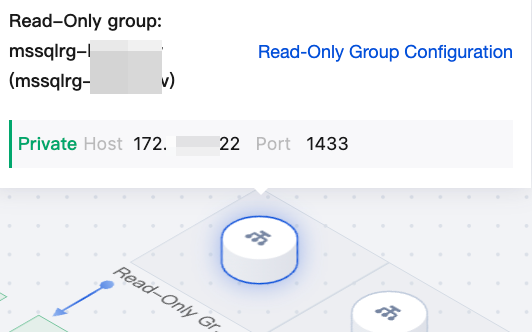 | Read-Only group address | If a read-only instance is created, the read-only group address section will be displayed. You can hover the mouse over the read-only group address in the topology diagram to quickly view the read-only group address and configure the read-only group. For details, see Read-Only Group. |
| 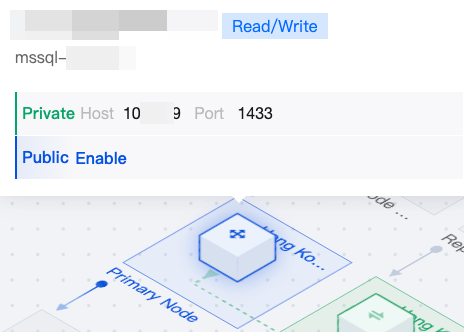 | Primary Node | You can hover the mouse over the primary node in the topology diagram to quickly view the instance name and private or public network address of the primary node. If the public network address is not enabled, you can click Enable. For details, see Enabling Public Network Address. |
| 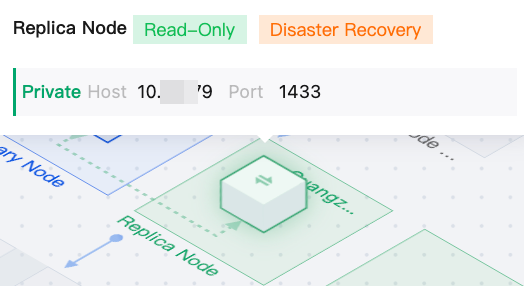 | Replica Node | If the replica node read-only feature is not enabled, information will not be displayed when you hover the mouse over the replica node in the topology diagram. At this time, the replica node is used for disaster recovery purposes. If the replica node read-only feature is enabled, the read-only address of the replica node will be displayed when you hover the mouse over the replica node in the topology diagram. At this time, the replica node is used for read-only and disaster recovery purposes. No matter whether the replica node read-only feature is enabled, you can click the switching icon on the replica node to perform manual switching between primary and replica nodes. For details, see Manual Primary-Replica Switching. |
| 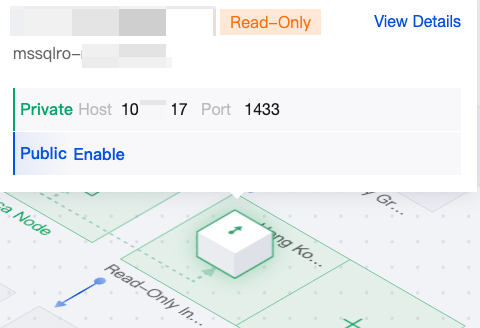 | Read-only instance | If a read-only instance has been created, the read-only instance section will be displayed. You can hover the mouse over the read-only instance in the topology diagram to quick view the private network address and public network address of the read-only instance. Click View Details to enter the corresponding read-only instance details page for viewing, or click the primary instance ID at the bottom right corner to return to the primary instance details page. You can also click the + icon on the read-only instance in the topology diagram to create a read-only instance. |
| 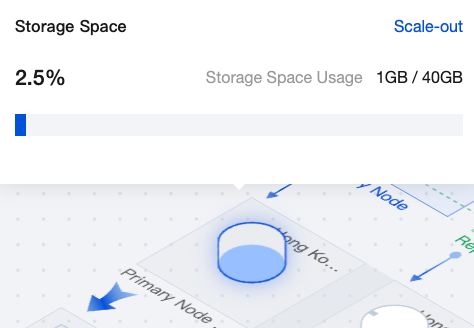 | Primary node storage | You can hover the mouse over the primary node storage in the topology diagram to view the storage space usage of the instance. The storage usage of the replica node is consistent with that of the primary node. Click Scale-out to enter the configuration adjustment page for setup. |
| 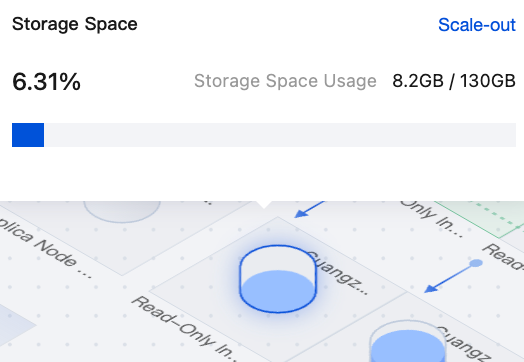 | Read-only instance storage | You can hover the mouse over the read-only instance storage in the topology diagram to view the storage space usage of the read-only instance. Click Scale-out to enter the configuration adjustment page for setup. |
| 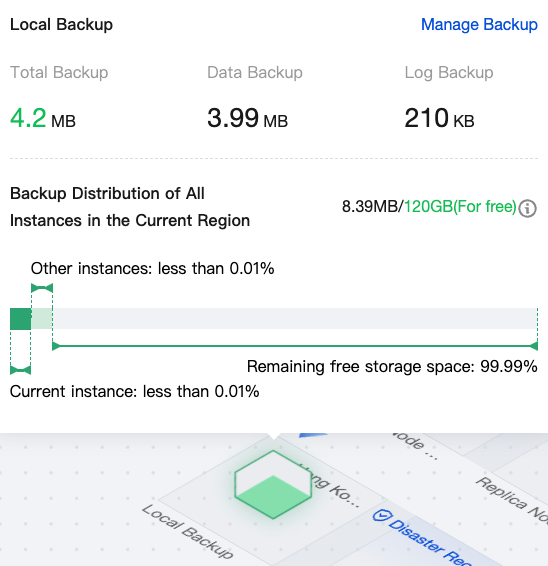 | Local Backup | You can hover the mouse over the local backup in the topology diagram to view the details of local backups, such as total backup, data backup, log backup, and actual occupied space/total free space quota. |
| 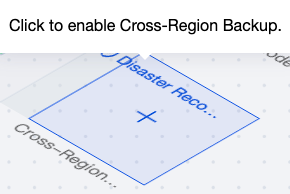 | Cross-Region Backup | If cross-region backup is not enabled, you can click the + icon on the cross-region backup in the topology diagram to enable it. If cross-region backup is enabled, you can hover the mouse over the cross-region backup in the topology diagram to view its detailed usage. |
|  | Topology diagram view scale | You can adjust the display scale of the topology diagram. |
Instance information (on the right side) |  | Hiding/Showing instance information | You can hide or show the instance information section. |
| 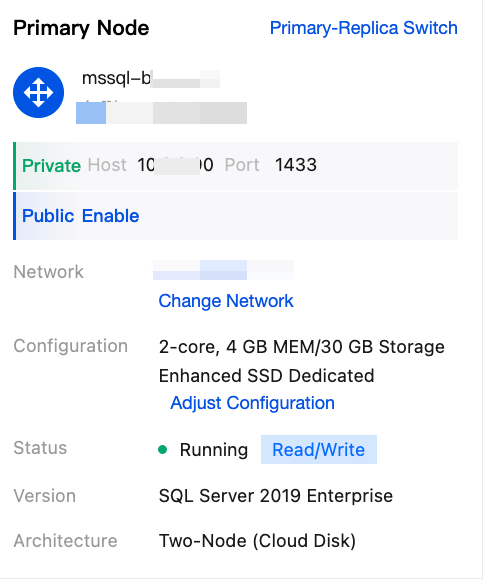 | Primary Node Information | Under the primary node on the right side, you can view the private network address, public network address, network, configuration, instance status, edition, and architecture information of the primary node. Operations that can be performed include manual primary-replica switching,changing network,enabling public network address, and adjusting configuration. |
| 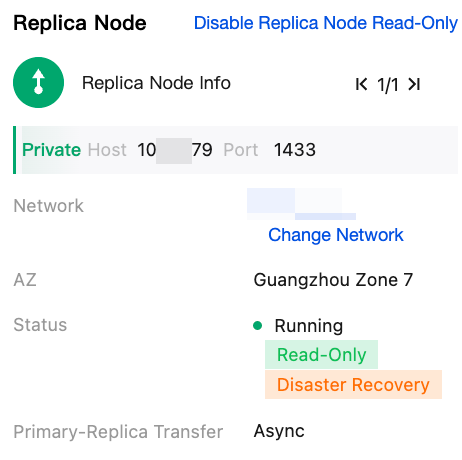 | Replica Node information | Under the replica node on the right side, you can enable the replica node read-only feature. Once enabled, you can view the replica node read-only address. You can also view the replica node information such as network, AZ, instance status, and primary-replica transmission mode. Operations that can be performed include enabling/disabling replica node read-only and changing network. |
| 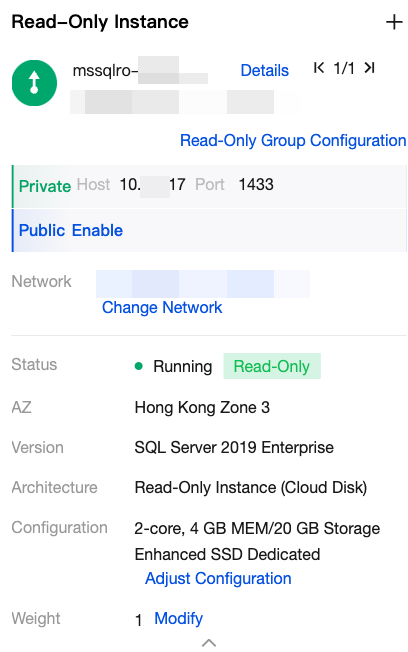 | Read-Only Instance information | Under the read-only instance on the right side, you can view the read-only instance information such as private network address, public network address, network, instance status, AZ, edition, architecture, configuration, and weight. Operations that can be performed include switching to query information of other read-only instances,read-only group configuration, changing network, enabling public network address, and adjusting configuration. |
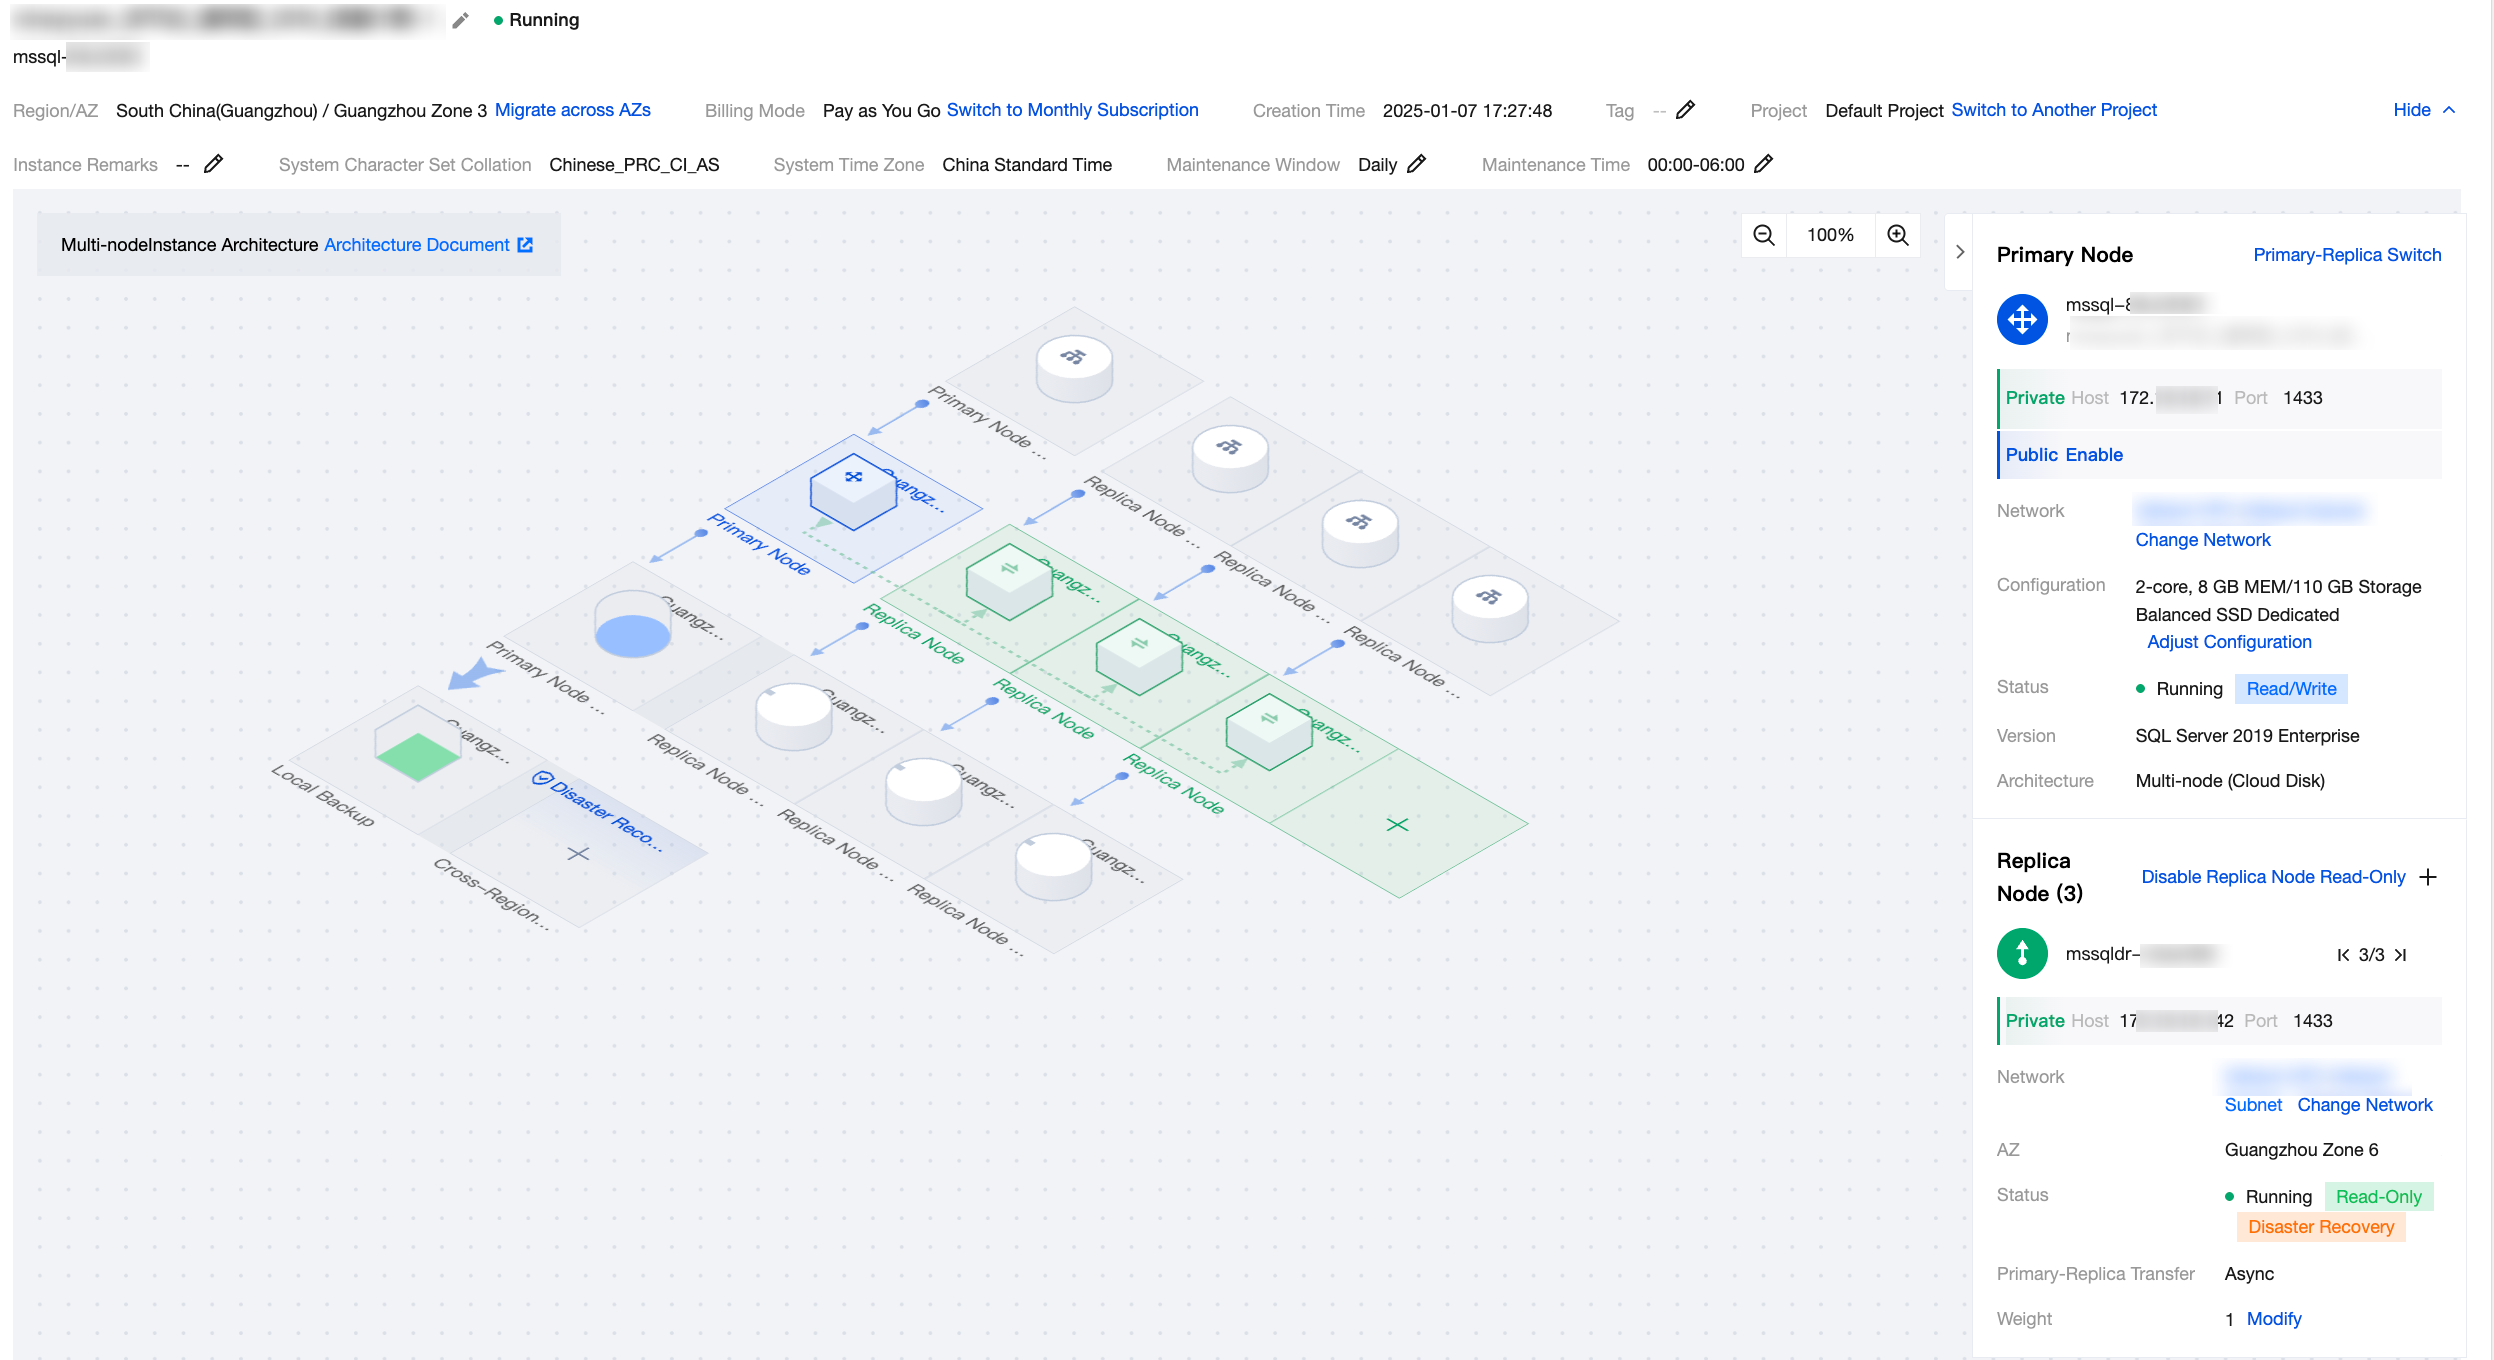
The instance details page for multi-node instances is shown in the following figure:
Feature Area | Figure | Feature | Description |
Top information |  | Modify the instance name | The instance name is mainly used to distinguish and manage SQL Server instances. For details, see Modify Instance Name. |
|  | Migrate across AZs | Enable the migration of an instance to another availability zone within the same region. For details, see Cross-AZ Migration. |
|  | Switch to Monthly Subscription | Convert a pay-as-you-go instance to a monthly subscribed instance. For details, see Pay-as-you-go to Monthly Subscription. |
|  | Renewal Management | |
|  | Tag | Tags can be used to classify and manage cloud database SQL Server resources. For details, see Set Instance Tags. |
|  | Switch to Another Project | Assign instances to different projects for management. For details, see Set Project to Which Instance Belongs. |
|  | Instance Remarks | Set or modify instance remarks for easier identification and management. For details, see Set Instance Remark. |
|  | Maintenance cycle and time | Configure the maintenance cycle and maintenance time for the instance. For details, see Set Instance Maintenance Information. |
Topology (architecture diagram) | 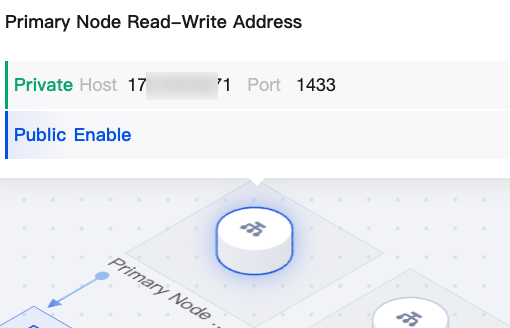 | Primary Node Read-Write Address | Hover over the primary node read-write address in the topology to view its private or public network address quickly. If the public network address is not enabled, click Enable Public Network Address. |
| 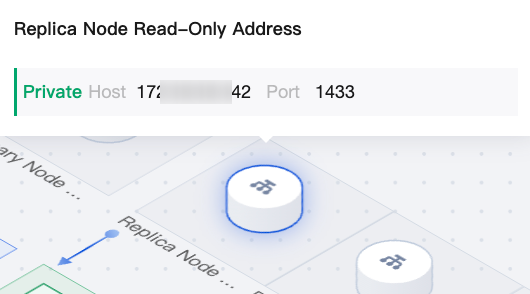 | Replica Node Read-Only Address | If read-only mode is not enabled for the secondary node, click the "+" on the secondary node read-only address in the topology to enable it. If read-only mode is enabled for the secondary node, hover over the read-only address in the topology to query the address quickly. For details, see Replica Node Read-Only. |
| 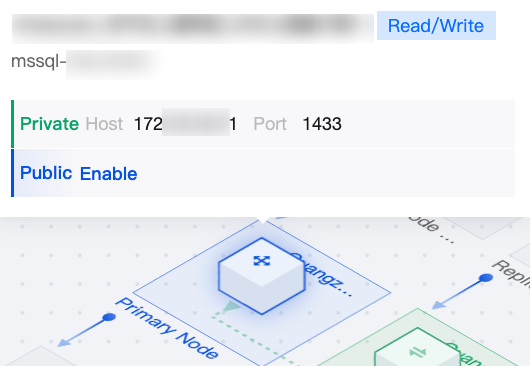 | Primary Node | Hover over the primary node in the topology to quickly view its instance name and private/public network address. If the public network address is not enabled, click Enable Public Network Address. |
| 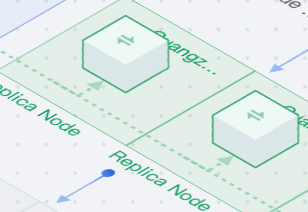 | Replica Node | If read-only mode is not enabled for the secondary node, hovering over the secondary node in the topology will not display any detailed information, as the secondary node serves only for disaster recovery. If read-only mode is enabled for the secondary node, hovering over the secondary node in the topology will display its read-only address, indicating that the node is used for read-only operations and disaster recovery. Click the "+" in the topology to add a secondary node. If you need to manually switch between primary and secondary nodes, see Manual Primary/Replica Switchover. |
| 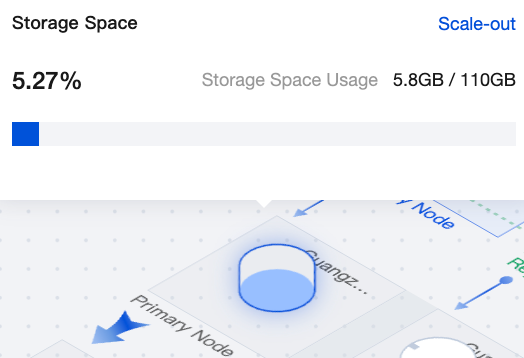 | Primary node storage | Hovering over the primary node storage in the topology allows viewing the instance's storage usage. Storage usage for the secondary node is identical to that of the primary node. Click Scale Out to go to the configuration adjustment page. |
| 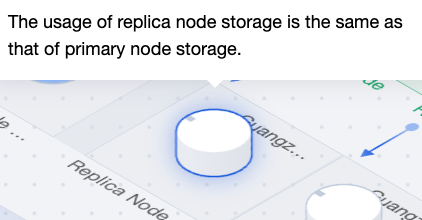 | Replica node storage | Storage usage for the secondary node is identical to that of the primary node. |
| 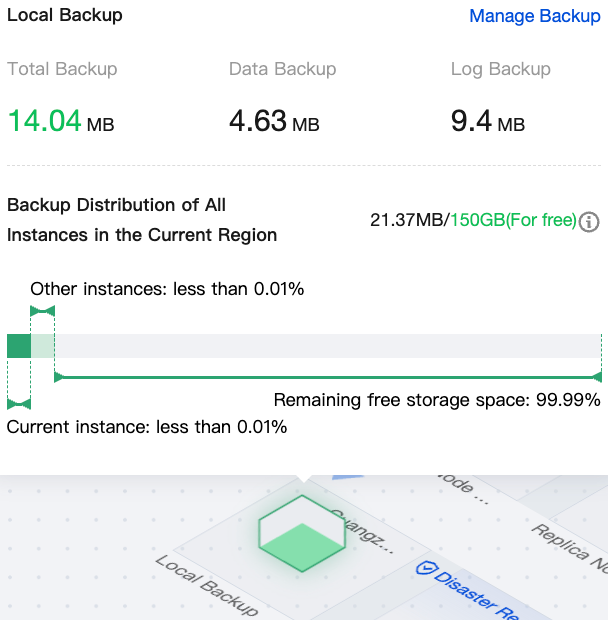 | Local Backup | Hovering over the local backup in the topology allows viewing details such as total backup size, data backup, log backup, and actual space usage/total free space quota. |
| 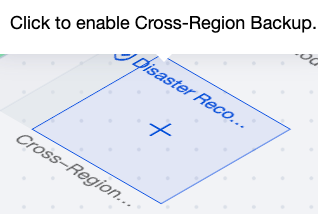 | Cross-Region Backup | If cross-region backup is not enabled, click the "+" on the cross-region backup in the topology to enable it. If cross-region backup is enabled, hovering over the cross-region backup in the topology allows viewing the usage details. |
|  | Topology view scale | Adjust the display scale of the topology. |
Instance information (right side) | 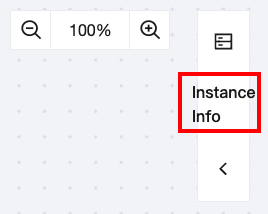 | Showing/Hiding instance information | Show/Hide the instance information panel. |
| 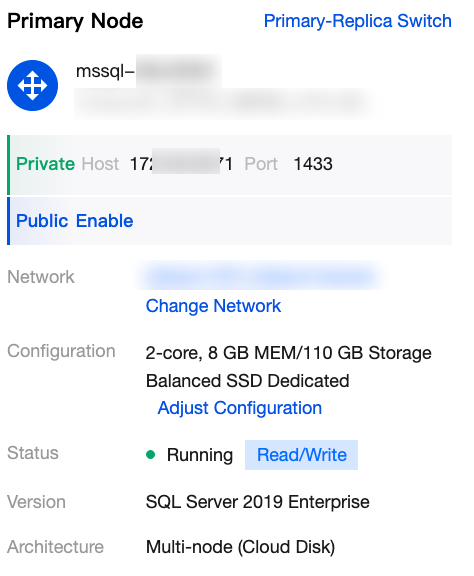 | Primary Node information | In the right-side primary node section, you can view details such as its private and public network addresses, associated network, configuration, instance status, version, and architecture. Available operations include: Manual primary-secondary switch, changing network, enabling public network address, and configuration adjustment. |
| 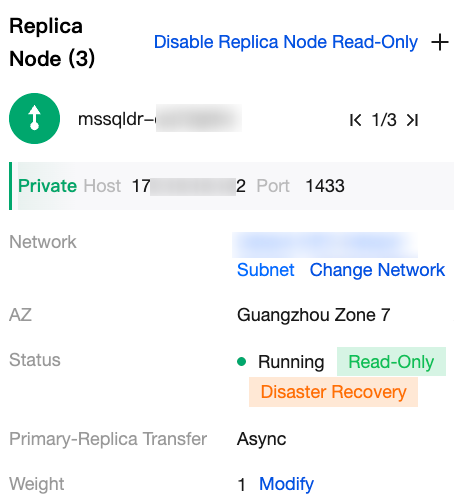 | Replica Node information | In the right-side secondary node section, users can enable read-only mode. Once enabled, you can view details such as its read-only address, associated network, AZ, instance status, and primary-secondary transmission mode. Available operations include: Enabling or disabling read-only mode for secondary nodes and changing the network. |
Was this page helpful?
You can also Contact Sales or Submit a Ticket for help.
Yes
No

