Overview
In TDMQ for RocketMQ, namespace is a resource management concept. It can generally be used to isolate different businesses via customized configurations such as message retention period. Topics, subscriptions, and role permissions in one namespace are all kept separate from those in another.
This document describes how to create multiple namespaces in TDMQ for RocketMQ to use the same TDMQ for RocketMQ cluster in different scenarios.
Notes
Topic and group names must be unique in the same namespace.
Directions
Creating a namespace
1. Log in to the TDMQ console, select the region, and click the ID of the target cluster to enter the Basic Info page. 2. Select the Namespace tab at the top of the page and click Create to enter the namespace creation page.
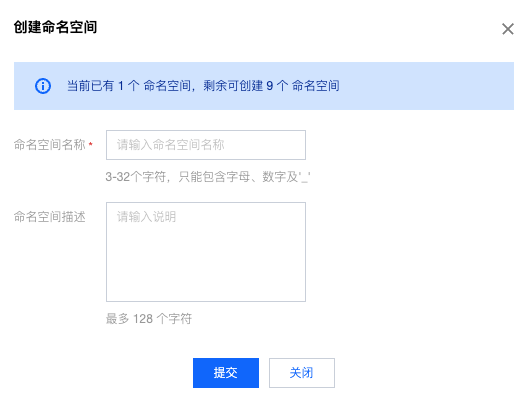
3. In the Create Namespace window, configure the namespace attributes:
Namespace Name: Enter the namespace name, which cannot be modified after creation and can contain 3–32 letters, digits, backslashes, and underscores.
Message Retention Period: Set the retention period (0 seconds to 3 days) of unconsumed messages. After a message is successfully produced, it will be stored for a period of time no matter whether it is consumed or not. It will be automatically deleted upon expiration.
Namespace Description: Enter the remarks of the namespace.
4. Click Save.
Notes
Up to ten namespaces can be created in one cluster.
After the above steps, you can create a topic in the namespace to produce and consume messages as instructed in Topic Management. Getting the access address
On the Namespace list page, you can get the namespace access addresses for TCP in the VPC Access Address and Public Network Access Address columns. You can view the HTTP access point on the Basic Info of the cluster.
Modifying a namespace
You can modify a namespace in the following steps:
1. On the Namespace list page, click Edit in the Operation column of the target namespace to enter the editing page.
2. Modify the message TTL, message retention period, or namespace description and click Save.
Deleting a namespace
You can delete a created namespace in the following steps:
1. On the Namespace list page, click Delete in the Operation column of the target namespace.
2. In the deletion confirmation pop-up window, click OK.
Notes
A namespace with topics cannot be deleted.
Was this page helpful?