TDMQ for RocketMQ
- Release Notes and Announcements
- Announcements
- Product Introduction
- RocketMQ 5.x
- Introduction to RocketMQ 5.x
- Purchase Guide
- Getting Started
- Console Guide
- Cluster Management
- Message Query
- Permission Management
- Development Guide
- Message Type
- Consumption Mode
- SDK Documentation
- Practical Tutorial
- RocketMQ 4.x
- Product Introduction
- Purchase Guide
- Billing Overview
- Getting Started
- Messaging over TCP
- Operation Guide
- Cluster Management
- Access Management (CAM)
- Tag Management
- Monitoring and Alarms
- Development Guide
- Message Types
- Practical Tutorial
- Access over HTTP
- SDK Documentation
- Access over TCP
- Spring Boot Starter
- SDK for Java
- Migration to Cloud
- Feeling Migration
- FAQs

Use of Spring Cloud Stream

Last updated: 2024-01-17 16:57:33
Overview
This document describes how to send and receive messages with the Spring Cloud Stream serving as example, for you to better understand the complete procedure involved in message sending and receiving.
Prerequisites
You have downloaded the demo or visited the GitHub project.
Directions:
Step 1: Incorporating Dependencies
Incorporate the spring-cloud-starter-stream-rocketmq dependency in the pom.xml file. The current recommended version is 2021.0.5.0, and it is necessary to exclude dependencies, using SDK 4.9.7.
<dependency><groupId>com.alibaba.cloud</groupId><artifactId>spring-cloud-starter-stream-rocketmq</artifactId><version>2021.0.5.0</version><exclusions><exclusion><groupId>org.apache.rocketmq</groupId><artifactId>rocketmq-client</artifactId></exclusion><exclusion><groupId>org.apache.rocketmq</groupId><artifactId>rocketmq-acl</artifactId></exclusion></exclusions></dependency><dependency><groupId>org.apache.rocketmq</groupId><artifactId>rocketmq-client</artifactId><version>4.9.7</version></dependency><dependency><groupId>org.apache.rocketmq</groupId><artifactId>rocketmq-acl</artifactId><version>4.9.7</version></dependency>
Step 2: Adding Configurations
Add the corresponding RocketMQ configurations to the configuration file.
spring:cloud:stream:rocketmq:binder:# Full name of the service addressname-server: rmq-xxx.rocketmq.ap-bj.public.tencenttdmq.com:8080# Role namesecret-key: admin# Role keyaccess-key: eyJrZXlJZ...# producer groupgroup: producerGroupbindings:# Channel name, corresponding to the channel name under spring.cloud.stream.bindingsTopic-TAG1-Input:consumer:# Subscribed tag type, configured according to real consumer conditions (all messages are subscribed to by default)subscription: TAG1# Channel nameTopic-TAG2-Input:consumer:subscription: TAG2bindings:# Channel nameTopic-send-Output:# Specify topic, corresponding to the created topic namedestination: TopicTestcontent-type: application/json# Channel nameTopic-TAG1-Input:destination: TopicTestcontent-type: application/jsongroup: consumer-group1# Channel nameTopic-TAG2-Input:destination: TopicTestcontent-type: application/jsongroup: consumer-group2
Note:
In terms of configuration, the subscription configuration item for
2.2.5-RocketMQ-RC1 and 2.2.5.RocketMQ.RC2 is subscription, and the configuration item for other lower versions is tags.The complete configuration item reference for other versions is as follows:
spring:cloud:stream:rocketmq:bindings:# Channel name, corresponding to the channel name under spring.cloud.stream.bindingsTopic-test1:consumer:# Subscribed tag type, configured according to real consumer conditions (all messages are subscribed to by default)tags: TAG1# Channel nameTopic-test2:consumer:tags: TAG2binder:# Full name of the service addressname-server: rocketmq-xxx.rocketmq.ap-bj.public.tencenttdmq.com:8080# Role namesecret-key: admin# Role keyaccess-key: eyJrZXlJZ...bindings:# Channel nameTopic-send:# Specified topicdestination: topic1content-type: application/json# Use the full name of the groupgroup: group1# Channel nameTopic-test1:destination: topic1content-type: application/jsongroup: group1# Channel nameTopic-test2:destination: topic1content-type: application/jsongroup: group2
Parameter | Description |
name-server | Cluster access address, which can be copied from Access Address in the Operation column on the Cluster page on the console. Namespace access addresses in new version shared or exclusive clusters can be copied from the namespace list. |
secret-key | Role name, which can be copied from SecretKey on the Cluster Permission page. |
access-key | Role key, which can be copied from AccessKey on the Cluster Permission page. 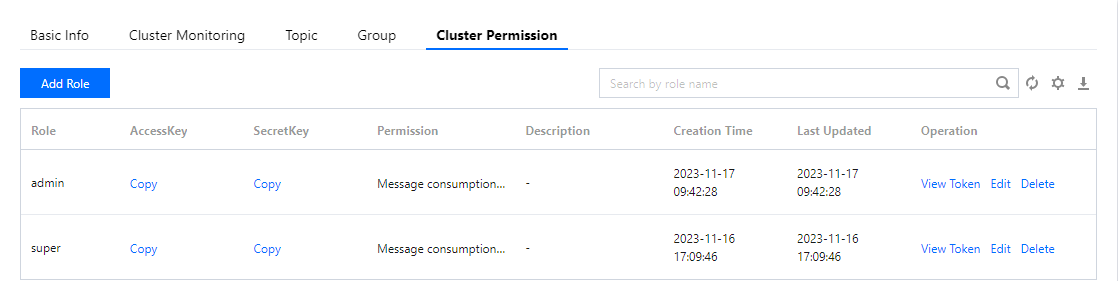 |
group | Producer group name, which can be copied from the Group tab on the console. |
destination | Topic name, which can be copied from the Topic tab on the console. |
Step 3: Configuring the Channel
A channel consists of input and output. These can be individually configured as needed.
/*** Custom channel binder*/public interface CustomChannelBinder {/*** Send the message (message producer)* Bind the channel name specified in the configuration settings.*/@Output("Topic-send-Output")MessageChannel sendChannel();/*** Receive Message 1 (Consumer 1)* Bind the channel name specified in the configuration settings.*/@Input("Topic-TAG1-Input")MessageChannel testInputChannel1();/*** Receive Message 2 (Consumer 2)* Bind the channel name specified in the configuration settings.*/@Input("Topic-TAG2-Input")MessageChannel testInputChannel2();}
Step 4: Adding Annotations
Add relevant annotations to the configuration or boot class. If there are multiple configured binder configurations, each must be specifically specified within these annotations.
@EnableBinding({CustomChannelBinder.class})
Step 5: Sending the Messages
1. Inject
CustomChannelBinder into the class of the message to be sent.@Autowiredprivate CustomChannelBinder channelBinder;
2. Send the messages by calling the corresponding output stream channel.
Message<String> message = MessageBuilder.withPayload("This is a new message.").build();channelBinder.sendChannel().send(message);
Step 6: Consuming the Messages
@Servicepublic class StreamConsumer {private final Logger logger = LoggerFactory.getLogger(StreamDemoApplication.class);/*** Monitor channel (designated by channel name in configuration)** @param messageBody message content*/@StreamListener("Topic-TAG1-Input")public void receive(String messageBody) {logger.info("Receive1: Message received via stream, messageBody = {}", messageBody);}/*** Monitor channel (designated by channel name in configuration)** @param messageBody message content*/@StreamListener("Topic-TAG2-Input")public void receive2(String messageBody) {logger.info("Receive2: Message received via stream, messageBody = {}", messageBody);}}
Step 7: Local Test
After the project is initiated locally, a successful startup notification will be displayed on the console.
Visit
http://localhost:8080/test-simple via a browser. You can see a successful transmission. Keep an eye on the output log of your development IDE.2023-02-23 19:19:00.441 INFO 21958 --- [nio-8080-exec-1] c.t.d.s.controller.StreamController : Send: Message sent via stream, messageBody = GenericMessage [payload={"key":"value"}, headers={id=3f28bc70-da07-b966-a922-14a17642c9c4, timestamp=1677151140353}]2023-02-23 19:19:01.138 INFO 21958 --- [nsumer-group1_1] c.t.d.s.StreamDemoApplication : Receive1: Message received via stream, messageBody = {"headers":{"id":"3f28bc70-da07-b966-a922-14a17642c9c4","timestamp":1677151140353},"payload":{"key":"value"}}
You can see that a message with the TAG1 has been sent, and only the subscriber of TAG1 has received the message.
Note:
Was this page helpful?
You can also Contact Sales or Submit a Ticket for help.
Yes
No