发送与接收普通消息
最后更新时间:2025-07-15 18:32:07
操作场景
本文以调用 Spring Boot Starter SDK 为例介绍通过开源 SDK 实现消息收发的操作过程,帮助您更好地理解消息收发的完整过程。
前提条件
操作步骤
步骤1:添加依赖
在 pom.xml 中添加依赖,建议 2.3.3 最新版本,可以同时支持 Spring Boot 2 和 Spring Boot 3。
<dependency><groupId>org.apache.rocketmq</groupId><artifactId>rocketmq-spring-boot-starter</artifactId><version>2.3.3</version><exclusions><exclusion><groupId>org.apache.rocketmq</groupId><artifactId>rocketmq-client</artifactId></exclusion><exclusion><groupId>org.apache.rocketmq</groupId><artifactId>rocketmq-acl</artifactId></exclusion></exclusions></dependency><dependency><groupId>org.apache.rocketmq</groupId><artifactId>rocketmq-client</artifactId><version>4.9.7</version></dependency><dependency><groupId>org.apache.rocketmq</groupId><artifactId>rocketmq-acl</artifactId><version>4.9.7</version></dependency>
步骤2:准备配置
在配置文件中添加配置信息。
server:port: 8082#rocketmq配置信息rocketmq:# tdmq-rocketmq服务接入地址name-server: rocketmq-xxx.rocketmq.ap-bj.public.tencenttdmq.com:9876# 生产者配置producer:# 生产者组名group: group111# 角色密钥access-key: eyJrZXlJZC....# 已授权的角色名称secret-key: admin# 消费者公共配置consumer:# 角色密钥access-key: eyJrZXlJZC....# 已授权的角色名称secret-key: admin# 自定义配置,根据业务进行配置namespace: rocketmq-xxx|namespace1producer1:topic: testdev1consumer1:group: group111topic: testdev1subExpression: TAG1consumer2:group: group222topic: testdev1subExpression: TAG2
参数 | 说明 |
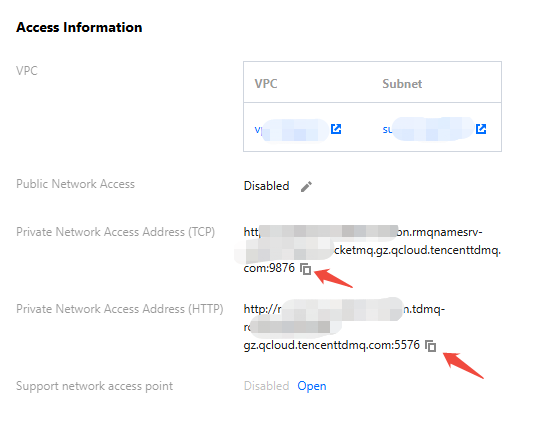
name-server | 集群接入地址,在控制台集群基本信息页面的接入信息模块获取。  |
group | 生产者的名称,用户自行定义,可以使用对应的 Topic 名字。 |
secret-key | 角色名称,在控制台的角色管理页面 SecretKey 列复制。 |
access-key | 角色密钥,在控制台的角色管理页面 AccessKey 列复制。  |
namespace | 命名空间的名称,在控制台命名空间页面复制。如果您使用的是5.x集群或者 4.x 通用集群,此处填写集群 ID 即可。 |
topic | Topic 的名称,在控制台 Topic 管理页面复制。 |
subExpression | 用来设置消息的 TAG。 |
步骤3:发送消息
1. 在需要发送消息的类中注入
RcoketMQTemplate 。@Value("${rocketmq.namespace}%${rocketmq.producer1.topic}")private String topic; // topic名称 (需要使用topic全称,所以在这里对topic名称进行拼接)@Autowiredprivate RocketMQTemplate rocketMQTemplate;
2. 发送消息,消息体可以是自定义对象,也可以是 Message 对象(org.springframework.messaging包中)。
SendResult sendResult = rocketMQTemplate.syncSend(destination, message);/*------------------------------------------------------------------------*/rocketMQTemplate.syncSend(destination, MessageBuilder.withPayload(message).build())
3. 完整示例如下。
/*** Description: 消息生产者*/@Servicepublic class SendMessage {// 需要使用topic全称,所以进行topic名称的拼接,也可以自己设置 格式:namespace全称%topic名称@Value("${rocketmq.namespace}%${rocketmq.producer1.topic}")private String topic;@Autowiredprivate RocketMQTemplate rocketMQTemplate;/*** 同步发送** @param message 消息内容* @param tags 订阅tags*/public void syncSend(String message, String tags) {// springboot不支持使用header传递tags,根据要求,需要在topic后进行拼接 formats: `topicName:tags`,不拼接标识无tagString destination = StringUtils.isBlank(tags) ? topic : topic + ":" + tags;SendResult sendResult = rocketMQTemplate.syncSend(destination,MessageBuilder.withPayload(message).setHeader(MessageConst.PROPERTY_KEYS, "yourKey") // 指定业务key.build());System.out.printf("syncSend1 to topic %s sendResult=%s %n", topic, sendResult);}}
步骤4:消费消息
@Service@RocketMQMessageListener(consumerGroup = "${rocketmq.namespace}%${rocketmq.consumer1.group}", // 消费组,格式:namespace全称%group名称// 需要使用topic全称,所以进行topic名称的拼接,也可以自己设置 格式:namespace全称%topic名称topic = "${rocketmq.namespace}%${rocketmq.consumer1.topic}",selectorExpression = "${rocketmq.consumer1.subExpression}" // 订阅表达式, 不配置表示订阅所有消息)public class MessageConsumer implements RocketMQListener<String> {@Overridepublic void onMessage(String message) {System.out.println("Tag1Consumer receive message:" + message);}}
可根据业务需求配置多个消费者。消费者其他配置可根据具体业务需求进行配置。
步骤5:查看消费详情
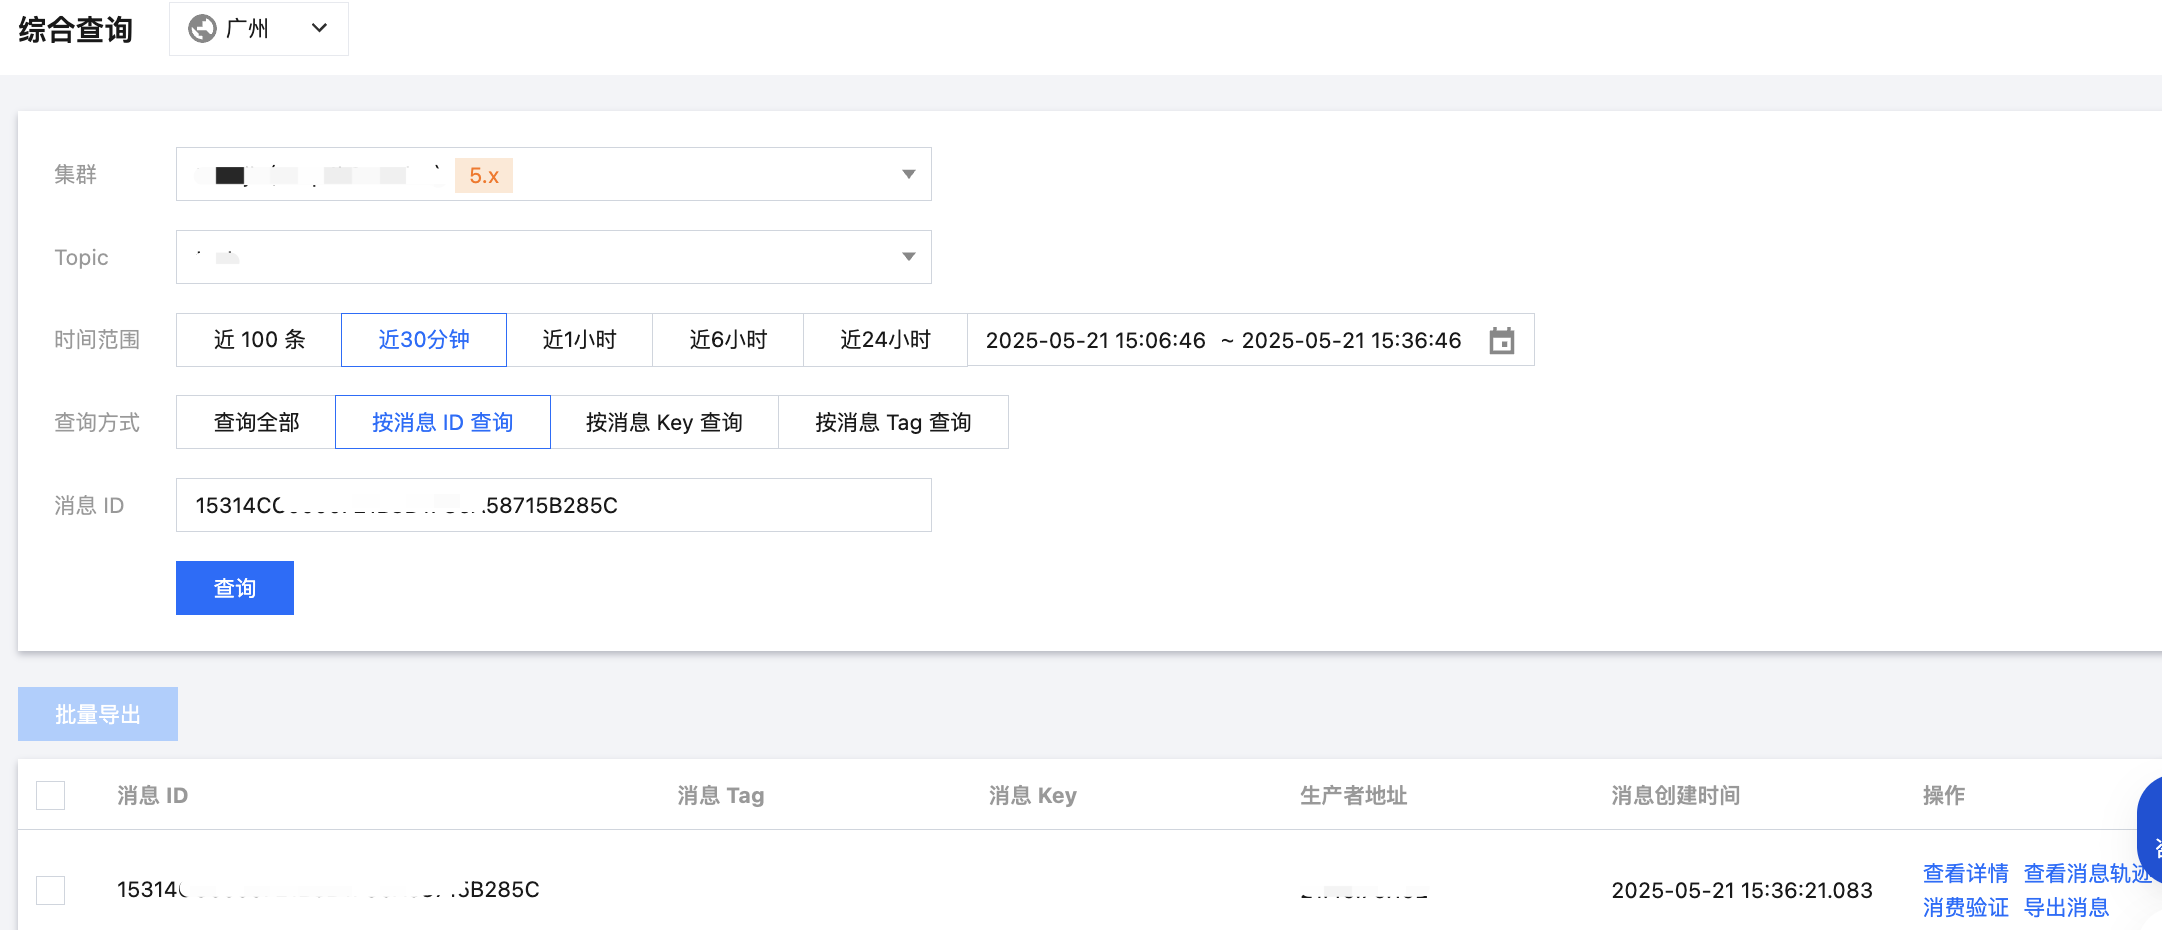
发送完成消息后会得到一个消息 ID (messageID),您可以在控制台的消息查询 > 综合查询页面查询刚刚发送的消息,以及该消息的详情和轨迹等信息。

文档反馈

