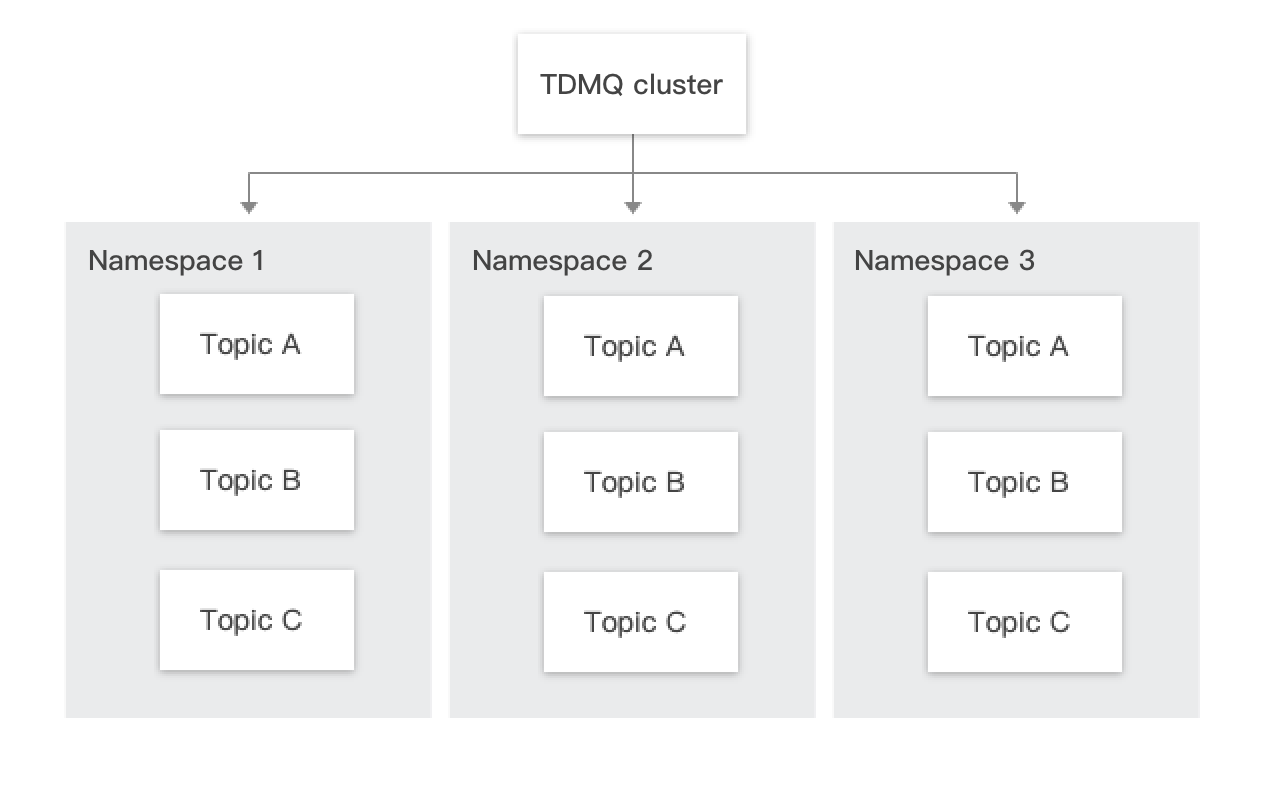
Cluster is a resource dimension in TDMQ for Apache Pulsar, and namespaces, topics, and role permissions of different clusters are completely isolated from each other. Each cluster has its own resource limits, such as the total number of topics and message retention period. It is common for the development, test, and production environments to use their respective dedicated clusters.
Professional cluster: Physical resources are exclusive, and data is secure. There are almost no use limits. Resource usage fees will be charged even if resources are idle.
Note:
Currently, clusters are available in multiple versions. For more information, see Cluster Version Updates.
Billing mode: Professional cluster supports monthly subscription mode. For more details, see Billing Overview.
Region: Select a region closest to your business. Cloud products in different regions cannot communicate over the private network. The choice cannot be changed after purchase. Choose with caution. For example, cloud servers in the Guangzhou region cannot access clusters in the Shanghai region over the private network. For cross-region private network communication, see Peering Connection.
Cluster Name: Define the cluster name. It cannot be empty. Alphanumeric characters as well as symbols “-_=:.” are supported. The length cannot exceed 64 characters.
Tenant alias: Used to customize the tenant name for client access to the cluster. Defaults to the cluster ID. If you do not use it for self-build migration to the cloud, it is recommended not to enable it.
Elastic storage or fixed storage form: select.
Specification: Select the cluster specifications that suit your business needs. For a description of different cluster configurations, see Pro Cluster Specifications.
Storage: Select the storage specifications that suit your business needs. The Pulsar pro cluster is deployed with 3 replicas by default.
Cross-AZ Deployment:The Professional Edition Cluster supports deployment in three different availability zones.For more details, see Cross Availability Zone Deployment.
Virtual Private Cloud: Bind the newly purchased cluster's access point domain name to the specified Virtual Private Cloud.
Public network access: It is not enabled by default. To enable it, submit a ticket for application. We recommend you only enable this option for development and test clusters as it cannot be disabled once enabled.
2. Create a namespace as instructed in Namespace in the cluster.
3. Create a role as instructed in Role and Authentication in the cluster and grant it the production/consumption permissions of the namespace.
4. Create a topic as instructed in Topic Management in the namespace.
5. Write a demo as instructed in SDK Overview and configure the connection information and token for message production/consumption.
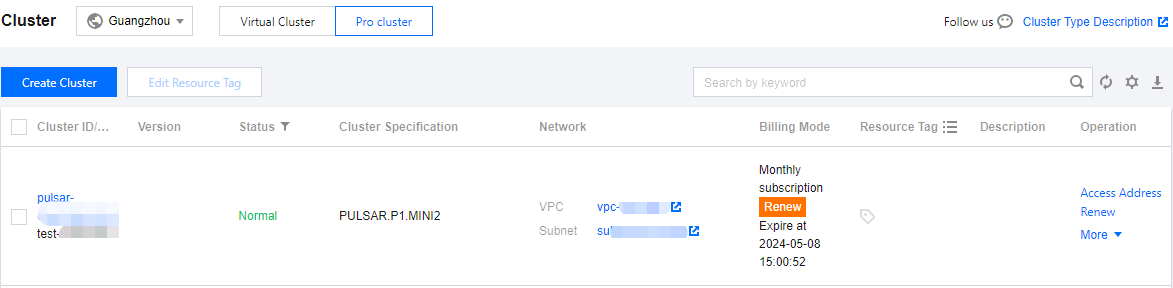
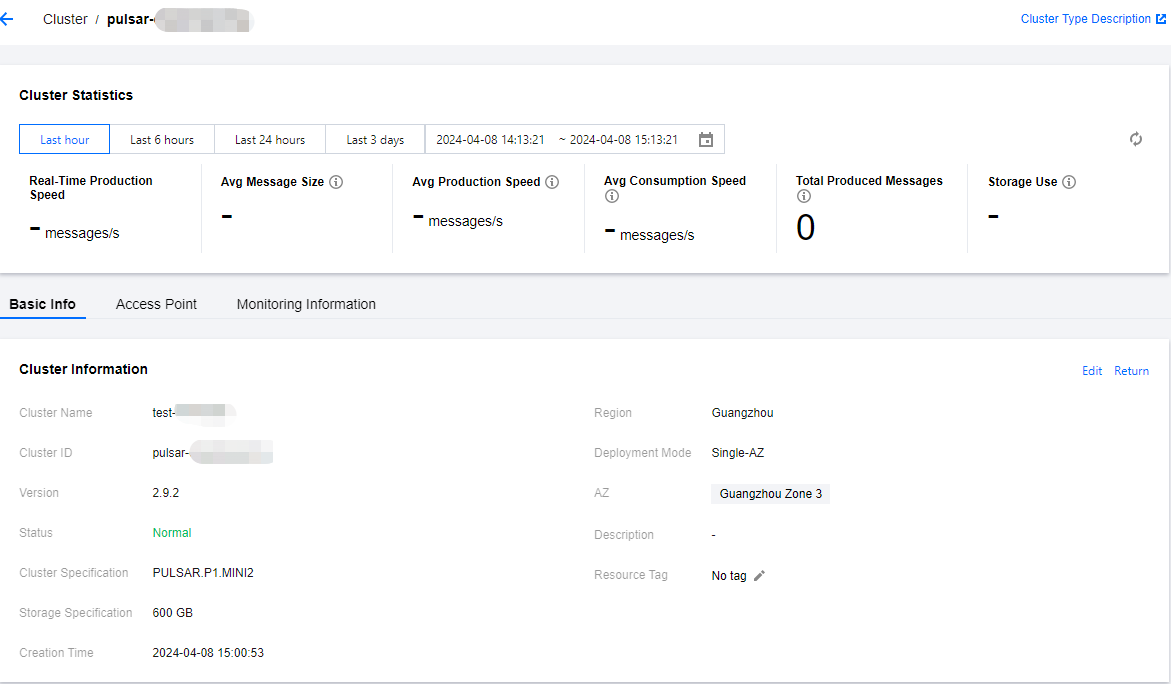
Viewing cluster details
On the Cluster Management list page, click the ID of the target cluster to enter the cluster details page, where you can view the following information:
Professional Cluster
Virtual Cluster
Metrics
Description
Real-Time Production Speed
The number of messages produced to the cluster per second at the current time.
Average Message Size
The average size of message data within the selected time range, including the size of the message header and body.
Average Production Speed
The average rate at which messages are produced to the cluster within the selected time range.
Average Consumption Speed
The average rate at which the cluster pushes messages to clients within the selected time range.
Total Produced Messages
The number of messages produced to the cluster within the selected time range.
Storage Use
At the last time point of the selected time range, the actual size of message data consumed by storage. (This value changes only with the end point of the time range).
Basic information of the cluster: cluster name/ID, version, access address, region, cluster specification, billing mode, etc.
Cluster statistics: Displays the average message size, average production and consumption rate, number of produced messages, and cumulative storage duration within a specific time range.
Note:
Statistics data is not supported for clusters on version 2.6.x.
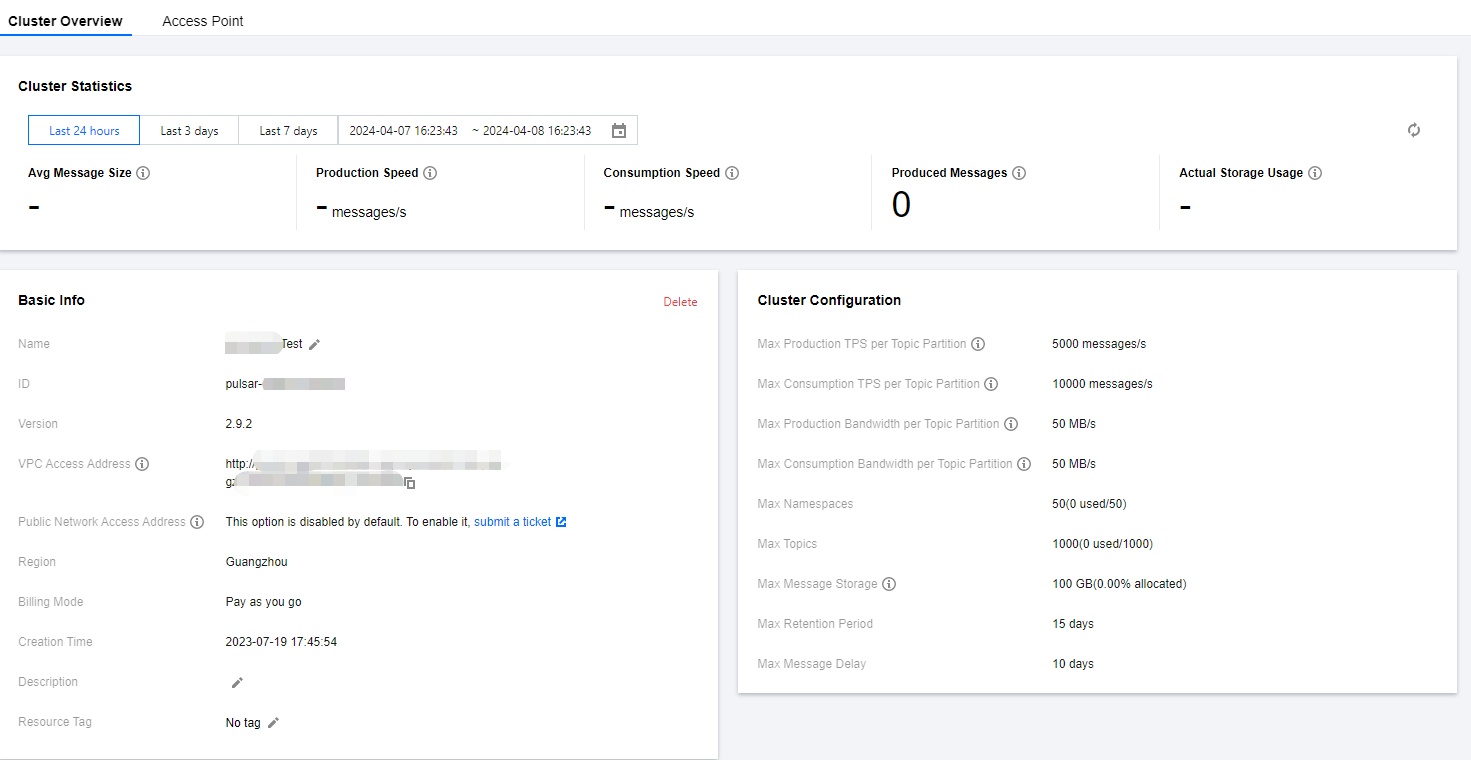
Metrics
Description
Average Message Size
The average size of message data within the selected time range, including the size of the message header and body.
Production Speed
The average rate at which messages are produced to the cluster within the selected time range.
Consumption Speed
The average rate at which the cluster pushes messages to clients within the selected time range.
Produced Messages
The number of messages produced to the cluster within the selected time range.
Actual Storage Usage
At the last time point of the selected time range, the actual size of message data consumed by storage. (This value changes only with the end point of the time range).
Basic information of the cluster: Cluster name/ID, version, access address (can only view in clusters v2.7.1 and above), region, billing mode, creation time, description, resource tags.
Cluster configuration:
Cluster Configuration
Configuration Instructions
Max Production TPS per Topic Partition
Maximum number of messages that can be produced per second per single Topic partition.
Max Consumption TPS per Topic Partition
Maximum number of messages that can be pushed to the client per second per single Topic partition.
Max Production Bandwidth per Topic Partition
Maximum message size that can be produced per second per single Topic partition.
Max Consumption Bandwidth per Topic Partition
Maximum message size that can be pushed to the client per second per single Topic partition.
Max Namespaces
Maximum number of namespaces that can be created within a cluster.
Max Topics
Maximum number of Topics that can be created per namespace.
Max Message Storage
Maximum disk capacity used by message backlog, exceeding this will prevent the production of new messages (under normal circumstances, message backlog should not be too large. If such a situation occurs, check whether the business is normally consuming messages).
Max Retention Period
Maximum message retention period that can be configured. A shorter period can be configured at the namespace level.
Max Message Delay
Maximum message consumption time delay.
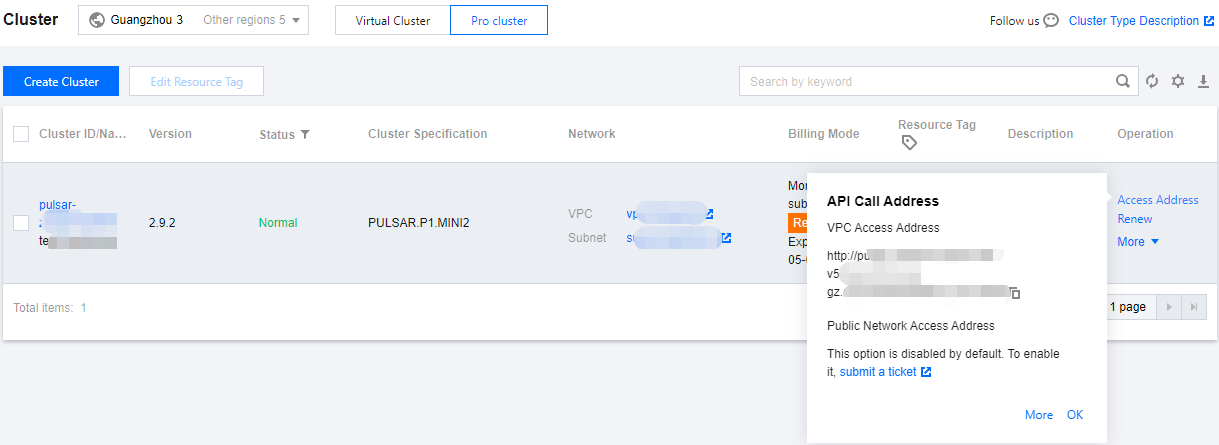
Getting the access address
On the Cluster Management list page, click Access Address in the Operation column of the target cluster. You can get the access address in the following ways:
Note:
A cluster can be configured with multiple access points. Currently only VPC network access is supported. For configuration method, see VPC Access.
Pro Cluster Send-Receive Ratio Configuration
Configuration path: Pro Cluster Details > Basic Information > Cluster Configuration > Send-Receive Ratio Configuration Item . At the top right corner, click Edit for configuration.