This scenario applies when you do not have a Cloud Exchange (CX) platform account and need to achieve interconnection between Tencent Cloud and another cloud. This service is provided by Tencent Cloud on behalf of the customer to purchase the CX platform connection service, so as to help customers achieve one-stop connection.
This document uses the example of achieving interconnection between Tencent Cloud and AWS Cloud on the Equinix platform to introduce the practical tutorial.
Regardless of different CX platforms or different peer clouds, customers only need to perform standard and unified operations on the Tencent Cloud console and the peer cloud console. Therefore, this document applies to all one-stop interconnection scenarios for different CX platforms and different peer clouds.
I. Providing Information
If you have a need for CX, contact your business manager or Submit a Ticket to apply. We will provide you with a suitable networking solution.
Meanwhile, prepare the following information in advance:
1. Peer cloud: for example, AWS.
2. Peer region: for example, Singapore.
3. Peer cloud account information: for example, AWS account ID.
4. Bandwidth: for example, 10G*2.
5. Region: for example, Singapore.
6. Special requirements: for example, latency.
7. VLAN information: for example, 2999.
After you provide the above information, we will conduct a resource check as soon as possible and timely notify you to proceed with the next step after the check is completed. The estimated processing time is 1 to 7 working days.
II. Configuration on the AWS Side
Step 1: Accepting the CX Connection Request
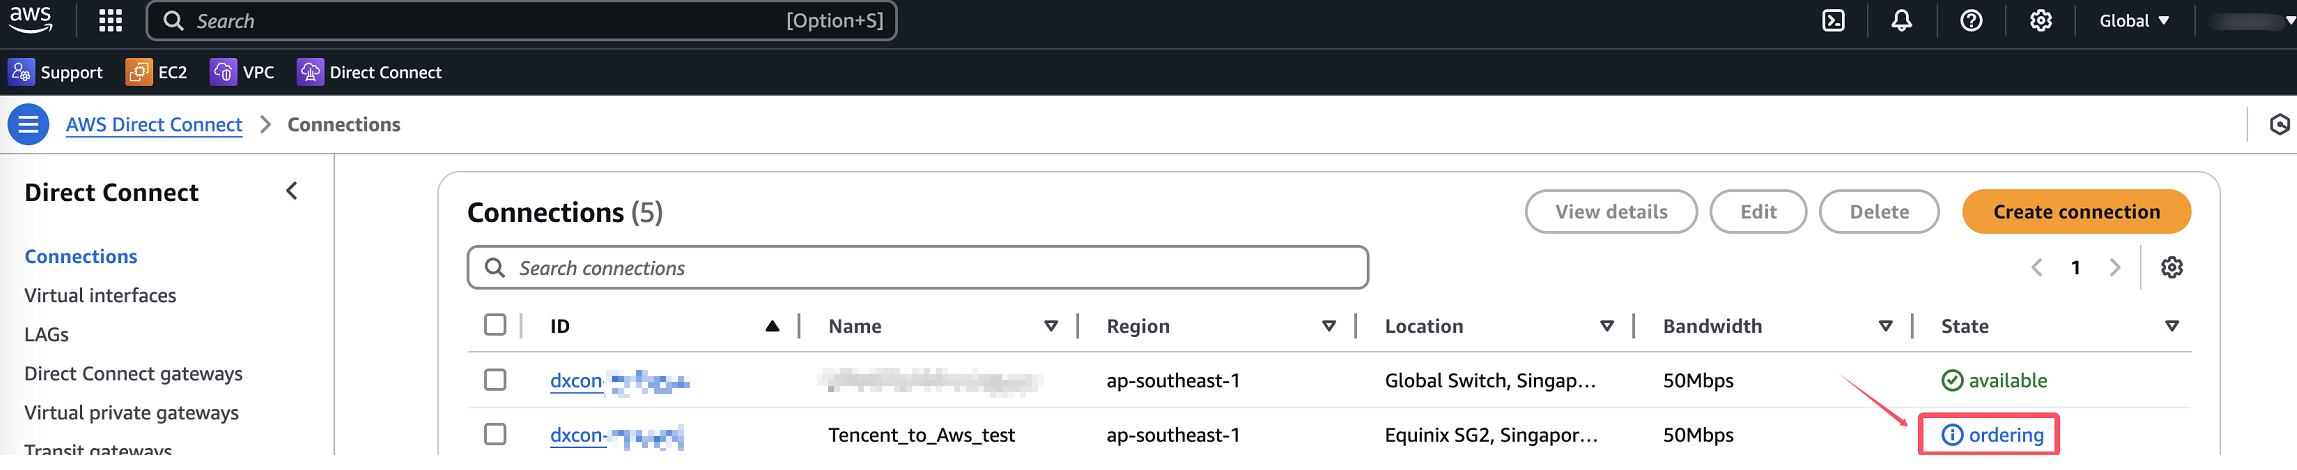
1. Log in to the Direct Connect console of AWS Cloud and click Connections in the left navigation bar to enter the connection list page. Click the connection ID with ordering status to view the connection details.
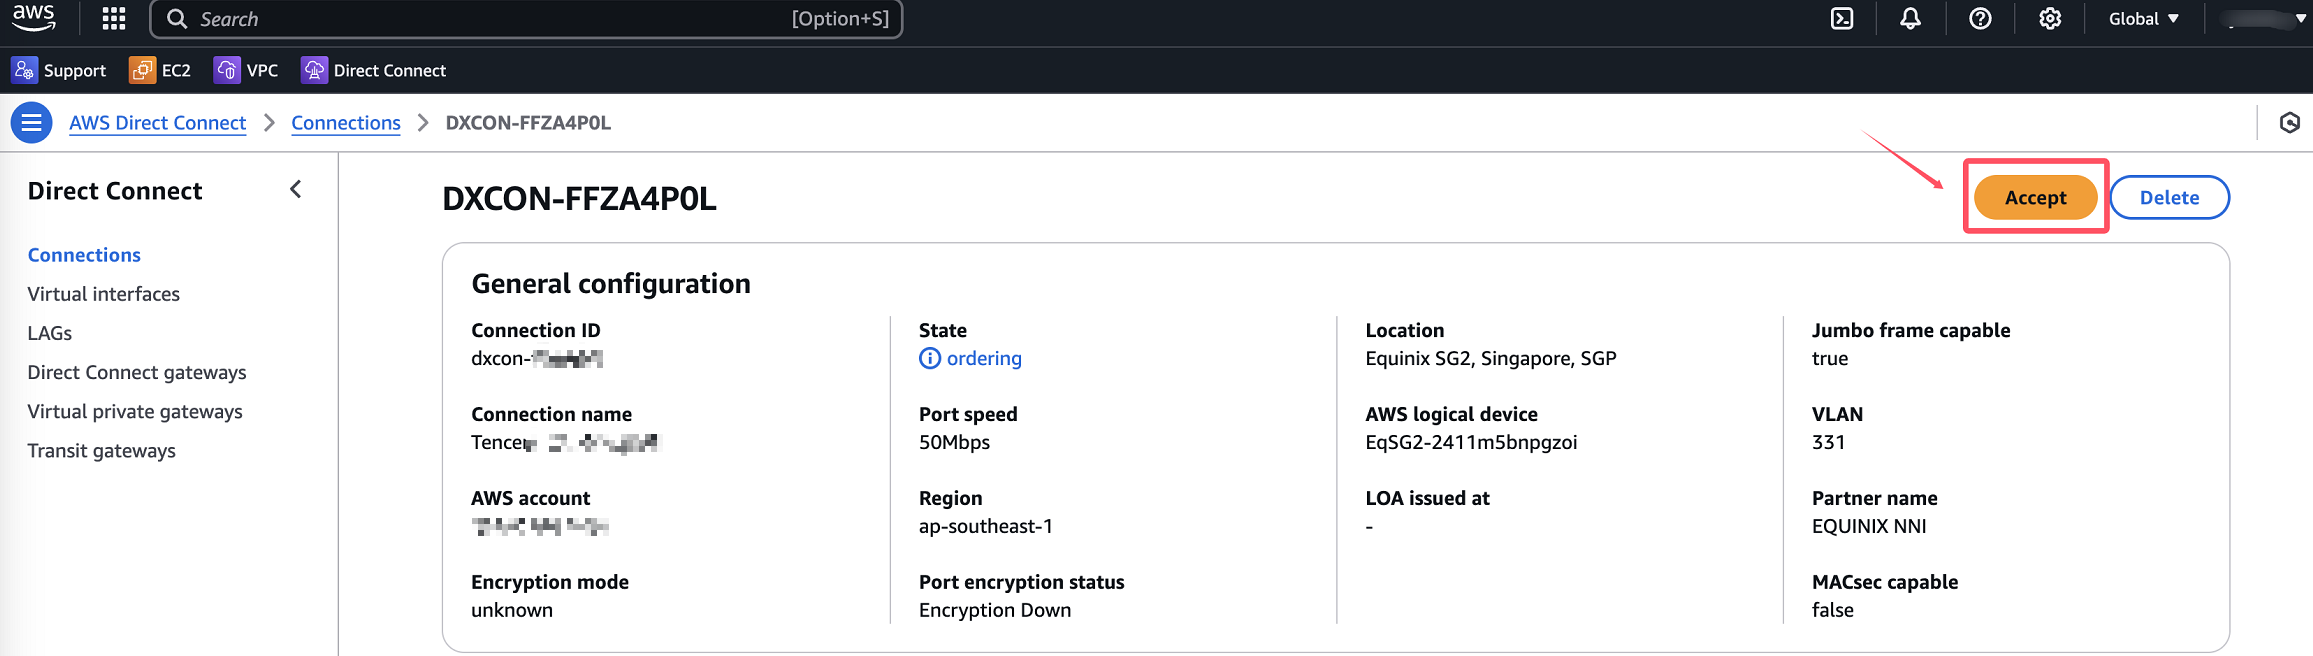
2. Click Accept on the right to approve the connection order.
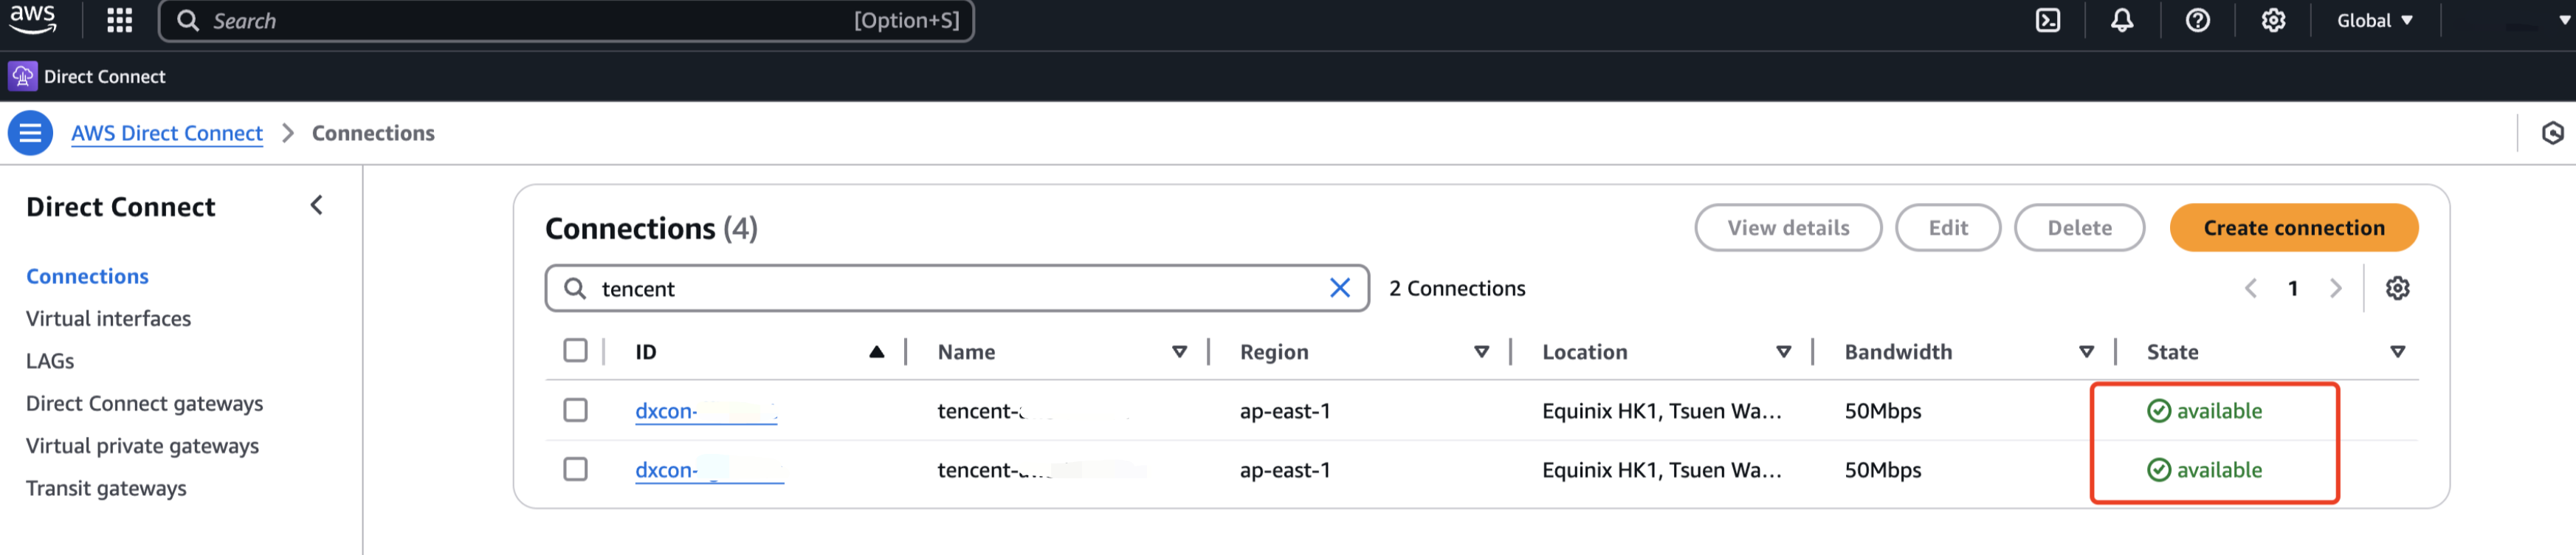
3. Wait for the configuration to complete until the connection status is available.
Note:
Subsequent steps for the configuration on the AWS side can be built by customers according to their business needs. Similar situations apply to other cloud providers.
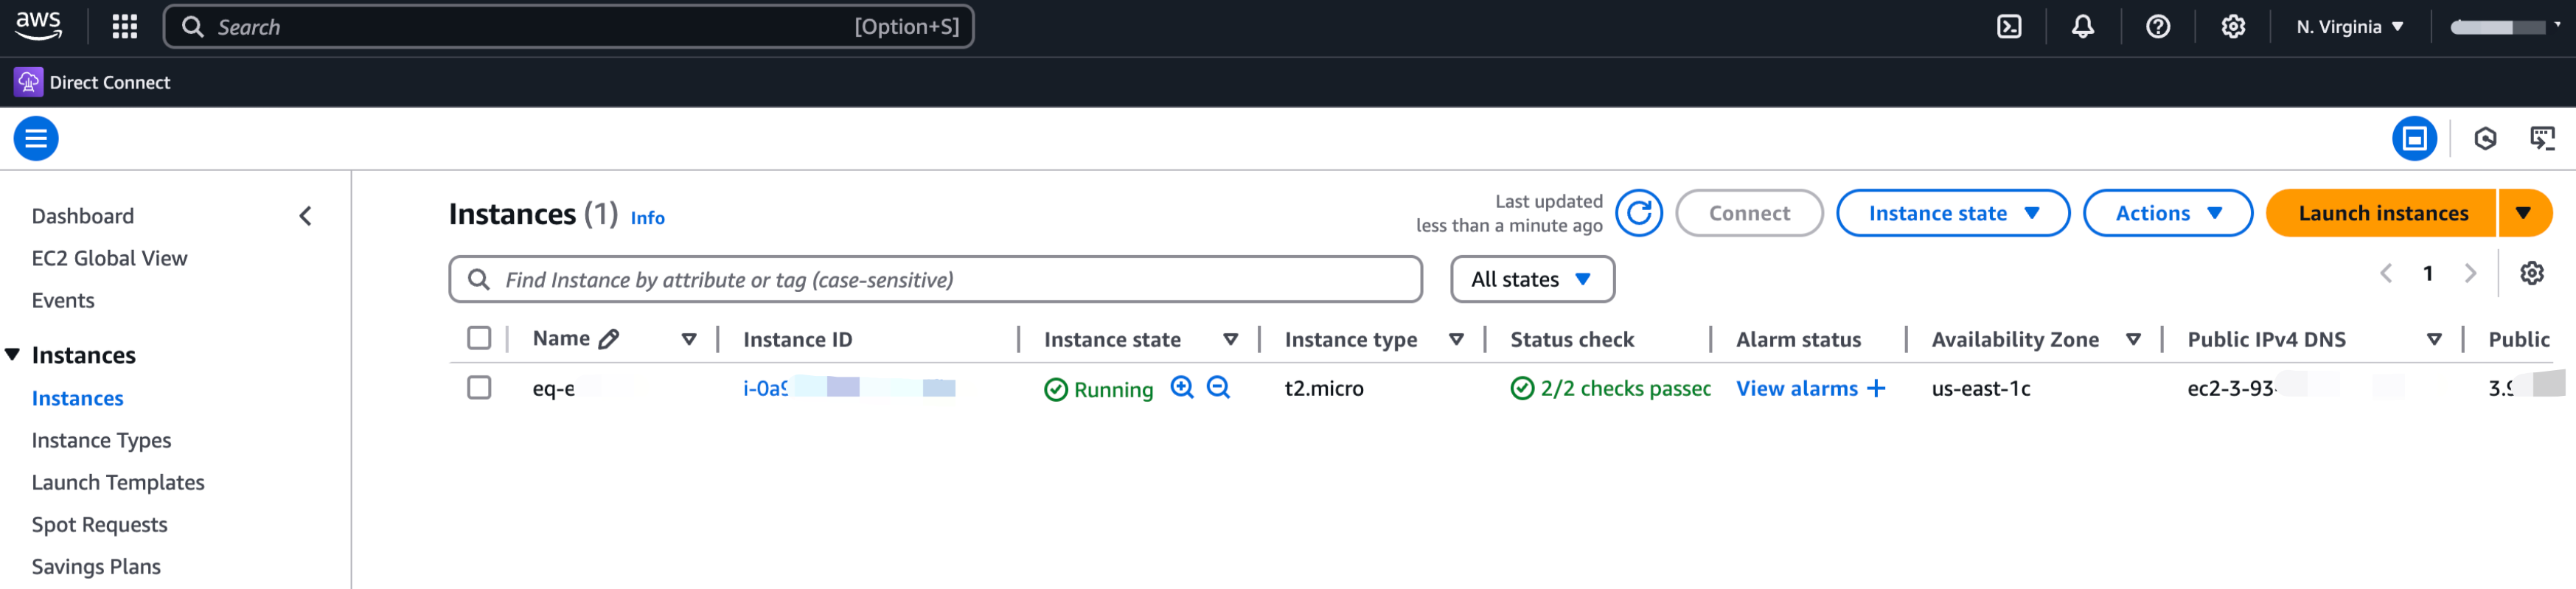
Step 2: Creating EC2 and Generating a Default VPC
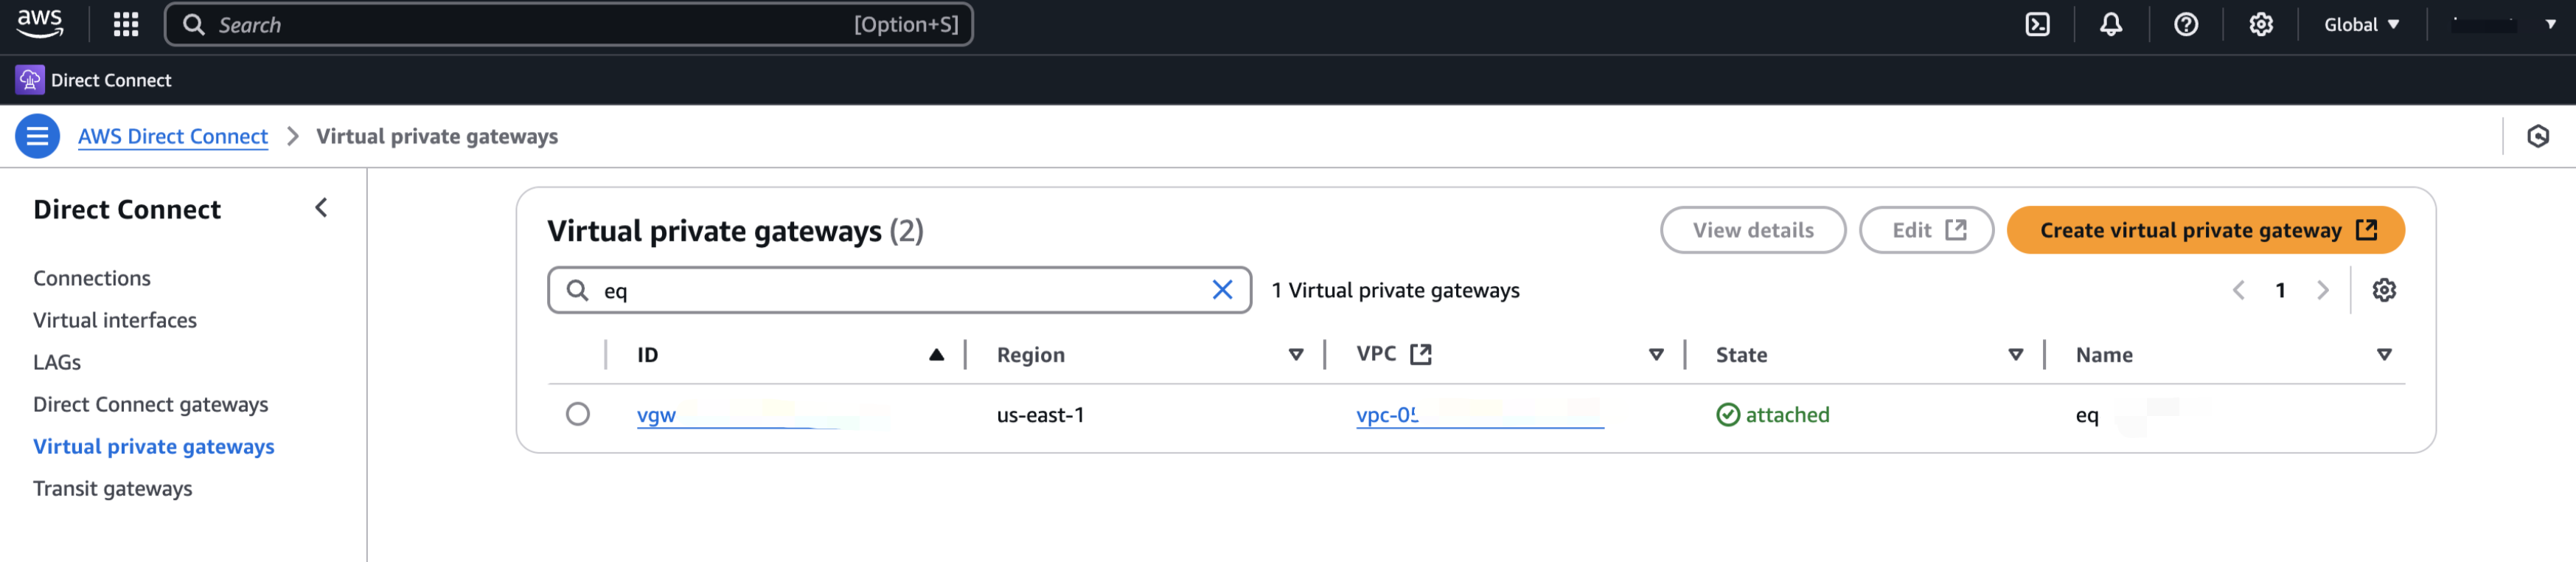
Step 3: Creating a Virtual Private Gateway and Associating it with the Default VPC
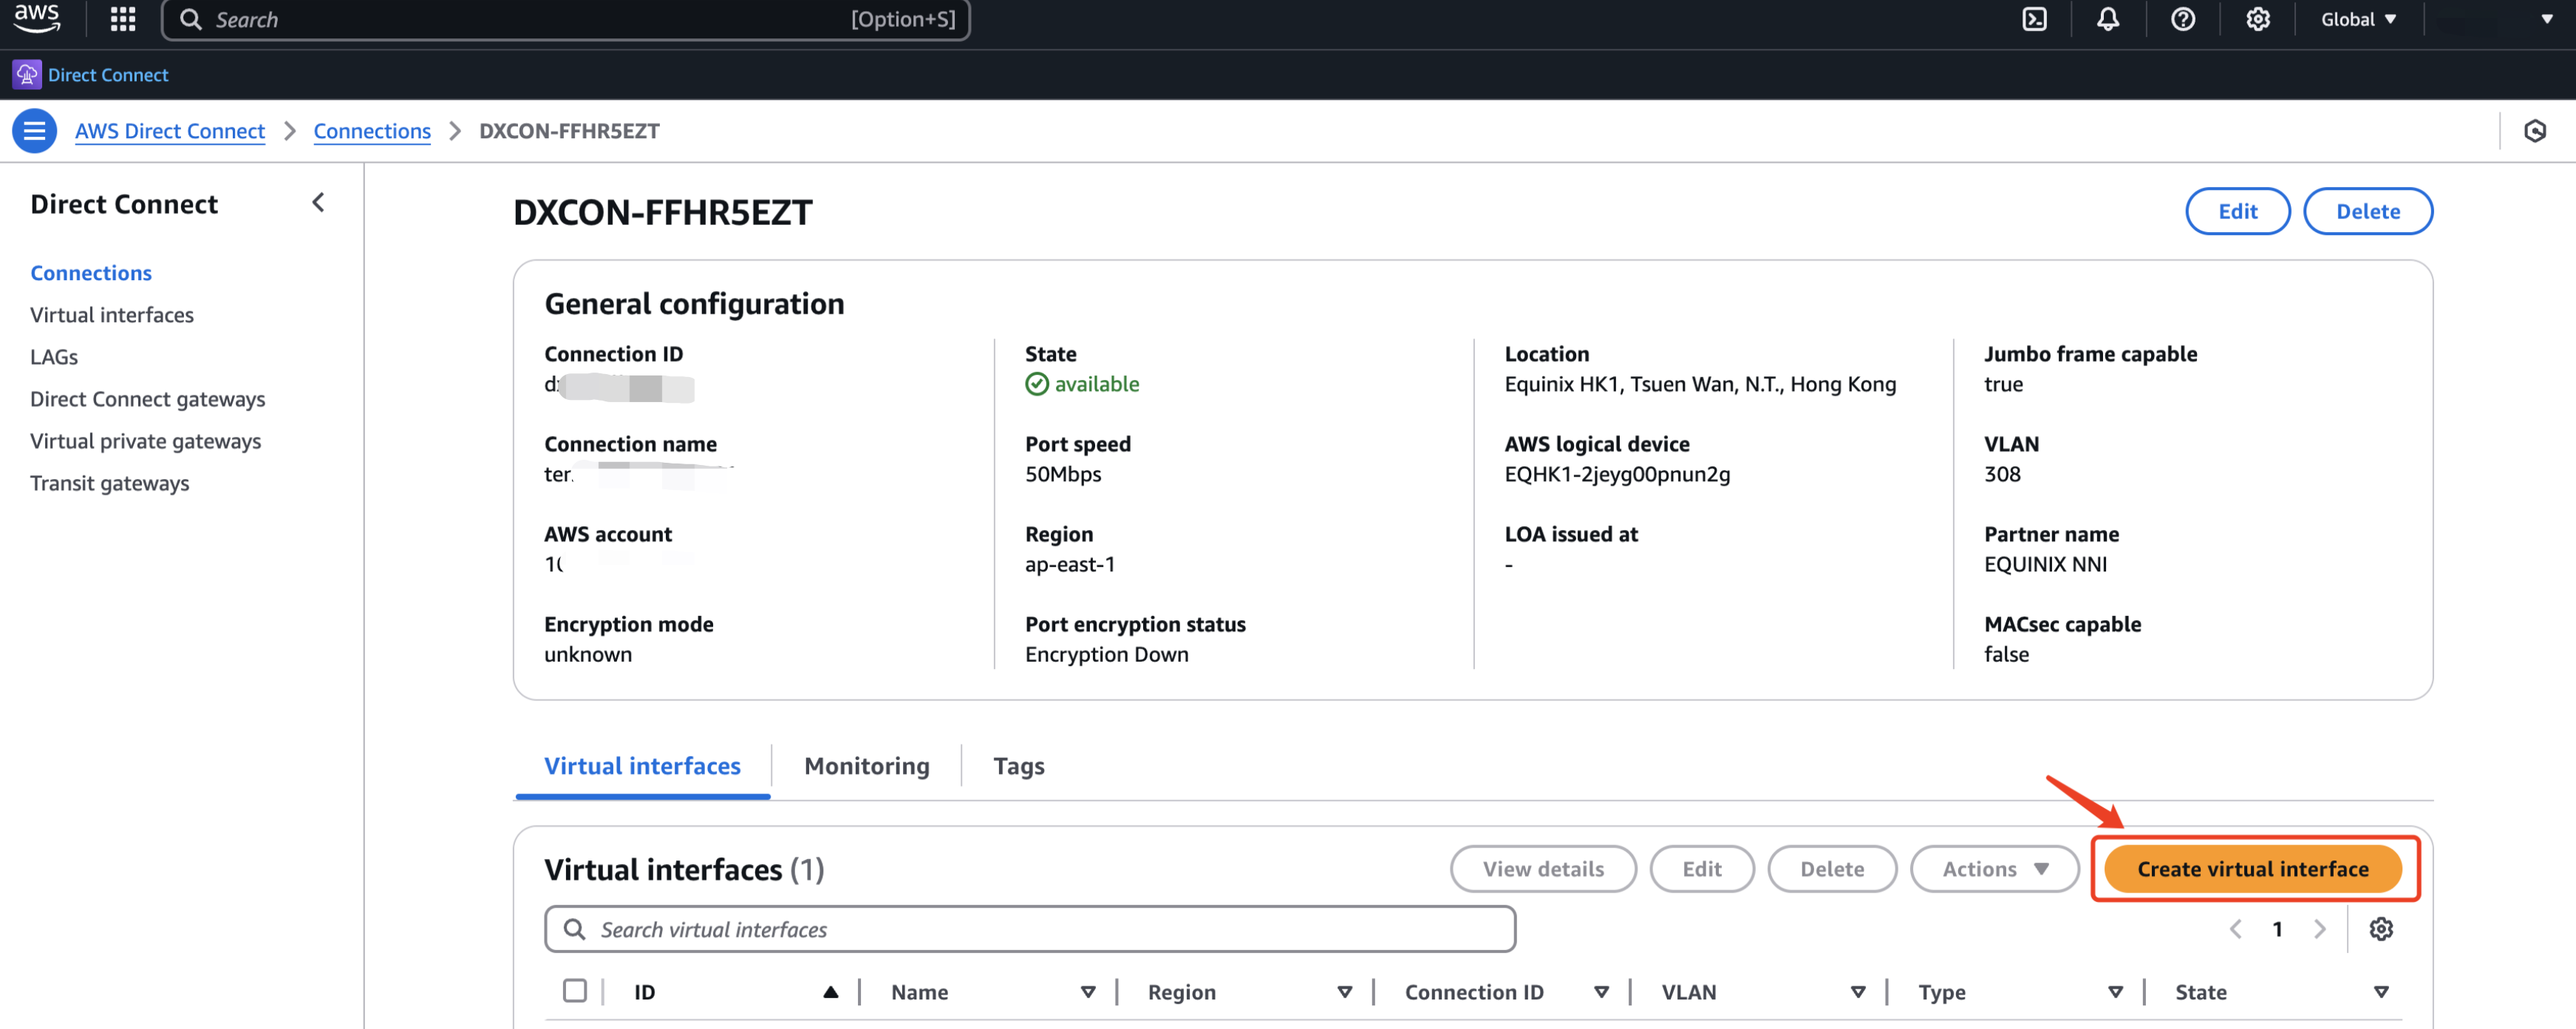
Step 4: Creating a Virtual Interface
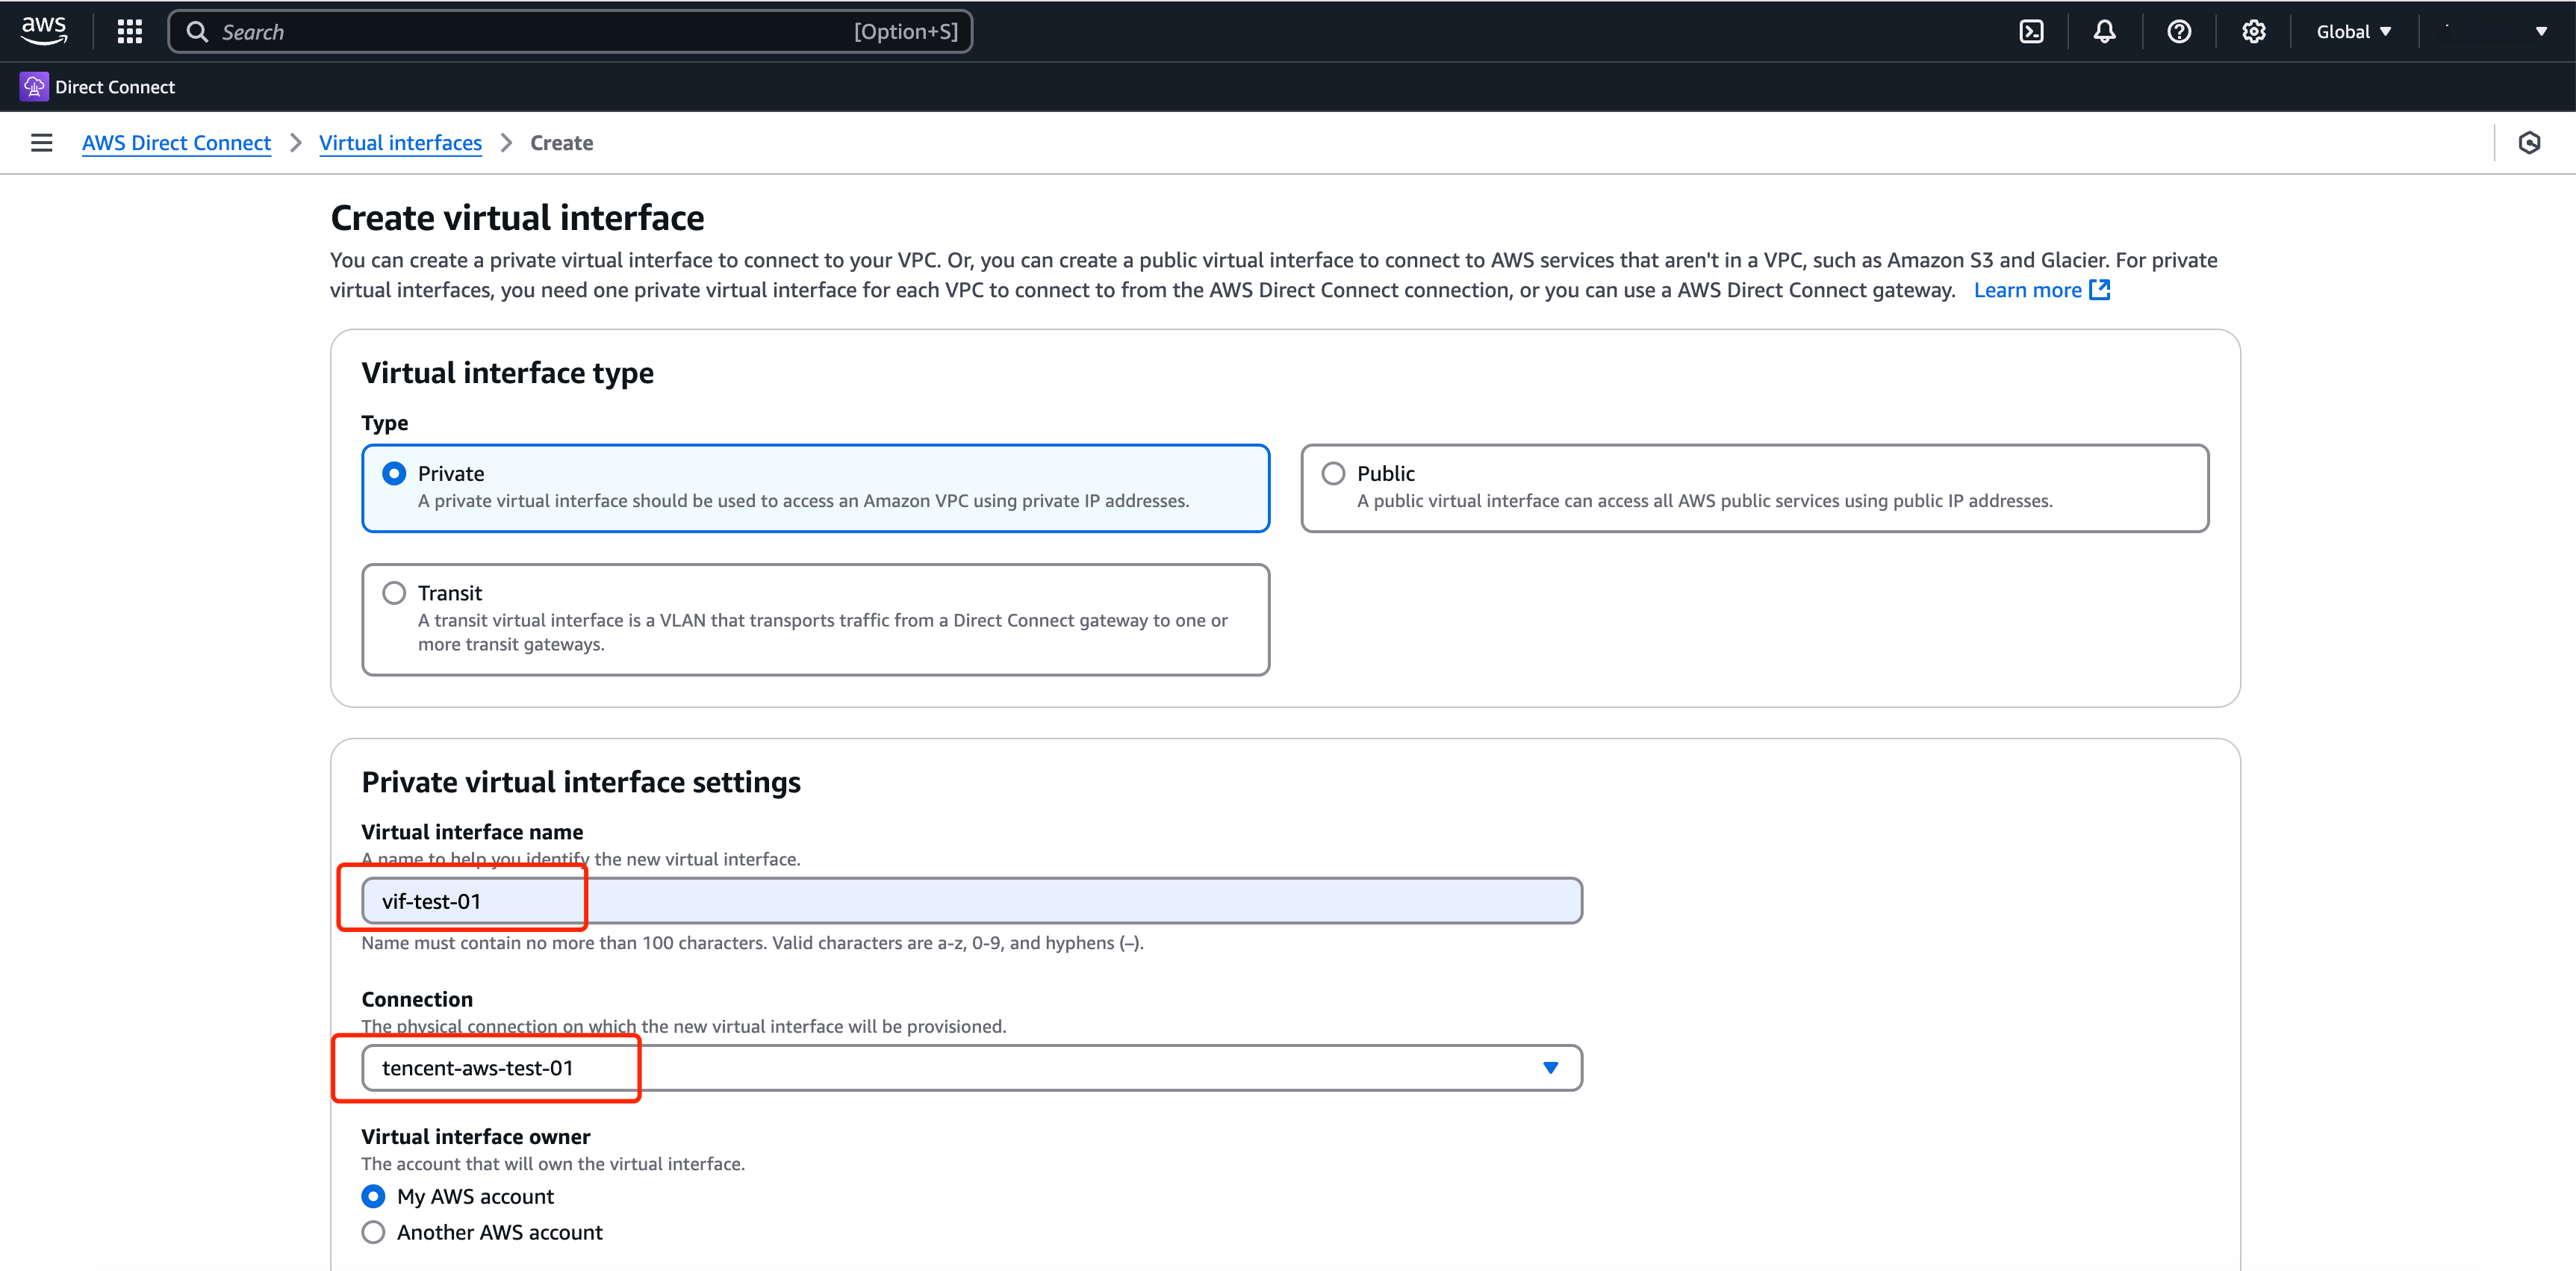
1. On the connection details page, click Create Virtual Interface.
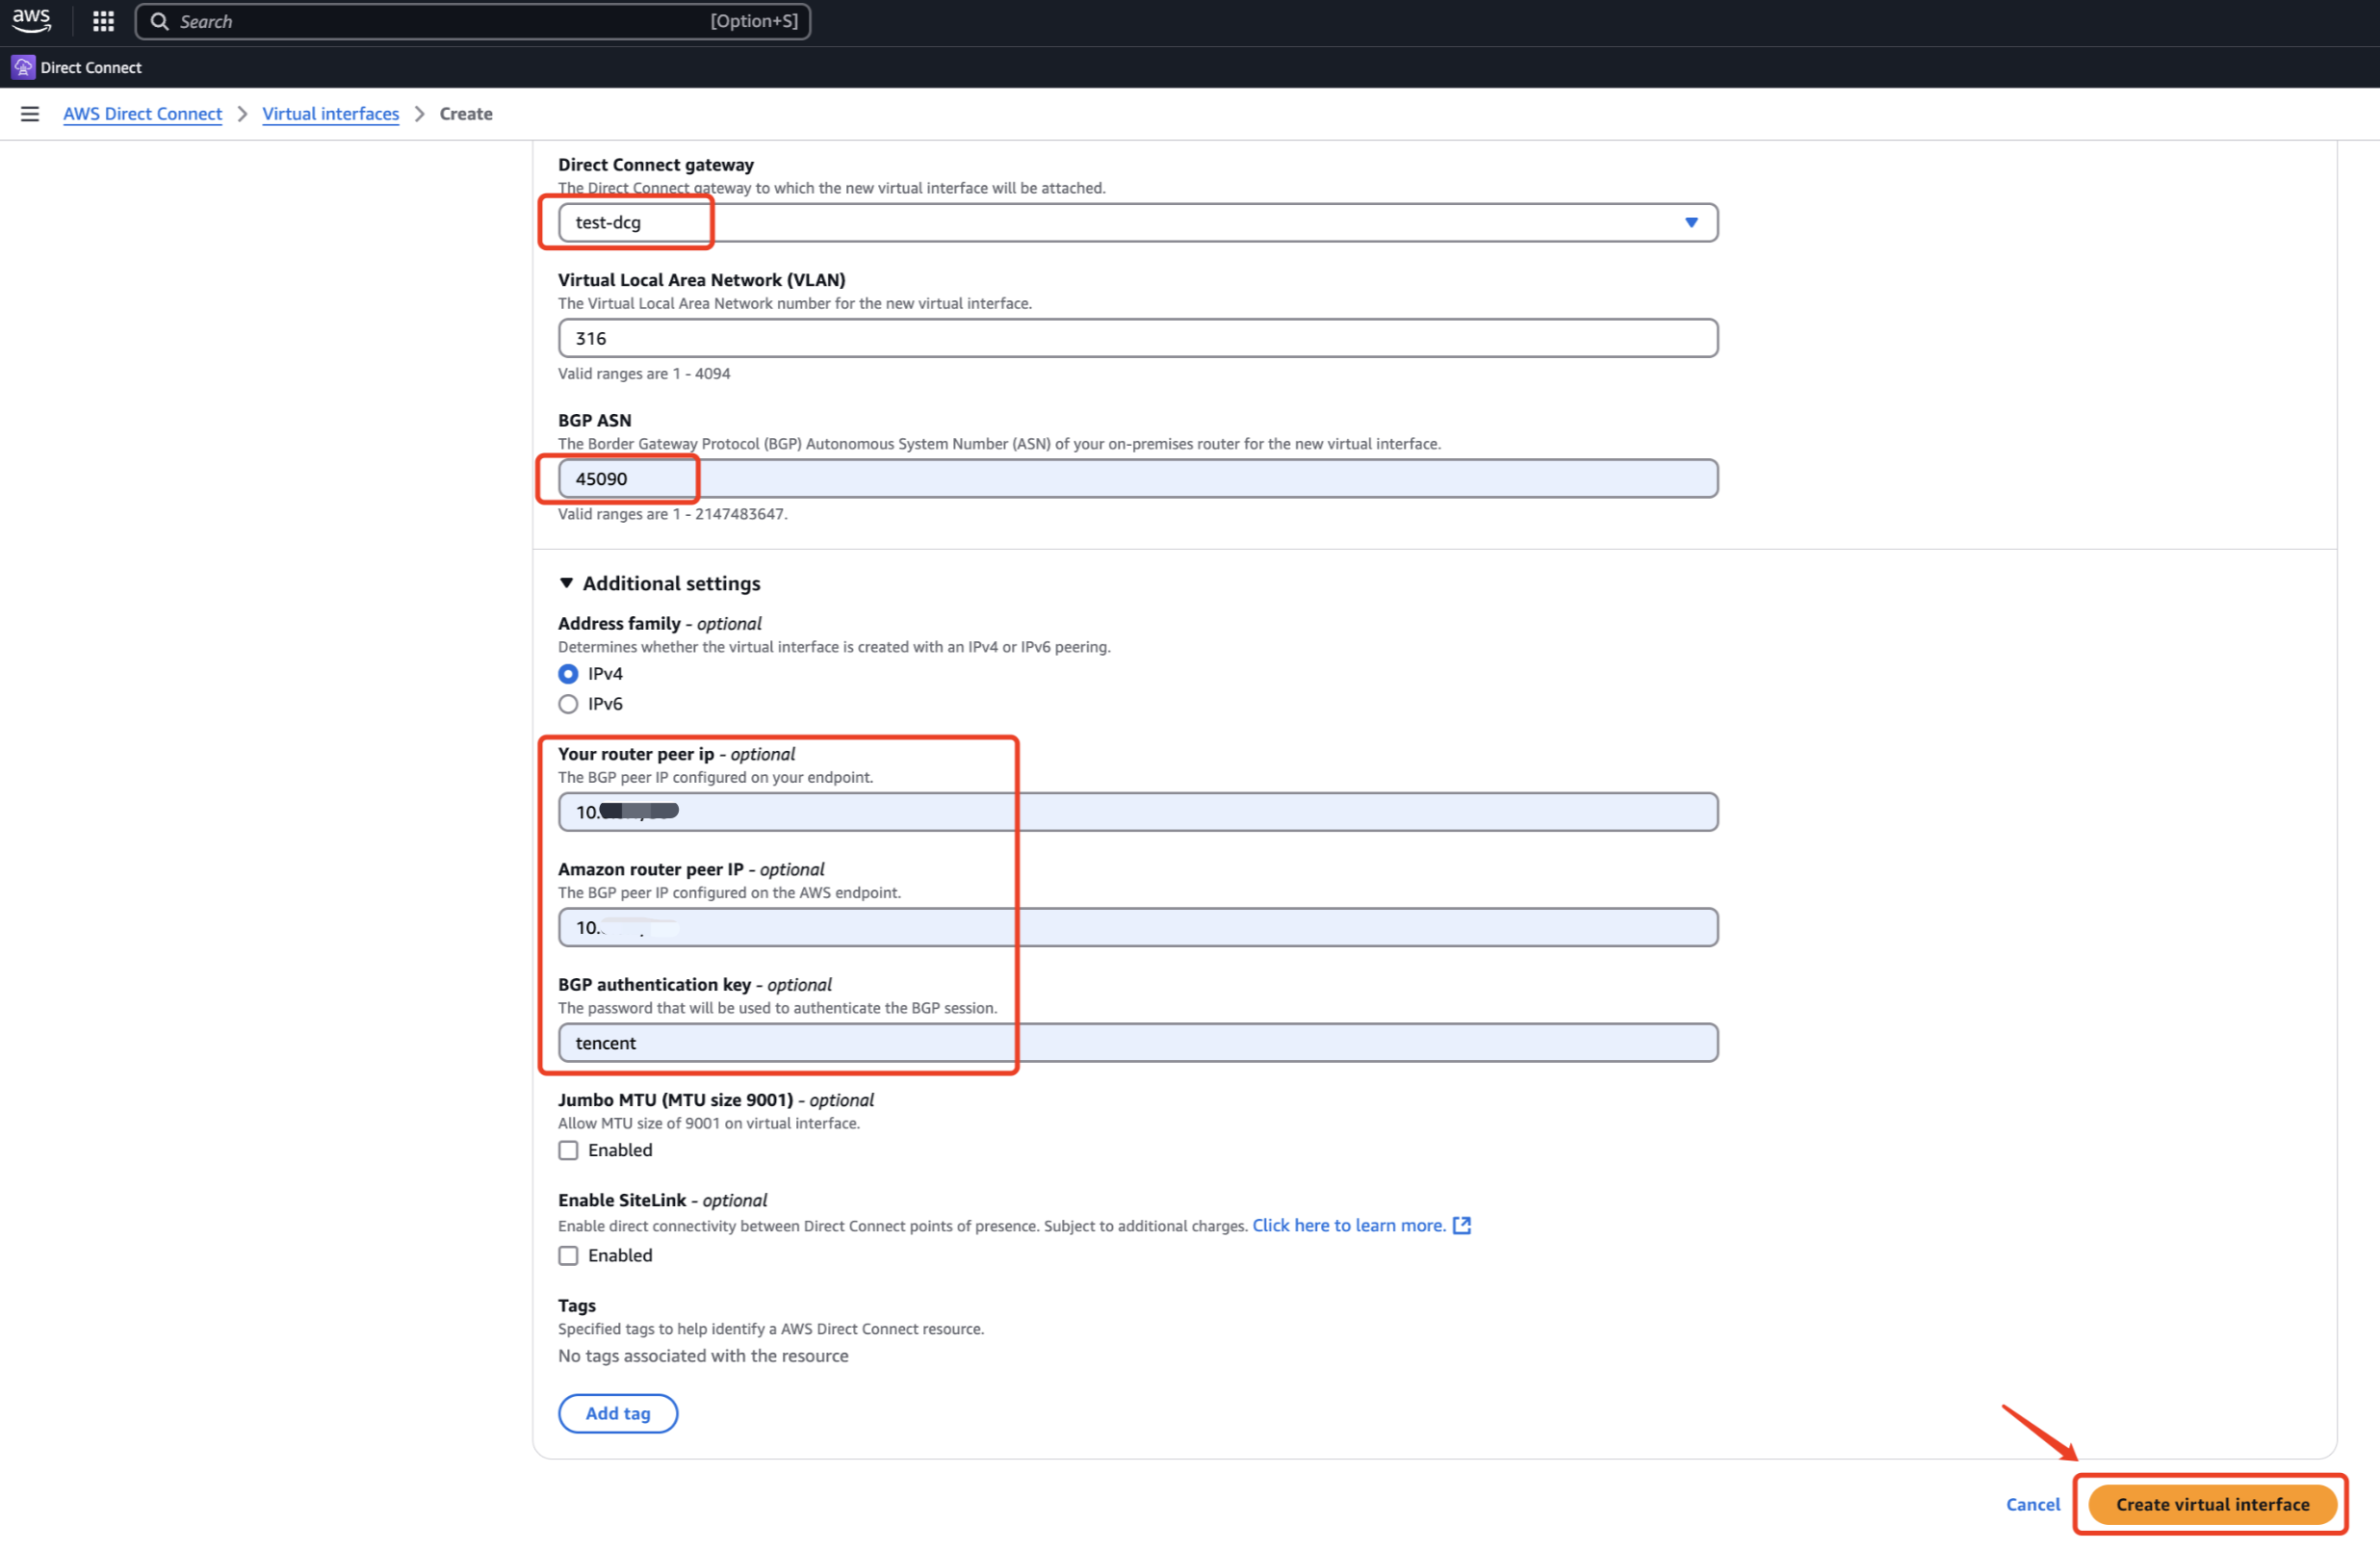
2. Fill in the virtual interface information, select the corresponding connection and Direct Connect gateway, fill in the virtual interface configuration information, and click Create Virtual Interface to complete the virtual interface configuration.
Note:
In this example, the peer IP, BGP ASN, and BGP key entered in the AWS console must match the configuration entered in the Tencent Cloud console, otherwise the virtual interface cannot be connected.
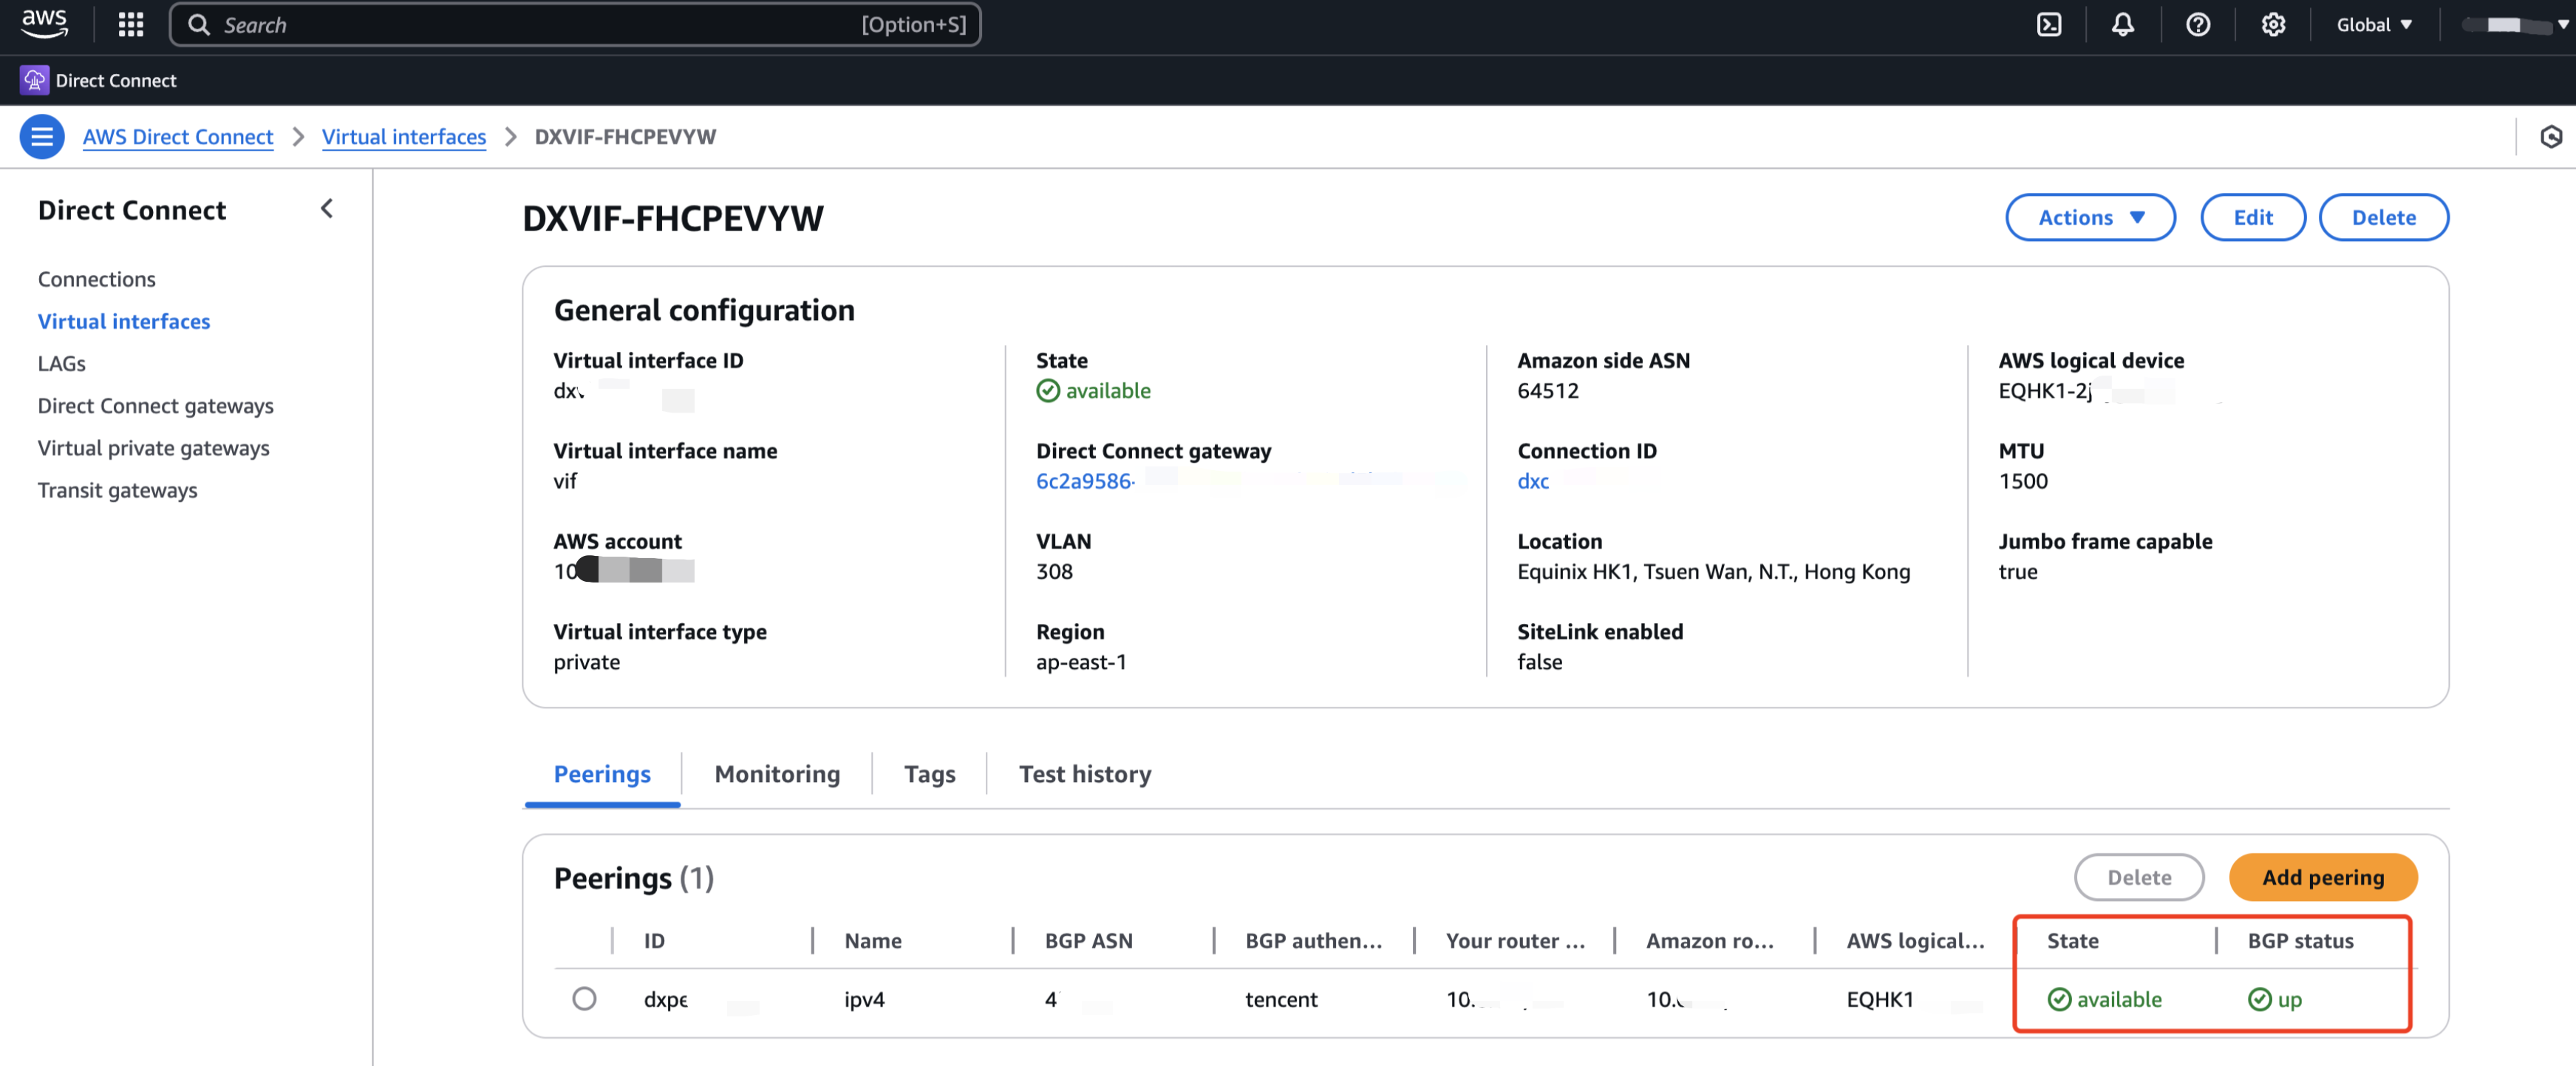
Step 5: Confirming the Virtual Interface Status
1. Wait for Tencent Cloud service personnel to complete the configuration on the Tencent side.
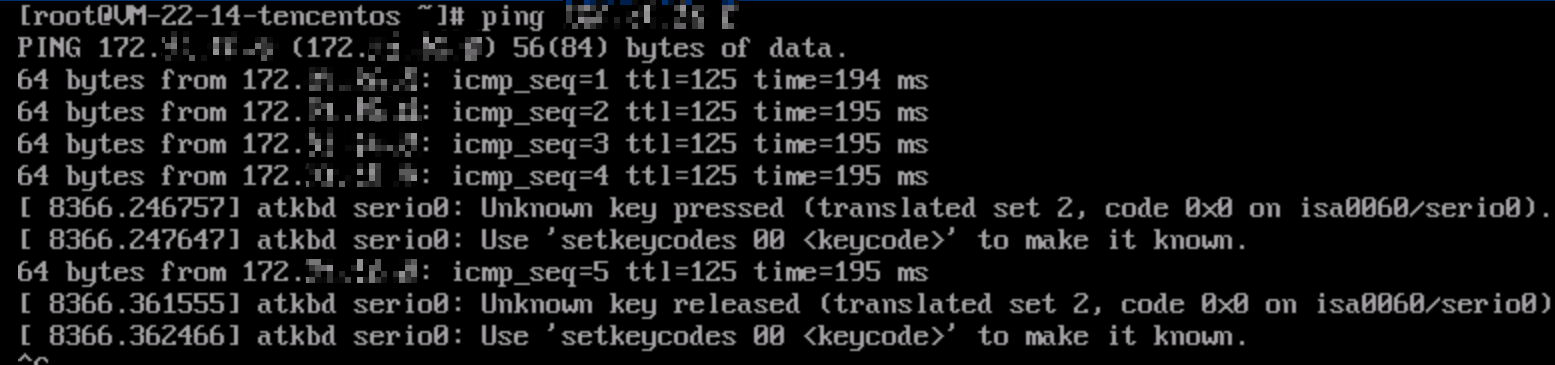
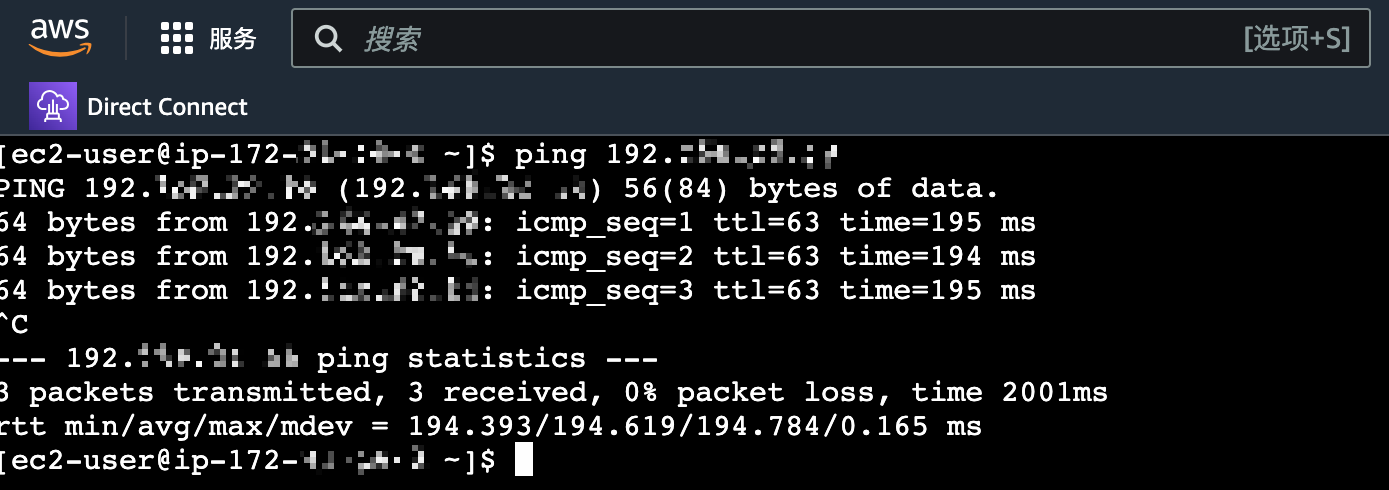
2. Check and confirm that the virtual interface is available and the BGP status is up.
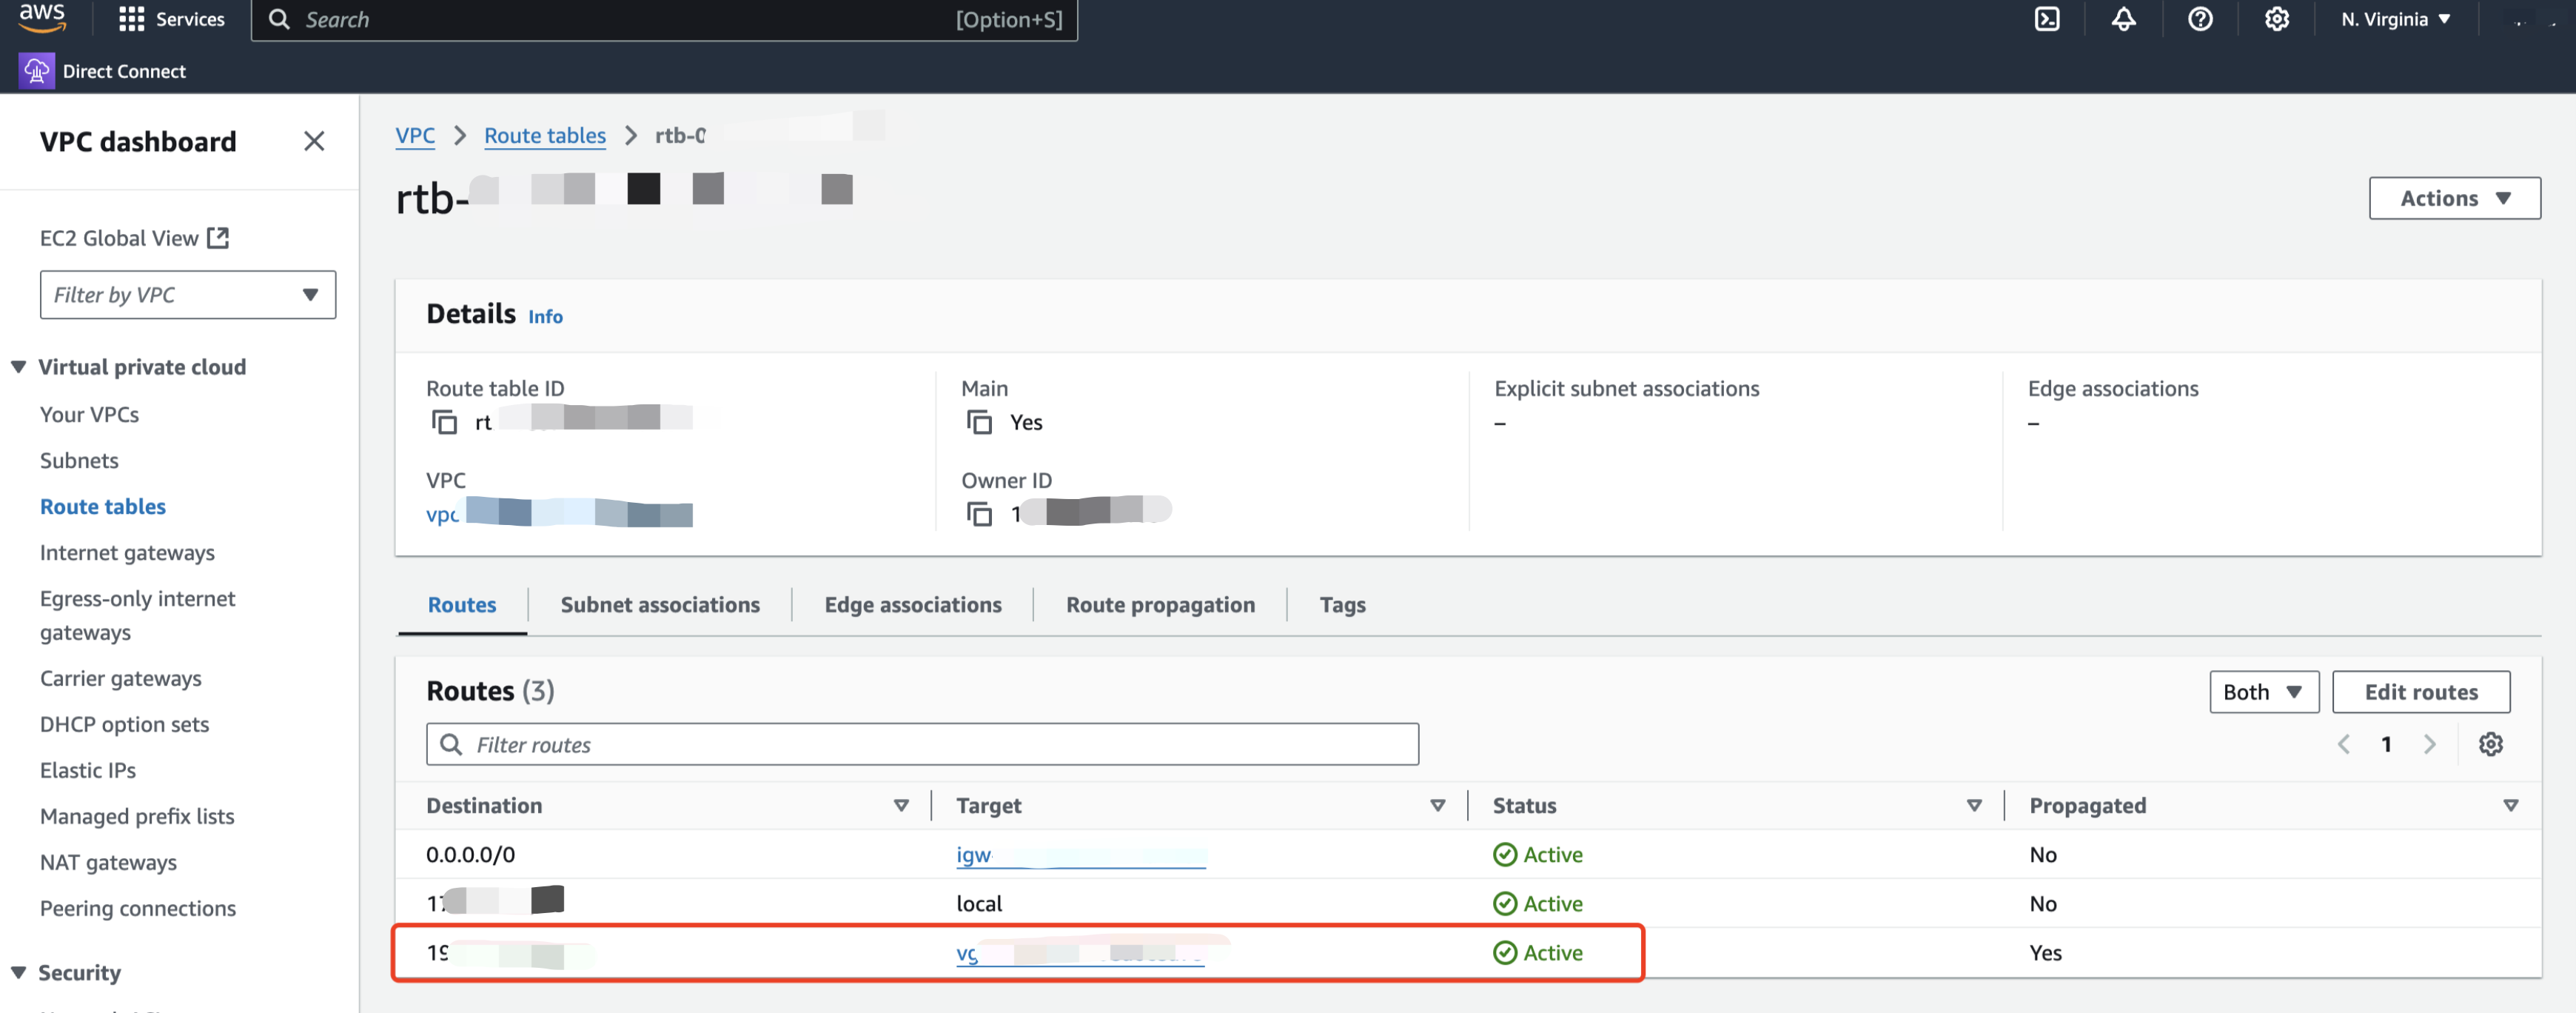
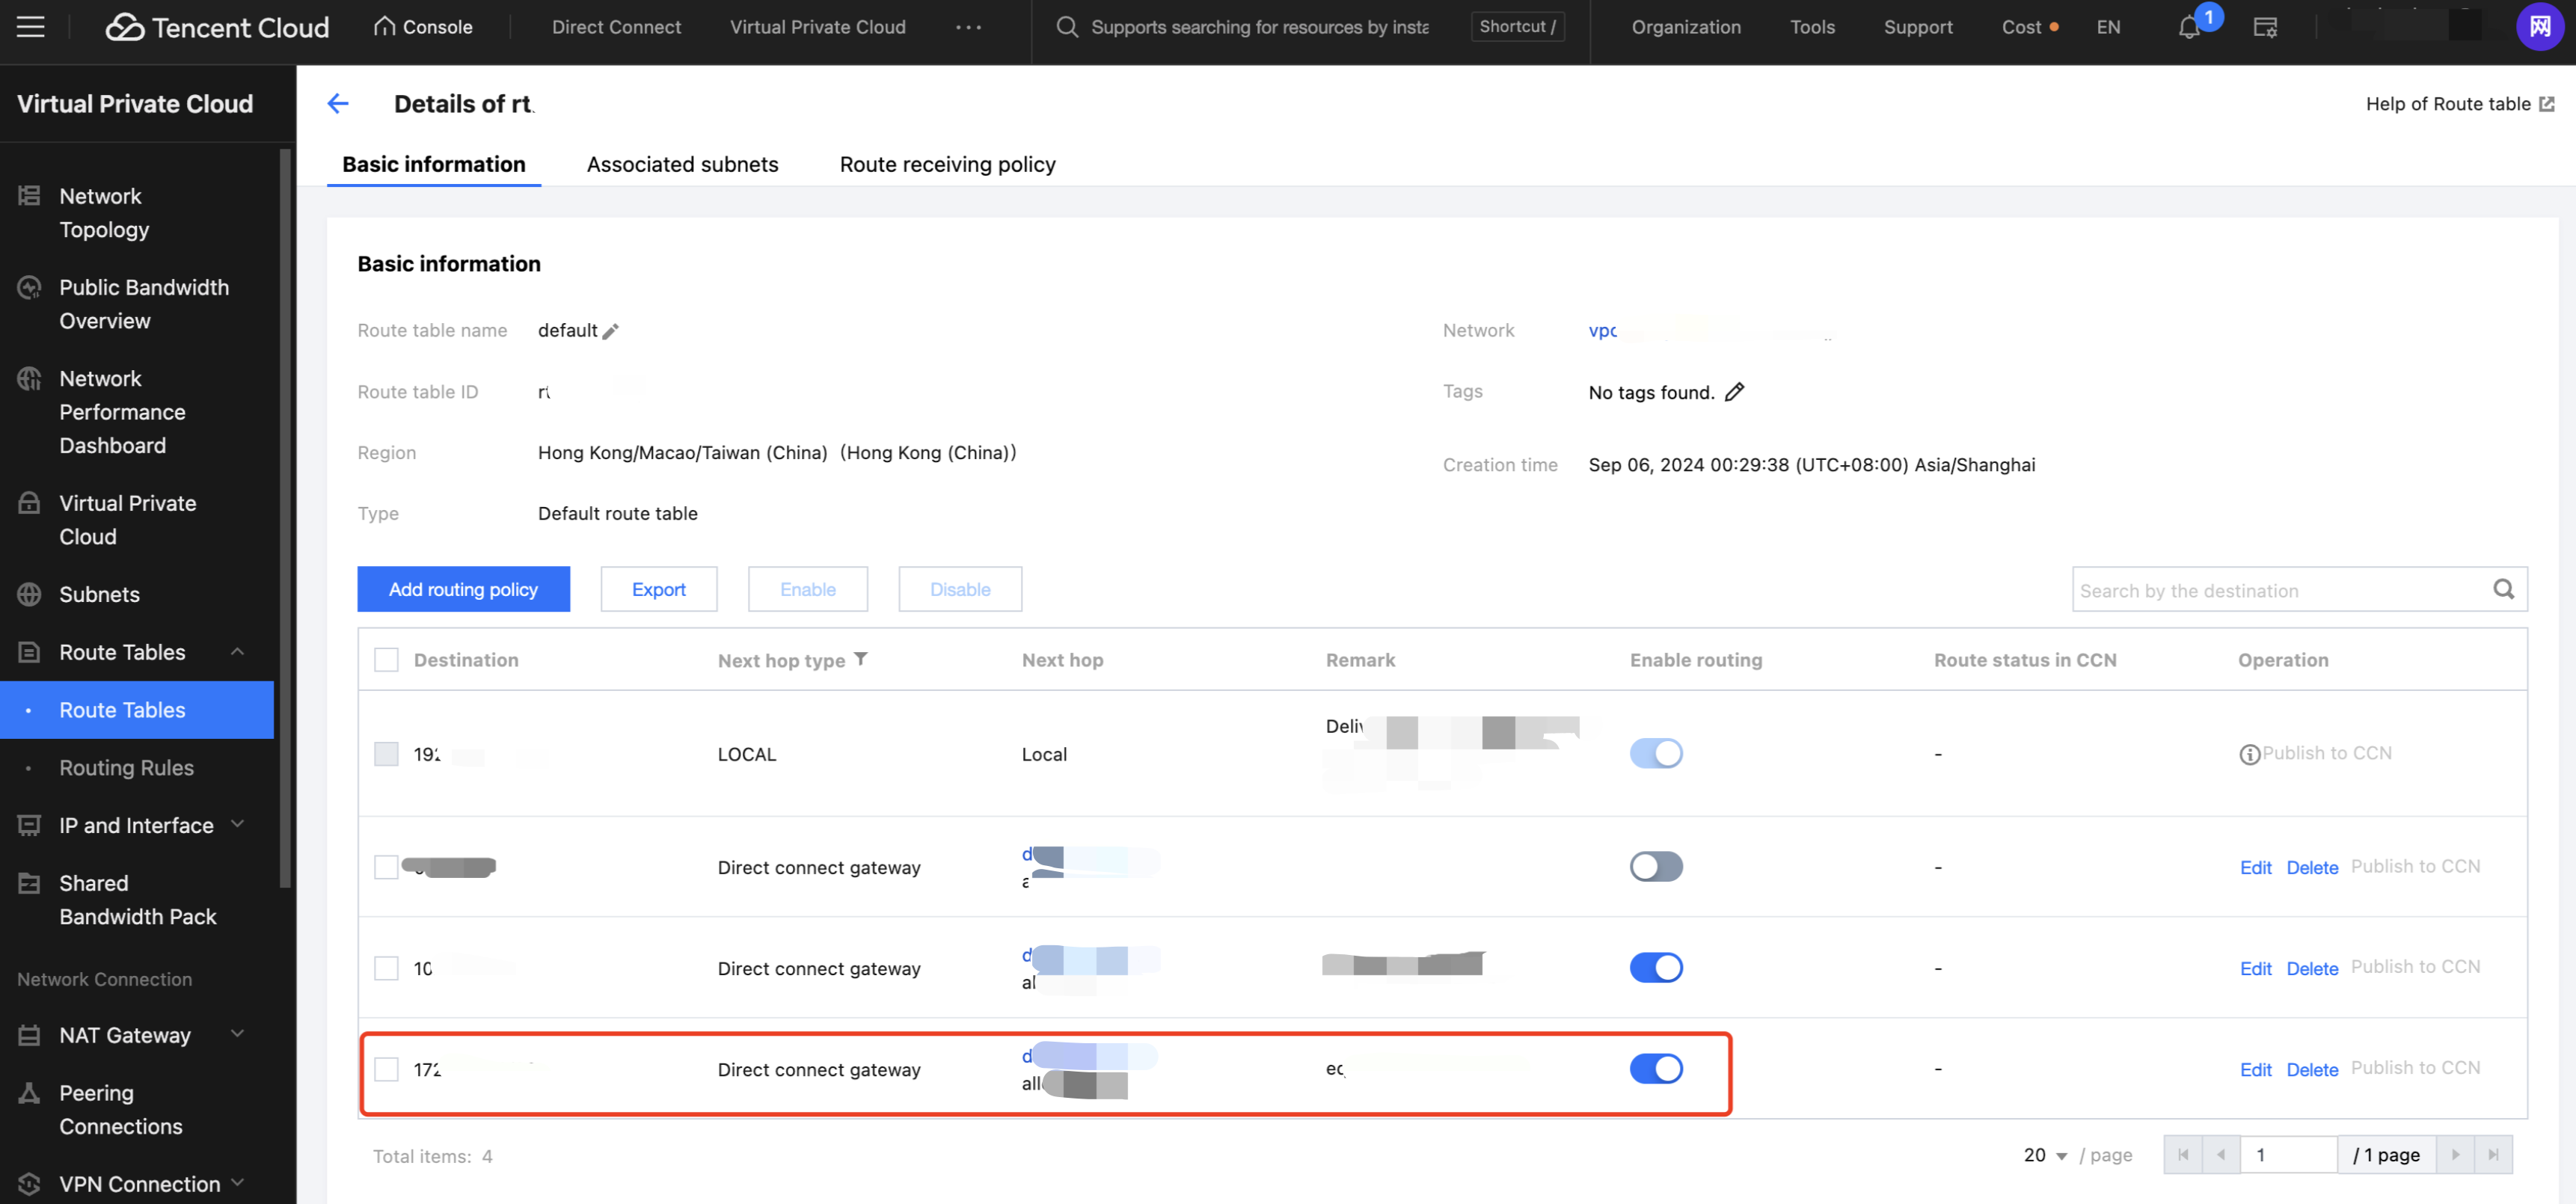
Step 6: Configuring the VPC Route Table
Configure the VPC route table for egress routes.
III. Configuration on the Tencent Side
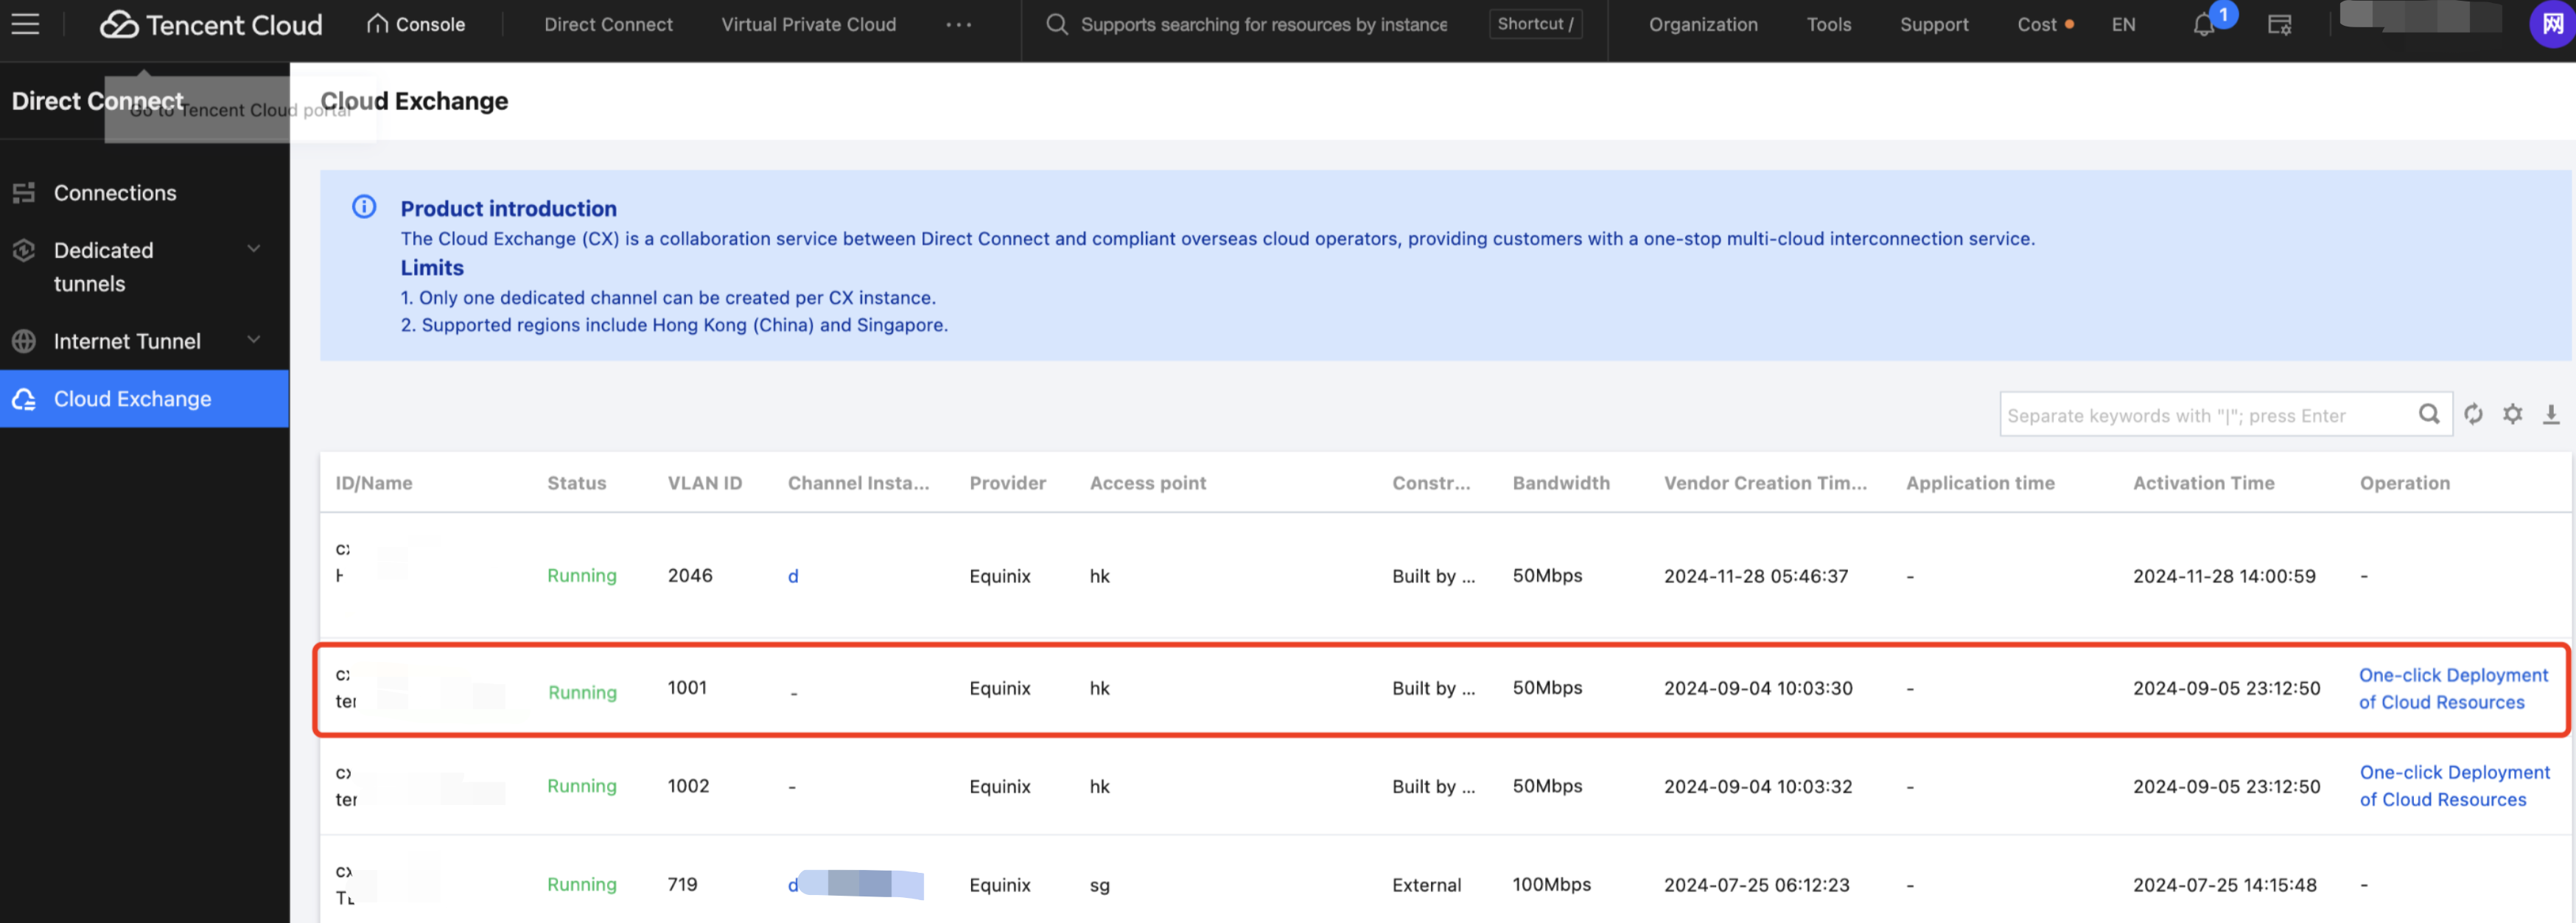
Step 1: Viewing the CX Information in the Console
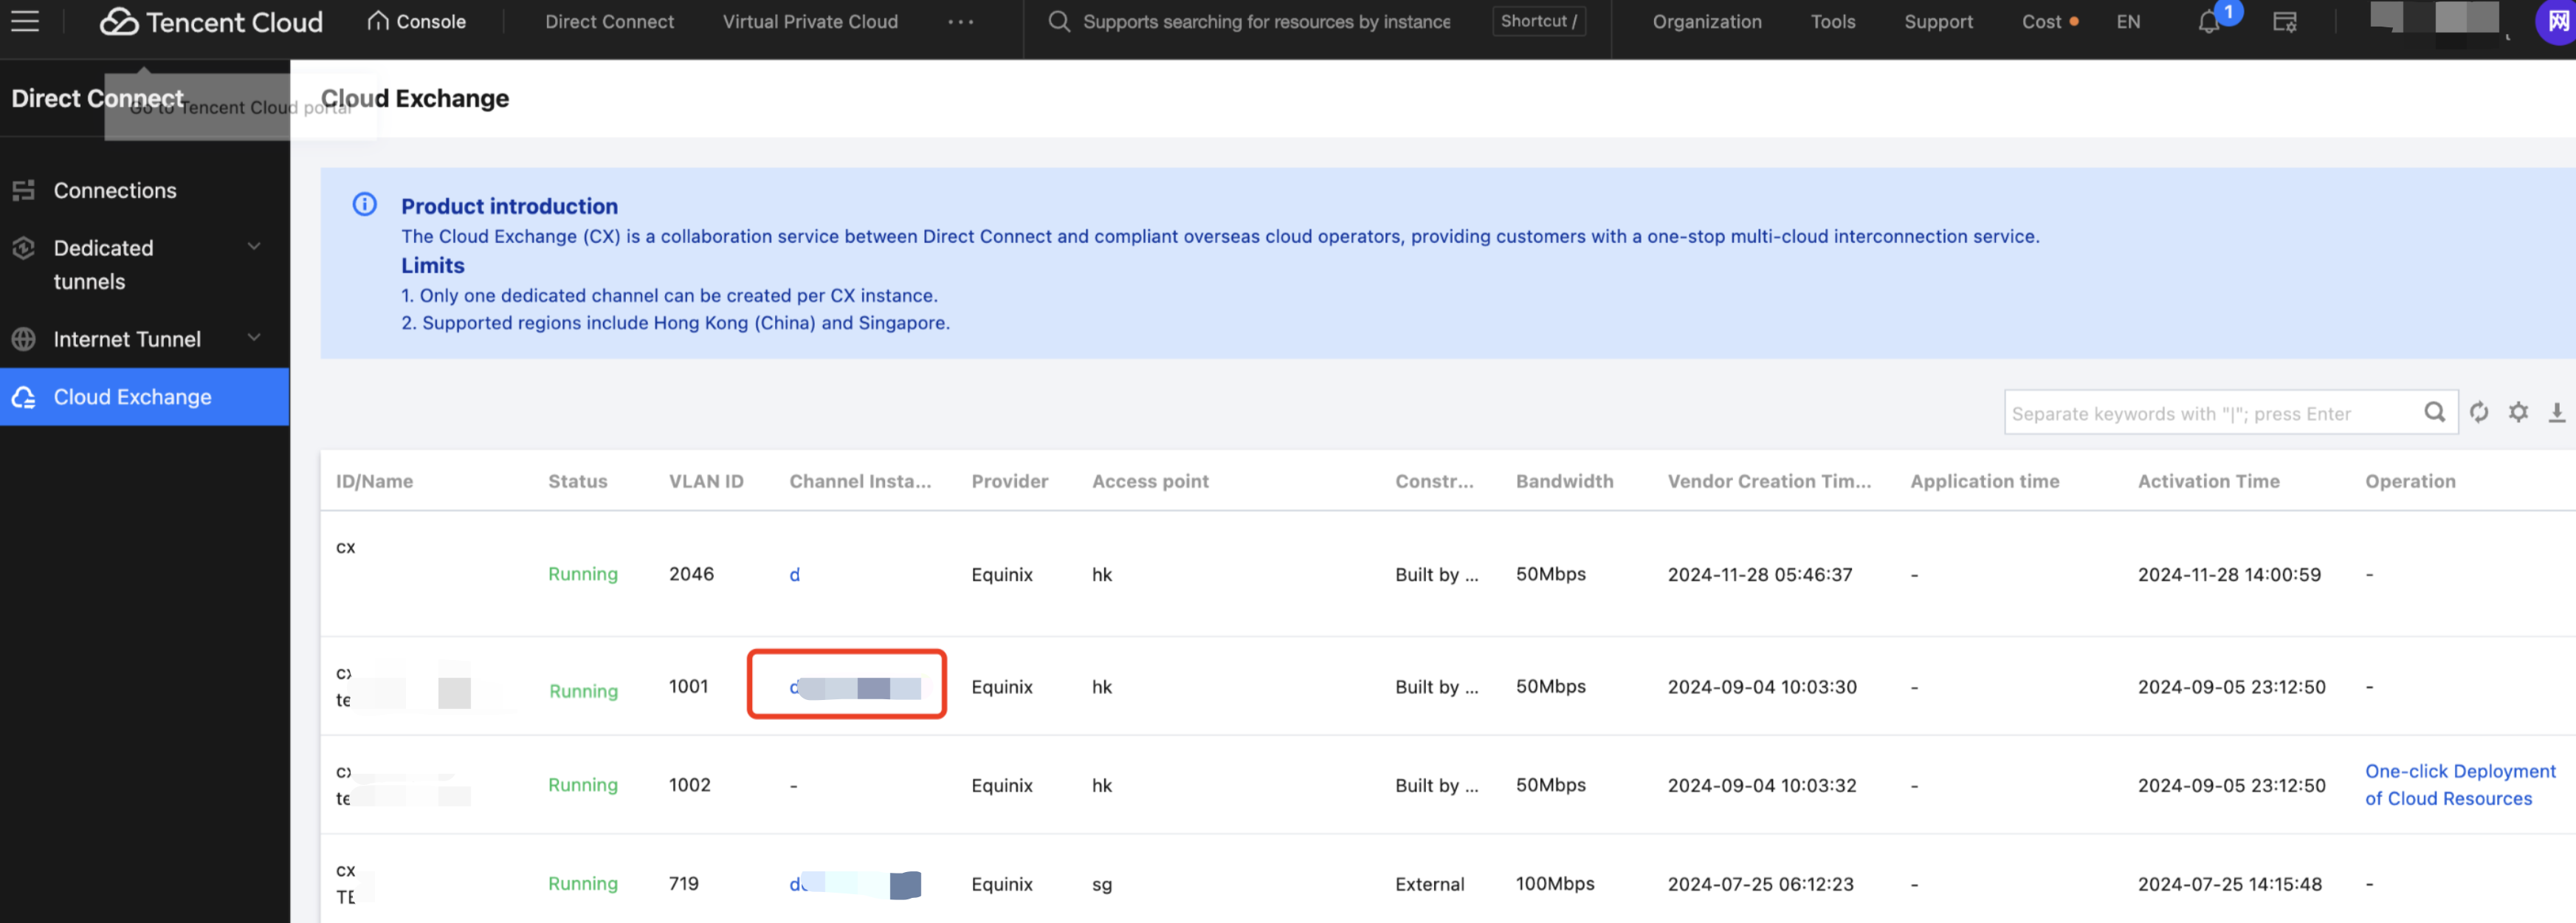
1. Log in to the Direct Connect console and click Cloud Exchange in the left navigation bar. You can view the CX instance information, complete the accepting, and confirm the payment.
2. Wait for you to complete the connection accepting in the AWS console until the Tencent console shows the CX instance as in operation. Then billing will start.
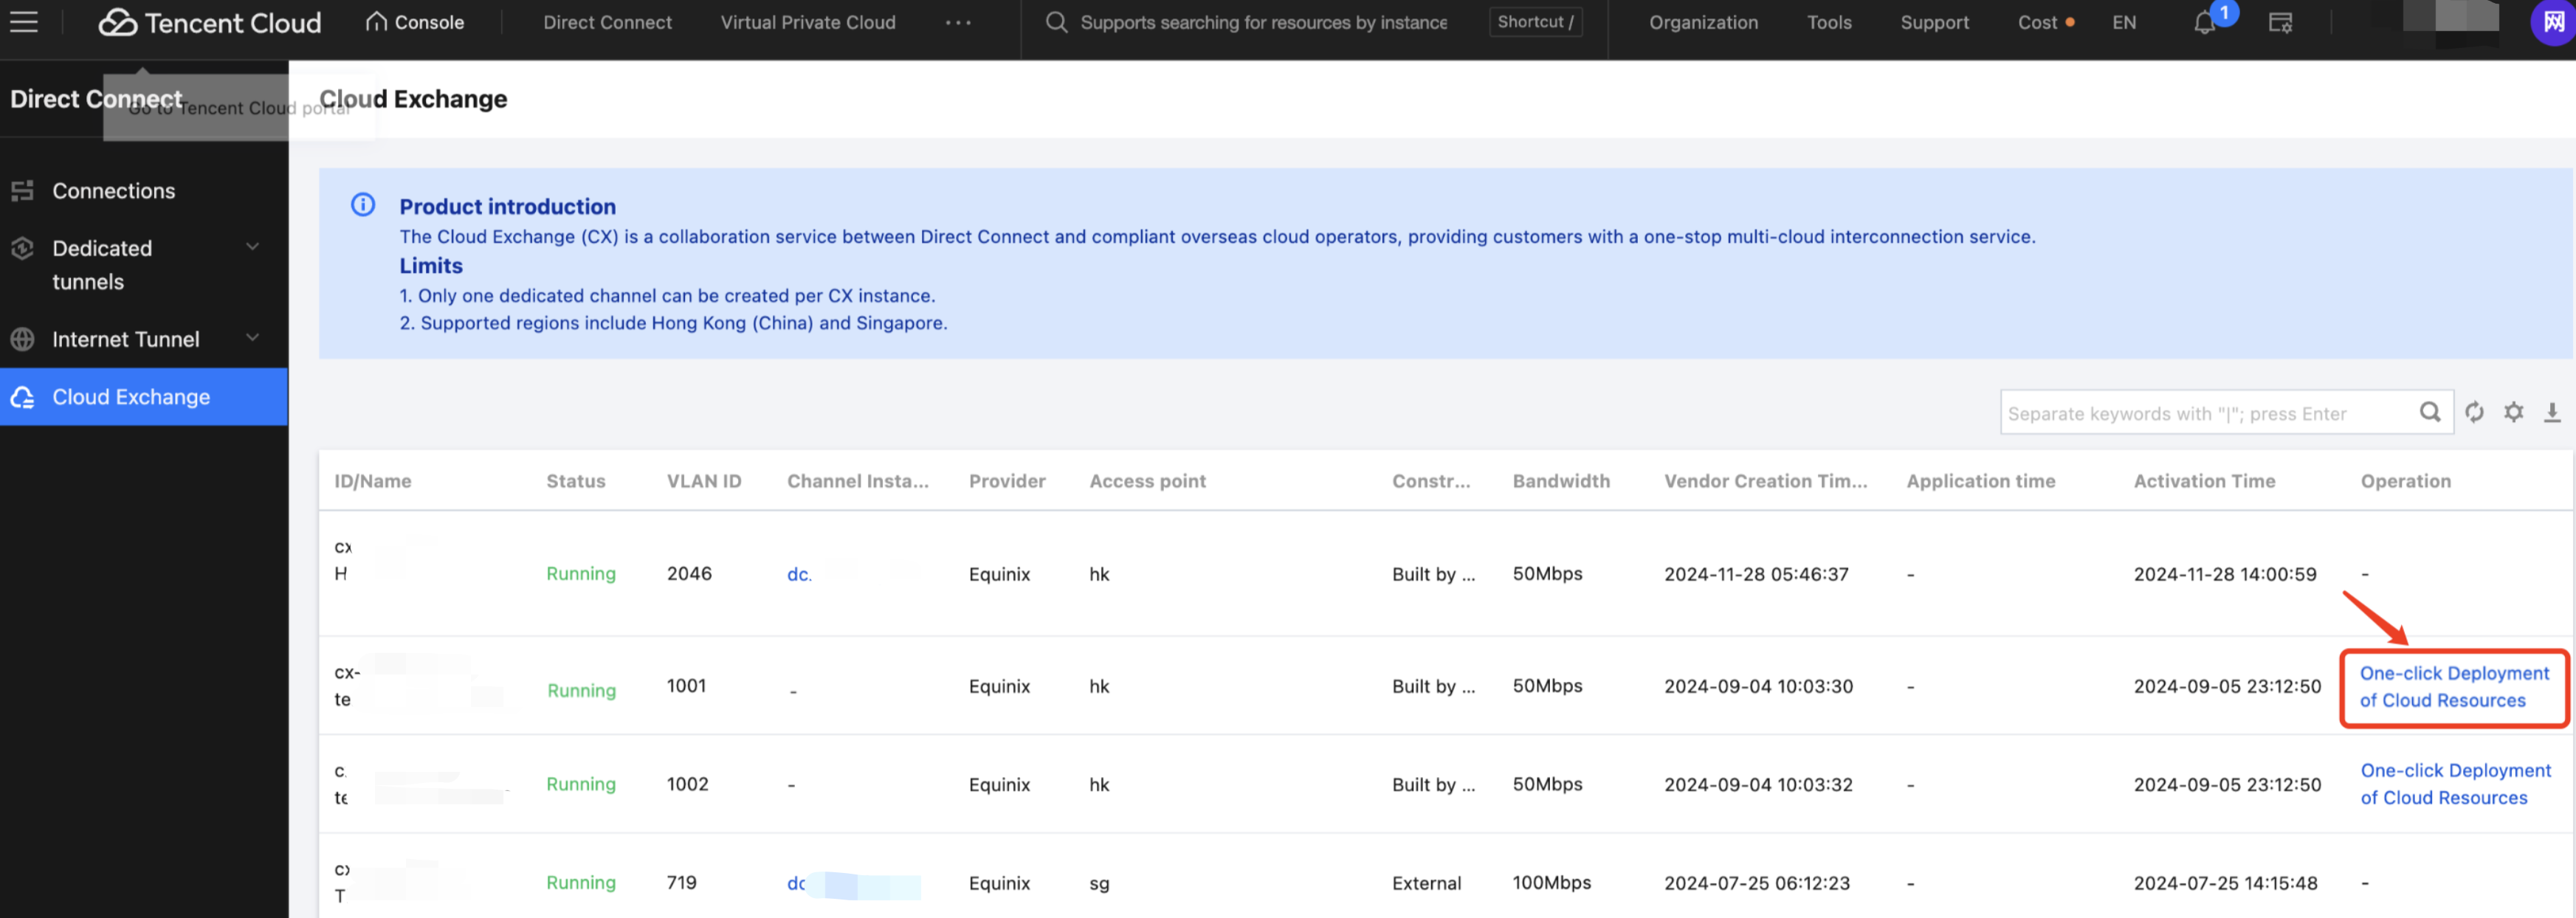
Step 2: Building Cloud Resources in the Console with One Click
2. Log in to the Direct Connect console and click Cloud Exchange in the left navigation bar.
3. In the CX list page, click Build Cloud Resources with One Click.
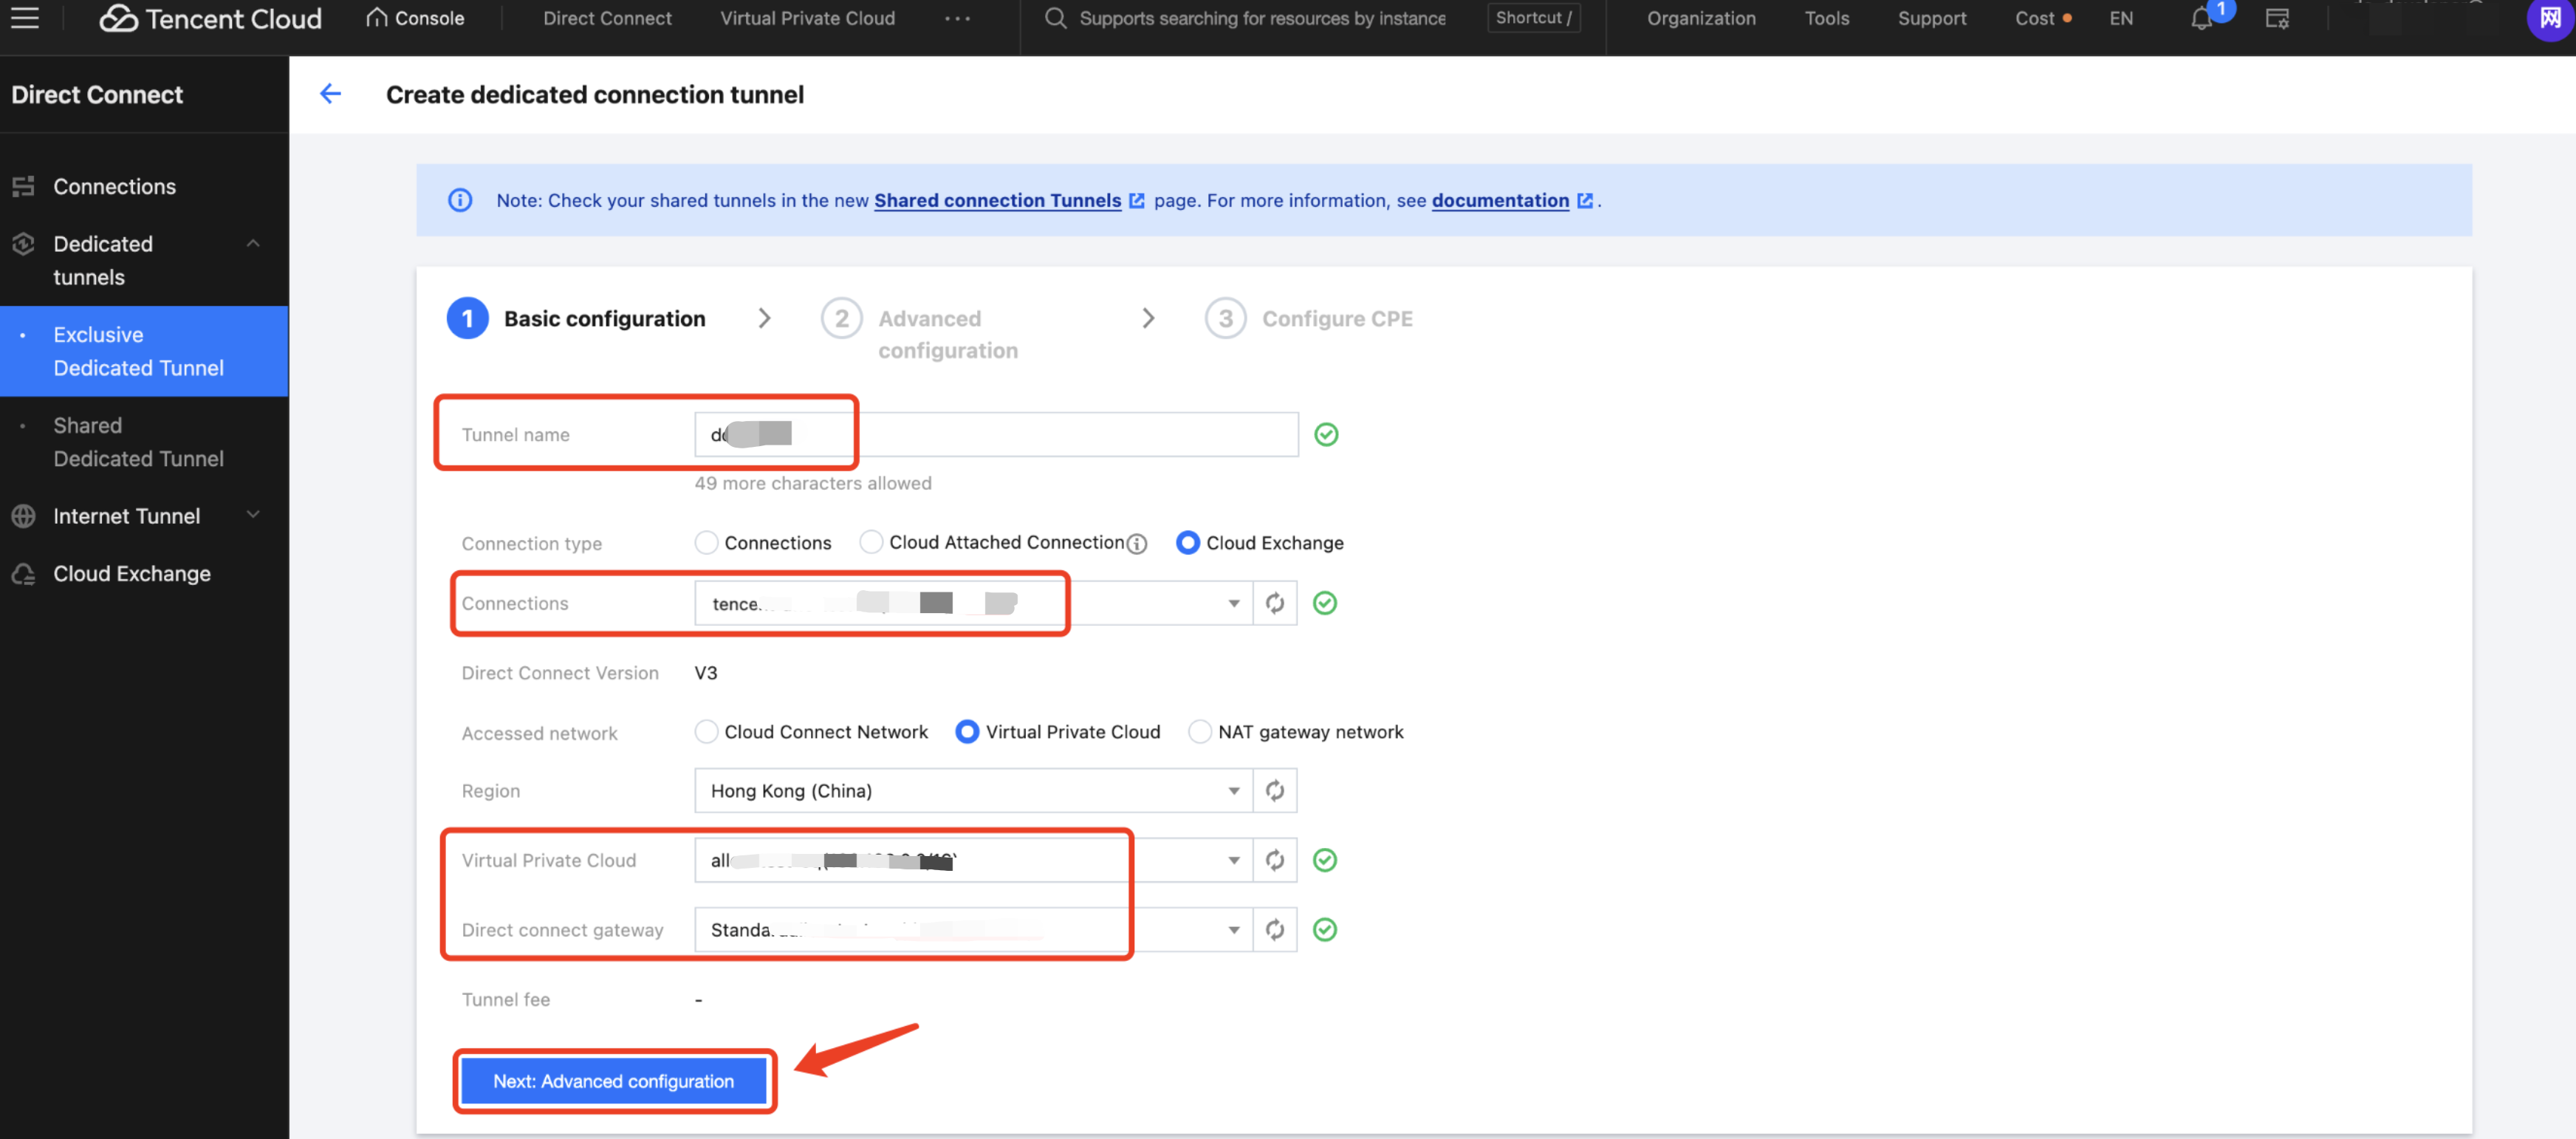
4. Fill in the basic configuration of the exclusive virtual interface and click Next: Advanced Configuration.
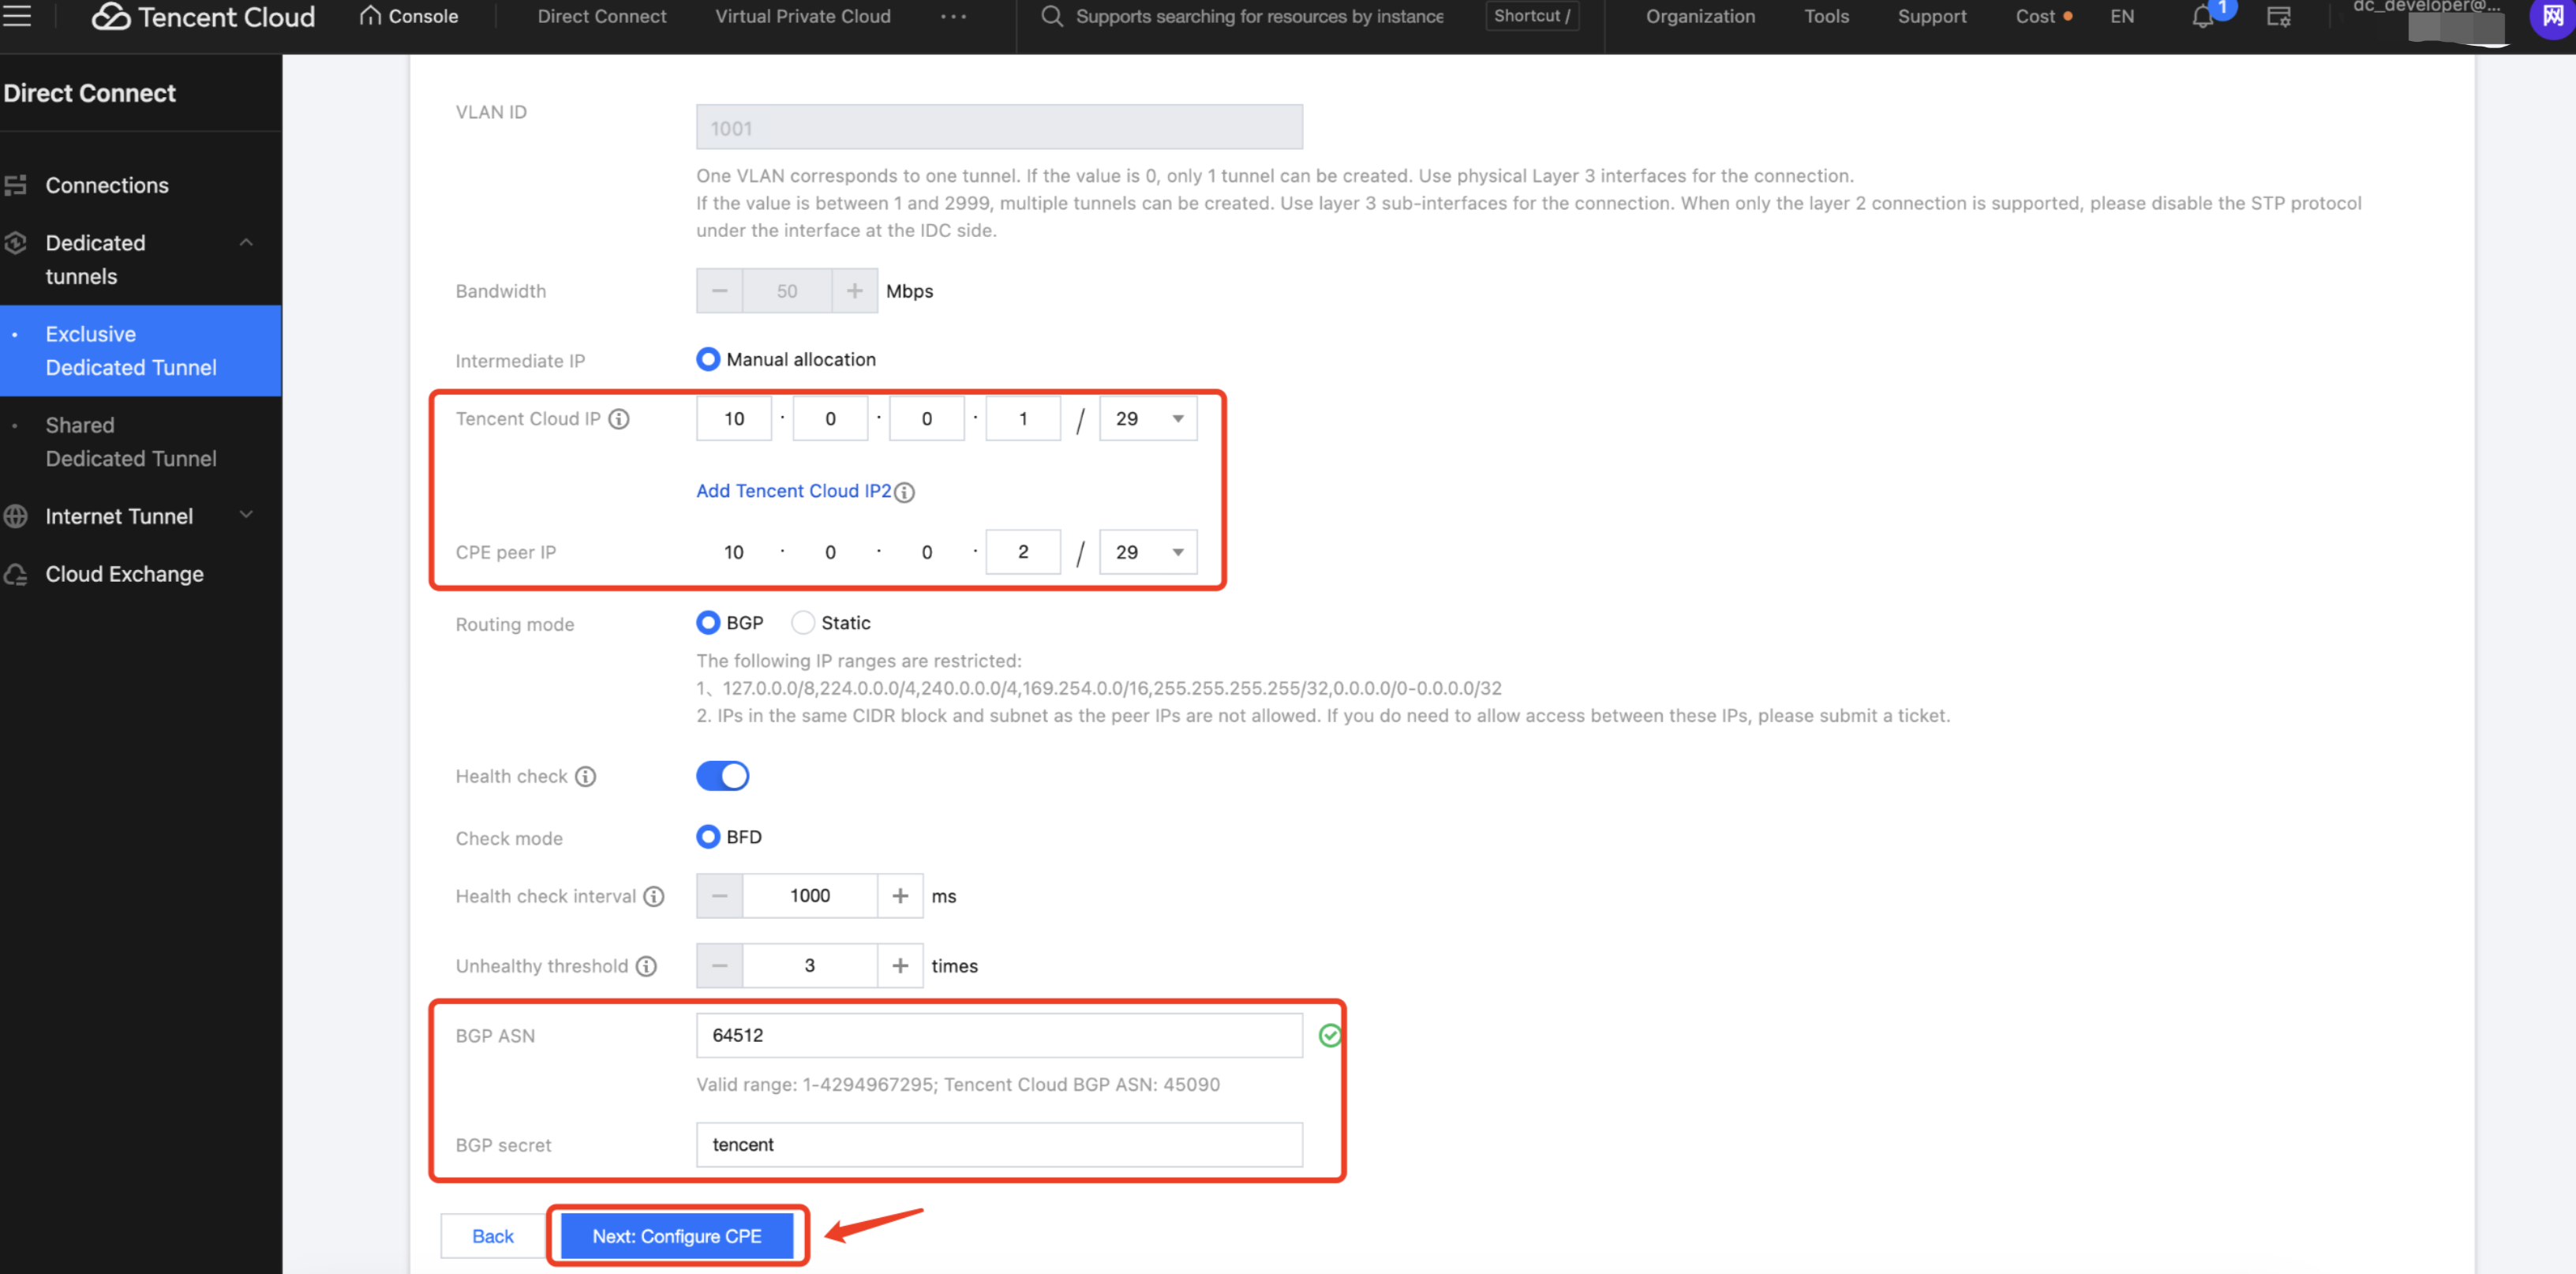
5. Fill in the advanced configuration associated with the dedicated tunnel and click Next: Configure IDC Device.
Note:
In this example, the interconnection IP, BGP ASN, and BGP key entered in the Tencent console must match the configuration entered in the AWS console, otherwise the dedicated tunnel cannot be connected.
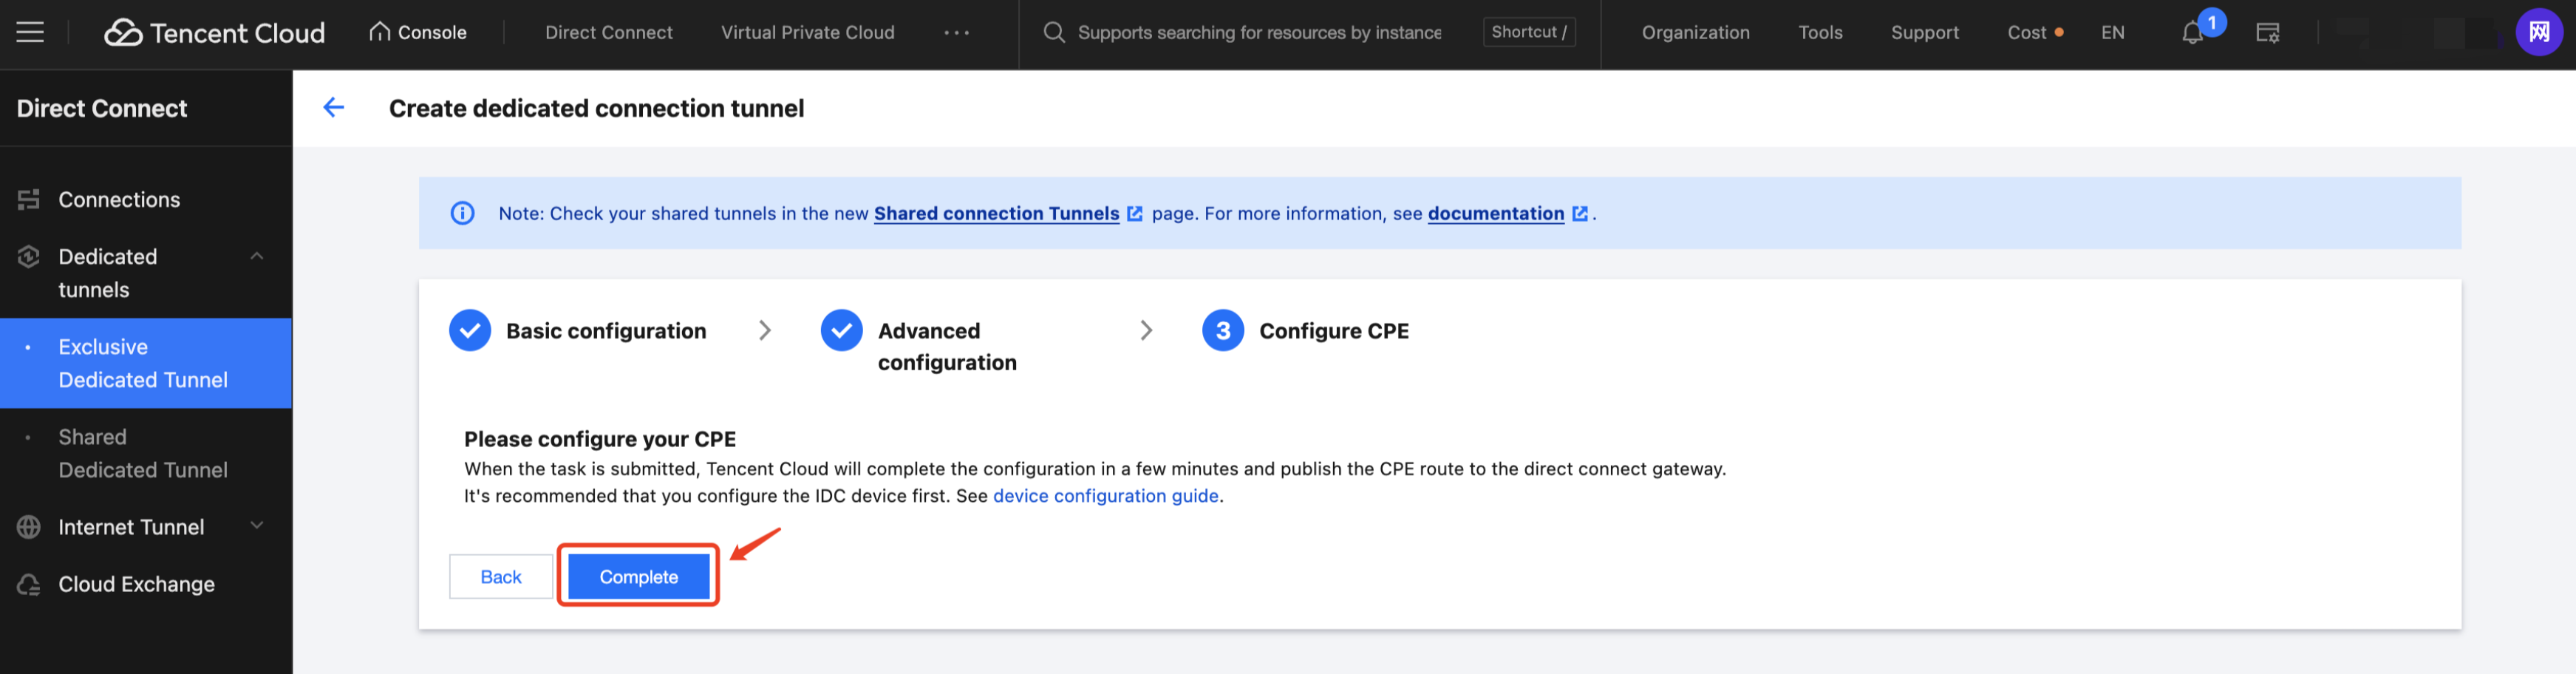
6. Click Complete to complete the configuration of the exclusive virtual interface.
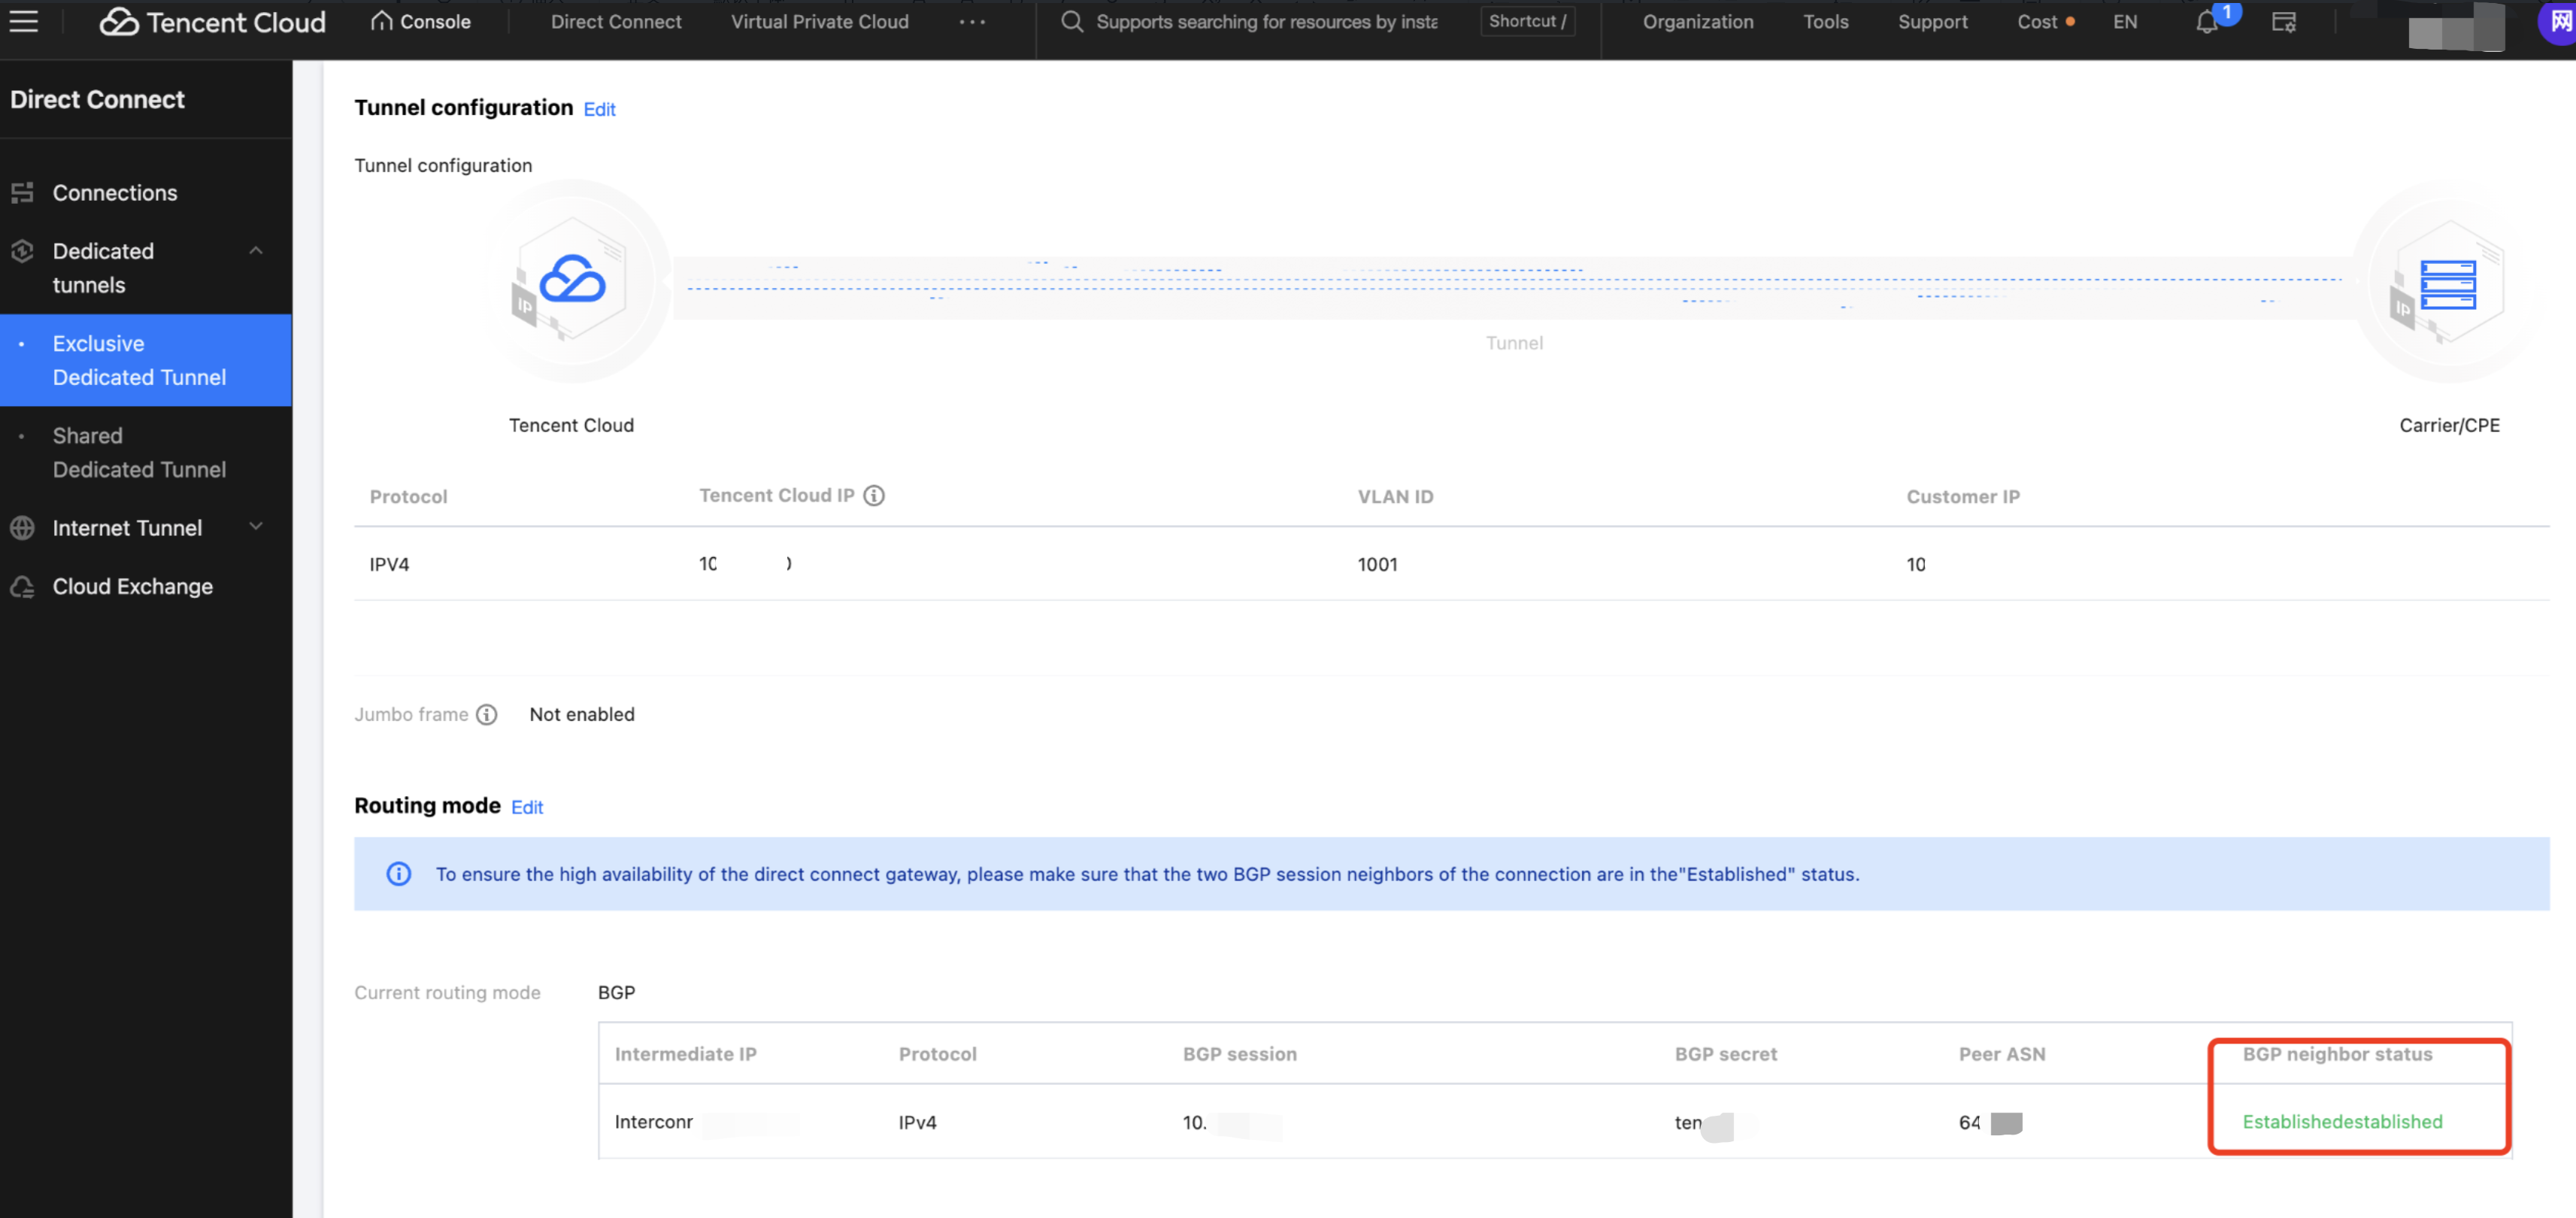
Step 3: Confirming the Status of the Dedicated Tunnel
1. Wait for you to complete the configuration on the AWS side.
2. Log in to the Direct Connect console and click Cloud Exchange in the left navigation bar.
3. On the CX instance page, click Tunnel Instance ID.
4. On the Tunnel Instance > Advanced Configuration page, you can view the connection status of the dedicated tunnel. The BGP neighbor status established indicates that it is connected.