This bill is viewed from the reseller perspective (reseller, first-level distributor, and second-level reseller) to see the bill data generated by their sub-accounts using cloud services, excluding the bill data generated from the reseller's internal usage of cloud services.
Billing occurs on the 5th of each month. The complete bill for the current month can be viewed or downloaded after billing on the 5th of the next month (all times are in UTC+8, China).
The data displayed on the resource ID bill page for the current month and in downloaded files is as of the day before the current date. The resource ID bill only supports querying and downloading data starting from November 2023.
The bill data for prepaid products displayed on the detailed bill page for the current month is generated about 1 hour after purchase. The bill data for pay-as-you-go products is generated about 1 hour after the product settlement cycle. The data in the downloaded files is up to about 7 hours before the current time.
2. Select Billing > Customer Bills in the left sidebar to enter the sub-client bill page.
Note:
If it is a first-level reseller querying the indirect sub-client bill belonging to them, select Cost > Sub-client Bill to enter the bill webpage.
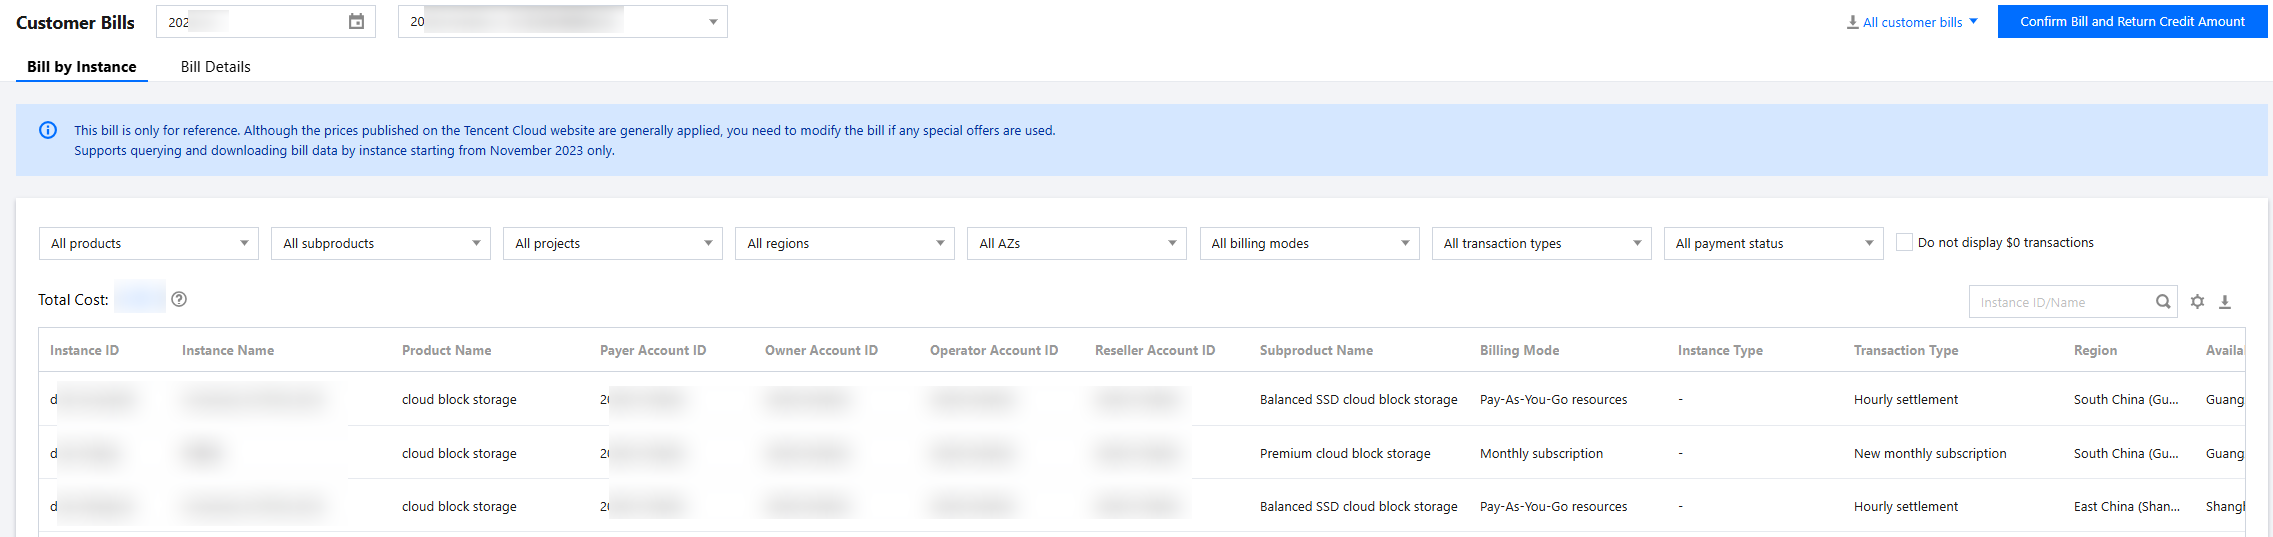
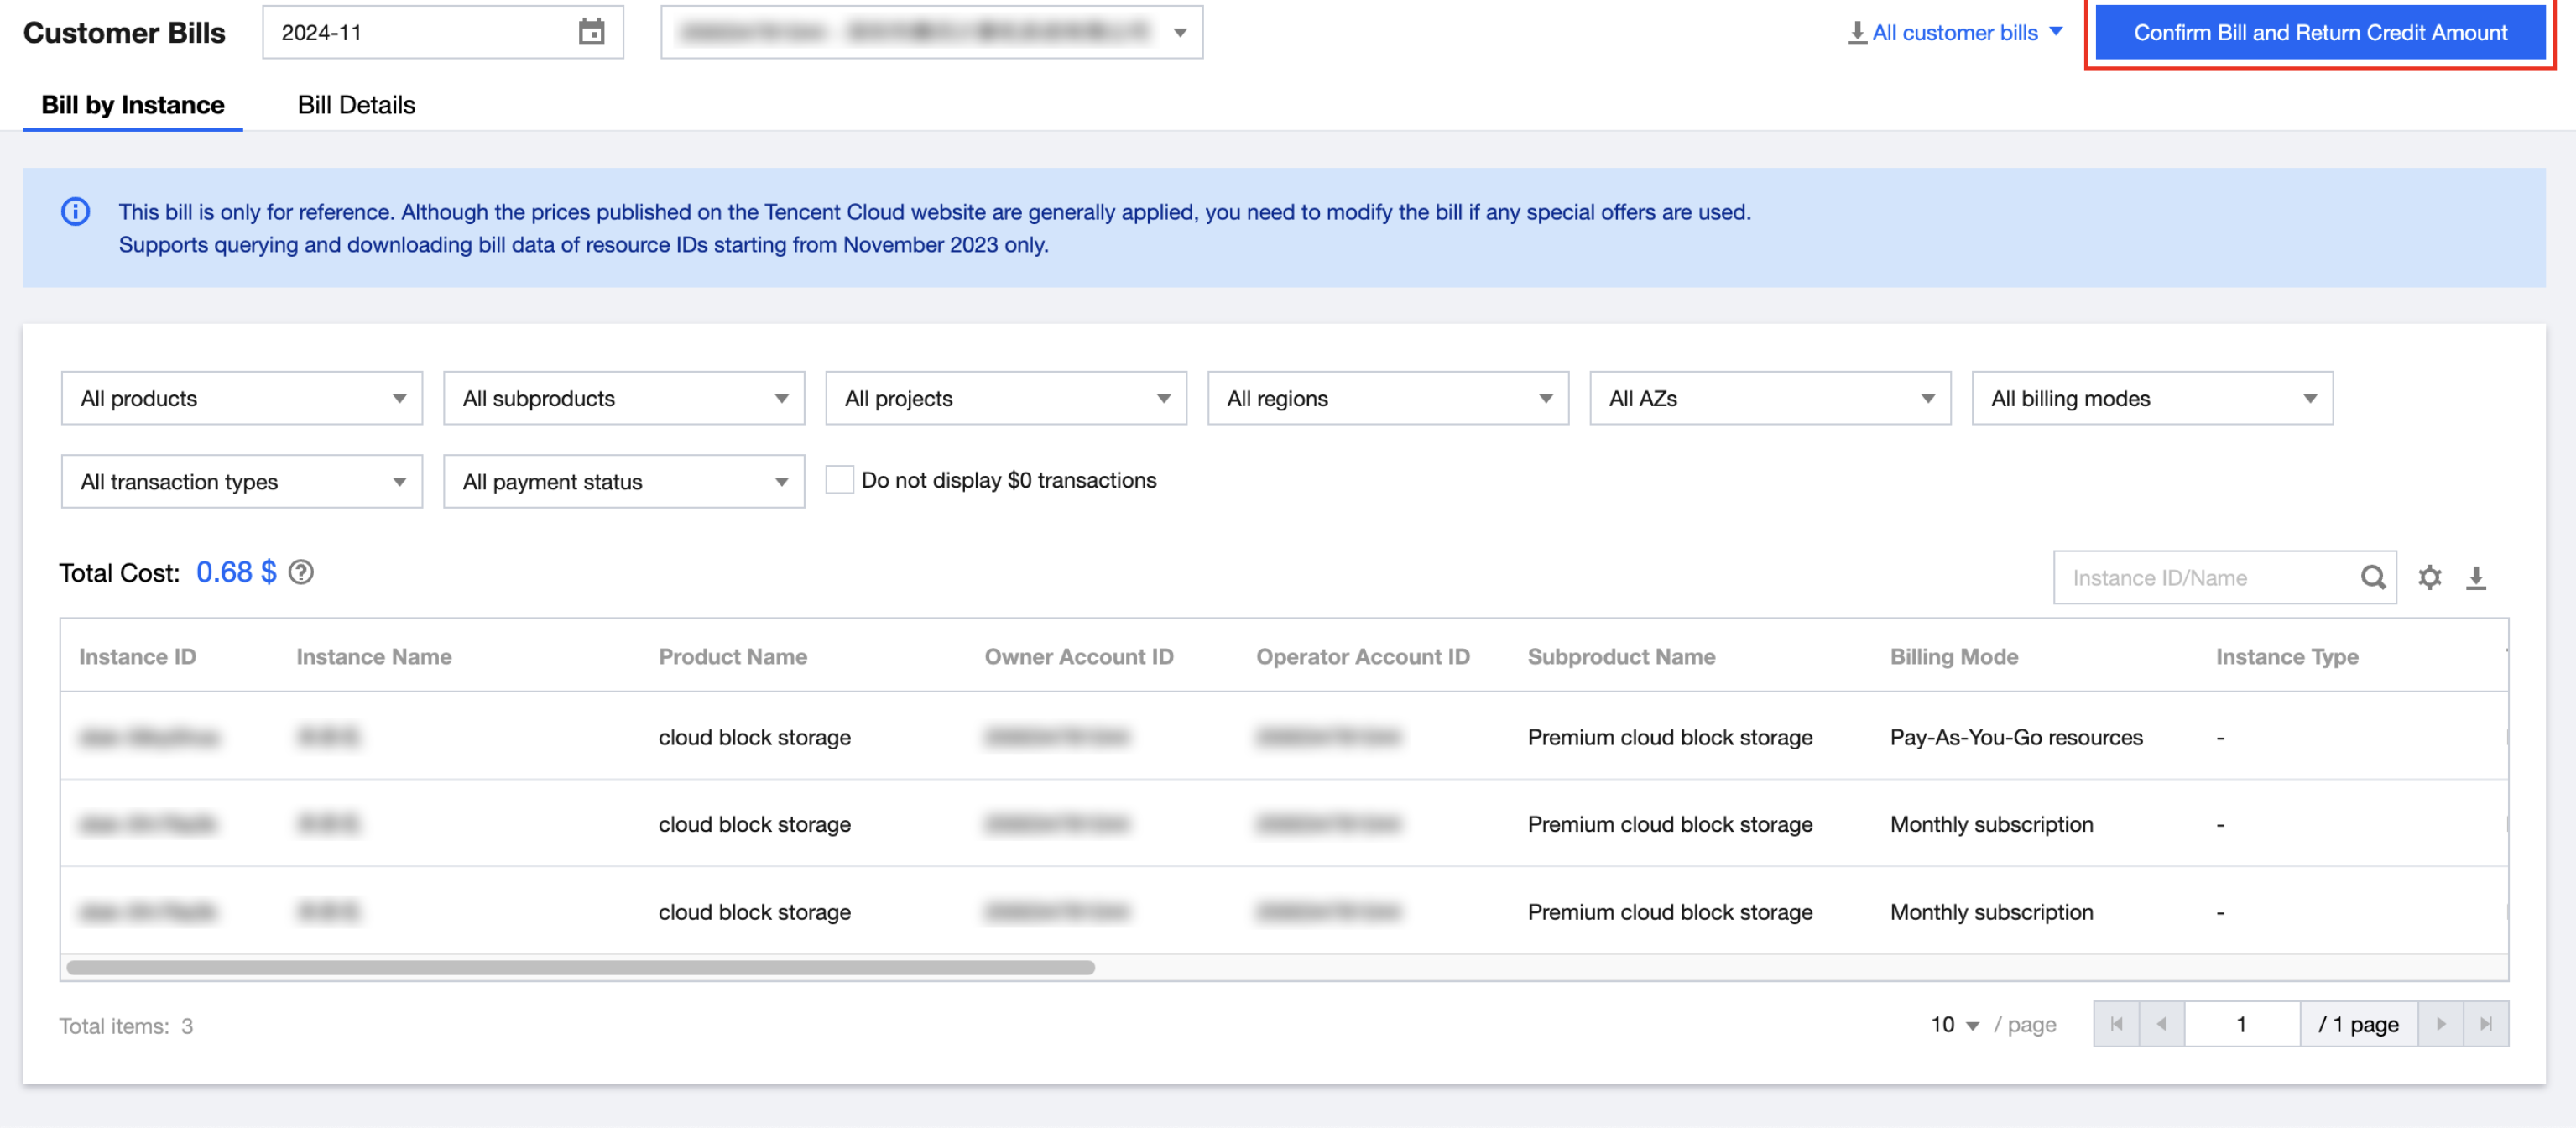
3. Select bill month and sub-client UIN/sub-client name to show the bill of the specified sub-client for the corresponding month.
4. Click Bill by Instance or Bill Details to switch to view bills of different tiers.
5. Click the options in the filter area to filter display statement data based on fields such as product, project, and region.
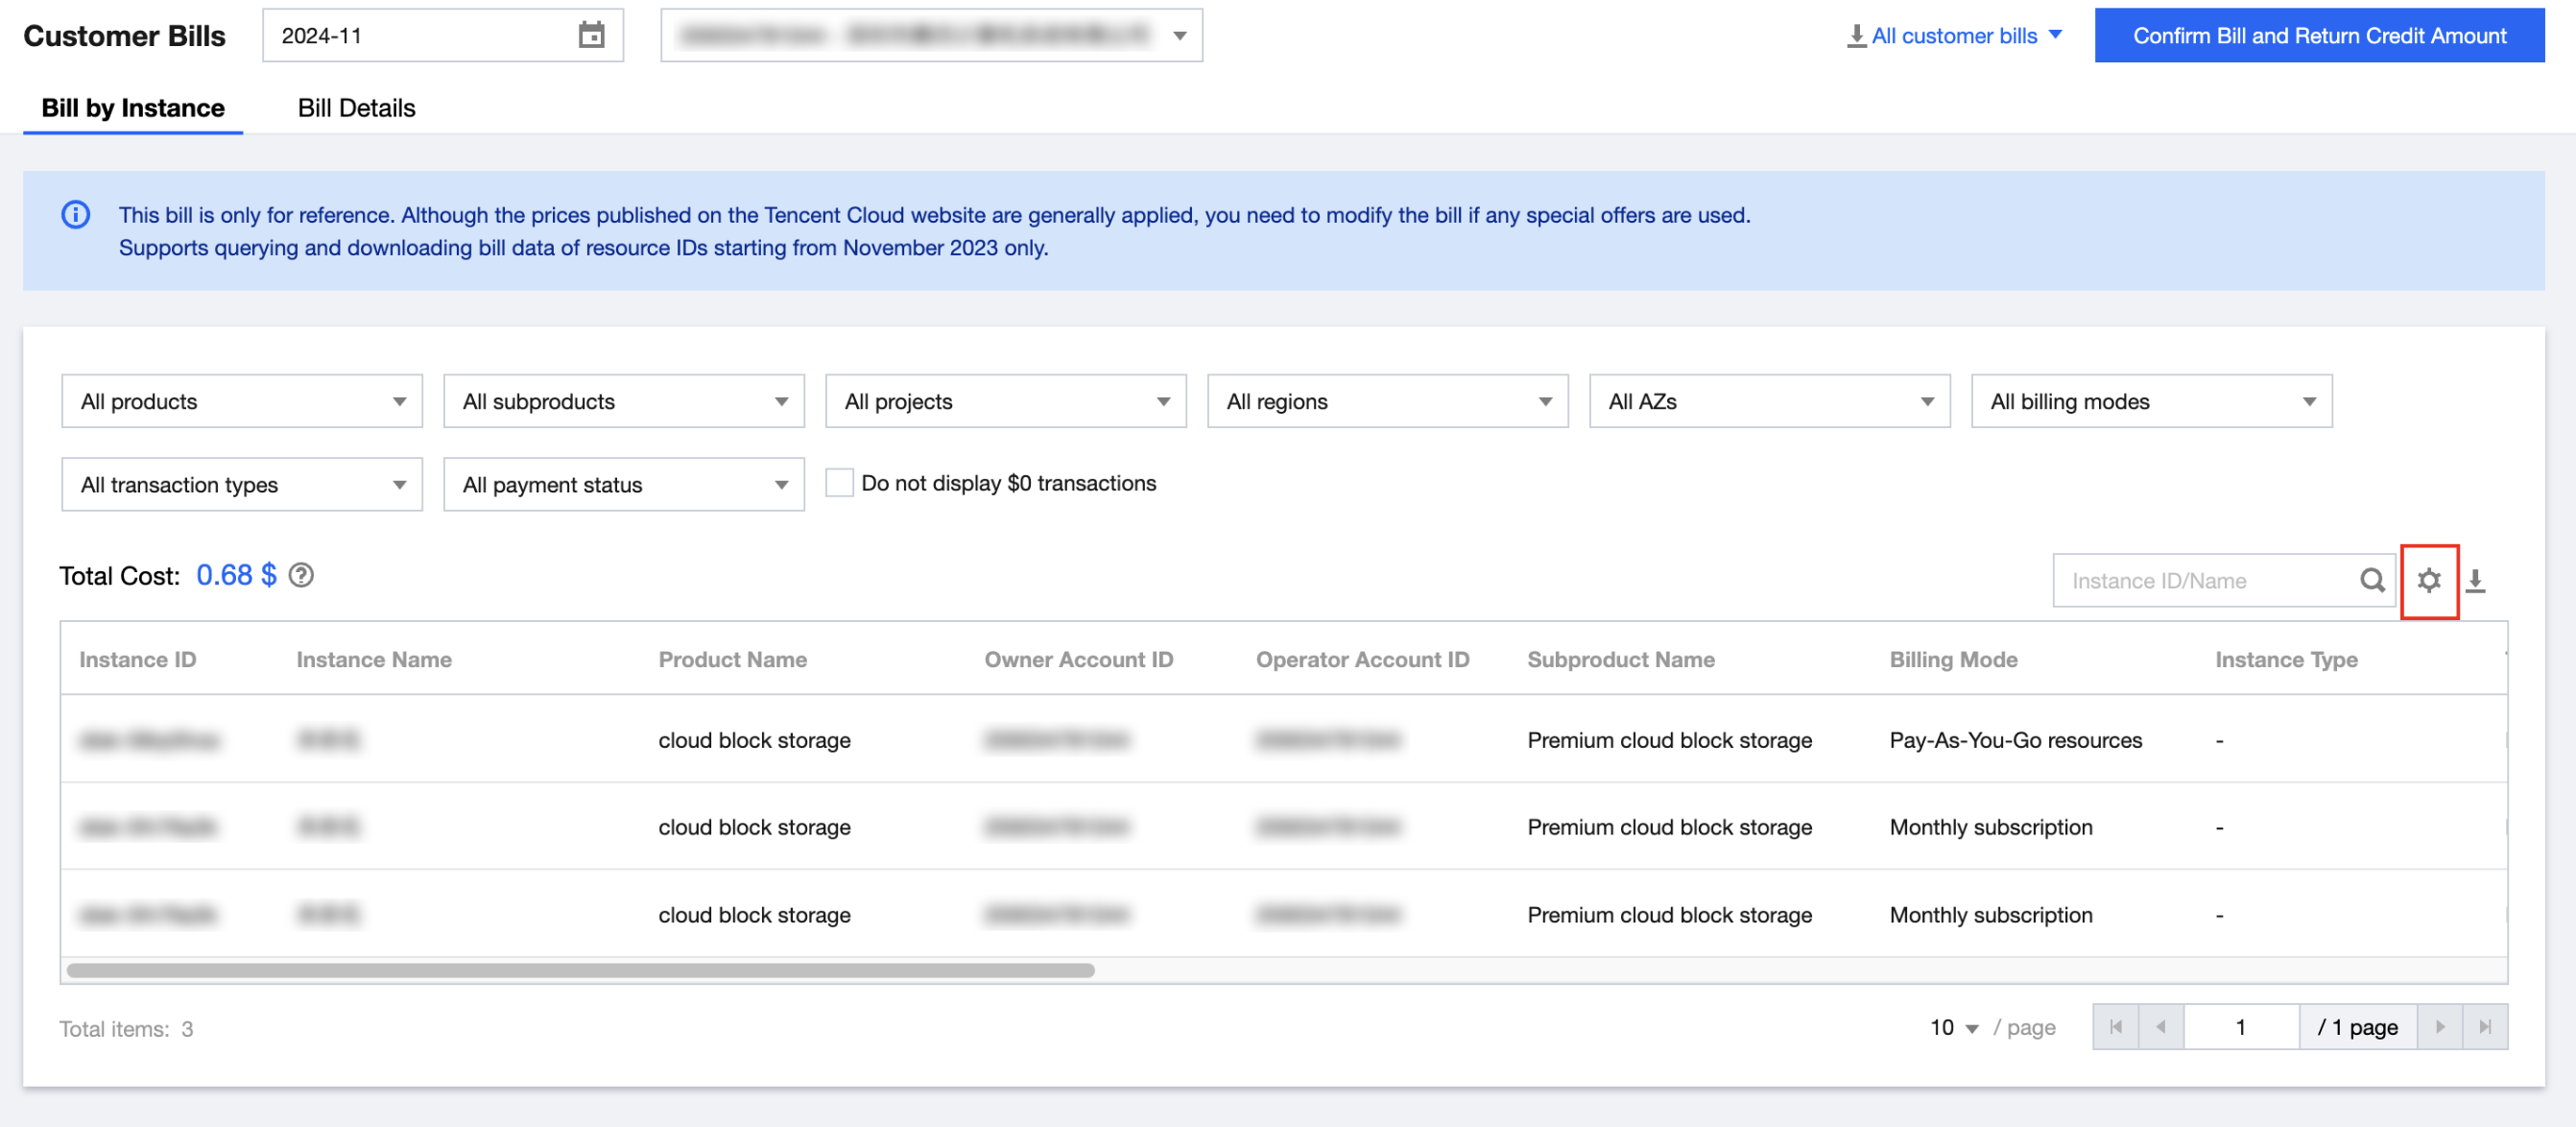
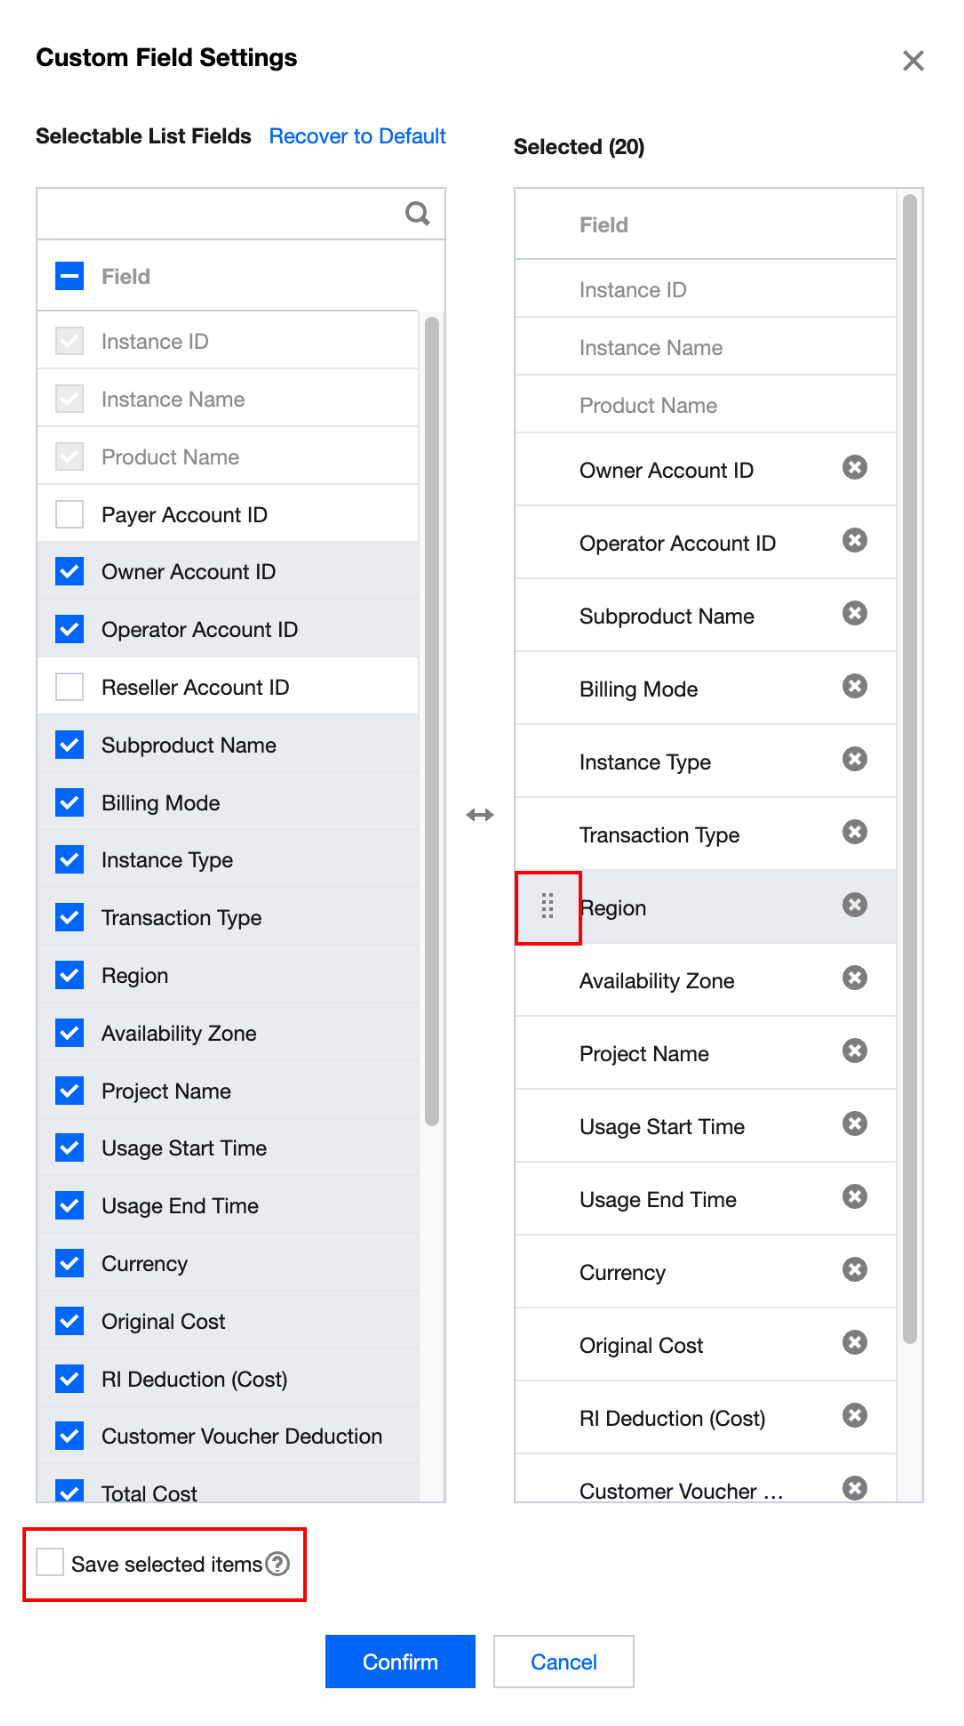
Set the fields to be displayed in the list.
1. Click "Settings" in the upper-right corner of the list to customize the displayed fields as needed.
2. In the pop-up window, check/uncheck the corresponding field, press and hold and drag the "selected" field name up or down to arrange the displayed fields in the table. Then click Confirm to display according to the saved content and sequence.
Note:
If you do not check "Save option", the settings will only take effect for this session and restore default settings after refreshing the interface.
The setting results only act on interface display, not on bill download.
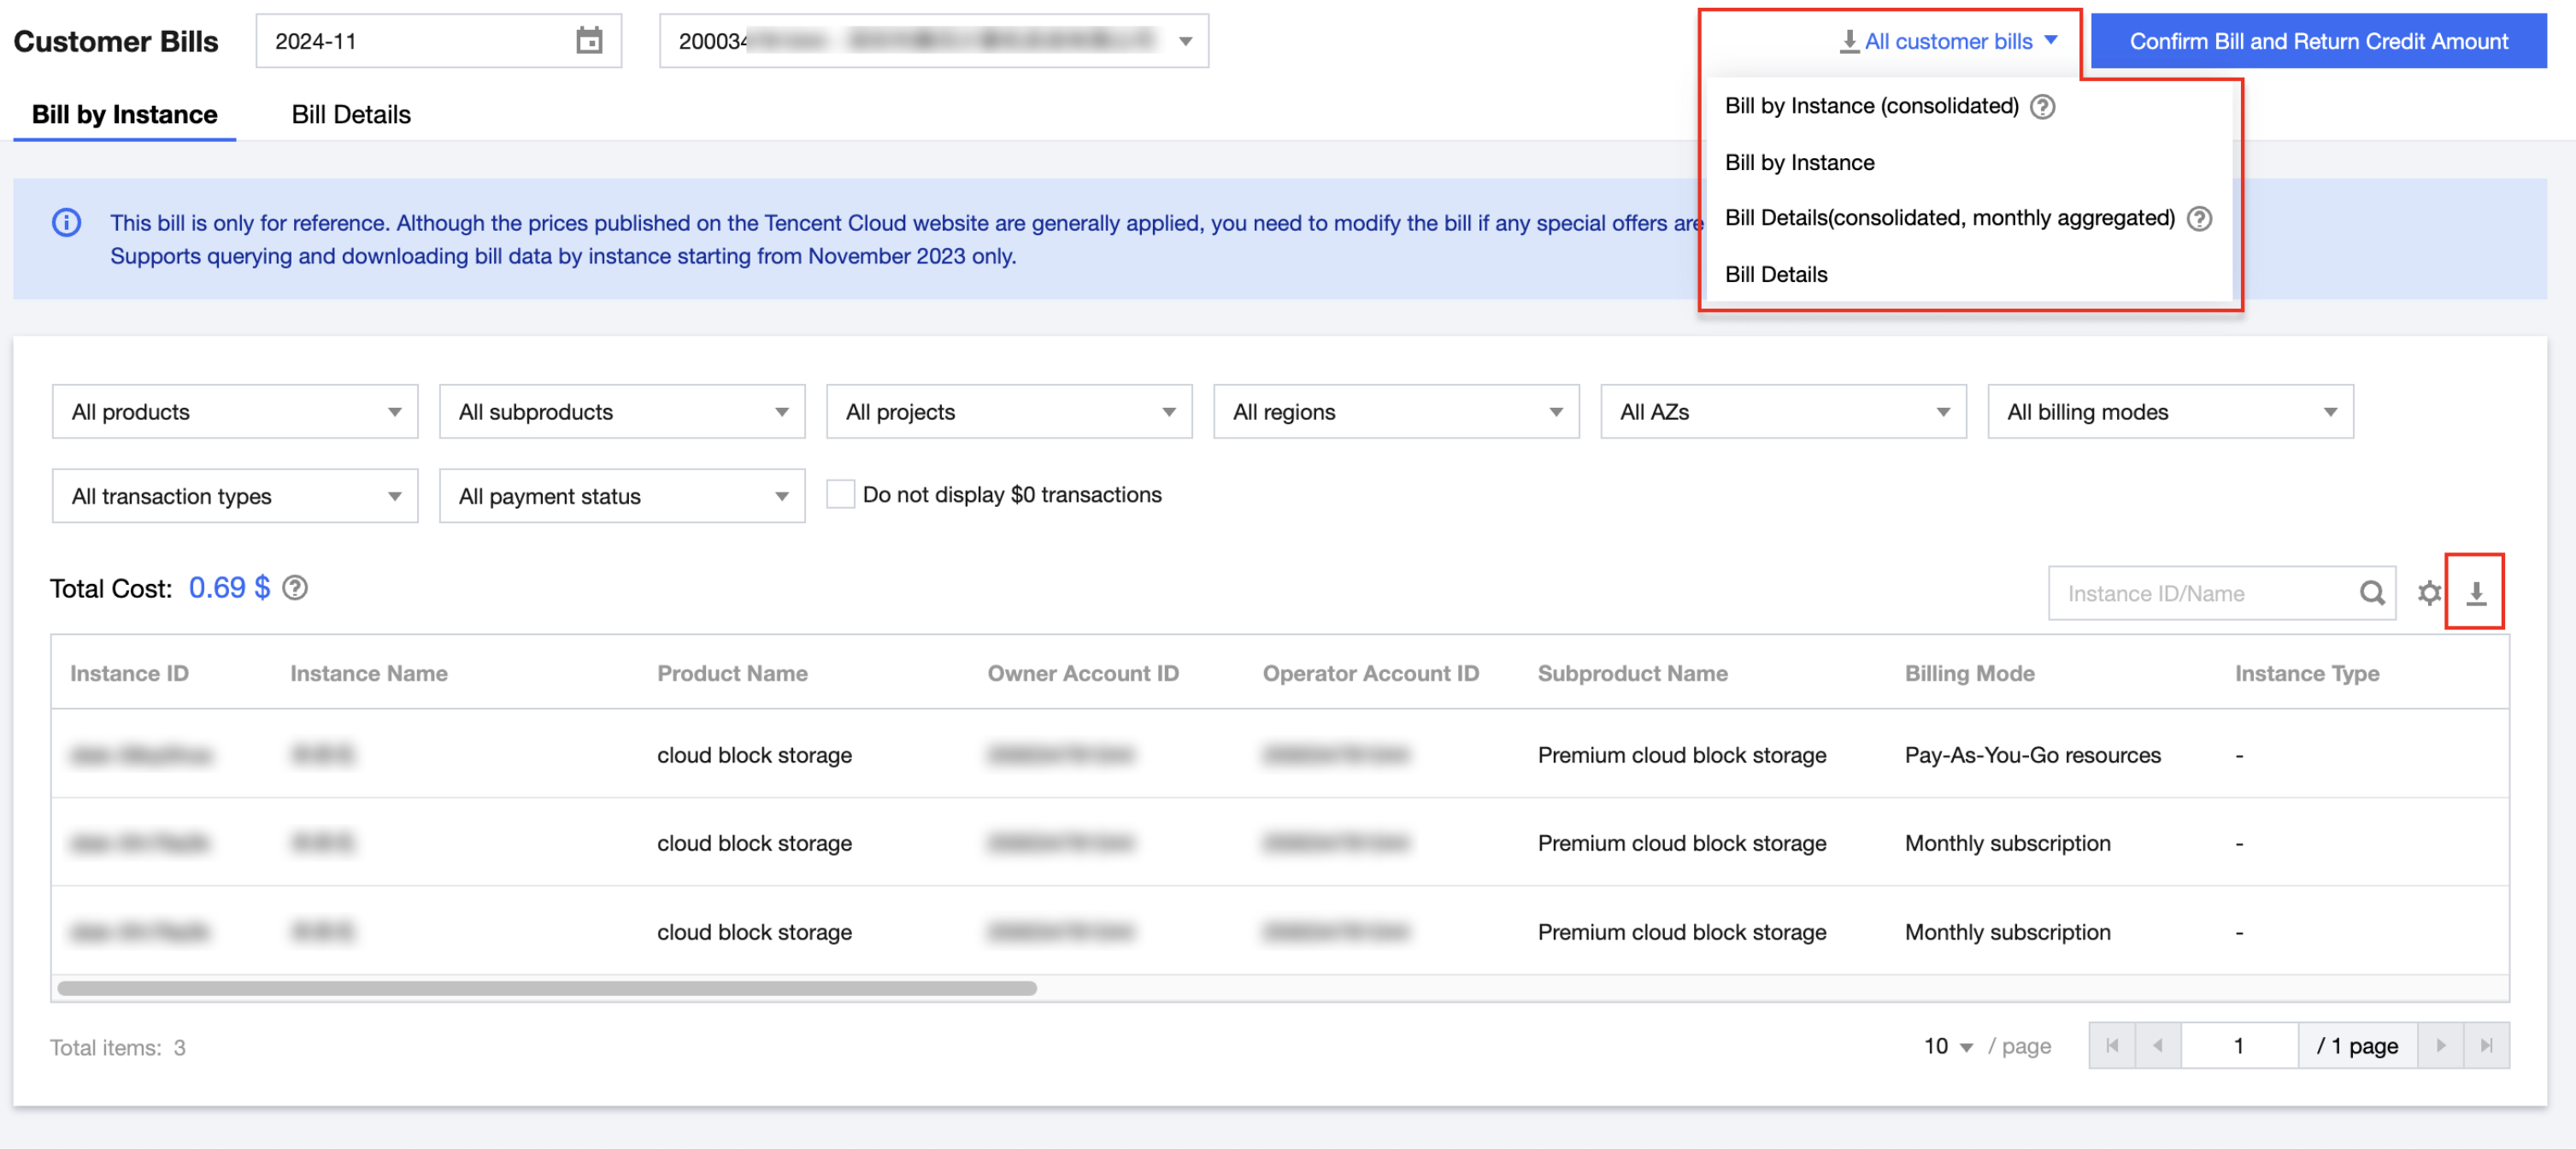
1. On the Customer Bill webpage, click All Customer Bills at the top right of the page to download all sub-client bill files. Four levels of bills are supported: Resource ID Bill (Consolidated), Resource ID Bill, Detailed Bill (Consolidated, Monthly Aggregate), and Detailed Bill. For detailed differences, refer to Bill Level Description.
Note:
Note: If it is a first-level reseller downloading the indirect sub-client bill belonging to them, select Cost > Sub-client Bill to enter the bill webpage.
2. Click
at the right corner of the list to download the selected sub-account's bill file for the corresponding month individually. It supports two tiers of bills: Resource ID Bill and Detailed Bill.
Note:
The filtered statement data only act on interface display, not on bill download.
Confirming Bill and Credit Return
Note:
Support the following perspectives to confirm bill and perform credit return:
Reseller confirms bills of sub-accounts under its name.
- First-level distributor confirms bills of direct sub-clients under its name (no support for first-level distributor confirming bills of second-level resellers under its name or bills of sub-clients under second-level resellers).
- Second-level reseller confirms bills of sub-clients under its name.
On the customer bill page, click Confirm Bill and Return Credit Amount to enter the bill confirmation interface.
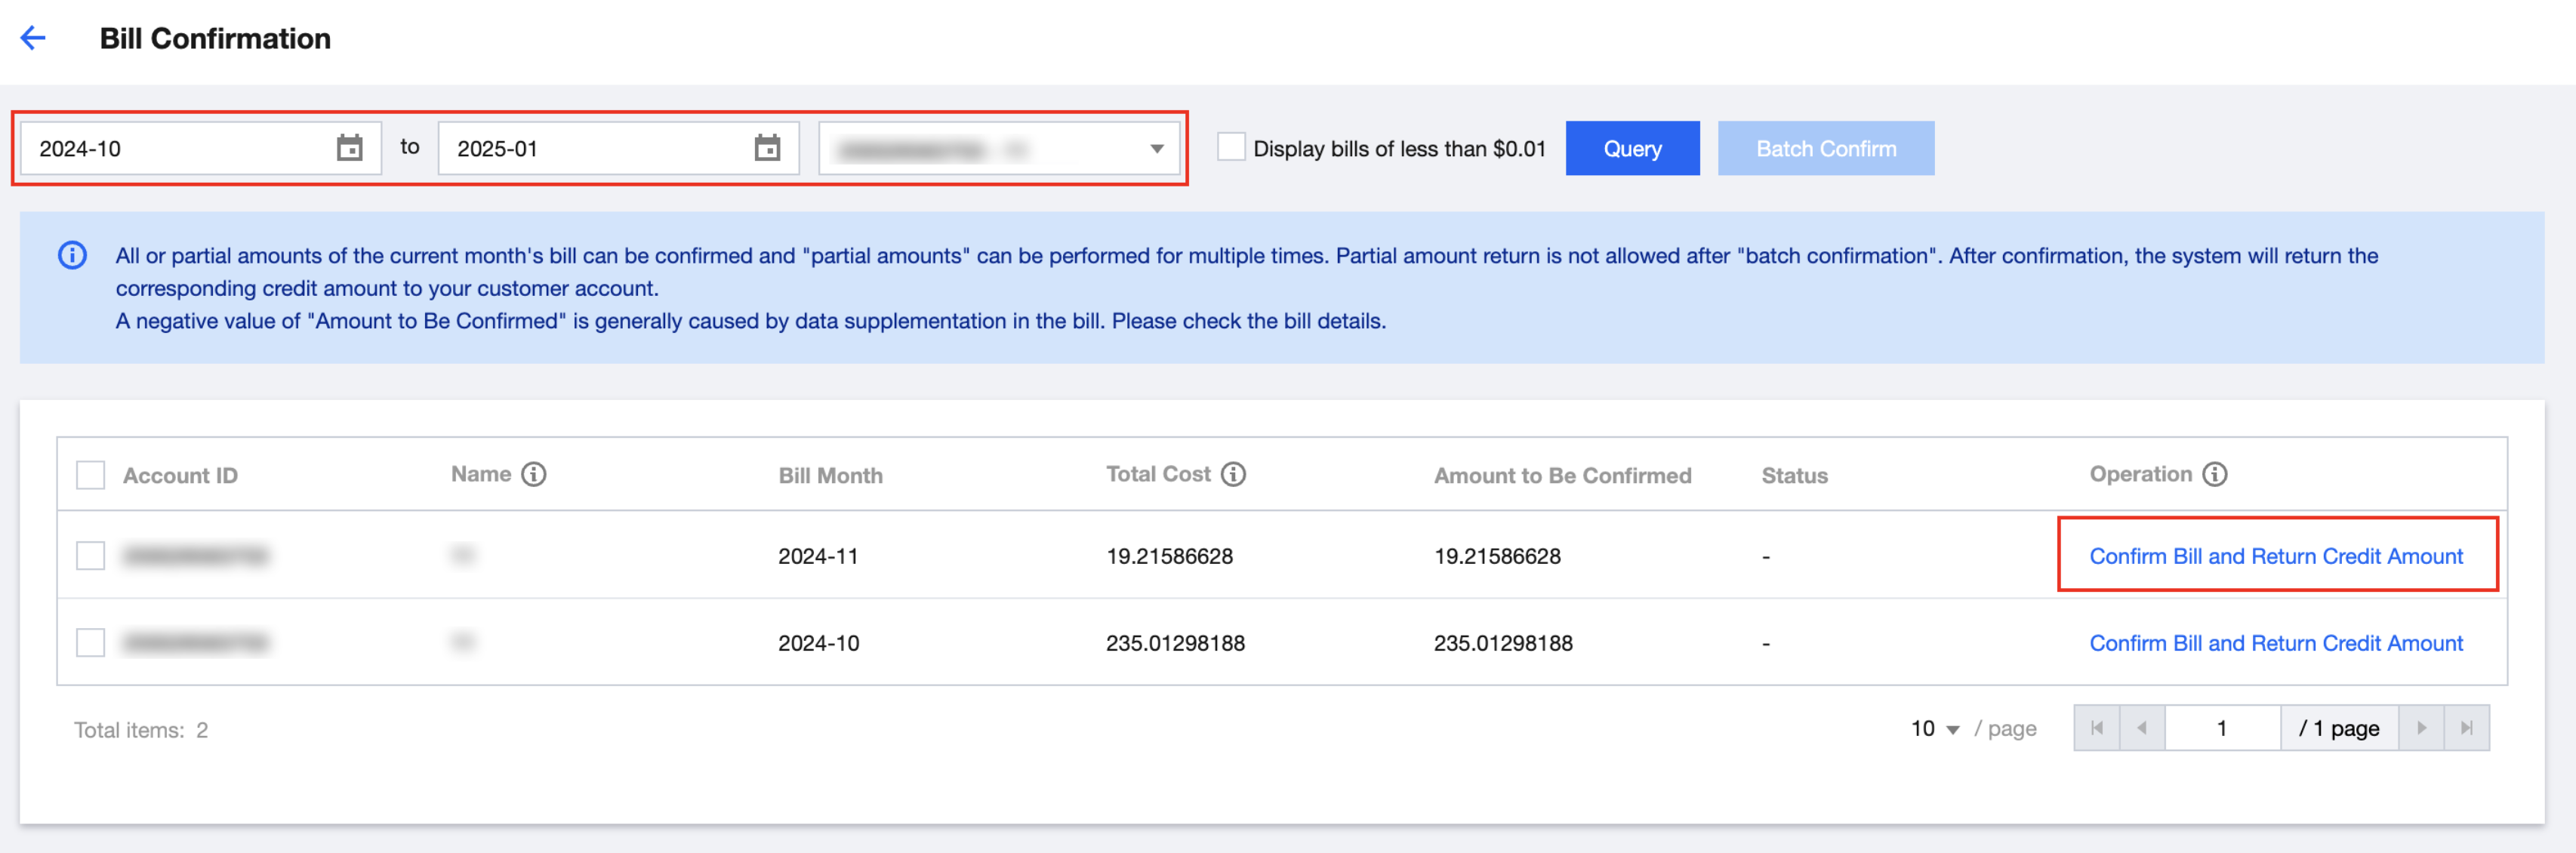
Confirming One by One
1. Select bill month and sub-client UIN/sub-client name to query bills that need to confirm.
2. Click Confirm Bill and Return Credit Amount in the operation list of each bill in the query result.
Note:
- Sub-account UIN/name is optional. If not select, query all sub-account bills.
- Page viewable total amount and pending confirmation amount.
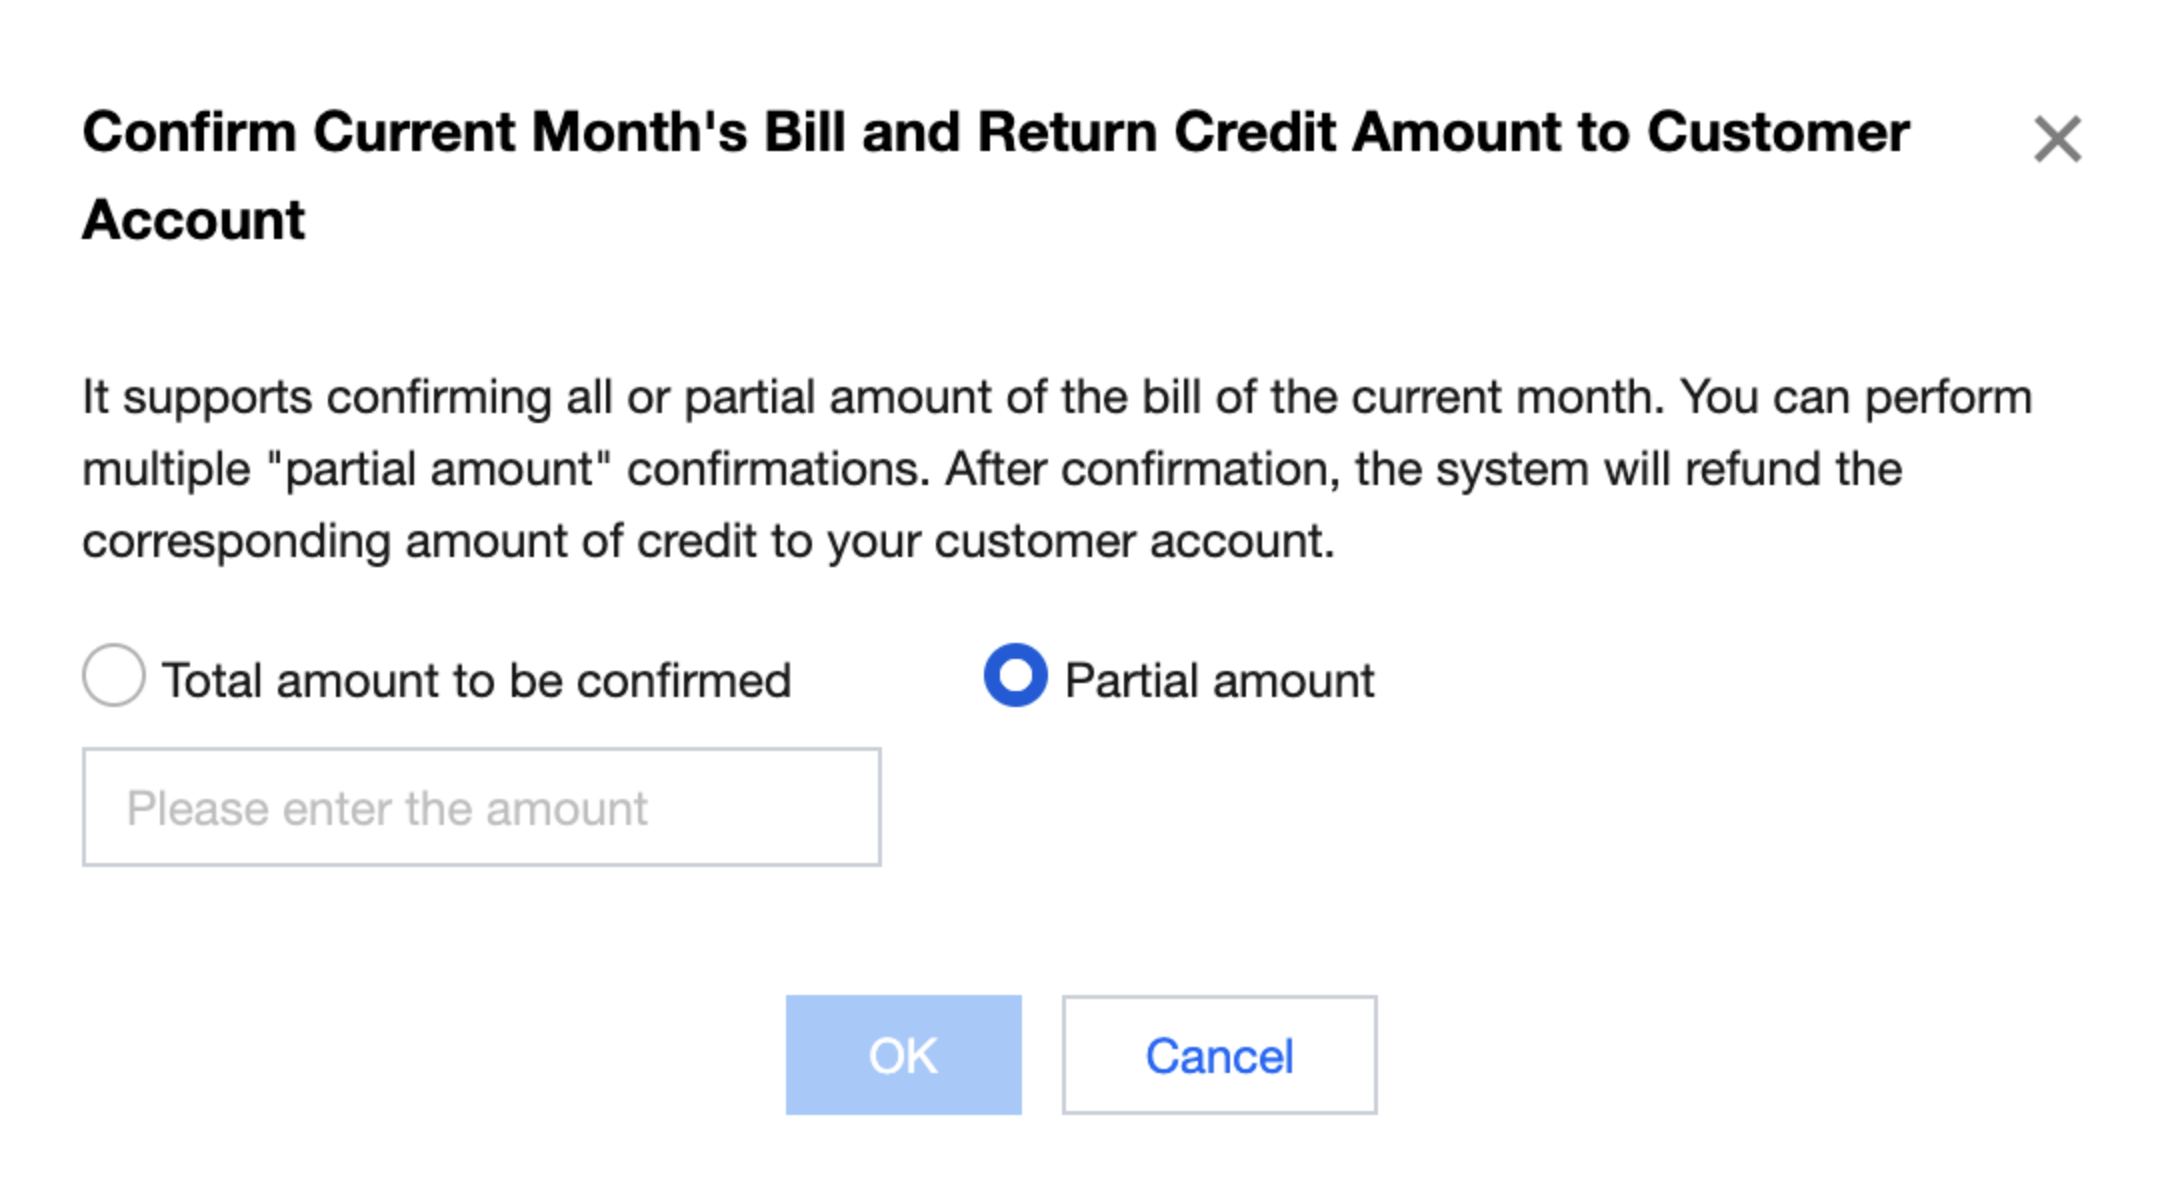
3. In the pop-up interface, select all pending confirmation amount or partial amount. If selected, manually input the amount based on the actual situation.
4. Click OK.
Note:
Partial amount confirm operation can be performed multiple times.
Upon confirmation, the system will refund the corresponding credit to the sub-customer account.
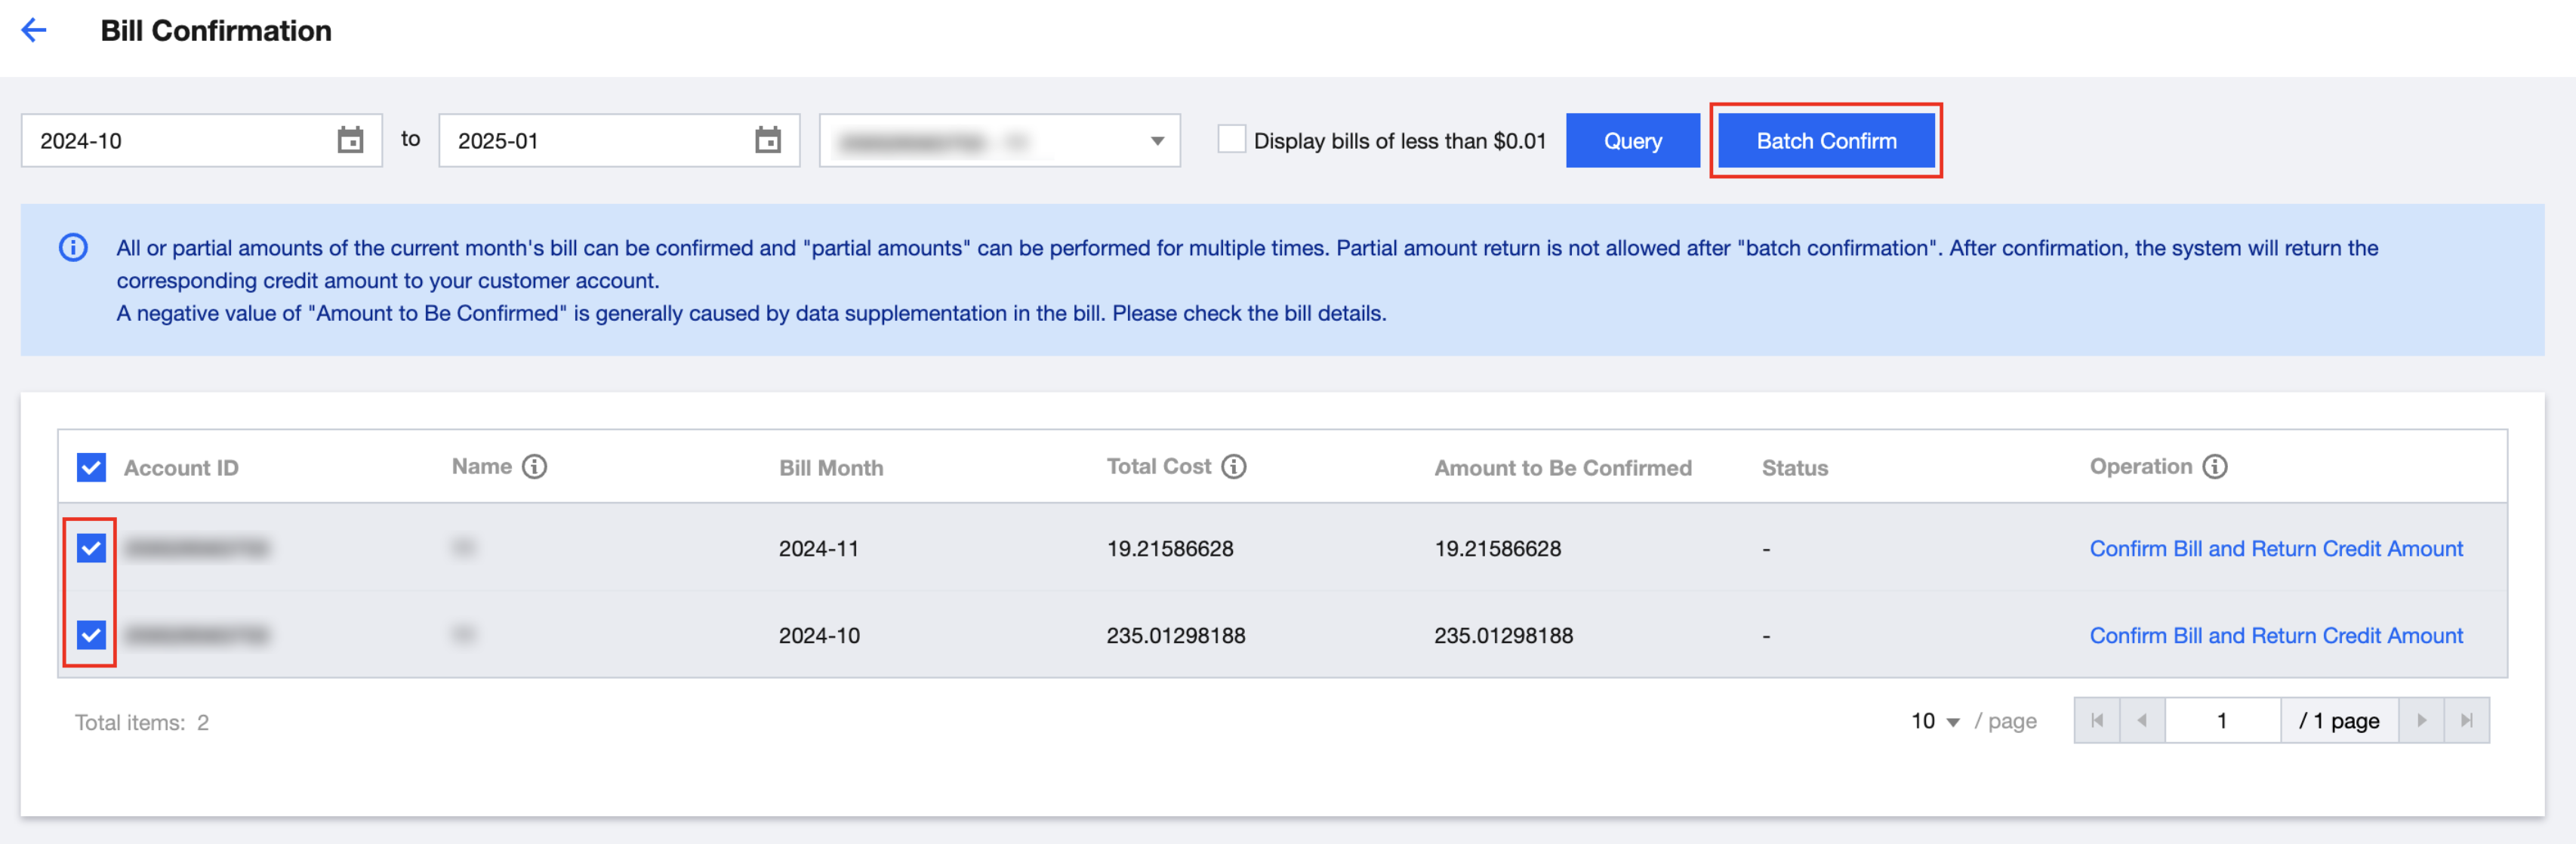
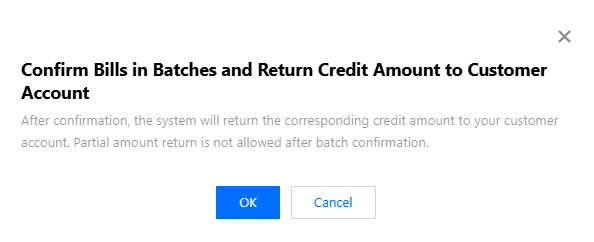
Batch Confirmation
1. Check the bills that need to confirm on the left of the list.
2. Click batch confirmation.
3. In the pop-up window, click Confirm to proceed.
Note:
"Batch confirmation" does not support partial amount confirmation.
Group Sub-Account Supplemental Description
If multiple sub-accounts under a reseller belong to the same group, the payments generated by the Group Administrator and all members will be settled by the Group Administrator with the reseller. This means the credit in the admin account will be deducted, while the credit in Group Member accounts will not.
In the "confirm bill and return credit" directions for resellers, queries should be conducted using the Group Member's UIN (i.e., the resource owner's UIN). After confirming the bill, the credit will be returned to the Group Administrator's account.