To modify the DNS information of your business domain name, you need to purchase a DNS service, such as Tencent Cloud DNSPod.
Process
Directions
Configuring forwarding rules
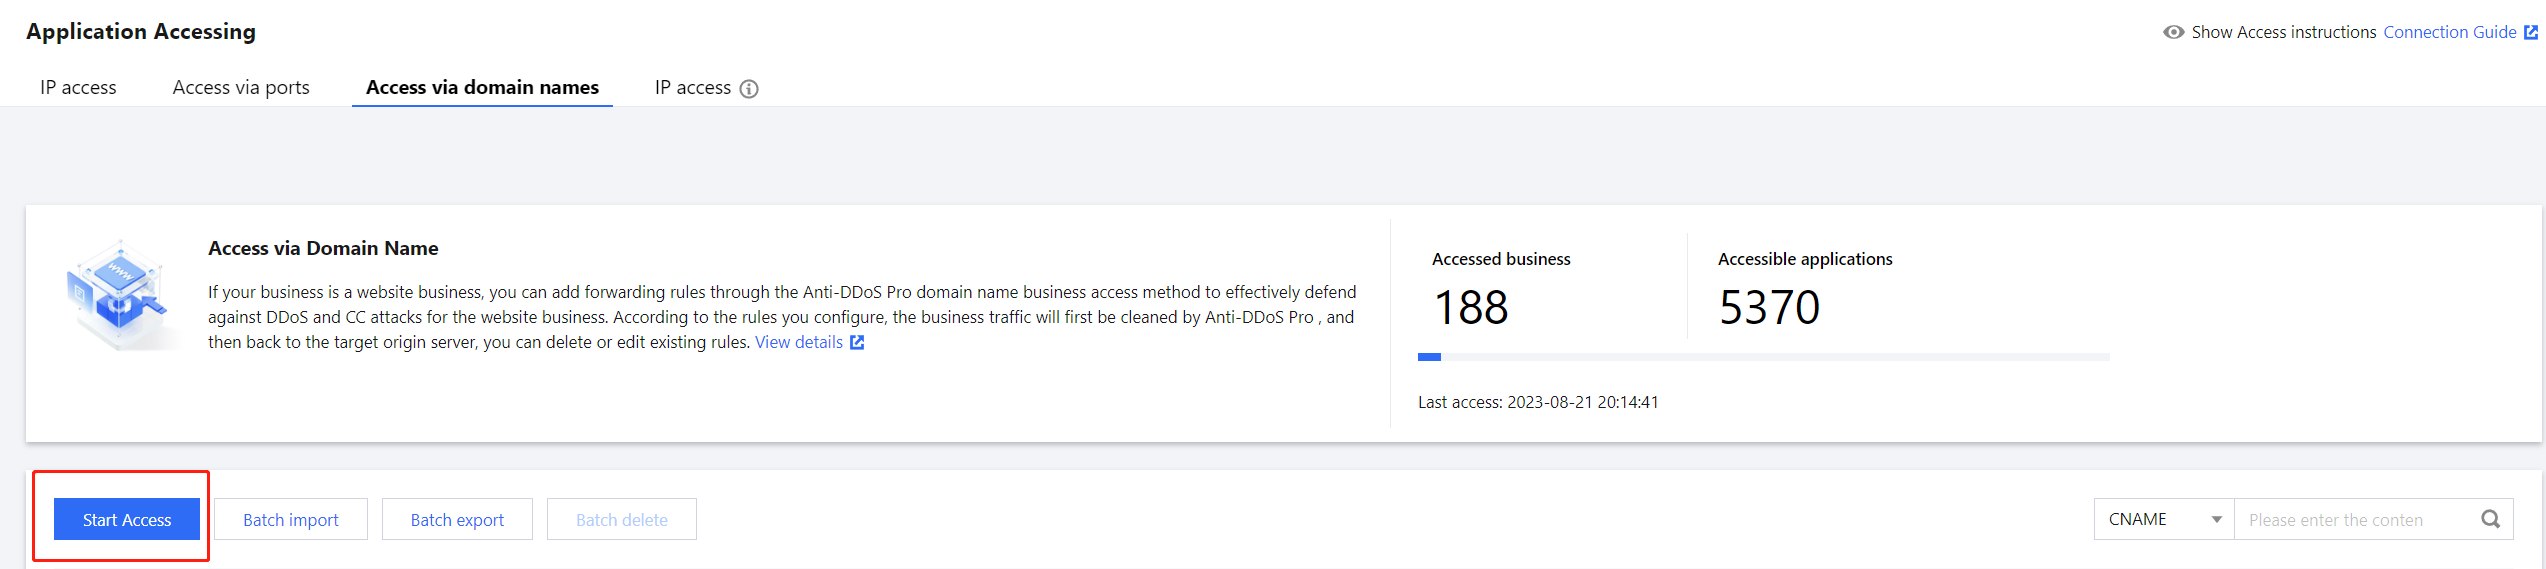
1. Log in to the new Anti-DDoS console, and click Business Access > Access via domain name on the left sidebar.
2. On the Access via domain name tab, click Start access.
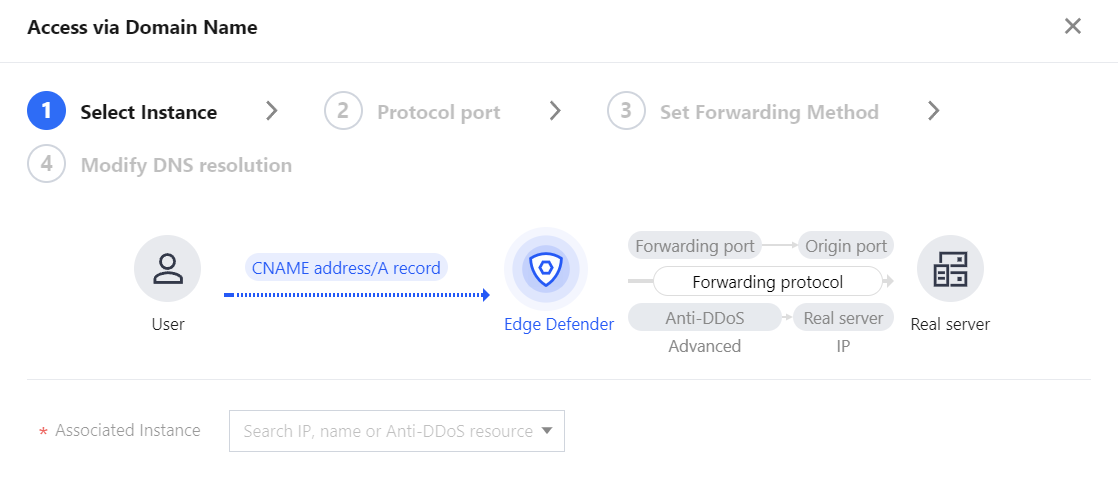
3. On the Access via Domain Name page, select an associated instance ID and click Next: Set Protocol Port.
Note:
You can select multiple instances.
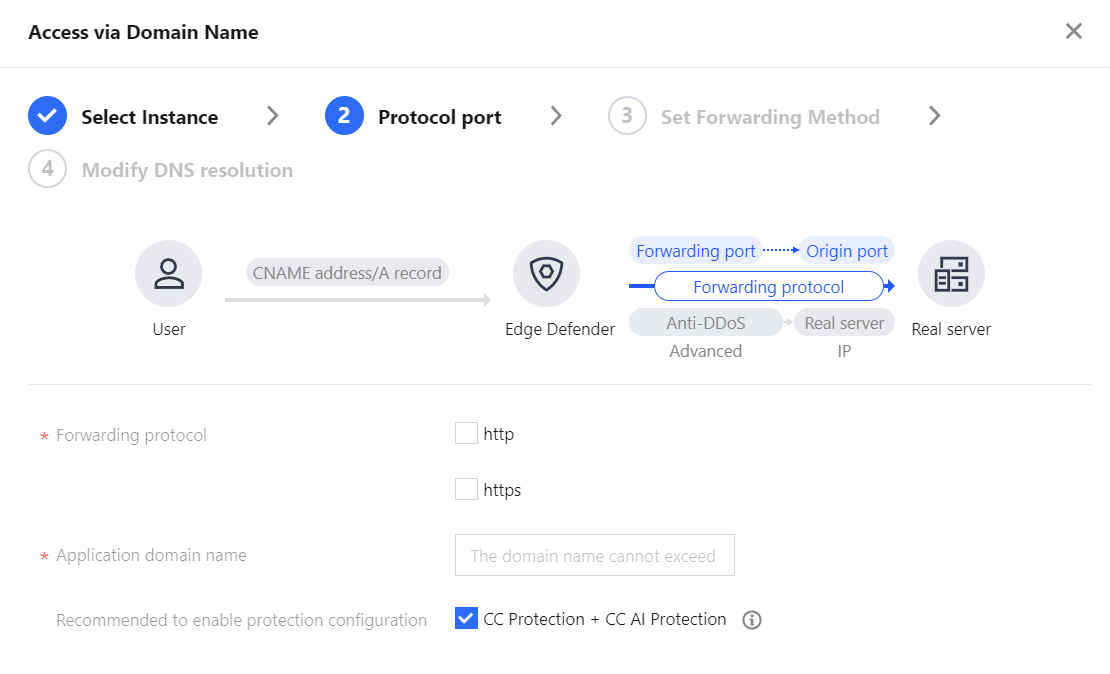
4. Select a forwarding protocol and certificate, specify a domain name, and then click Next: Set Forwarding Method.
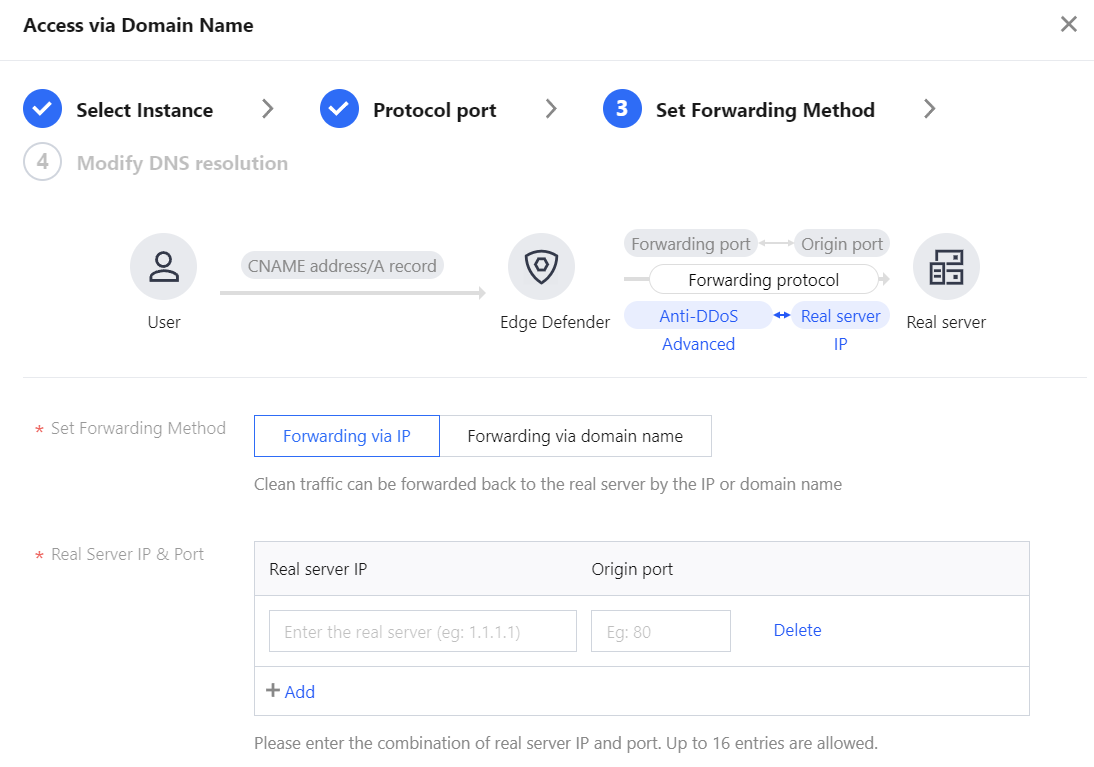
5. Select a forwarding method, specify a real server IP and port or a real server domain name, and then click Next: Modify DNS Resolution.
Note:
An alternate real server is used when the forwarding to the real server fails.
Only the standard protocol ports 80 (HTTP) and 443 (HTTPS).
Wildcard domain names are supported.
6. Click Complete.
Note:
After you have connected to the service, you can customize your protection settings on the Configurations page. For more information, see Protection Configuration.
Allowing forwarding IP ranges
Allow the Anti-DDoS's forwarding IP in the firewall rules of the origin server or disable the firewall to , so that the forwarding IP will not be affected by the security policies of the real server.
1. Log in to the new Anti-DDoS console and click Anti-DDoS instances on the left sidebar.
2. On the Anti-DDoS instances page, select a target instance and click the instance ID.
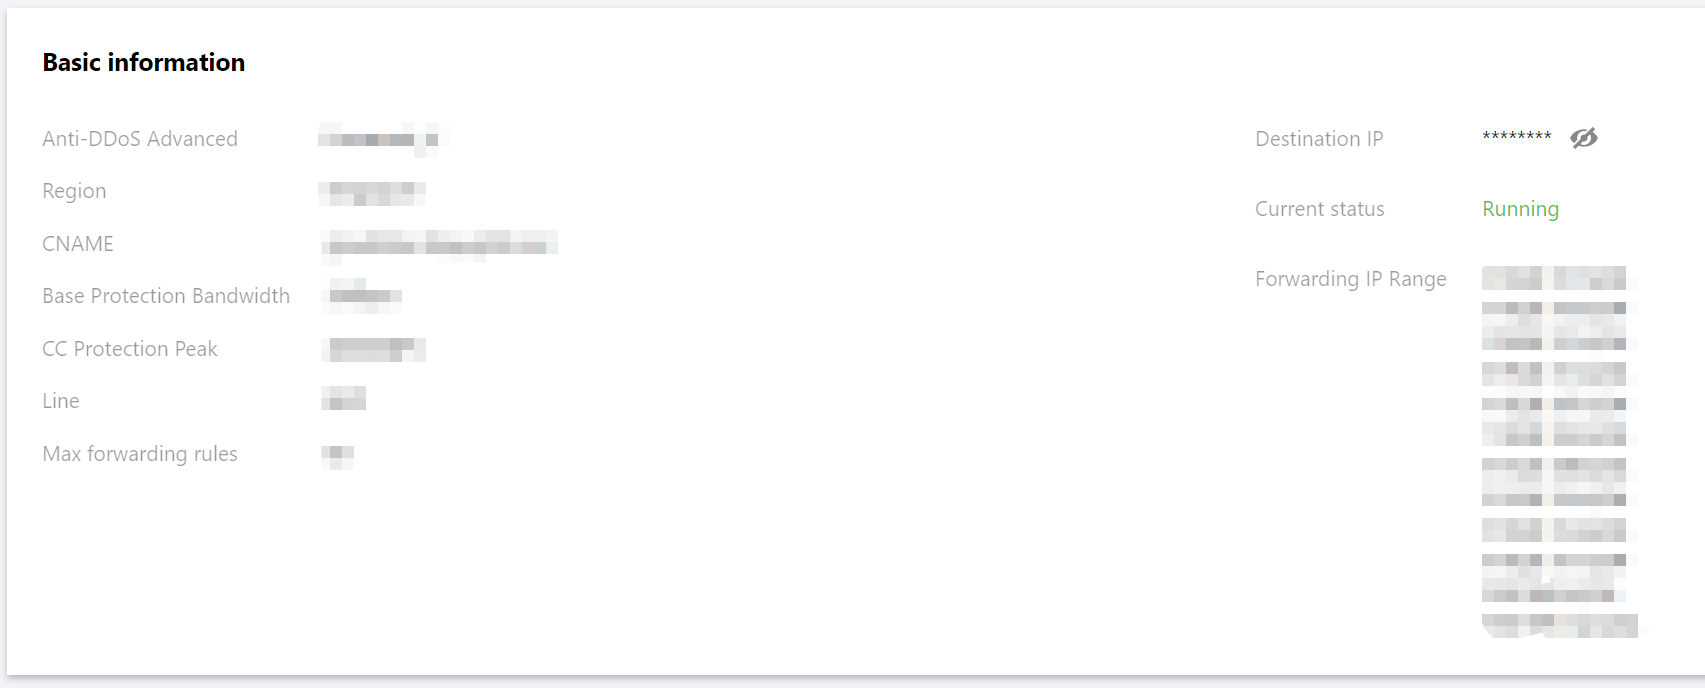
3. On the Basic information page, you will see the forwarding IP ranges.
Verifying configuration locally
After the forwarding configuration is completed, the Anti-DDoS Advanced IP will forward packets from the relevant port to the corresponding real server port according to the forwarding rules.
To ensure the stability of your business, a local test is recommended. The verification methods are as follows:
1. Edit the local hosts file to direct local requests to the protected site to your Anti-DDoS Advanced instance. The following uses Windows OS as an example to describe how to configure the local hosts file:
Open the hosts file in C:\\Windows\\System32\\drivers\\etc and add the following content at the end of the file:
<Anti-DDoS Advanced IP><Domain name of the protected website>
2. For example, if the Anti-DDoS Advanced IP is 10.1.1.1 and the domain name is www.qqq.com, add:
10.1.1.1 www.qqq.com
Save the hosts file and ping the protected domain name on the local computer. If the resolved IP address is the Anti-DDoS Advanced IPs bound in the hosts file, the local hosts configuration has taken effect.
Note:
If the resolved IP is still the real server IP, try running ipconfig/flushdns in the Windows Command Prompt to refresh the local DNS cache.
3. After confirming the protective IP bound in the hosts file has taken effect, check whether the domain name can be accessed. If it can be accessed properly, the configuration has taken effect.
Note:
If the verification still fails with the correct method, log in to the Anti-DDoS Advanced console and check the configuration. If the problem persists, please submit a ticket.
The DNS resolution address should be changed to the CNAME address provided, which will be updated from time to time. (Non-BGP resources are not supported).