Anti-DDoS
- Release Notes and Announcements
- Product Introduction
- Purchase Guide
- Getting Started
- Operation Guide
- Asset Center
- Business Connection
- Protection Configuration
- DDoS Protection
- Security Operations
- Service Management
- Unblocking Service
- Practical Tutorial
- Troubleshooting
- API Documentation
- Making API Requests
- Anti-DDoS Advanced Instance APIs
- Resource List APIs
- Protection Configuration APIs
- Other APIs
- Alarm Notification APIs
- Connection Configuration APIs
- Intelligent Scheduling APIs
- Black hole unblocking APIs
- Statistical Report APIs
- Product Policy
Creating an Anti-DDoS EIP
Last updated: 2024-07-01 11:38:27
Note:
Only a standard account supports creating Anti-DDoS EIPs. If you are not certain about your account type, please contact us.
Step 1. Purchase an Anti-DDoS Pro (Enterprise) instance
Go to the Anti-DDoS Pro buy page and purchase an instance. For more information, see Purchase Guide.
Step 2. Create a BGP bandwidth package
Note:
If you already have created a general BGP bandwidth package in the target region, please skip to Step 3.
Step 3. Create an Anti-DDoS EIP
1. Log in to the CVM console and click Public IP on the left sidebar.
2. On the Public IP/EIP page, select a region and click Apply.

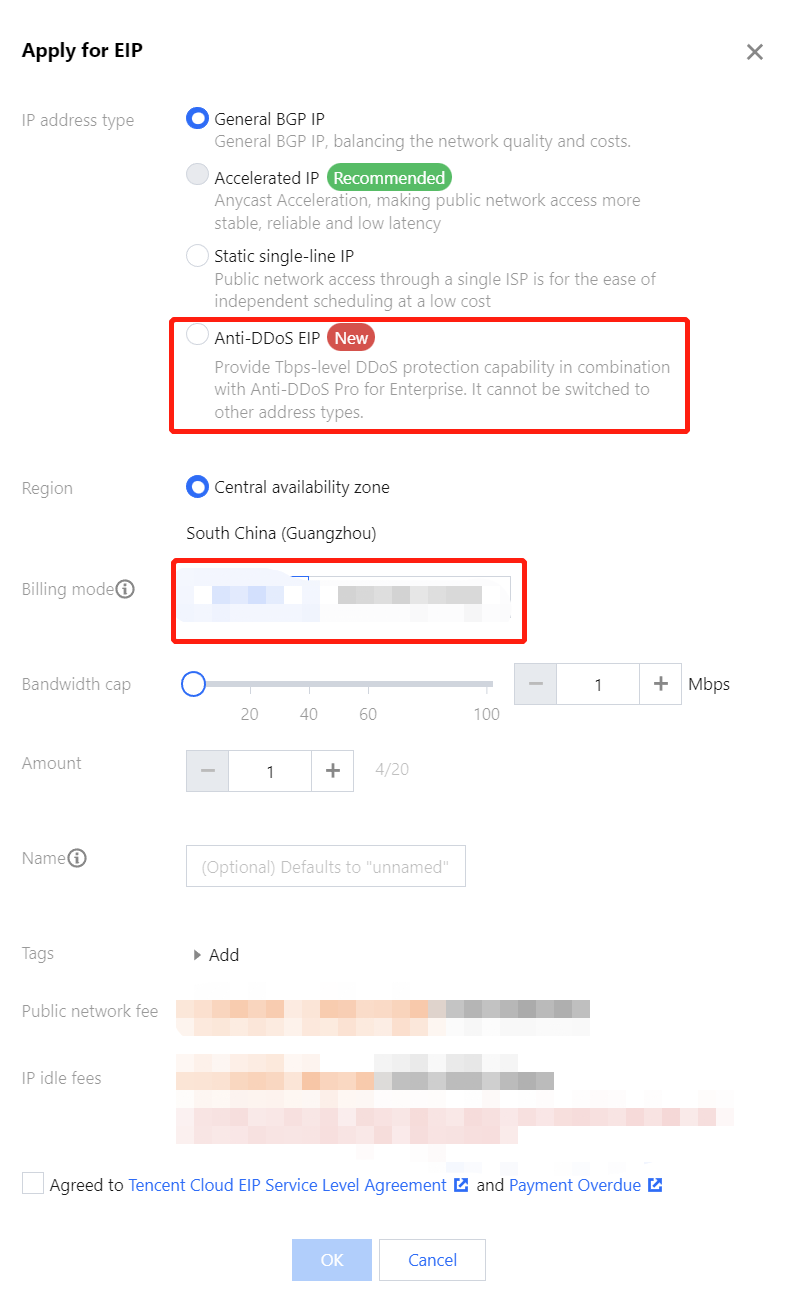
3. In the Apply for EIP pop-up window, configure relevant parameters and click OK.

Parameter | Description |
IP address type | Select Anti-DDoS EIP. |
Billing mode | Only bandwidth package is supported. |
Bandwidth package | Select the wanted general BGP bandwidth package. |
Bandwidth cap | Set the bandwidth cap as needed and allocate bandwidth resources reasonably. |
Anti-DDoS Pro for Enterprise | Select the Anti-DDoS Pro instance you want to bind. |
Amount | Select the quantity of EIPs to be applied and ensure that it does not exceed the total quota. |
Name | (Optional) Enter an EIP instance name. |
Tags | You can add a tag and use it for permission management. |
Related operations
Was this page helpful?
You can also Contact Sales or Submit a Ticket for help.
Yes
No

