- Release Notes and Announcements
- Product Introduction
- Purchase Guide
- Getting Started
- Operation Guide
- Instance Management
- Creating Instance
- Naming with Consecutive Numeric Suffixes or Designated Pattern String
- Viewing Instance
- Upgrading Instance
- Downgrading Instance Configuration
- Terminating/Returning Instances
- Change from Pay-as-You-Go to Monthly Subscription
- Upgrading Instance Version
- Adding Routing Policy
- Public Network Bandwidth Management
- Connecting to Prometheus
- AZ Migration
- Setting Maintenance Time
- Setting Message Size
- Topic Management
- Consumer Group
- Monitoring and Alarms
- Smart Ops
- Permission Management
- Tag Management
- Querying Message
- Event Center
- Migration to Cloud
- Data Compression
- Instance Management
- CKafka Connector
- Practical Tutorial
- Practical Tutorial of CKafka Client
- Connector Practical Tutorial
- Connecting Flink to CKafka
- Connecting Schema Registry to CKafka
- Connecting Spark Streaming to CKafka
- Connecting Flume to CKafka
- Connecting Kafka Connect to CKafka
- Connecting Storm to CKafka
- Connecting Logstash to CKafka
- Connecting Filebeat to CKafka
- Multi-AZ Deployment
- Log Access
- Replacing Supportive Route (Old)
- Practice Tutorial for Cluster Bandwidth in High CPU Utilization Scenarios
- Practice Tutorial for Cluster Capacity Planning
- Troubleshooting
- API Documentation
- History
- Introduction
- API Category
- Making API Requests
- DataHub APIs
- ACL APIs
- Topic APIs
- DescribeTopicProduceConnection
- BatchModifyGroupOffsets
- BatchModifyTopicAttributes
- CreateConsumer
- CreateDatahubTopic
- CreatePartition
- CreateTopic
- CreateTopicIpWhiteList
- DeleteTopic
- DeleteTopicIpWhiteList
- DescribeDatahubTopic
- DescribeTopic
- DescribeTopicAttributes
- DescribeTopicDetail
- DescribeTopicSubscribeGroup
- FetchMessageByOffset
- FetchMessageListByOffset
- ModifyDatahubTopic
- ModifyTopicAttributes
- DescribeTopicSyncReplica
- Instance APIs
- Route APIs
- Other APIs
- Data Types
- Error Codes
- SDK Documentation
- General References
- Conducting Production and Consumption Pressure Testing on CKafka
- Configuration Guide for Common Parameters in CKafka
- Connecting to Legacy Self-Built Kafka
- Suggestions for CKafka Version Selection
- CKafka Data Reliability Description
- Connector
- FAQs
- Service Level Agreement
- Contact Us
- Glossary
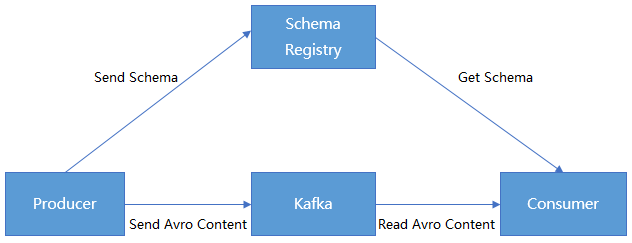
We can serialize/deserialize classes by using Avro APIs or the Twitter Bijection class library, but the disadvantage of the two methods is that the Kafka record size will multiply as each record must be embedded with a schema. However, the schema is required for reading the records.
CKafka makes it possible for data to share one schema by registering the content of the schema in Confluent Schema Registry. Kafka producers and consumers can implement serialization/deserialization by identifying the schema content in Confluent Schema Registry.
Prerequisites
You have downloaded JDK 8.
You have downloaded Confluent OSS 4.1.1.
You have created an instance as instructed in Creating Instance.
Directions
Step 1. Obtain the instance access address and enable automatic topic creation
1. Log in to the CKafka console.
2. Select Instance List on the left sidebar and click the ID of the target instance to enter its basic information page.
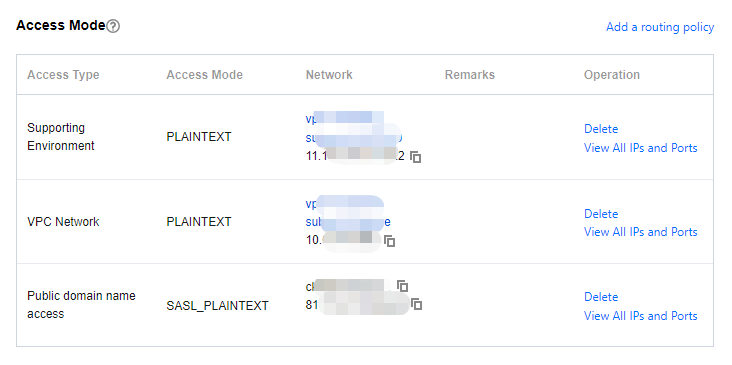
3. On the instance's basic information page, get the instance access address in the Access Mode module.

4. Enable automatic topic creation in the Auto-Create Topic module.
Note:
Automatic topic creation must be enabled as a topic named
schemas will be automatically created when OSS is started.Step 2. Prepare Confluent configurations
1. Modify the server address and other information in the OSS configuration file.
The configuration information of the PLAINTEXT access method is as follows:
kafkastore.bootstrap.servers=PLAINTEXT://xxxxkafkastore.topic=schemasdebug=true
The configuration information of the SASL_PLAINTEXT access method is as follows:
kafkastore.bootstrap.servers=SASL_PLAINTEXT://ckafka-xxxx.ap-xxx.ckafka.tencentcloudmq.com:50004
kafkastore.security.protocol=SASL_PLAINTEXT
kafkastore.sasl.mechanism=PLAIN
kafkastore.sasl.jaas.config=org.apache.kafka.common.security.plain.PlainLoginModule required username='ckafka-xxxx#xxxx' password='xxxx';kafkastore.topic=schemasdebug=true
Note:
bootstrap.servers: Access the network and copy from the network column of the Access Method section on the instance details page in the CKafka Console.
2. Run the following command to start Schema Registry.
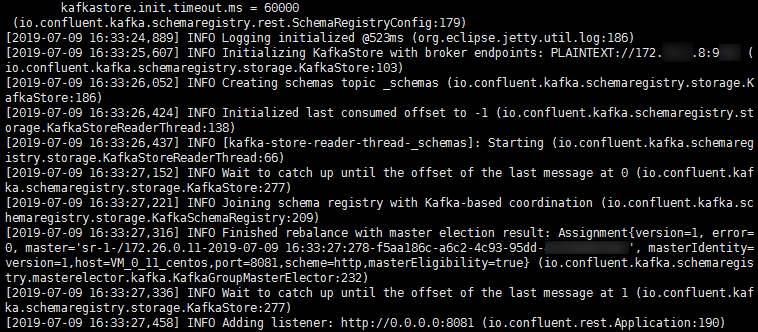
bin/schema-registry-start etc/schema-registry/schema-registry.properties
The execution result is as follows:
Step 3. Receive/Send messages
Below is the content of the schema file:
{"type": "record","name": "User","fields": [{"name": "id", "type": "int"},{"name": "name", "type": "string"},{"name": "age", "type": "int"}]}
1. Register the schema in the topic named
test.The script below is an example of registering a schema by calling an API with the
curl command in the environment deployed in Schema Registry.curl -X POST -H "Content-Type: application/vnd.schemaregistry.v1+json" \\--data '{"schema": "{\\"type\\": \\"record\\", \\"name\\": \\"User\\", \\"fields\\": [{\\"name\\": \\"id\\", \\"type\\": \\"int\\"}, {\\"name\\": \\"name\\", \\"type\\": \\"string\\"}, {\\"name\\": \\"age\\", \\"type\\": \\"int\\"}]}"}' \\http://127.0.0.1:8081/subjects/test/versions
2. The Kafka producer sends messages.
package schemaTest;import java.util.Properties;import java.util.Random;import org.apache.avro.Schema;import org.apache.avro.generic.GenericData;import org.apache.avro.generic.GenericRecord;import org.apache.kafka.clients.producer.KafkaProducer;import org.apache.kafka.clients.producer.Producer;import org.apache.kafka.clients.producer.ProducerRecord;public class SchemaProduce {public static final String USER_SCHEMA = "{\\"type\\": \\"record\\", \\"name\\": \\"User\\", " +"\\"fields\\": [{\\"name\\": \\"id\\", \\"type\\": \\"int\\"}, " +"{\\"name\\": \\"name\\", \\"type\\": \\"string\\"}, {\\"name\\": \\"age\\", \\"type\\": \\"int\\"}]}";public static void main(String[] args) throws Exception {Properties props = new Properties();// Add the access address of the CKafka instanceprops.put("bootstrap.servers", "xx.xx.xx.xx:xxxx");props.put("key.serializer", "org.apache.kafka.common.serialization.StringSerializer");// Use the Confluent `KafkaAvroSerializer`props.put("value.serializer", "io.confluent.kafka.serializers.KafkaAvroSerializer");// Add the schema service address to obtain the schemaprops.put("schema.registry.url", "http://127.0.0.1:8081");Producer<String, GenericRecord> producer = new KafkaProducer<>(props);Schema.Parser parser = new Schema.Parser();Schema schema = parser.parse(USER_SCHEMA);Random rand = new Random();int id = 0;while(id < 100) {id++;String name = "name" + id;int age = rand.nextInt(40) + 1;GenericRecord user = new GenericData.Record(schema);user.put("id", id);user.put("name", name);user.put("age", age);ProducerRecord<String, GenericRecord> record = new ProducerRecord<>("test", user);producer.send(record);Thread.sleep(1000);}producer.close();}}
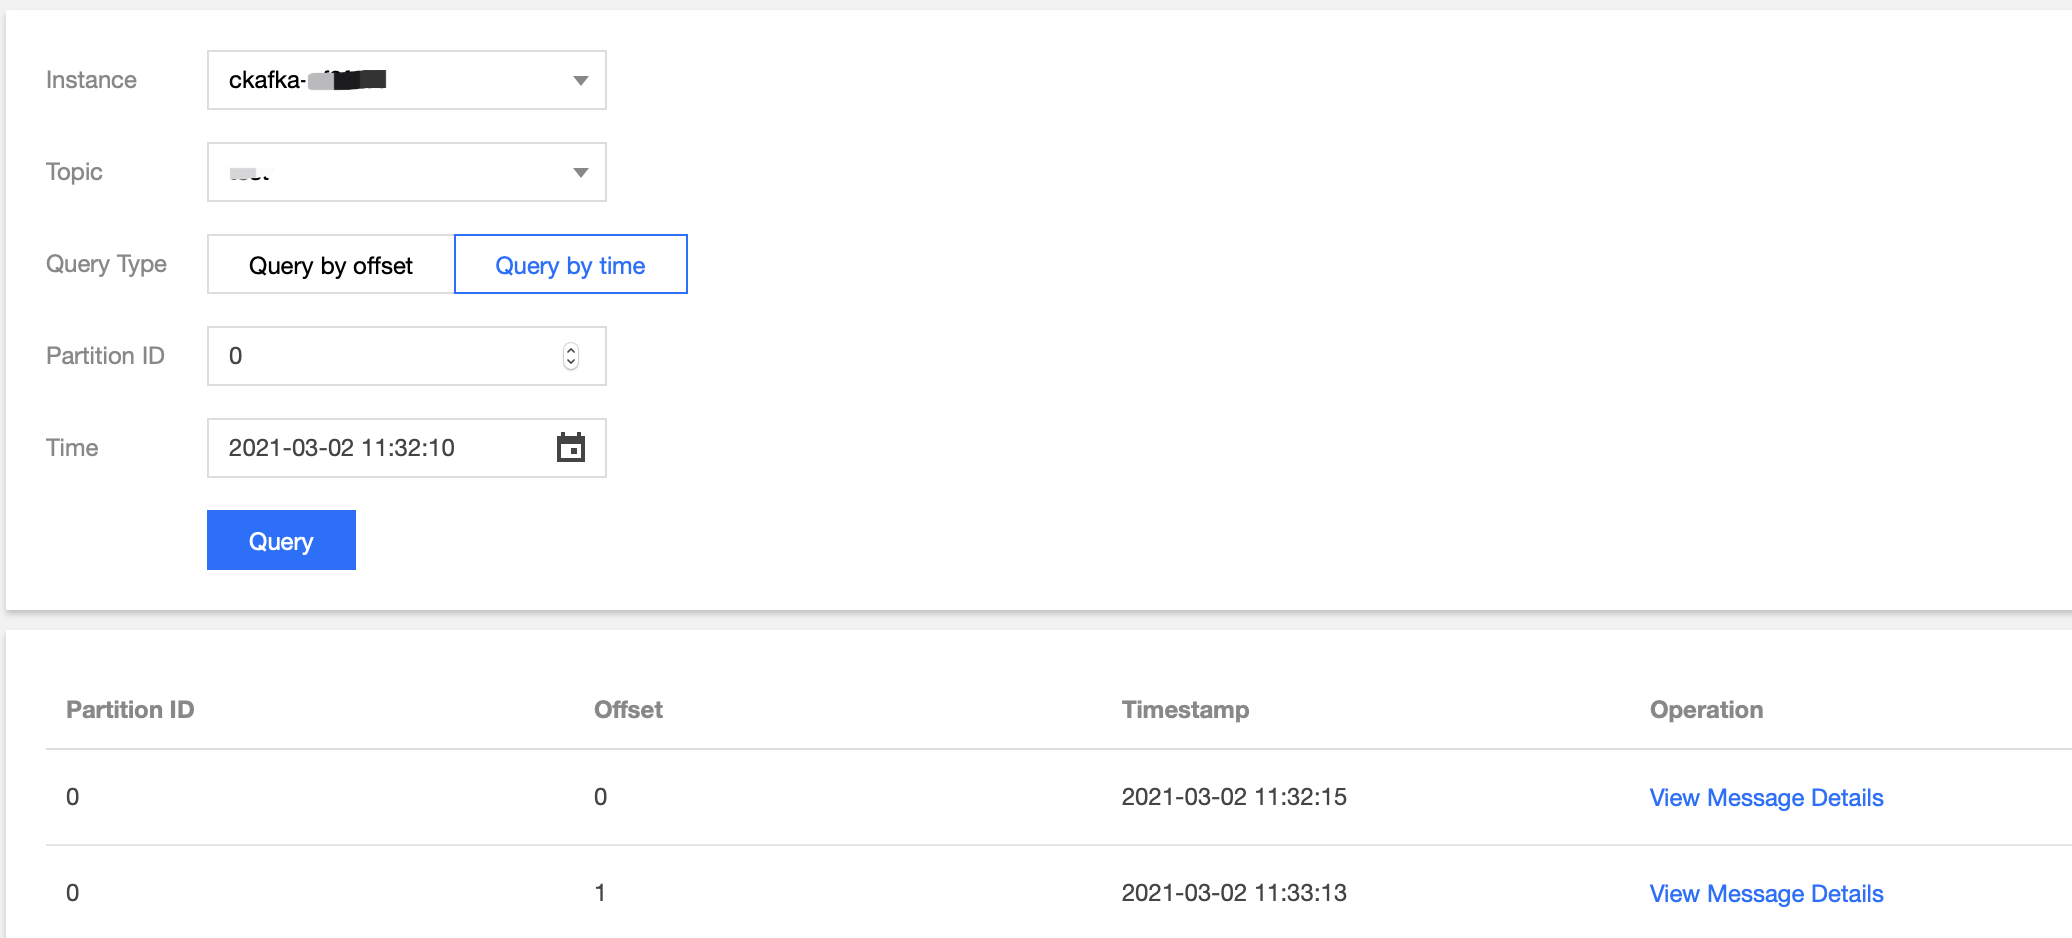
After running the script for a while, go to the CKafka console, select the Topic Management tab on the instance details page, select the topic, and click More > Message Query to view the message just sent.
3. The Kafka consumer consumes messages.
package schemaTest;import java.util.Collections;import java.util.Properties;import org.apache.avro.generic.GenericRecord;import org.apache.kafka.clients.consumer.ConsumerRecord;import org.apache.kafka.clients.consumer.ConsumerRecords;import org.apache.kafka.clients.consumer.KafkaConsumer;public class SchemaProduce {public static void main(String[] args) throws Exception {Properties props = new Properties();props.put("bootstrap.servers", "xx.xx.xx.xx:xxxx"); // Access address of the CKafka instanceprops.put("group.id", "schema");props.put("key.deserializer", "org.apache.kafka.common.serialization.StringDeserializer");// Use the Confluent `KafkaAvroDeserializer`props.put("value.deserializer", "io.confluent.kafka.serializers.KafkaAvroDeserializer");// Add the schema service address to obtain the schemaprops.put("schema.registry.url", "http://127.0.0.1:8081");KafkaConsumer<String, GenericRecord> consumer = new KafkaConsumer<>(props);consumer.subscribe(Collections.singletonList("test"));try {while (true) {ConsumerRecords<String, GenericRecord> records = consumer.poll(10);for (ConsumerRecord<String, GenericRecord> record : records) {GenericRecord user = record.value();System.out.println("value = [user.id = " + user.get("id") + ", " + "user.name = "+ user.get("name") + ", " + "user.age = " + user.get("age") + "], "+ "partition = " + record.partition() + ", " + "offset = " + record.offset());}}} finally {consumer.close();}}}
On the Consumer Group tab page in the CKafka console, select the consumer group named
schema, enter the topic name, and click View Consumer Details to view the consumption details.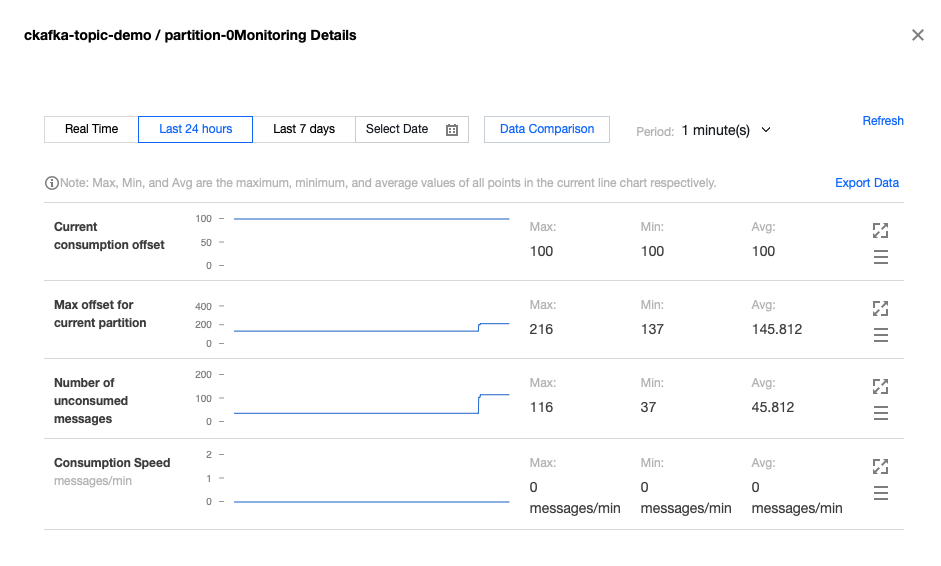
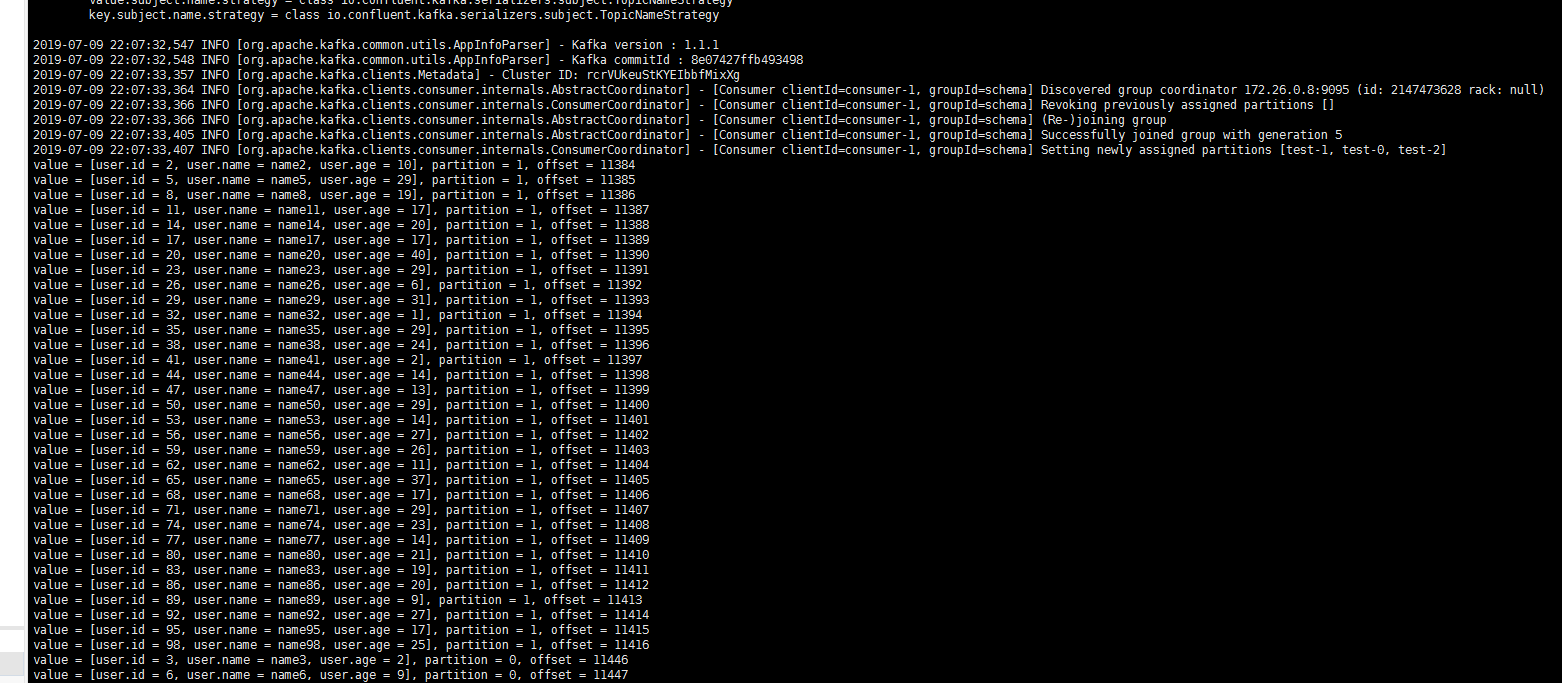
Start the consumer for consumption. Below is a screenshot of the consumption log:

 예
예
 아니오
아니오
문제 해결에 도움이 되었나요?