TencentDB for Redis®
- Release Notes and Announcements
- Product Introduction
- Product Series
- Purchase Guide
- Getting Started
- Operation Guide
- Access Management
- SDK Connection
- Daily Instance Operation
- Upgrading Redis Edition Instances
- Managing Redis Edition Nodes
- Multi-AZ Deployment Management
- Backup and Restoration
- Downloading Redis Edition Backups
- Data Migration for Redis Edition Instances
- Account and Password (Redis Edition)
- Parameter Configuration
- Redis Parameter Operations
- Network and Security
- Monitoring and Alarms
- Redis Edition Event Management
- Global Replication for Redis Edition
- Performance Optimization
- Development Guidelines
- Connection Pool Configuration
- Command Reference
- Commands Supported by Different Versions
- Additional Command Operations in the Redis Edition
- Troubleshooting
- Connection Exception
- Performance Troubleshooting and Fine-Tuning
- Practical Tutorial
- API Documentation
- Making API Requests
- Instance APIs
- Parameter Management APIs
- Other APIs
- Backup and Restoration APIs
- Monitoring and Management APIs
- Service Agreement

DocumentationTencentDB for Redis®Operation GuideNetwork and SecurityEnabling Public Network Access via CLB
Enabling Public Network Access via CLB

Last updated: 2024-11-25 15:59:43
TencentDB for Redis® supports both private and public network addresses. By default, a private network address is provided for internal access to the instance. If you need to enable public network access, you can access the instance via a Linux or Windows CVM connection after enabling the public network address. Alternatively, you can set up public network access via CLB, but you need to configure security group rules. Here is how to connect to the instance by enabling public network access via CLB.
Prerequisites
Backend service feature has been requested.
1. Enter the cross-region CLB binding 2.0 application page.
2. Fill out the necessary information and submit the application.
3. After you submit the beta application to CLB to request access to backend service features.
Note:
Ensure that the CLB instance and the Redis instance are in the same VPC network. When you submit the application, be sure to specify this requirement.
Step 1: Purchasing CLB Instances
Note:
If there is already a CLB instance in the same region as that of your TencentDB for Redis®, you do not need to purchase another one.
The region should be set to where TencentDB for Redis® instance is located.
The CLB instance and the Redis instance should be in the same VPC.
Step 2: Configuring CLB
1. Enable cross-VPC access (which allows CLB to bind to other private IP addresses).
1.1 Log in to the CLB console, select a region, and click Instance ID in the instance management list to enter the instance management page.
1.2 In the Backend service section of the Basic Information tab, click Configure.
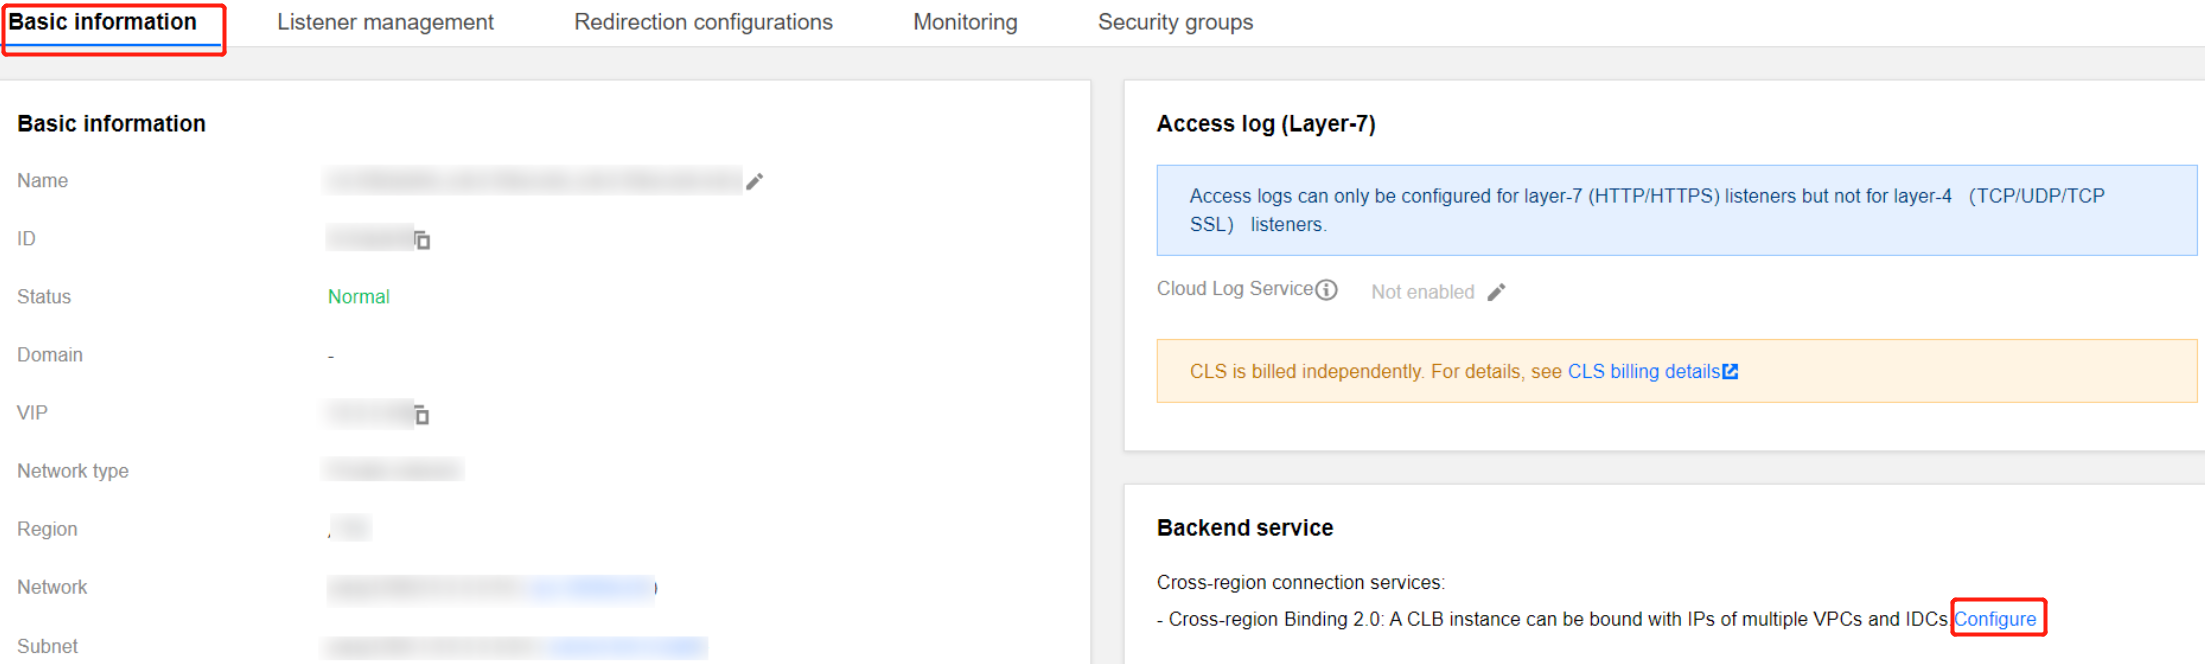
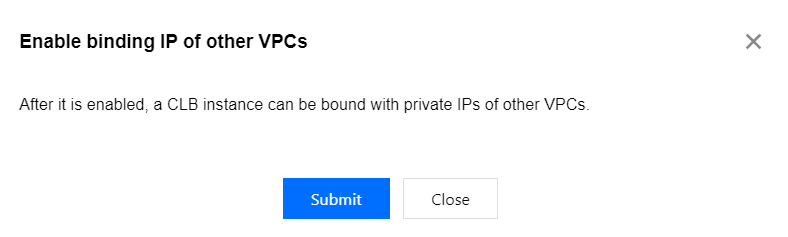
1.3 In the pop-up dialog, click Submit to enable it.
2. Configure the public network listening port.
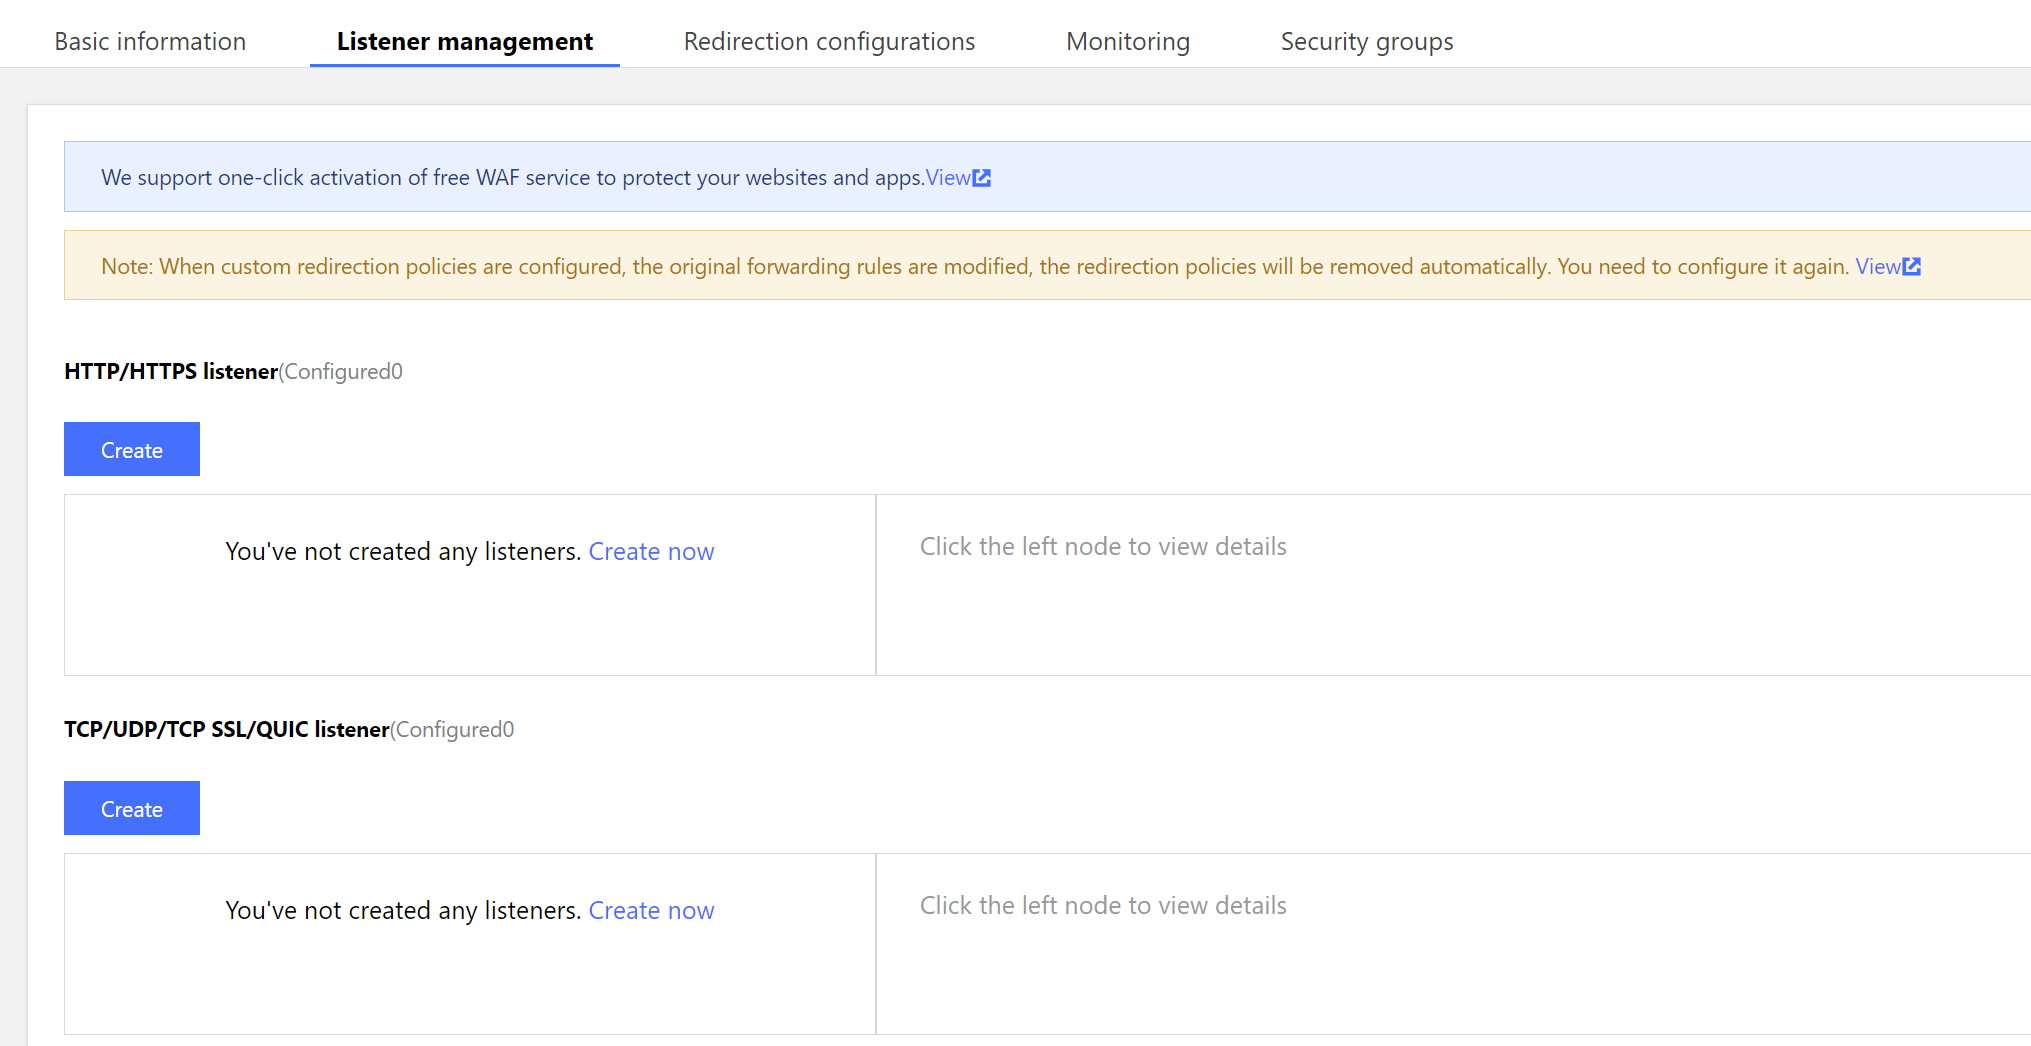
2.1 Log in to the CLB console, select a region, and click Instance ID in the instance management list to enter the instance management page.
2.2 On the instance management page, select the Listener management tab, and click Create under TCP/UDP/TCP SSL/QUIC listener.
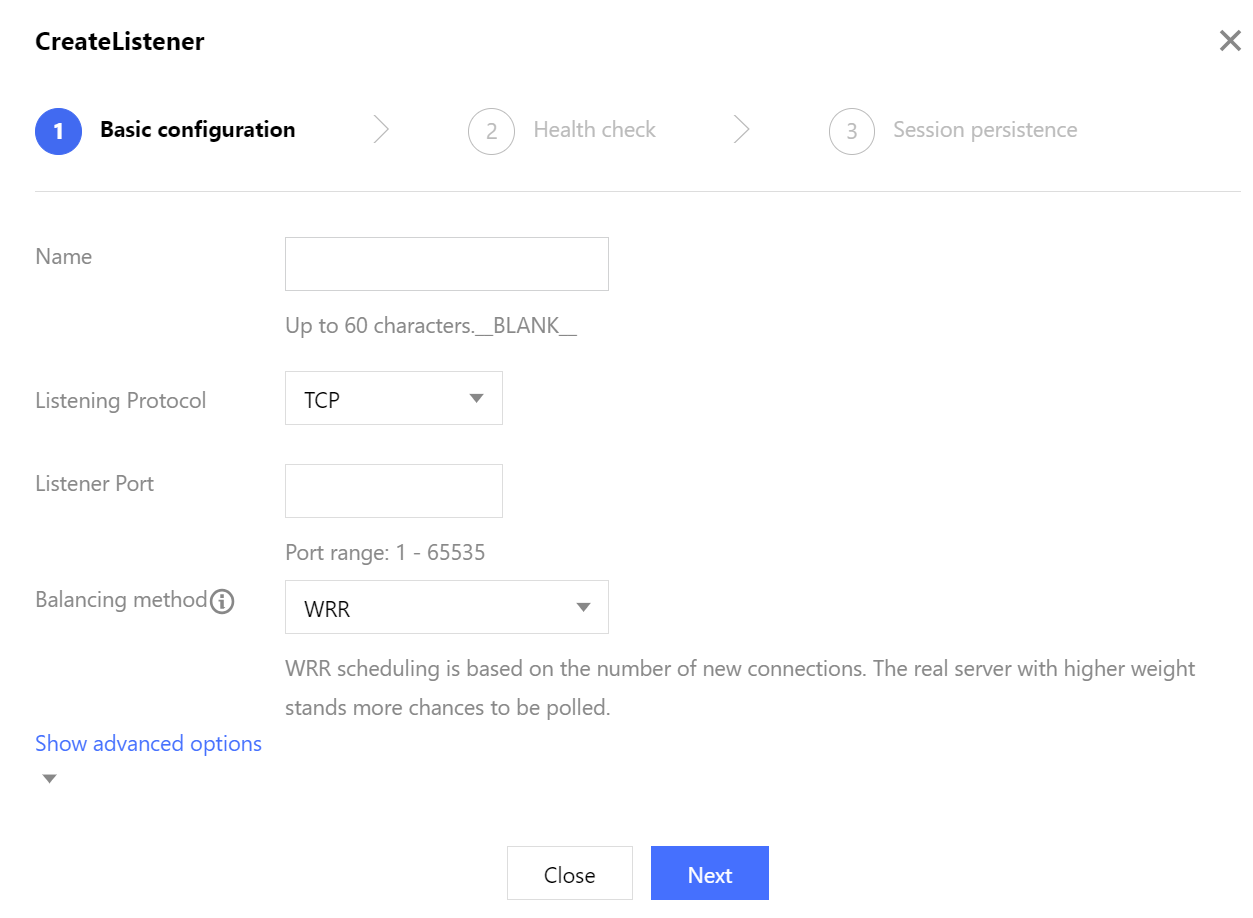
2.3 In the pop-up dialog, follow the steps to complete the settings, and then click Submit to complete the creation.
Step 3: Binding Redis Instances
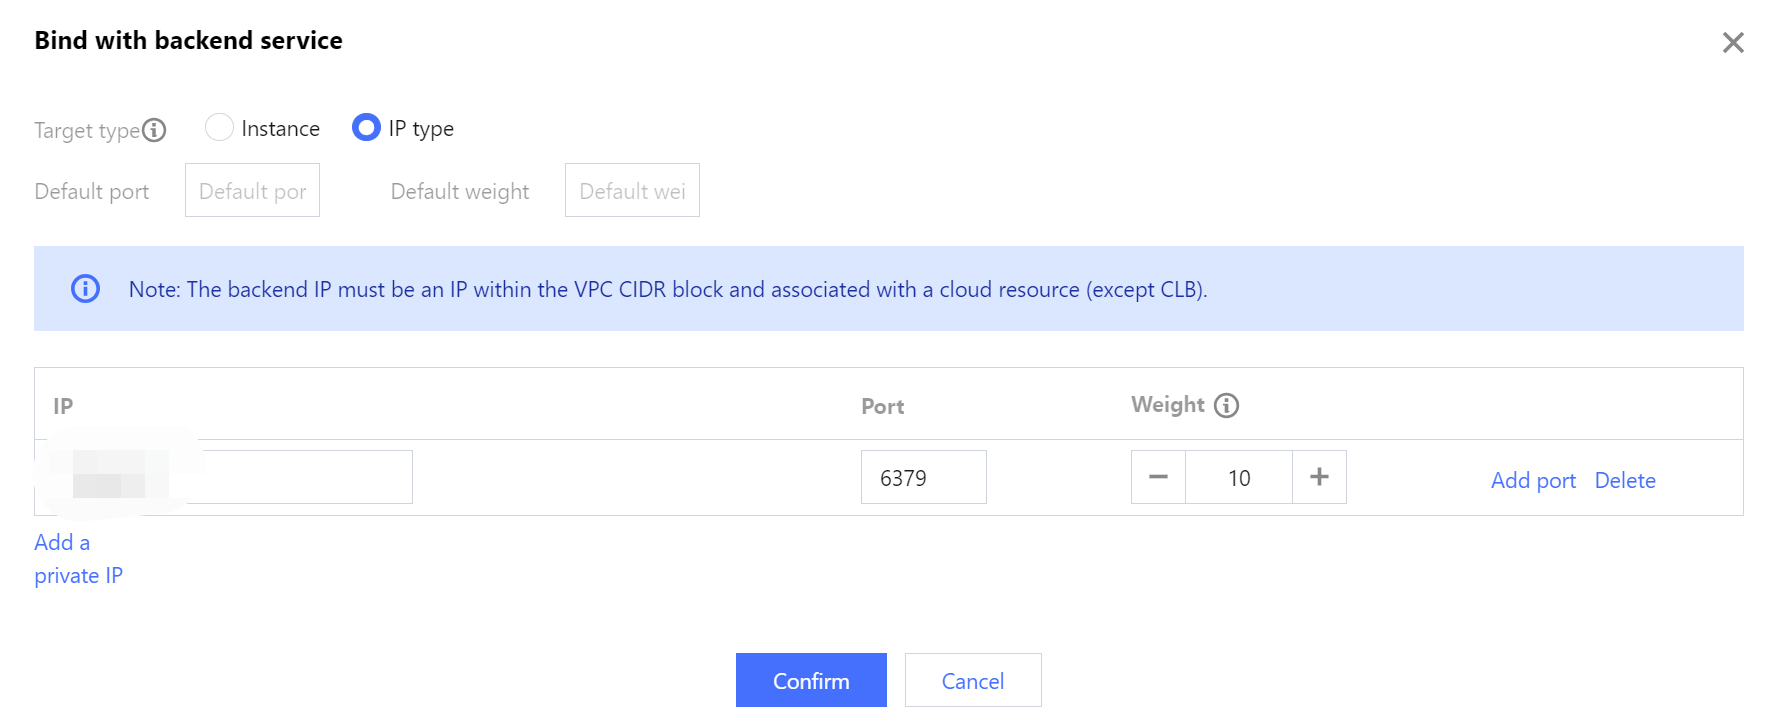
1. After the listener is created, go to the Listener management tab, click the created listener, and then click Bind on the right.

2. In the pop-up dialog, set the Target type to IP type, and enter the IP address and port of the Redis instance in the respective input fields. Click Confirm to complete the binding.
Note:
Make sure the login account is a standard account (with bandwidth upgrade). If you are unable to bind the Redis instance, submit a ticket for assistance.
Step 4: Configuring Redis Security Groups
After the public network service is enabled, promptly configure security group rules for both CLB and its Redis instances to control access sources and ensure data access security.
1. Log in to the CVM console and navigate to the security group page. Create a security group and set inbound rules to allow access from the Redis client IP address and listening port of the Redis instance you specify. For detailed directions, see Creating a Security Group.

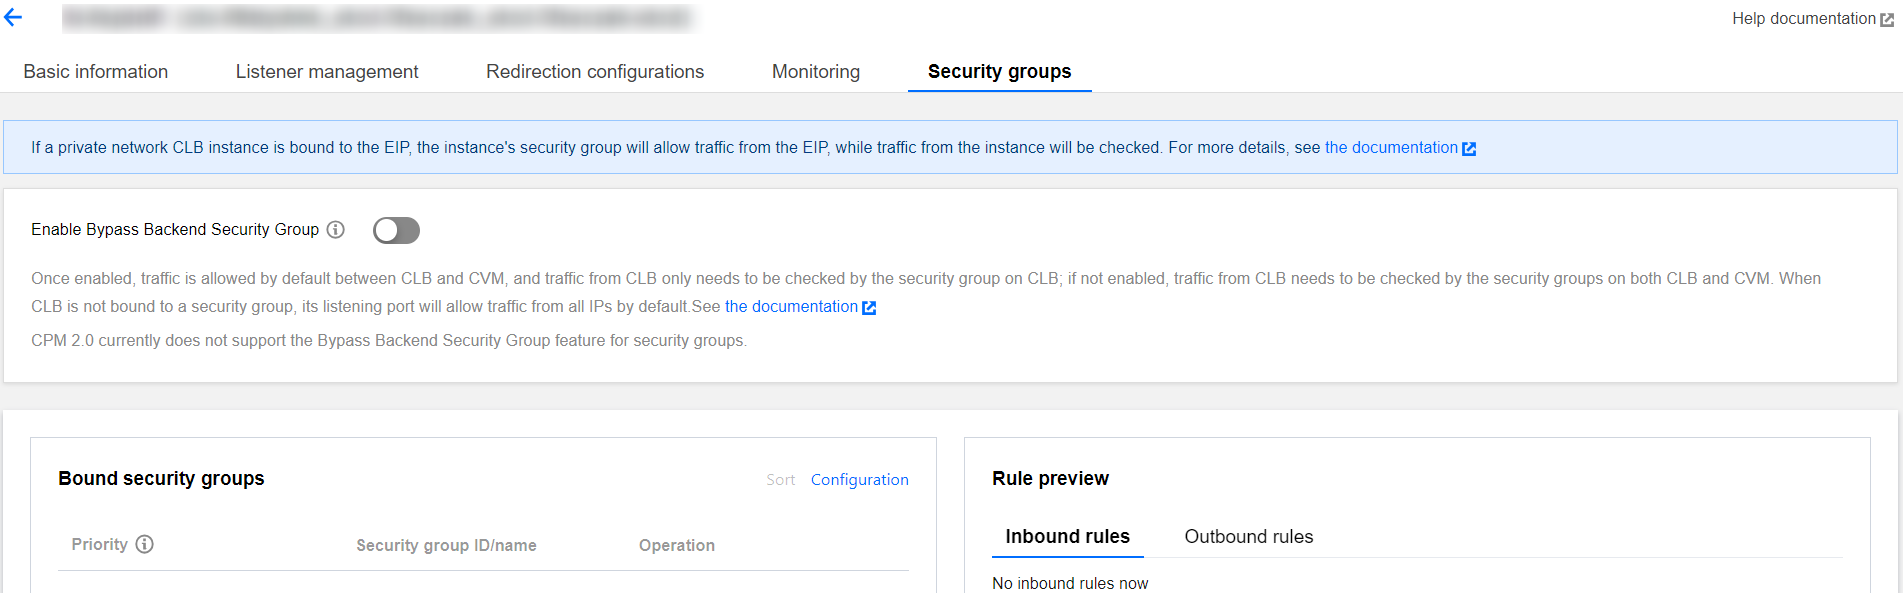
2. Log in to the CLB console, locate the CLB instance bound to the Redis in the instance management list. Click its Instance ID to enter the Basic Information tab, select the Security groups tab, and click Configuration in the Bound security groups section. In the Configure security group pop-up window, select the security group you have created and click OK. For detailed directions, see Configuring CLB Security Group.
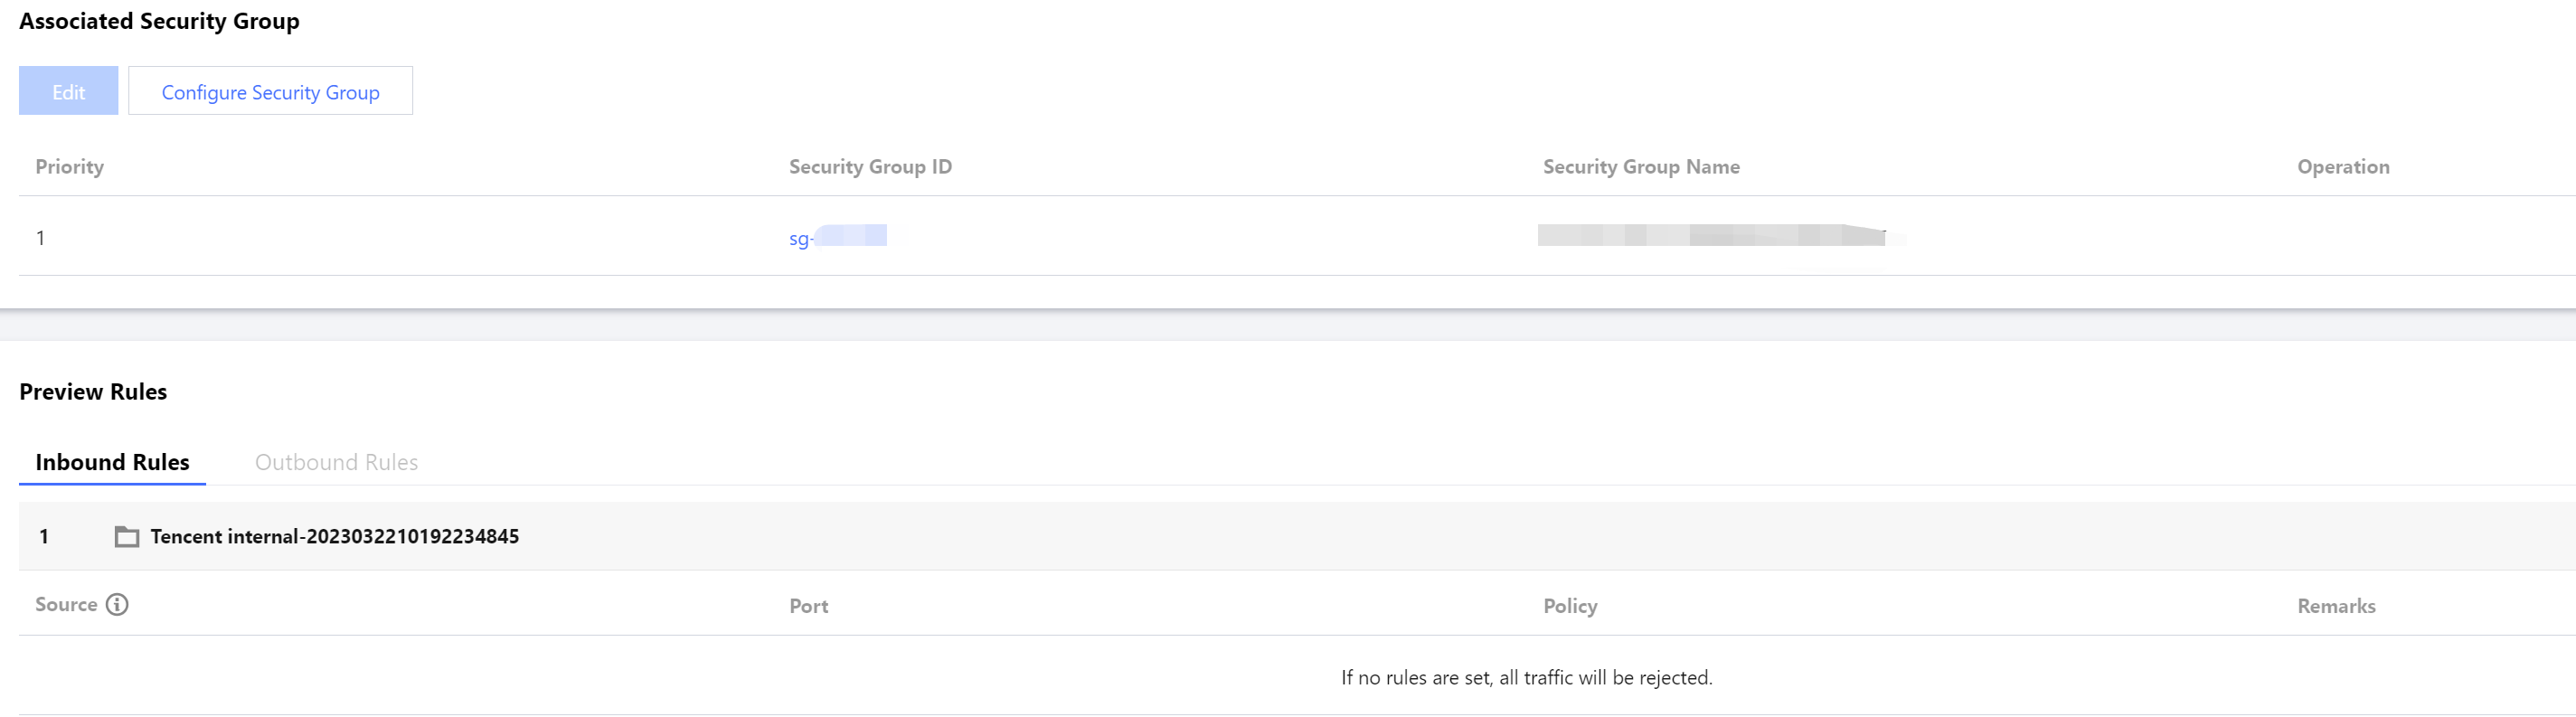
3. Log in to the TencentDB for Redis console, locate the instance that requires to bind a security group in the instance list. Click the target Instance ID, select the Security groups tab, and click Configure Security Group. In the Configure security group dialog box, select the security group you want to bind, and click OK. For detailed directions, see Binding security groups.
Step 5: Connecting to the Database via Redis Client
Use the redis-cli command line to connect to the Redis database.
hostname: Enter the public address of the CLB.
port: Enter the listening port of the CLB.
password: Use the default account password of the Redis instance. If you use a custom account for connection, the authentication method will set the password parameter for accessing Redis as
account name@password.redis-cli -h <hostname> -p <port> -a <password>
Was this page helpful?
You can also Contact Sales or Submit a Ticket for help.
Yes
No