- 릴리스 노트 및 공지 사항
- 제품 소개
- 구매 가이드
- 시작하기
- 콘솔 가이드
- 툴 가이드
- 툴 개요
- 환경 설치 및 설정
- COSBrowser 툴
- COSCLI 툴
- COSCLI 소개
- 다운로드 및 설치 설정
- 범용 옵션
- 자주 쓰는 명령어
- 프로파일 생성 및 수정 - config
- 버킷 생성 - mb
- 버킷 삭제 - rb
- 버킷 태그 - bucket-tagging
- 버킷 또는 파일 리스트 쿼리 - ls
- 파일 유형별 통계 정보 가져오기 - du
- 파일 업/다운로드 또는 복사 - cp
- 파일 동기화 업/다운로드 또는 복사 - sync
- 파일 삭제 - rm
- 파일 해시 값 가져오기 - hash
- 멀티파트 업로드에서 생성된 조각 나열 - lsparts
- 조각 정리 - abort
- 아카이브 파일 검색 - restore
- 소프트 링크 생성/획득 - symlink
- 객체 내용 보기 - cat
- 목록하의 내용 열거 및 통계 - Isdu
- FAQ
- COSCMD 툴
- COS Migration 툴
- FTP Server 툴
- Hadoop 툴
- COSDistCp 툴
- Hadoop-cos-DistChecker 툴
- HDFS TO COS 툴
- 온라인 보조 툴
- 자가 진단 도구
- 사례 튜토리얼
- 개발자 가이드
- 데이터 레이크 스토리지
- 데이터 처리
- 장애 처리
- FAQ
- Related Agreements
- 용어집
소개
본 문서는 SDK에 종속되지 않고 간단한 코드를 사용하여 웹 페이지(Web)에서 파일을 COS의 버킷에 다이렉트 업로드하는 방법을 소개합니다.
주의:
전제 조건
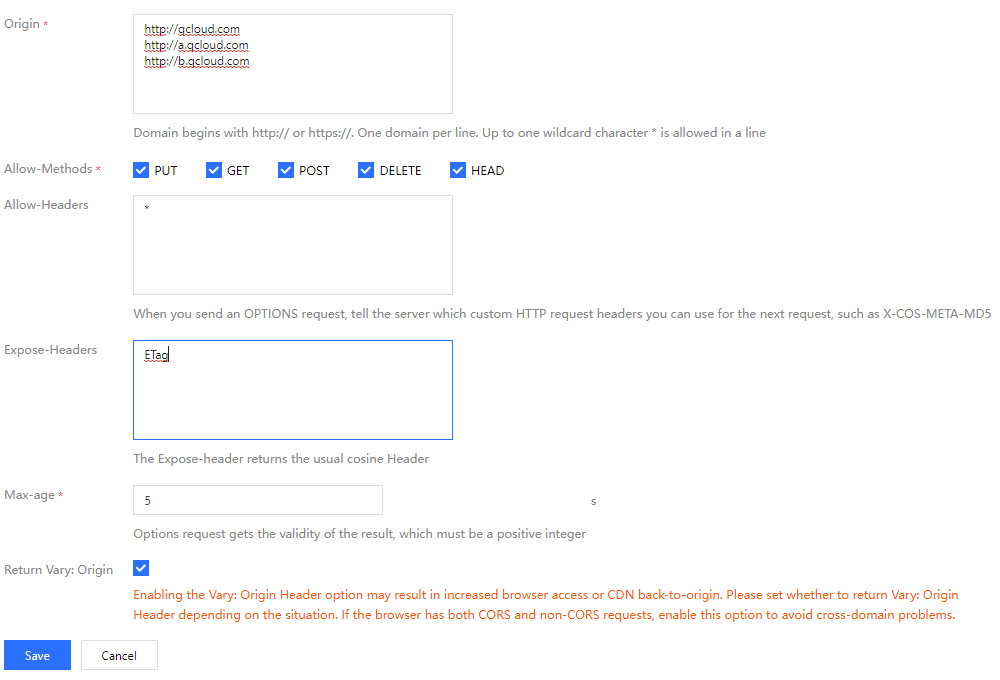
2. 버킷 상세 페이지로 이동하여 보안 관리 탭을 클릭합니다. 페이지를 아래로 내려 크로스 도메인 액세스 CORS 설정 항목을 찾아 규칙 추가를 클릭한 후, 다음 이미지와 같이 설정합니다. 자세한 내용은 크로스 도메인 액세스 설정 문서를 참조하십시오.


3. CAM 콘솔에 로그인한 뒤 프로젝트의 SecretId와 SecretKey를 획득합니다.
솔루션 설명
실행 과정
1. 프론트엔드에서 파일을 선택하고, 프론트엔드에서 접미사를 서버 측에 발송합니다.
2. 서버 측은 접미사에 근거하여 시간이 표시된 랜덤 COS 파일 경로를 생성하고 대응하는 서명을 계산하고, URL 및 서명 정보를 프론트엔드에 반환합니다.
3. 프론트엔드는 PUT 또는 POST 요청을 사용하여 COS로 파일을 직접 전송합니다.
솔루션 장점
권한 보안: 서버 측 서명은 지정된 하나의 파일 경로 업로드에만 사용되므로 안전한 권한 범위를 효과적으로 제한할 수 있습니다.
경로 보안: 서버 측에 의해 랜덤 COS 파일 경로가 결정되므로 기존 파일의 덮어쓰기 문제와 보안 위험을 효과적으로 방지할 수 있습니다.
실천 절차
서버 측 구성으로 서명 구현
주의:
공식 배포 시 서버 측에서 웹사이트 자체의 권한 검증을 추가하세요.
서명을 계산하는 방법은 문서 서명 요청을 참조할 수 있습니다.
서버 측은 Nodejs를 사용하여 서명 코드를 계산하며 Nodejs 예시를 참조할 수 있습니다.
Web 측 업로드 예시
AJAX PUT 업로드 사용
1. 전제조건 의 절차에 따라 버킷의 관련 구성을 준비합니다.
2.
test.html파일을 생성하고, 다음의 코드를 test.html파일로 복사합니다.3. 백엔드의 서명 서비스를 배포하고,
test.html에 있는 서명 서비스 주소를 수정합니다.4.
test.html을 Web 서버에 놓고, 브라우저를 통해 페이지를 방문하고, 파일 업로드 기능을 테스트합니다.<!DOCTYPE html><html lang="en"><head><meta charset="UTF-8" /><title>Ajax Put 업로드(서버 측 서명 계산)</title><style>h1,h2 {font-weight: normal;}#msg {margin-top: 10px;}</style></head><body><h1>Ajax Put 업로드(서버 측 서명 계산)</h1><input id="fileSelector" type="file" /><input id="submitBtn" type="submit" /><div id="msg"></div><script>(function () {// 더 많은 문자로 인코딩된 url encode 격식const camSafeUrlEncode = function (str) {return encodeURIComponent(str).replace(/!/g, '%21').replace(/'/g, '%27').replace(/\\(/g, '%28').replace(/\\)/g, '%29').replace(/\\*/g, '%2A');};// 서명 계산const getAuthorization = function (opt, callback) {// 자신의 서버 측 주소로 교체하여 put 업로드 서명을 얻습니다. demo: https://github.com/tencentyun/cos-demo/blob/main/server/upload-sign/nodejs/app.jsconst url = `http://127.0.0.1:3000/put-sign?ext=${opt.ext}`;const xhr = new XMLHttpRequest();xhr.open('GET', url, true);xhr.onload = function (e) {let credentials;try {const result = JSON.parse(e.target.responseText);credentials = result;} catch (e) {callback('서명 가져오기 오류');}if (credentials) {// 프린터하여 credentials가 정확한지 여부를 확인// console.log(credentials);callback(null, {securityToken: credentials.sessionToken,authorization: credentials.authorization,cosKey: credentials.cosKey,cosHost: credentials.cosHost,});} else {console.error(xhr.responseText);callback('서명 가져오기 오류');}};xhr.onerror = function (e) {callback('서명 가져오기 오류');};xhr.send();};// 파일 업로드const uploadFile = function (file, callback) {const fileName = file.name;// 파일 접미사 이름 가져오기let ext = '';const lastDotIndex = fileName.lastIndexOf('.');if (lastDotIndex > -1) {// 여기서는 파일 접미사를 가져옵니다. 서버 측에 의해 최종 업로드 경로가 생성됩니다.ext = fileName.substring(lastDotIndex + 1);}getAuthorization({ ext }, function (err, info) {if (err) {alert(err);return;}const auth = info.authorization;const securityToken = info.securityToken;const Key = info.cosKey;const protocol =location.protocol === 'https:' ? 'https:' : 'http:';const prefix = protocol + '//' + info.cosHost;const url =prefix + '/' + camSafeUrlEncode(Key).replace(/%2F/g, '/');const xhr = new XMLHttpRequest();xhr.open('PUT', url, true);xhr.setRequestHeader('Authorization', auth);securityToken &&xhr.setRequestHeader('x-cos-security-token', securityToken);xhr.upload.onprogress = function (e) {console.log('업로드 진행률 ' +Math.round((e.loaded / e.total) * 10000) / 100 +'%');};xhr.onload = function () {if (/^2\\d\\d$/.test('' + xhr.status)) {const ETag = xhr.getResponseHeader('etag');callback(null, { url: url, ETag: ETag });} else {callback('파일 ' + Key + ' 업로드 실패, 상태 코드: ' + xhr.status);}};xhr.onerror = function () {callback('파일 ' + Key + ' 업로드 실패, CORS 크로스 도메인 규칙이 구성되지 않았는지 여부를 검사하세요');};xhr.send(file);});};// 모니터링 리스트 제출document.getElementById('submitBtn').onclick = function (e) {const file = document.getElementById('fileSelector').files[0];if (!file) {document.getElementById('msg').innerText = '업로드 파일을 선택하지 않음';return;}file &&uploadFile(file, function (err, data) {console.log(err || data);document.getElementById('msg').innerText = err? err: '업로드 성공, ETag=' + data.ETag;});};})();</script></body></html>
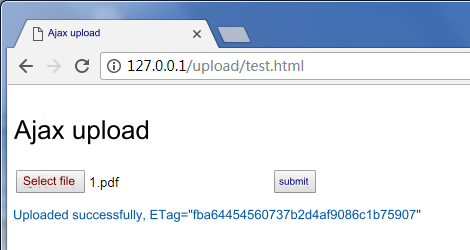
실행 효과는 다음 그림과 같습니다.


AJAX POST 업로드 사용
1. 전제 조건 순서에 따라 버킷에 관련 정보를 설정합니다.
2.
test.html파일을 생성하고,다음의 코드를 test.html파일로 복사합니다.3. 백그라운드의 서명 서비스를 배포하고,
test.html의 서명 서비스 주소를 수정합니다.4.
test.html을 Web 서버에 올리고, 브라우저로 페이지에 액세스하여 파일 업로드 기능을 테스트합니다.<!DOCTYPE html><html lang="en"><head><meta charset="UTF-8" /><title>Ajax Post 업로드(서버 측 서명 계산)</title><style>h1,h2 {font-weight: normal;}#msg {margin-top: 10px;}</style></head><body><h1>PostObject 업로드(서버 측 서명 계산)</h1><input id="fileSelector" type="file" /><input id="submitBtn" type="submit" /><div id="msg"></div><script>(function () {let prefix = '';let Key = '';// 더 많은 문자로 인코딩된 url encode 격식const camSafeUrlEncode = function (str) {return encodeURIComponent(str).replace(/!/g, '%21').replace(/'/g, '%27').replace(/\\(/g, '%28').replace(/\\)/g, '%29').replace(/\\*/g, '%2A');};// 권한 정책 가져오기const getAuthorization = function (opt, callback) {// 자신의 서버 측 주소로 교체하여 post 업로드 서명을 얻습니다. demo: https://github.com/tencentyun/cos-demo/blob/main/server/upload-sign/nodejs/app.jsconst url = `http://127.0.0.1:3000/post-policy?ext=${opt.ext}`;const xhr = new XMLHttpRequest();xhr.open('GET', url, true);xhr.onload = function (e) {let credentials;try {const result = JSON.parse(e.target.responseText);credentials = result;} catch (e) {callback('서명 가져오기 오류');}if (credentials) {// 프린터하여 credentials가 정확한지 여부를 확인// console.log(credentials);callback(null, {securityToken: credentials.sessionToken,cosKey: credentials.cosKey,cosHost: credentials.cosHost,policy: credentials.policy,qAk: credentials.qAk,qKeyTime: credentials.qKeyTime,qSignAlgorithm: credentials.qSignAlgorithm,qSignature: credentials.qSignature,});} else {console.error(xhr.responseText);callback('서명 가져오기 오류');}};xhr.send();};// 업로드파일const uploadFile = function (file, callback) {const fileName = file.name;// 파일 접미사 이름 가져오기let ext = '';const lastDotIndex = fileName.lastIndexOf('.');if (lastDotIndex > -1) {// 여기서는 파일 접미사를 가져옵니다. 서버 측에 의해 최종 업로드 경로가 생성됩니다.ext = fileName.substring(lastDotIndex + 1);}getAuthorization({ ext }, function (err, credentials) {if (err) {alert(err);return;}const protocol =location.protocol === 'https:' ? 'https:' : 'http:';prefix = protocol + '//' + credentials.cosHost;Key = credentials.cosKey;const fd = new FormData();// 현재 목록에는 하나의 빈 empty.html를 추가합니다. 인터페이스 업로드가 완료되면 다시 이동하여 돌아오기 위해서입니다.fd.append('key', Key);// policy 서명 보호 격식 사용하기credentials.securityToken &&fd.append('x-cos-security-token', credentials.securityToken);fd.append('q-sign-algorithm', credentials.qSignAlgorithm);fd.append('q-ak', credentials.qAk);fd.append('q-key-time', credentials.qKeyTime);fd.append('q-signature', credentials.qSignature);fd.append('policy', credentials.policy);// 파일 내용, file 필드를 리스트 마지막에 놓아 파일 내용이 너무 길어 서명 판단과 인증에 영향을 미치는 것을 피면합니다.fd.append('file', file);// xhrconst url = prefix;const xhr = new XMLHttpRequest();xhr.open('POST', url, true);xhr.upload.onprogress = function (e) {console.log('업로드 진행률 ' +Math.round((e.loaded / e.total) * 10000) / 100 +'%');};xhr.onload = function () {if (Math.floor(xhr.status / 100) === 2) {const ETag = xhr.getResponseHeader('etag');callback(null, {url:prefix + '/' + camSafeUrlEncode(Key).replace(/%2F/g, '/'),ETag: ETag,});} else {callback('파일 ' + Key + ' 업로드 실패, 상태 코드: ' + xhr.status);}};xhr.onerror = function () {callback('파일 ' + Key + ' 업로드 실패, CORS 크로스 도메인 규칙이 구성되지 않았는지 여부를 검사하세요');};xhr.send(fd);});};// 모니터링 리스트 제출document.getElementById('submitBtn').onclick = function (e) {const file = document.getElementById('fileSelector').files[0];if (!file) {document.getElementById('msg').innerText = '업로드 파일을 선택하지 않음';return;}file &&uploadFile(file, function (err, data) {console.log(err || data);document.getElementById('msg').innerText = err? err: '업로드 성공, ETag=' + data.ETag + 'url=' + data.url;});};})();</script></body></html>
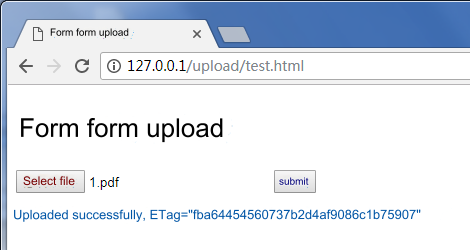
실행 효과는 다음 그림과 같습니다.


Form 리스트 업로드 사용
1. 전제 조건 순서에 따라 버킷을 준비합니다.
2.
test.html파일을 생성하고, 다음의 코드를 test.html파일로 복사합니다.3. 백그라운드의 서명 서비스를 배포하고,
test.html의 서명 서비스 주소를 수정합니다.4.
test.html과 동일한 디렉터리에 비어 있는 empty.html을 생성하여 업로드 성공 시 리디렉션하는 데 사용합니다.5.
test.html과 empty.html을 Web 서버에 올리고, 브라우저로 페이지에 액세스하여 파일 업로드 기능을 테스트합니다.<!DOCTYPE html><html lang="en"><head><meta charset="UTF-8" /><title>Form 리스트 간단 업로드(IE8 호환 가능)(서버 측 서명 계산)</title><style>h1,h2 {font-weight: normal;}#msg {margin-top: 10px;}</style></head><body><h1>Form 리스트 간단 업로드(IE8 호환 가능)(서버 측 서명 계산)</h1><div>최소 IE6 업로드 호환 가능, onprogress</div>는 지원하지 않음<formid="form"target="submitTarget"action=""method="post"enctype="multipart/form-data"accept="*/*"><input id="name" name="name" type="hidden" value="" /><input name="success_action_status" type="hidden" value="200" /><inputid="success_action_redirect"name="success_action_redirect"type="hidden"value=""/><input id="key" name="key" type="hidden" value="" /><input id="policy" name="policy" type="hidden" value="" /><inputid="q-sign-algorithm"name="q-sign-algorithm"type="hidden"value=""/><input id="q-ak" name="q-ak" type="hidden" value="" /><input id="q-key-time" name="q-key-time" type="hidden" value="" /><input id="q-signature" name="q-signature" type="hidden" value="" /><input name="Content-Type" type="hidden" value="" /><inputid="x-cos-security-token"name="x-cos-security-token"type="hidden"value=""/><!-- file 필드를 리스트 마지막에 놓음으로써 파일 내용이 너무 길어 서명 판단과 인증에 영향을 미치는 것을 방지합니다.--><input id="fileSelector" name="file" type="file" /><input id="submitBtn" type="button" value="제출" /></form><iframeid="submitTarget"name="submitTarget"style="display: none"frameborder="0"></iframe><div id="msg"></div><script>(function () {const form = document.getElementById('form');let prefix = '';// 더 많은 문자로 인코딩된 url encode 격식const camSafeUrlEncode = function (str) {return encodeURIComponent(str).replace(/!/g, '%21').replace(/'/g, '%27').replace(/\\(/g, '%28').replace(/\\)/g, '%29').replace(/\\*/g, '%2A');};// 서명 계산const getAuthorization = function (opt, callback) {// 자신의 서버 측 주소로 교체하여 post 업로드 서명을 얻습니다. demo: https://github.com/tencentyun/cos-demo/blob/main/server/upload-sign/nodejs/app.jsconst url = `http://127.0.0.1:3000/post-policy?ext=${opt.ext || ''}`;const xhr = new XMLHttpRequest();xhr.open('GET', url, true);xhr.onload = function (e) {let credentials;try {const result = JSON.parse(e.target.responseText);credentials = result;} catch (e) {callback('서명 가져오기 오류');}if (credentials) {// 프린터하여 credentials가 정확한지 여부를 확인// console.log(credentials);callback(null, {securityToken: credentials.sessionToken,cosKey: credentials.cosKey,cosHost: credentials.cosHost,policy: credentials.policy,qAk: credentials.qAk,qKeyTime: credentials.qKeyTime,qSignAlgorithm: credentials.qSignAlgorithm,qSignature: credentials.qSignature,});} else {console.error(xhr.responseText);callback('서명 가져오기 오류');}};xhr.send();};// 모니터링 업로드 완료let Key;const submitTarget = document.getElementById('submitTarget');const showMessage = function (err, data) {console.log(err || data);document.getElementById('msg').innerText = err? err: '업로드 성공, ETag=' + data.ETag;};submitTarget.onload = function () {let search;try {search = submitTarget.contentWindow.location.search.substr(1);} catch (e) {showMessage('파일 ' + Key + ' 업로드 실패');}if (search) {const items = search.split('&');let i = 0;let arr = [];const data = {};for (i = 0; i < items.length; i++) {arr = items[i].split('=');data[arr[0]] = decodeURIComponent(arr[1] || '');}showMessage(null, {url: prefix + camSafeUrlEncode(Key).replace(/%2F/g, '/'),ETag: data.etag,});} else {}};// 업로드 개시document.getElementById('submitBtn').onclick = function (e) {const filePath = document.getElementById('fileSelector').value;if (!filePath) {document.getElementById('msg').innerText = '업로드 파일을 선택하지 않음';return;}// 파일 접미사 이름 가져오기let ext = '';const lastDotIndex = filePath.lastIndexOf('.');if (lastDotIndex > -1) {// 여기서는 파일 접미사를 가져옵니다. 서버 측에 의해 최종 업로드 경로가 생성됩니다.ext = filePath.substring(lastDotIndex + 1);}getAuthorization({ ext }, function (err, AuthData) {if (err) {alert(err);return;}const protocol =location.protocol === 'https:' ? 'https:' : 'http:';prefix = protocol + '//' + AuthData.cosHost;form.action = prefix;Key = AuthData.cosKey;// 현재 목록에는 하나의 빈 empty.html를 추가합니다. 인터페이스 업로드가 완료되면 다시 이동하여 돌아오기 위해서입니다.document.getElementById('success_action_redirect').value =location.href.substr(0, location.href.lastIndexOf('/') + 1) +'empty.html';document.getElementById('key').value = AuthData.cosKey;document.getElementById('policy').value = AuthData.policy;document.getElementById('q-sign-algorithm').value =AuthData.qSignAlgorithm;document.getElementById('q-ak').value = AuthData.qAk;document.getElementById('q-key-time').value = AuthData.qKeyTime;document.getElementById('q-signature').value = AuthData.qSignature;document.getElementById('x-cos-security-token').value =AuthData.securityToken || '';form.submit();});};})();</script></body></html>
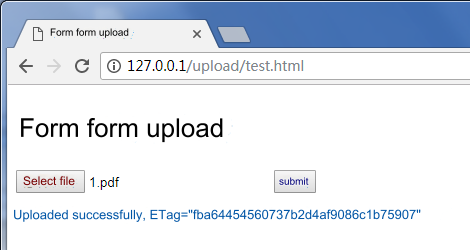
실행 효과는 다음 그림과 같습니다.


업로드 시 파일 유형 및 파일 크기 제한
프론트엔드 파일 유형 제한
위의 AJAX PUT를 참조하여 업로드하고, 파일 선택 시 하나의 판단만 추가하면 됩니다.(제한 파일 접미사만 지원)
// 기타 코드 생략document.getElementById('submitBtn').onclick = function (e) {const file = document.getElementById('fileSelector').files[0];if (!file) {document.getElementById('msg').innerText = '업로드 파일을 선택하지 않음';return;}// 파일 접미사 가져오기const fileName = file.name;const lastDotIndex = fileName.lastIndexOf('.');const ext = lastDotIndex > -1 ? fileName.substring(lastDotIndex + 1) : '';// 제한하고 싶은 격식으로 교체하세요. 예를 들어 jpg png 유형 파일만 업로드합니다.const allowExt = ['jpg', 'png'];if (!allowExt.includes(ext)) {alert('jpg, png 파일 업로드만 지원');return;}file &&uploadFile(file, function (err, data) {console.log(err || data);document.getElementById('msg').innerText = err? err: '업로드 성공, ETag=' + data.ETag + 'url=' + data.url;});};
프론트엔드 파일 크기 제한
위의 AJAX PUT를 참조하여 업로드하고,파일 선택 시 하나의 판단만 추가하면 됩니다.
// 기타 코드 생략document.getElementById('submitBtn').onclick = function (e) {const file = document.getElementById('fileSelector').files[0];if (!file) {document.getElementById('msg').innerText = '업로드 파일을 선택하지 않음';return;}const fileSize = file.size;// 제한하고 싶은 개체 크기로 교체하세요. 최대 하나의 개체가 5GB까지 가능합니다. 예를 들어 업로드 파일이 5MB를 초과할 수 없습니다.if (fileSize > 5 * 1024 * 1024) {alert('선택한 파일이 5MB를 초과하였습니다. 다시 선택하세요.');return;}file &&uploadFile(file, function (err, data) {console.log(err || data);document.getElementById('msg').innerText = err? err: '업로드 성공, ETag=' + data.ETag + 'url=' + data.url;});};
서버 측 서명 제한
관련 문서
더 다양한 인터페이스 호출이 필요한 경우 다음 JavaScript SDK 문서를 참조하십시오.

 예
예
 아니오
아니오
문제 해결에 도움이 되었나요?