DLC is fully compatible with open-source Apache Spark, allowing users to write business programs for reading, writing, and analyzing data on the DLC platform. This example demonstrates how to write Java code to read and write data on COS and perform detailed operations such as creating databases and tables, and reading and writing tables on DLC, helping users complete job development on DLC.
Environment Preparation
Dependencies: JDK1.8 Maven IntelliJ IDEA
Development Process
Development Flowchart
The development flowchart for DLC Spark JAR jobs is as follows:
Creating Resource
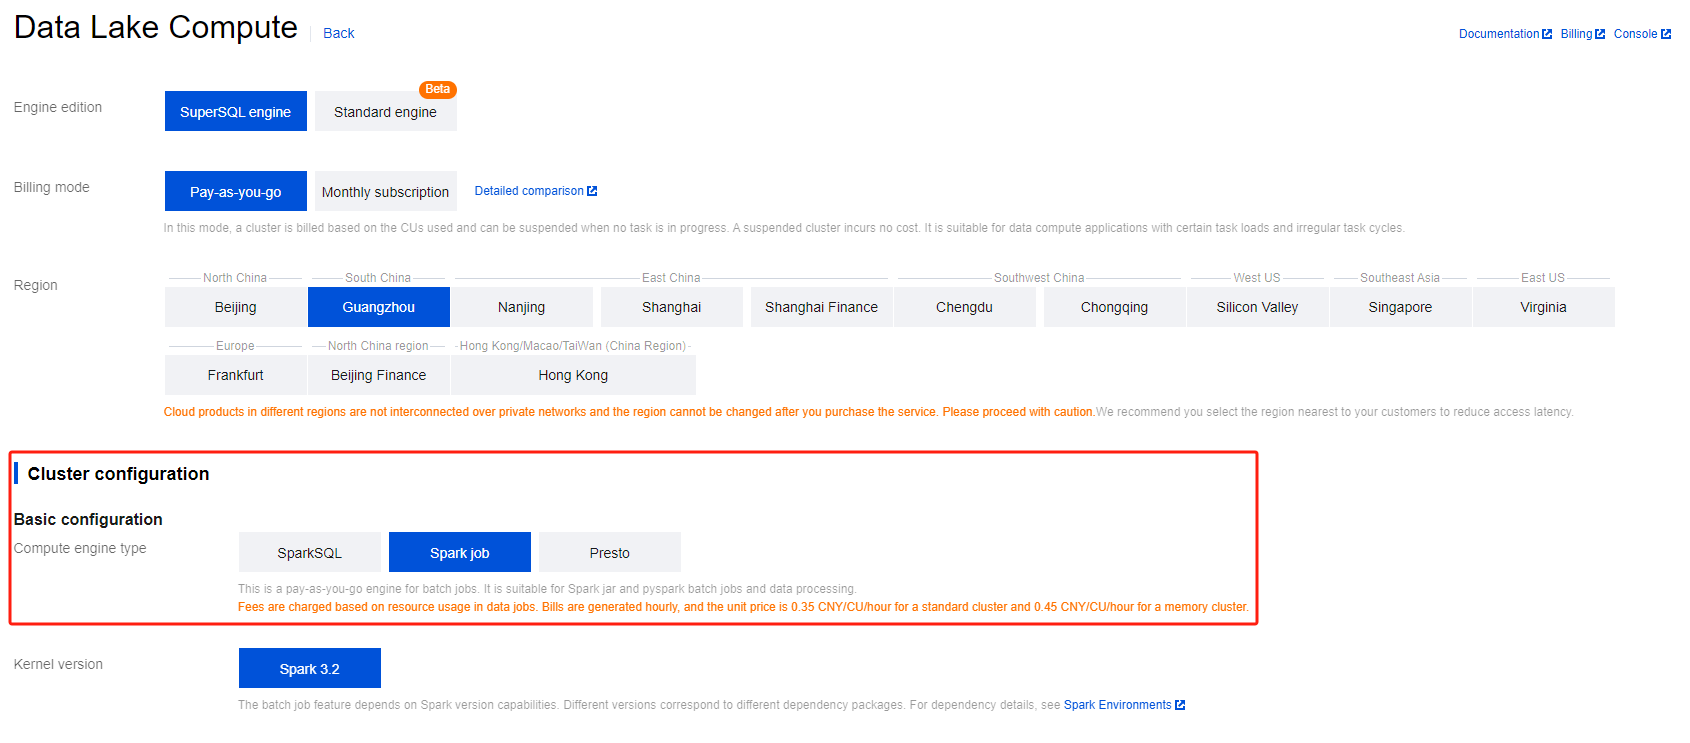
The first time you run a job on DLC, you need to create Spark job computing resources. For example, create a Spark job resource named "dlc-demo".
1. Log in to the Data Lake Compute DLC Console. Select your service region, and click Data Engine in the navigation menu.
2. Click Create Resource in the upper left corner to enter the resource configuration purchase page.
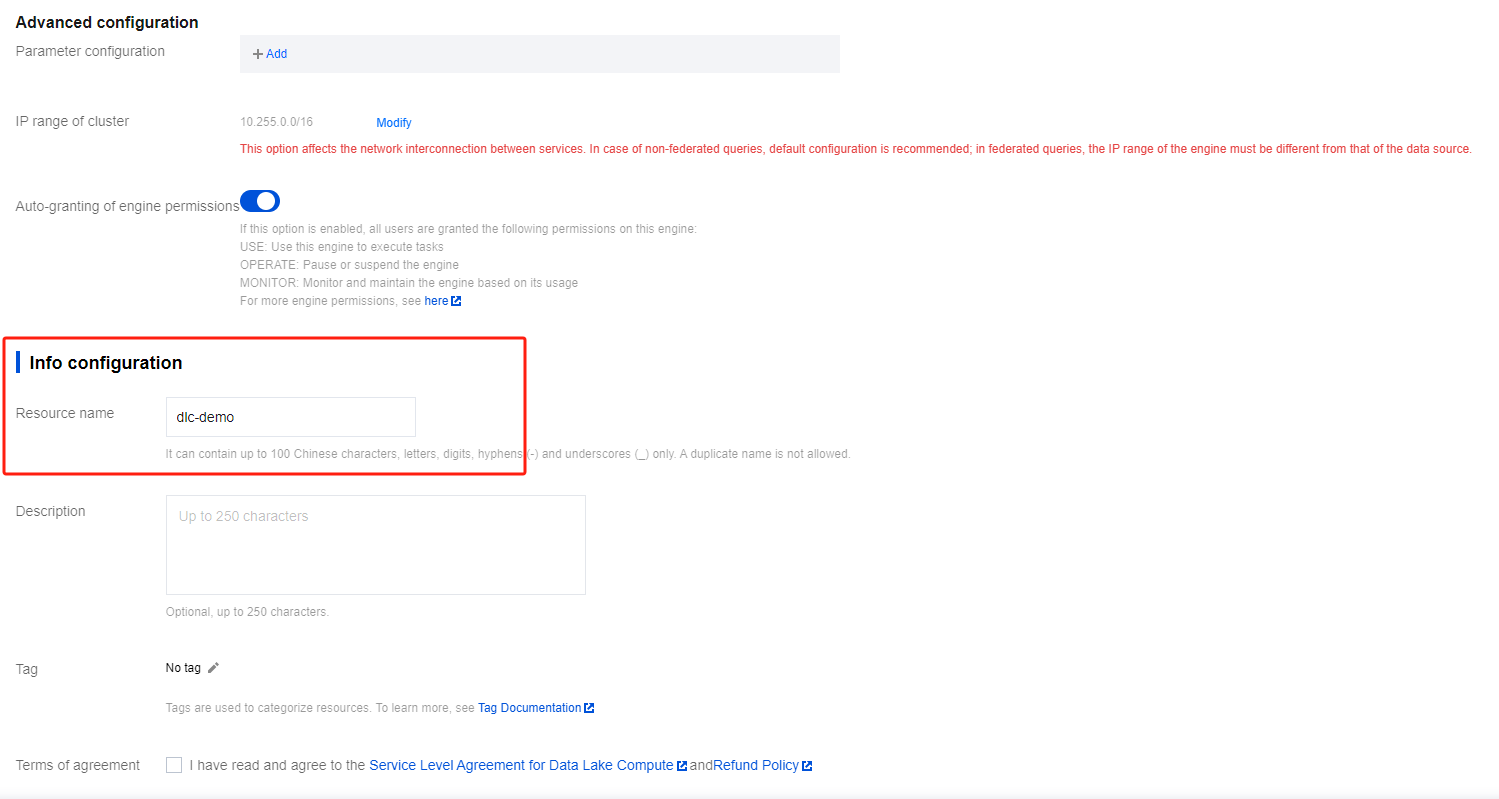
In Information Configuration > Resource Name, enter "dlc-demo". For detailed instructions on creating resources, see Purchasing Private Data Engine.
4. Click Activate Now and confirm the resource configuration information.
5. After confirming the information is correct, click Submit to complete the resource configuration.
Uploading Data to COS
Create a bucket named "dlc-demo" and upload the people.json file to use as an example for reading and writing data from COS. The content of the people.json file is as follows:
2. Create a bucket: Click Create Bucket in the upper left corner, enter "dlc-demo" for the name, and click Next to complete the configuration.
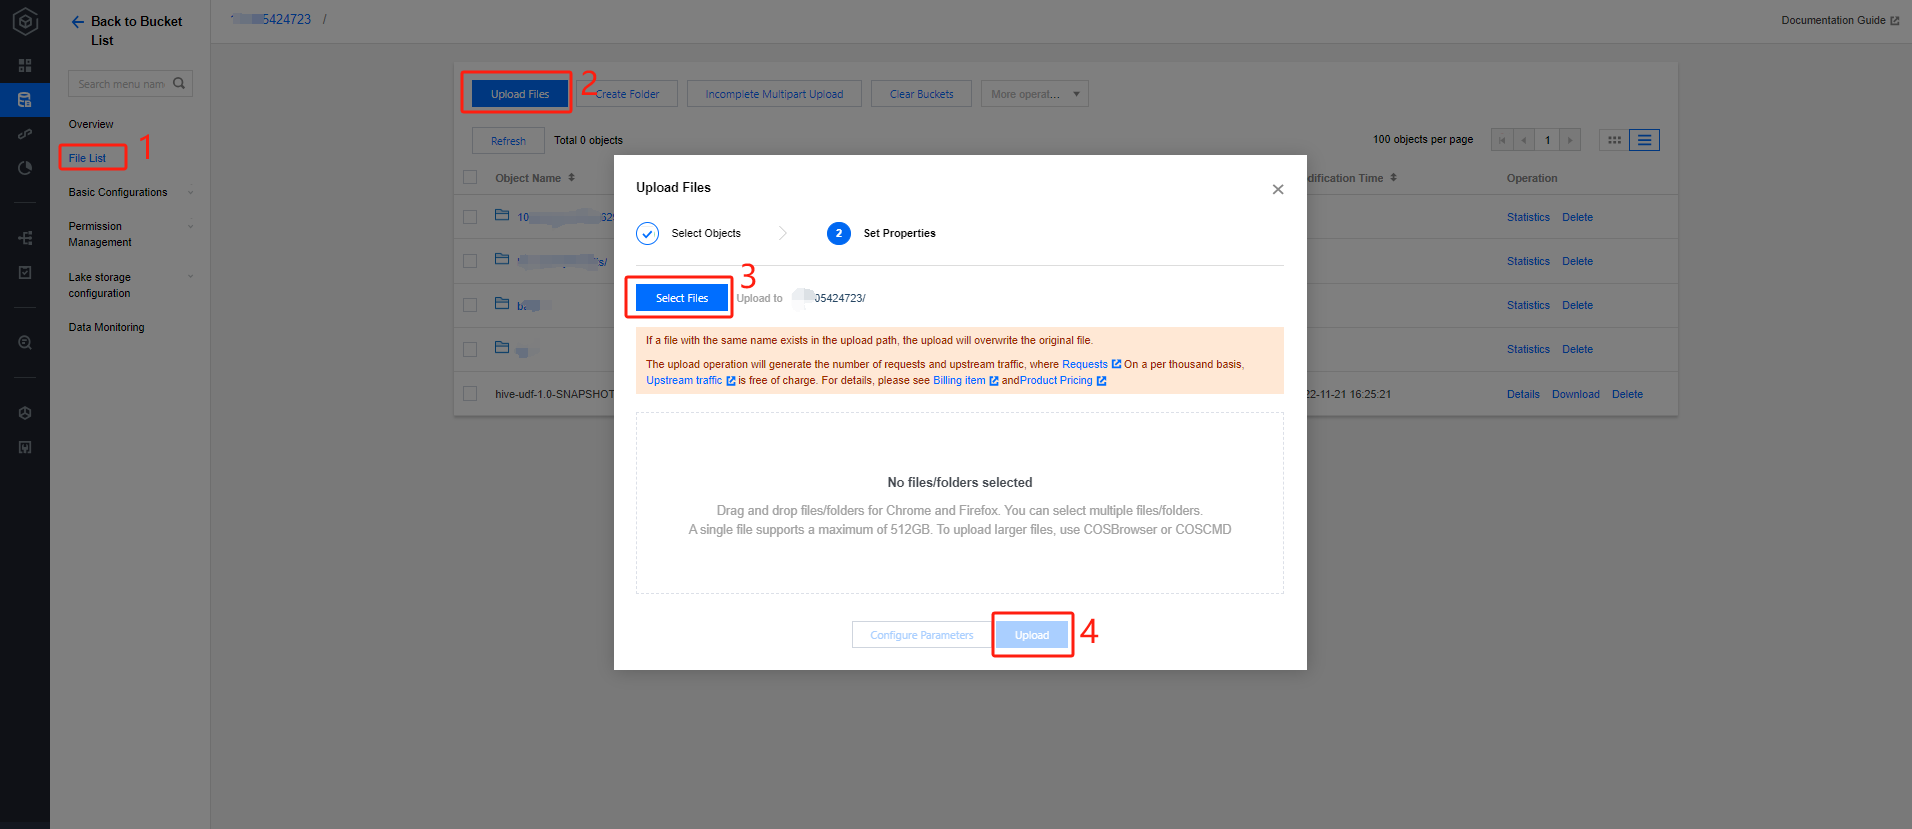
3. Upload files: Click File List > Upload File, select the local "people.json" file, and upload it to the "dlc-demo-1305424723" bucket (-1305424723 is a randomly generated string by the platform when creating the bucket), then click Upload to complete the file upload. For detailed instructions on creating a new bucket, see Create Bucket.
Creating a Maven Project
1. Create a new Maven project named "demo" through IntelliJ IDEA.
2. Add dependencies: Add the following dependencies to the pom.xml file:
<dependency>
<groupId>org.apache.spark</groupId>
<artifactId>spark-core_2.12</artifactId>
<version>3.2.1</version>
<scope>provided</scope>
</dependency>
<dependency>
<groupId>org.apache.spark</groupId>
<artifactId>spark-sql_2.12</artifactId>
<version>3.2.1</version>
<scope>provided</scope>
</dependency>
Writing Codes
The code features include reading and writing data from COS, as well as creating databases and tables, querying data, and writing data in DLC.
1. Example code for reading and writing data from COS:
packagecom.tencent.dlc;
importorg.apache.spark.sql.Dataset;
importorg.apache.spark.sql.Row;
importorg.apache.spark.sql.SaveMode;
importorg.apache.spark.sql.SparkSession;
publicclassCosService{
publicstaticvoidmain(String[] args )
{
//1. Create SparkSession
SparkSession spark =SparkSession
.builder()
.appName("Operate data on cos")
.config("spark.some.config.option","some-value")
.getOrCreate();
//2. Read the json file from COS to generate a data set, supporting various file types such as json, csv, parquet, orc, text
//3. Perform business computations on the data set to generate result data, supporting API and SQL formats. Here, a temporary table is generated and SQL is used to read data.
readData.createOrReplaceTempView("people");
Dataset<Row> result = spark.sql("SELECT * FROM people where age > 3");
String dbSql ="CREATE DATABASE IF NOT EXISTS"+ dbName +" COMMENT 'demo test'";
spark.sql(dbSql);
//3. Create an internal table
String tableName ="`test`";
String tableSql ="CREATE TABLE IF NOT EXISTS "+ dbName +"."+ tableName
+"(`id` int,`name` string, `age` int)";
spark.sql(tableSql);
//4. Write data
spark.sql("INSERT INTO "+ dbName +"."+ tableName +"VALUES (1,'Andy',12),(2,'Justin',3) ");
//5. Query data
spark.sql(" SELECT * FROM "+ dbName +"."+ tableName).show();
//6. Create an external table
String extTableName ="`ext_test`";
spark.sql(
"CREATE EXTERNAL TABLE IF NOT EXISTS "+ dbName +"."+ extTableName +""
+" (`id` int, `name` string, `age` int) "
+"ROW FORMAT SERDE 'org.apache.hive.hcatalog.data.JsonSerDe' "
+"STORED AS TEXTFILE LOCATION 'cosn://dlc-demo-1305424723/ext_test '");
//7. Write data to the external table
spark.sql("INSERT INTO "+ dbName +"."+ extTableName +"VALUES (1,'LiLy',12),(2,'Lucy',3) ");
//8. Query data from the external table
spark.sql(" SELECT * FROM "+ dbName +"."+ extTableName).show();
//9. Close the session
spark.stop();
}
}
When you create an external table, follow the steps to upload data to COS and first create a corresponding folder named after the table in the bucket to store the table files.
Debugging, Compiling Codes, and Packaging Them as JAR Files
Compile and packet the demo project through IntelliJ IDEA to generate the JAR packet demo-1.0-SNAPSHOT.jar in the project's target folder.
Uploading JAR Files to COS
Log in to the COS console and follow the steps in Uploading Data to COS to upload demo-1.0-SNAPSHOT.jar to COS.
Creating a Spark Jar Data Job
Before creating a data job, you need to configure CAM role arn to ensure the data job can securely access the data. For details on configuring CAM role arn, see Configuring Data Access Policy. If you have already configured a data policy, the policy name might be: qcs::cam::uin/100018379117:roleName/dlc-demo.
1. Log in to the Data Lake Compute DLC Console. Select your service region, and click Data Jobs in the navigation menu.
2. Click Create Job in the upper left corner to enter the creation page.
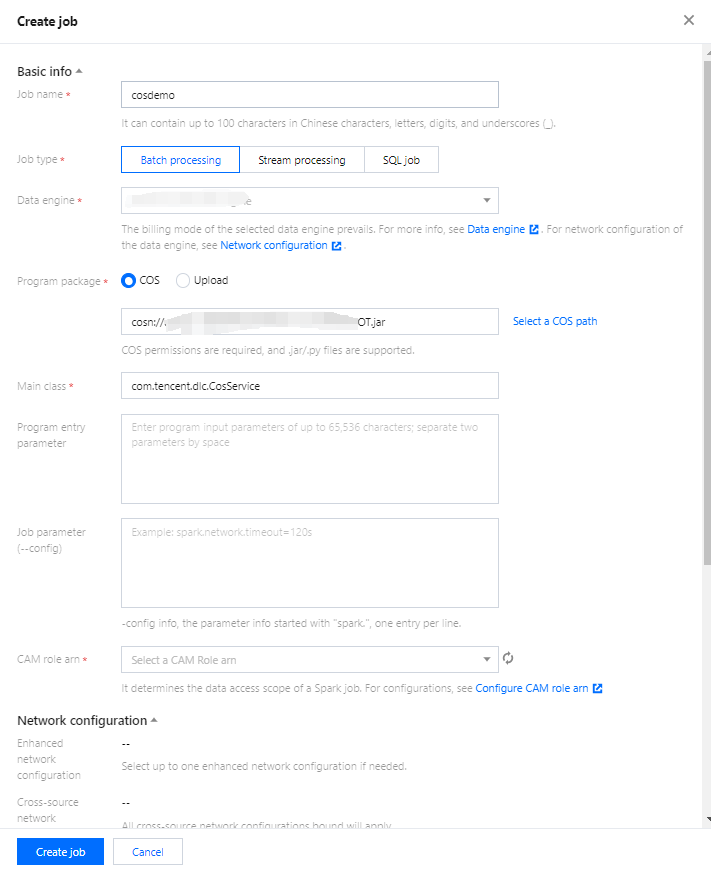
3. On the job configuration page, configure the job running parameters as follows:
Configuration Parameter
Note
Job Name
Custom Spark Jar job name, for example: cosn-demo.
Job Type
Select Batch Processing Type
Data Engine
Select the dlc-demo computing engine created in the Create Resource step.
Program Packet
Select COS, and choose the JAR file demo-1.0-SNAPSHOT.jar uploaded in the Upload JAR file to COS step.
Main Class
Fill in according to the program code, such as:
For reading and writing data from COS, fill in: com.tencent.dlc.CosService
For creating databases and tables on DLC, fill in: com.tencent.dlc.DbService.
CAM role arn
Select the policy created in the previous step, qcs::cam::uin/100018379117:roleName/dlc-demo.
Keep other parameter values as default.
4. Click Save and you can see the created job on the Spark Job page.
Running and Viewing Job Results
1. Running the Job: On the Spark Job page, find the newly created job and click Run to run the job.
2. Viewing Job Running Results: You can view the job running logs and results.
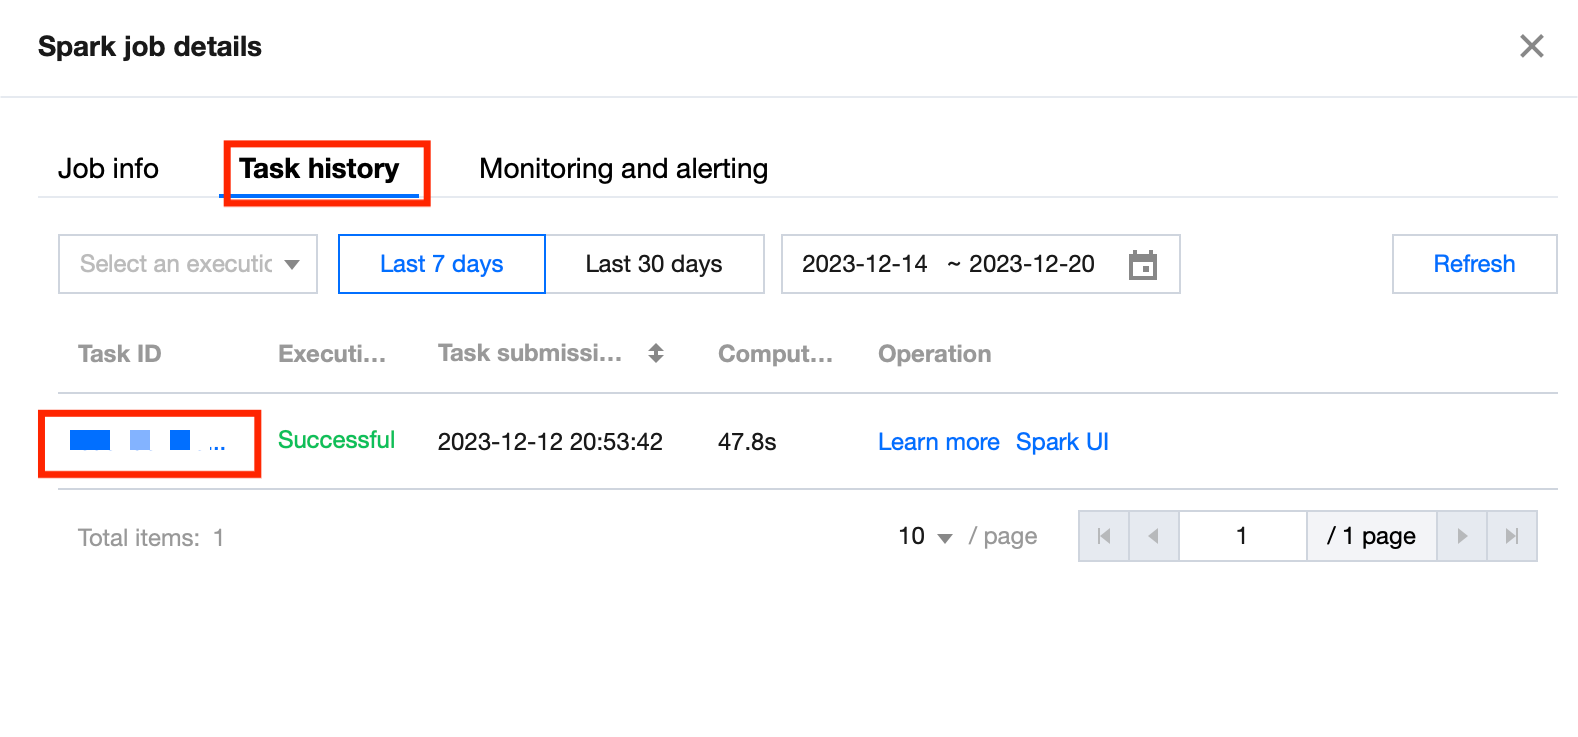
Viewing Job Running Logs
1. Click Job Name >Tasks history to view the task's running status.
2. Click Task ID > Run Log to view the job running logs.
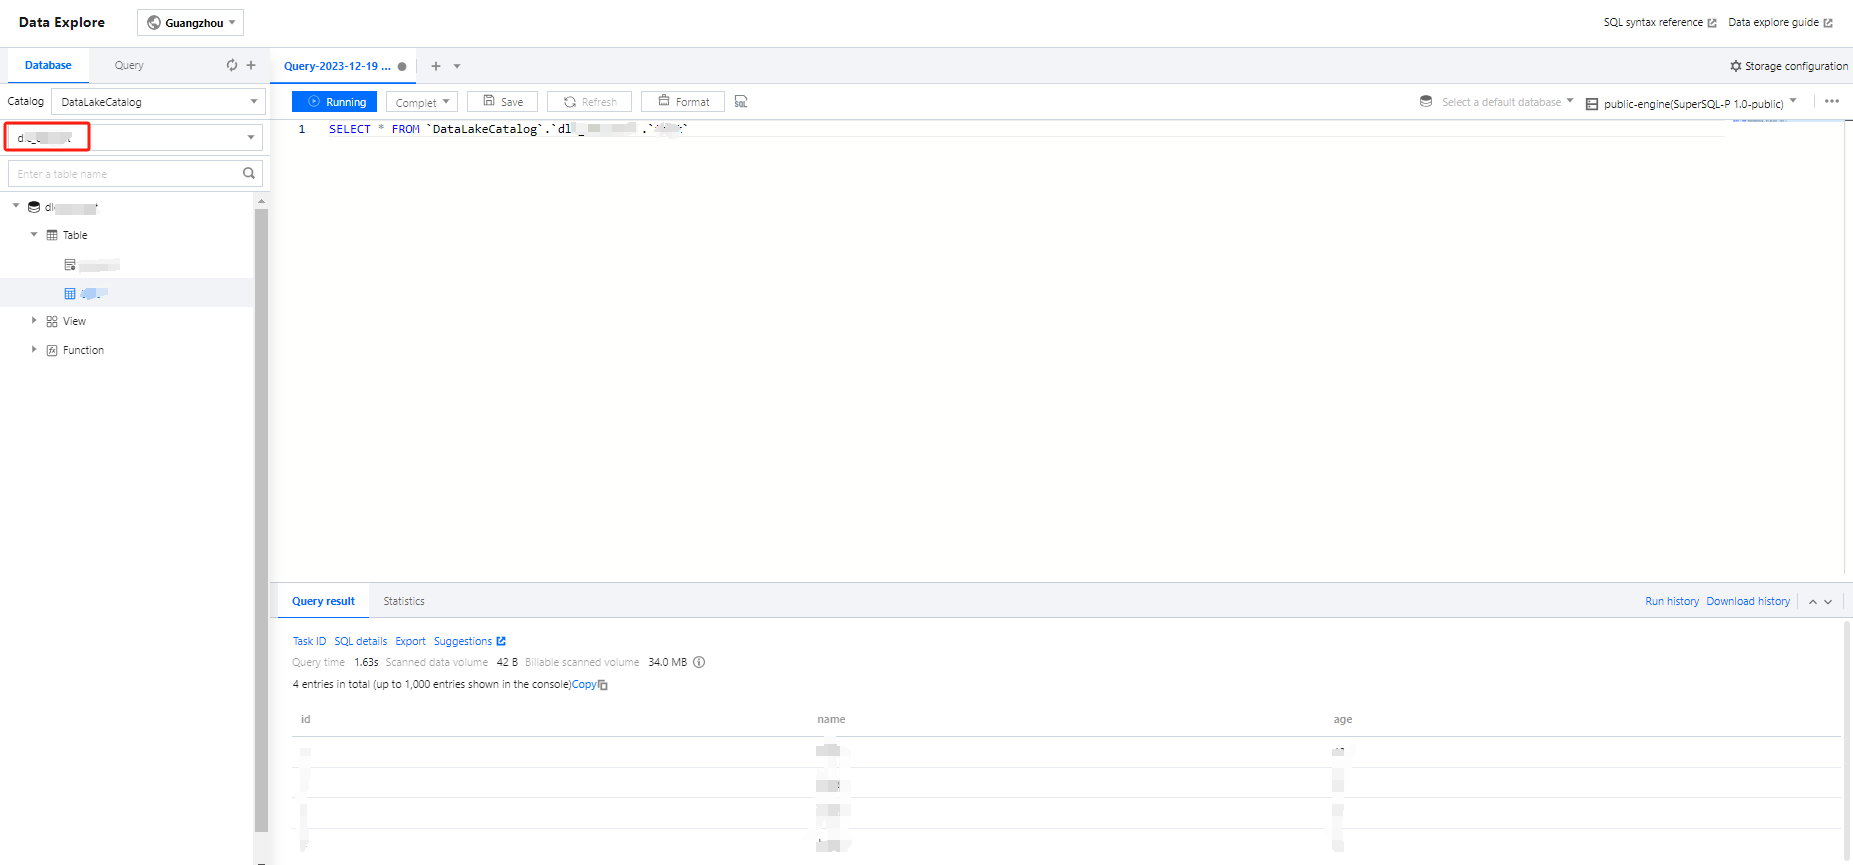
Viewing Job Running Results
1. If you run the example of reading and writing data from COS, you should check the COS Console for writing results.
2. For jobs that create tables and databases on DLC, check the DLC Data Exploration page to view the created databases and tables.