
PySpark 依赖包管理

最后更新时间:2024-09-18 18:00:04
目前 DLC 的 PySpark 基础运行环境使用 Python=3.9.2。
Spark 作业 Python 依赖可以使用如下两种方式:
1. 通过
--py-files 指定依赖模块、文件。2. 通过
--archives 指定虚拟环境。如果您的模块或文件使用纯 Python 实现 ,则推荐通过
--py-files的方式指定。通过
--archives 的方式可以直接打包使用整个开发测试环境,这种方式支持编译安装 C 相关的依赖,推荐依赖环境较为复杂时使用。说明:
上述两种方式可以根据您的需求同时使用。
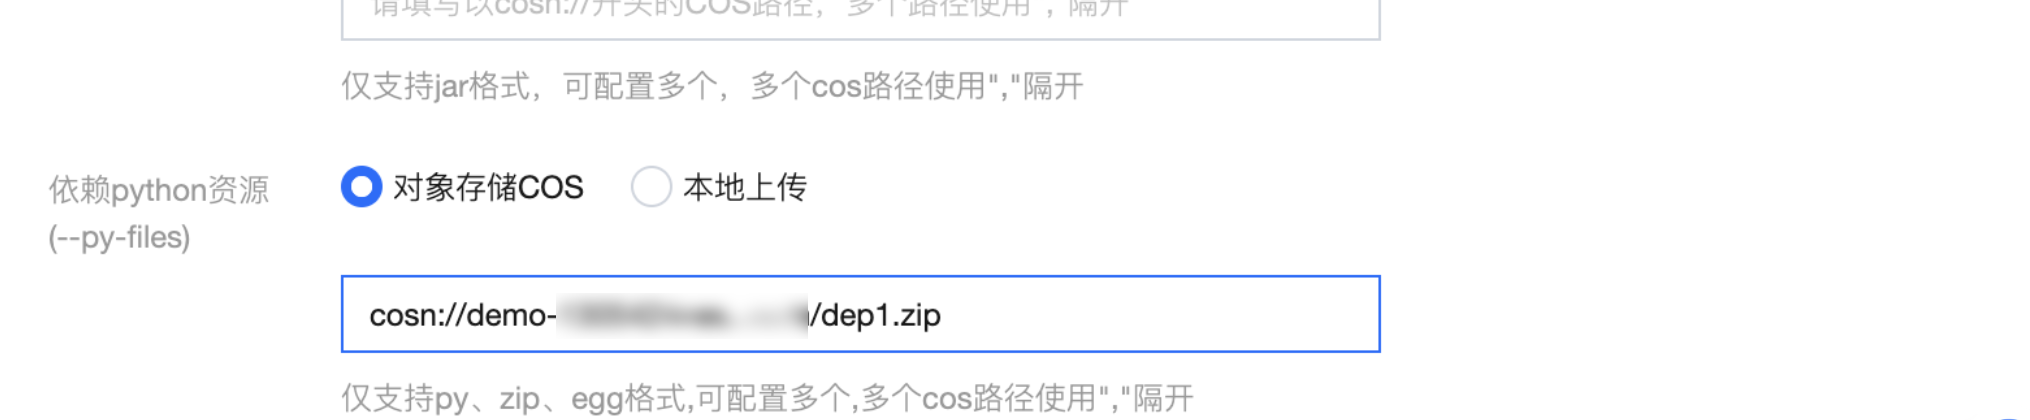
使用--py-files依赖包
该方式适用于纯 Python 实现的模块或文件,其中未包含任何 C 依赖。
步骤一:打包模块/文件
PyPI 外部包,需要在本地环境中,使用 pip 指令安装并打包常用依赖,要求依赖包使用纯 Python 实现,不依赖 C 相关库。
pip install -i https://mirrors.tencent.com/pypi/simple/ <packages...> -t depcd depzip -r ../dep.zip .
单文件模块(funtions.py)和自定义 Python 模块都可以通过上述方法打包,需要注意的是自定义 Python 模块需要按照 Python 官方要求标准化,详情可参考Python 官方文档Python Packaging User Guide。
步骤二:引入打包好的模块
使用虚拟环境
虚拟环境可解决部分 Python 依赖包对 C 的依赖问题。用户可根据需要,将依赖包编译安装进虚拟环境,然后将整个虚拟环境上传。
因为 C 相关的依赖涉及到编译安装,所以建议使用 x86架构的机器、Debian 11(bullseye) 系统、Python = 3.9.2 环境进行打包。
步骤一:打包虚拟环境
打包虚拟环境有两种方式,使用 Venv 打包和使用 Conda 打包。
1. 使用 Venv 打包。
python3 -m venv pyvenvsource pyvenv/bin/activate(pyvenv)> pip3 install -i [https://mirrors.tencent.com/pypi/simple/](https://mirrors.tencent.com/pypi/simple/) packages(pyvenv)> deactivatetar czvf pyvenv.tar.gz pyvenv/
2. 使用 Conda 打包。
conda create -y -n pyspark_env conda-pack <packages...> python=<3.9.x>conda activate pyspark_envconda pack -f -o pyspark_env.tar.gz
打包完毕后,将打包好的虚拟环境包
pyvenv.tar.gz 上传到 cos 中。注意:
请使用 tar 命令打包。
3. 使用打包脚本。
使用打包脚本,您需要安装docker 环境, 目前支持 Linux / mac 环境。
bash pyspark_env_builder.sh -hUsage:pyspark-env-builder.sh [-r] [-n] [-o] [-h]-r ARG, the requirements for python dependency.-n ARG, the name for the virtual environment.-o ARG, the output directory. [default:current directory]-h, print the help info.
参数 | 描述 |
-r | 指定 requirements.txt 位置 |
-n | 指定虚拟环境名称,默认 py3env |
-o | 指定虚拟环境保存本地目录,默认当前目录 |
-h | 打印 help 信息 |
# requirement.txtrequests# 执行如下命令bash pyspark_env_builder.sh -r requirement.txt -n py3env
等待脚本运行完成后,您可以在当前目录获取到 py3env.tar.gz,然后将该文上传到 cos。
步骤二:指定虚拟环境
1. 在
--archives 参数填入虚拟环境的完整路径, #号后面为解压文件夹名称。
注意:
“#”号用于指定解压目录。解压目录影响后续运行环境参数配置。
2. 在
--config 参数中指定运行环境参数。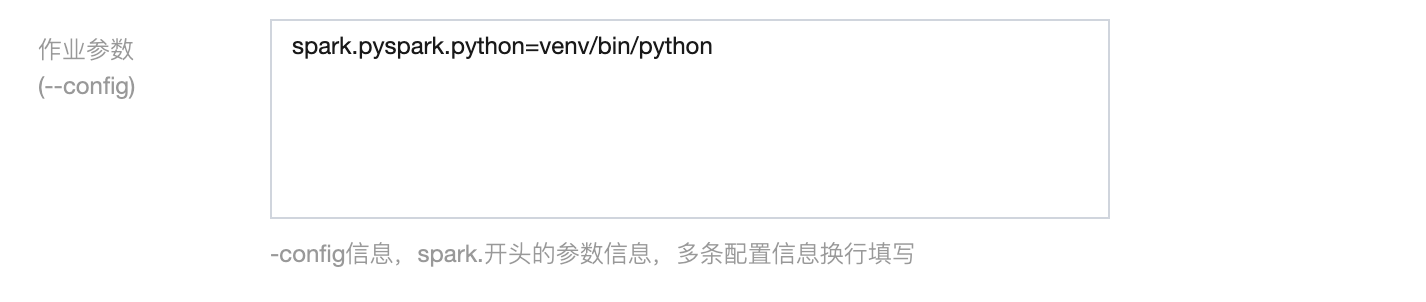
使用 Venv 打包方式请配置:
spark.pyspark.python = venv/pyspark_venv/bin/python3使用 Conda 打包方式请配置:
spark.pyspark.python = venv/bin/python3使用脚本打包方式请配置:
spark.pyspark.python = venv/bin/python3说明:
venv 和 conda 因打包方式不同,目录层级不同,具体可解压 .tar.gz 查看 python 文件相对路径。
文档反馈