We use cookies that are necessary to provide the Tencent Cloud website. We would also like to use other cookies to improve your experience, optimise and analyse Tencent Cloud website features and usage. For more information, please refer to our Cookies Policy.


腾讯 RTC 免费试用多种产品提升用户参与度
- 动态与公告
- 产品简介
- 购买指南
- 新手指引
- Demo 体验
- 视频通话(含 UI)
- 组件介绍(TUICallKit)
- 开通服务(TUICallKit)
- 跑通 Demo(TUICallKit)
- 快速接入(TUICallKit)
- Chat 集成通话能力(TUICallKit)
- 界面定制(TUICallKit)
- 离线唤醒(TUICallKit)
- AI 降噪(TUICallKit)
- 虚拟背景(TUICallKit)
- 会话聊天(TUICallKit)
- 云端录制(TUICallKit)
- 更多特性(TUICallKit)
- 解决方案(TUICallKit)
- 服务端 API(TUICallKit)
- 客户端 API(TUICallKit)
- 错误码表(TUICallkit)
- 发布日志(TUICallKit)
- 常见问题(TUICallKit)
- 多人会议(含 UI)
- 组件介绍(TUIRoomKit)
- 开通服务(TUIRoomKit)
- 跑通 Demo(TUIRoomKit)
- 快速接入(TUIRoomKit)
- 屏幕共享(TUIRoomKit)
- 预定会议(TUIRoomKit)
- 会中呼叫(TUIRoomKit)
- 界面定制(TUIRoomKit)
- 虚拟背景(TUIRoomKit)
- 会议控制(TUIRoomKit)
- 云端录制(TUIRoomKit)
- AI 降噪(TUIRoomKit)
- 会中聊天(TUIRoomKit)
- 机器人推流(TUIRoomKit)
- 更多特性(TUIRoomKit)
- 客户端 API(TUIRoomKit)
- 服务端 API(TUIRoomKit)
- 常见问题(TUIRoomKit)
- 错误码 (TUIRoomKit)
- SDK更新日志(TUIRoomKit)
- 在线直播(含 UI)
- Live 视频直播计费说明
- 组件介绍(TUILiveKit)
- 开通服务(TUILiveKit)
- 跑通 Demo(TUILiveKit)
- 快速接入(TUILiveKit)
- 界面定制(TUILiveKit)
- 开播和观看(TUILiveKit)
- 房间列表(TUILiveKit)
- 关注主播(TUILiveKit)
- 主播连线(TUILiveKit)
- 主播 PK(TUILiveKit)
- 观众连麦(TUILiveKit)
- 至臻画质(TUILiveKit)
- 互动弹幕(TUILiveKit)
- 互动礼物(TUILiveKit)
- 礼物特效(TUILiveKit)
- 美颜特效(TUILiveKit)
- 悬浮窗(TUILiveKit)
- 客户端 API(TUILiveKit)
- 服务端 API(TUILiveKit)
- 错误码(TUILiveKit)
- 发布日志(TUILiveKit)
- 常见问题(TUILiveKit)
- 语音聊天室(含 UI)
- 无 UI 集成
- 高级功能
- 服务端 API
- 控制台指南
- 解决方案
- 常见问题
- 旧版文档
- 协议与策略
- TRTC 政策
- 词汇表
本文将指导您如何在较短时间内接入
TUIRoomKit组件。遵循本指南,您将在10分钟内完成以下关键步骤,并最终实现具备完整 UI 界面的音视频会议功能。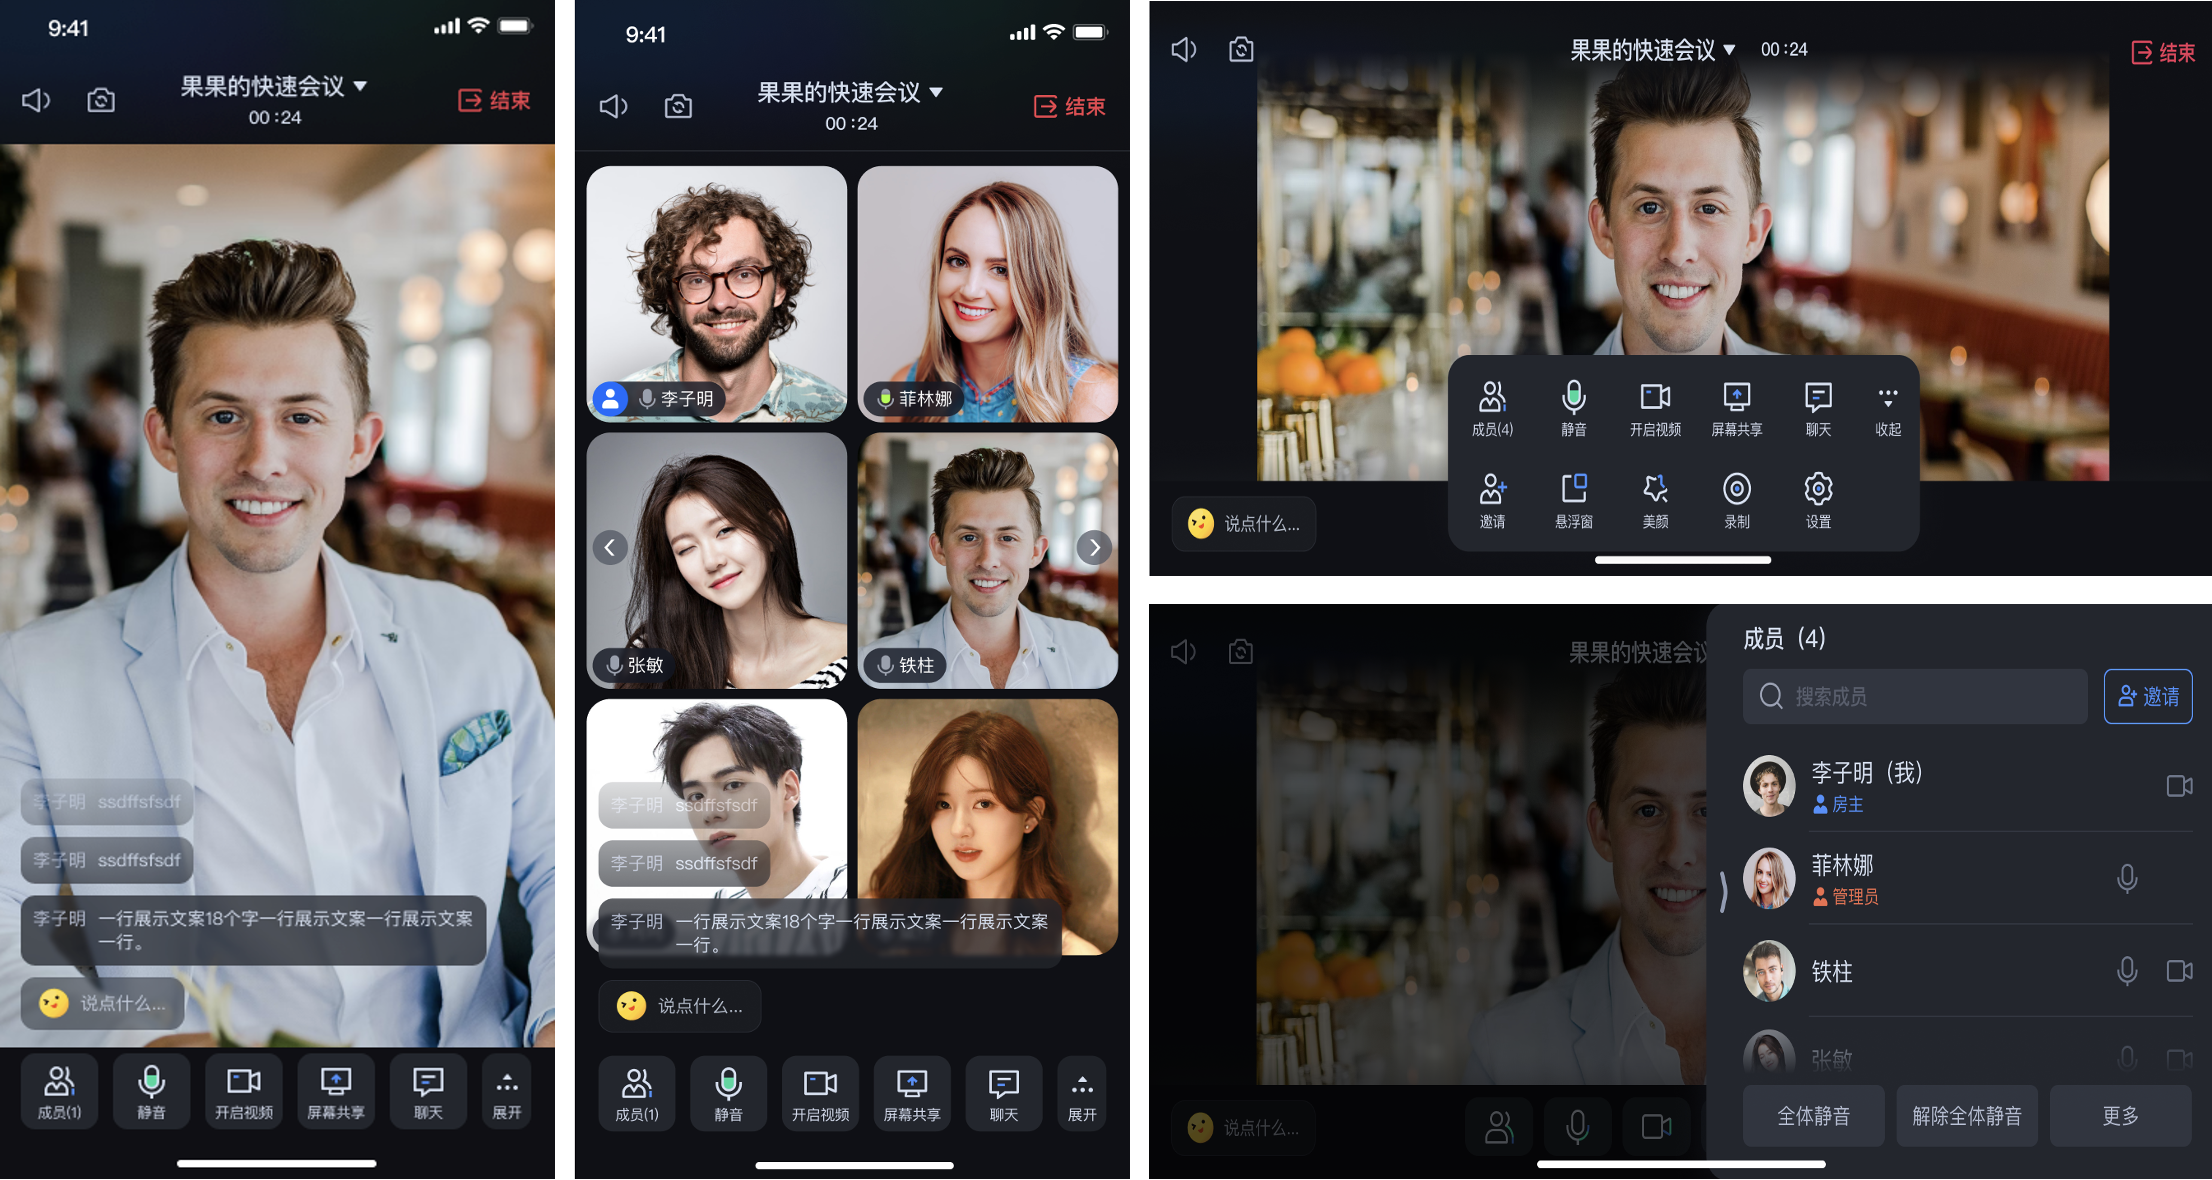
环境准备
最低兼容 Android 4.4(SDK API Level 19),建议使用 Android 5.0 (SDK API Level 21)及以上版本。
Android Studio 3.5 及以上的版本(Gradle 3.5.4 及以上的版本)。
Android 4.4 及以上的手机设备。
步骤一:开通服务
步骤二:下载 TUIRoomKit 组件
1. 在 Github 中克隆/下载代码,然后拷贝
Android目录下的timcommon、 tuiroomkit子目录到您当前工程中的 app 同级目录中,如下图: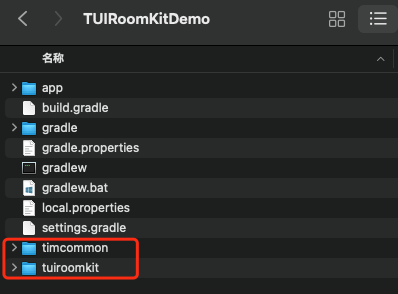
步骤三:工程配置
1. 工程根目录下找到
setting.gradle(或settings.gradle.kts)文件,并在其中增加如下代码,它的作用是将tuiroomkit组件导入到您当前的项目中。include ':timcommon'include ':tuiroomkit'
include (":timcommon")
include (":tuiroomkit")
2. 在 app 目录下找到
build.gradle(或build.gradle.kts)文件,并在其中增加如下代码,它的作用是声明当前app对新加入的tuiroomkit组件的依赖。api project(':tuiroomkit')
api(project(":tuiroomkit"))
3. 由于我们在 SDK 内部使用了Java 的反射特性,需要将 SDK 中的部分类加入不混淆名单,因此需要您在 proguard-rules.pro 文件中添加如下代码:
-keep class com.tencent.** { *; }
4. 在 app目录下找到 AndroidManifest.xml 文件,在 application 节点中添加 tools:replace="android:allowBackup" ,覆盖组件内的设置,使用自己的设置。
// app/src/main/AndroidManifest.xml<application android:name=".DemoApplication" android:allowBackup="false" android:icon="@drawable/app_ic_launcher" android:label="@string/app_name" android:largeHeap="true" android:theme="@style/AppTheme" tools:replace="android:allowBackup">
步骤四:登录
在您的项目中添加如下代码,它的作用是通过调用
TUILogin中的相关接口完成组件的登录。这个步骤异常关键,因为只有在登录后才能正常使用 TUIRoomKit的各项功能,故请您耐心检查相关参数是否配置正确。import com.tencent.qcloud.tuicore.TUILogin; import com.tencent.qcloud.tuicore.interfaces.TUICallback;import com.tencent.cloud.tuikit.roomkit.debug.GenerateTestUserSig;String userId = "denny"; // 请替换为您的 UserIDint sdkAppId = 1400000001; // 请替换为步骤一取到的 sdkAppIdString sdkSecretKey = "xxxx"; // 请替换为您的 sdkSecretKeyString userSig = GenerateTestUserSig.genTestUserSig(sdkAppId, userId, sdkSecretKey);TUILogin.login(context,sdkAppId,userId,userSig,new TUICallback() {@Overridepublic void onSuccess() {}@Overridepublic void onError(int errorCode, String errorMessage) {}});
import com.tencent.qcloud.tuicore.TUILogin import com.tencent.qcloud.tuicore.interfaces.TUICallbackimport com.tencent.cloud.tuikit.roomkit.debug.GenerateTestUserSigval userId = "denny" // 请替换为您的 UserIDval sdkAppId = 1400000001 // 请替换为步骤一取到的 sdkAppIdval sdkSecretKey = "xxxx" // 请替换为您的 sdkSecretKeyval userSig = GenerateTestUserSig.genTestUserSig(sdkAppId, userId, sdkSecretKey)TUILogin.login(this,sdkAppId,userId,userSig,object : TUICallback() {override fun onSuccess() {}override fun onError(errorCode: Int, errorMessage: String) {}})
TUILogin.login 函数参数说明: |
SDKAppID:在 开通服务 中的最后一步中获取。 UserID:当前用户的 ID,字符串类型,只允许包含英文字母(a-z 和 A-Z)、数字(0-9)、连词符(-)和下划线(_)。 UserSig:使用 开通服务 的第3步中获取的 SDKSecretKey对SDKAppID、UserID等信息进行加密,就可以得到UserSig,它是一个鉴权用的票据,用于腾讯云识别当前用户是否能够使用TRTC的服务。您可以通过控制台中的 辅助工具 生成一个临时可用的UserSig。更多信息请参见 如何计算及使用 UserSig。 说明: 开发环境:如果您正在本地开发调试阶段,可以采用本地 GenerateTestUserSig.genTestUserSig() 函数生成 userSig。该方法中 SDKSecretKey 很容易被反编译逆向破解,一旦您的密钥泄露,攻击者就可以盗用您的腾讯云流量。 生产环境:如果您的项目要发布上线,请采用 服务端生成 UserSig 的方式。 |
步骤五:发起您的第一次会议
// 请替换 "123456" 为您自定义的房间号ConferenceDefine.StartConferenceParams params = new ConferenceDefine.StartConferenceParams("123456");Intent intent = new Intent(this, ConferenceMainActivity.class);intent.putExtra(KEY_START_CONFERENCE_PARAMS, params);startActivity(intent);
// 请替换 "123456" 为您自定义的房间号val params = ConferenceDefine.StartConferenceParams("123456")val intent = Intent(this, ConferenceMainActivity::class.java)intent.putExtra(KEY_START_CONFERENCE_PARAMS, params);startActivity(intent)
步骤六:加入会议
// 请替换 "123456" 为您自定义的房间号ConferenceDefine.JoinConferenceParams params = new ConferenceDefine.JoinConferenceParams("123456");Intent intent = new Intent(this, ConferenceMainActivity.class);intent.putExtra(KEY_JOIN_CONFERENCE_PARAMS, params);startActivity(intent);
// 请替换 "123456" 为您自定义的房间号val params = ConferenceDefine.JoinConferenceParams("123456")val intent = Intent(this, ConferenceMainActivity::class.java)intent.putExtra(KEY_JOIN_CONFERENCE_PARAMS, params);startActivity(intent)
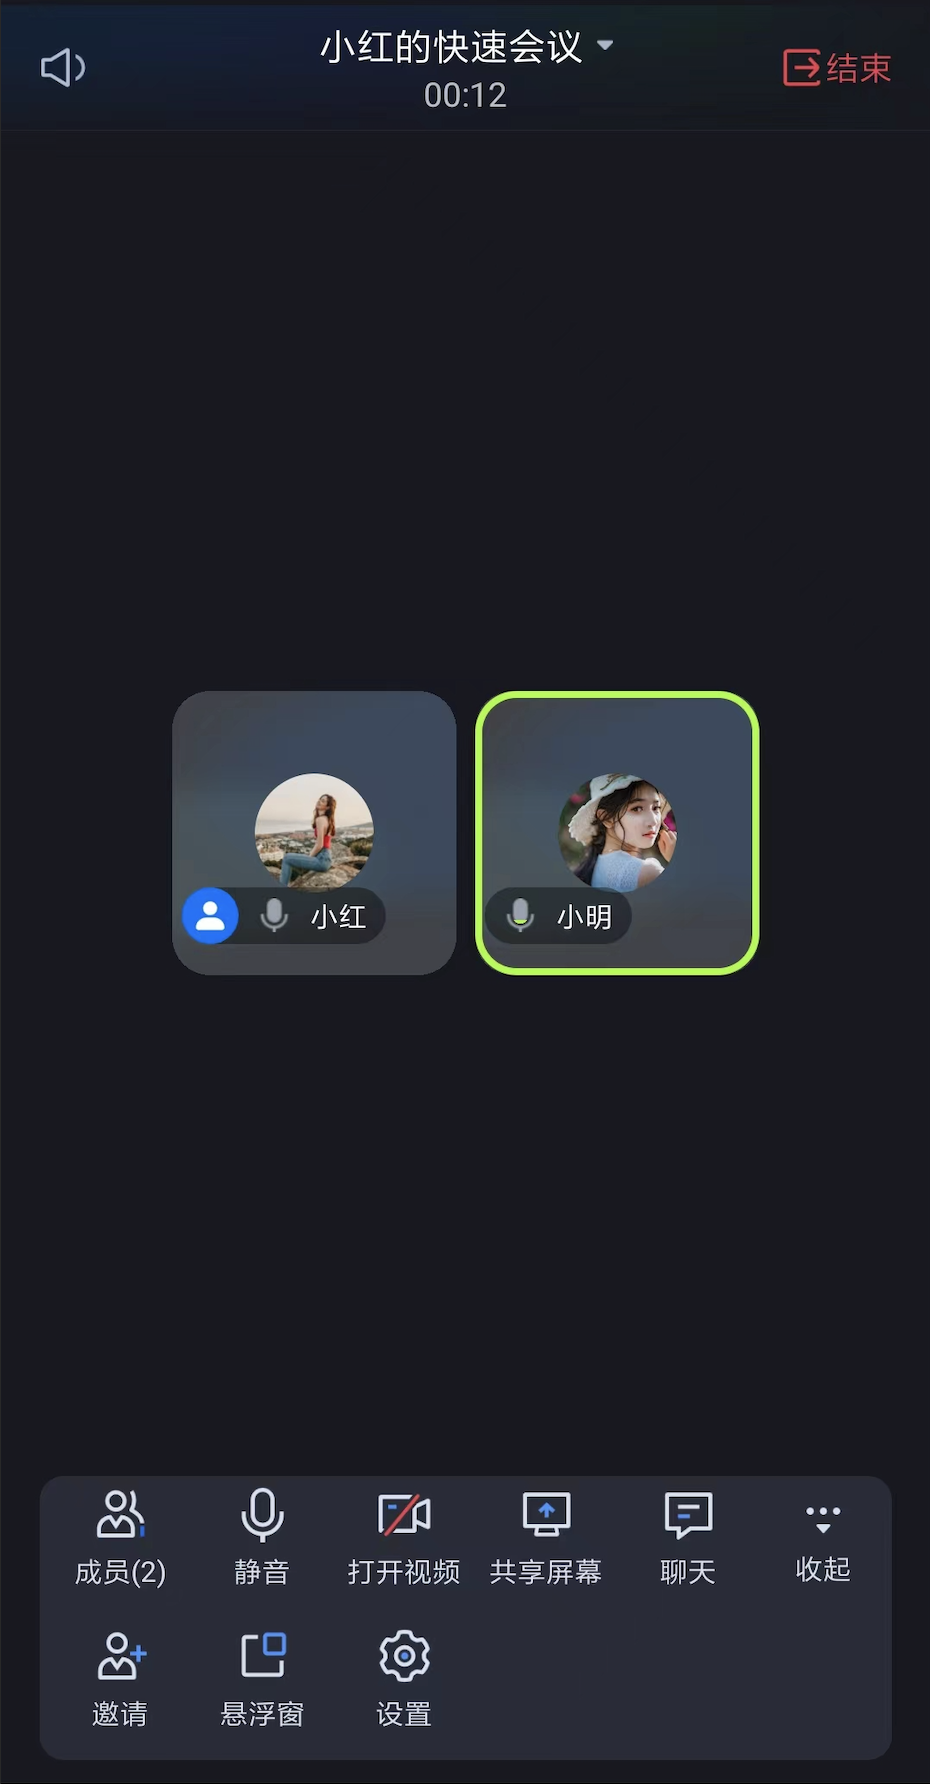
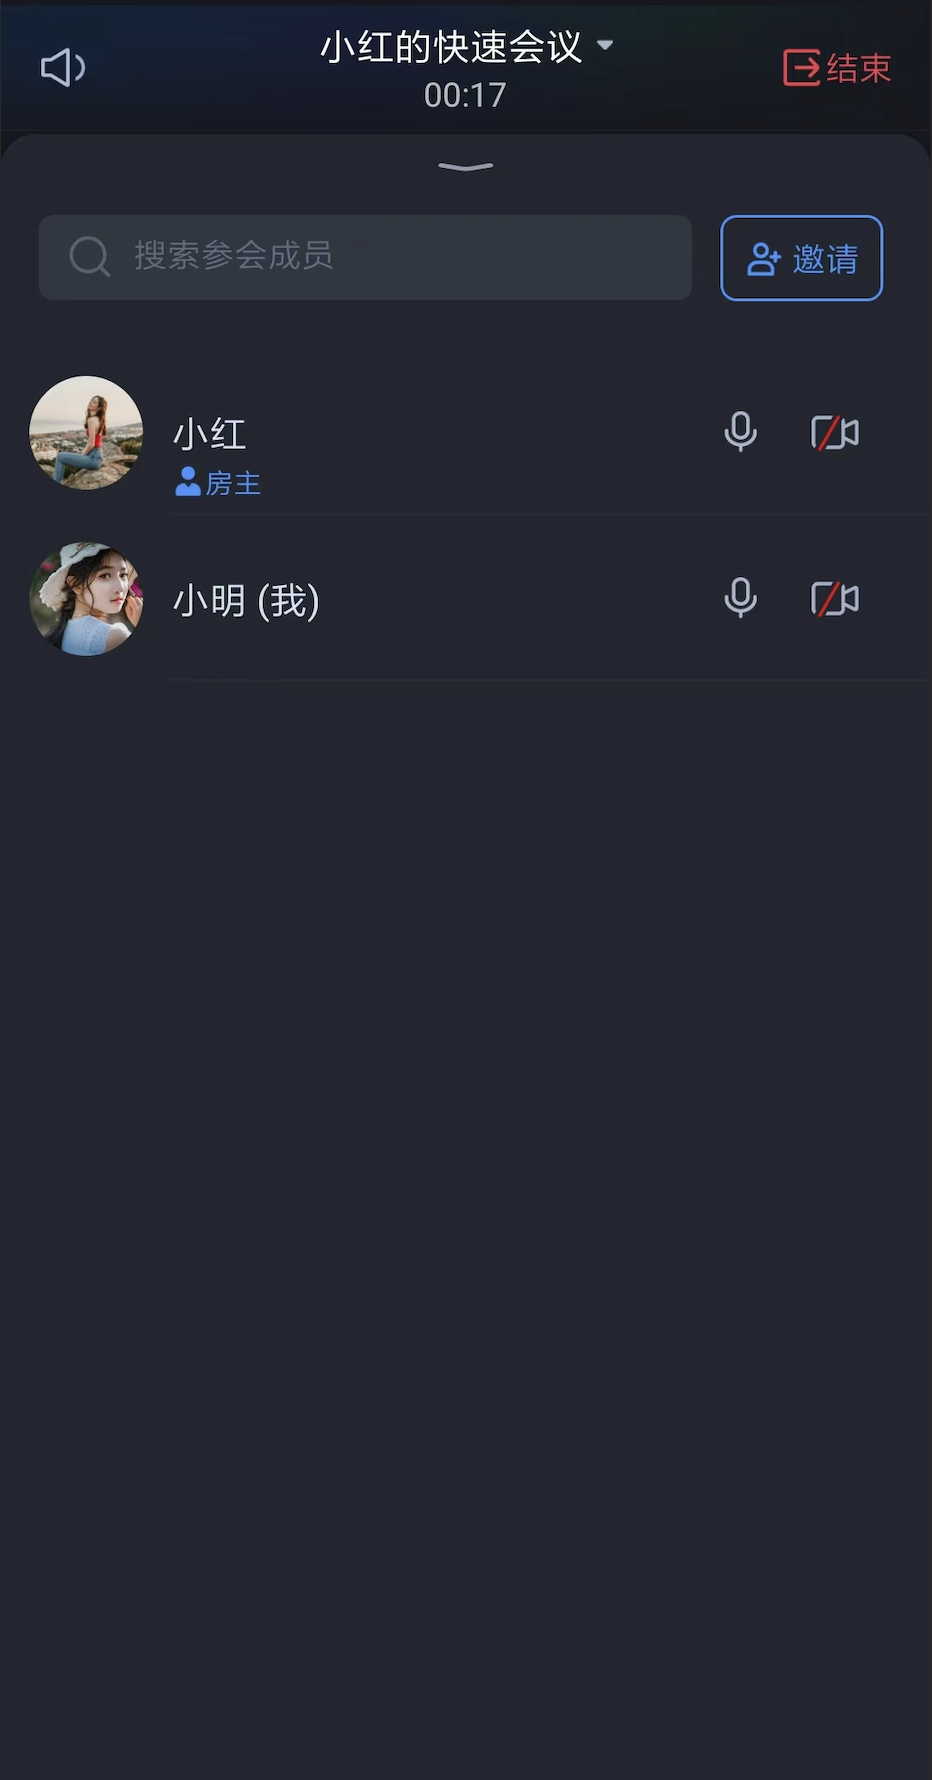
界面展示
当您成功完成步骤1 - 步骤6,UI 界面效果如下:
会议主界面 | 用户列表 |
 |  |
常见问题
交流与反馈
您在接入或使用过程有任何疑问或者建议,欢迎联系:info_rtc@tencent.com 。

 是
是
 否
否
本页内容是否解决了您的问题?