- 动态与公告
- 产品简介
- 购买指南
- 新手指引
- Demo 体验
- 视频通话(含 UI)
- 组件介绍(TUICallKit)
- 开通服务(TUICallKit)
- 跑通 Demo(TUICallKit)
- 快速接入(TUICallKit)
- Chat 集成通话能力(TUICallKit)
- 界面定制(TUICallKit)
- 离线唤醒(TUICallKit)
- AI 降噪(TUICallKit)
- 虚拟背景(TUICallKit)
- 会话聊天(TUICallKit)
- 云端录制(TUICallKit)
- 更多特性(TUICallKit)
- 解决方案(TUICallKit)
- 服务端 API(TUICallKit)
- 客户端 API(TUICallKit)
- 错误码表(TUICallkit)
- 发布日志(TUICallKit)
- 常见问题(TUICallKit)
- 多人会议(含 UI)
- 组件介绍(TUIRoomKit)
- 开通服务(TUIRoomKit)
- 跑通 Demo(TUIRoomKit)
- 快速接入(TUIRoomKit)
- 预定会议(TUIRoomKit)
- 会中呼叫(TUIRoomKit)
- 界面定制(TUIRoomKit)
- 虚拟背景(TUIRoomKit)
- 会议控制(TUIRoomKit)
- 云端录制(TUIRoomKit)
- AI 降噪(TUIRoomKit)
- 会中聊天(TUIRoomKit)
- 机器人推流(TUIRoomKit)
- 更多特性(TUIRoomKit)
- 客户端 API(TUIRoomKit)
- 服务端 API(TUIRoomKit)
- 常见问题(TUIRoomKit)
- 错误码 (TUIRoomKit)
- SDK更新日志(TUIRoomKit)
- 在线直播(含 UI)
- Live 视频直播计费说明
- 组件介绍(TUILiveKit)
- 开通服务(TUILiveKit)
- 跑通 Demo(TUILiveKit)
- 快速接入(TUILiveKit)
- 界面定制(TUILiveKit)
- 开播和观看(TUILiveKit)
- 房间列表(TUILiveKit)
- 关注主播(TUILiveKit)
- 主播连线(TUILiveKit)
- 主播 PK(TUILiveKit)
- 观众连麦(TUILiveKit)
- 互动弹幕(TUILiveKit)
- 互动礼物(TUILiveKit)
- 礼物特效(TUILiveKit)
- 美颜特效(TUILiveKit)
- 悬浮窗(TUILiveKit)
- 客户端API(TUILiveKit)
- 服务端 API(TUILiveKit)
- 错误码(TUILiveKit)
- 发布日志(TUILiveKit)
- 常见问题(TUILiveKit)
- 语音聊天室(含 UI)
- 无 UI 集成
- 高级功能
- 服务端 API
- 控制台指南
- 解决方案
- 常见问题
- 旧版文档
- 协议与策略
- TRTC 政策
- 词汇表
本文将指导您如何快速地将桌面端 TUILiveKit 组件集成到您的项目中,从而为您的应用程序提供直播推流功能。
环境准备
Windows 电脑:操作系统 Windows 10 或者 11 版本。
Node.js: 版本:Node.js ≥ 16.19.1(推荐使用官方 LTS 版本,npm 版本请与 node 版本匹配)。
步骤一:开通服务
步骤二:下载 TUILiveKit 源码
git clone https://github.com/Tencent-RTC/ultra-live-electron.git
步骤三:集成 TUILiveKit
当 TUILiveKit 在桌面端运行时,需要创建两个 Electron 窗口,分别用于承载 TUILiveKit 的主界面和设置界面。我们将这两个窗口分别称为 TUILiveKit 主窗口和子窗口。集成后的最终效果是:在您现有的 Electron 应用中,通过点击一个按钮,即可创建并打开 TUILiveKit 主窗口,开始使用 TUILiveKit 的全部功能。
前置依赖
您的代码工程需要包含以下技术栈:
Vue3
Webpack
TypeScript
Electron
注意:
复制 TUILiveKit 代码到您的工程
1. 复制 TUILiveKit 组件
复制
ultra-live-electron/src/TUILiveKit目录到您工程的src目录下。2. 复制 TUILiveKit 窗口创建代码
复制
ultra-live-electron/TUILiveKit.main.js和ultra-live-electron/TUILiveKit.preload.js文件到您工程的根目录下。3. 复制 TUILiveKit 主窗口和子窗口页面及其页面路由定义
复制
ultra-live-electron/src/views/TUILiveKitChild.vue和ultra-live-electron/src/views/TUILiveKitMain.vue文件到您工程的src/views目录下。在您工程的页面路由文件
src/router/index.ts中,新增如下两条路由配置:// src/router/index.tsimport { createRouter, createWebHashHistory, RouteRecordRaw } from 'vue-router';import HomeView from '../views/HomeView.vue';const routes: Array<RouteRecordRaw> = [{ // 您应用的当前路由页面,页面内有触发打开 TUILiveKit 主窗口的按钮path: '/',name: 'home',component: HomeView},// ********************************** TUILiveKit 相关代码开始 ********************************** //{ // TUILiveKit 主窗口页面path: '/tui-live-kit-main',name: 'tui-live-kit-main',component: () => import(/* webpackChunkName: "TUILiveKitMain" */ '../views/TUILiveKitMain.vue')},{ // TUILiveKit 子窗口页面path: '/tui-live-kit-child',name: 'tui-live-kit-child',component: () => import(/* webpackChunkName: "TUILiveKitChild" */ '../views/TUILiveKitChild.vue'),},// ********************************** TUILiveKit 相关代码结束 ********************************** //];// ********************************** TUILiveKit 相关代码开始 ********************************** //// 监听来自主进程的窗口类型通知,进行路由跳转window.ipcRenderer.on('window-type', (event: any, type: string) => {console.log(`[router] window type:${type}`);console.log(`[router] current href:${window.location.href}`);router.replace({ name: `tui-live-kit-${type}`});});// ********************************** TUILiveKit 相关代码结束 ********************************** //const router = createRouter({history: createWebHashHistory(),routes});export default router;
4. 复制美颜相关代码、资源和配置。
复制
ultra-live-electron/public/assets目录和文件public/avatar.png到您工程的public目录下。复制
ultra-live-electron/scripts/prestart.js文件到您工程的scripts目录下,并在您工程的package.json文件中的scripts部分新增如下命令。{"scripts": {"prestart": "node ./scripts/prestart.js"}}
这里我们先不开启美颜功能,以上配置、代码、资源复制,可以保证工程运行不出错。美颜功能的开启参见 如何开启美颜功能。
5. 修改 vue.config.js 配置
在您工程的
vue.config.js文件中,新增如下配置:// vue.config.jsconst { defineConfig } = require('@vue/cli-service')// *********************************** TUILiveKit 相关代码开始 *********************************** //const os = require("os");const isProduction = process.env.NODE_ENV === "production";const platform = os.platform();// *********************************** TUILiveKit 相关代码结束 *********************************** //module.exports = defineConfig({transpileDependencies: true,// *********************************** TUILiveKit 相关代码开始 *********************************** //publicPath: "./",configureWebpack: {devtool: isProduction ? "source-map" : "inline-source-map",target: "electron-renderer",module: {rules: [{test: /\\.node$/,loader: "native-ext-loader",options: {rewritePath: isProduction? platform === "win32"? "./resources": "../Resources": "./node_modules/trtc-electron-sdk/build/Release",},},],},}// *********************************** TUILiveKit 相关代码结束 *********************************** //});
6. 复制
src/debug目录,配置SDKAppID和SDKSecretKey。复制
ultra-live-electron/src/debug文件夹到您工程的src目录下,打开复制过来的basic-info-config.js文件,填入 步骤一:开通服务 时获取的SDKAppID和SDKSecretKey。// basic-info-config.js/*** 腾讯云 SDKAppID,需要替换为您自己账号下的 SDKAppID。* 进入腾讯云实时音视频[控制台](https://console.tencentcloud.com/rav ) 创建应用,即可看到 SDKAppID,* 它是腾讯云用于区分客户的唯一标识。*/export const SDKAppID = 0;/*** 计算签名用的加密密钥,获取步骤如下:** step1. 进入腾讯云实时音视频[控制台](https://console.tencentcloud.com/rav ),如果还没有应用就创建一个,* step2. 单击“应用配置”进入基础配置页面,并进一步找到“帐号体系集成”部分。* step3. 点击“查看密钥”按钮,就可以看到计算 UserSig 使用的加密的密钥了,请将其拷贝并复制到如下的变量中** 注意:该方案仅适用于调试Demo,正式上线前请将 UserSig 计算代码和密钥迁移到您的后台服务器上,以避免加密密钥泄露导致的流量盗用。* 文档:https://www.tencentcloud.com/document/product/647/17275?from_cn_redirect=1#Server*/export const SDKSecretKey = '';
7. 启用 pinia 状态管理并引入主题样式
打开您工程的
src/main.ts文件,增加 pinia 状态管理支持:// main.tsimport { createApp } from 'vue';// *********************************** TUILiveKit 相关代码开始 *********************************** //import { createPinia } from 'pinia';import "./TUILiveKit/assets/theme.css";// *********************************** TUILiveKit 相关代码结束 *********************************** //import App from './App.vue'import router from './router'createApp(App)// *********************************** TUILiveKit 相关代码开始 *********************************** //.use(createPinia())// *********************************** TUILiveKit 相关代码结束 *********************************** //.use(router).mount('#app');
8. 修改 global.d.ts
在您工程的
src/global.d.ts文件中,针对 Window 类型增加以下属性声明:// src/global.d.tsexport {}declare global {interface Window {// *********************************** TUILiveKit 相关代码开始 *********************************** //ipcRenderer: any;nativeWindowHandle: Uint8Array;mainWindowPort: MessagePort | null;}// *********************************** TUILiveKit 相关代码结束 *********************************** //}
增加入口,打开 TUILiveKit 主窗口
在您项目的某个页面中,新增一个按钮,点击后,通知 Electron 主进程打开 TUILiveKit 主窗口。如下所示,是我们实现的示例代码。
// HomeView.vue<template><div class="home"><button @click="openTUILiveKit">开始直播</button></div></template><script setup lang="ts">import { ref } from 'vue';import type { Ref } from 'vue';import { getBasicInfo } from '../debug/basic-info-config';const isOpen:Ref<boolean> = ref(false); // 记录状态,避免重复打开 TUILiveKit 主窗口const openTUILiveKit = async () => {if (!isOpen.value) {const currentUserInfo = await getBasicInfo();if (currentUserInfo) {window.ipcRenderer.send('openTUILiveKit', {userInfo: currentUserInfo // 注意打开 TUILiveKit 主窗口需要带上用户信息作为参数});isOpen.value = true;} else {console.error('Error: cannot get current user info');}}};</script>
在您 Electron 工程的 preload 脚本中,将 Electron 的
ipcRenderer对象放到全局对象window上,方便在 vue 组件和 JavaScript/TypeScript 脚本中,与 Electron 主进程通信。// preload.jsconst { ipcRenderer } = require("electron");// Enable `ipcRenderer` can be used in vue and Javascript modulewindow.ipcRenderer = ipcRenderer;
在您 Electron 工程的主进程脚本中,接收来自 vue 组件发送的
openTUILiveKit请求,打开 TUILiveKit 主窗口。// main.jsconst { app, BrowserWindow, ipcMain } = require('electron');const path = require('path');// *********************************** TUILiveKit 相关代码开始 *********************************** //const { TUILiveKitMain } = require("./TUILiveKit.main");// *********************************** TUILiveKit 相关代码结束 *********************************** //let mainWindow = null;const createWindow = () => {mainWindow = new BrowserWindow({width: 800,height: 600,// *********************************** TUILiveKit 相关代码开始 *********************************** //webPreferences: {preload: path.join(__dirname, 'preload.js'),nodeIntegration: true,contextIsolation: false,}// *********************************** TUILiveKit 相关代码结束 *********************************** //});// *********************************** TUILiveKit 相关代码开始 *********************************** //bindIPCMainEvent();// *********************************** TUILiveKit 相关代码结束 *********************************** //if (app.isPackaged) {mainWindow.loadFile("dist/index.html");} else {mainWindow.loadURL('http://localhost:8080');}}// *********************************** TUILiveKit 相关代码开始 *********************************** //function bindIPCMainEvent() {ipcMain.on("openTUILiveKit", (event, args) => {console.log(`[main] open live kit`, args);TUILiveKitMain.open(args); // Open TUILiveKit main window});}// *********************************** TUILiveKit 相关代码结束 *********************************** //app.whenReady().then(() => {createWindow();app.on('activate', () => {if (BrowserWindow.getAllWindows().length === 0) createWindow()});})app.on('window-all-closed', () => {if (process.platform !== 'darwin') app.quit()});
在您工程的 package.json 文件中,新增如下配置,支持以开发模式启动 Electron 应用程序。
{"main": "main.js","scripts": {"start": "electron ."},"overrides": {"@tencentcloud/tuiroom-engine-electron": {"trtc-electron-sdk": "^12.2.701"}}}
安装依赖
npm install --save pinianpm install --save trtc-electron-sdk movable-resizable-jsnpm install --save @tencentcloud/tuiroom-engine-electron # TUILiveKit 直播间引擎npm install --save trtc-electron-plugin-xmagic # TUILiveKit 集成的美颜插件npm install --save-dev native-ext-loader electron-devtools-installer electron-builder
步骤四:开发模式启动
1. 进入您的项目目录,打开命令行终端
cmd.exe,执行以下命令,以开发模式启动 Web 项目。npm run serve
如果您在启动时遇到了 error Component name "Index" should always be multi-word vue/multi-word-component-names 报错,表示您的项目工程 eslint 配置与 TUILiveKit 有差异,打开您项目的 .eslintrc.js 文件或者在 package.json 文件的 eslintConfig 部分,增加如下所示代码中的 vue/multi-word-component-names 校验规则,再重新执行 “npm run serve” 命令。
// .eslintrc.jsmodule.exports = {root: true,env: {node: true},'extends': ['plugin:vue/vue3-essential','eslint:recommended','@vue/typescript/recommended'],parserOptions: {ecmaVersion: 2020},rules: {'no-console': process.env.NODE_ENV === 'production' ? 'warn' : 'off','no-debugger': process.env.NODE_ENV === 'production' ? 'warn' : 'off',// *********************************** TUILiveKit 相关代码开始 *********************************** //"vue/multi-word-component-names": process.env.NODE_ENV === 'production' ? 'warn' : 'off',// *********************************** TUILiveKit 相关代码结束 *********************************** //}}
2. 进入您的项目目录,再打开一个新的命令行终端
cmd.exe,执行以下命令,以开发模式启动 Electron 应用程序。npm run start
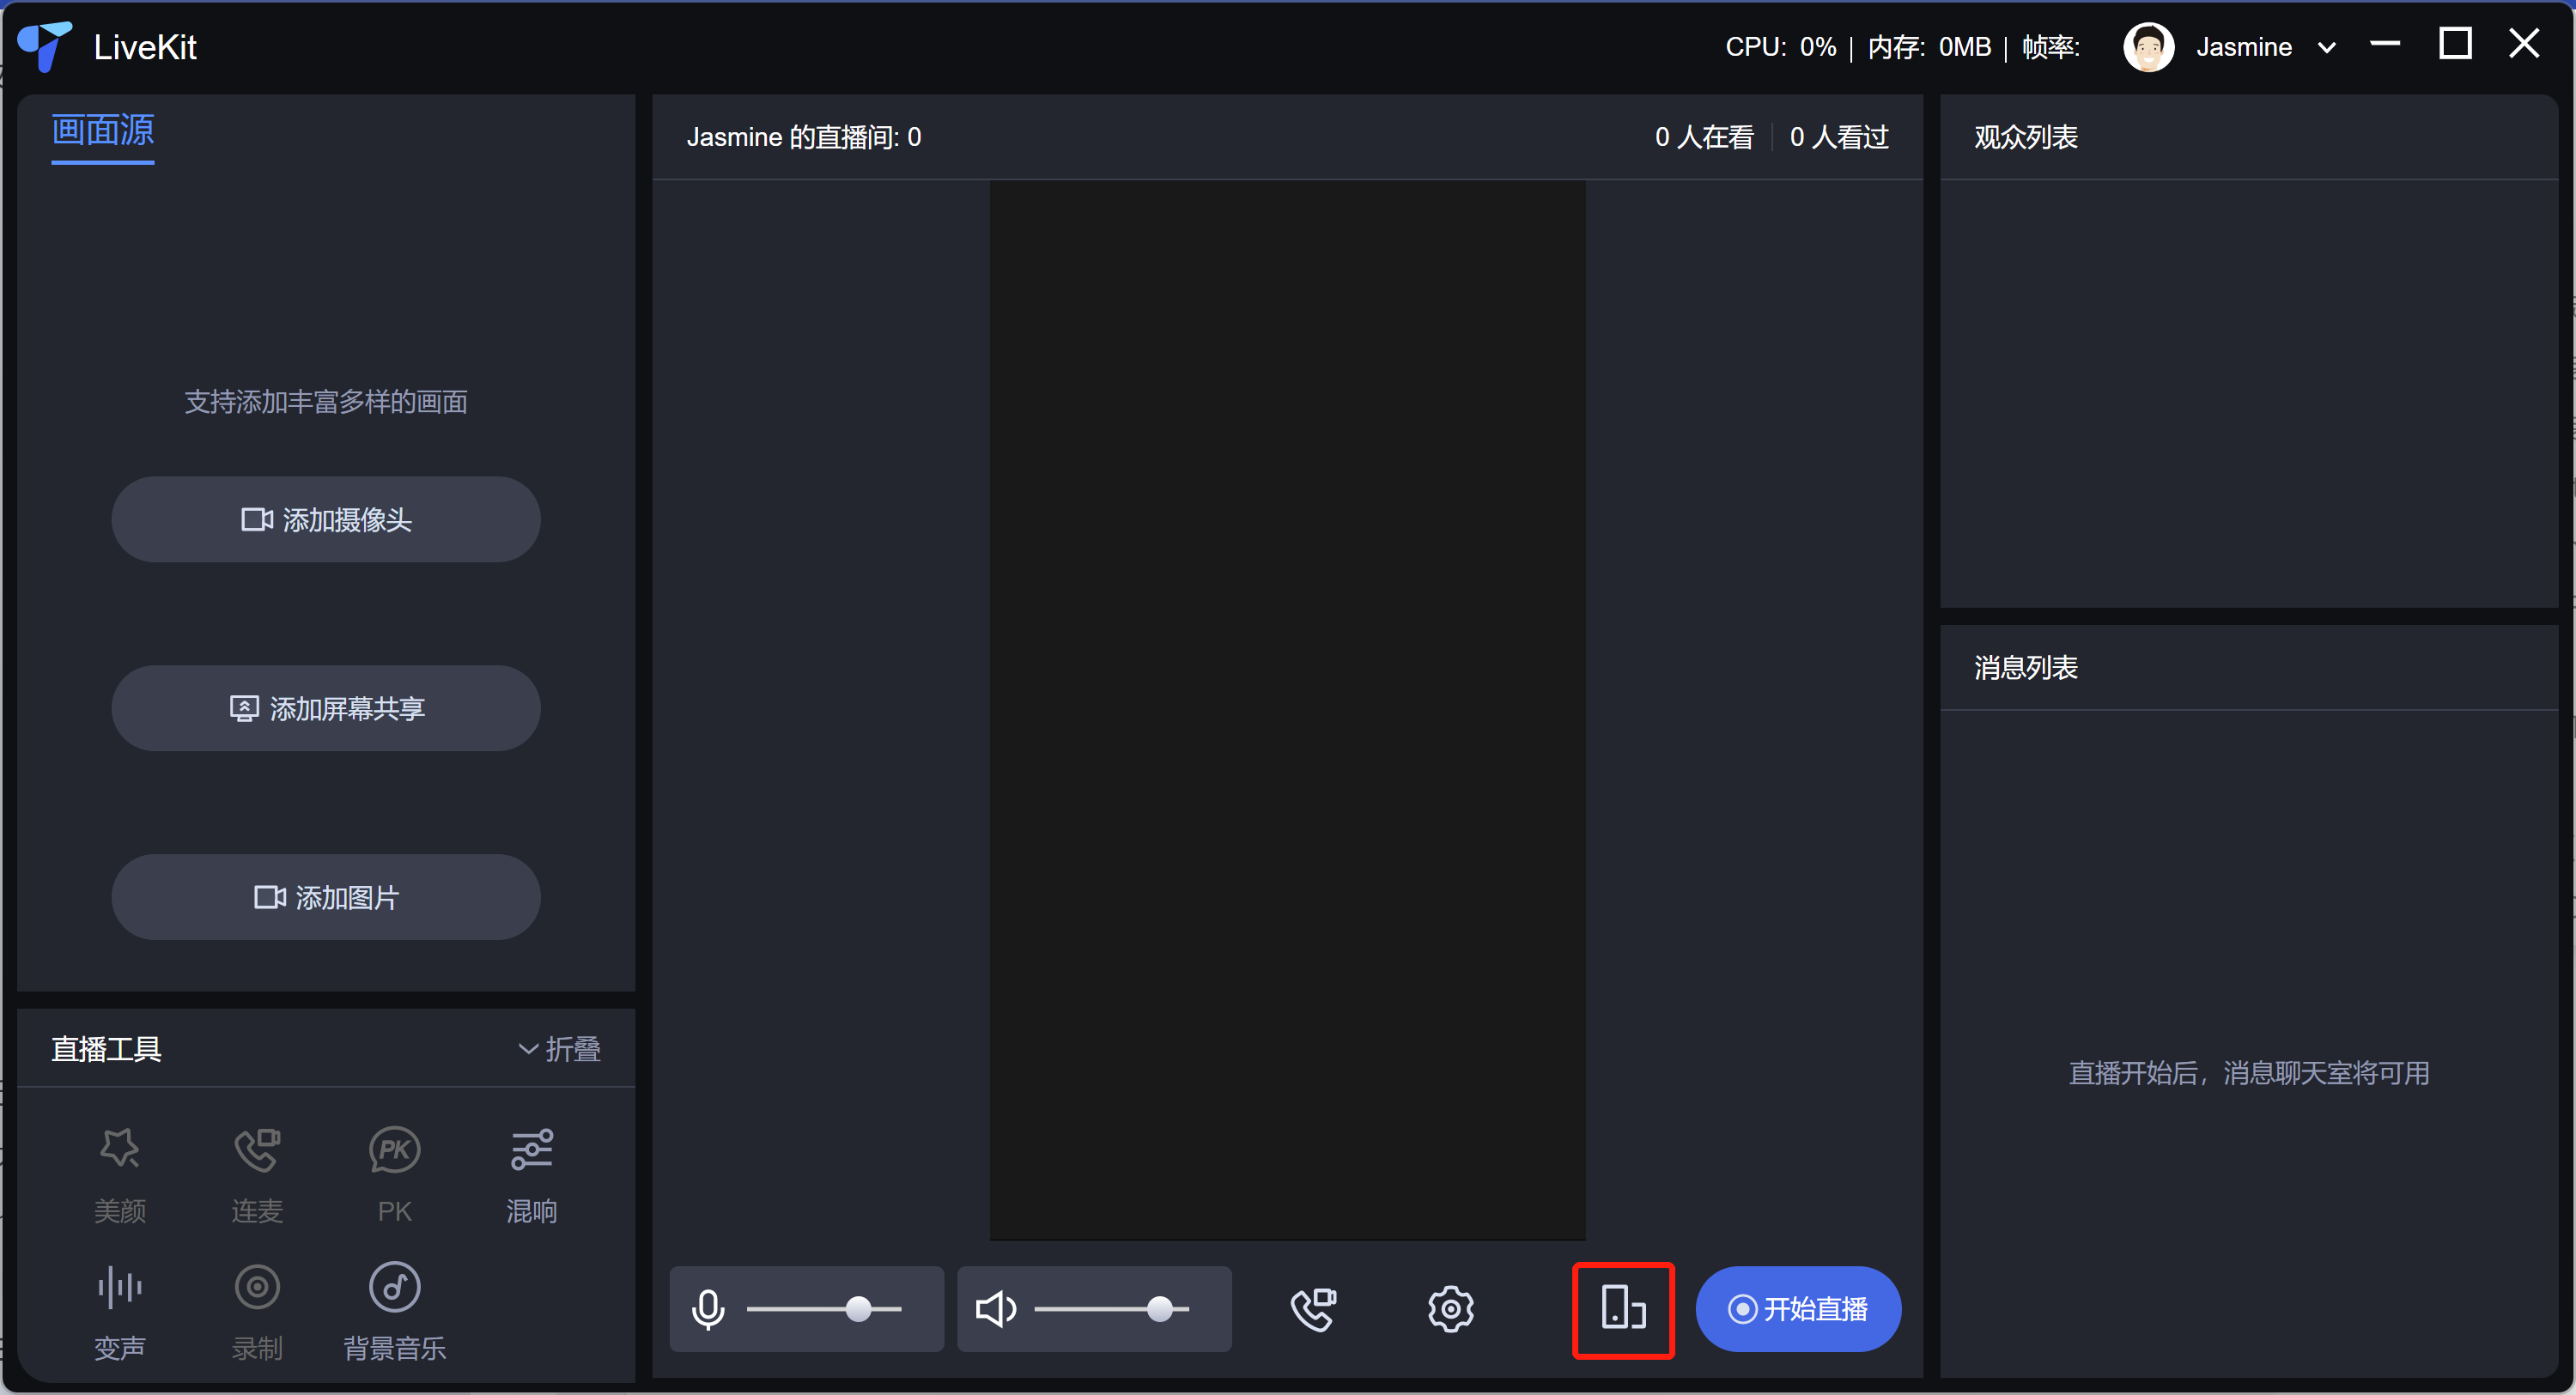
启动成功后,点击您在应用界面添加的 “开始直播” 按钮,就可以打开 TUILiveKit 主窗口,打开后效果如下图:


步骤五:开启一场直播
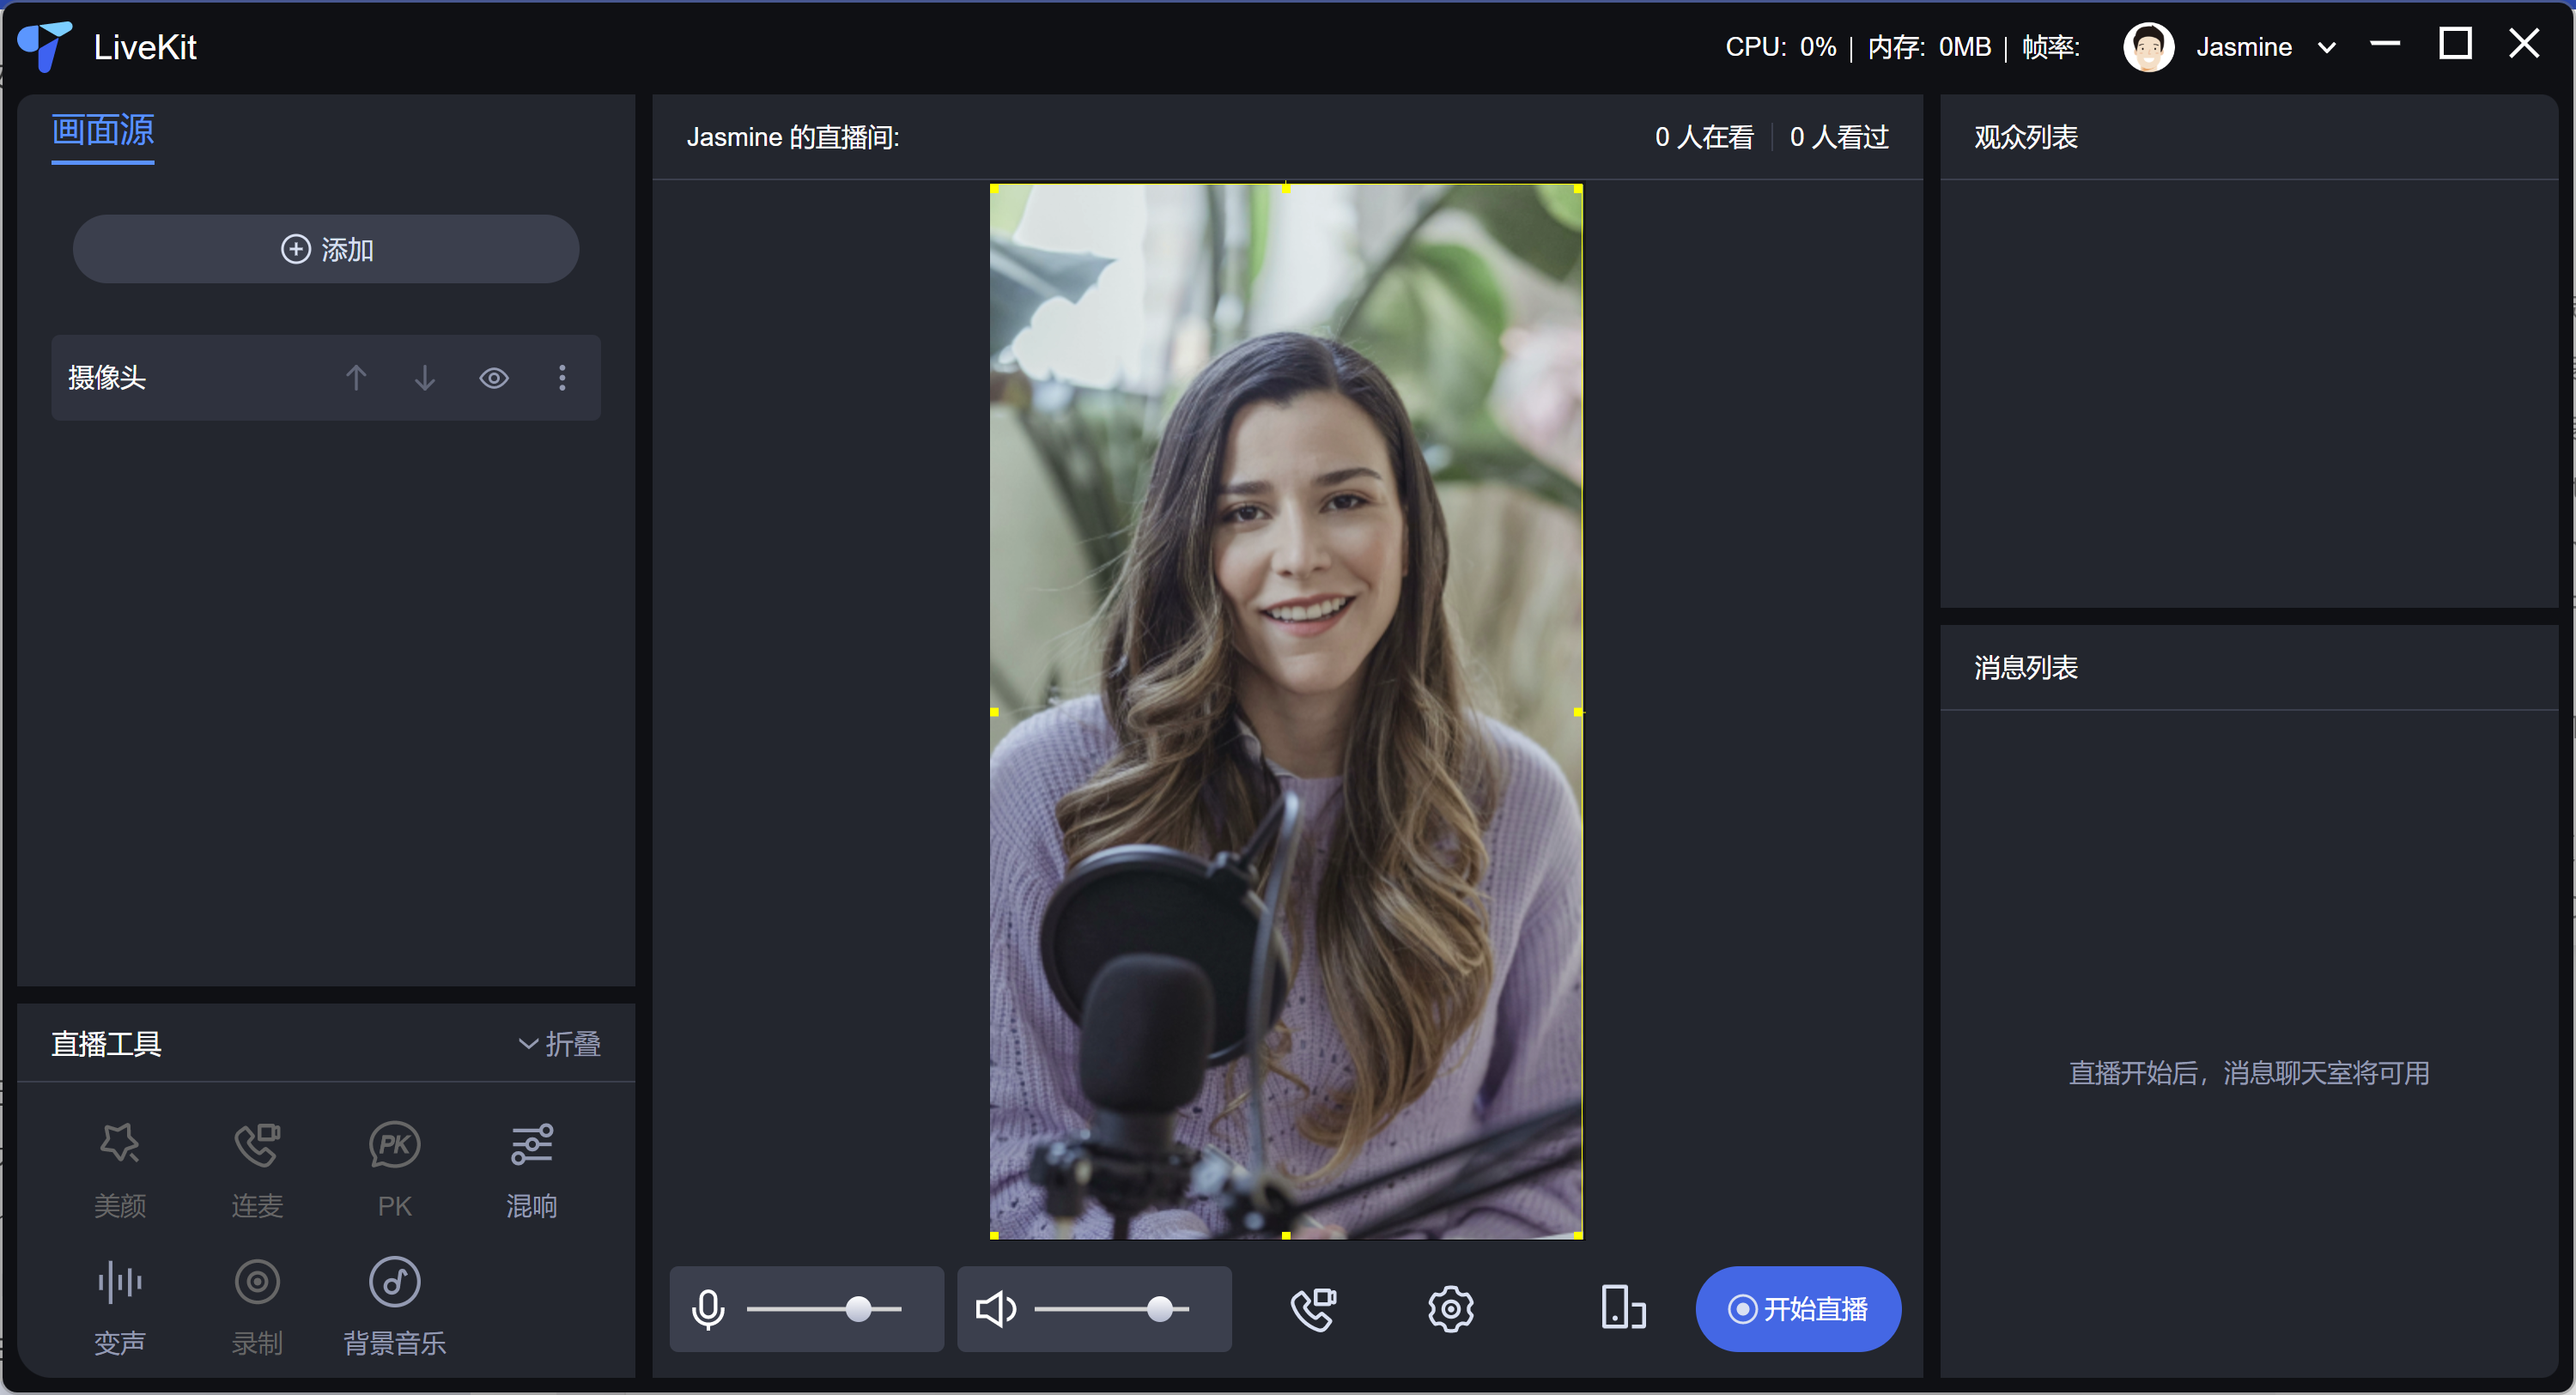
1. 添加摄像头
在开播前,需要先添加画面源,目前支持:摄像头、屏幕分享、窗口分享和图片,如下图是添加一个摄像头后的效果。


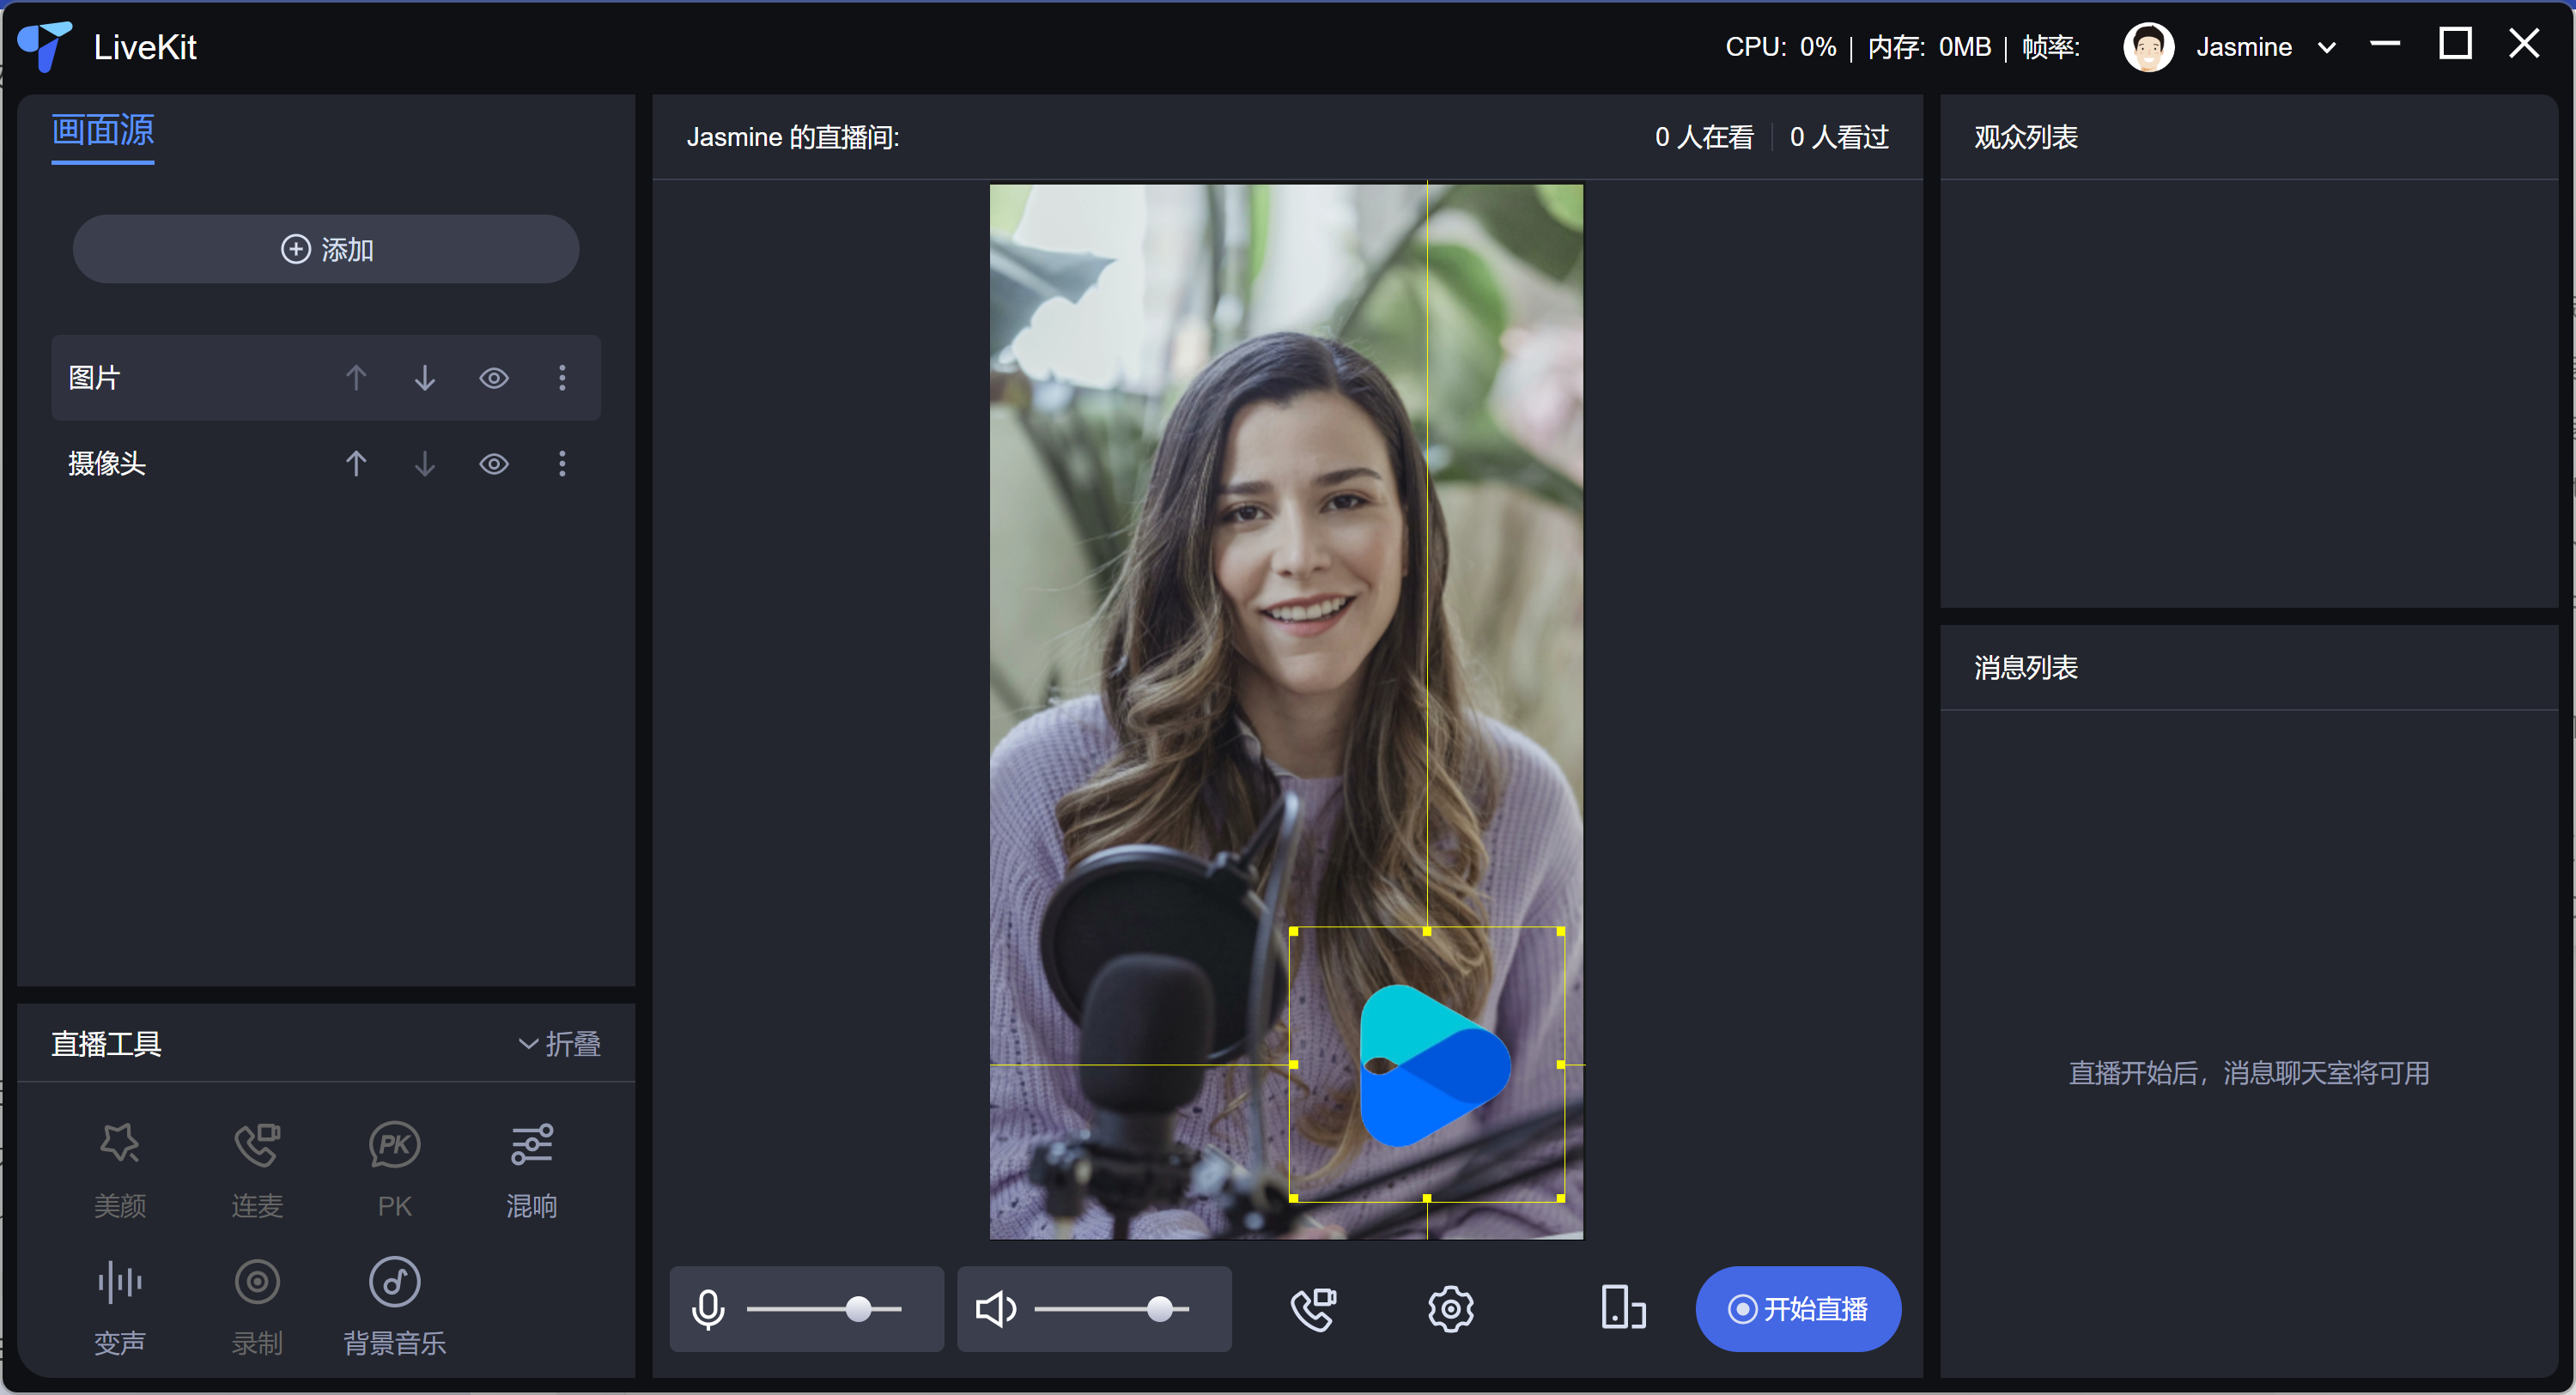
2. 添加 Logo 图片
如果您在直播时,需要添加自己的品牌 Logo,可以添加 Logo 图片。如下图,是添加一个背景透明的 Logo 图片后的效果,新添加的图片周围会有黄色边框,表示当前处于选中状态。处于选中状态的多媒体源,可以使用鼠标移动位置、调整大小,使用右键菜单对多媒体源进行旋转、修改显示层级等。


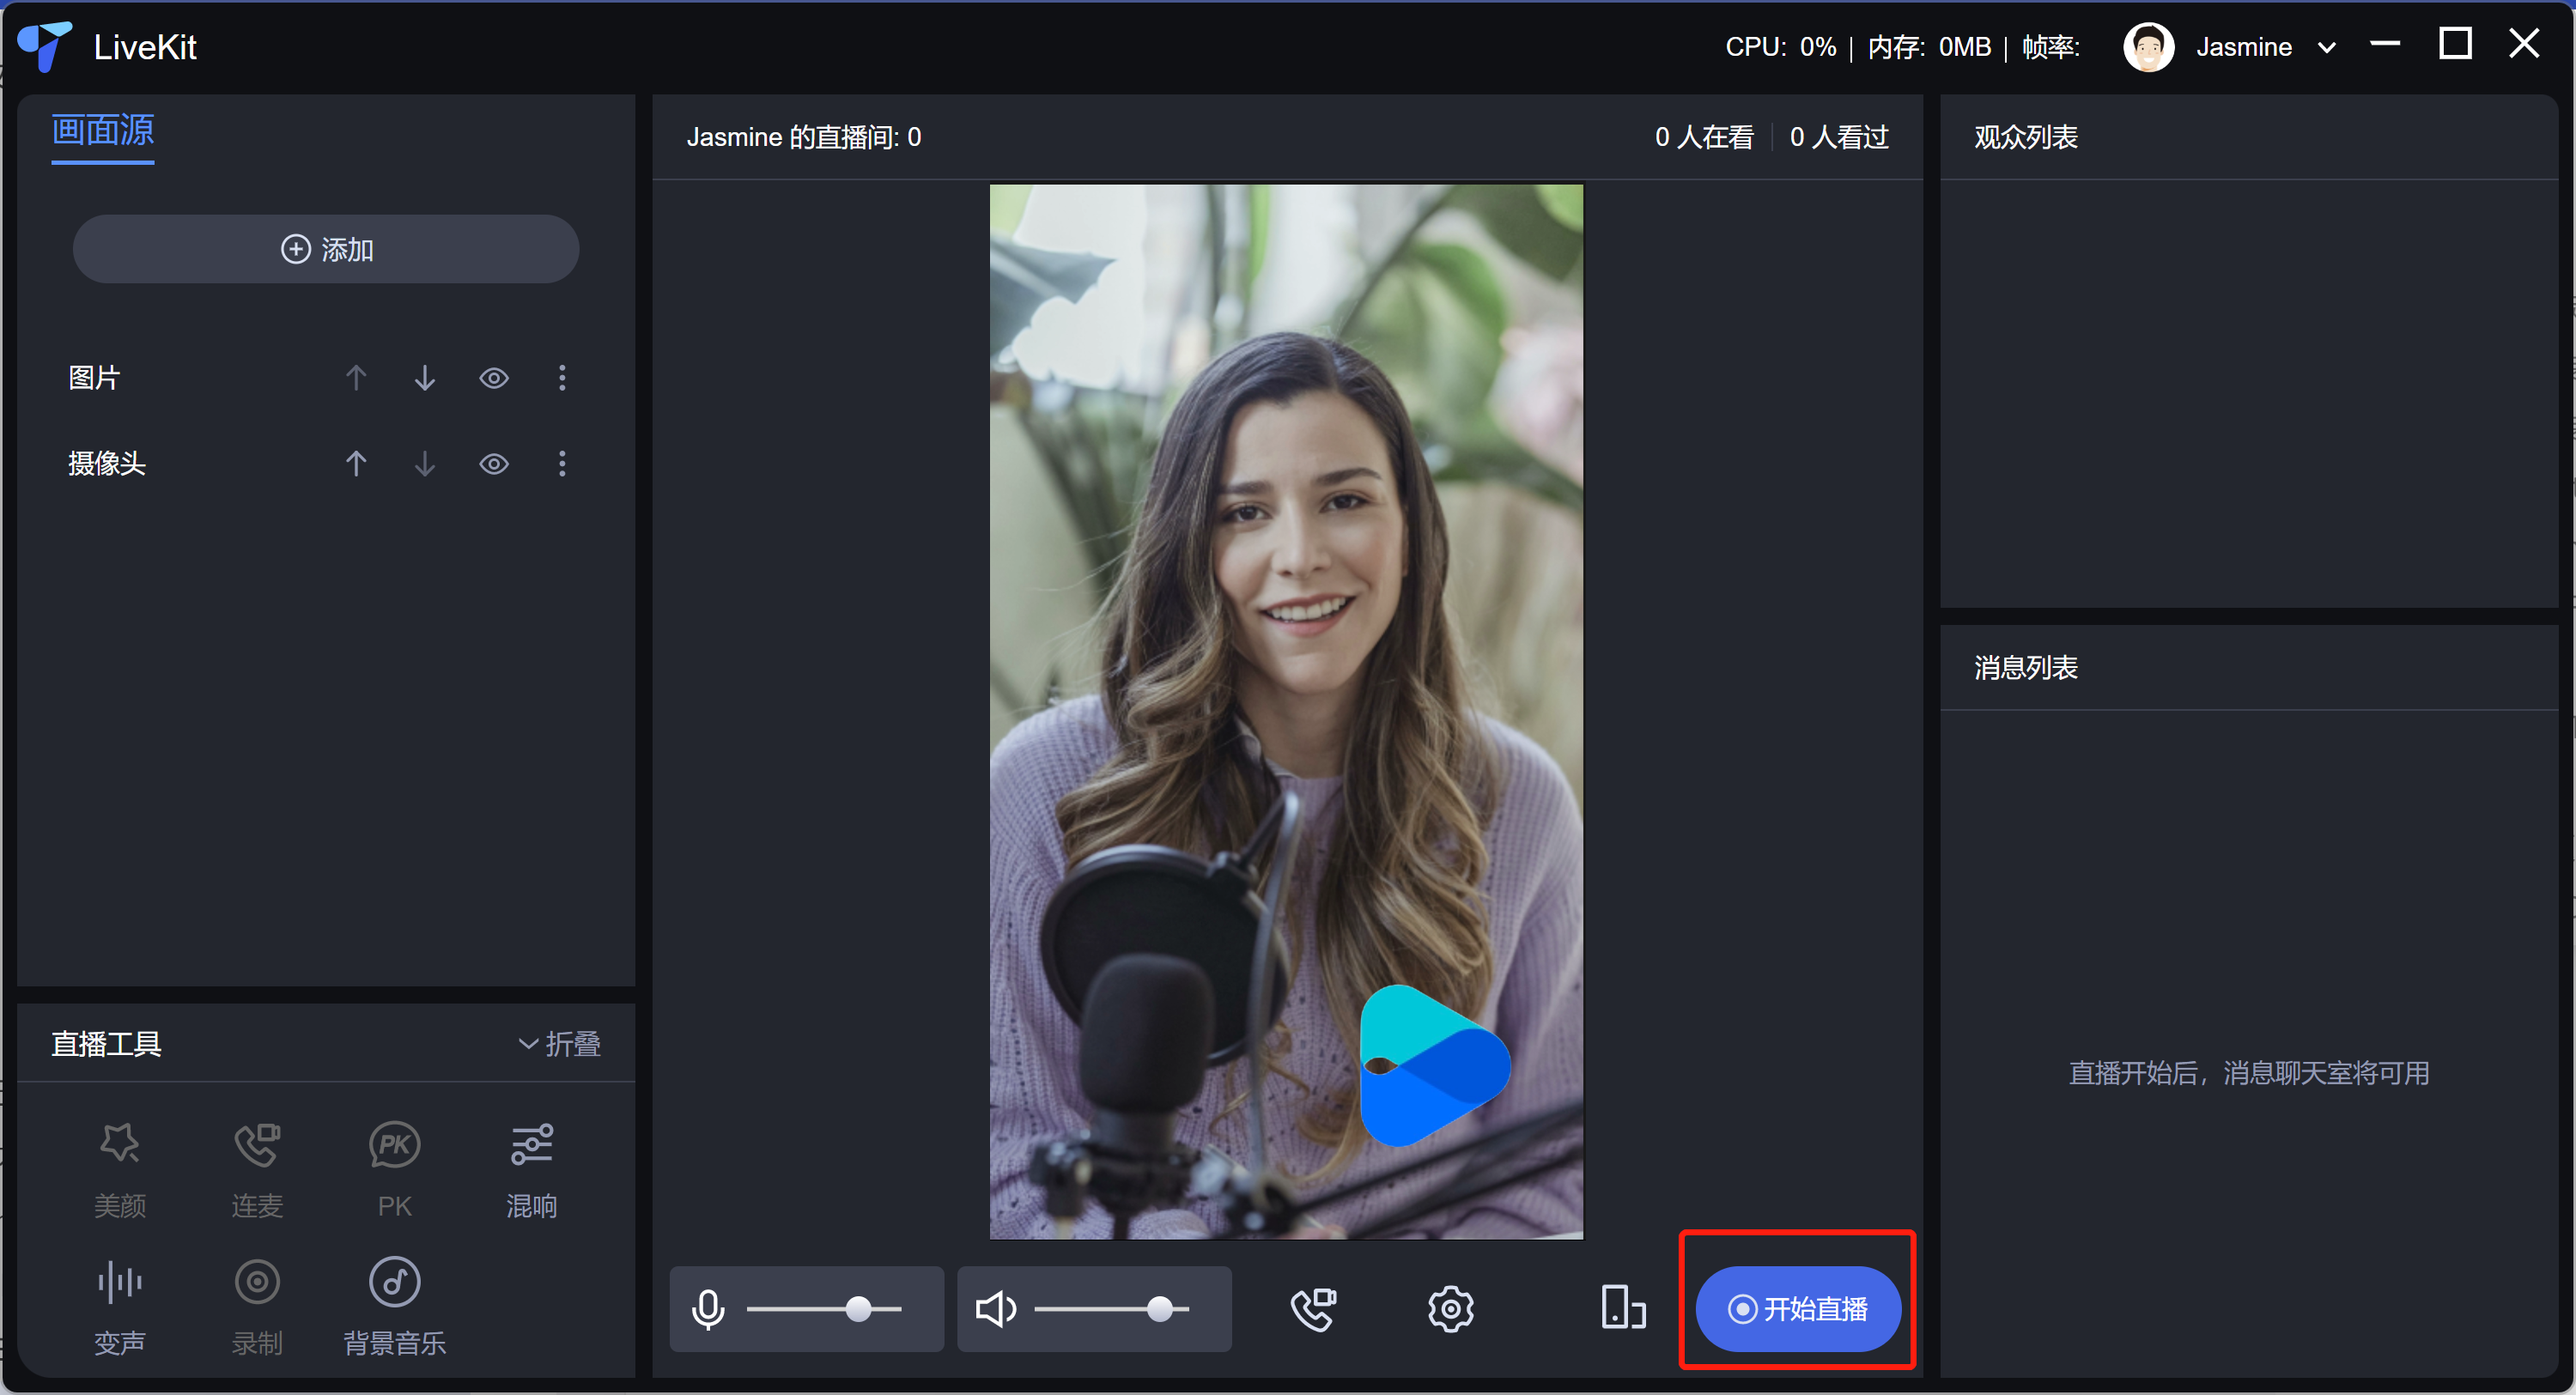
3. 开始直播
单击开始直播,将开启直播推流,成功开播后,开始直播按钮会变成结束直播,单击可结束直播推流。


4. 观看直播
步骤六:构建安装包
1. 复制 `ultra-live-electron/electron-builder.json5` 文件到您项目的根目录下,文件中的 `productName` 和 `appId` 请改成您应用的相应信息。
2. 在您工程的 package.json 文件中新增以下命令,支持构建应用程序安装包。
{"scripts": {"build:win64": "electron-builder --win --x64","pack:win64": "npm run build && npm run build:win64"}}
3. 构建应用程序安装包。
进入您的项目目录,打开命令行终端 `cmd.exe`,执行以下命令即可启动构建,构建好的安装包在您工程的
release目录下。npm run pack:win64
4. 安装构建的应用程序安装包,并运行。
常见问题
没有符合接入条件的项目工程,如何解决?
根据您的具体情况,建议采用不同的途径:
如果您还没有项目工程,建议您直接使用我们开源的 Github 项目为基础,克隆一份作为您的项目工程。
如果您的项目与我们要求的接入条件不一致,可以参照我们开源的 模板工程: trtc-electron-template-vue3-webpack ,对照调整您的项目。
如果您的项目是 JavaScript 工程,不支持 TypeScript ,可以参照常见问题 “3. 如何在 JavaScript 工程中集成?”。
是否支持 Vite 构建、接入?
如何在 JavaScript 工程中集成?
JavaScript 工程无法直接集成 TUILiveKit,需要改造您的工程,使其支持 TypeScript。步骤如下:
1. 安装依赖
npm install --save-dev typescript@4.5.5 @typescript-eslint/eslint-plugin@5.4.0 @typescript-eslint/parser@5.4.0 @vue/cli-plugin-typescript@5.0.0 @vue/eslint-config-typescript@9.1.0
2. 复制
ultra-live-electron/tsconfig.json文件到您工程的根目录下。3. 复制
ultra-live-electron/src/global.d.ts文件到您工程的根目录下。如何开启美颜功能?
TUILiveKit 使用的美颜功能基于 腾讯特效 SDK 实现,如需使用,需要 购买相应服务,获取
licenseURL和 licenseKey, 填入src/TUILiveKit/utils/beauty.ts文件即可。注意:
生产项目需要通过调用后台服务获取
licenseURL 和licenseKey,此处写入 JavaScript 文件可以快速启用,但是licenseURL和licenseKey泄露风险极高,仅适合快速接入、体验。// beauty.tsexport const XmagicLicense = {licenseURL: "",licenseKey: "",};
交流与反馈
如果有任何需要或者反馈,您可以联系:info_rtc@tencent.com。

 是
是
 否
否
本页内容是否解决了您的问题?