Cloud Streaming Services
- Release Notes and Announcements
- Announcements
- Product Introduction
- CSS Products
- Purchase Guide
- Basic Service Fee
- Value-Added Service Fee
- Live Video Broadcasting (LVB)
- Live Event Broadcasting (LEB)
- Live Video Caster
- General Cloud Director
- Console Guide
- Domain Management
- Adding Domain Names
- Push Domain Name Management
- Playback Domain Name Management
- HTTPS Configuration
- Feature Configuration
- Time Shifting
- Live Stream Moderation
- Live Subtitling
- Laboratory
- Monitoring
- Log Service
- Feature Guide
- Push and Playback
- WebRTC Protocol Push Stream
- Features
- Live Recording
- Practices in Typical Scenarios
- Live Streaming Security
- Global CSS Service
- Callback Notifications
- User Guides for Common Third-Party Tools
- SDK Guide
- 1. Stream Push
- API Documentation
- Making API Requests
- Monitoring Data Query APIs
- Billing Data Query APIs
- Live Transcoding APIs
- Delayed Playback Management APIs
- Domain Name Management APIs
- Watermark Management APIs
- Certificate Management APIs
- Live Stream Mix APIs
- Stream Pulling APIs
- Recording Management APIs
- Time Shifting APIs
- Live Callback APIs
- Screencapturing and Porn Detection APIs
- Authentication Management APIs
- Live Stream Management APIs
- Ops Guide
- Troubleshooting
- About Pushing
- Generating Push URLs
- PC Push
- Playing Method
- Web Player
- Web Player TcPlayer
- Web CSS Player 1.0
- Web VOD Player 1.0
- FAQs

DocumentationCloud Streaming ServicesConsole GuideFeature ConfigurationLive SubtitlingSubtitle Templates
Subtitle Templates

Last updated: 2025-03-13 16:27:31
The live subtitling feature can perform real-time Automatic Speech Recognition (ASR) in live streaming, convert the speech into subtitles, and support translation into the target language. Currently, the feature offers multilingual speech translation services. In practical applications, choose appropriate target language combinations based on your service needs and audiences.
This document describes how to create, modify, and delete subtitle templates through the console.
Points of Attention
A template takes effect about 5 to 10 minutes after successfully created.
To use the live subtitling function, after binding a subtitle template to a transcoding template, you should obtain the subtitle stream with the suffix of a playback address corresponding to the name of a transcoding template.
Live subtitling function is a premium service. Utilizing this function will incur live transcoding fees and ASR fees of MPS. Cross-language translation may generate voice translation fees of MPS. For the specific billing rules, please refer to billing document.
Prerequisites for Use
The CSS service has been activated.
Creating Subtitle Template
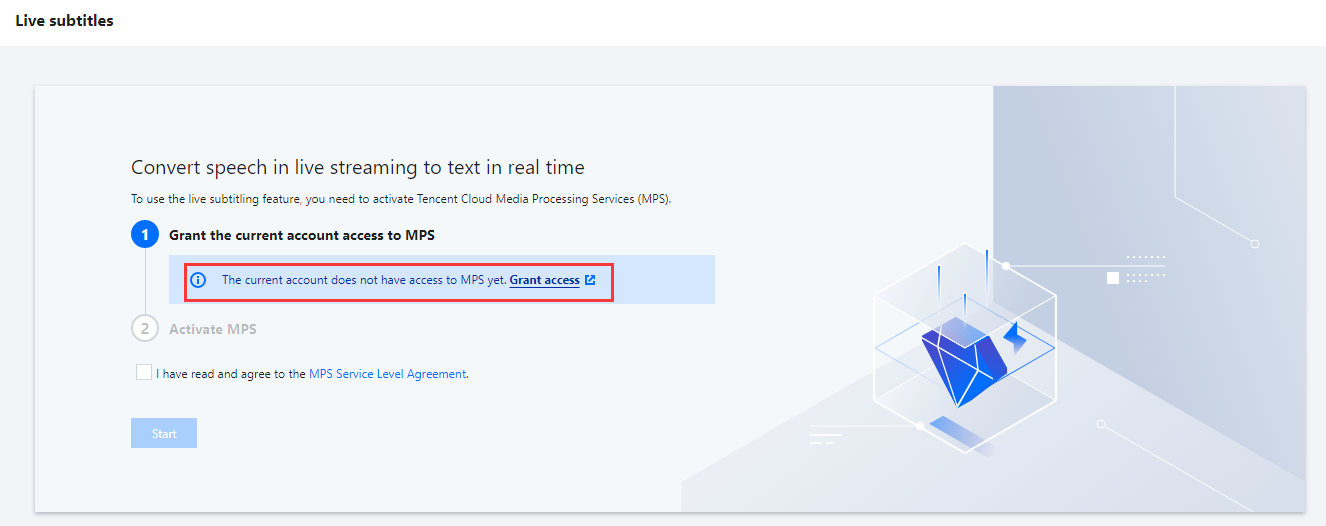
1. Log in to the CSS console. Choose Feature Configuration > Live Subtitles.
Note:
Due to the use of the live subtitling function, creating a service role and authorizing the current account role to use MPS product services are required for the first creation of a subtitle template.
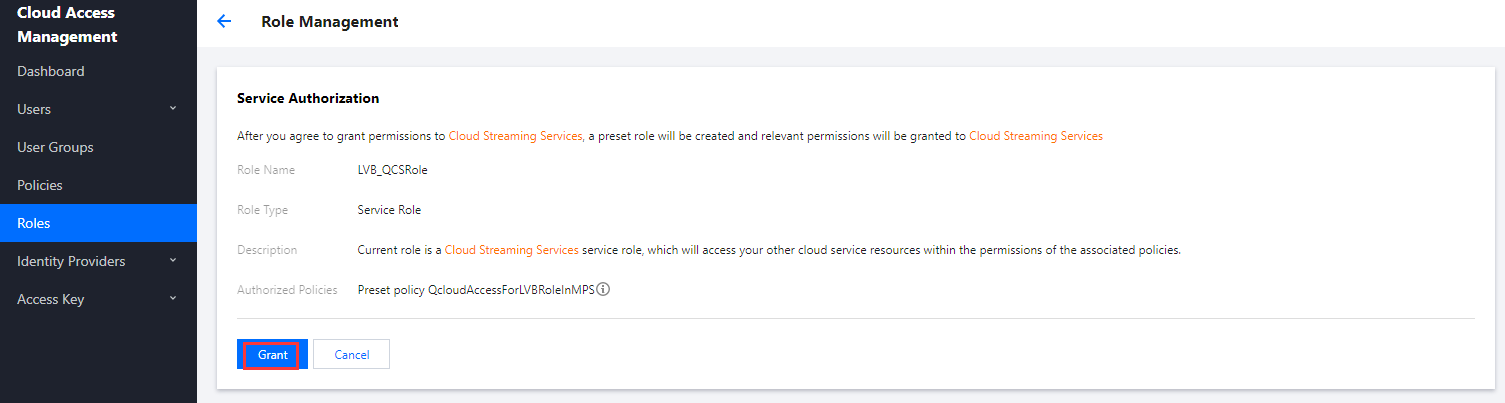
2. Click Grant access to enter the CAM role management page.
3. On the role management page, click Grant. After completing identity authentication to finish the MPS authorization, you can utilize the MPS service normally.
4. After successful authorization, select the service agreement and click Start. The system will automatically activate the MPS product and open the live subtitling management page.
5. Click Create template to enter the subtitle template creation page and configure the template as follows:
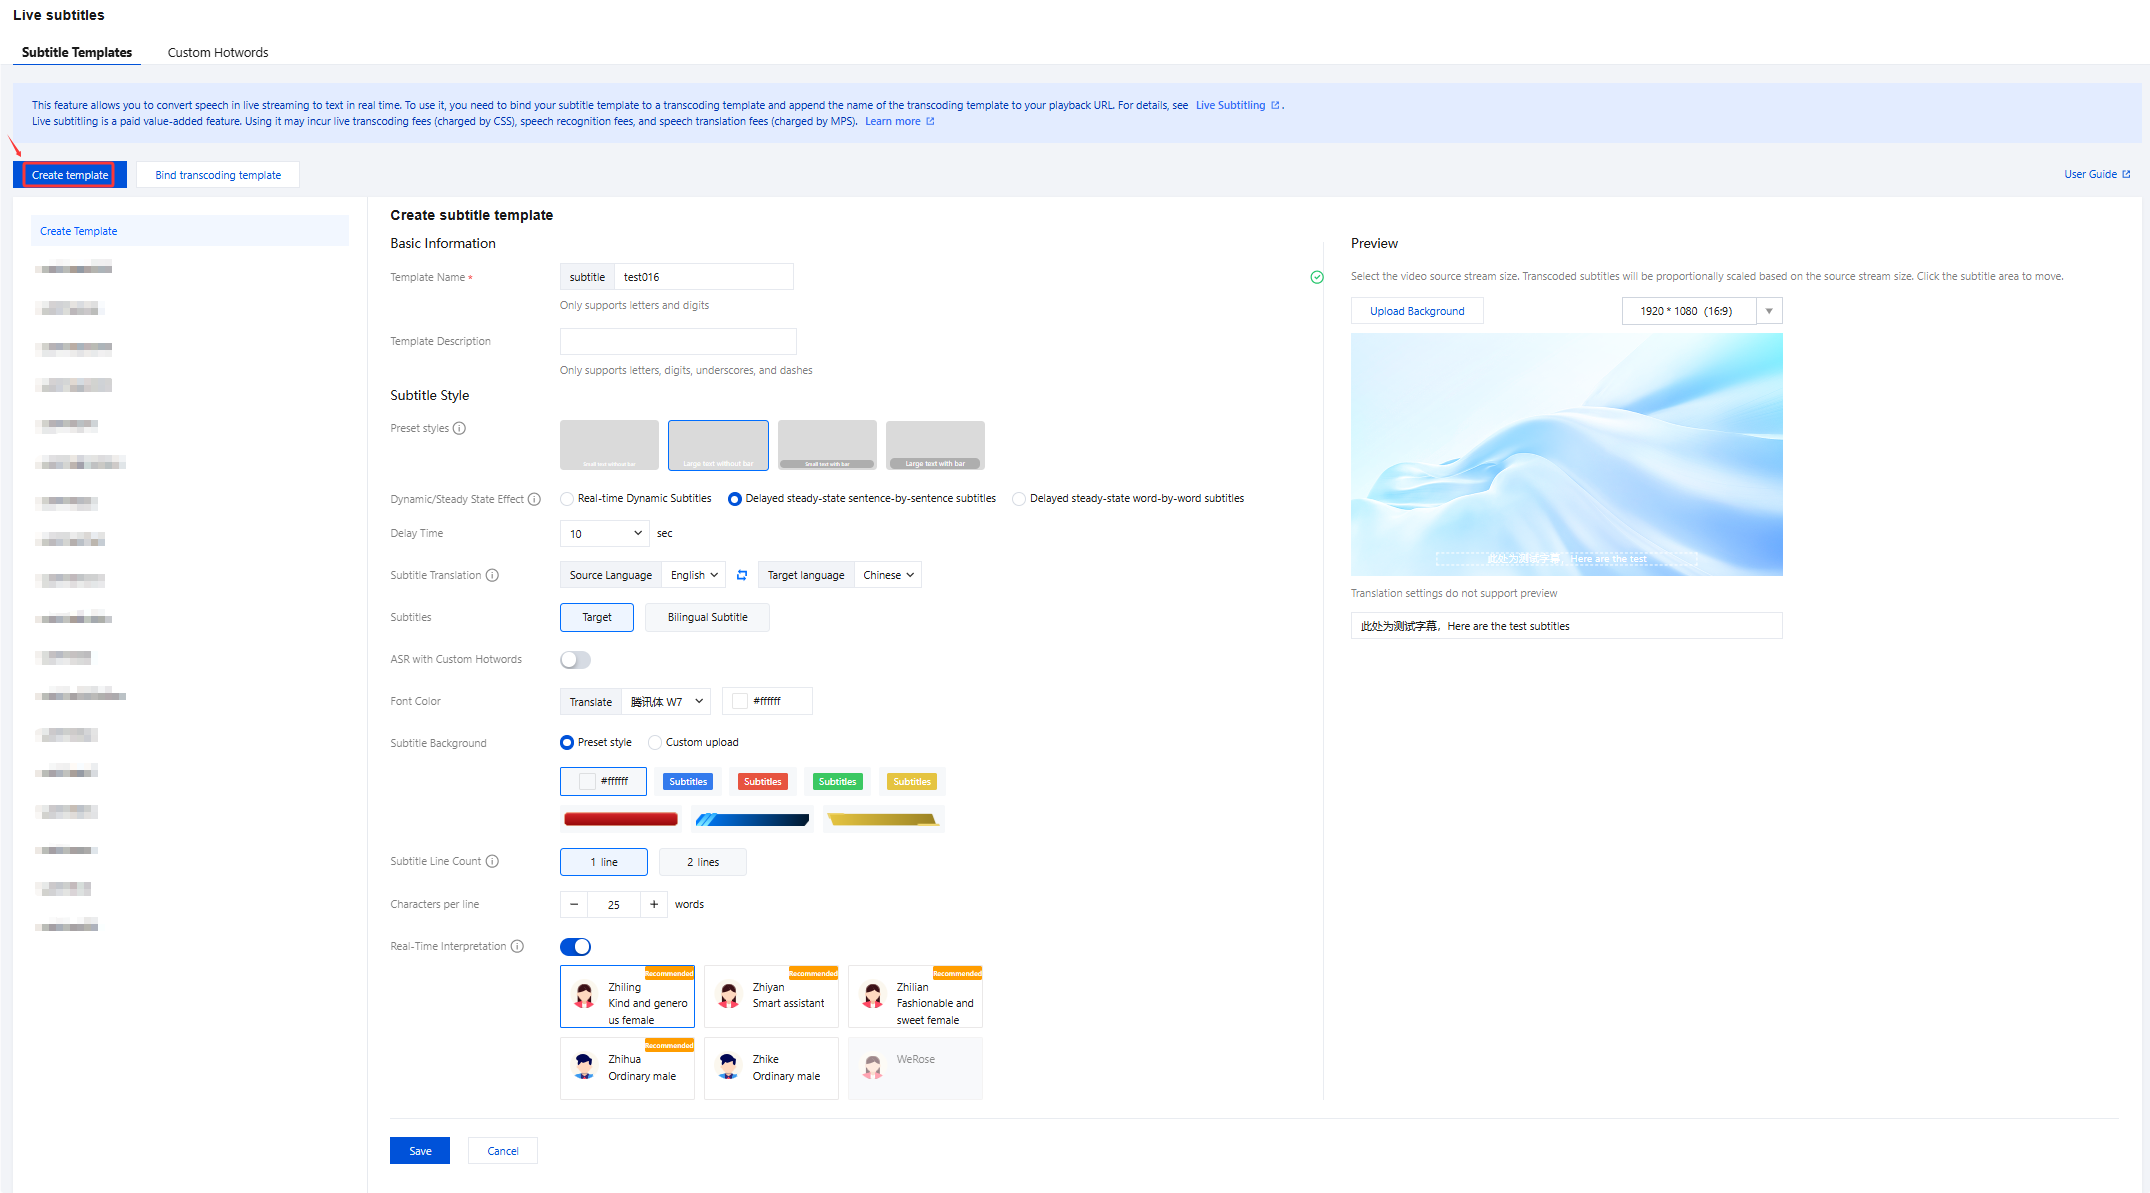
Note:
The font selection for subtitles will vary depending on the Subtitle Translation and Subtitles you have selected. Select the appropriate source language type, target language, and subtitles according to your actual needs.
Configuration Item | Description |
Template Name | The prefix for the template name is fixed to "subtitle". The template name cannot exceed 30 characters and only supports English letters and digits. |
Template Description | Subtitle template description. It contains up to 100 characters, only supporting letters, digits, underscores, and dashes. |
Preset Styles | When preset styles are selected, the system will automatically adapt Font Color , Subtitle Line Count , Characters per Line , and Margins and Line Spacing . Currently, the following preset styles are supported: The default option is Small text without bar. You may select Small text without bar, Large text without bar, Small text with bar, or Large text with bar to configure the settings. After selection, the system will automatically set the corresponding subtitle style, which can be modified. Modifying configurations will clear the selected preset styles. |
Dynamic/Steady State Effect | The default setting is delayed steady-state sentence-by-sentence subtitles. You can switch it to real-time dynamic subtitles or delayed steady-state word-by-word subtitles. When choosing the Delayed Steady State Subtitles mode, it's necessary to set the latency, with a default value of 10 seconds. Available latency options include 20 seconds, 30 seconds, and 60 seconds. Note: When you choose real-time dynamic subtitles, subtitles in live streaming will be dynamically corrected word by word based on changes in speech. When you choose delayed steady-state word-by-word subtitles, the system will delay the display of live streaming based on the set time, but the full-sentence subtitle mode provides a better viewing experience. |
Subtitle Translation | The default source language is Chinese. English, Japanese, and Korean are also supported. It is set to "No Selection" by default. Switching to any of other unselected options in the source language is supported. For example, if "English" is selected as the source language, the available options for the target language include: No Selection, Chinese, Japanese, and Korean. Cross-language translation will incur voice translation fees of MPS. ASR fees will be generated without translation. For more details, please see Content II. If you need to translate it into other languages, please submit a ticket to contact us. |
Subtitles | Source is supported by default. Target and Bilingual Subtitle are also supported. By selecting the three options of Source language , Target language , and Subtitles , you can achieve subtitle effects in different languages. |
ASR Associating with Custom Hotwords | The Automatic Speech Recognition (ASR) with custom hotwords feature is disabled by default. Enabling custom hotwords can improve the recognition accuracy of ASR for proprietary words. After enabling the feature of custom hotword lexicons, you need to select the hotword lexicon you want to apply. If you have not created a hotword lexicon, you can click Add to jump to the Create Hotword Lexicon page. For detailed steps, see Creating Library. 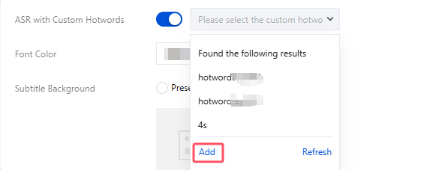 |
Font Color | The font selection for subtitles will vary depending on the Subtitle Translation and Subtitles you have selected. You may choose a variety of fonts such as DIN Alternate Bold, Helvetica, or HelveticalnseratLTPro-Roman, or select a custom font according to your service needs. If you need a custom font, click Custom to upload the font. The system will display a confirmation box. Before uploading and using the font, check the notice, and then click OK. Note that only .ttf files are supported. Before using a custom font, make sure that you have obtained legal authorization, otherwise Tencent Cloud will not bear any legal responsibility arising from the use. The default font color is white , and you can customize the font color according to your preference. When "Subtitles" is set to "Bilingual Subtitle," it supports the configuration of distinct fonts and colors for each language individually. |
Subtitle Background | You can select a preset style or upload a custom background according to your business needs. After selection, you can preview the effect. Custom upload instructions: Upload a file in PNG format, with a file size not exceeding 1MB. |
Subtitle Line Count | Options are 1 or 2 . When lines exceed the displayed range, only the latest content will be displayed. |
Characters per line | The value range is 1 - 200. When the Preset styles are set to "Small text without bar" or "Small text with bar," the default number of characters per line is 65. When the Preset styles are set to "Large text without bar" or "Large text with bar," the default number of characters per line is 25. One Chinese character counts as 1, while one English character or number counts as half. The fewer the characters per line are, the larger the font size is. |
Real-Time Interpretation | The Real-Time Interpretation feature is disabled by default and is only displayed when the subtitle effect is set to Delayed steady-state sentence-by-sentence subtitles, and the Subtitles option is configured as either Target or Bilingual Subtitle. Note: Note: If this feature is enabled, the system will interpret the source audio to the target audio with the selected voice effect. This feature will incur recognition fees. For billing rules, seeBilling Documentation. This feature does not support Korean currently. By clicking and dragging the mouse over the relevant language play icon, you can audition the real-time voice translation effects. When the translation language is set to English, Real-Time Interpretation supports the following voice: WeRose. By clicking and dragging the mouse over the relevant language play icon, you can audition the real-time voice translation effects. |
Preview | You can adjust the subtitle display effect by dragging and scaling the position and size of the subtitle content type and subtitle background. Uploading background images, selecting the preview window resolution, and entering the subtitle test content can help you preview subtitle styles. The subtitle effect is for reference only and the test content will not be translated. |
6. Click Save to save the current template.
Binding Transcoding Template
1. Log in to the CSS console. Choose Feature Configuration > Live Subtitles.
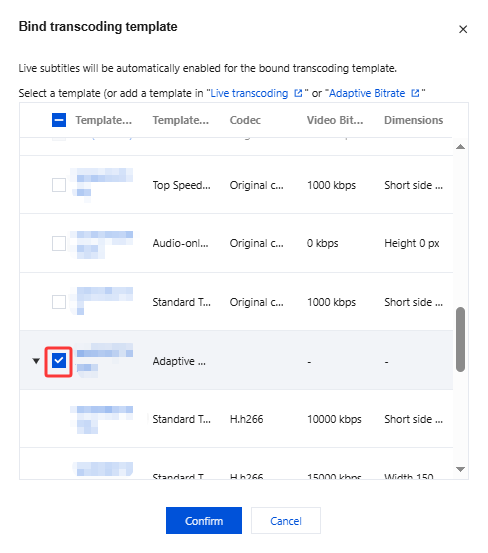
2. The system allows subtitle templates to bind transcoding templates or adaptive bitrate templates. Both transcoding templates and adaptive bitrate templates have similar subsequent use procedures. A transcoding template serves as an example for description below:
2.1 Direct association with transcoding templates:
2.1.1 Associate a transcoding template after it is successfully created: After the successful creation of a transcoding template, click Bind transcoding template in the upper left corner.

2.1.2 Select Transcoding template or Adaptive bitrate template according to your actual business requirements, then click Confirm.
2.2 In order to bind a playback domain to the corresponding transcoding template, the subtitle effects will be output at the same time when the transcoding stream is obtained subsequently (add _ transcoding template name after the corresponding live stream StreamName to generate a transcoding stream address).
Note:
Once the transcoding template is bound, the subtitle function configured in the transcoding template will be synchronously activated.
Unbinding
1. Log in to the CSS console. Choose Feature Configuration > Live Subtitles.
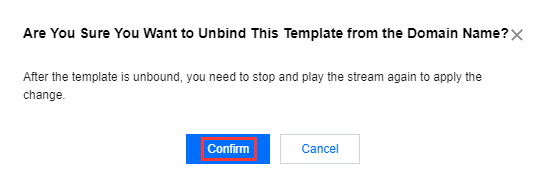
2. Select the transcoding template associated with a domain name and click Unbind.

3. Confirm whether to unbind the current associated domain. Click Confirm to unbind it.
Modifying a Template
1. Log in to the CSS console. Choose Feature Configuration > Live Subtitles.
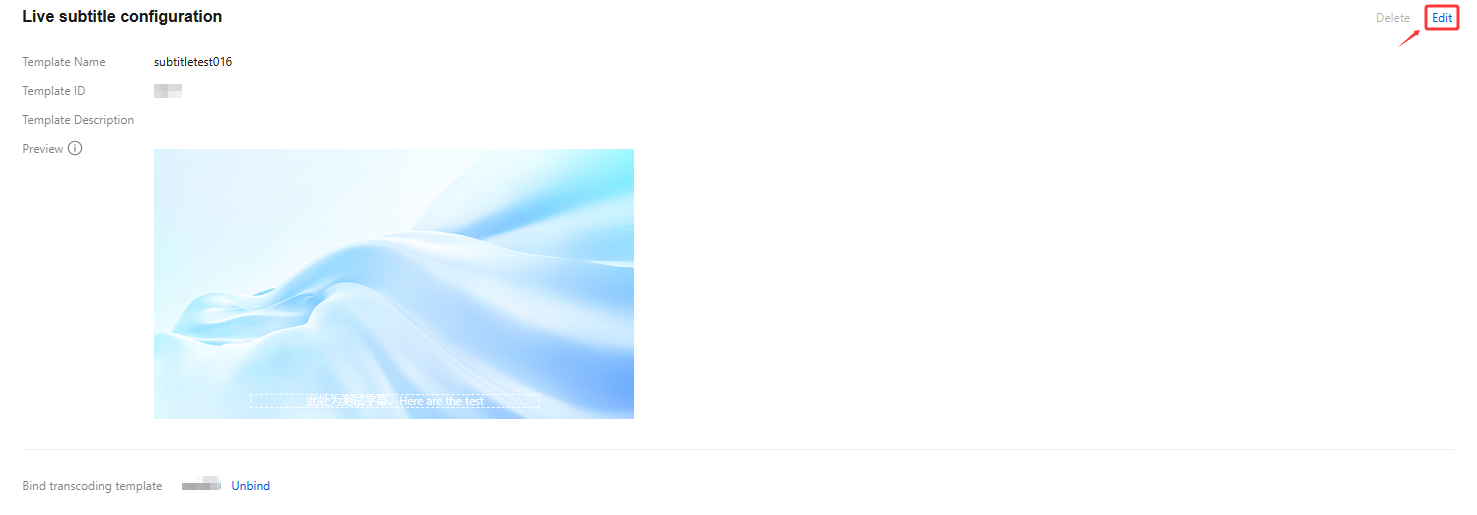
2. Select the successfully created subtitle template and click Edit on the right to go to the template information modification page. Click Save to finish the modification.
Deleting a Template
Note:
If the template has already been associated, you must first unbind it before you proceed with the deletion process.
Note that a template cannot be restored after deleted. Be careful when performing operations.
1. Log in to the CSS console. Choose Feature Configuration > Live Subtitles.
2. Select the successfully created subtitle template and click Delete above.
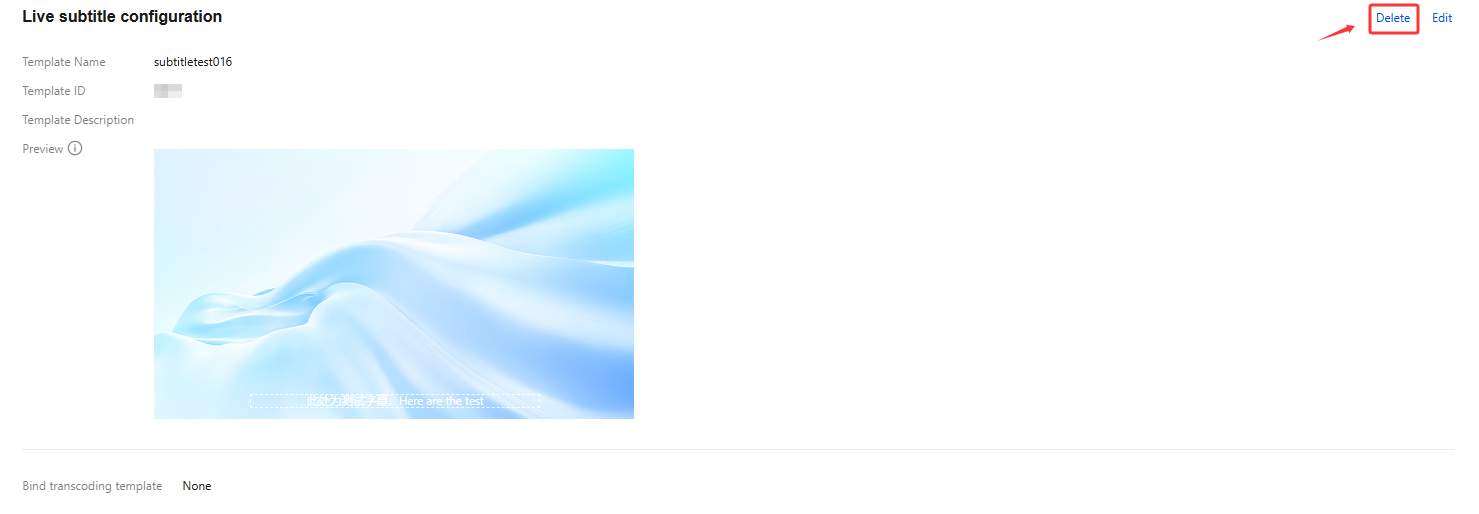
3. Confirm whether to delete the current subtitle template, then click Confirm to successfully delete it.
Was this page helpful?
You can also Contact Sales or Submit a Ticket for help.
Yes
No