After configuring the Live Video Caster (LVC), you can start PGM output. LVC also supports recording and relay, enriching downstream live broadcast systems.
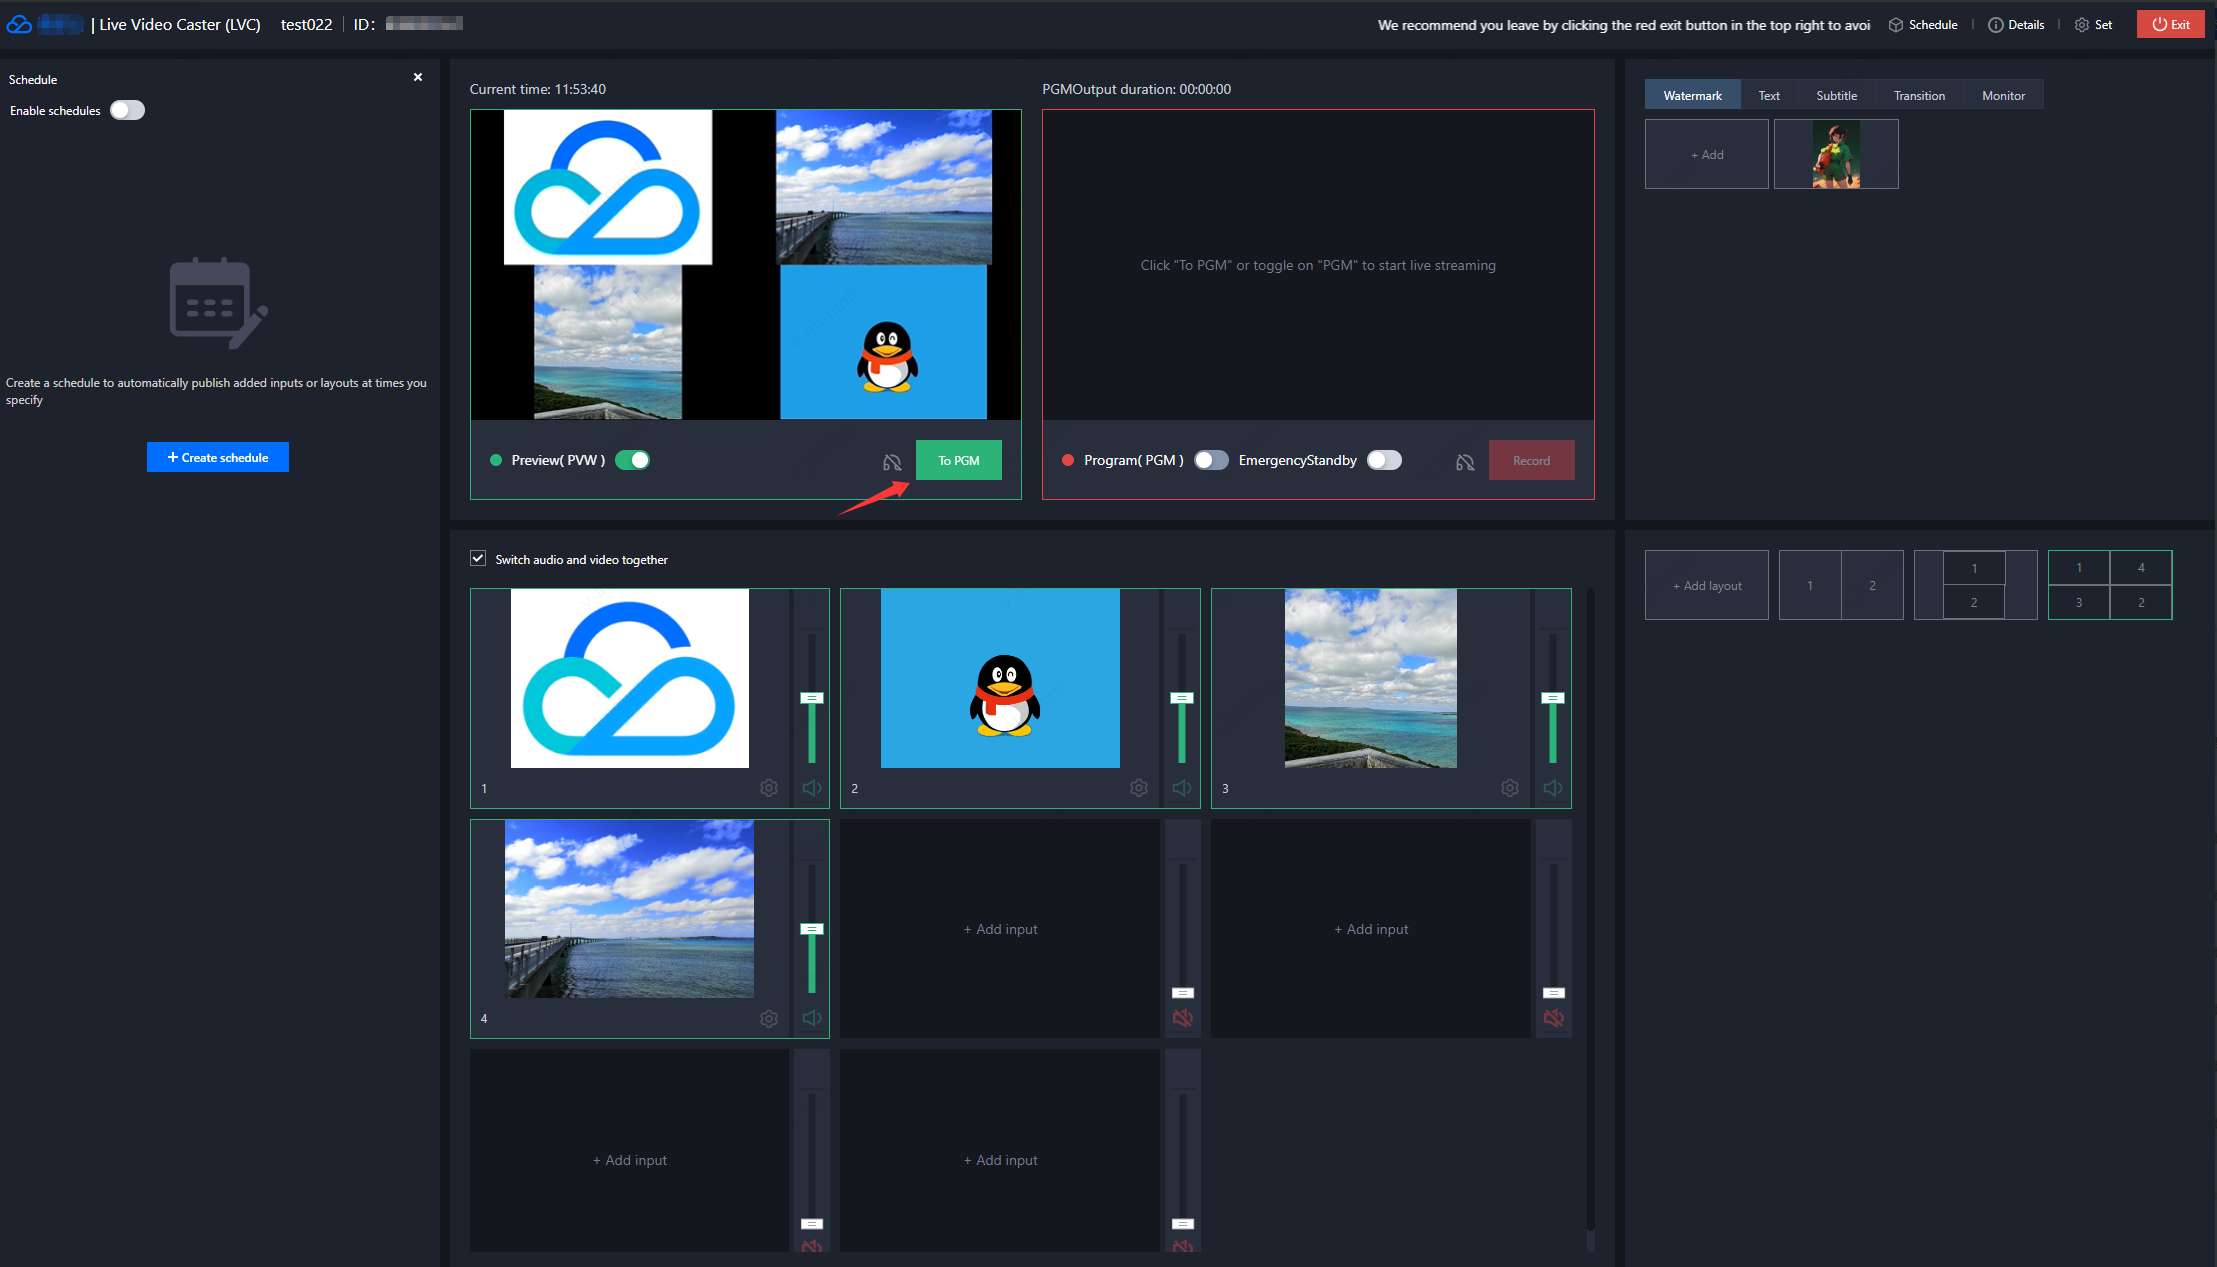
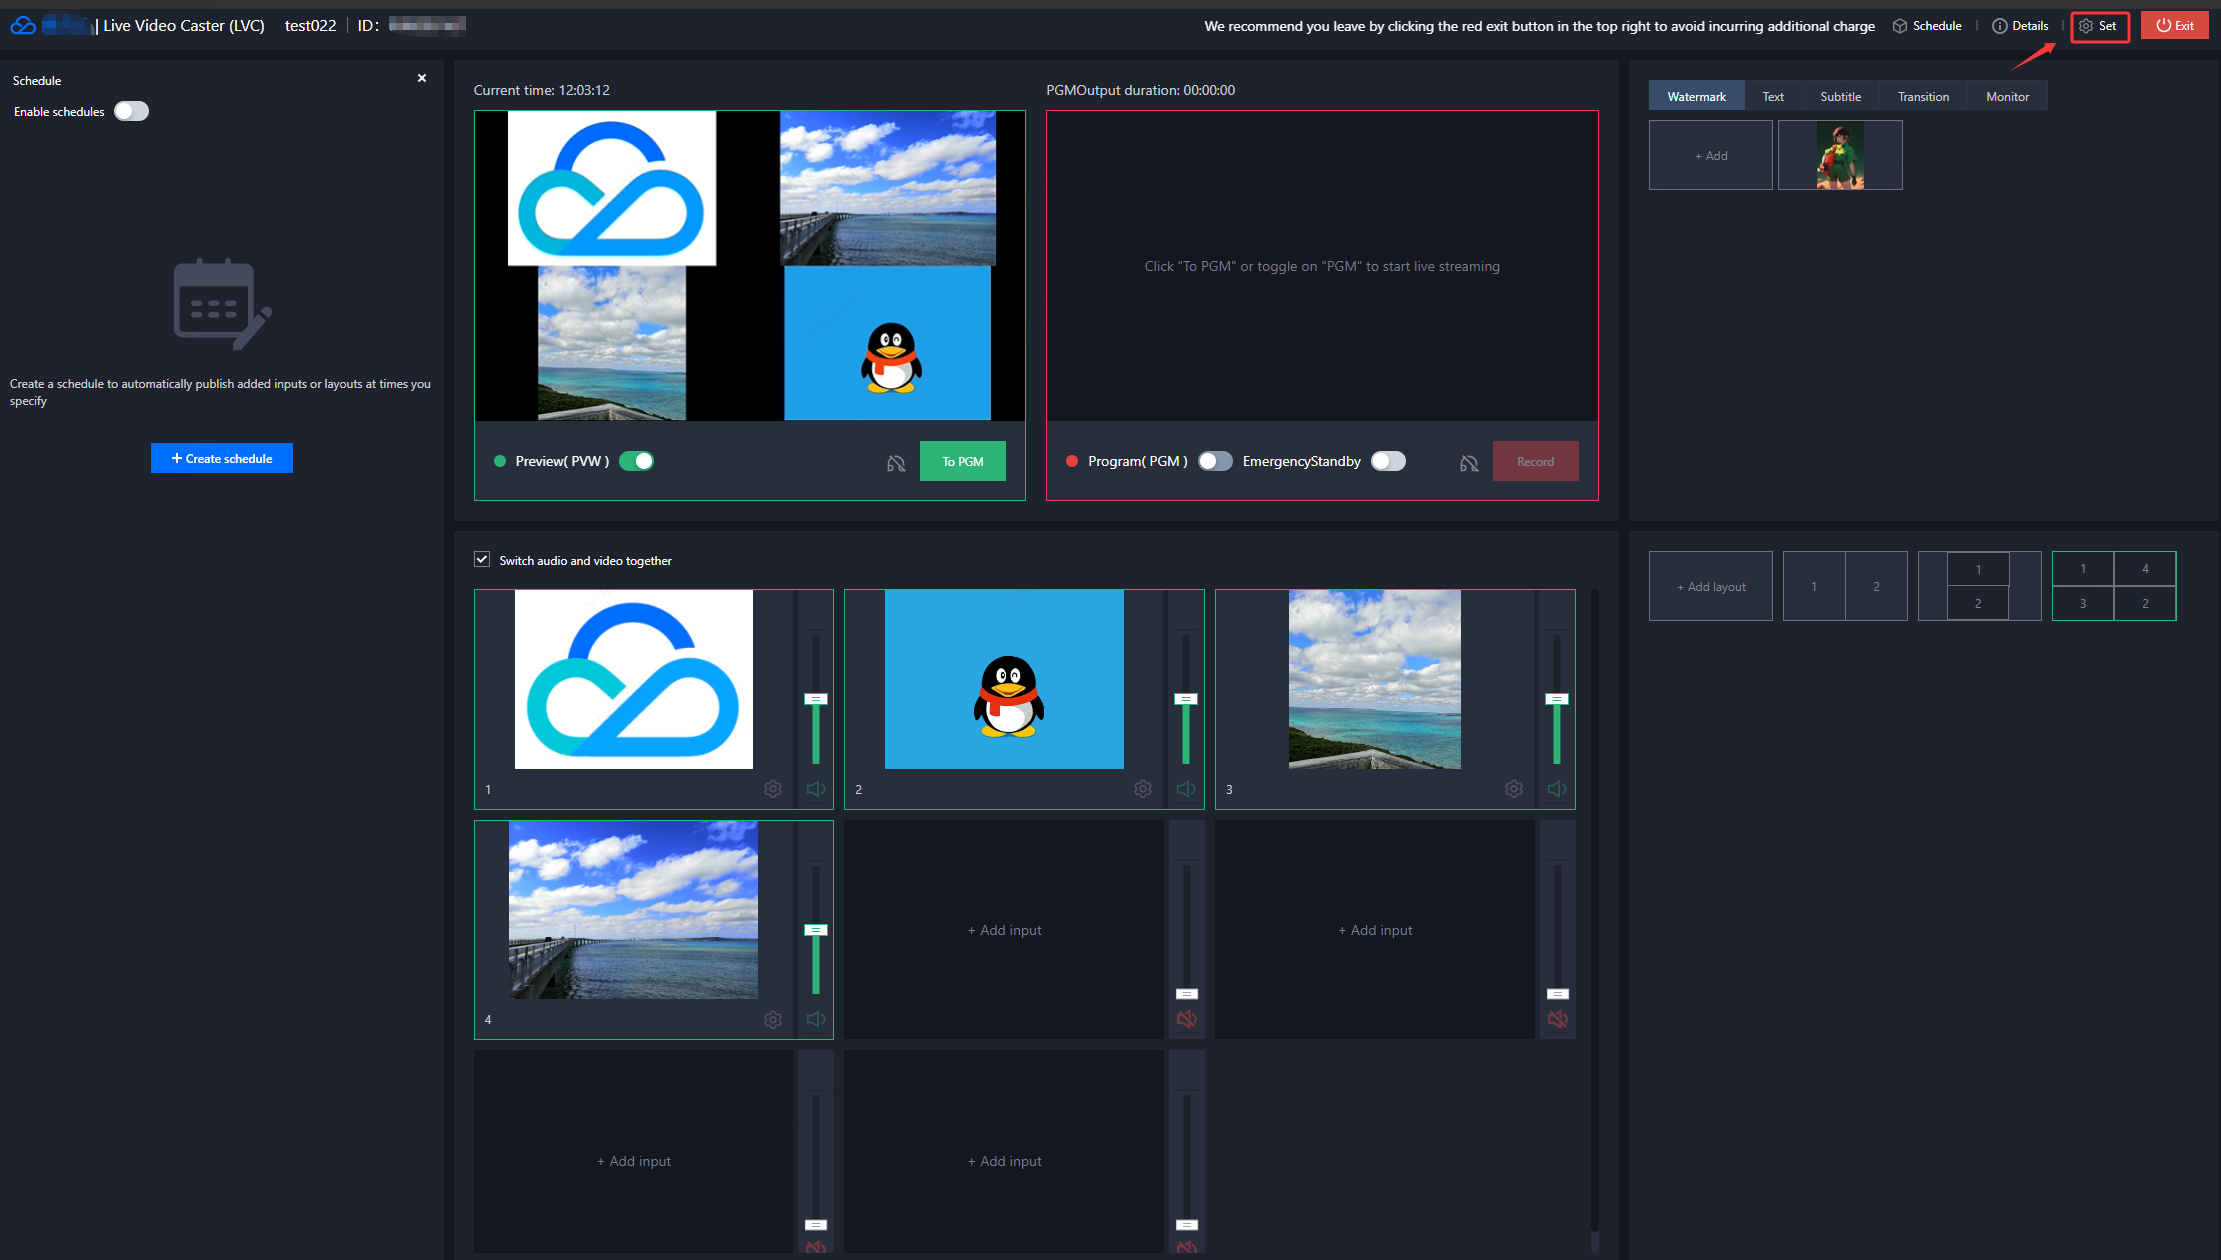
1. If the preview effect meets your requirements, you can click To PGM to start the output.
Note:
A red frame appears on the input source or layout that is currently being used for output, indicating that the input source or layout is in use in PGM.
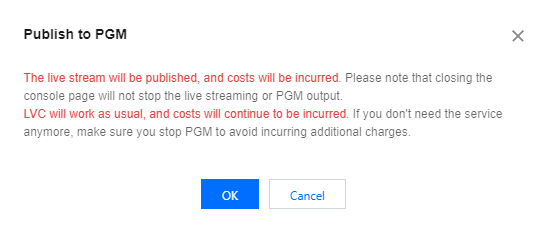
Once the stream is published to PGM, formal output and billing start. Closing the LVC console will not stop the live streaming or PGM output; the LVC will remain in operation and billing will continue. To stop the LVC, you need to manually turn off the PGM.
2. Before publishing the stream, the system once again verifies whether to turn on the main monitor (PGM).
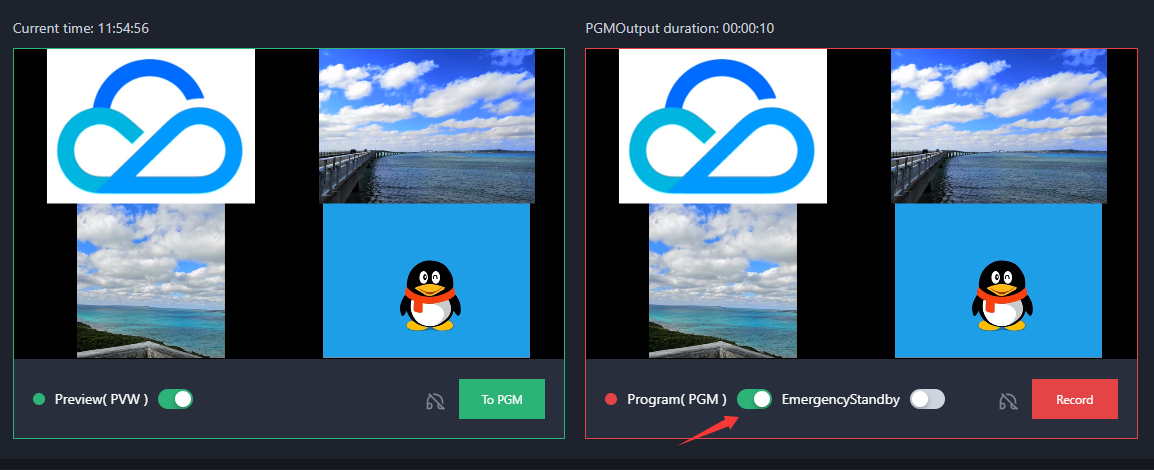
3. Once the output starts, you can see the published stream in the main monitor.
Step 2: Obtaining the Output Playback URL
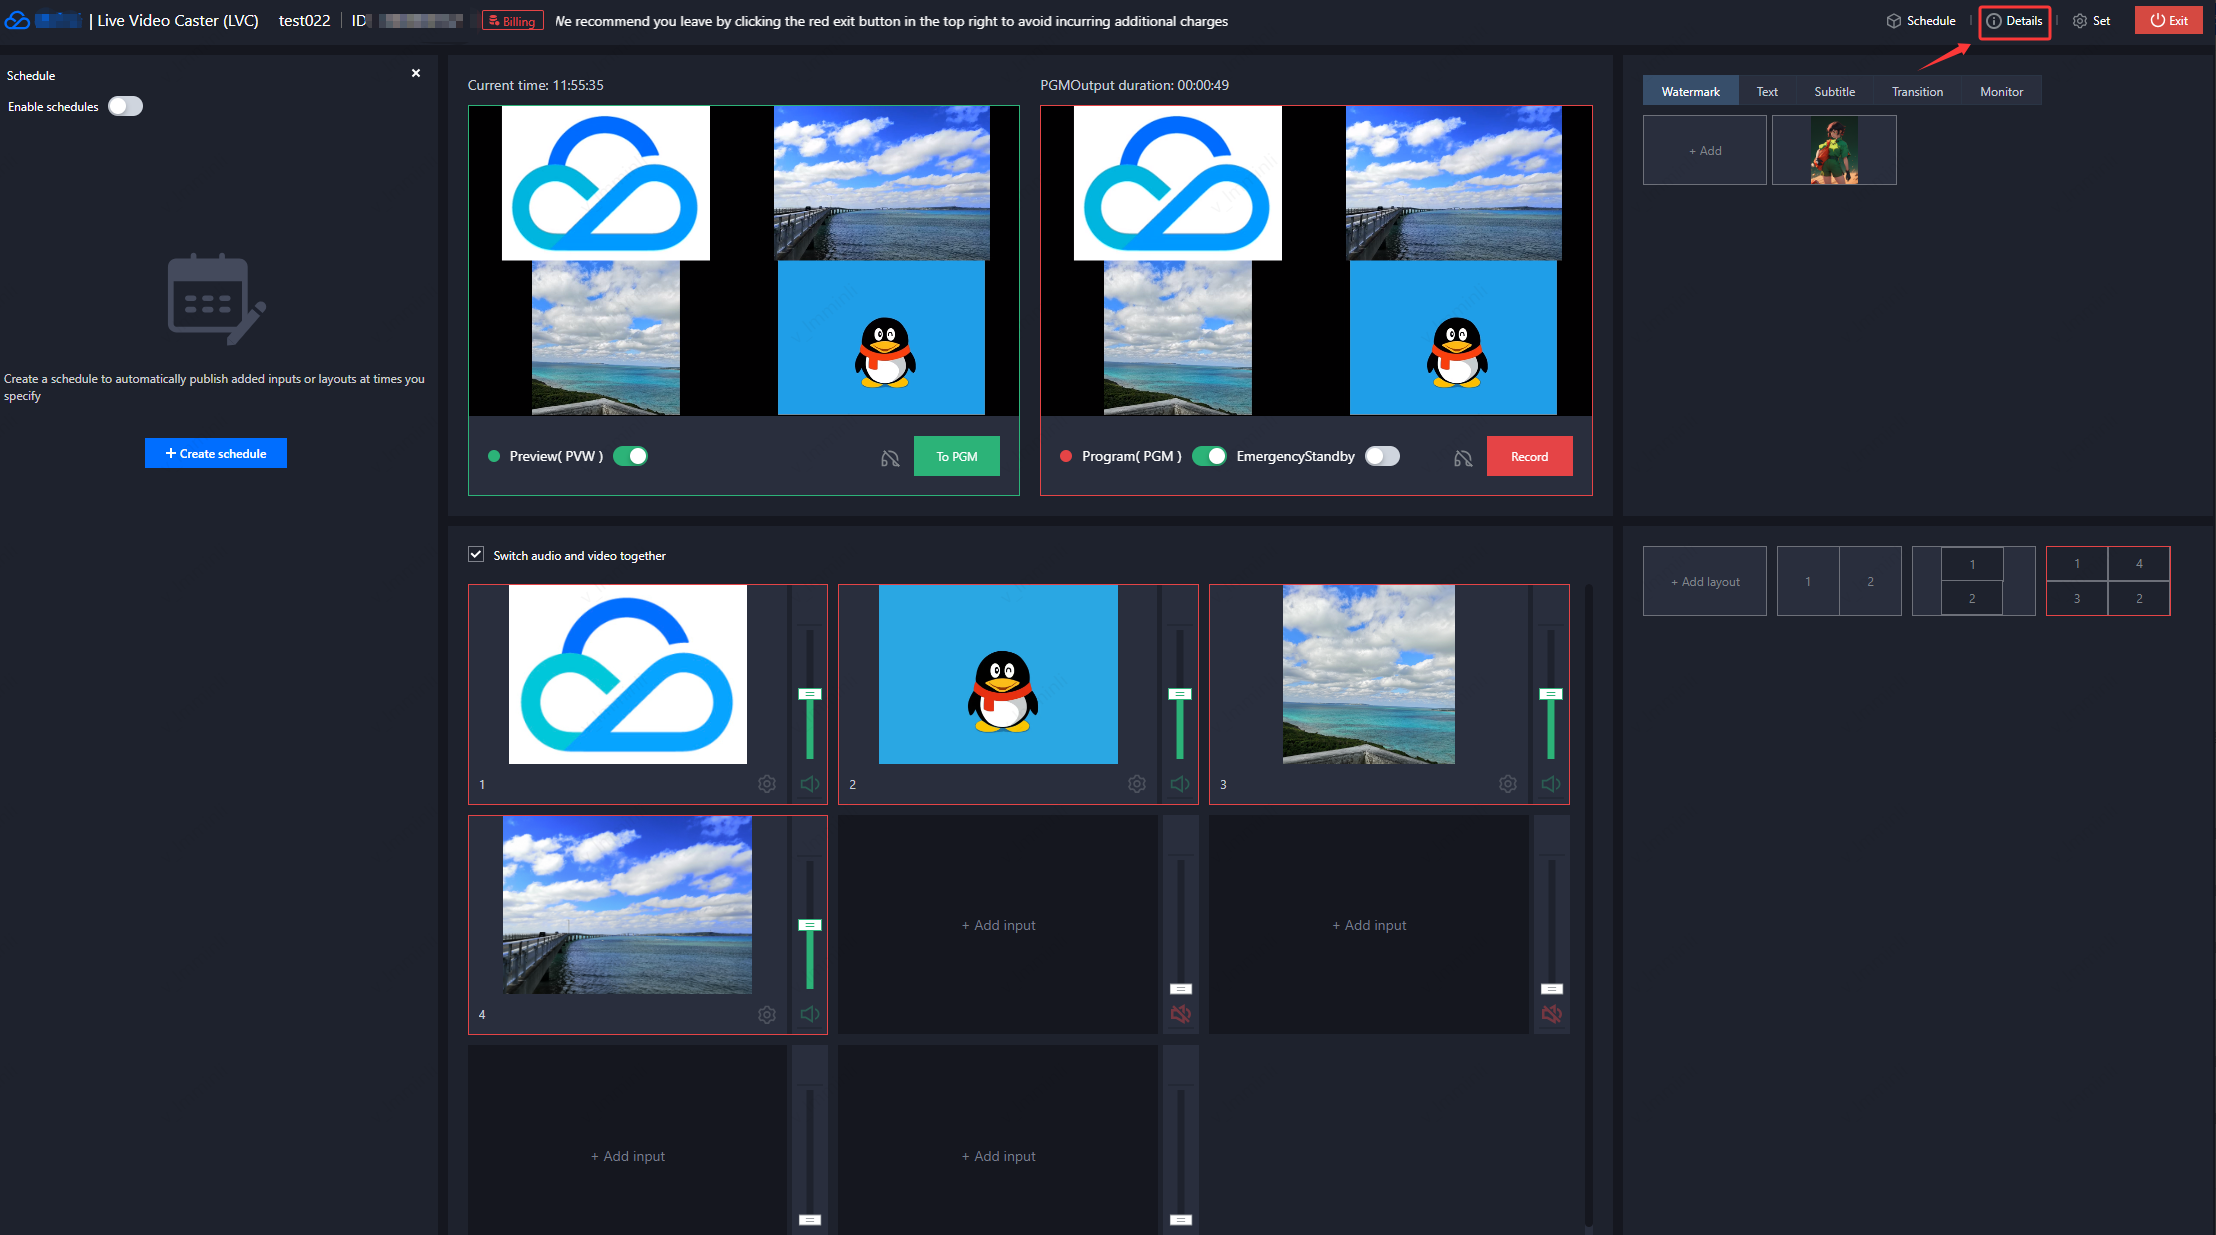
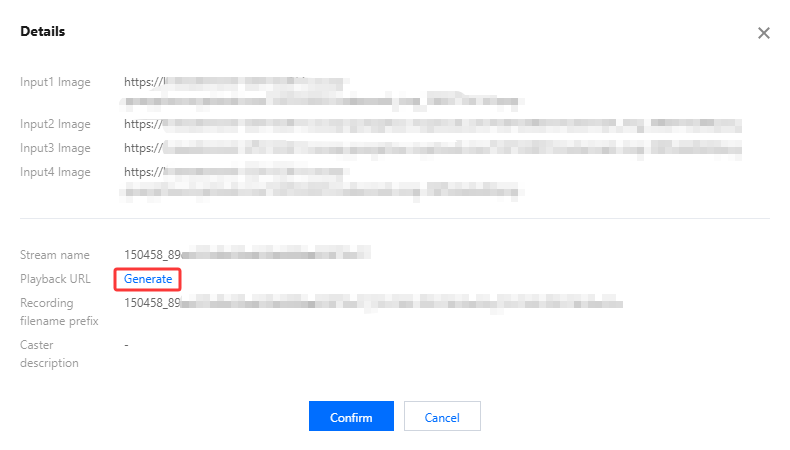
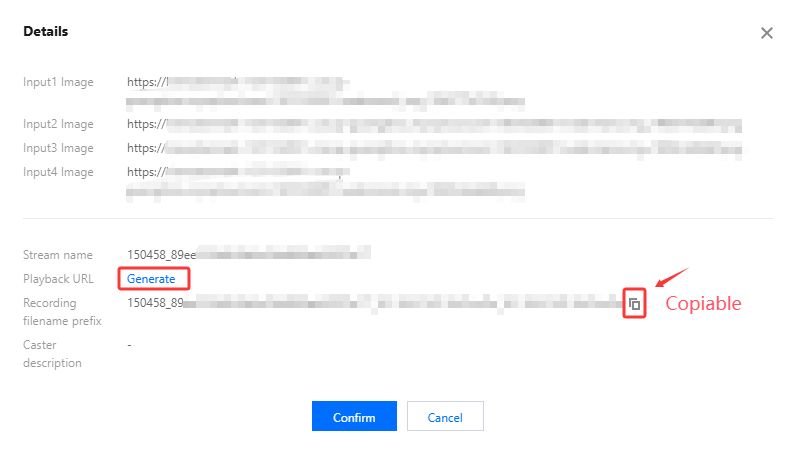
1. After the stream is published to PGM, if you want to obtain the output playback URL, you can click Details in the upper-right corner to enter the details page.
2. Click Generate to enter the Address Generator to generate the URL.
Note:
Make sure you have already successfully configured a CNAME for your domain.
If you have not set a live streaming playback domain, this section is blank and you cannot play the stream through Tencent Cloud CDN.
If you have multiple domains, the LVC system will randomly select a domain to generate a playback URL. If the randomly selected domain does not meet your needs, you can go to the CSS console to generate a playback URL.
Step 3: Recording the Live Stream
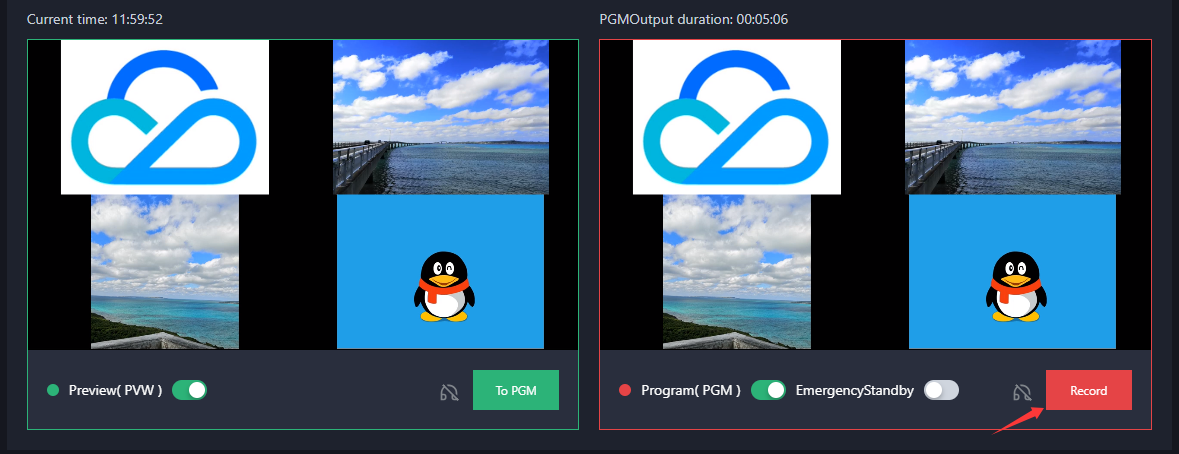
1. Click
in the main monitor (PGM) to enter the recording configuration page.
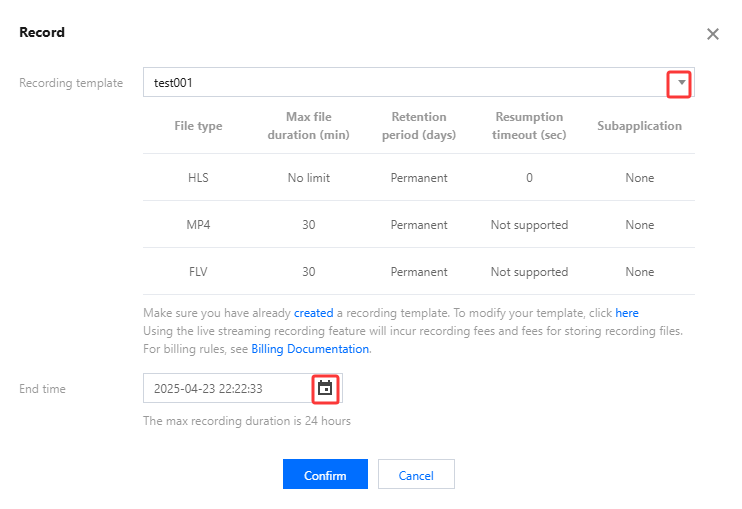
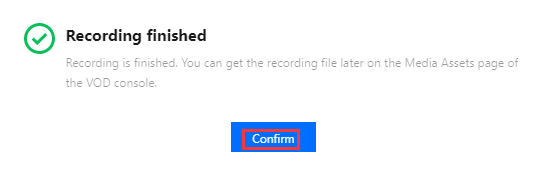
2. Select a recording template you configured and set the recording end time. The maximum recording duration is 24 hours. Click Confirm to start recording.
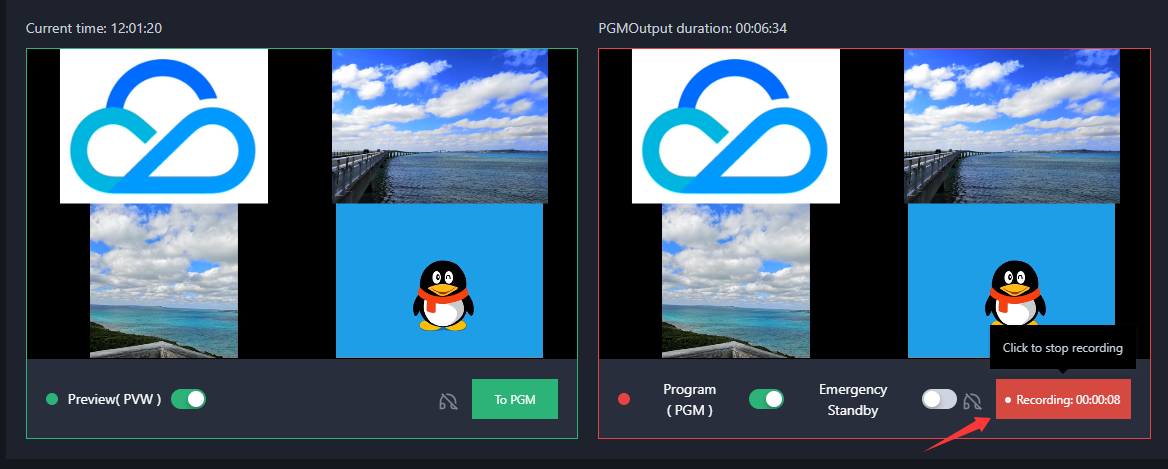
3. Once recording has started, hover your mouse over Recording and click to stop recording.
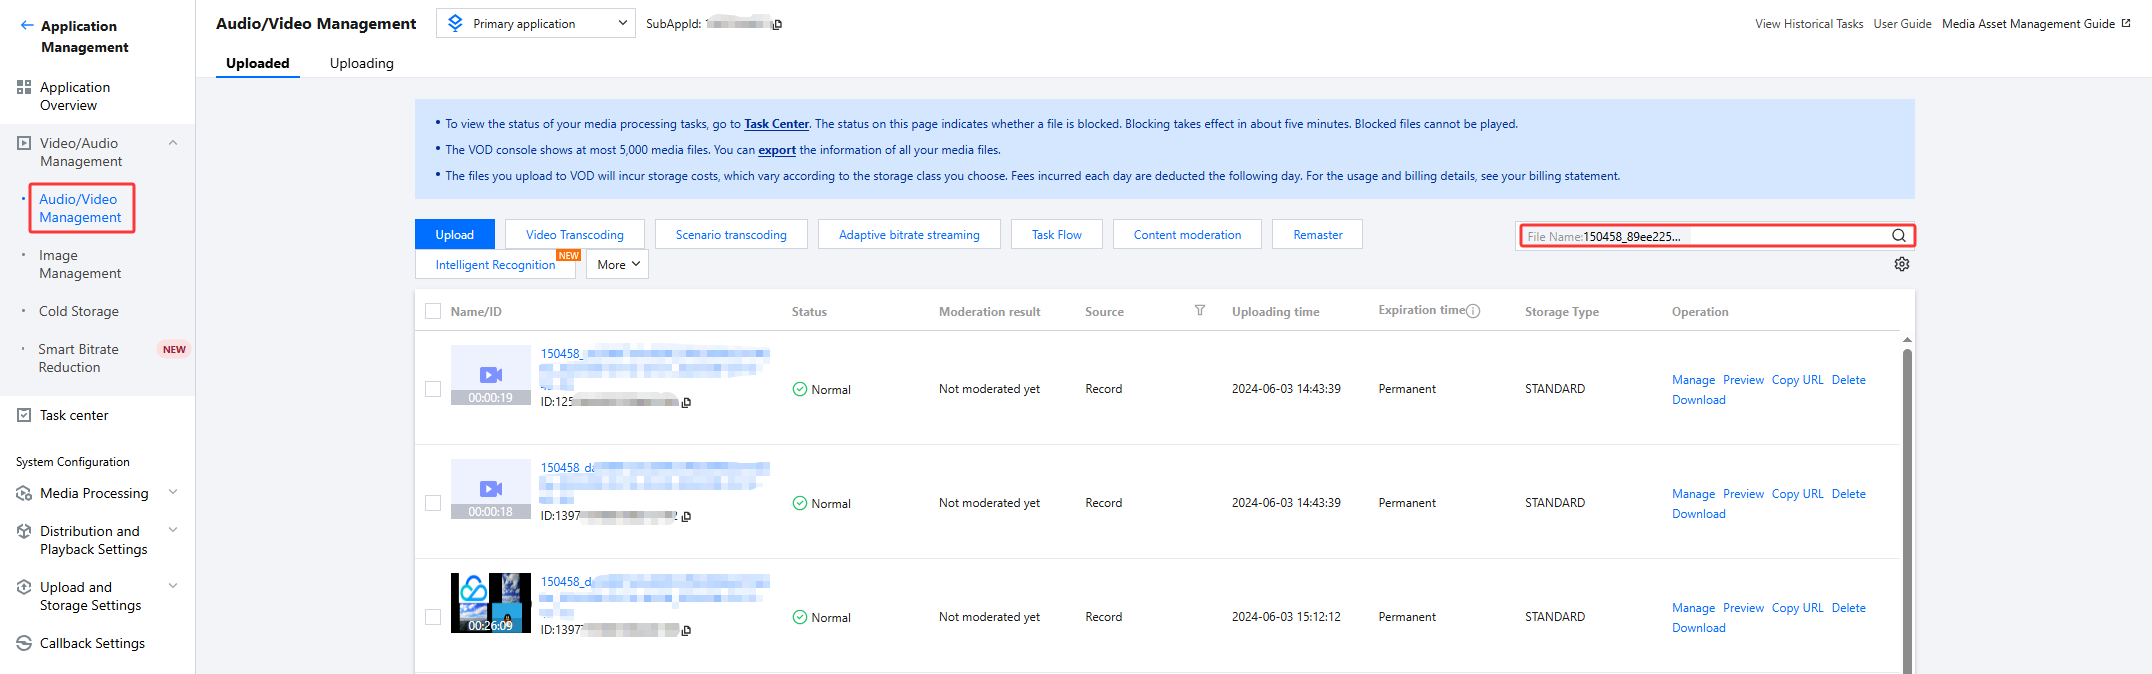
4. The system transmits the recorded file to the Video on Demand (VOD) system. You can view the recorded file in VOD.
5. Click Details in the upper-right corner to enter the details page and view or copy the prefix of your recording file.
Note:
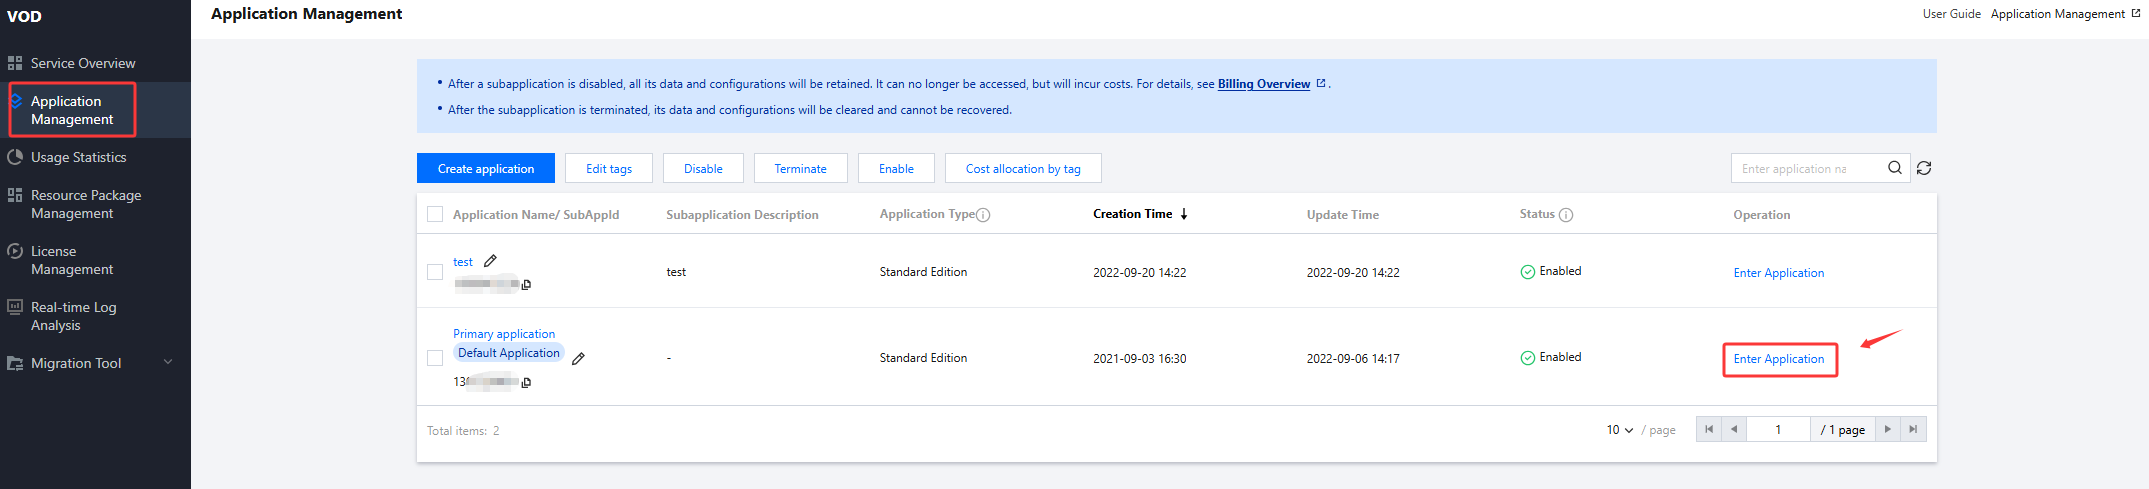
You can go to VOD > Application Management, select an application, and click Enter Application to access the Media Asset Management Guide.
On the Audio/Video Management page, you can search for a recorded video by entering its file prefix.
Step 4: Setting a Relay
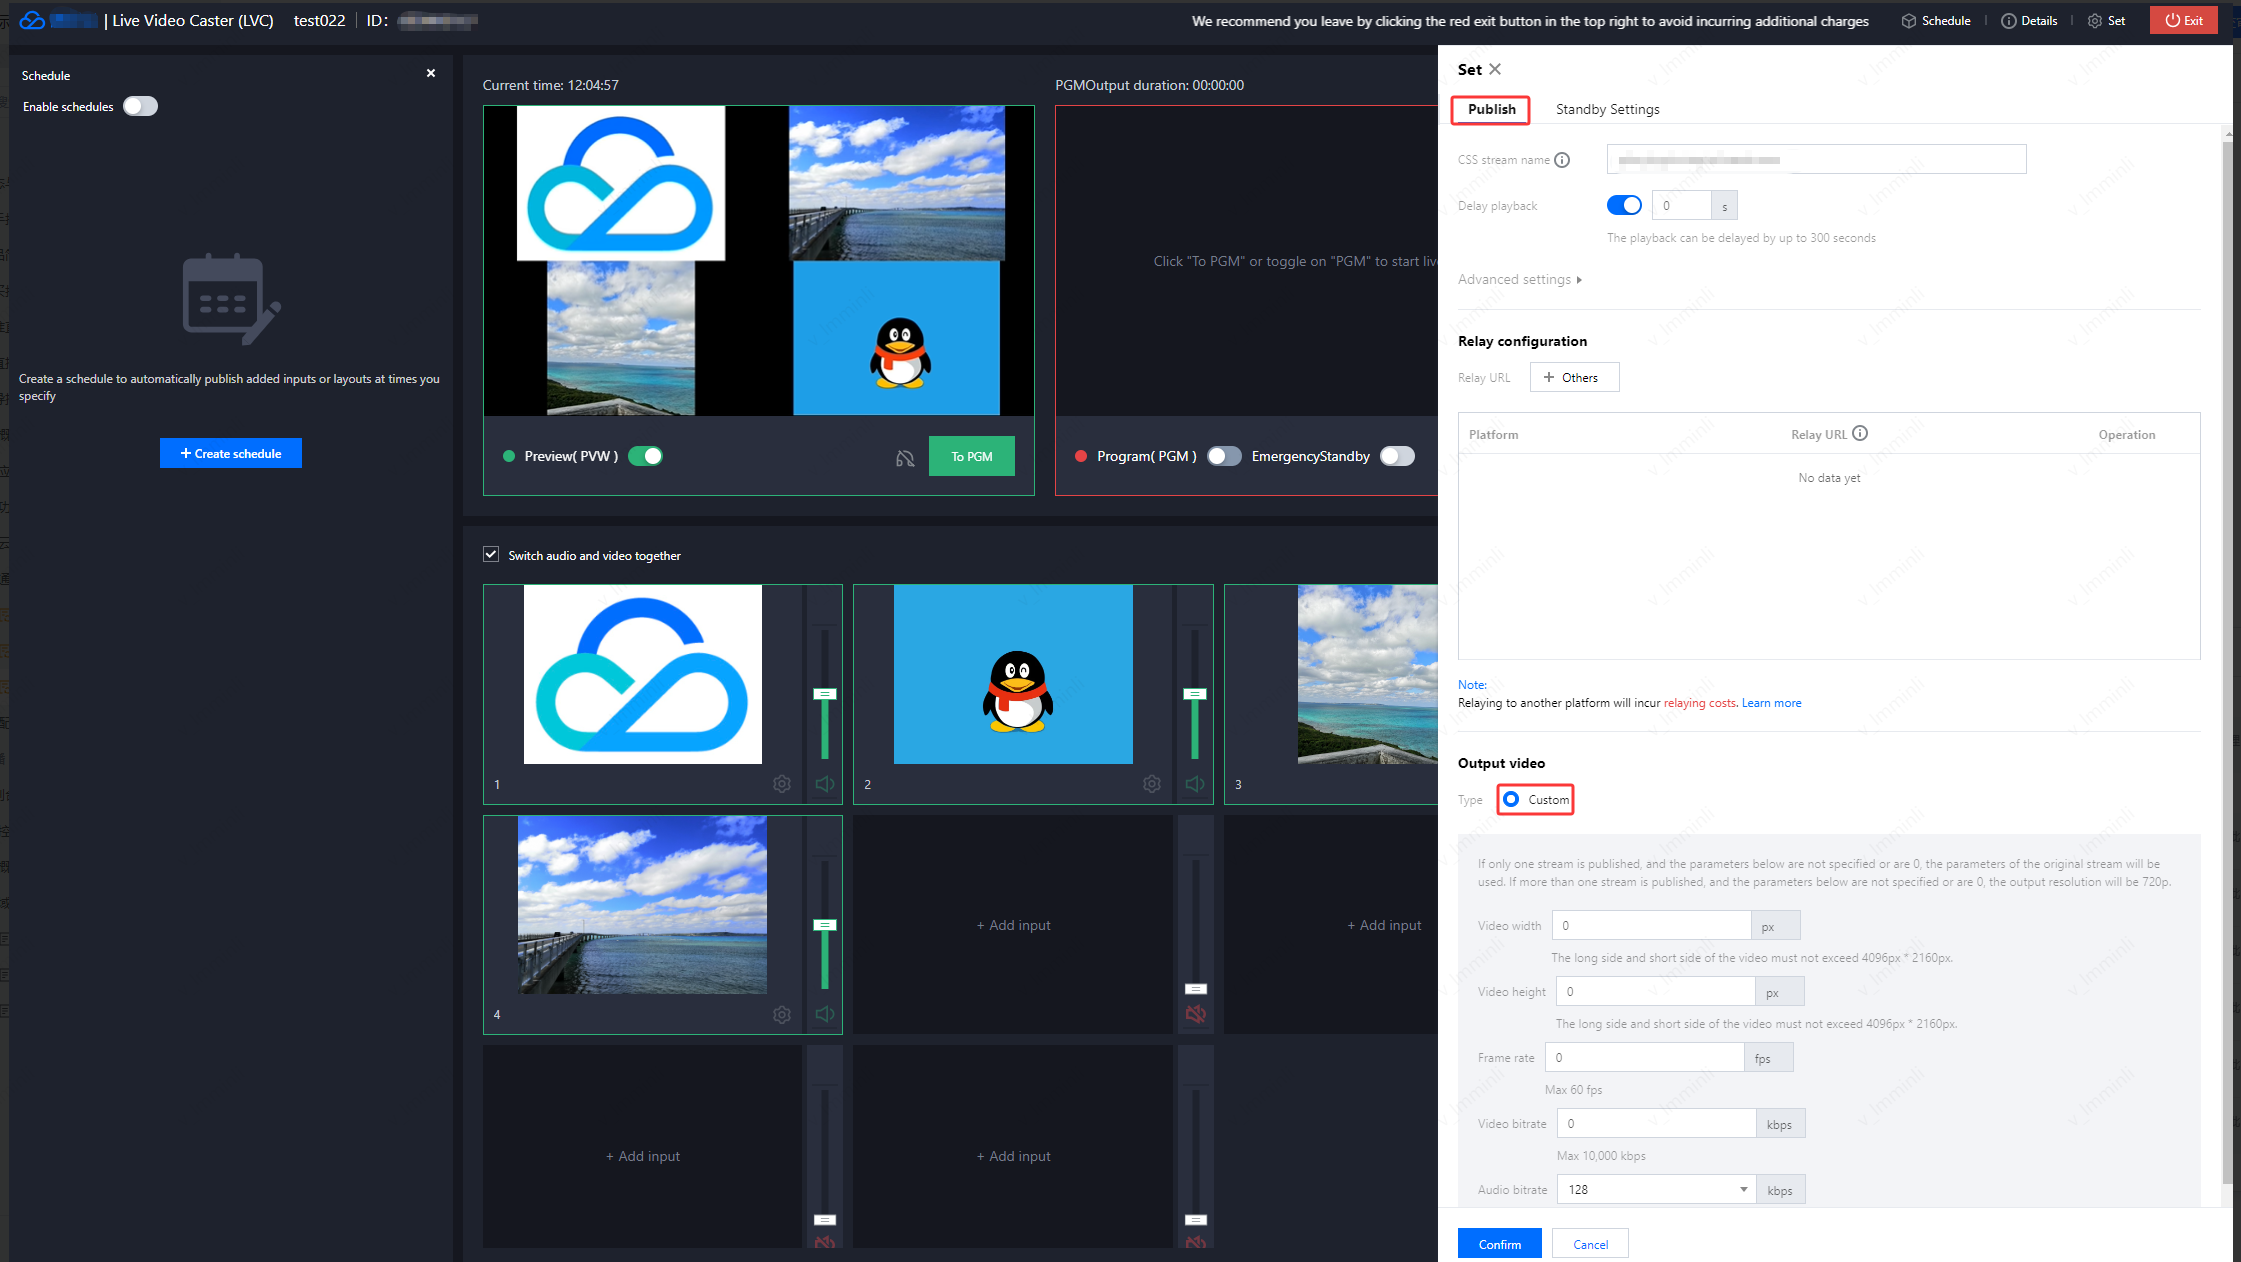
To push your live stream to a third-party cloud vendor, you need to configure a relay first.
1. Click
in the upper-right corner and select Publish to enter the push settings page.
2. Fill in the CSS stream name.
3. You can enable delayed playback for the live stream. The maximum delay is 300 seconds.
4. Click Advanced settings to configure the domain and parameters.
Advanced Settings
Required
Description
Push domain
No
Select an available push domain. If left blank, this field will be filled with a backend-generated value when you save the settings.
AppName
No
Use English letters, numbers, and underscores only.
Custom parameters
No
Enter stream push parameters.
5. Set a relay address:
Click
to add a custom third-party vendor address.
Note:
Third-party relay supports only RTMP and RTMPS protocols.The stream push address format is as follows: rtmp(s)://domain/app/stream?arg1=xxx.The relay feature is enabled by CSS.To learn more,see Getting Started with LVC and LVC Billing.
A maximum of three target addresses are supported in third-party relay. One of the target addresses defaults to the current Tencent Cloud Streaming Services account, and the other two can be third-party addresses, excluding streaming domain names under the current account. Relay to third parties incurs relay bandwidth-based fees, which are calculated according to the relay charging standard.
Relay to other CSS accounts (other than those under the current account) also incurs bandwidth-based fees, which are calculated according to the relay billing rules. For more information, see Live Video Caster Billing Overview.
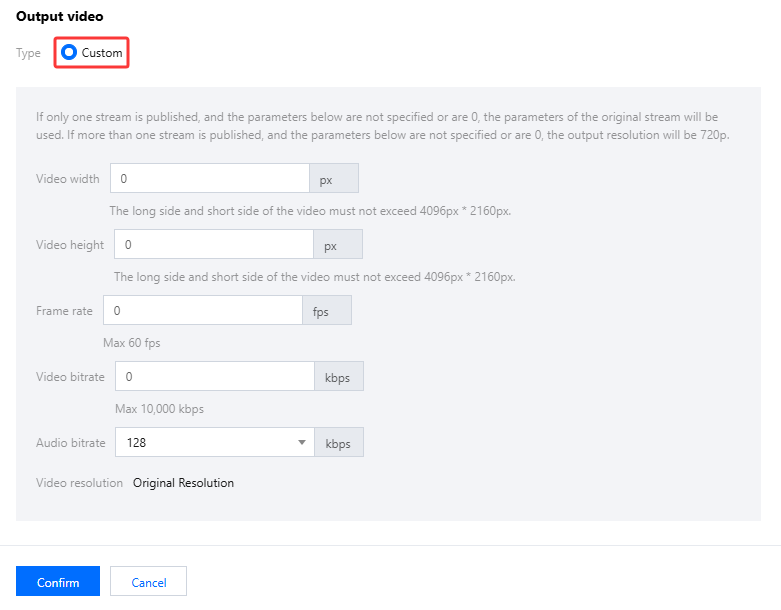
6. Set the size of the video output.
Select Custom, and set the following parameters:
Video width: The long side and short side of the video must not exceed 4096 x 2160 pixels.
Video height: The long side and short side of the video must not exceed 4096 x 2160 pixels.
Frame rate: No greater than 60 fps.
Video bitrate: No greater than 10,000 kbps.
Audio bitrate: Supports 128 kbps, 192 kbps, and 256 kbps.
7. Click Confirm to save the settings.
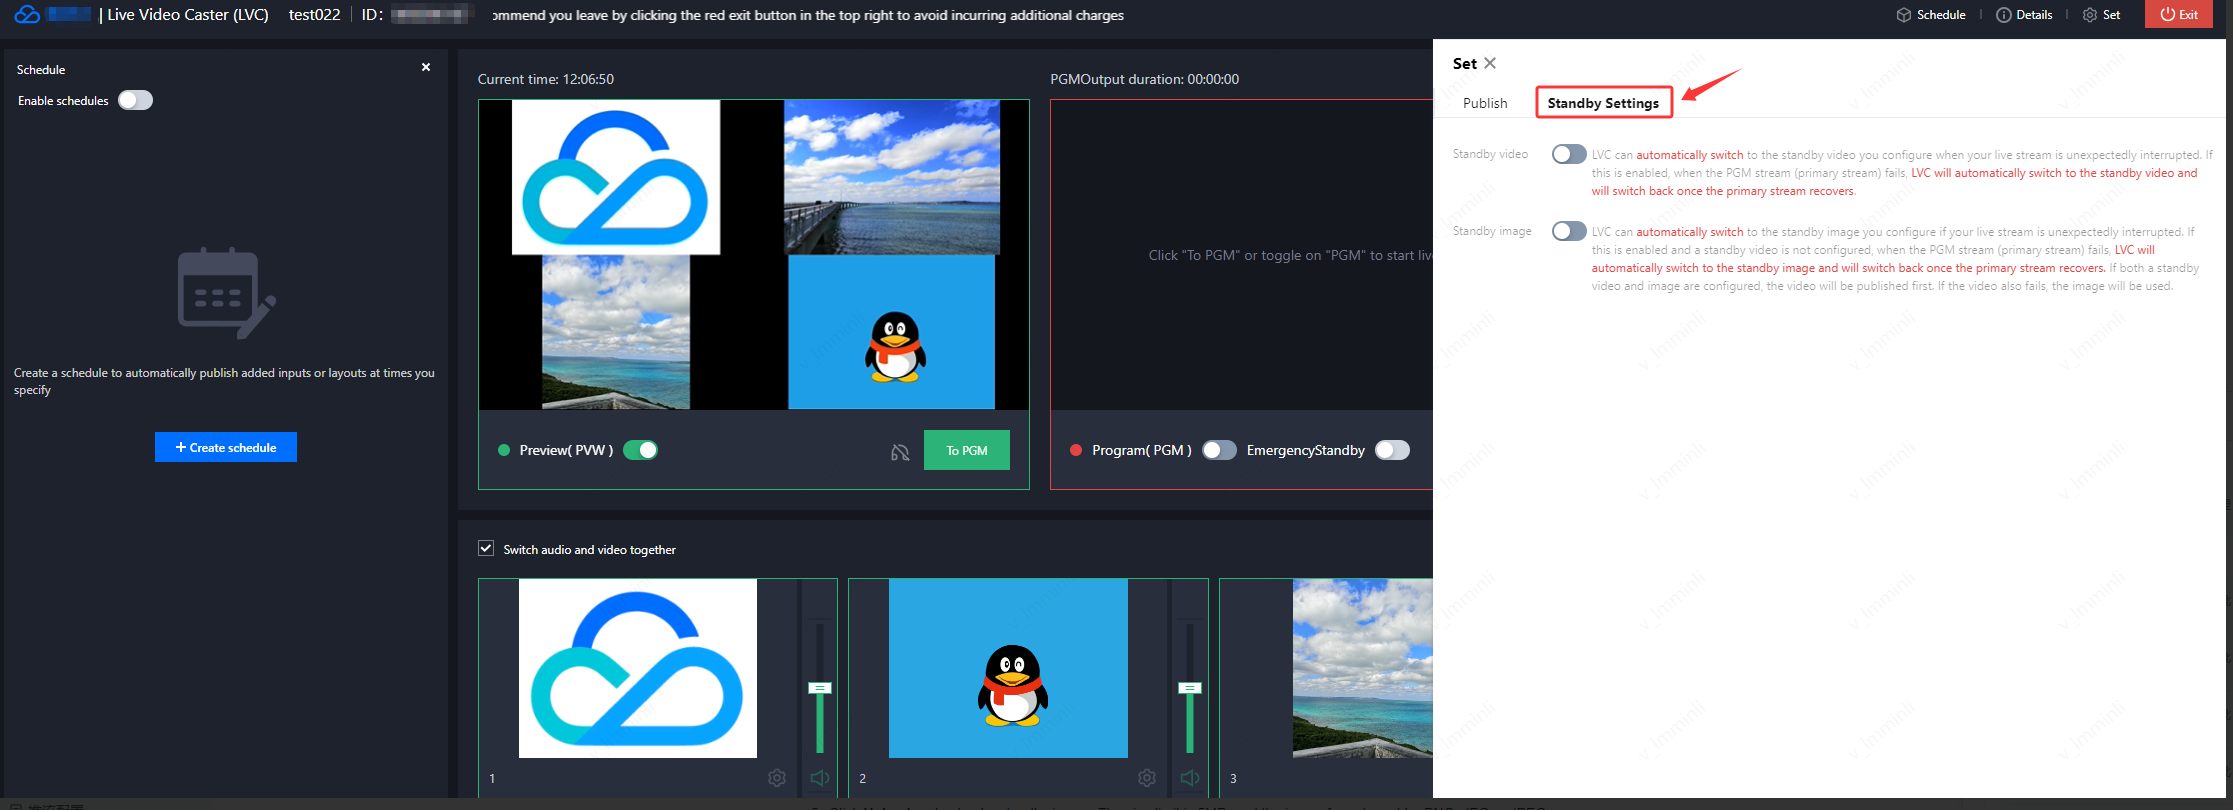
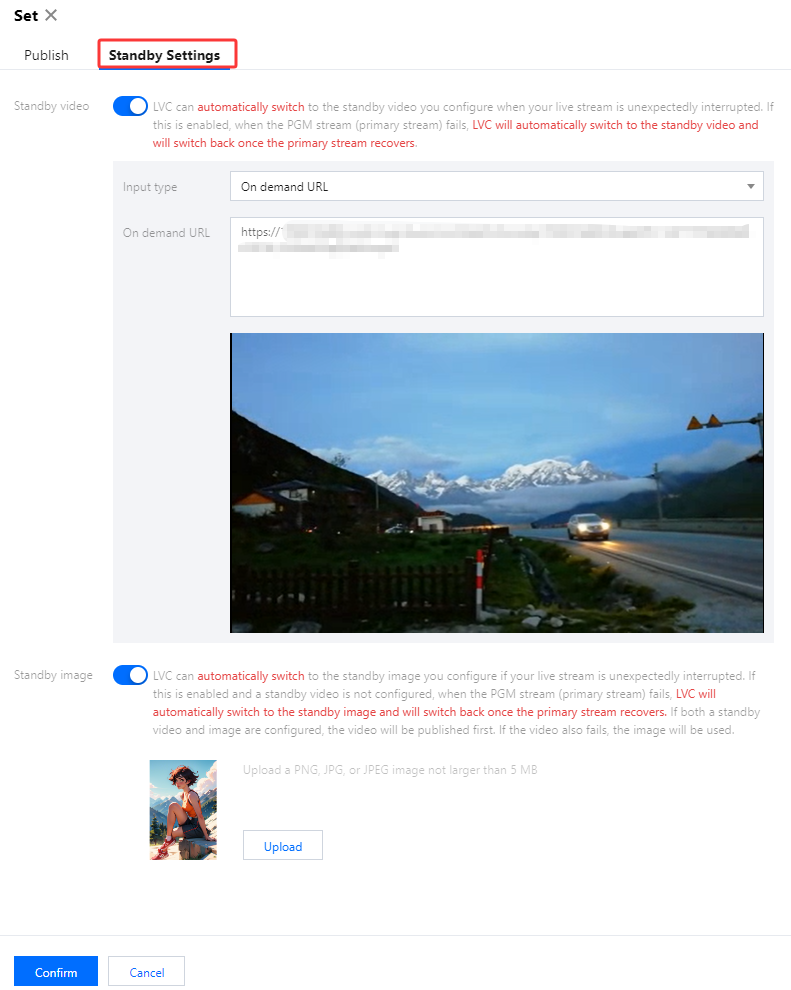
Step 5: Setting a Standby Input Source
You can enable a standby input source on the standby stream page.
1. Click
in the upper-right corner and select Standby Settings to enter the standby stream page.
2. Enable or disable the standby video. A standby video serves as an auxiliary input source. If a standby video is enabled, when the input source or pulled stream for the PGM (primary stream) fails or is interrupted, LVC automatically switches to the standby video. Once the primary stream recovers, LVC switches back to the primary stream.
3. Set the input type to On demand URL or Live URL.
On demand URL: You can set multiple on-demand URLs by separating them with semicolons (;) or line breaks.
Live URL: Fill in this field with the stream/playback URL.
4. Enable or disable the standby image. A standby image serves as an auxiliary image input source. If a standby video is not enabled, when the input source or pulled stream for the PGM (primary stream) fails or is interrupted, LVC automatically switches to the standby image. Once the primary stream recovers, LVC switches back to the primary stream.
5. Click Upload and upload a standby image. The size limit is 5MB, and the image format must be PNG, JPG or JPEG.
6. Click Confirm to save the settings.
Note:
If a standby video and standby image are both enabled, LVC switches to the standby video first. If the standby video also fails, LVS switches to the standby image.
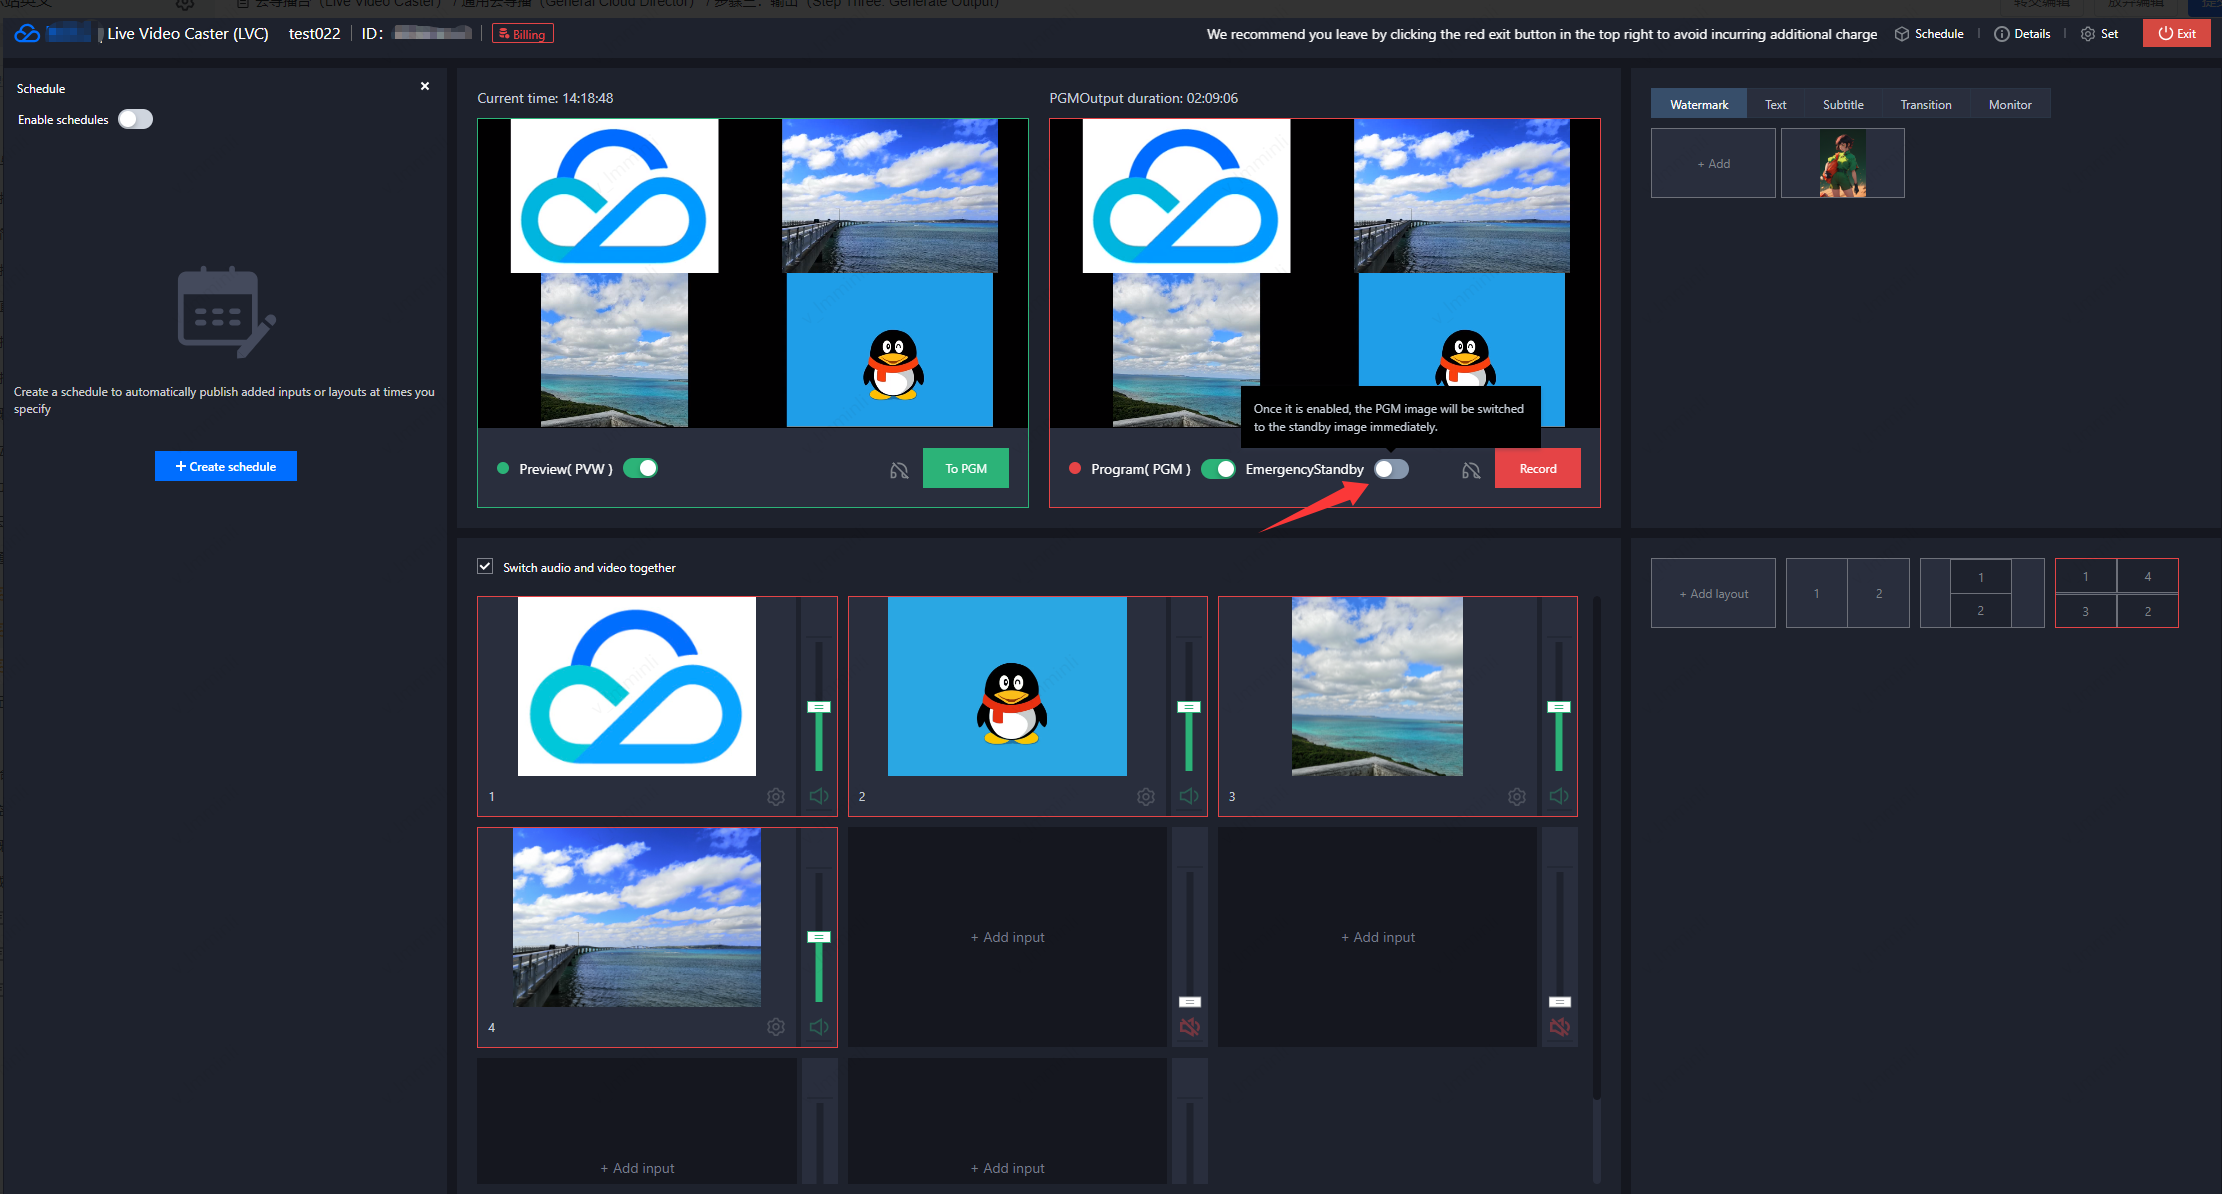
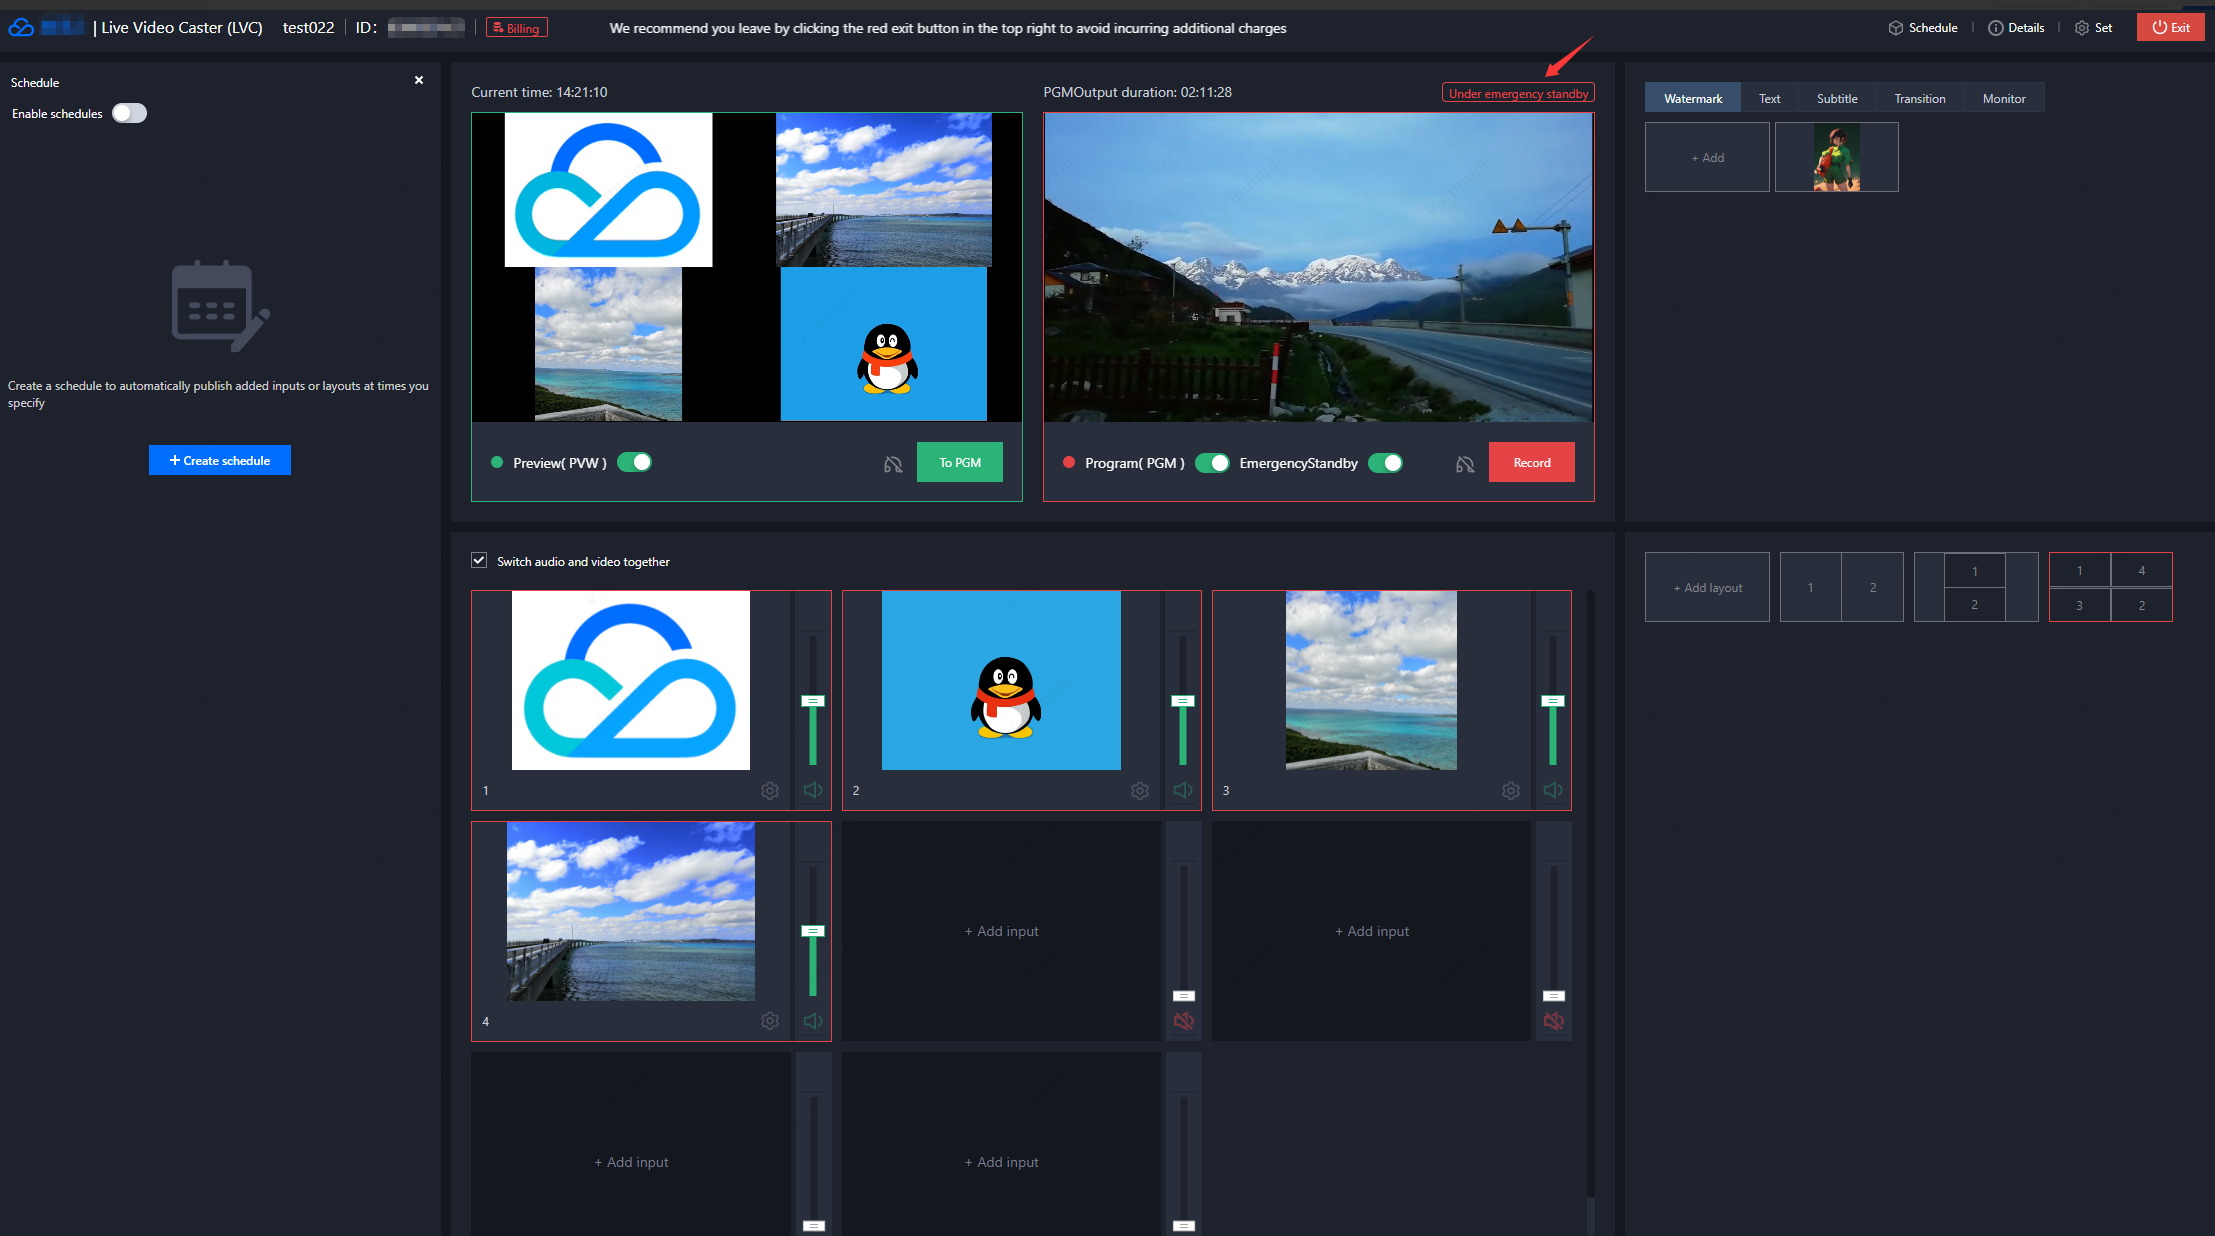
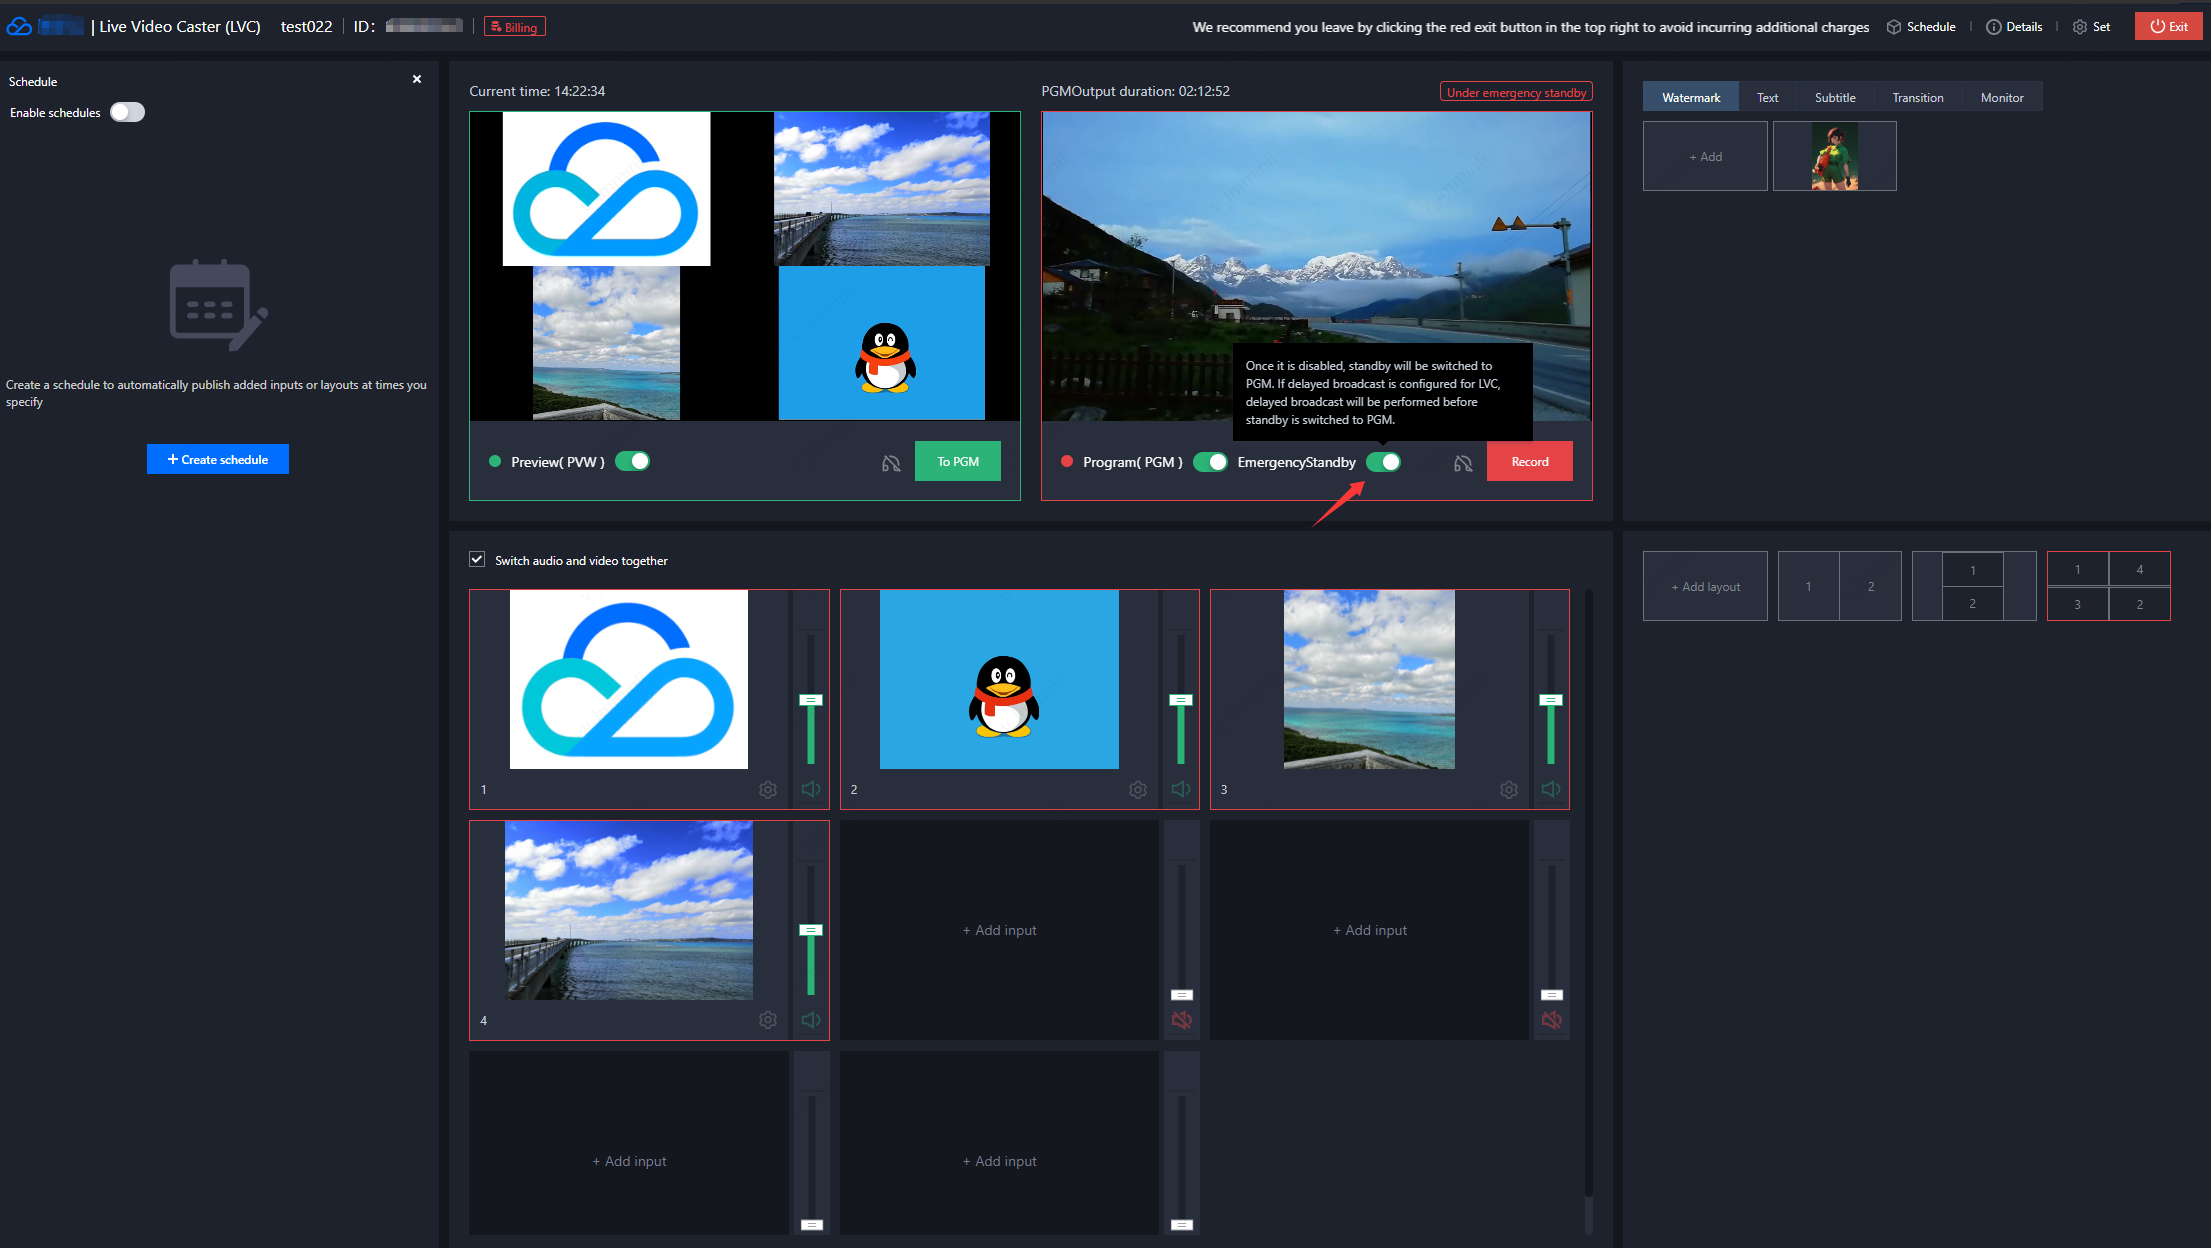
Enable Emergency Standby
1. After the PGM on the director's console is turned on, you can also manually insert the standby input through the Emergency Standby function. You can click
to manually start the Emergency Standby.
Note:
First, you need to configure the standby in the settings (add Standby video/picture) and turn on PGM to enable the Emergency Standby function.
If the Standby video function is not enabled, when the input source (referred to as the primary stream) of PGM is disconnected or fails to pull the stream, it will automatically switch to the Standby image. When the primary stream is recovered, it will switch back to the primary stream.
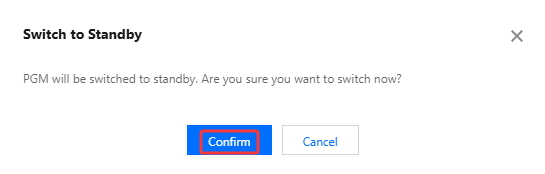
2. After clicking Confirm, the PGM image willbe switched to the standby image immediately.
Turn off Emergency Standby
1. According to your business needs, you can click
to turn off Emergency Standby. Once it is disabled, standby will be switched to PGM. If delayed playback is configured for LVC, delayed playback will be performed before the standby is switched to PGM.
2. Click Confirm to switch to live streaming.
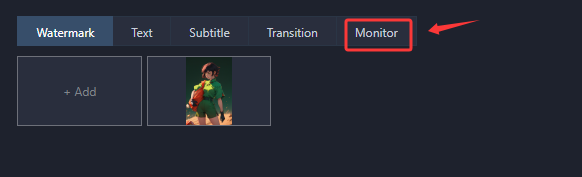
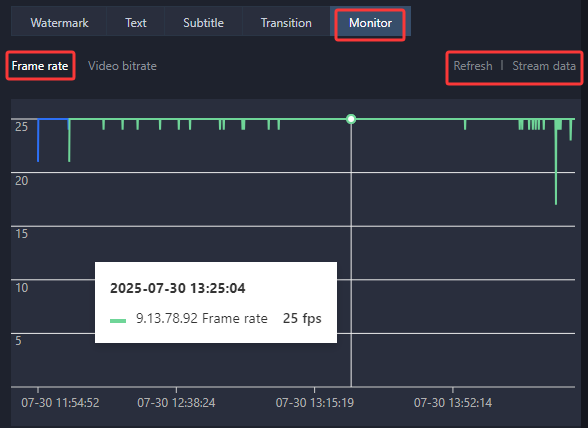
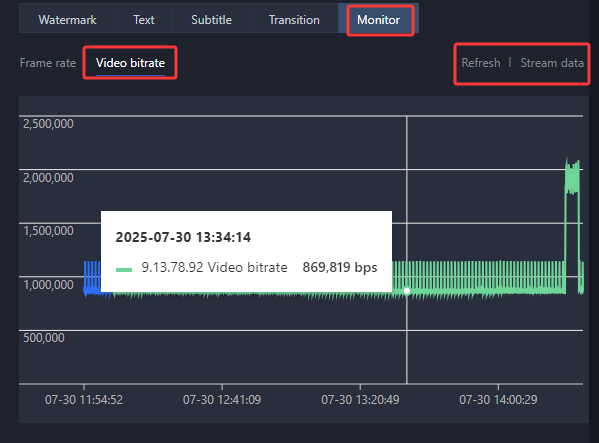
Step 6: Monitoring Output Stream Quality
After the stream is output from LVC, you can view the frame rate and bitrate data in the Monitor section.
1. Click Refresh in the upper-right corner to refresh the current chart.
2. Click Stream data to view the detailed push stream data.