- 動向とお知らせ
- 製品の説明
- 購入ガイド
- クイックスタート
- コンソールガイド
- コンソール概要
- バケットの管理
- オブジェクトの管理
- バッチ処理
- データ監視
- データ処理
- インテリジェントツールボックス使用ガイド
- データワークフロー
- アプリ統合
- ツールガイド
- プラクティスチュートリアル
- 開発者ガイド
- データレークストレージ
- データ処理
- トラブルシューティング
- よくある質問
- 用語集
- 動向とお知らせ
- 製品の説明
- 購入ガイド
- クイックスタート
- コンソールガイド
- コンソール概要
- バケットの管理
- オブジェクトの管理
- バッチ処理
- データ監視
- データ処理
- インテリジェントツールボックス使用ガイド
- データワークフロー
- アプリ統合
- ツールガイド
- プラクティスチュートリアル
- 開発者ガイド
- データレークストレージ
- データ処理
- トラブルシューティング
- よくある質問
- 用語集
概要
Cloud Object Storage(COS)サービスにおいて、毎回のリクエスト送信時に、COSサーバーはリクエストに対し1つのID、すなわちRequestIdを生成します。ここでは、様々なケースにおけるRequestIdの取得方法についてご説明します。
コンソール上でブラウザを通じて取得
1. COSコンソールにログインし、左側ナビゲーションバーのバケットリストをクリックし、バケットリストページに進みます。
2. アクセスしたいバケットをクリックして進みます。
3.
F12キーを押し、ブラウザの開発者ツールページに進みます。4. 開発者ツールの上方のNetworkをクリックします。
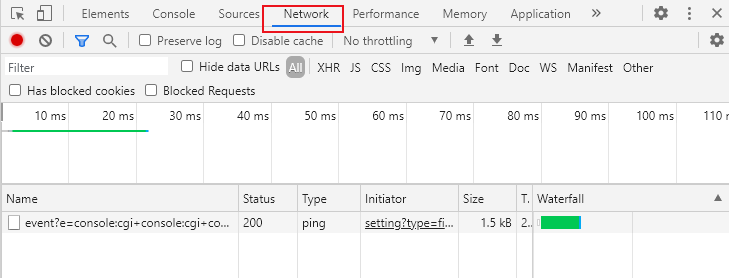
5. ダウンロードしたいファイル名の右側のダウンロードをクリックし、開発者ツールページでダウンロードしたいファイル名を入力してフィルタリングを行います。ファイルを選択し、Headersをクリックし、Response HeadersエリアでRequestId情報を取得します。
ファイルアクセス失敗時の取得
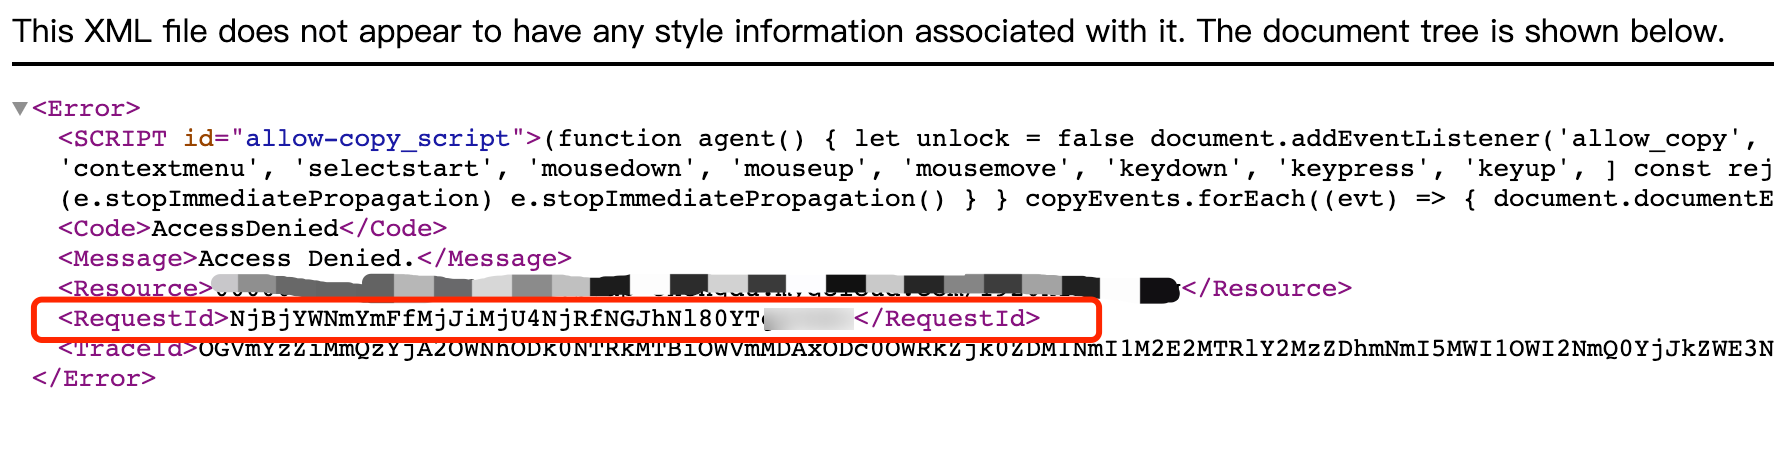
ファイルへのアクセスが失敗した際、ページに表示される、返されたXML情報の中からRequestIdノード情報を取得できます。
次の操作を行って取得することもできます。
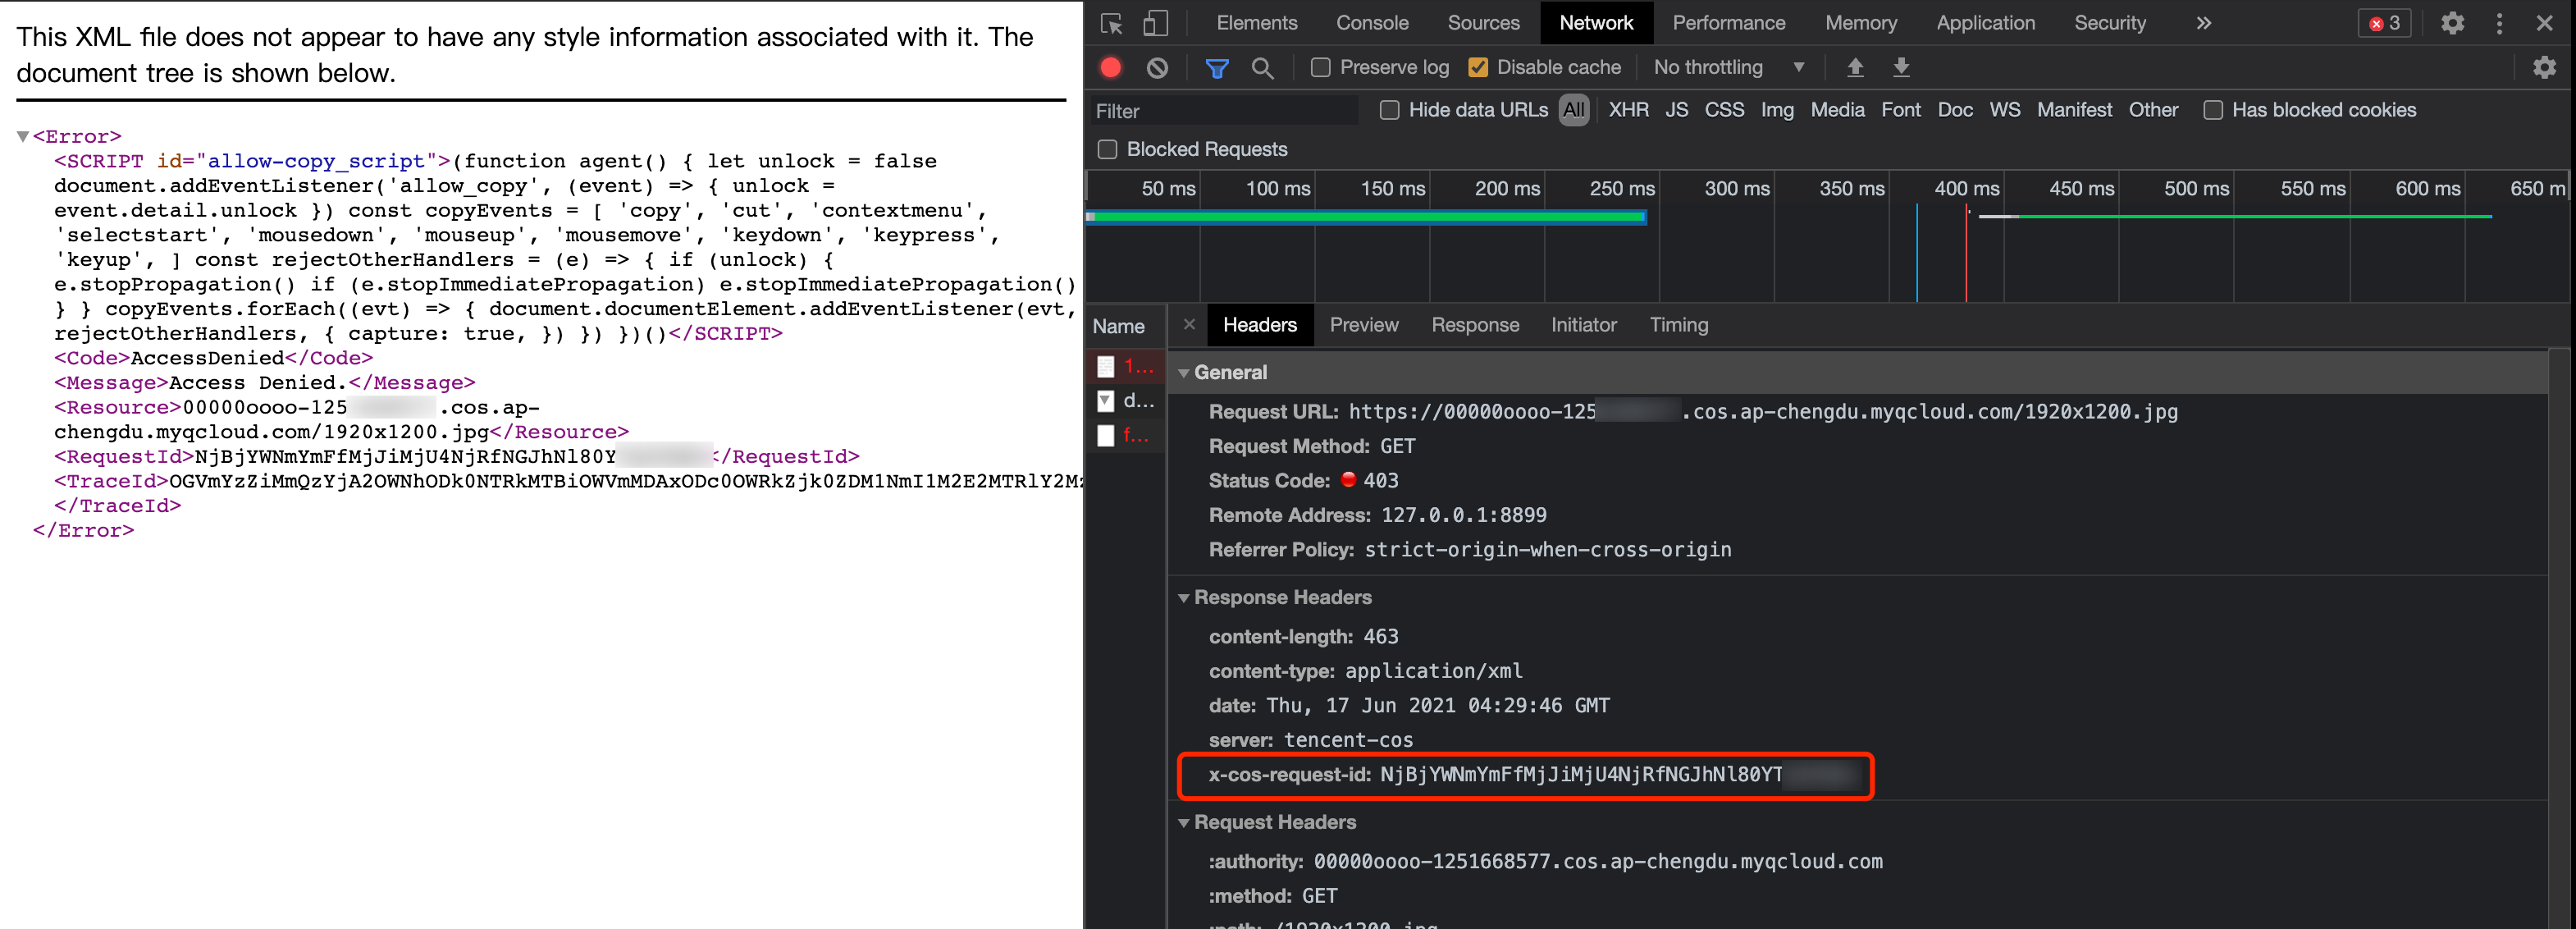
1.
F12キーを押し、ブラウザの開発者ツールページに進みます。2. ページ上方のNetworkをクリックし、Allタイプを選択すると、Response Headersの中からRequestIdフィールド情報を見つけることができます。
SDKによる取得
SDKに含まれるインターフェースは非常に多く、すべてのインターフェースの例を挙げることができないため、すべてのSDKについてファイルのアップロードを例にとり、現在の操作のRequestIdの取得方法を示します。
.NET SDKによる取得
try{string bucket = "examplebucket-1250000000"; //バケット、形式:BucketName-APPIDstring cosPath = "test.cs"; // オブジェクトキーbyte[] data = System.Text.Encoding.Default.GetBytes("Hello COS"); // バイナリーデータPutObjectRequest putObjectRequest = new PutObjectRequest(bucket, cosPath, data);PutObjectResult result = cosXml.PutObject(putObjectRequest);string requestId = result.responseHeaders.GetValueOrDefault("x-cos-request-id")[0];Console.WriteLine(requestId);}catch (COSXML.CosException.CosClientException clientEx){//リクエストに失敗しましたConsole.WriteLine("CosClientException: " + clientEx);}catch (COSXML.CosException.CosServerException serverEx){//リクエストに失敗しましたConsole.WriteLine("CosServerException: " + serverEx.GetInfo());}
Go SDKによる取得
package mainimport ("context""fmt""net/http""net/url""strings""github.com/tencentyun/cos-go-sdk-v5")func main(){// examplebucket-1250000000およびCOS_REGIONを真の情報に変更しますu, _ := url.Parse("https://examplebucket-1250000000.cos.COS_REGION.myqcloud.com")b := &cos.BaseURL{BucketURL: u}c := cos.NewClient(b, &http.Client{Transport: &cos.AuthorizationTransport{SecretID: "SECRETID",SecretKey: "SECRETKEY",},})// オブジェクトキー(Key)はオブジェクトのバケット内での固有識別子です。// 例えば、オブジェクトのアクセスドメイン名`examplebucket-1250000000.cos.COS_REGION.myqcloud.com/test.go`の中で、オブジェクトキーはtest.goとなりますname := "test.go"// 1.文字列によってオブジェクトをアップロードしますf := strings.NewReader("Hello COS")_, err := c.Object.Put(context.Background(), name, f, nil)if err != nil{// error情報にはRequestIdフィールドが直接含まれますpanic(err)}requestId := response.Header.Get("X-Cos-Request-Id")fmt.Println(requestId)}
Java SDKによる取得
// 1 ユーザーID情報(secretId、secretKey)を初期化します。String secretId = "SECRETID";String secretKey = "SECRETKEY";COSCredentials cred = new BasicCOSCredentials(secretId, secretKey);// 2 bucketのリージョンを設定します。COSリージョンの略称についてはhttps://www.tencentcloud.com/document/product/436/6224?from_cn_redirect=1をご参照ください// clientConfigにはregion、https(デフォルトではhttp)、タイムアウト、プロキシなどを設定するsetメソッドが含まれます。使用にあたってはソースコードまたはよくあるご質問のJava SDKのパートを参照できますRegion region = new Region("COS_REGION");ClientConfig clientConfig = new ClientConfig(region);// ここではhttpsプロトコルの設定と使用を推奨しますclientConfig.setHttpProtocol(HttpProtocol.https);// 3 cosクライアントを生成します。COSClient cosClient = new COSClient(cred, clientConfig);// Bucketの命名形式はBucketName-APPIDです。ここに入力するバケット名は、この形式でなければなりませんString bucketName = "examplebucket-1250000000";String content = "Hello COS";String key = "test.java";PutObjectResult putObjectResult = cosClient.putObject(bucketName, key, content);String requestId = putObjectResult.getRequestId();System.out.println(requestId);
Python SDKによる取得
# -*- coding=utf-8from qcloud_cos import CosConfigfrom qcloud_cos import CosS3Clientimport sysimport osimport logging# 正常な状況のログレベルはINFOを使用し、特定が必要な場合はDEBUGに変更します。このときSDKは、サーバーとの通信情報をプリントアウトしますlogging.basicConfig(level=logging.INFO, stream=sys.stdout)# 1. secret_id, secret_key, regionなどを含む、ユーザーの属性を設定します。AppidはすでにCosConfigから削除されていますので、パラメータBucket中にAppidを含めてください。Bucketは、BucketName-Appidによって構成されますsecret_id = os.environ['COS_SECRET_ID'] # ユーザーのSecretIdです。サブアカウントのキーを使用し、権限承認は最小権限ガイドに従って行い、使用上のリスクを低減させることをお勧めします。サブアカウントキーの取得については、https://www.tencentcloud.com/document/product/598/37140?from_cn_redirect=1をご参照くださいsecret_key = os.environ['COS_SECRET_KEY'] # ユーザーのSecretKeyです。サブアカウントのキーを使用し、権限承認は最小権限ガイドに従って行い、使用上のリスクを低減させることをお勧めします。サブアカウントキーの取得については、https://www.tencentcloud.com/document/product/598/37140?from_cn_redirect=1をご参照くださいregion = 'ap-beijing' # ユーザーのregionに置き換えます。すでに作成済みのバケットが帰属するregionについては、コンソールでhttps://console.tencentcloud.com/cos5/bucketをご参照ください# COSがサポートするすべてのregionリストについては https://www.tencentcloud.com/document/product/436/6224?from_cn_redirect=1をご参照くださいtoken = None # パーマネントキーを使用する場合、tokenへの入力は不要です。一時キーを使用する場合は入力が必要です。一時キーの発行および使用ガイドについてはhttps://www.tencentcloud.com/document/product/436/14048?from_cn_redirect=1をご参照くださいscheme = 'https' # http/httpsプロトコルを指定使用してCOSにアクセスします。デフォルトはhttpsです。未入力でもかまいませんconfig = CosConfig(Region=region, SecretId=secret_id, SecretKey=secret_key, Token=token, Scheme=scheme)client = CosS3Client(config)try:response = client.put_object(Bucket='examplebucket-1250000000',Key='exampleobject',Body=b'abcdefg')# リクエストの正常なリターンについては、responseによりrequest-idを確認しますif 'x-cos-request-id' in response:print(response['x-cos-request-id'])# リクエスト失敗については、異常によりrequest-idを確認しますexcept CosServiceError as e:print(e.get_request_id())
JavaScript SDKによる取得
cos.putObject({Bucket: 'examplebucket-1250000000', /* 必須 */Region: 'COS_REGION', /* 必須 */Key: 'test.js', /* 必須 */StorageClass: 'STANDARD',Body: 'Hello COS',onProgress: function(progressData) {console.log(JSON.stringify(progressData));}}, function(err, data) {var requestId = (err || data).headers['x-cos-request-id'];console.log(requestId );});
Node.js SDKによる取得
var COS = require('cos-nodejs-sdk-v5');var cos = new COS({SecretId: 'SECRETID',SecretKey: 'SECRETKEY'});cos.putObject({Bucket: 'examplebucket-1250000000', /* 必須 */Region: 'COS_REGION', /* 必須 */Key: 'test.nodejs', /* 必須 */StorageClass: 'STANDARD',Body: Buffer.from('Hello COS'),onProgress: function(progressData) {console.log(JSON.stringify(progressData));}}, function(err, data) {var requestId = (err || data).headers['x-cos-request-id'];console.log(requestId );});
WeixinアプレットSDKによる取得
var COS = require('cos-wx-sdk-v5');var cos = new COS({SecretId: 'SECRETID',SecretKey: 'SECRETKEY'});cos.putObject({Bucket: 'examplebucket-1250000000', /* 必須 */Region: 'COS_REGION', /* 必須 */Key: 'test.js', /* 必須 */StorageClass: 'STANDARD',Body: 'Hello COS',onProgress: function(progressData) {console.log(JSON.stringify(progressData));}}, function(err, data) {var requestId = (err || data).headers['x-cos-request-id'];console.log(requestId );});
PHP SDKによる取得
$secretId = "SECRETID"; //"Tencent Cloud APIキー SecretId";$secretKey = "SECRETKEY"; //"Tencent Cloud APIキー SecretKey";$region = "COS_REGION"; //デフォルトのバケットリージョンを設定$cosClient = new Qcloud\\Cos\\Client(array('region' => $region,'schema' => 'https', //プロトコルヘッダー。デフォルトではhttp'credentials'=> array('secretId' => $secretId ,'secretKey' => $secretKey)));# ファイルのアップロード## putObject(アップロードインターフェース。最大5Gまでのファイルのアップロードをサポート)### アップロードメモリ内の文字列try {$bucket = "examplebucket-1250000000"; //バケット名 形式:BucketName-APPID$key = "test.php"; //ここでのkeyはオブジェクトキーです。オブジェクトキーはオブジェクトのバケット内での固有識別子です$result = $cosClient->putObject(array('Bucket' => $bucket,'Key' => $key,'Body' => 'Hello COS'));$requestId = $result['RequestId'];print_r($requestId);} catch (\\Exception $e) {echo "$e\\n";}
iOS SDKによる取得
QCloudCOSXMLUploadObjectRequest* put = [QCloudCOSXMLUploadObjectRequest new];/** ローカルファイルパスは、URLを必ずfile://で始めてください。形式は次のとおりです。1. [NSURL URLWithString:@"file:////var/mobile/Containers/Data/Application/DBPF7490-D5U8-4ABF-A0AF-CC49D6A60AEB/Documents/exampleobject"]2. [NSURL fileURLWithPath:@"/var/mobile/Containers/Data/Application/DBPF7490-D5U8-4ABF-A0AF-CC49D6A60AEB/Documents/exampleobject"]*/NSURL* url = [NSURL fileURLWithPath:@"ファイルのURL"];// バケット名はBucketName-Appidで構成され、COSコンソールで確認できます。 https://console.tencentcloud.com/cos5/bucketput.bucket = @"examplebucket-1250000000";// オブジェクトキーは、オブジェクトのCOS上での完全パスです。ディレクトリがある場合は、形式は「video/xxx/movie.mp4」ですput.object = @"exampleobject";// アップロードする必要があるオブジェクトの内容です。NSData*またはNSURL*タイプの変数を渡すことができますput.body = url;// アップロードの進捗を監視します[put setSendProcessBlock:^(int64_t bytesSent,int64_t totalBytesSent,int64_t totalBytesExpectedToSend) {// bytesSent 今回送信する必要があるバイト数(大容量ファイルは数回に分けての送信が必要な可能性があります)// totalBytesSent 送信済みバイト数// totalBytesExpectedToSend 今回のアップロードで送信する必要がある総バイト数(すなわち1ファイルのサイズ)}];// アップロードの結果を監視します[put setFinishBlock:^(QCloudUploadObjectResult *result, NSError *error) {// requestidを取得します[result.__originHTTPURLResponse__.allHeaderFields objectForKey:@"x-cos-request-id"]}];[put setInitMultipleUploadFinishBlock:^(QCloudInitiateMultipartUploadResult *multipleUploadInitResult,QCloudCOSXMLUploadObjectResumeData resumeData) {// マルチパートアップロードの初期化が完了すると、このblockがコールバックされ、ここでresumeData、uploadidが取得できるようになりますNSString* uploadId = multipleUploadInitResult.uploadId;}];[[QCloudCOSTransferMangerService defaultCOSTransferManager] UploadObject:put];
Android SDKによる取得
// 1. 初期化TransferServiceです。同じ設定の場合、同一のTransferServiceを再利用しなければなりませんTransferConfig transferConfig = new TransferConfig.Builder().build();CosXmlServiceConfig cosXmlServiceConfig = new CosXmlServiceConfig.Builder().setRegion(COS_REGION).builder();CosXmlService cosXmlService = new CosXmlService(context, cosXmlServiceConfig, credentialProvider);TransferService transferService = new TransferService(cosXmlService, transferConfig);// 2. 初期化PutObjectRequestString bucket = "examplebucket-1250000000"; //バケット、形式:BucketName-APPIDString cosPath = "exampleobject"; //オブジェクトのバケット内での位置識別子です。オブジェクトキーと呼ばれますString srcPath = "examplefilepath"; //ローカルファイルの絶対パスPutObjectRequest putObjectRequest = new PutObjectRequest(bucket,cosPath, srcPath);// 3. upload方法を呼び出し、ファイルをアップロードfinal COSUploadTask uploadTask = transferService.upload(putObjectRequest);uploadTask.setCosXmlResultListener(new CosXmlResultListener() {@Overridepublic void onSuccess(CosXmlRequest request, CosXmlResult result) {// アップロードに成功しました。ここでrequestIdを取得できますString requestId = result.getHeader("x-cos-request-id");}@Overridepublic void onFail(CosXmlRequest request,CosXmlClientException clientException,CosXmlServiceException serviceException) {// CosXmlServiceExceptionさえあれば、異常時にのみrequestIdが得られますif (serviceException != null) {String requestId = serviceException.getRequestId();}}});

 はい
はい
 いいえ
いいえ
この記事はお役に立ちましたか?