Cloud Virtual Machine
- Release Notes and Announcements
- Announcements
- Product Introduction
- Image
- Public Image
- TencentOS Server
- Network and Security
- OPS and Monitoring
- Purchase Guide
- Purchasing Instances
- Purchasing Cloud Disks
- Purchasing Reserved Instances
- Purchasing Public Network Bandwidth
- Getting Started
- Operation Guide
- Convenience Features
- Instances
- Creating Instances
- Logging In to Linux Instances
- Logging in to Windows instance
- Adjusting Configuration
- View Instance Details
- Managing Instance IPs
- Terminating/Returning Instances
- Reserved Instances
- Images
- Importing Images
- CentOS Linux Operations
- Migrating Servers
- Online Migration
- Migration Operation Guide
- Maintenance Tasks
- Networking
- Security
- Security Groups
- Managing Security Groups
- Managing Security Group Rules
- Monitoring and Alarms
- Practical Tutorial
- Building an Environment
- Setting up LNMP
- Setting up LAMP manually
- Setting up Java Web
- Setting up Node.js
- Manual Setup of WIPM Environment
- Building a Website
- Discuz! Forum
- Building an Application
- Setting Up FTP Site
- NTP Service
- Building a Visual GUI
- Uploading Local Files to CVM
- High-throughput Network Performance Test
- Operations Guide
- Initializing Data Disks
- Environment Configurations
- Installing Software
- Work with Operating Systems
- Troubleshooting
- Instance-Related Failures
- Windows Instance Login Failures
- Linux Instance Login Failures
- Linux CVM Memory Issues
- API Documentation
- Region APIs
- Instance APIs
- Cloud Hosting Cluster APIs
- Image APIs
- Instance Launch Template APIs
- Making API Requests
- Placement Group APIs
- Key APIs
- Security Group APIs
- Network APIs
- FAQs
- Billing
- Instance
- Storage
- Images
- OPS & Monitoring
- Related Agreement
DocumentationCloud Virtual MachinePractical TutorialBuilding an EnvironmentSetting up LNMPManual Setup of LNMP (CentOS 6)
Manual Setup of LNMP (CentOS 6)
Last updated: 2024-01-06 17:43:09
Overview
The LNMP environment is a website server architecture consisting of Nginx, MySQL or MariaDB, and PHP running on Linux. This document describes how to manually set up the LNMP environment on a Tencent Cloud CVM.
To manually set up the LNMP environment, you should familiarize yourself with common Linux commands such as installing software via YUM in CentOS, and understand the usage and version compatibility of the software to be installed.
Note:
It’s recommended that you can configure the LNMP environment through the image environment of Tencent Cloud marketplace, and it may take a long time to set up the LNMP environment manually.
Software
The following software is used to build the LNMP environment.
CentOS is a distribution of the Linux operating system. This document uses CentOS 6.9 as an example.
Nginx is a web server. This document uses Nginx 1.17.5 as an example.
MySQL is a database software. This document uses MySQL 5.1.73 as an example.
PHP is a scripting language. This document uses PHP 7.1.32 as an example.
Prerequisite
Setting up a LNMP environment requires a Linux CVM. If you have not purchased one yet, see Getting Started with Linux CVMs.
Directions
Step 1: log in to a Linux instance
Log in to the Linux instance using standard login method. You can also use any of the following login methods you are comfortable with:
Step 2: install Nginx
1. Run the following command to create a file named
nginx.repo under /etc/yum.repos.d/.vi /etc/yum.repos.d/nginx.repo
2. Press i to switch to the editing mode and enter the following.
[nginx]name=nginx repobaseurl=https://nginx.org/packages/mainline/centos/6/$basearch/gpgcheck=0enabled=1
3. Click Esc and enter :wq to save and close the file.
4. Run the following command to install Nginx.
yum install -y nginx
5. Run the following command to open the
default.conf file.vim /etc/nginx/conf.d/default.conf
6. Press i to switch to the edit mode to modify the
default.conf file.7. Find
server{...} and replace the content inside the curly brackets with the following. This is to cancel the listening of the IPv6 address and configure Nginx to realize linkage with PHP.server {listen 80;root /usr/share/nginx/html;server_name localhost;#charset koi8-r;#access_log /var/log/nginx/log/host.access.log main;#location / {index index.php index.html index.htm;}#error_page 404 /404.html;#redirect server error pages to the static page /50x.html#error_page 500 502 503 504 /50x.html;location = /50x.html {root /usr/share/nginx/html;}#pass the PHP scripts to FastCGI server listening on 127.0.0.1:9000#location ~ .php$ {fastcgi_pass 127.0.0.1:9000;fastcgi_index index.php;fastcgi_param SCRIPT_FILENAME $document_root$fastcgi_script_name;include fastcgi_params;}}
8. Press Esc and enter :wq. Save and close the file.
9. Run the following command to start Nginx.
service nginx start
10. Run the following commands to automatically launch Nginx at startup.
chkconfig --add nginx
chkconfig nginx on
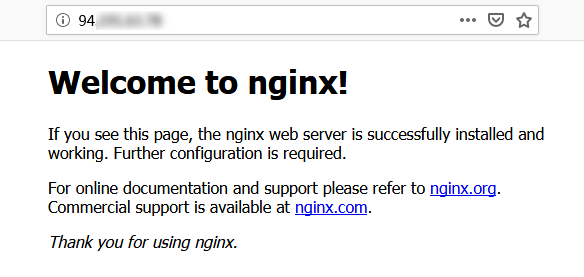
11. Enter the following URL in your local browser and verify whether the Nginx service is working properly.
http://[Public IP address of the CVM instance]
If the following appears, Nginx has been successfully installed and configured.


Step 3: install a database
1. Run the following command to check whether MySQL has been already installed.
rpm -qa | grep -i mysql
If the following appears, MySQL has already been installed.


yum -y remove [Package name]
If nothing is returned, MySQL has not been installed. In this case, proceed to the next step.
2. Run the following command to install MySQL.
yum install -y mysql-devel.x86_64 mysql-server.x86_64 mysql-libs.x86_64
3. Run the following command to start MySQL.
service mysqld start
4. Run the following commands to automatically launch MySQL at startup.
chkconfig --add mysqld
chkconfig mysqld on
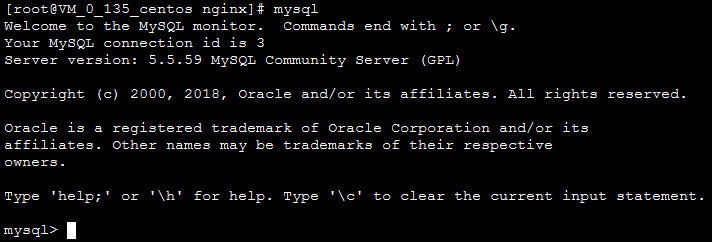
5. Run the following command to verify whether MySQL has been successfully installed.
mysql
If the following appears, MariaDB has been successfully installed.


6. Run the following command to exit MySQL.
\\q
Step 4: install and configure PHP
1. Run the following commands to update the software source of PHP in Yum.
rpm -Uvh https://mirrors.cloud.tencent.com/epel/epel-release-latest-6.noarch.rpm
rpm -Uvh https://mirror.webtatic.com/yum/el6/latest.rpm
2. Run the following command to install the packages required for PHP 7.1.32.
yum -y install mod_php71w.x86_64 php71w-cli.x86_64 php71w-common.x86_64 php71w-mysqlnd php71w-fpm.x86_64
3. Run the following command to start the PHP-FPM service.
service php-fpm start
4. Run the following commands to automatically launch PHP-FPM at startup.
chkconfig --add php-fpm
chkconfig php-fpm on
Verifying the Environment Configuration
1. Run the following command to create a test file.
echo "<?php phpinfo(); ?>" >> /usr/share/nginx/html/index.php
2. Run the following command to restart Nginx.
service nginx restart
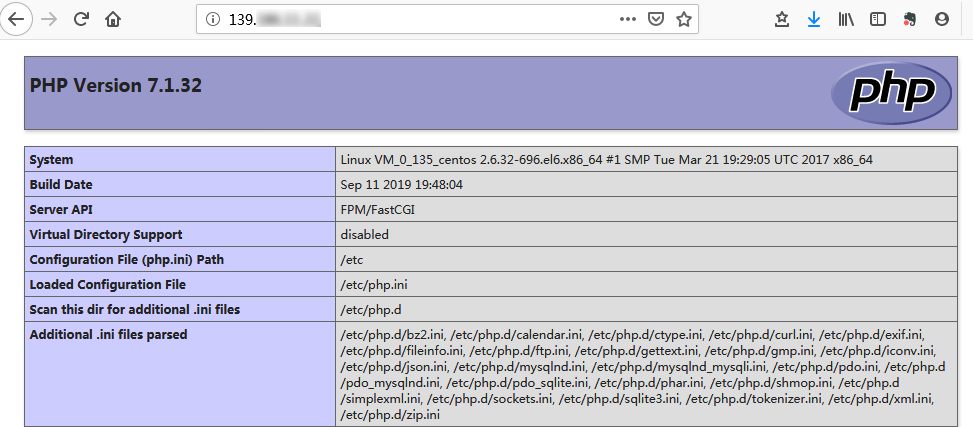
3. In a local browser, visit the following URL to check whether the environment has been successfully configured.
http://[Public IP address of the CVM instance]
If the following appears, the environment has been successfully configured.


Related Operations
After the LNMP environment is built, you can manually build a WordPress website to familiarize yourself with CVM and its features.
FAQs
If you encounter a problem when using CVM, refer to the following documents for troubleshooting:
CVM login: Password Login and SSH Key Login and Login and Remote Access.
CVM network: IP Address and Port.
CVM disks: System and Data Disks.
Was this page helpful?
You can also Contact Sales or Submit a Ticket for help.
Yes
No

