Installing the chronyd Service (CentOS 8)
Last updated: 2024-01-06 17:38:11
Overview
Currently, native CentOS 8 does not support setting the NTP service. Instead, you need to use chronyd to deliver accurate time. This document describes how to install and configure chronyd on a CentOS 8-based Tencent Cloud CVM instance.
Directions
Installing and configuring the chronyd service
2. Run the following command to install the chronyd service.
yum -y install chrony
3. Run the following command to modify the
chrony.conf configuration file.vim /etc/chrony.conf
4. Press i to enter the edit mode, and append the following content to the next line of
#log measurements statistics tracking.server time1.tencentyun.com iburstserver time2.tencentyun.com iburstserver time3.tencentyun.com iburstserver time4.tencentyun.com iburstserver time5.tencentyun.com iburst
The result should be as follows:


5. Press Esc and enter :wq to save and close the file.
6. Run the following commands in sequence to enable chronyd autostart and restart it.
systemctl restart chronyd
systemctl enable chronyd
Verifying the configurations
1. Run the following command to check whether the clock is synced.
date
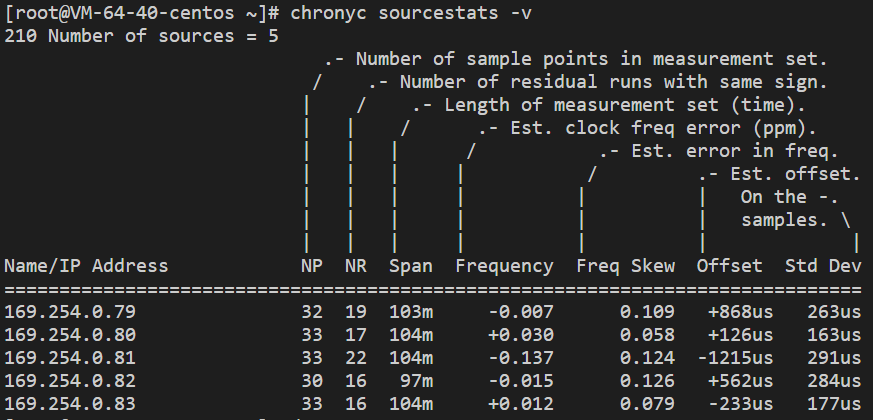
2. Run the following command to check the clock source status.
chronyc sourcestats -v
If a result similar to the following is returned, the configuration was successful.


Appendix
Commands
Command | Description |
chronyc sources -v | Check the clock source. |
chronyc sourcestats -v | Check the clock source status. |
timedatectl set-local-rtc 1 | Set the real time clock. The default format is UTC. |
timedatectl set-ntp yes | Enable the NTP service for synchronization. |
chronyc tracking | Calibrate the NTP server. |
chronyc -a makestep | Force synchronization of the system clock. |
Was this page helpful?
You can also Contact Sales or Submit a Ticket for help.
Yes
No
Feedback

