
集群回档优化方案

最后更新时间:2025-10-23 20:37:53
通常情况下,您可以使用快照备份通过 库表级回档至原集群 或 整集群回档至新集群 方式来恢复数据。但如果您的集群存储使用量较大(超过1TB),且需要回档的库表较大(需回档的库表占比超过存储使用量的70%),则建议您使用本文推荐的功能进行数据的快速恢复。
说明:
使用本文方法进行回档时,此功能会将原集群与新建集群进行建连,通过 binlog 来同步非回档的库表,以保证除了指定回档的库表处于回档时间,其余的库表均可处于最新数据状态。
使用本文方法进行回档时,当原集群与新建集群数据追平时,若一致性校验通过,则允许进行 VIP 切换操作。若切换了 VIP,则会终止数据同步,同时原集群与新建集群进行内网 VIP 交换;若取消切换 VIP,则会终止数据同步,原集群与新建集群的 VIP 不交换。
操作场景
集群回档优化方案适用于大存储集群针对某单一库表的回档,如果集群存储使用量大于1TB,且需要回档的库表较大(需回档的库表占比超过存储使用量的70%),则可以使用此功能快速恢复数据。
使用限制
库表级回档至新集群功能仅支持开启 binlog 的集群使用。
库表级回档至新集群功能仅支持回档至本地。
库表级回档至新集群时,新集群的选择仅支持实例形态为预置资源。
仅库表级回档至新集群可以和原集群交换 VIP 地址,整集群回档至新集群不支持。
集群 VIP 地址切换能力说明
库表级回档至新集群时,系统会根据您的选择创建一个新集群,新集群经过验证后,您可在系统提示的时间内手动切换原集群与新集群的读写实例、只读实例(若有)的 VIP 地址,无需在应用程序切换新 VIP 地址,以便更快地恢复业务对数据库的访问及操作。若超过系统提示的时间未进行 VIP 地址切换,则视为放弃切换 VIP 地址,回档完成后您可以在应用程序切换新 VIP 地址来连接新集群使用,或者将数据通过 DTS 迁回原集群,继续使用旧集群。
回档方式
按备份文件回档:将集群恢复到某一个快照备份文件的数据集状态,备份文件选择范围由用户设置的数据备份保留时长决定。
按时间点回档:将集群恢复到任意时间点,时间点的选择范围由用户设置的日志保留时长决定。
前提条件
集群的实例形态为预置资源。
原集群下已存在可用的快照备份,要生成快照备份,可参见 执行备份 各文档中的生成快照备份的步骤。
集群状态为运行中。
操作步骤
1. 登录 TDSQL-C MySQL 版控制台,在集群列表,单击集群 ID,进入集群管理页面。
2. 在集群管理页面,选择备份管理页,单击回档。
3. 在回档信息右上角,单击集群回档优化方案。

4. 在回档弹窗下,完成如下配置,单击前往购买页回档集群。
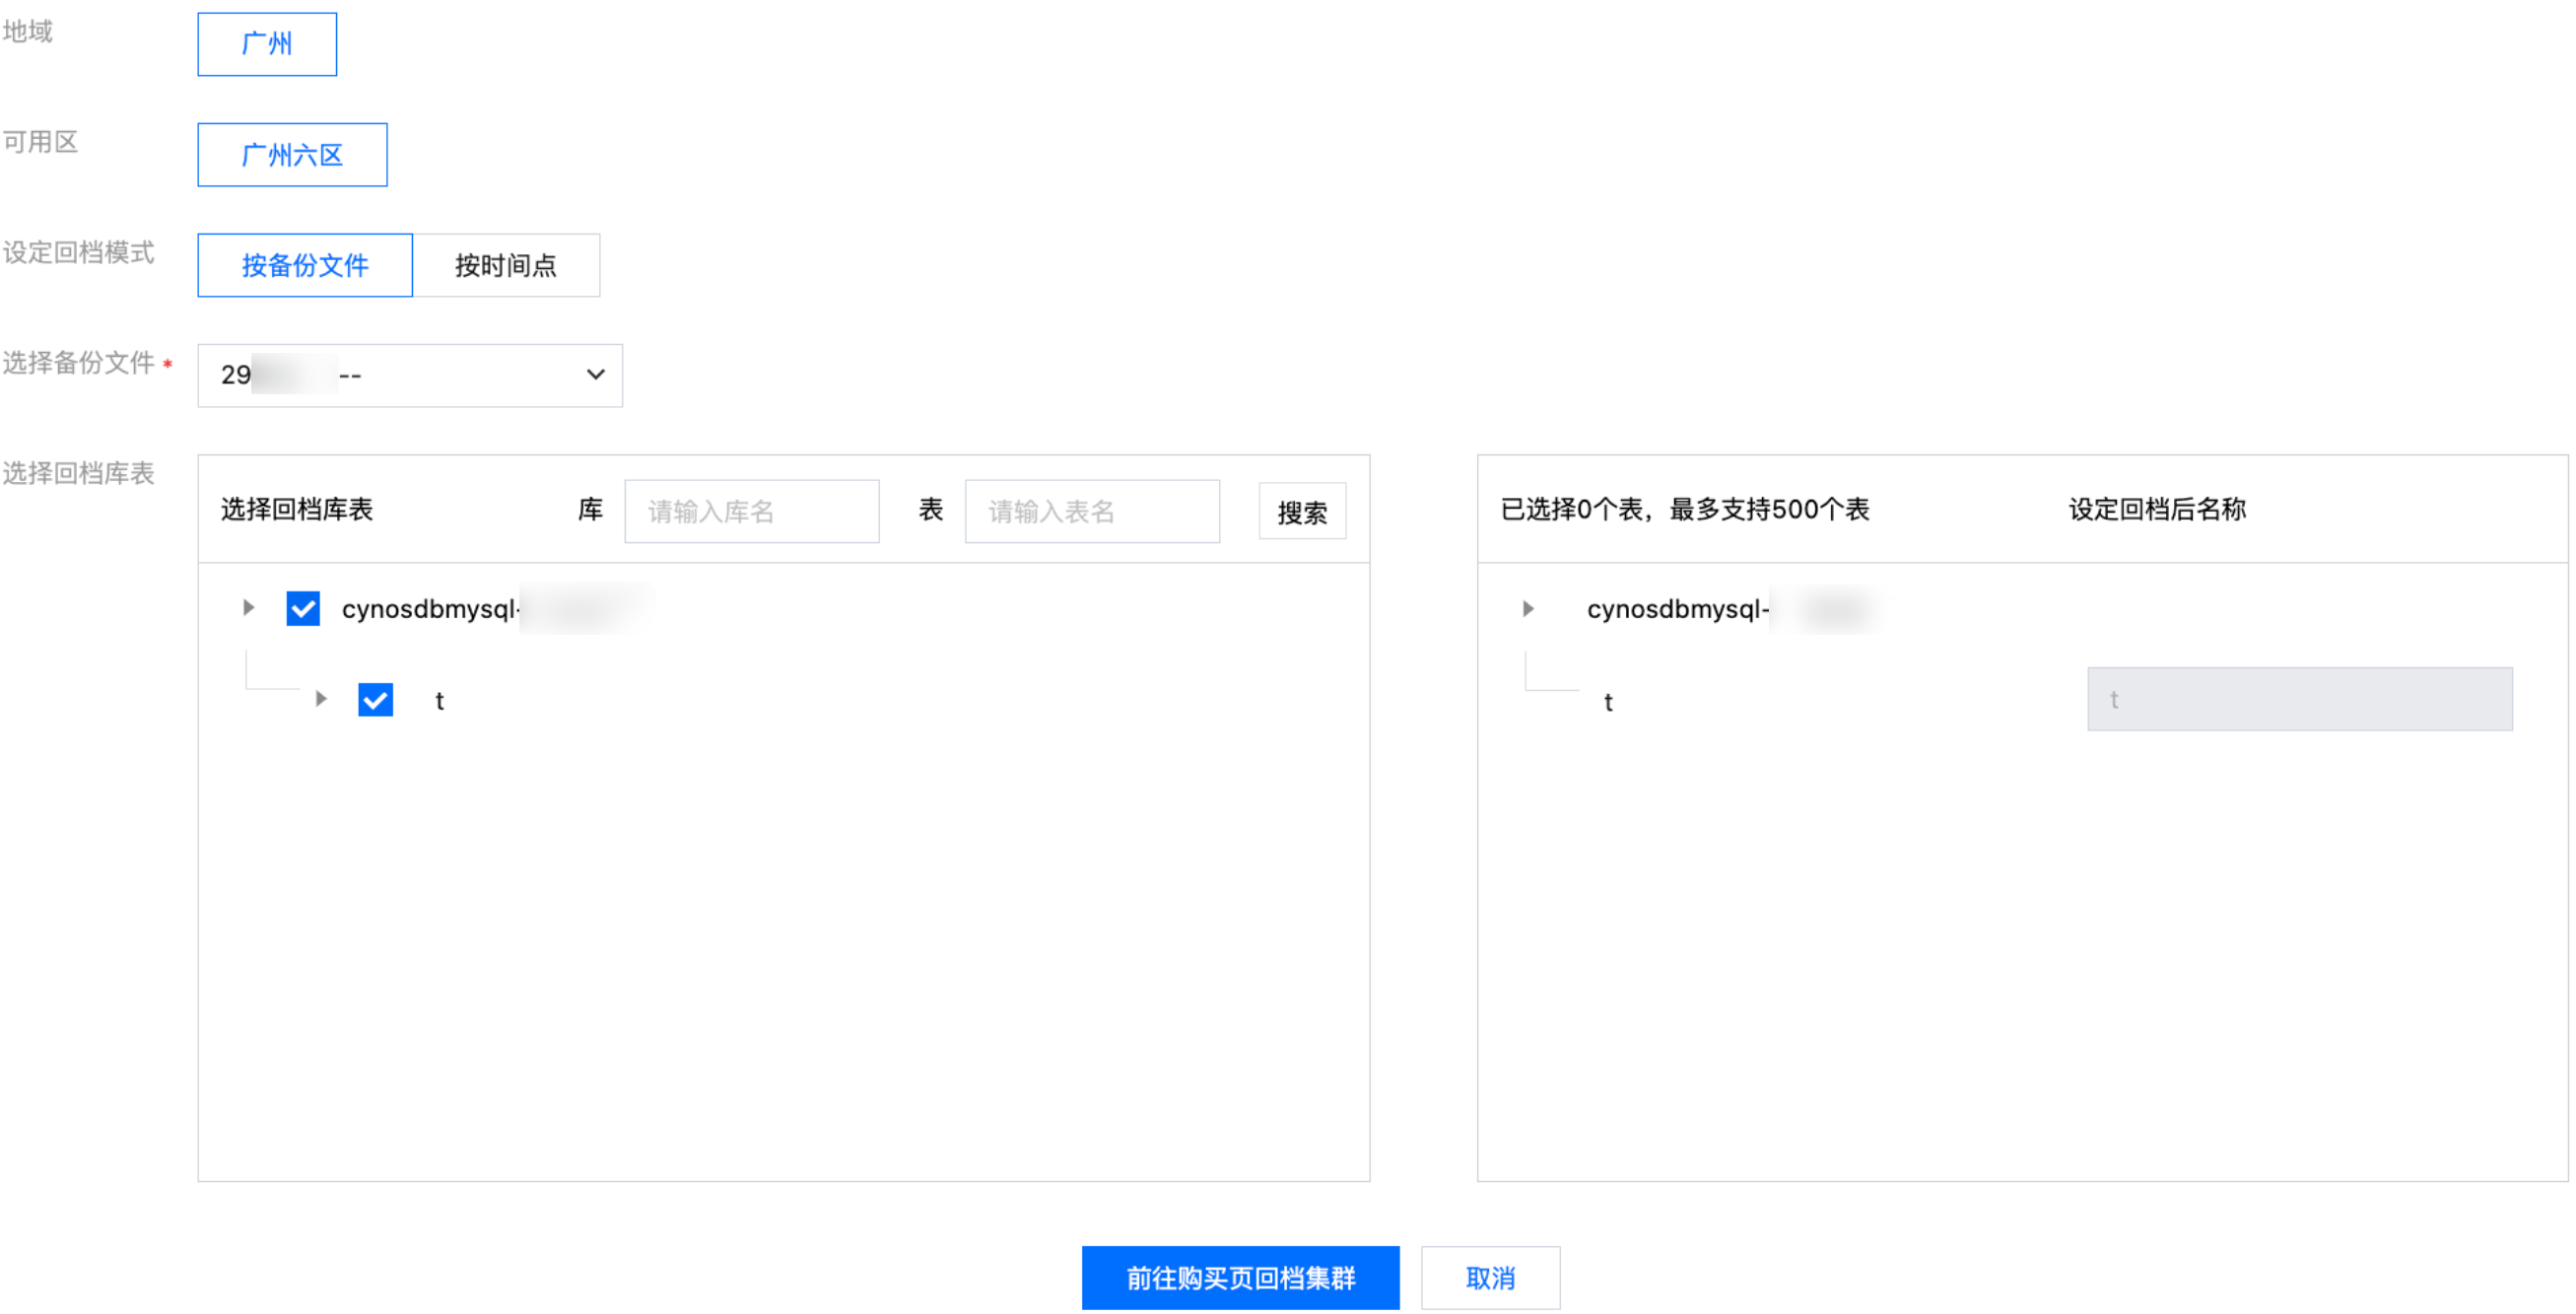
参数 | 说明 |
地域 | 默认和原集群一致。 |
可用区 | 默认和原集群一致。 |
设定回档模式 | 支持按备份文件、按时间点回档。 |
选择备份文件 | 若回档模式设定为按备份文件,则需选择已有的用于回档的快照备份文件。 |
设定回档时间 | 若回档模式设定为按时间点,则需选择回档的时间点。 |
选择回档库表 | 选择要回档的具体库或表,回档后默认命名为原库表名称。 |
5. 跳转至购买页,完成如下配置后,单击下一步。
参数 | 说明 |
实例形态 | 这里选择预置资源。 |
回档模式 | 支持按备份文件、按时间点回档。 |
选择备份文件 | 若回档模式设定为按备份文件,则需选择已有的用于回档的快照备份文件。 |
设定回档时间 | 若回档模式设定为按时间点,则需选择回档的时间点。 |
选择恢复范围 | 这里选择库表级回档。 |
选择回档库表 | 选择要回档的具体库或表,回档后默认命名为原库表名称。 |
地域 | 默认和原集群一致,不支持调整。 |
主可用区 | 默认和原集群一致,不支持调整。 |
传输链路 | 默认为高 IO 版。 |
网络 | 选择私有网络。 |
计算计费模式 | 支持包年包月、按量计费。 |
实例类型 | 支持通用型、独享型。 |
计算实例(读写) | 选择读写实例的计算规格,仅支持配置一个读写实例。 |
计算实例(只读) | 若原集群无只读实例,此项不需要设置。 若原集群有只读实例,此项需要选择保留的只读实例。只读实例的数量和规格默认与原集群中只读实例一致,支持删除只读实例,支持恢复此步骤中被删除的只读实例,不支持在此时增加只读实例,如需增加只读实例,您可在回档完成后再新建只读实例。 说明: 当只读实例数量小于原集群只读实例数量时,只读 VIP 地址将无法完全对应迁移。 |
存储计费模式 | 默认按量计费。 |
时长 | 计算计费模式选择为包年包月时需要为实例选择时长,例如1个月、1年等;计算计费模式为按量计费时无需为实例选择时长。 |
6. 在跳转页面配置基本信息和高级配置,包括集群名称,默认字符集,安全组,参数模板及项目等,确认无误后单击立即购买。
7. 返回集群列表,找到通过回档新建的集群,单击集群 ID 进去新集群的管理页。
8. 在集群详情 > 读写实例 > 读写地址后,单击切换详情,您需要在系统提示的时间内完成切换,否则将视为放弃切换。

9. 进入连接地址切换弹窗,核对连接地址后,根据需要进行如下操作。
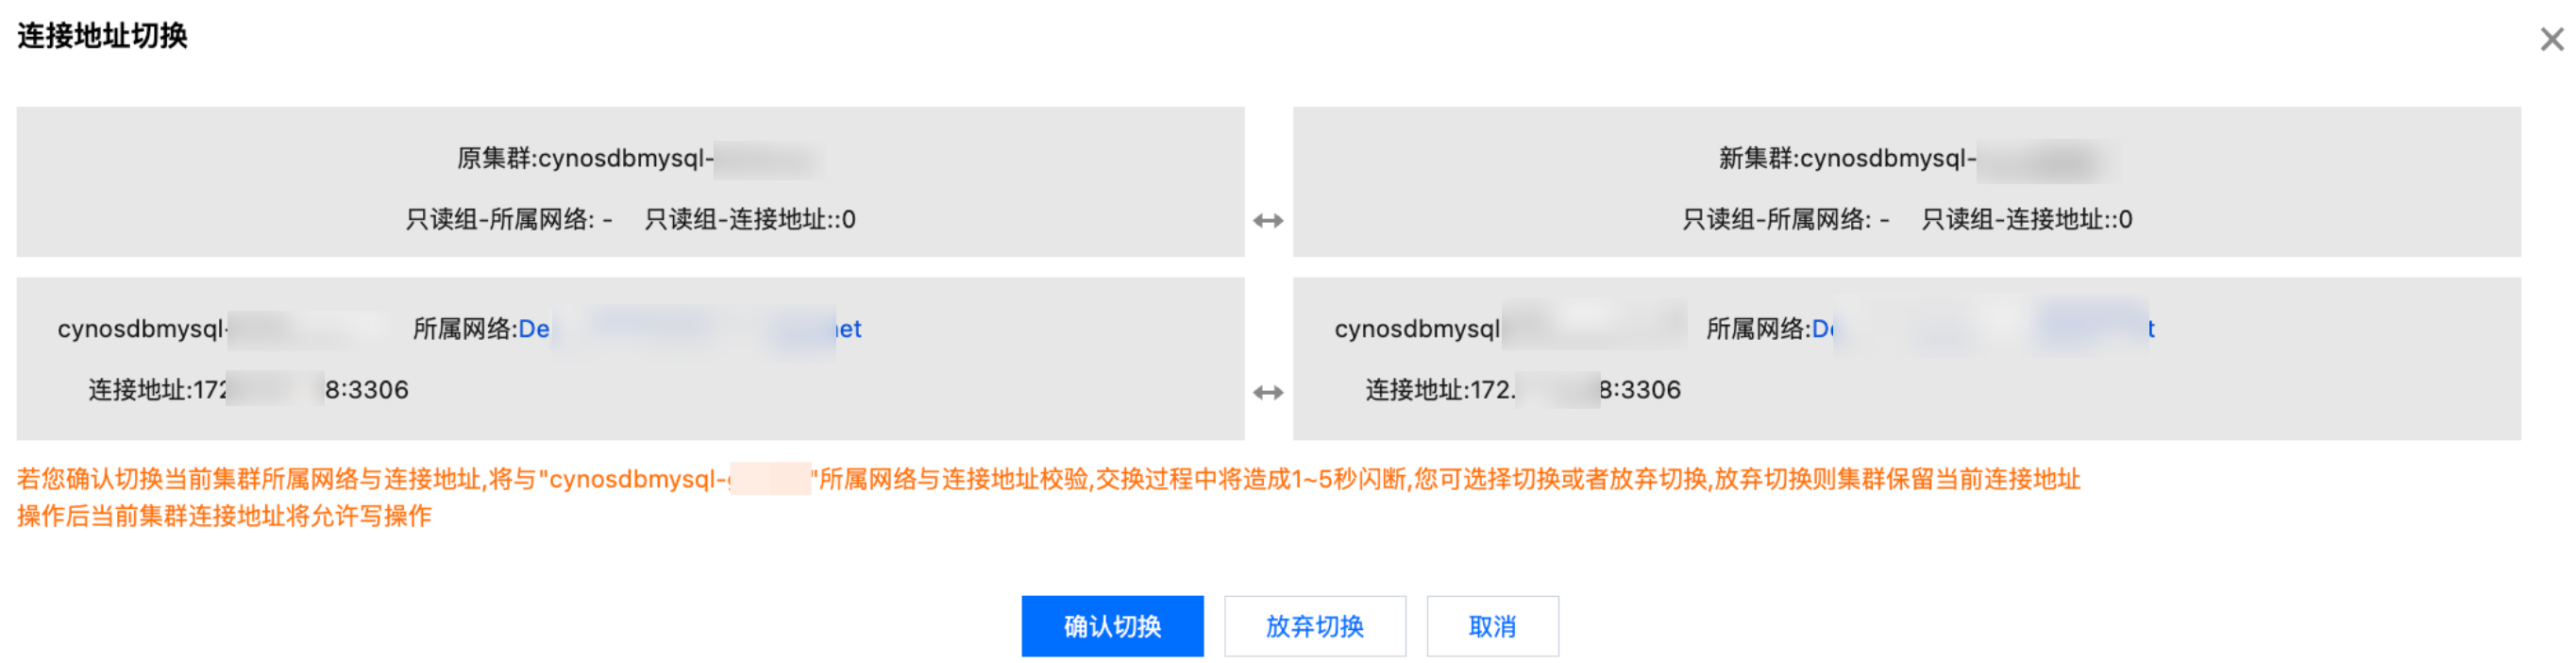
确认切换:点击确认切换,会与原集群连接中断,过程中会有1 - 5秒闪断,原集群和新集群将交换 VIP 地址。
放弃切换:点击放弃切换,会与原集群连接中断,原集群和新集群不交换 VIP 地址,操作后当前集群的 VIP 地址将允许写操作。
取消:点击取消,将关闭弹窗,您可在系统提示的时间内再次选择切换。
10. 上述操作执行完成后,即库表级别回档至新集群完成。
附录:回档实时进度查询
当您执行了库表级别回档至新集群操作,您可以通过任务列表查询任务“库表回档至新集群”、“创建库表回档用新集群”的实时进度。
1. 登录 TDSQL-C MySQL 版控制台。
2. 在左侧导航栏单击任务列表进入任务列表界面。
3. 在上方选择对应地域。
4. 找到需要查询任务详情的任务项(“库表回档至新集群”、“创建库表回档用新集群”),在操作列单击任务详情后进行进度查看。
文档反馈