
Operation Overview

Last updated: 2025-01-23 17:01:24
This document describes the common features of the cluster list page and cluster management page in the TDSQL-C for MySQL console, guiding you to easily manage TDSQL-C for MySQL.
Cluster List Page
On the cluster list page in the TDSQL-C for MySQL console, you can view cluster information and manage clusters.

Feature | Description |
Create | At the top of the cluster list, select Create to go to the purchase page to create a cluster. For detailed operations, see Creating Cluster. |
Quick Check | At the top of the cluster list, select Quick Check to go to the DBbrain console, where you can check the health status of the clusters under your account and diagnose and optimize instances. For more information, see Performance Optimization. |
Renew | After selecting the target cluster, click Renew at the top of the cluster list to manually renew a monthly subscription cluster. For detailed operations, see Renewal. |
Enable Auto-Renewal | After selecting the target cluster, select More > Enable Auto-Renewal at the top of the cluster list to set auto-renewal each month after expiration for a monthly subscription cluster. Batch settings are supported (selecting multiple clusters). For detailed operations, see Renewal. |
Edit Tag | After selecting the target cluster, select More > Edit Tag at the top of the cluster list to edit the tags of cluster resources. For detailed operations, see Editing and Deleting Tag. |
Cluster Management Page
Log in to the TDSQL-C for MySQL console and click the cluster ID in the cluster list to enter the cluster management page. You can switch to view cluster details, monitoring and alarms, account management, database management, database proxy, parameter settings, security group, backup management, operation logs, and resource packages.
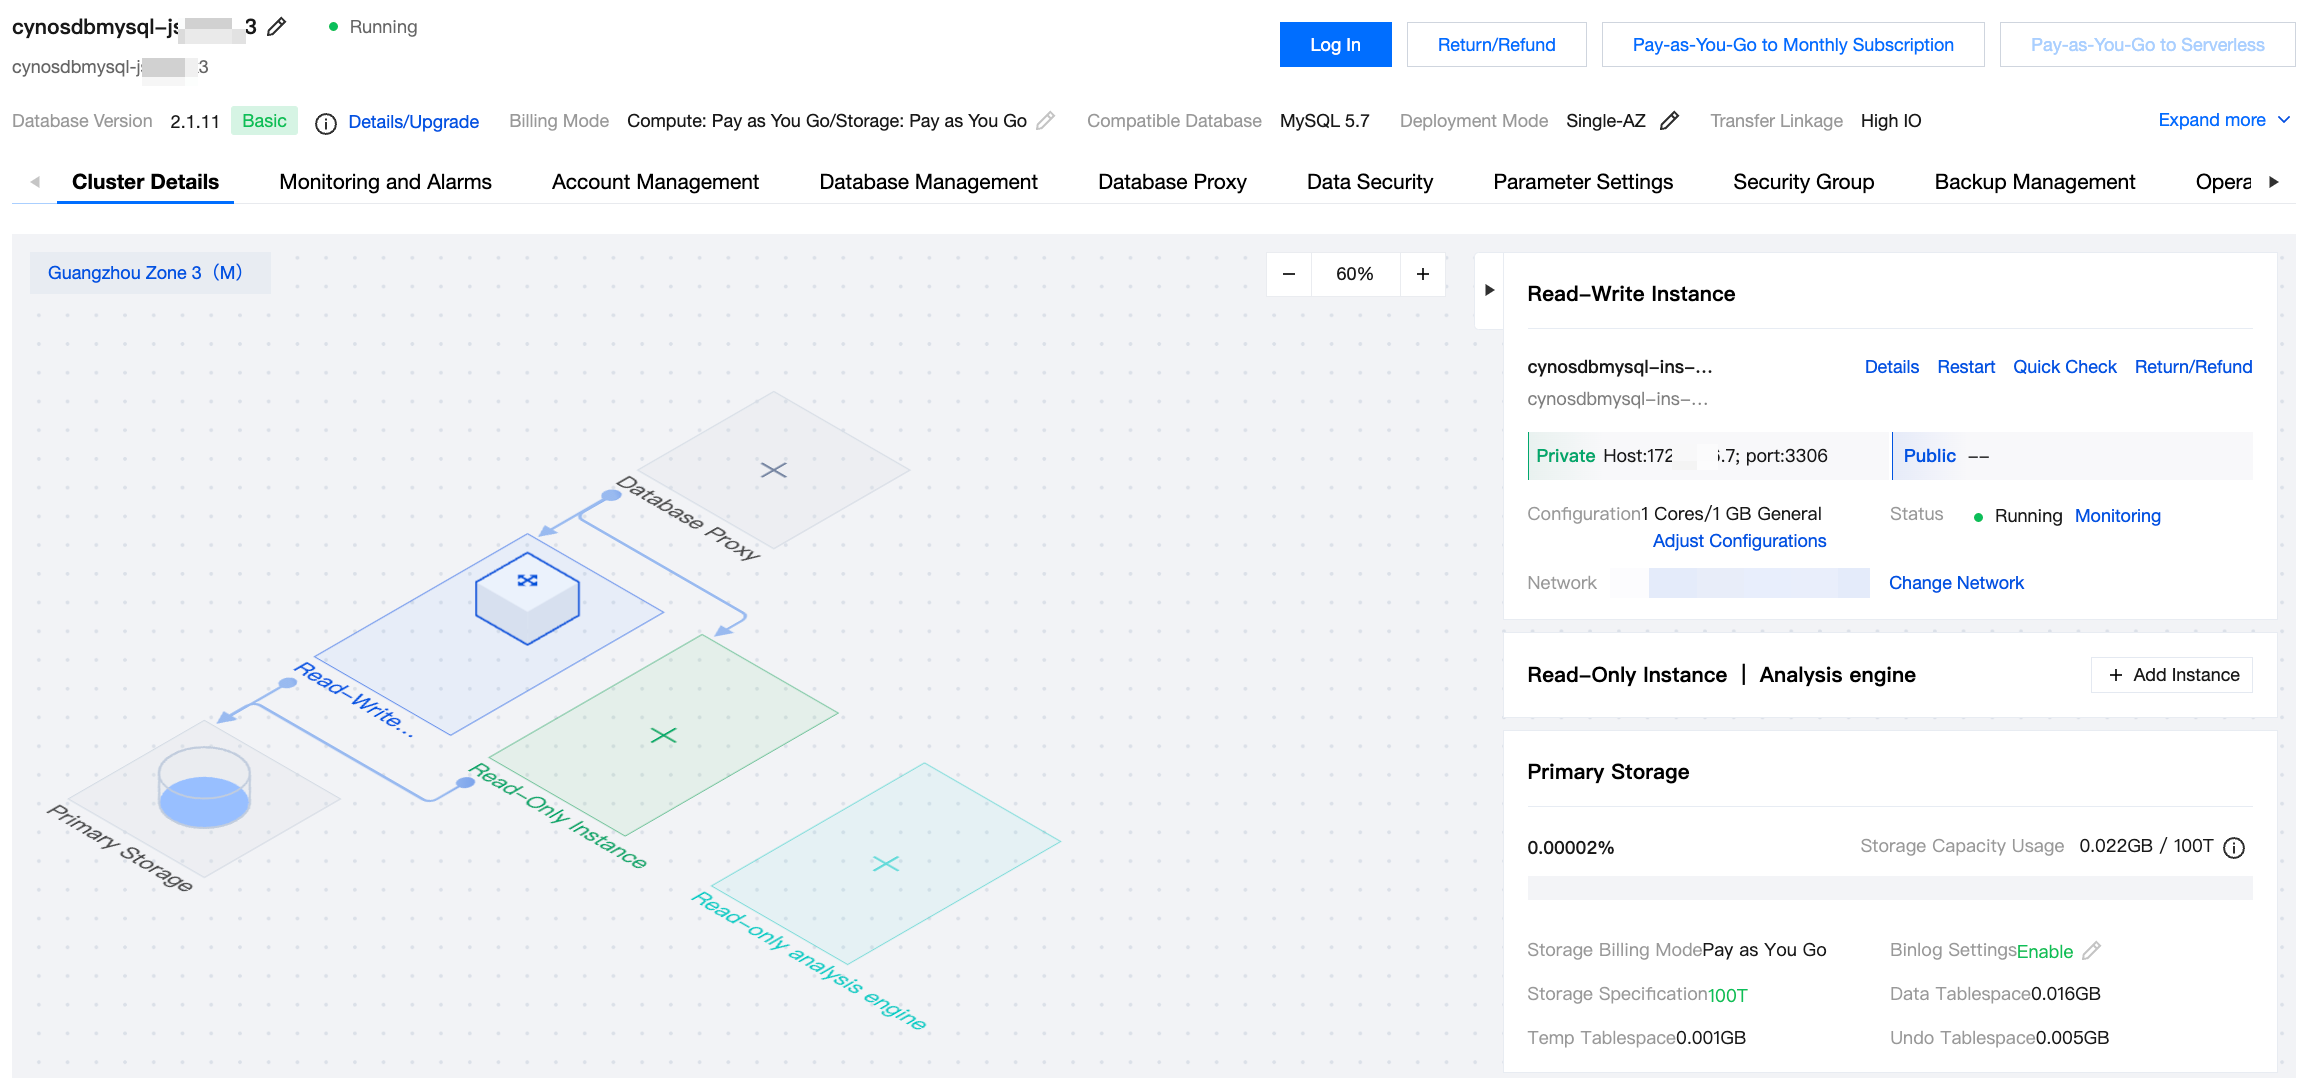
Feature Page | Feature Item | Description |
Cluster Details | Rename cluster | Click the edit icon next to a cluster name to customize the cluster name. |
| Details/Upgrade | Click Details/Upgrade to view the database kernel versions of all instances in the current cluster, as well as the release date of the latest database kernel version. When the database kernel version is not the latest, you can choose to manually upgrade it. For detailed operations, see Upgrading Kernel Minor Version. |
| Switch to Another Project | Next to the project to which a cluster belongs, click Switch to Another Project to assign the cluster to a different project. |
| Set | If the cluster billing mode is monthly subscription, click the setting button next to Renewal Settings to renew. |
| Storage Billing Mode | Click the edit icon next to Billing Mode to adjust the storage space for clusters billed on a monthly subscription basis or switch from pay-as-you-go to monthly subscription. |
| Deployment Mode | Click the edit icon next to Deployment Mode to switch a cluster from single-AZ to multi-AZ deployment or vice versa. For detailed operations, see Multi-AZ Deployment. |
| Primary-Secondary Switch | If a cluster is deployed in multiple AZs, click the switch icon between the primary AZ and secondary AZ to perform a primary-secondary switch (at the whole cluster level). For detailed operations, see Switching AZs. |
| Enable Database Proxy | For clusters without a database proxy enabled, click Enable Database Proxy to quickly enter the enabling page from the cluster details page. |
| Restart | Click Restart to restart an instance. During the restart, the instance will not be accessible, and existing connections will be terminated. Prepare accordingly to avoid any impact. During the restart, a large business write volume and too many dirty pages can cause the restart to fail. If the restart fails, the instance will revert to its state before the restart and remain accessible. Be sure to restart the instance during off-peak hours so as to ensure the success rate of the restart and reduce the impact on your business. |
| Adjusting Configurations | Click Adjust Configurations or the corresponding icon to adjust a cluster's compute configurations. For detailed operations, see Adjusting Compute Configuration. |
| Quick Check | In the read-write or read-only instance section, click Quick Check to go to the DBbrain console, where you can check the health status of the current instance and diagnose and optimize the instance. For more information, see Performance Optimization. |
| Return/Refund | In the read-write or read-only instance section, click the return/refund icon to terminate the corresponding instance. Note that if the instance type is provisioned resource, and if there are read-write and read-only instances under a cluster, you need to first return and complete the refund for the read-only instances before proceeding with the return and refund of the read-write instances. If the instance type is Serverless, for single-node edition, click the return/refund icon in the read-write instance section to terminate. For cluster edition, termination via the return/refund icon is not supported. In this case, you need to adjust the configuration to change the number of read-only instances. |
| Rename Instance | Click the edit icon next to an instance name to customize the instance name. |
| Change Network | Click Change Network next to the associated network to modify the network of a read-write or read-only instance. |
| Modify private network address and port | Click the edit icon next to a read-write or read-only instance to modify the private network address and port of the instance. |
| Enable Public Network Access | Click Enable next to the public network of a read-write or read-only instance to enable the public network. For detailed operations, see Enabling/Disabling Public Network Address. |
| Add read-only instance | When the instance type is provisioned resource, click Add Read-Only Instance to add a new read-only instance to a cluster. When the instance type is Serverless, you can only add a read-only instance by adjusting the configuration. |
| Scale-out | When the instance type is provisioned resource and the cluster storage billing mode is monthly subscription, you can click Expand after the storage specification to adjust the storage space. |
Monitoring and Alarms | | On the Monitoring and Alarms page, you can query the resource, engine, and deployment monitoring data of read-write or read-only instances under a cluster. You can add time ranges for comparison and time granularities for filtering. For detailed operations, see Monitoring and Alarms. |
Account Management | Create Account | In addition to the default root account, you can also create accounts. |
| Reset Password | If you forget the password or need to update it, you can reset the password. It is supported for both root and non-root accounts. |
| Reset Permissions | You can reset permissions for the root account to restore default system-assigned permissions. |
| Modify Permissions | You can grant and modify permissions for non-root accounts. |
| Modify Host | You can modify the authorized hosts for non-root accounts. |
| Modifying the number of connections | You can modify the connection limits for non-root accounts. |
| Deleting Account | You can delete non-root accounts. |
| Modify Remarks | You can modify remarks for non-root accounts. |
| Clone | You can choose a non-root account for cloning. |
| Custom Password Strength | The custom password strength feature is supported. Once enabled, it will restrict password settings for account creation, password reset, and account cloning. For details, see Configuring Custom Password Strength. |
Database Management | Create Database | Click Create Database to create a database for a cluster. |
| Import Data | Click Import Data to go to the Database Management Center (DMC) and import data into a database. |
| Batch Delete | Click More > Batch Delete to delete multiple selected databases that were not created by the system. |
| Delete | Click Delete to delete the selected database that was not created by the system. |
| Modify | Click Modify to add or modify specific account permissions or remarks for the selected database. |
Database Proxy | Enable Now | For clusters without a database proxy enabled, click Enable Now to enter the configuration page for enabling the database proxy. |
| Overview | On the database proxy overview page, you can view basic information about the database proxy, adjust database proxy nodes, disable the database proxy, add access addresses, adjust the configuration of the database proxy access address, delete database proxy access addresses, rebalance the load, and perform other operations. |
| Access Policy | On the database proxy access policy page, you can query the deployment situation of the current database proxy access address, adjust the configuration of the database proxy access address, add nodes, add read-only instances, and perform other operations. |
| Performance Monitoring | On the database proxy performance monitoring page, you can query the monitoring situation of each database proxy node, and can also click Set Alarm to go to the Tencent Cloud Observability Platform (TCOP) for setting alarms. |
Parameter Settings | Modify Parameters | You can modify the runtime values of parameters either individually or in batches. |
| Import Parameters | You can import an existing parameter configuration template from a local computer. |
| Export Parameters | You can export the current parameter settings as a template to a local computer. |
| Import from Template | You can import parameter settings from an existing template in the console. |
| Save as Template | You can save the current parameter settings as a template to the console. |
| Recent Modifications | Click Recent Modifications to query the latest parameter modification records for the corresponding instances in a cluster. |
Security Group | | On the Security Group page, you can view or configure the security groups of read-write instances, read-only groups, and database proxy access addresses under a cluster. When configuring multiple security groups, you can adjust the security group priority order or delete redundant security groups. |
Backup Management | Roll Back | You can roll back data through snapshot backups by backup file or time. For detailed operations, see Restoring Data from Snapshot Backup. |
| Manual Backup | You can choose snapshot backup to back up the entire cluster or choose logical backup to back up the entire cluster or specific databases/tables. The current system only allows initiating a manual backup once per hour. For detailed operations, see Manual Backup. |
| Auto-Backup Settings | In automatic backup settings, snapshot backup is enabled by default, and logical backup needs to be enabled manually. You can modify the backup retention period, set the logical backup start time, enable cross-region logical backup, and perform other operations. For detailed operations, see Automatic Backup. |
| Log Backup Settings | In log backup settings, the binlog backup retention period is enabled by default, which can be modified. You can enable cross-region backup for binlog logs. |
Operation Log | Slow Log Details | You can query and download slow logs. |
| Error Log Details | You can query and download error logs. |
| CLS (Activate Service) | Slow log data is collected from TDSQL-C for MySQL instances and shipped to Cloud Log Service (CLS) for analysis. For detailed operations, see CLS. |
Resource Pack | | Serverless clusters support resource package management. You can purchase resource packages, bind resource packages, adjust the priority order of resource packages, and perform other operations on the resource package page. |
Was this page helpful?
You can also Contact Sales or Submit a Ticket for help.
Yes
No
Feedback