If the UI interaction of conference(TUIRoomKit) does not meet your product requirements, and you have your own interaction and business logic needs for custom implementation of scheduled conference-related interaction features, you can integrate TUIRoomEngineSDK and refer to key code related calls to meet your needs.
Description of the Feature
TUIRoomKit supports schedule conference, allowing users to book a room and schedule conference. This article will detail the features of this functionality and explain how to use it within the TUIRoomKit component.
Schedule Conference
Conference List
Configure Conference
nvite Members
Feature Integration
Before using the schedule conference feature, you need to complete the relevant configuration for TUIRoomKit and log in to . For details, please refer to Quick Access.
Note:
The scheduled conference feature requires Conference v2.5.0 and above.
How to Schedule a Conference
To utilize the scheduled conference feature, you need to access the conference scheduling page provided by TUIRoomKit:
Android
iOS
Flutter
According to your business, simply call the following code in the corresponding Activity to schedule a conference.
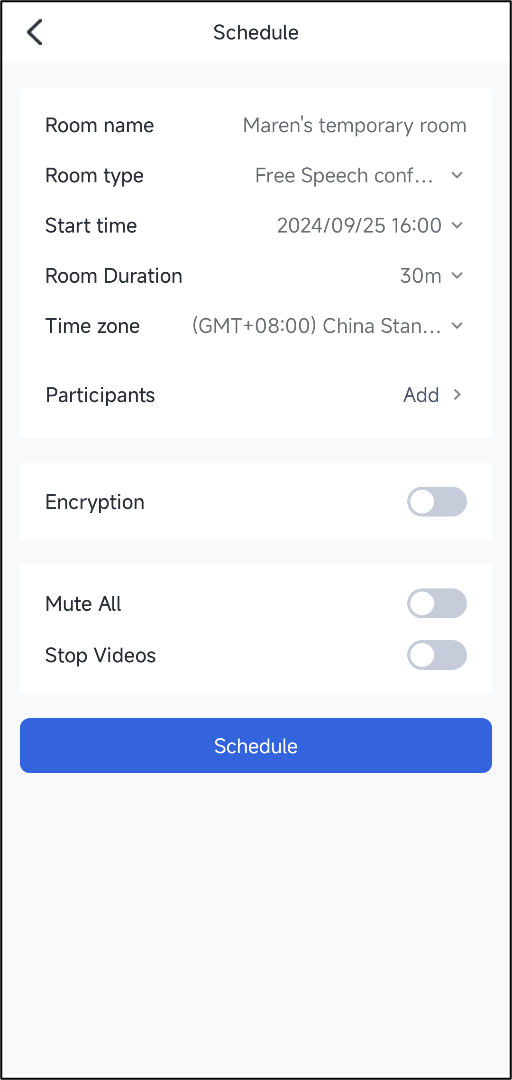
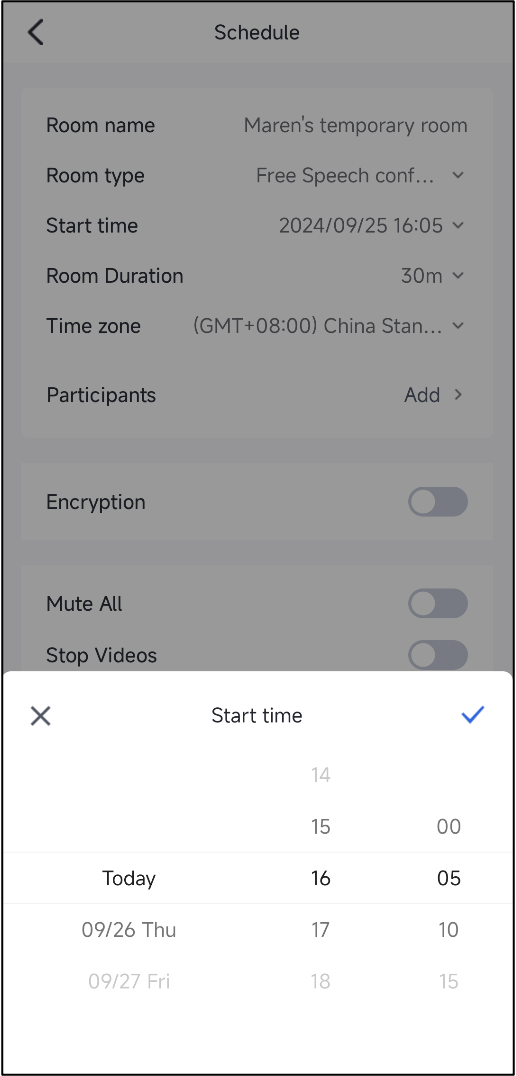
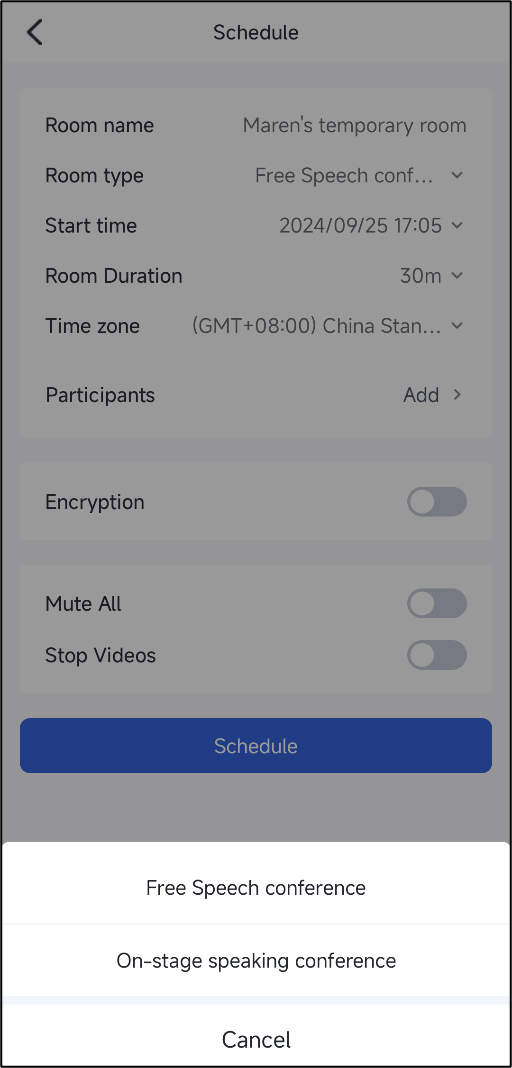
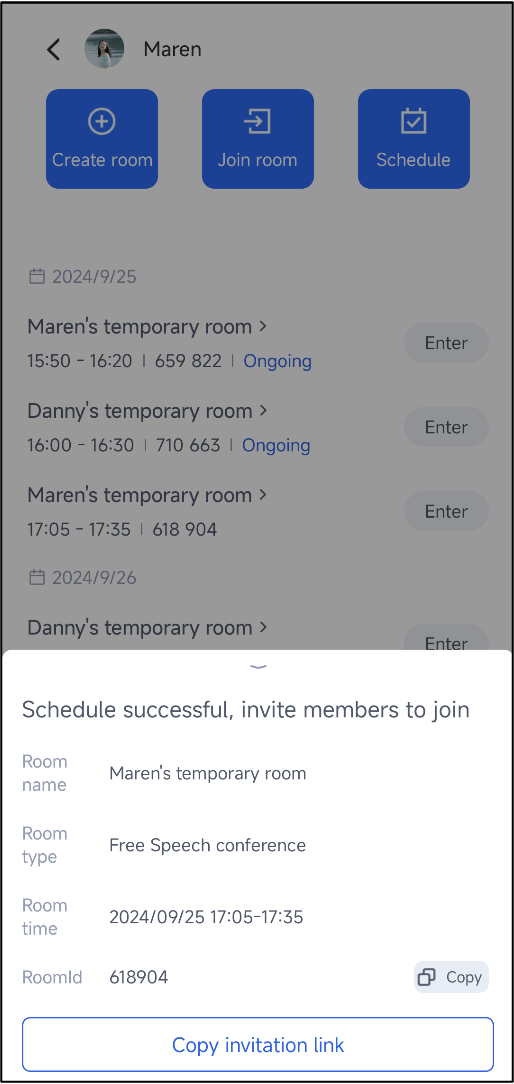
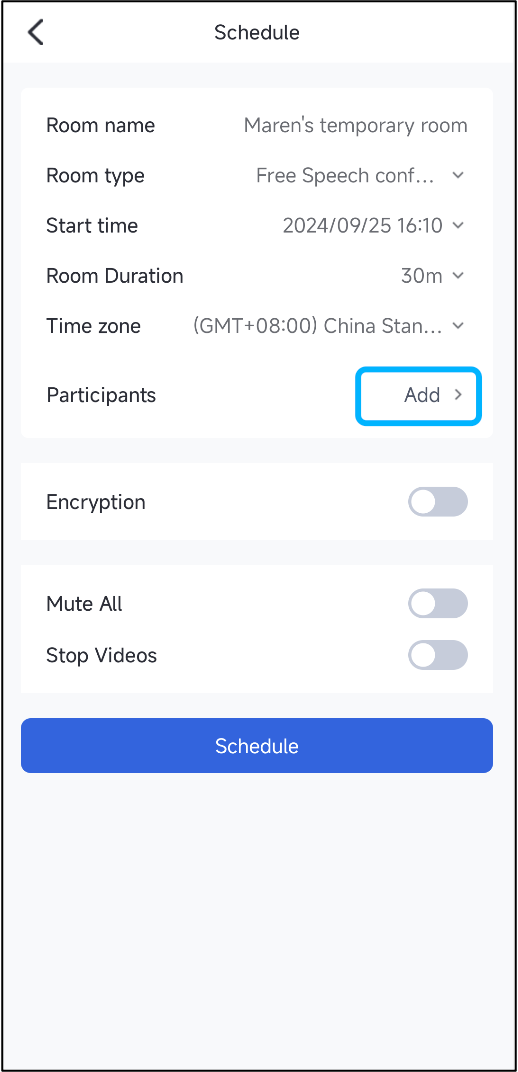
Configure Conference Details: Room Name, Room Type, Start Time, Room Duration, Timezone, Invite Members (Member List needs to be imported), Room Encryption, and Member Management (Mute All, Disable Drawing for All).
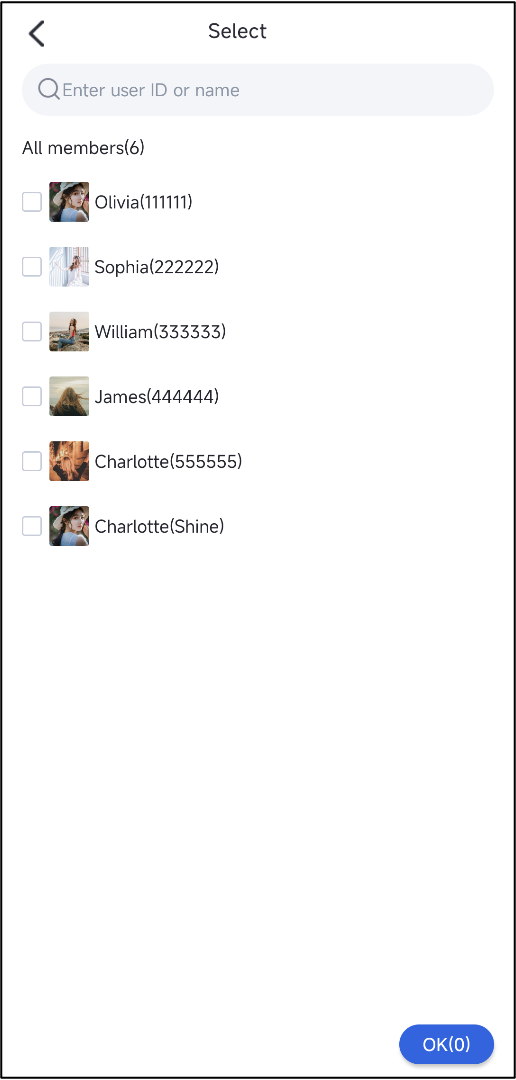
How to invite members: Click "Add" to invite members. By default, you need to input the user list. To facilitate a quick experience, we provide a demo user list. Please refer to How to invite members.
Enter the schedule conference interface
Configure conference details
Scheduled successful
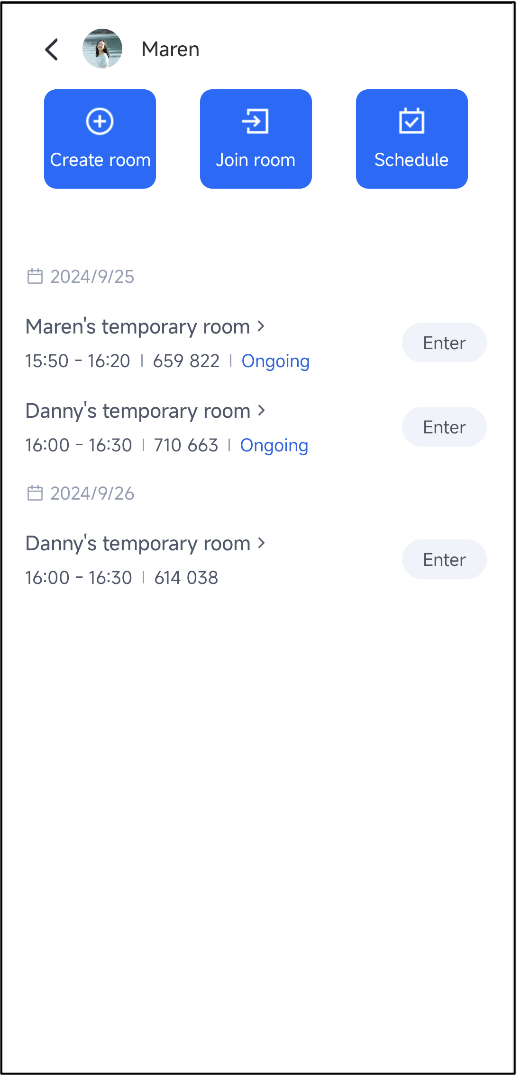
View scheduled conferences
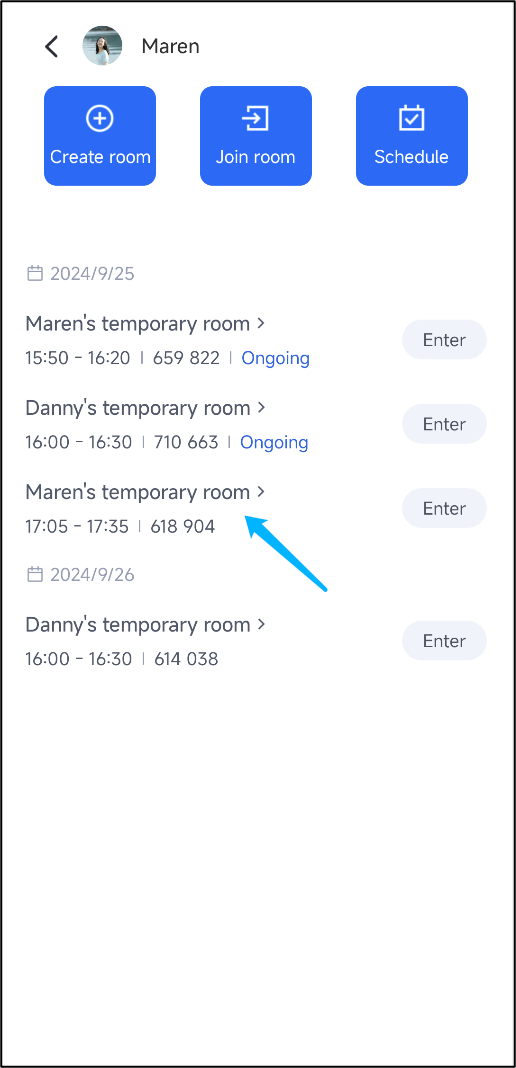
TUIRoomKit provides UI components for the conference list. By arranging the conference list component on your page, you can view and manage all conferences by the current user:
Android
iOS
Flutter
1. Based on your business, add the conference list layout to your layout:
<!-- For example, if your parent layout is ConstraintLayout, add the following code -->
...YourWidgets(),// Your other widgets, this is just an exam
constConferenceListWidget(),// Conference list component
],
),
);
}
}
The conference list provides the following features:
View the conference list: The list includes conference you created and conference you were invited to.
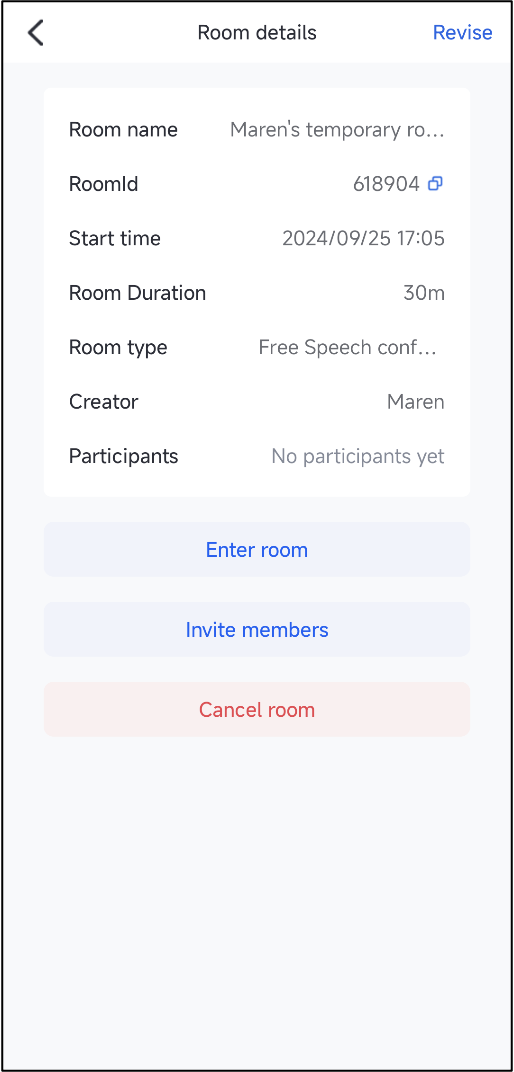
View conference details: You can click on a specific conference to view its details.
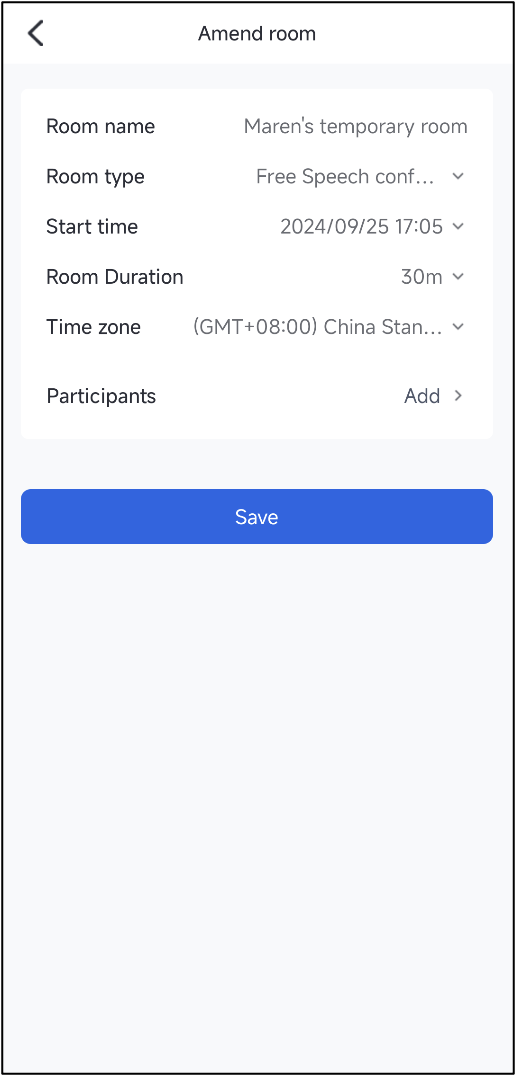
Modify conference information: Click on a conference in the conference list, if the conference has not started yet, and you are the organizer, you can edit the information for that conference.
Click on the conference list
View conference details
Modify conference Information
How to Invite Members
In the schedule conference or modify conference interface, you can click the Participating Members button to pop up the member selection interface. By default, TUIRoomKit uses the Chat relationship chain. We also support you to set the contacts list. For different platforms, please refer to:
Android
iOS
Flutter
Set contacts data
You can set your contacts user list through the setParticipants method.
val participants = bundle.getSerializable(CONFERENCE_PARTICIPANTS) as ConferenceParticipants
val selectedList:ArrayList<User>= participants.selectedList
Note:
If the contacts UI of TUIRoomKit does not meet your business needs, we support you to associate your own contacts UI with TUIRoomKit. Please refer to: How to set up a custom contacts.
How to experience the invite member feature
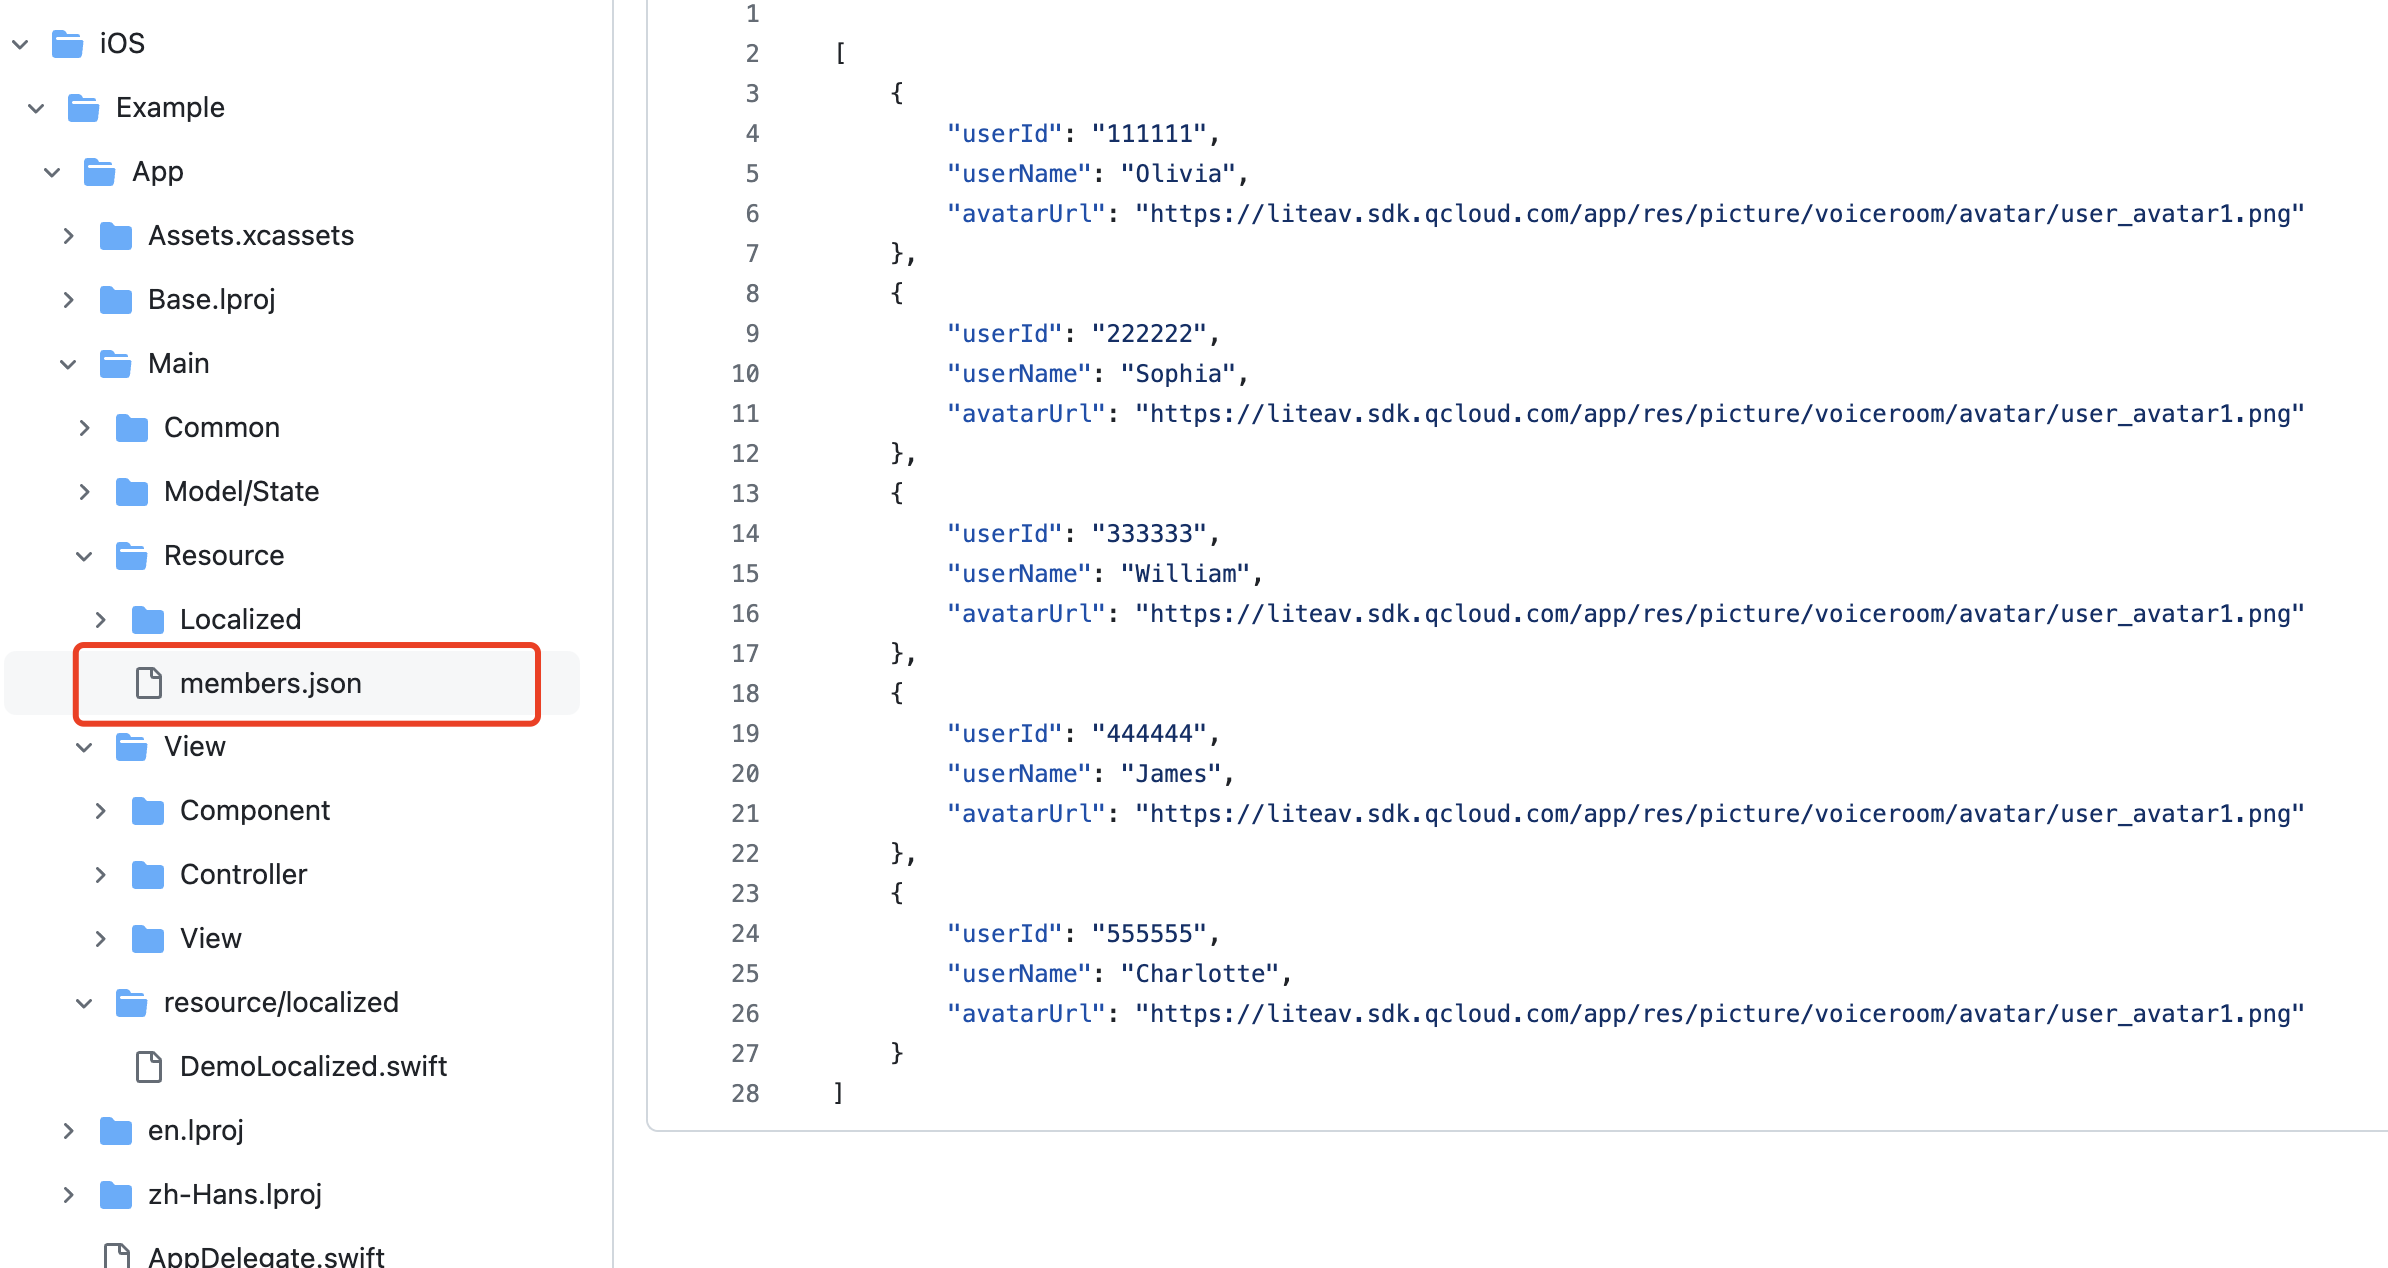
First, refer to Run Sample Code, and complete the demo. In the members.json file of the demo project, some test user information has been pre-configured. You can choose two accounts, log in with the configured userId on two different phones, and then select the other user when scheduling or editing a conference. This way, the scheduled conference will appear in the other user's schedule list.
Code Implementation for Member List Page
Considering the complexity of the user list data on the invite members page, we have designed a solution that allows you to customize the Member Selection Interface. Next, we will guide you on how to integrate your own member selection page (of course, you can also directly use the UI provided in the demo, which will be introduced later).
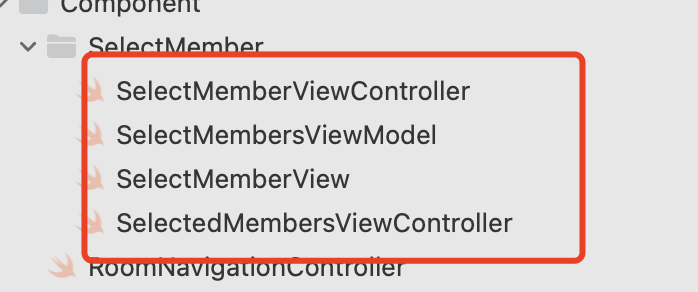
1. Prepare your Friend Selection Page viewController, implementing the SelectMemberControllerProtocol protocol.
The in-conference call feature also requires using your custom-defined contacts component. If you still need to use the in-conference call feature, it is recommended to place a ConferenceParticipants object in your contacts page's constructor parameter. The data source will be mentioned in the code in step two.
The ConferenceParticipants class has two members:
selectedList: the selected members;
unSelectableList: Non-selectable members. You can set the corresponding members as non-selectable on the UI. The schedule conference feature does not use this field.
2. Return the selected user list from the custom contacts to TUIRoomKit: After completing user selection in the contacts, you need to return the selected user list to TUIRoomKit. You can return the data to TUIRoomKit using the following method.
// Sample Code
ConferenceSession.sharedInstance.setContactsViewProvider { participants in
3. With the above two steps, you can display your own member selection page. We also provide the page code in the demo as shown in the image above. You can directly copy the following files into your project to get our example page.
In the loadMembers method of SelectMembersViewModel, you can load your own member list data (you can also directly obtain Chat Relationship Chain Data).
When you need to use the member invitation feature to invite members into the conference, we provide the following two solutions for you to add the members you need to invite:
Solution 1: Using json to configure user information
You can refer to our Example Project. In the example/assets directory, members.json stores the user information required for invitations. Follow these steps:
1. In the assets directory of your project, create a new members.json file listing all the user information you need. The file format should be the same as the members.json mentioned above.
2. In the pubspec.yaml file of your project, complete the following configuration:
assets:
- assets/members.json
After completing the above configuration, you can select the members listed in members.json in the member invitation interface.
Solution 2: Using Chat Buddy Information
If you have not configured the members.json mentioned above, the invite friends interface will default to pulling your Chat Buddy Information. When you need to invite other members to the conference, you can add the members you want to invite as friends according to your business needs.
Prerequisites: log in to Chat SDK, the login process is the same as the log in to Floating Chat process. If you have already completed the login process or are using In-Conference Chat, you can skip this step.
After adding friends, you can choose to invite the added users each time you make a reservation.
If you need more related friend operations, please refer to: Friend Management. If you need to use Rest API to batch add friends, please refer to: Adding Friends RestAPI.
After completing the steps above, by clicking the Add button, a member selection interface will pop up. Here, you can invite or remove members. Once modified, the conference you have booked will appear in the other party's conference list.
Schedule conference interface click Add
Add or delete members from the user list
Notes
After successfully scheduling a conference, you can get the conference id and reservation information.
To batch schedule conferences at different dates/times, select the times and submit in batches.
The start time for scheduling a conference cannot be earlier than the current time, but there is no limit on the number of days in advance.
After the scheduled conference reaches the end time, if the conference has not been dissolved and there are no users in the conference, the conference will be retained for 6 hours from the scheduled end time. During this period, you can still enter the conference at any time.
Feature customization
If the current UI does not meet your needs, you can achieve the desired UI effect by modifying the source code. For different platforms, please refer to:
2. Your contacts returns the selected user list to TUIRoomKit:
After the contacts completes the user selection, you need to return the selected user list to TUIRoomKit. You can return data to TUIRoomKit in the following way.
java
kotlin
Intent intent =newIntent();
// participants is the selected user list and must be of ArrayList<User> type.
val participants = bundle.getSerializable(CONFERENCE_PARTICIPANTS) as ConferenceParticipants
val selectedList:ArrayList<User>= participants.selectedList
You can achieve a satisfactory UI by modifying the source code in the iOS/TUIRoomKit/Source directory. To make it easier for you to customize the UI, here is an introduction to the files related to the room password.
You can modify the source code under the tencent_conference_uikit/lib/pages directory to achieve your desired UI results. To make UI customization easier for you, here is an introduction to the files for scheduled conference.
pages
├── conferenceList // Folder for scheduled conference list
| ├── view.dart // Scheduled conference list page
| └── widget.dart
| ├── conference_date_item.dart // Single date widget in the conference list
| ├── conference_item.dart // Single conference widget in the conference list
| └── no_schedule_widget.dart // Widget displayed when there are no conference in the conference list
├── schedule_conference // Folder for scheduled conference page
│ ├── view.dart // Scheduled conference page
│ └── widgets
│ ├── attendee_selector // Folder for attendee selection page
│ │ ├── view.dart // Attendee selection page
│ │ └── widgets
│ │ └── selected_attendees.dart // Pop-up page of selected attendees
│ ├── duration_selector.dart // Widget for selecting conference duration
│ ├── room_control.dart // Widget for muting/unmuting all attendees or disabling/enabling video during the conference
│ ├── room_info.dart // Widget for overall room information of the scheduled conference
│ ├── room_type.dart // Widget for selecting room type
│ ├── start_time_selector.dart // Widget for selecting conference start time
│ └── time_zone_selector.dart // Page for selecting conference time zone
└── schedule_details // Folder for conference details
│ ├── view.dart // conference details page
│ └── widgets
│ ├── details_button_item.dart // Single button widget in the conference details page
└── └── room_info.dart // Meeting information widget
Note:
If you have any suggestions or feedback, contact us at info_rtc@tencent.com.
Key code
If you want to implement the schedule conference feature from Definition, please refer to TUIConferenceListManager: Android, iOS&Mac.