Remaster
Last updated: 2023-05-15 17:31:32
Overview
This document shows you how to start a remaster task in the console and how to view the result in the task center.
Note:
Directions
Step 1. Start a remaster task
1. Log in to the VOD console and select Application Management on the left sidebar.
2. Select the target application.
3. You will be directed to the Service Overview page.
4. Go to Media Assets > Video/Audio Management > Uploaded, and select the media files you want to remaster.
5. Click Remaster.

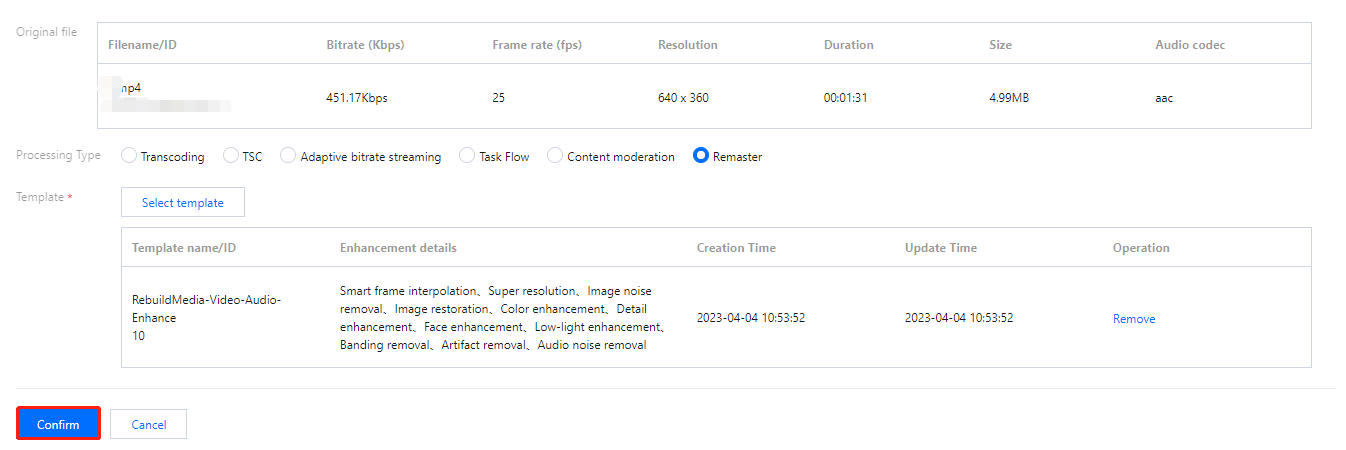
6. For Processing type, select Remaster.

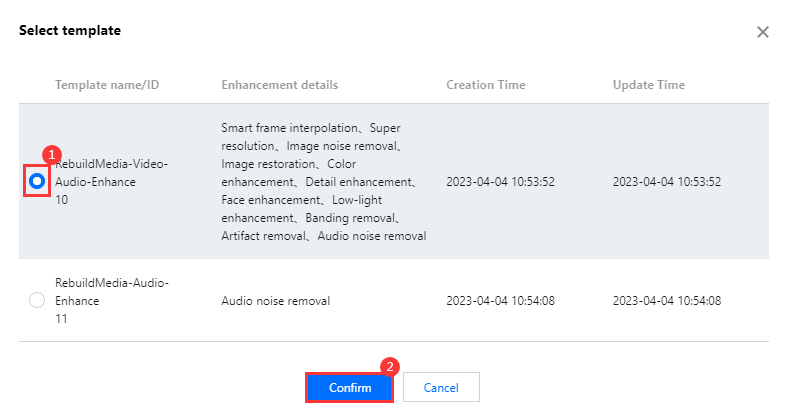
7. Click Select template. In the pop-up window, select RebuildMedia-Video-Audio-Enhance10 and click Confirm.

8. Back to the task configuration page, click Confirm, and a remaster task is created.

Step 2. View the result in the task center
1. Select Task Center on the left sidebar. Find the remaster task you started (whose task type is "Remaster").

2. After the task is executed, click Details to view the result.


Step 3. View the result on the "Video/Audio Management" page
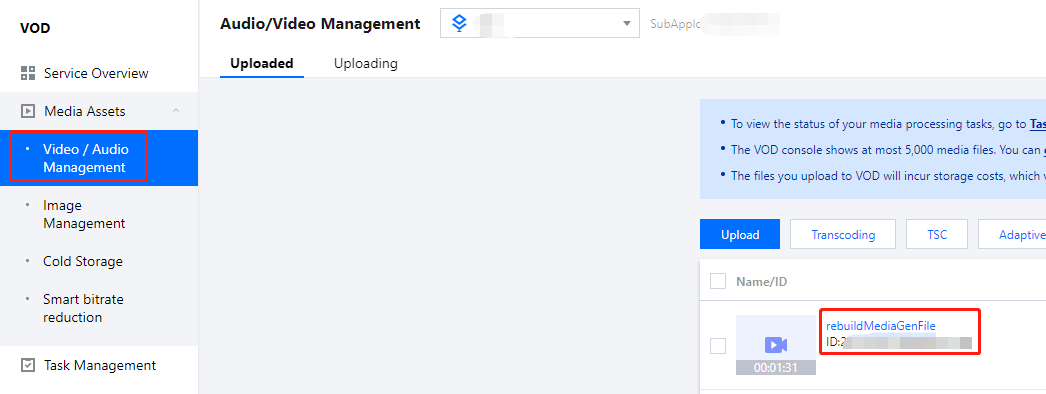
Select Video/Audio Management on the left sidebar. The file named 
rebuildMediaGenFile is the output of the remaster task.
Was this page helpful?
You can also Contact Sales or Submit a Ticket for help.
Yes
No
Feedback

