where YourTarget is the name of the target where you need to introduce SDK to your project.
2. Terminal cd to the directory where the Podfile file is located and run pod install to install the components.
$ pod install
Note:
If the error Couldn't determine repo type for URL: 'https://e.coding.net/tcmpp-work/tcmpp/tcmpp-repo.git': is reported, you need to run the pod repo add specs before executing the pod install. https://e.coding.net/tcmpp-work/tcmpp/tcmpp-repo.git
Manual SDK Integration
Integration Sample Code
You can download the manual integration demo by clicking
1. Add SDK
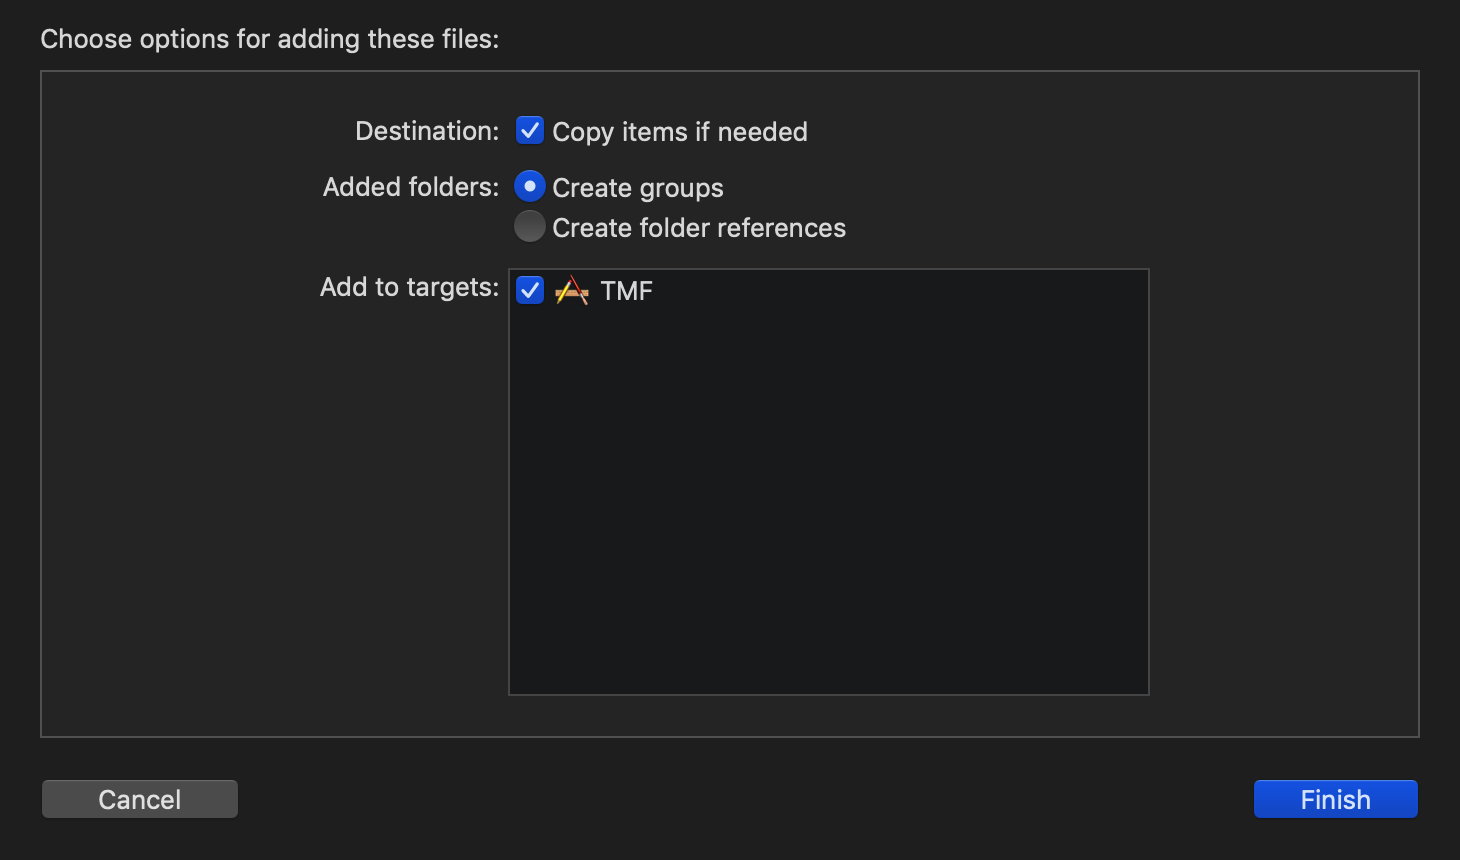
Add the directory of the SDK component to the appropriate location in your project's Xcode Project and select the appropriate target.
You can drag the component directory directly from Finder to Xcode Project for quick addition.
2. Add dependent SDKs
Add all the components that SDK depends on to the project. For a list of dependent components, see Component Dependencies in Pre-requisites.
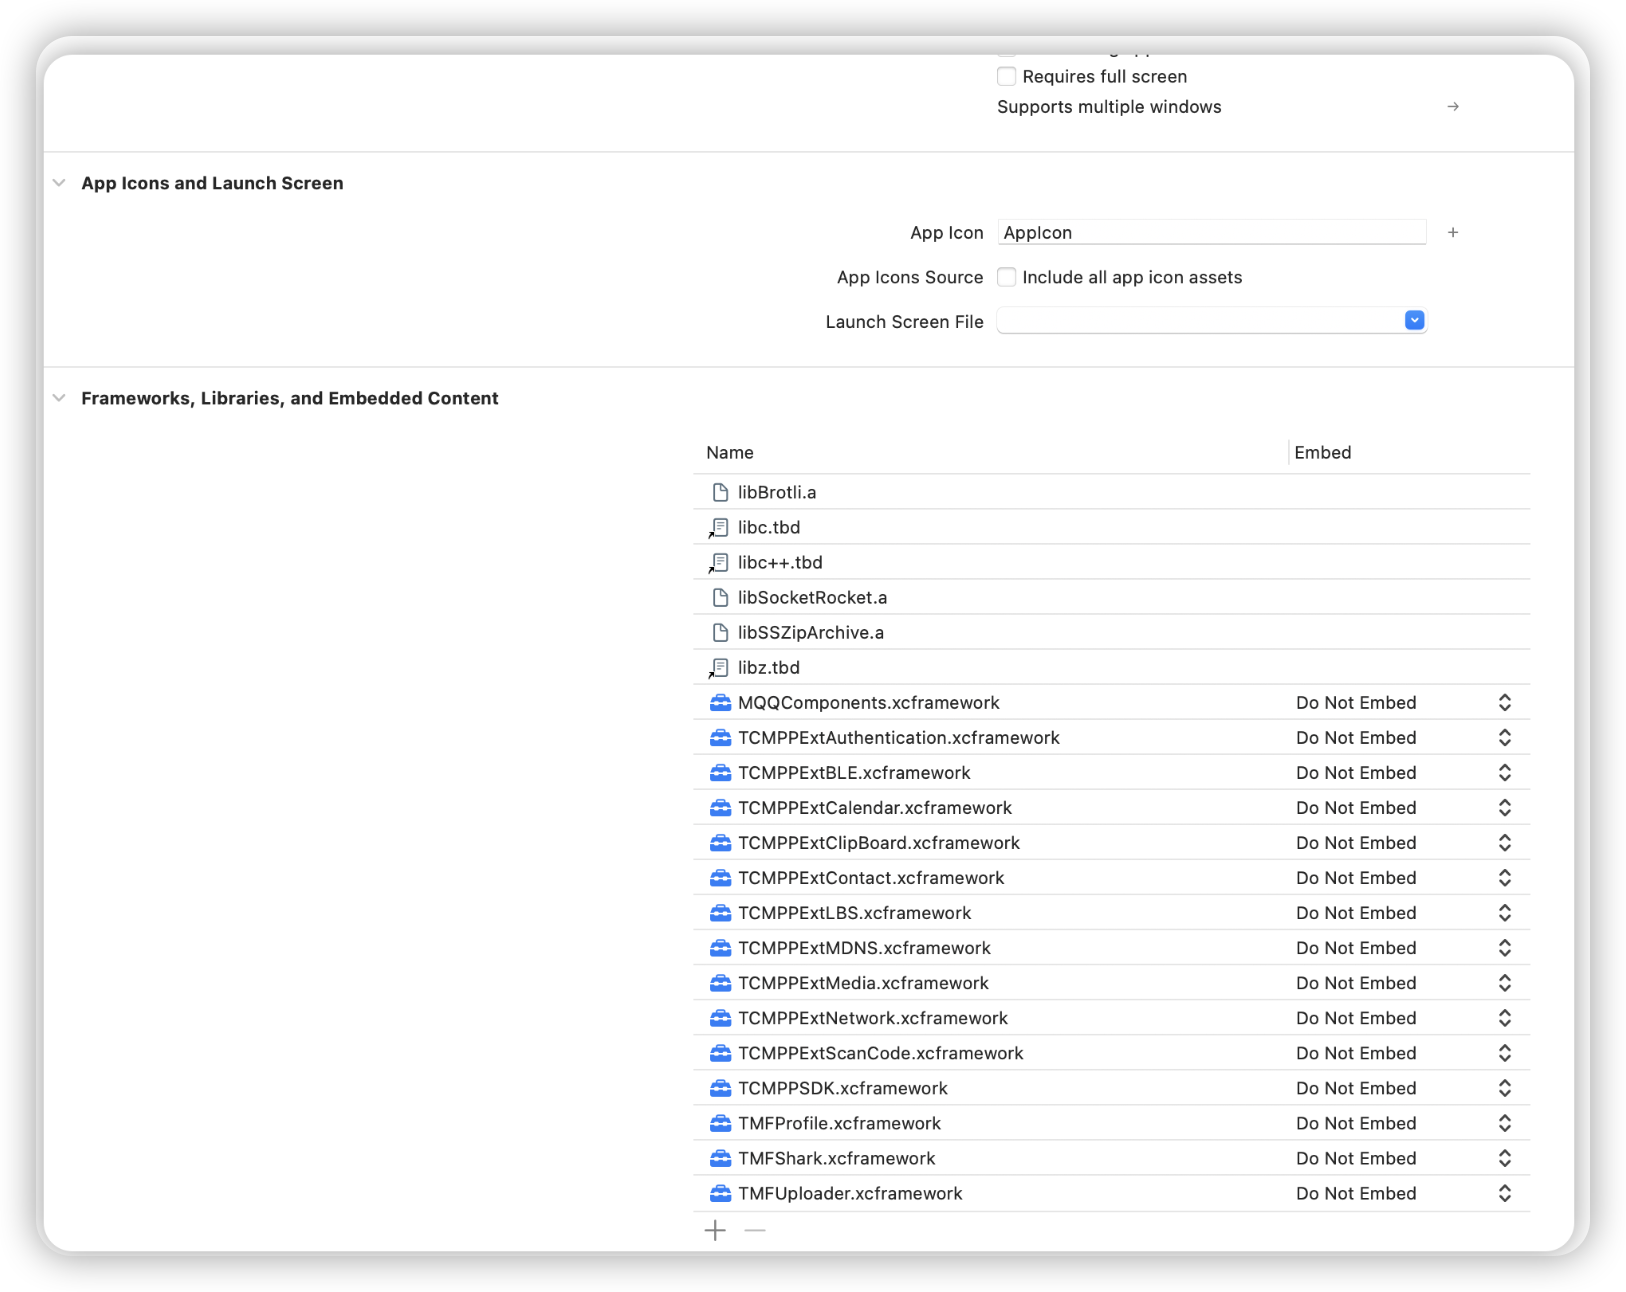
3. Add dependent libraries
To add SDK dependent libraries to the project, open the project settings page in Xcode, select the relevant target, click General, and add them under "Linked Frameworks and Libraries".
4. The system library dependencies are as follows:
Foundation.framework
CoreTelephony.framework
CFNetwork.framework
Security.framework
SystemConfiguration.framework
CoreService.framework
CoreFoundation.framework
libz.tdb
libc++.tbd
libc.tbd
libbz2.tbd
libsqlite3.0.tbd
5. project settings
After adding SDK, you need to set up the related project settings. Open the Project Settings page in Xcode, select the relevant target and make the following settings:
Select Build Settings > Linking > Other Linker Flags and add: -ObjC.
Select Build Settings > Apple Clang - Custom Compiler Flags > Other C Flags, add:
You can download the Swift Project Integration Demo here.
Add the code in file:
import TCMPPSDK
Getting the configuration file
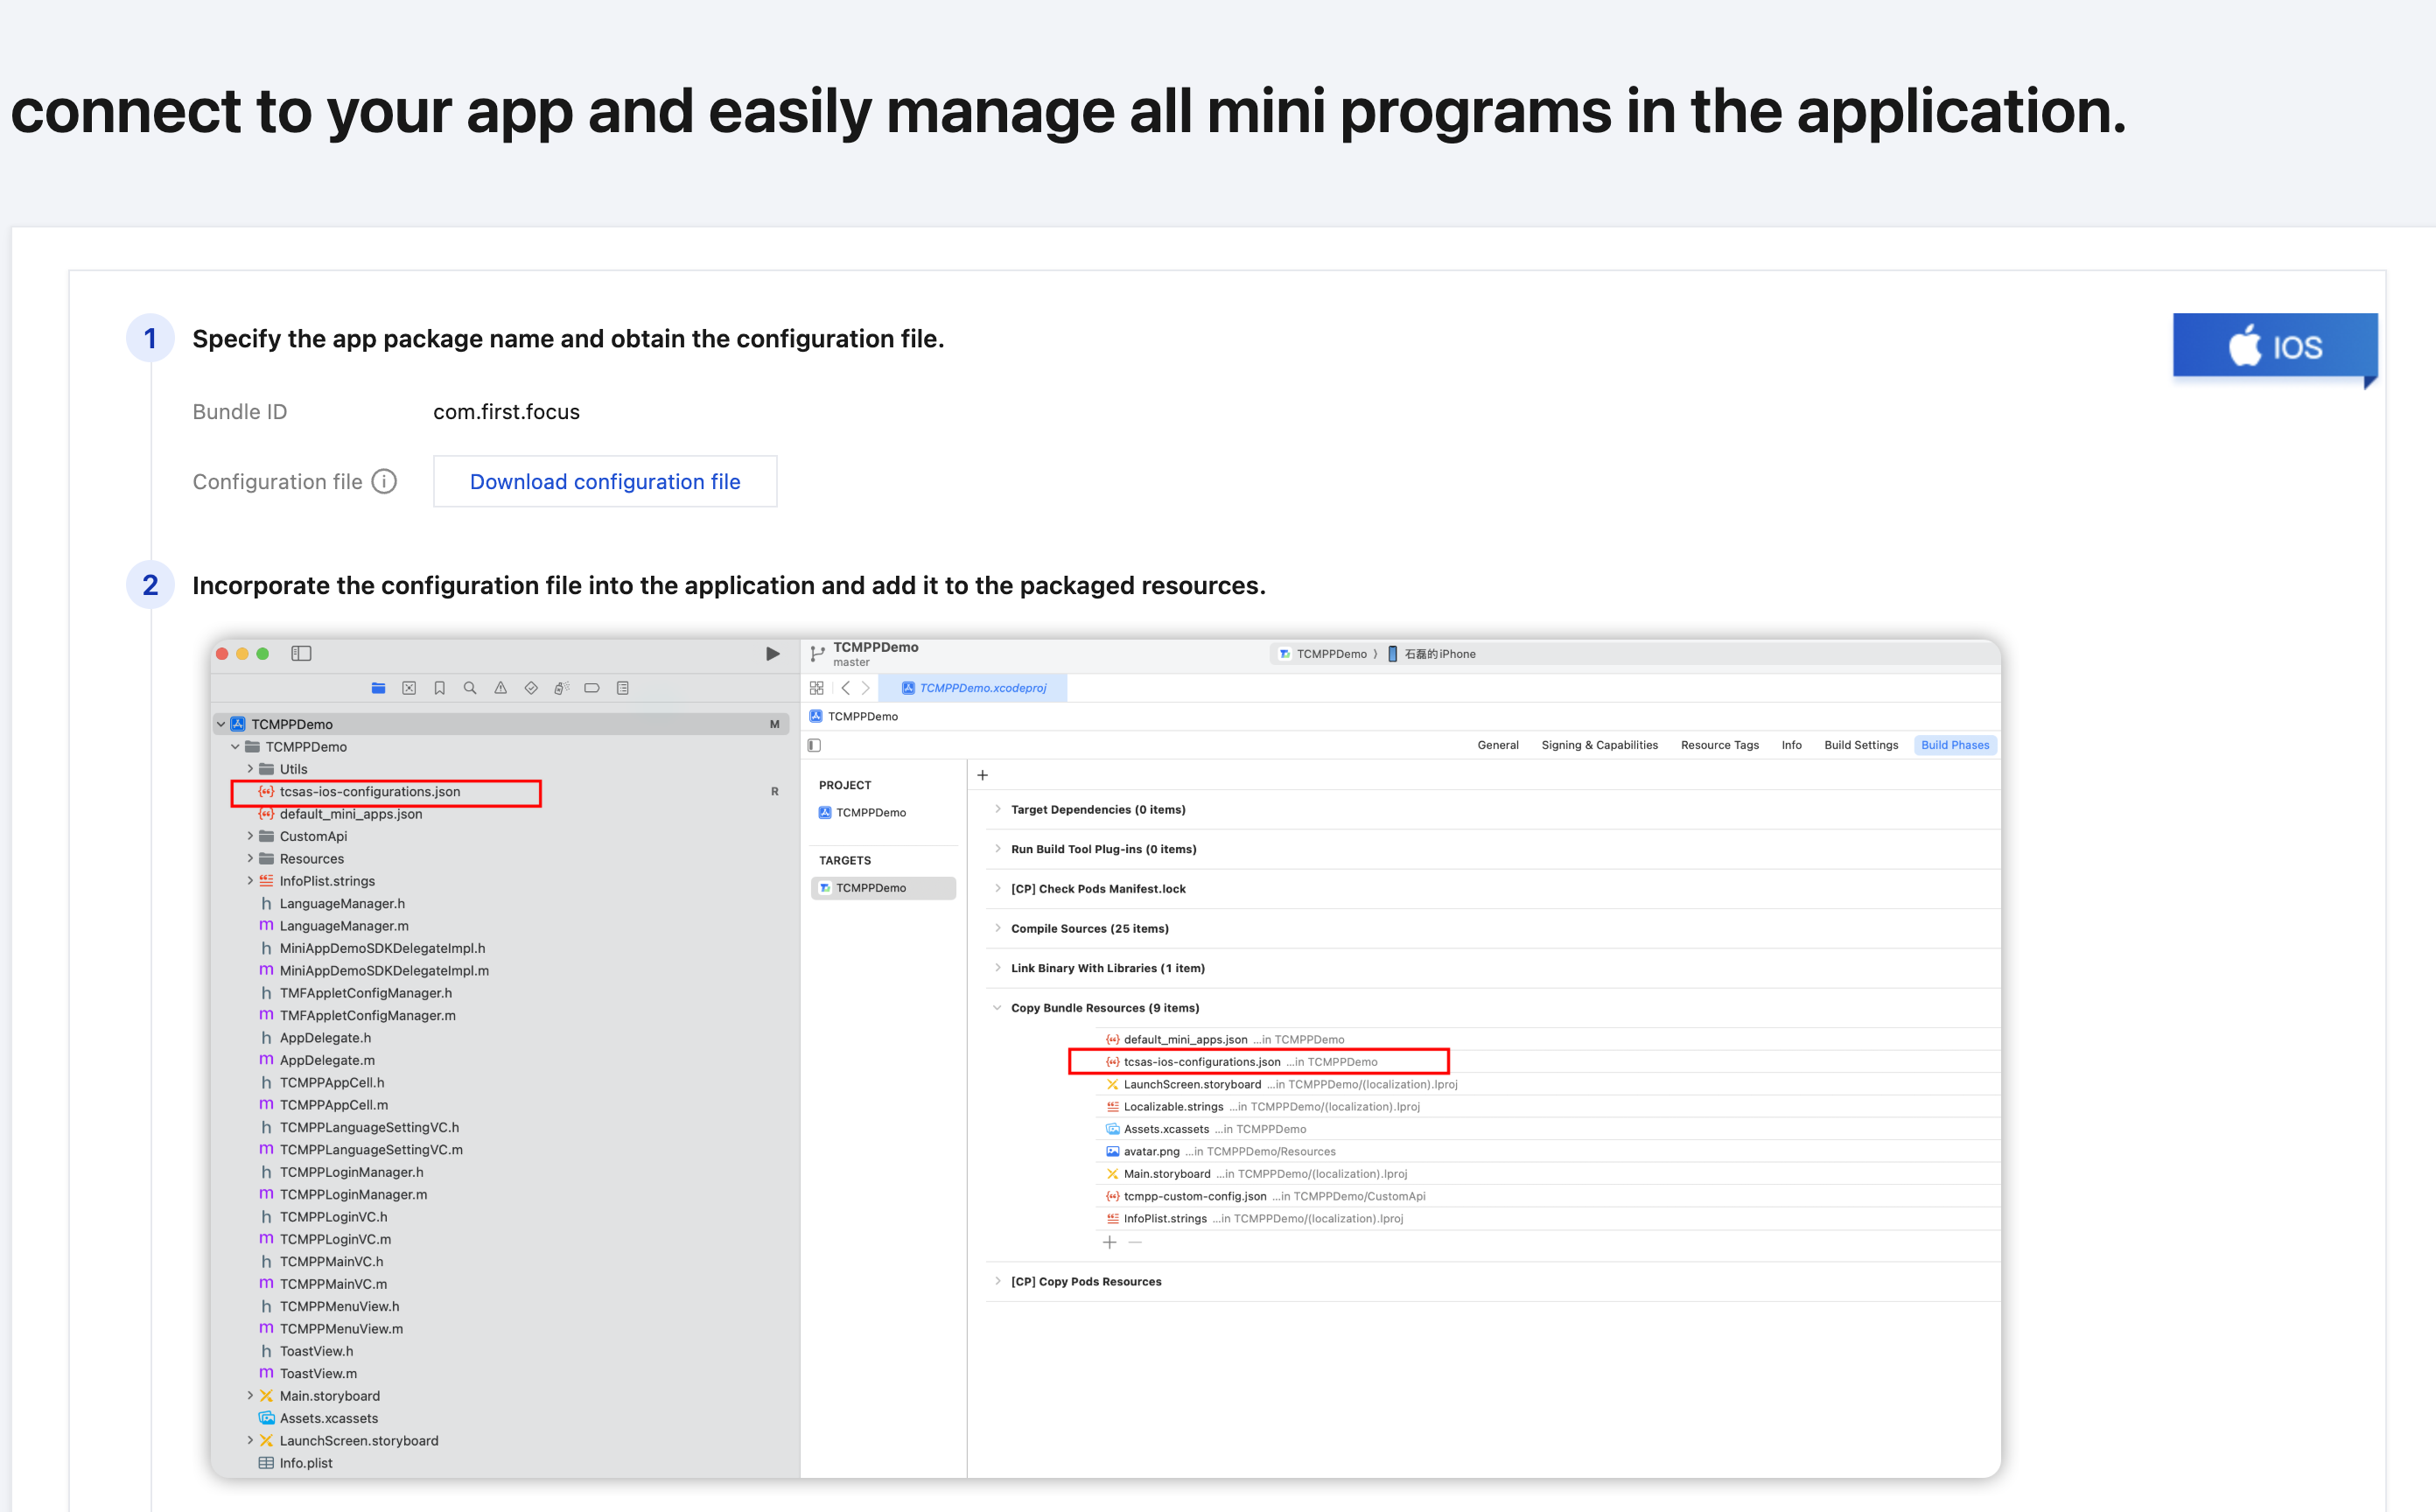
The initialisation of the mini program SDK relies on the mini program SDK configuration file obtained from the mini program console; before you start integrating the mini program SDK, you need to obtain the mini program SDK configuration file from the mini program console.
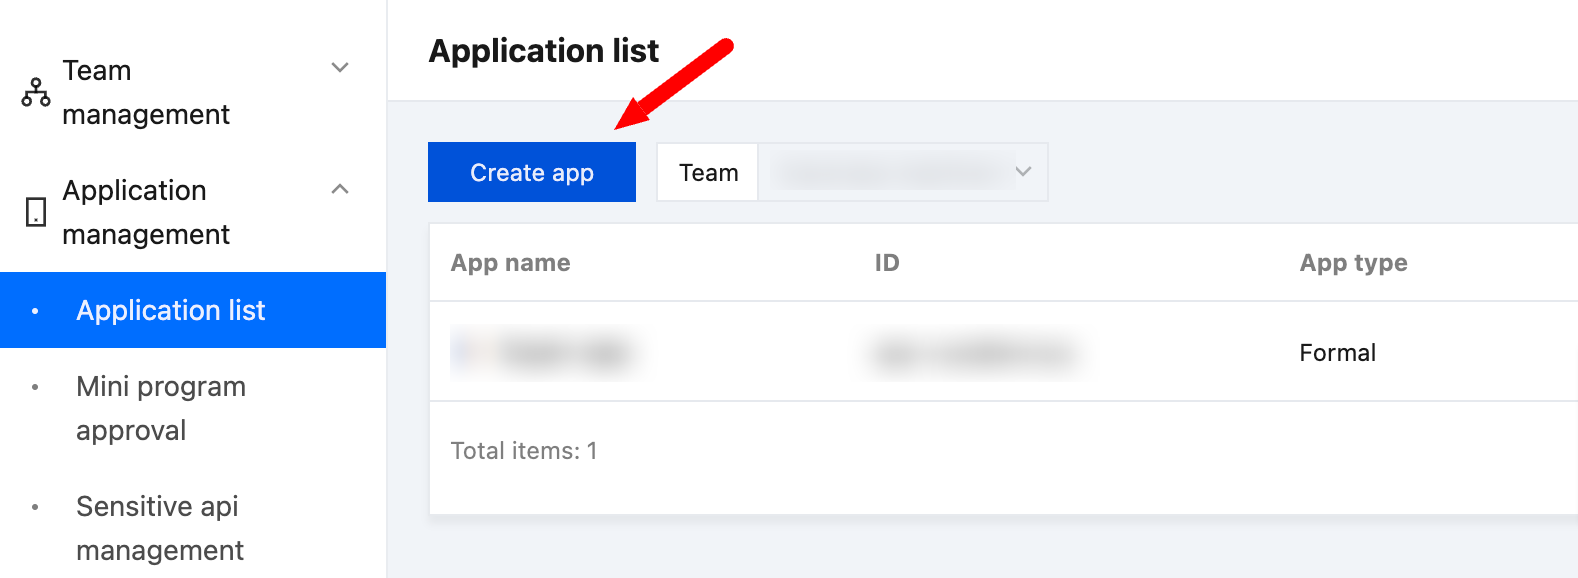
After logging into the console, please click Create App:
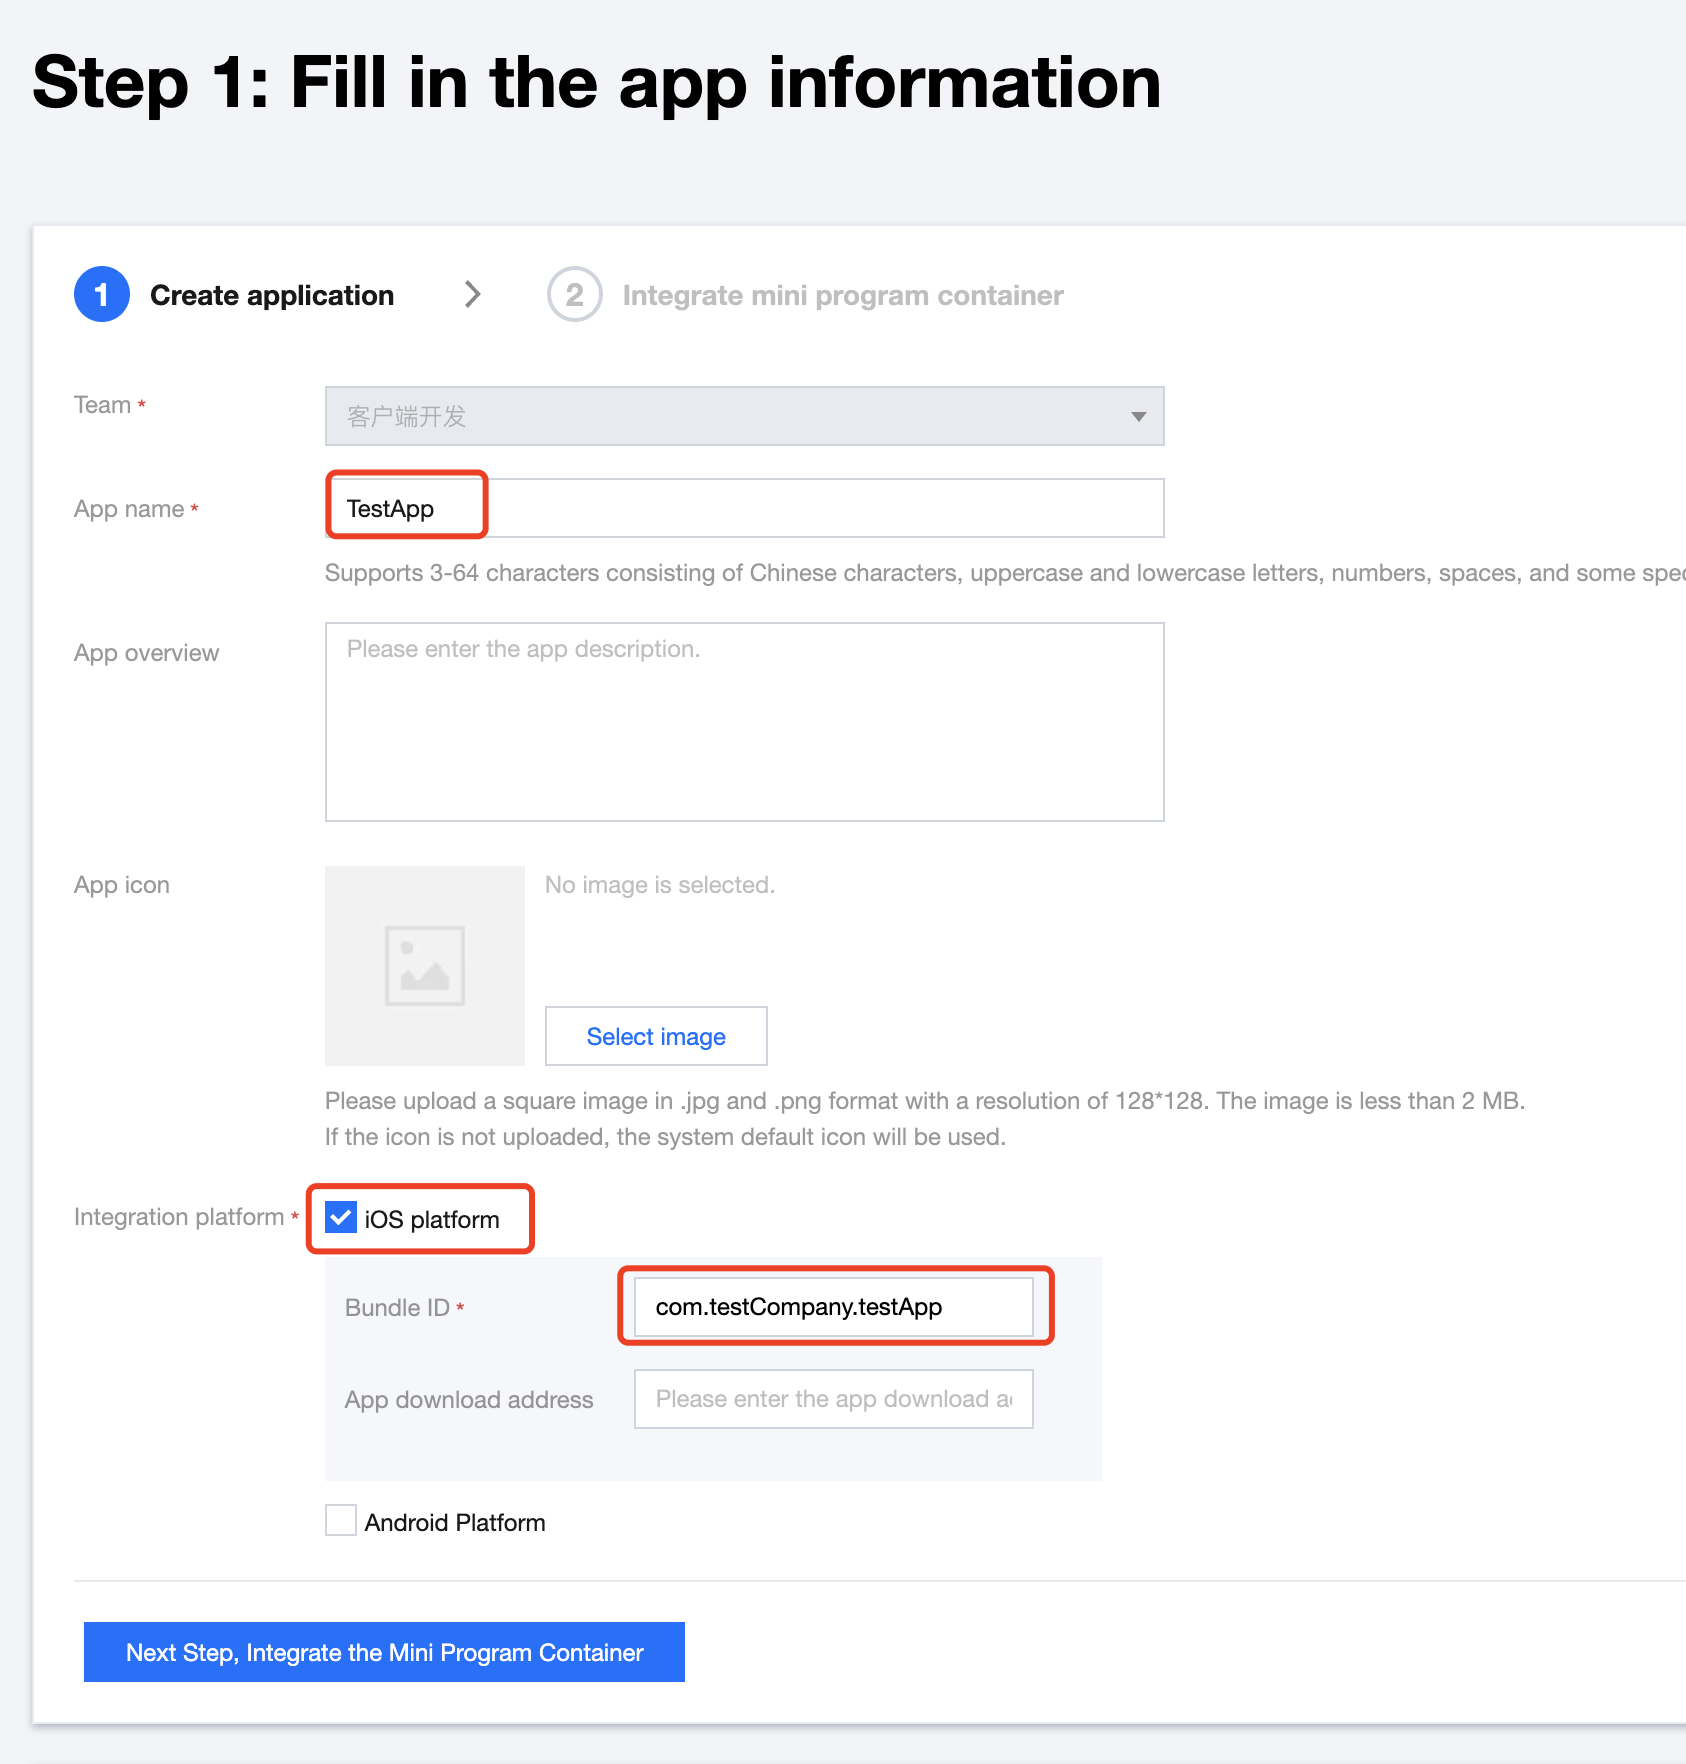
Fill in the app information:
Download the configuration file:
Note:
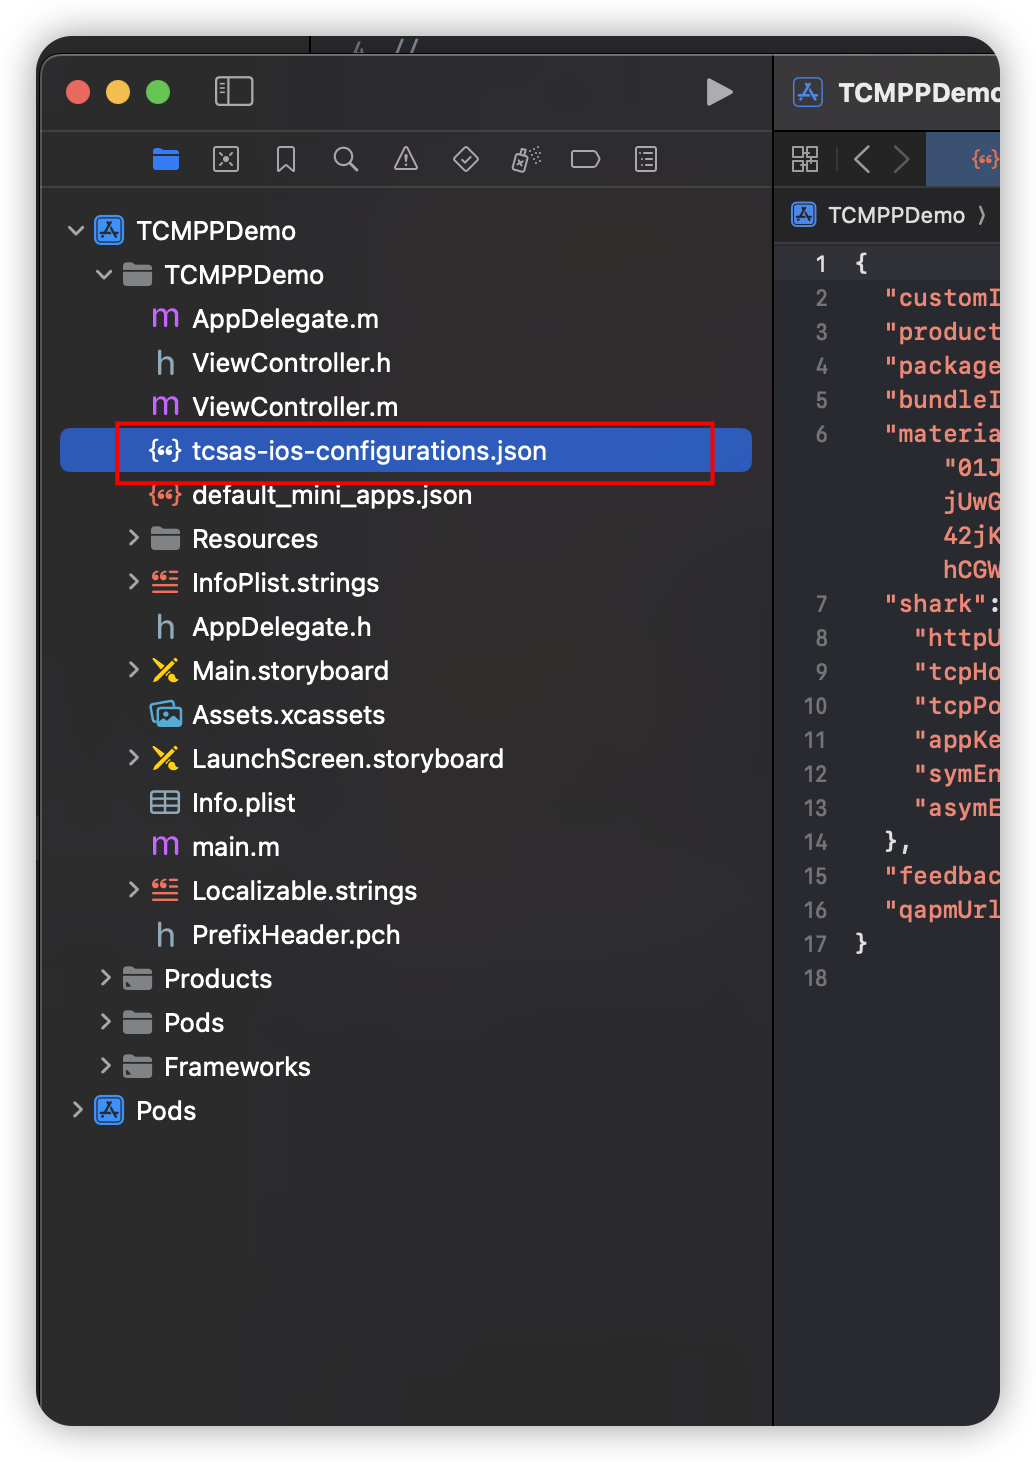
The name of the configuration file downloaded by default is: tcsas-ios-configurations.json
Adding Configuration Files to the Project
After obtaining the configuration file, you need to add the configuration file to the application source project:
Note:
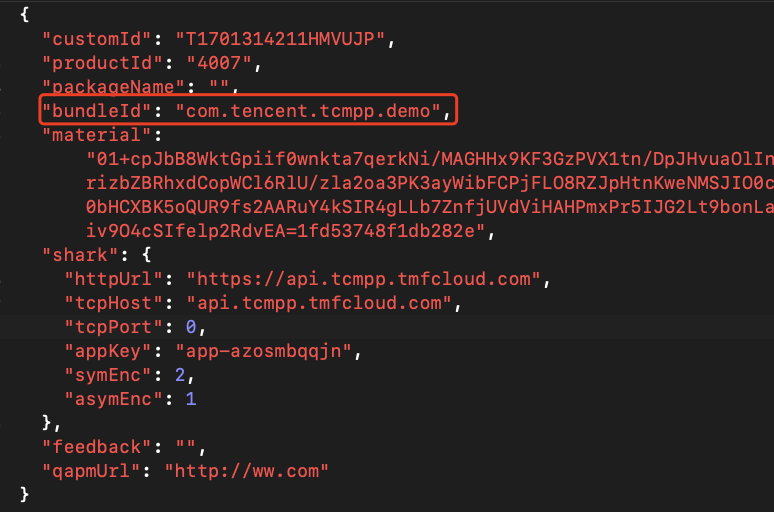
The bundleId of the iOS project must be consistent with the bundleId in the configuration file, otherwise the mini program SDK cannot pass the package name verification at runtime, resulting in SDK initialisation exceptions.
If it is inconsistent, you can't directly modify the bundleId field in the configuration file, you should correct it in the following two ways:
Modify the bundleId of the application in the project to be consistent with the bundleId in the configuration file.
The console modifies the bundleId of the application to be consistent with the bundleId of the application in the project and re-downloads the configuration file.
The packageName field in the configuration file needs to be consistent with the package name of the current project.
Adding Permission Settings
If you only integrate the core library of SDK, that is, TCMPPSDK, you need to add the permission application information in the info.plist file.
Among the permissions involved in the core SDK (FinApplet):
Permission
KEY
API of the permission
Write Album
NSPhotoLibraryAddUsageDescription
saveImageToPhotosAlbum、saveVideoToPhotosAlbum
Camera
NSCameraUsageDescription
CameraContext(Camera component)
Microphone
NSMicrophoneUsageDescription
CameraContext(Camera component)
f you need to use the extension SDK, then you need to add the corresponding permission request information in the info.plist file of your project.
The loading page and video components in SDK support landscape effect, but only if the app project supports landscape.
Please tick the following options in Xcode settings:
Note:
If landscape is not ticked, then the functions in the SDK that involve landscape have no effect.
Introduce the header file
Introduce TMFMiniAppSDKManager.h and TMFAppletConfigManager.h into AppDelegate.
//TCSAS
#import <TCMPPSDK/TCMPPSDK.h>
Configuration Information Setting
Initialise the TMAServerConfig object according to the configuration file and use TMAServerConfig to initialise the mini program engine.
The SDK can support direct engine initialisation, prepare the network link in advance, and update the base library information and configuration information to accelerate the post mini program loading, or it can support initialisation when needed.
Users can set up open interface implementation instances as needed. If you need to integrate the extension module, initialise the extension interface ready.
//Set up the mini program engine proxy class implementation
MIniAppDemoSDKDelegateImpl must implement the TMFMiniAppSDKDelegate protocol, you can refer to the MIniAppDemoSDKDelegateImpl file in Customised SDK capabilities and Demo projects.
Open mini program
You can open a mini program by calling the API directly through AppId.