iOS
Last updated: 2025-06-12 10:00:53
This document describes how to quickly integrate the Chat SDK to your projects.
Environment Requirements
Xcode 9.0+.
iPhone or iPad on iOS 8.0 or above.
Your project has a valid developer signature.
Integrating SDK
You can either automatically integrate SDK using CocoaPods, or manually download the SDK and import it to your current project.
CocoaPods
1. Install CocoaPods
Enter the following command in the terminal window (you need to install the Ruby environment on your macOS in advance):
sudo gem install cocoapods
2. Create a Podfile
Go to the path where the project is located and run the following command. Then, a Podfile will appear under the project path.
pod init
3. Edit the Podfile
Add the dependency to your Podfile:
platform :ios, '8.0'source 'https://github.com/CocoaPods/Specs.git'target 'App' do# Add the SDKpod 'TXIMSDK_Plus_iOS'# pod 'TXIMSDK_Plus_iOS_XCFramework'# pod 'TXIMSDK_Plus_Swift_iOS_XCFramework'# If you need to add the Quic plugin, please uncomment the next line.# Note:# - This plugin must be used with the TXIMSDK_Plus_iOS or TXIMSDK_Plus_iOS_XCFramework edition of the IM SDK, and the plugin version number must match the IM SDK version number.# pod 'TXIMSDK_Plus_QuicPlugin_XCFramework'end
4. Install the SDK or update the local repository.
Run the following command in the terminal window to update the local library file and install the Chat SDK:
pod install
Or, run the following command to update the local repository:
pod update
After the pod command is executed, an .xcworkspace project file integrated with the SDK will be generated. Double-click this file to open it. If the pod search fails, you are advised to update the local repo cache of the pod by running the following commands:
pod setuppod repo updaterm ~/Library/Caches/CocoaPods/search_index.json
Note:
Quic plugin provides axp-quic multiplexing protocol, which has better weak network resistance and can still provide services even when the network packet loss rate reaches 70%. This plugin is only available on the Chat Pro edition、Pro Plus edition、Enterprise edition, purchase the Pro edition、Pro Plus edition、Enterprise edition to use it. To ensure proper functionality, please update the client SDK to version 7.7.5282 or higer.
If you need to use the Quic feature in the Swift edition of the SDK, please contact us through the Telegram technical group.
Manual integration
1. Download the SDK
Download the latest SDK version from Github.
ImSDK_Plus.framework are the core dynamic library files of the SDK.2. Create a project
Create a project.
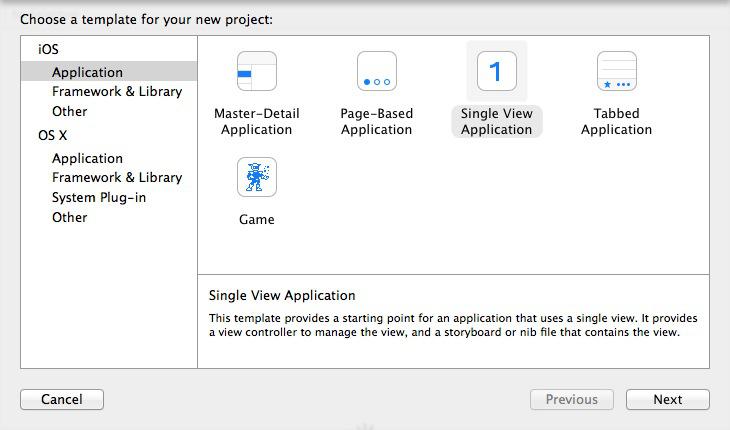
Enter a project name, for example, IMDemo.
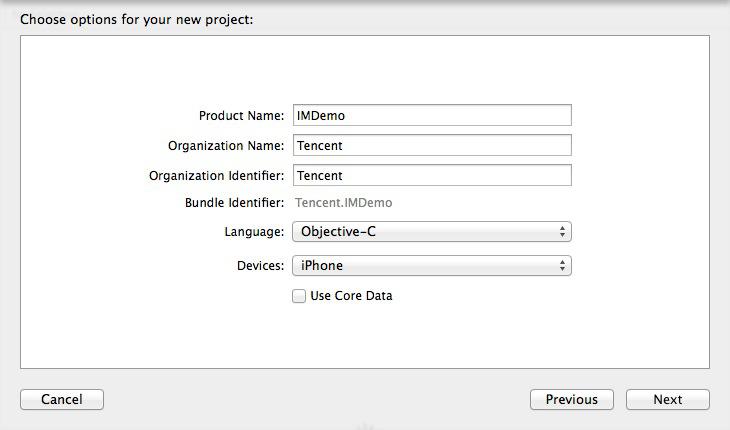
3. Integrate the SDK
Add the dependency library: select Target for IMDemo. On the General panel, add the dependency library under Embedded Binaries and Linked Frameworks and Libraries, select ImSDK_Plus.framework.
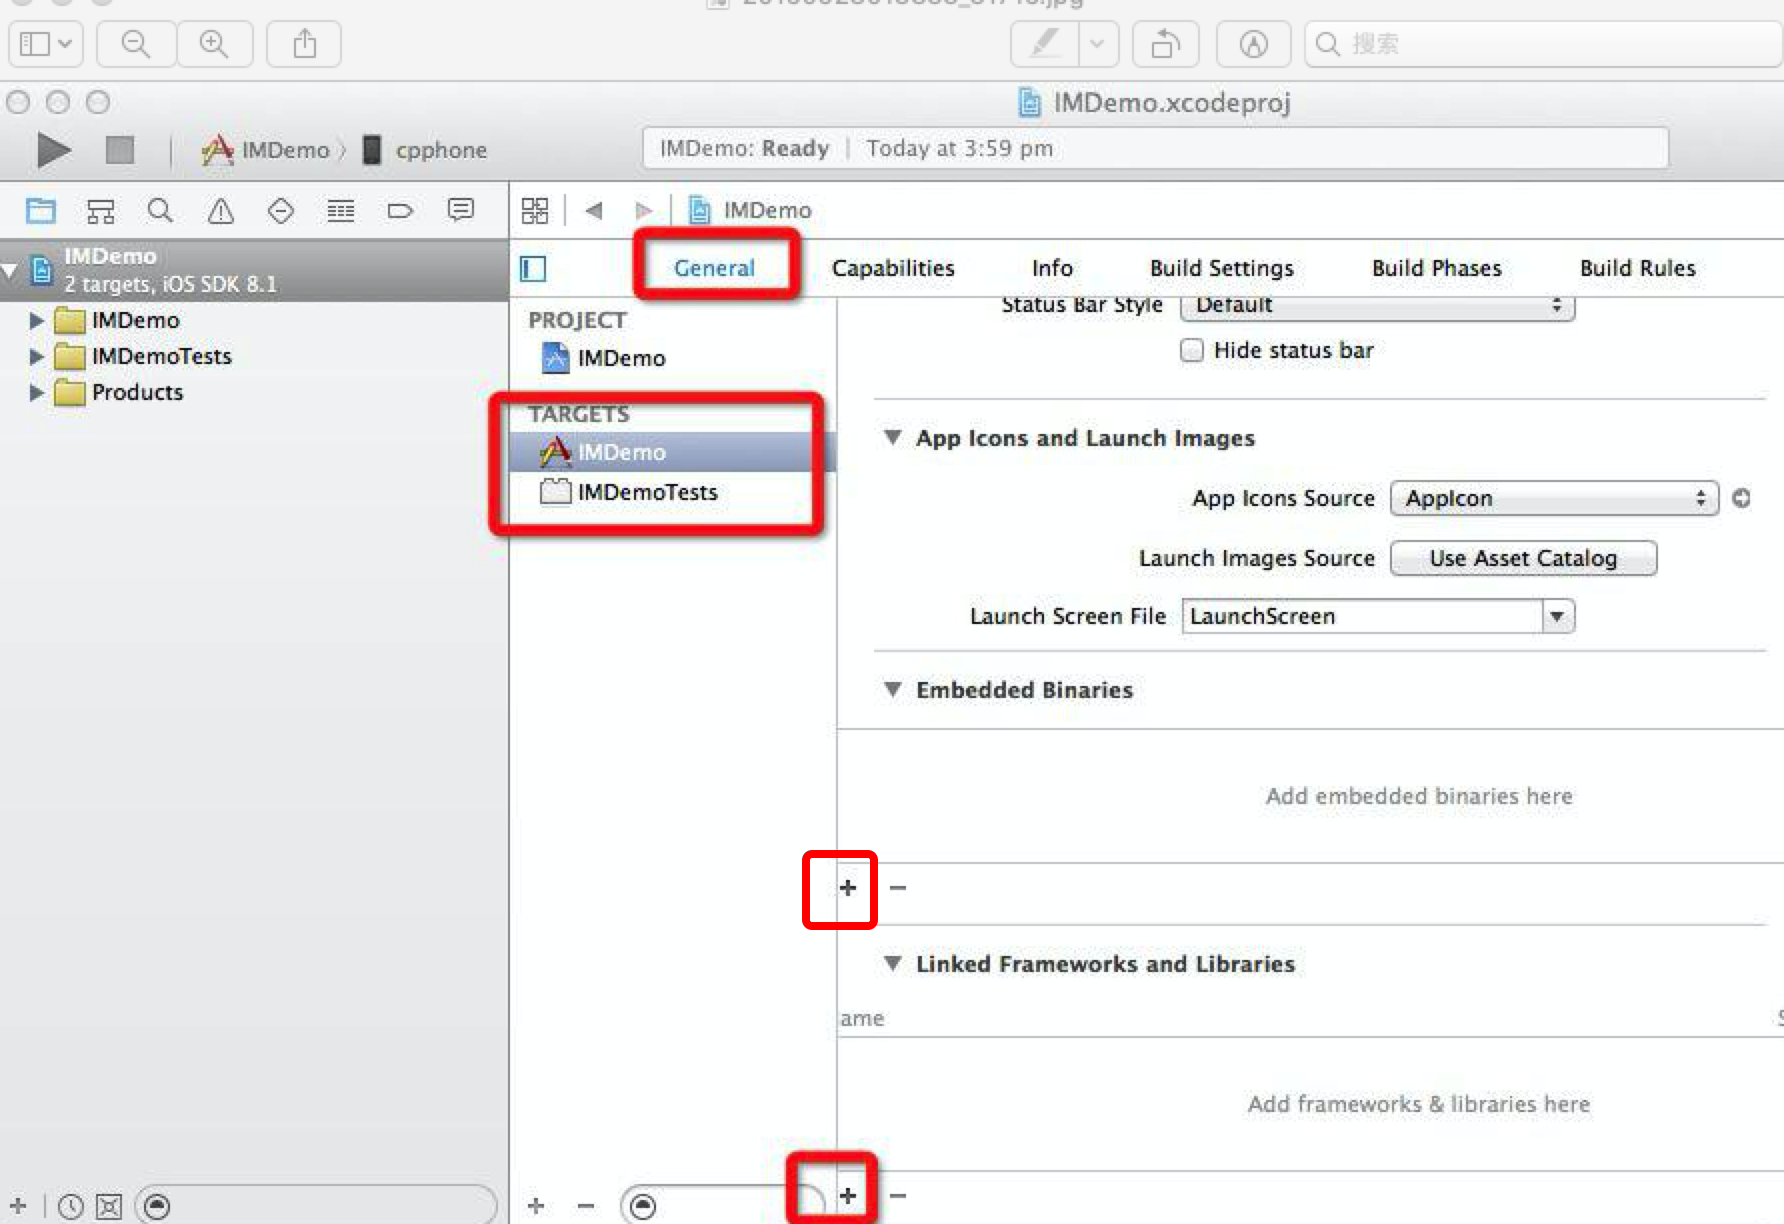
Set link parameters: add
-ObjC in Build Setting -> Other Linker Flags.Note:
For manual integration, you need to change
ImSDK_Plus.framework to Embed&Sign in Target -> General -> Frameworks -> Libraries and Embedded Content.If you need to add a Quic plugin, please refer to the previous steps and manually download the integrated Quic plugin.
Import SDK
There are two ways to use the SDK in your project code.
Method 1
Choose Xcode -> Build Setting -> Header Search Paths, and set the SDK header file path. In files that require the SDK API, reference the corresponding header file.
#import "ImSDK_Plus.h"
Method 2
In files that require the SDK API, reference the corresponding header file.
#import <ImSDK_Plus/ImSDK_Plus.h>
FAQs
[Xcodeproj] Unknown Object Version (60). (RuntimeError)

When you use Xcode 15 to create a project to integrate TUIKit, entering
pod install may result in this issue. The reason is that an earlier version of CocoaPods is used. The following two solutions are available:Solution 1: Change the
Project Format version of the Xcode project.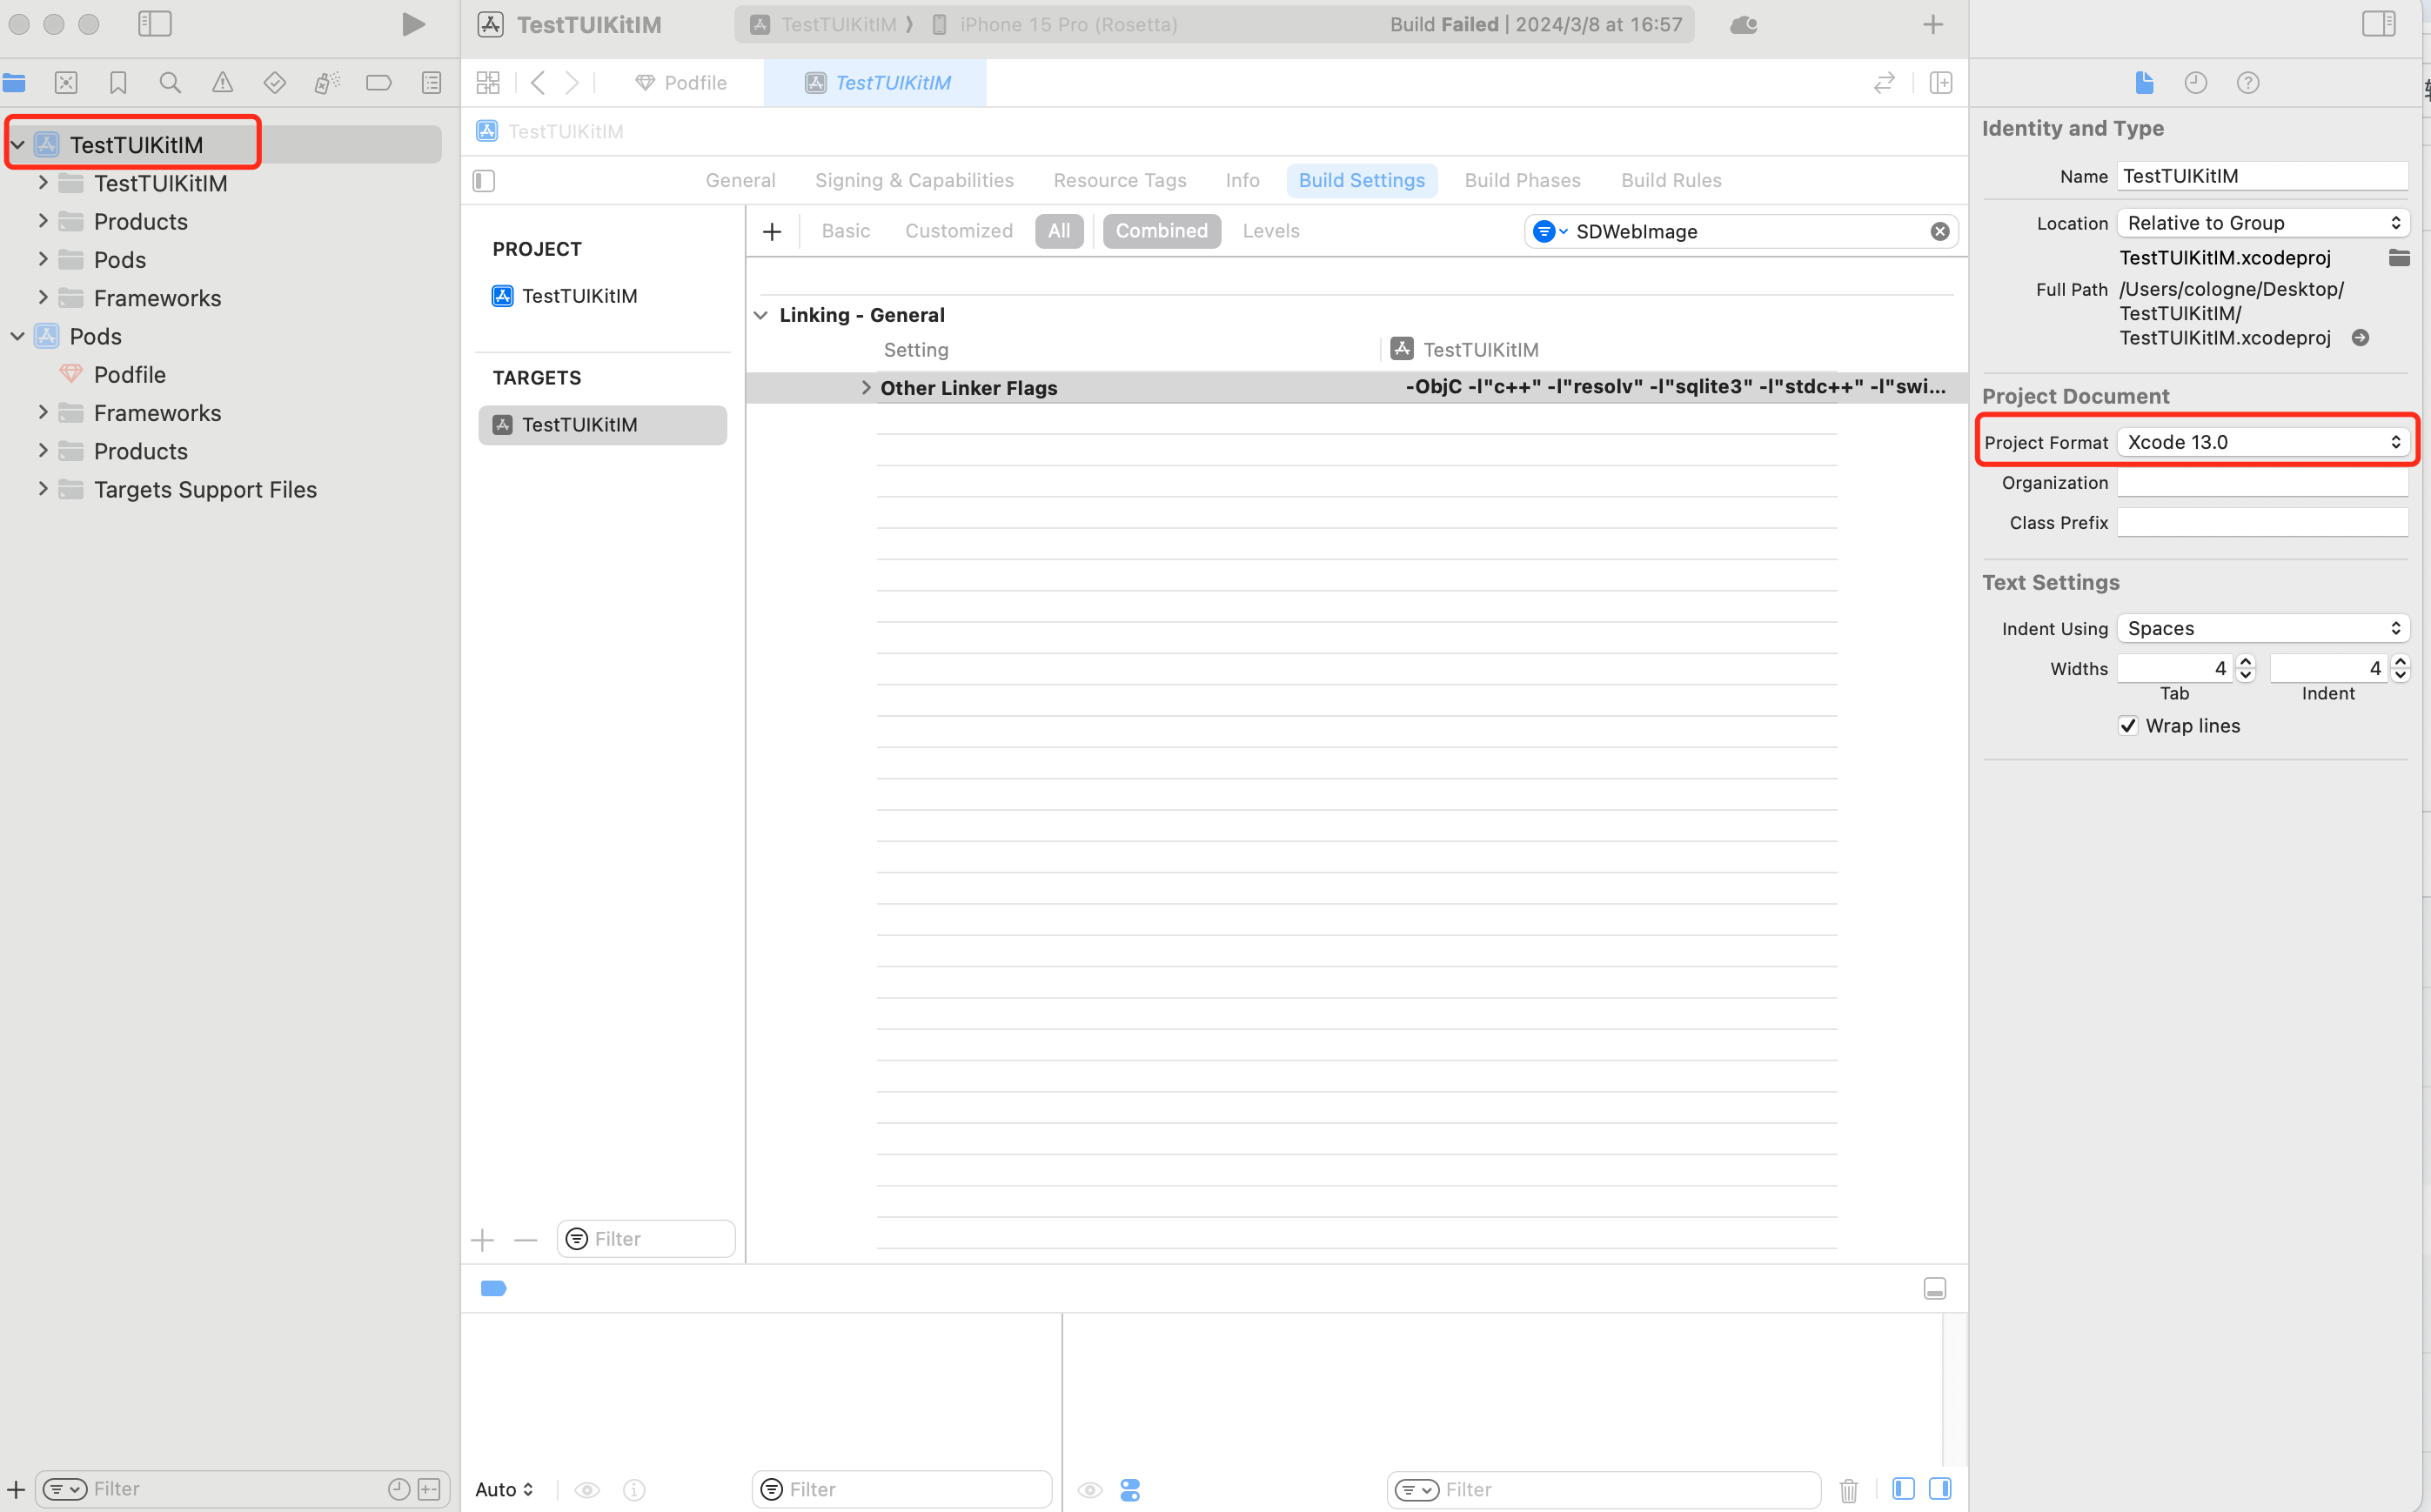
Solution 2: Upgrade the local version of CocoaPods. The upgrading method is not covered in this document.
You can enter
pod --version in the terminal to check the current version of Pods.Xcode 15 Developer Sandbox Option Issue
Sandbox: bash(xxx) deny(1) file-write-create
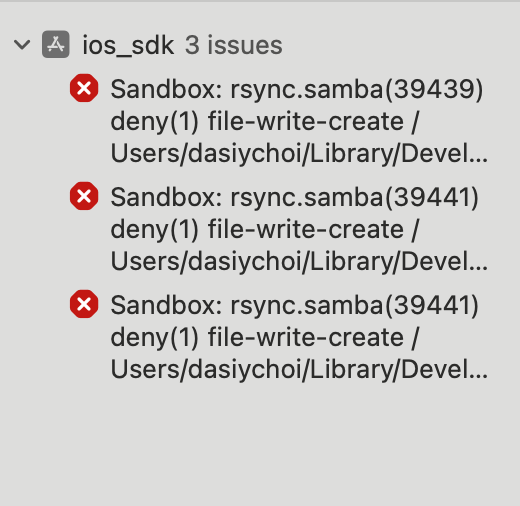
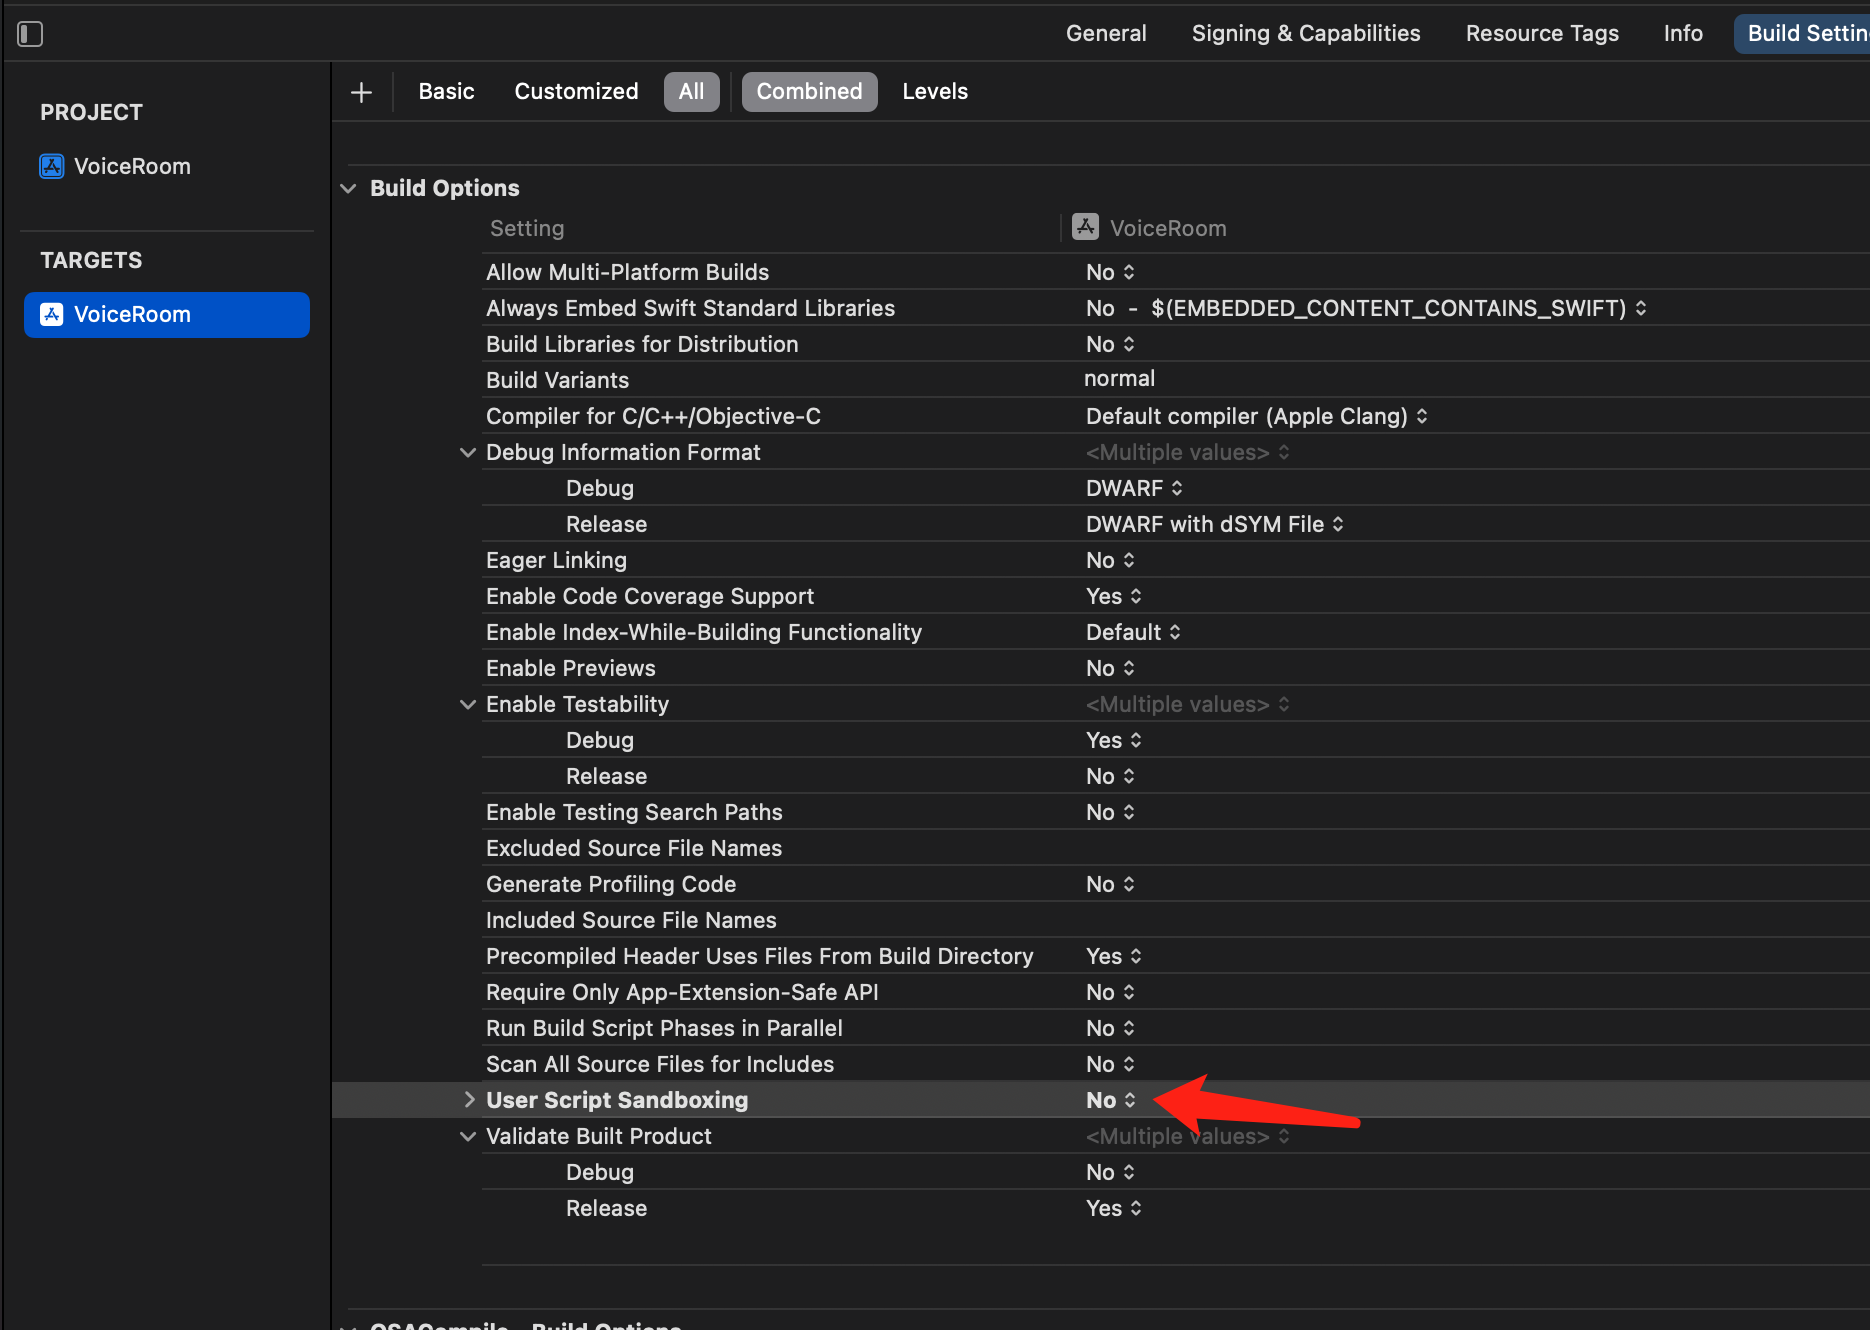
When using Xcode 15 to create a project, you may encounter compilation failures due to this option. It is recommended that you disable this option.
Xcode 16 does not support enabling bitcode for Frameworks
Solution 1: Upgrade the SDK
If you are using an old version SDK with Bitcode (e.g., TXIMSDK_iOS), it is recommended to follow this document and upgrade the SDK to TXIMSDK_Plus_iOS_XCFramework.
Solution 2: Modify the Podfile
Add the following configuration to the end of your Podfile and run pod install again.
post_install do |installer|bitcode_strip_path = 'xcrun --find bitcode_strip'.chop!def strip_bitcode_from_framework(bitcode_strip_path, framework_relative_path)framework_path = File.join(Dir.pwd, framework_relative_path)command = "#{bitcode_strip_path} #{framework_path} -r -o #{framework_path}"puts "Stripping bitcode: #{command}"system(command)endframework_paths = ["/Pods/TXIMSDK_iOS/ImSDK.framework/ImSDK",]framework_paths.each do |framework_relative_path|strip_bitcode_from_framework(bitcode_strip_path, framework_relative_path)endend
Was this page helpful?
You can also Contact Sales or Submit a Ticket for help.
Yes
No
Feedback

