tencent cloud

Feedback

Last updated: 2024-07-09 15:26:27
    This article introduces how to integrate TUIKit components.
    Note:
    Starting from version 5.7.1435, TUIKit supports modular integration and the classic UI. You can integrate the necessary modules according to your needs.
    Starting from version 6.9.3557, TUIKit introduces a brand new minimalist UI.
    You can freely choose between the classic or minimalist UI components according to your needs. If you are not familiar with the effects of the interface libraries, you can refer to the document TUIKit Overview.

    Environment Requirements

    Android Studio-Giraffe
    Gradle-7.2
    Android Gradle Plugin Version-7.0.0
    kotlin-gradle-plugin-1.5.31

    Integrate Module Source Code

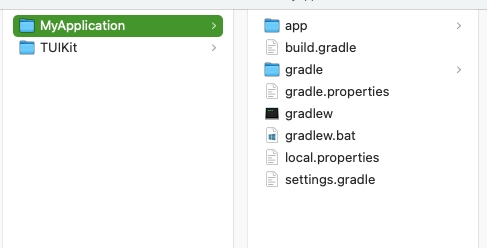
    1. Download the TUIKit source code from GitHub. Ensure that the TUIKit folder is at the same level as your project folder, for example:


    2. Add the corresponding TUIKit components to settings.gradle according to your business requirements. TUIKit components are independent of each other, and adding or removing them does not affect project compilation.
    // Include the upper-layer app module
    include ':app'
    
    // Include the internal communication module (required module)
    include ':tuicore'
    project(':tuicore').projectDir = new File(settingsDir, '../TUIKit/TUICore/tuicore')
    
    // Include the common module of IM component (required module)
    include ':timcommon'
    project(':timcommon').projectDir = new File(settingsDir, '../TUIKit/TIMCommon/timcommon')
    
    // Include the chat feature module (basic feature module)
    include ':tuichat'
    project(':tuichat').projectDir = new File(settingsDir, '../TUIKit/TUIChat/tuichat')
    
    // Include the relationship chain feature module (basic feature module)
    include ':tuicontact'
    project(':tuicontact').projectDir = new File(settingsDir, '../TUIKit/TUIContact/tuicontact')
    
    // Include the conversation list feature module (basic feature module)
    include ':tuiconversation'
    project(':tuiconversation').projectDir = new File(settingsDir, '../TUIKit/TUIConversation/tuiconversation')
    
    // Include the search feature module (To use this module, you need to purchase the Premium Edition)
    include ':tuisearch'
    project(':tuisearch').projectDir = new File(settingsDir, '../TUIKit/TUISearch/tuisearch')
    
    // Include the group feature module
    include ':tuigroup'
    project(':tuigroup').projectDir = new File(settingsDir, '../TUIKit/TUIGroup/tuigroup')
    
    // Include the community topic feature module (To use this module, you need to purchase the Premium Edition)
    include ':tuicommunity'
    project(':tuicommunity').projectDir = new File(settingsDir, '../TUIKit/TUICommunity/tuicommunity')
    
    // Include the audio/video call feature module
    include ':tuicallkit'
    project(':tuicallkit').projectDir = new File(settingsDir, '../TUIKit/TUICallKit/tuicallkit')
    
    // Include the video conference module
    include ':tuiroomkit' project(':tuiroomkit').projectDir = new File(settingsDir, '../TUIKit/TUIRoomKit/tuiroomkit')
    
    // Include speech-to-text plugin, supported from version 7.5
    include ':tuivoicetotextplugin' project(':tuivoicetotextplugin').projectDir = new File(settingsDir, '../TUIKit/TUIVoiceToTextPlugin/tuivoicetotextplugin')
    // Include customer service plugin, supported from version 7.6
    include ':tuicustomerserviceplugin' project(':tuicustomerserviceplugin').projectDir = new File(settingsDir, '../TUIKit/TUICustomerServicePlugin/tuicustomerserviceplugin')
    
    // Include chatbot plugin, supported from version 7.7
    include ':tuichatbotplugin' project(':tuichatbotplugin').projectDir = new File(settingsDir, '../TUIKit/TUIChatBotPlugin/tuichatbotplugin')
    
    // Include chat message translation plugin, supported from version 7.2 (Value-added feature activation is required. Please contact Tencent Cloud sales)
    include ':tuitranslationplugin'
    project(':tuitranslationplugin').projectDir = new File(settingsDir, '../TUIKit/TUITranslationPlugin/tuitranslationplugin')
    
    // Include emoji reaction plugin, supported from version 7.8 (To use this module, you need to purchase the Premium Edition)
    include ':tuiemojiplugin'
    project(':tuiemojiplugin').projectDir = new File(settingsDir, '../TUIKit/TUIEmojiPlugin/tuiemojiplugin')
    3. Add the following to build.gradle in App:
    dependencies {
    api project(':tuiconversation')
    api project(':tuicontact')
    api project(':tuichat')
    api project(':tuisearch')
    api project(':tuigroup')
    api project(':tuicommunity')
    api project(':tuicallkit')
    api project(':tuiroomkit')
    // Integrate speech-to-text plugin, supported from version 7.5
    api project(':tuivoicetotextplugin')
    // Integrate customer service plugin, supported from version 7.6
    api project(':tuicustomerserviceplugin')
    // Integrate chatbot plugin, supported from version 7.7
    api project(':tuichatbotplugin')
    // Integrate translation plugin, supported from version 7.2 (Value-added feature activation is required. Please contact Tencent Cloud sales)
    api project(':tuitranslationplugin')
    // Integrate emoji reaction plugin, supported from version 7.8 (To use this module, you need to purchase the Premium Edition)
    api project(':tuiemojiplugin')
    // Integrate group chain plugin, supported from version 7.1
    api "com.tencent.imsdk:tuigroupnote-plugin:7.8.5484"
    // Integrate group voting plugin, supported from version 7.1
    api "com.tencent.imsdk:tuipoll-plugin:7.8.5484"
    // Integrate session grouping plugin, supported from version 7.3
    api "com.tencent.imsdk:tuiconversationgroup-plugin:7.8.5484"
    // Integrate session tagging plugin, supported from version 7.3
    api "com.tencent.imsdk:tuiconversationmark-plugin:7.8.5484"
    // Integrate message push plugin, supported from version 7.6
    api 'com.tencent.timpush:timpush:7.8.5484'
    // Integrate the corresponding manufacturer's push package as needed
    api 'com.tencent.timpush:fcm:7.8.5484'
    api 'com.tencent.timpush:xiaomi:7.8.5484'
    api 'com.tencent.timpush:meizu:7.8.5484'
    api 'com.tencent.timpush:oppo:7.8.5484'
    api 'com.tencent.timpush:vivo:7.8.5484'
    api 'com.tencent.timpush:huawei:7.8.5484'
    api 'com.tencent.timpush:honor:7.8.5484'
    }
    4. Add the following to the gradle.properties file to automatically convert third-party libraries to use AndroidX:
    android.enableJetifier=true
    5. 
    Add the following to the build.gradle file (in the same level as settings.gradle) of the root project to add the Maven repository and
    
    
    Kotlin support:
    
    buildscript {
    repositories {
    mavenCentral()
    maven { url "https://mirrors.tencent.com/nexus/repository/maven-public/" }
    }
    dependencies {
    classpath 'com.android.tools.build:gradle:7.0.0'
    classpath "org.jetbrains.kotlin:kotlin-gradle-plugin:1.5.31"
    }
    }
    If you use Gradle 8.x, you need to add the following code.
    buildscript {
    repositories {
    mavenCentral()
    maven { url "https://mirrors.tencent.com/nexus/repository/maven-public/" }
    }
    dependencies {
    classpath 'com.android.tools.build:gradle:8.0.2'
    classpath "org.jetbrains.kotlin:kotlin-gradle-plugin:1.9.0"
    }
    }
    Note:
    The compatibility between Kotlin, Gradle, and AGP versions can be viewed here.
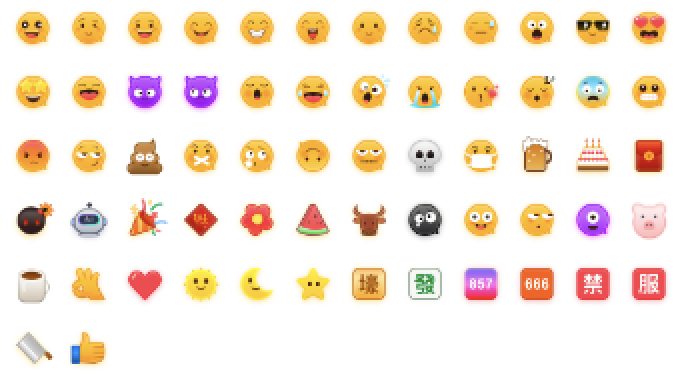
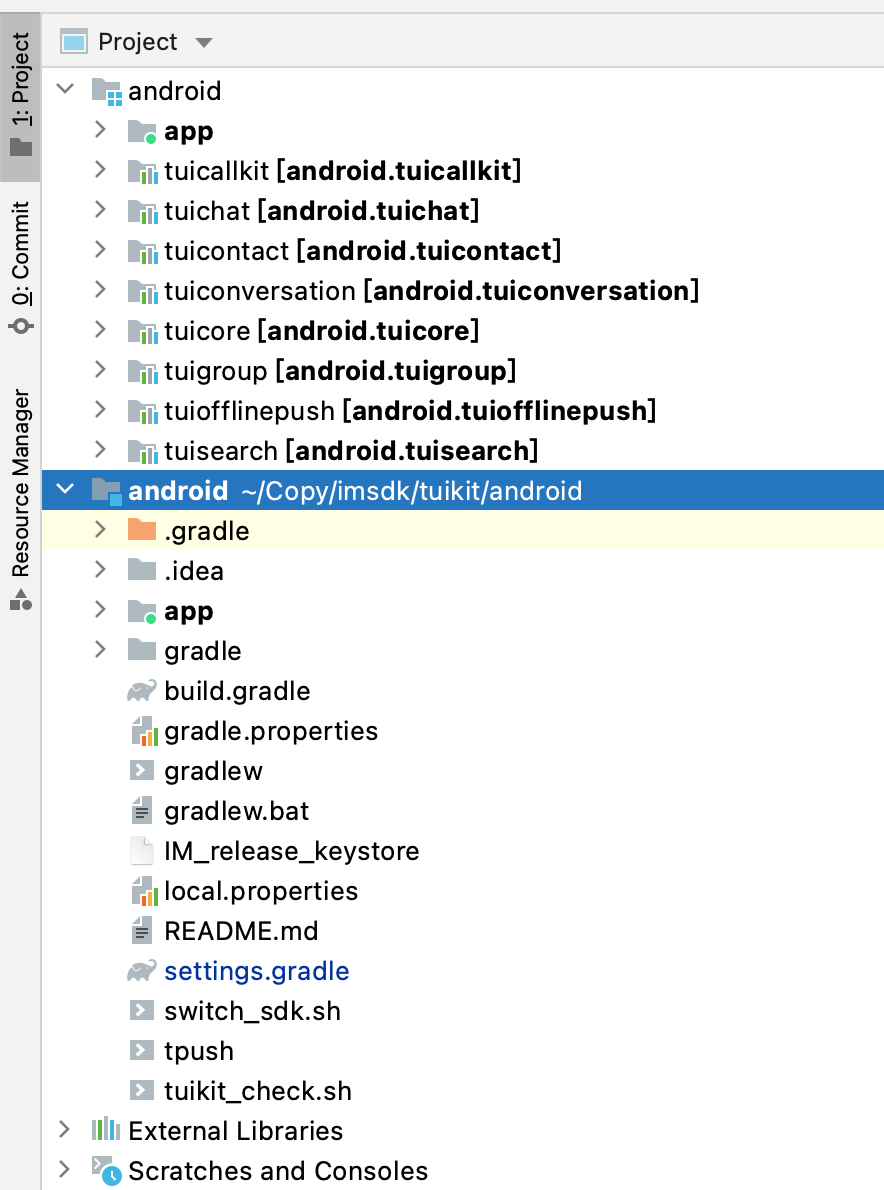
    6. Sync the project, and compile and run it. The expected project structure is shown in the following figure:


    7. [Optional] Delete unnecessary UI files 
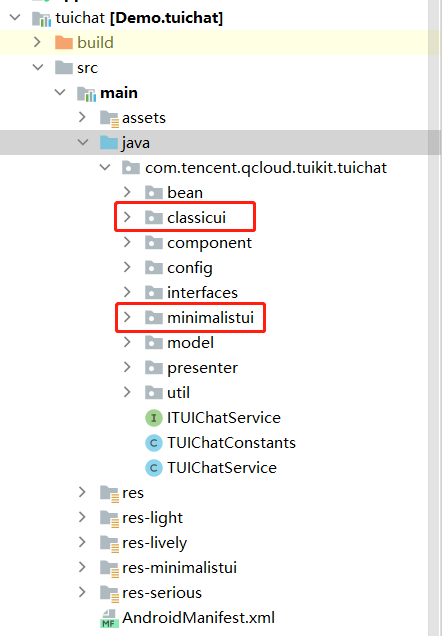
The classic and minimalist UI do not affect each other, and they can run independently. Their files are in separate folders. Take TUIChat as an example:


    The classicui folder stores the classic version UI files, while the minimalistui folder stores the minimalist version UI files. If you are to integrate the minimalist UI, just delete the classicui folder, Activity and Service in the AndroidManifest.xml file.
    Note:
    The Classic and Minimalist UI cannot be mixed. When integrating multiple components, you must choose classic UI or minimalist UI at the same time. For instance, the Classic TUIChat component must be used with the Classic versions of the TUIConversation, TUIContact, and TUIGroup. Similarly, the Minimalist version of the TUIChat component must be paired with the Minimalist versions of the TUIConversation, TUIContact, and TUIGroup.

    Build Basic Interfaces

    After integrating TUIKit, if you want to continue building basic interfaces for chat, conversation list, etc., please refer to the document: Build Chat, Build Conversation List.

    FAQs

    How to handle error "Manifest merger failed : Attribute application@allowBackup value=(true) from AndroidManifest.xml"?
    In the Chat SDK, the value of allowBackup is false by default, indicating that the backup and restore feature of the app is disabled. You can delete the allowBackup property from the AndroidManifest.xml file to disable the backup and restore feature. You can also add tools:replace="android:allowBackup" to the application node of the AndroidManifest.xml file to overwrite the Chat SDK configuration with your own configuration.
    For example:
    <manifest xmlns:android="http://schemas.android.com/apk/res/android"
    xmlns:tools="http://schemas.android.com/tools"
    package="com.tencent.qcloud.tuikit.myapplication">
    
    <application
    android:allowBackup="true"
    android:name=".MApplication"
    android:icon="@mipmap/ic_launcher"
    android:label="@string/app_name"
    android:roundIcon="@mipmap/ic_launcher_round"
    android:supportsRtl="true"
    android:theme="@style/Theme.MyApplication"
    tools:replace="android:allowBackup">
    <activity android:name=".MainActivity">
    <intent-filter>
    <action android:name="android.intent.action.MAIN" />
    <category android:name="android.intent.category.LAUNCHER" />
    </intent-filter>
    </activity>
    </application>
    
    </manifest>
    How to handle error "NDK at /Users/***/Library/Android/sdk/ndk-bundle did not have a source.properties file"?
    You only need to add you NDK path to the local.properties file. For example: ndk.dir=/Users/***/Library/Android/sdk/ndk/16.1.4479499
    How to handle error "Cannot fit requested classes in a single dex file"?
    The possible cause is that your API level is lower than expected. You need to enable MultiDex support in the build.gradle file in App and add multiDexEnabled true and the corresponding dependencies:
    android {
    defaultConfig {
    ...
    minSdkVersion 19
    targetSdkVersion 30
    multiDexEnabled true
    }
    ...
    }
    dependencies {
    implementation "androidx.multidex:multidex:2.0.1"
    }
    In addition, add the following code to the Application file:
    public class MyApplication extends SomeOtherApplication {
    @Override
    protected void attachBaseContext(Context base) {
    super.attachBaseContext(base);
    MultiDex.install(this);
    }
    }
    How to handle error "Plugin with id 'kotlin-android' not found."?
    Because TUIChat uses Kotlin code, you need to add the Kotlin build plug-in. For details, see Step 5 above.
    Why the App function of the Debug version is normal and the App function of the Release version is abnormal?
    This issue is very likely caused by ProGuard. Please try to avoid ProGuarding TUIKit. You can add the following rule:
    # Avoid deleting code logic -dontshrink -dontoptimize
    # Avoid aliasing TUIKit
    -keep class com.tencent.qcloud.** { *; }

    Contact Us

    If you have any questions about this article, feel free to join the Telegram Technical Group, where you will receive reliable technical support.
    
    
    Contact Us

    Contact our sales team or business advisors to help your business.

    Technical Support

    Open a ticket if you're looking for further assistance. Our Ticket is 7x24 avaliable.

    7x24 Phone Support